Welcome to Moda Fabrics!
Windmill Dance Quilt
Windmill Dance Quilt
Published:
Feb 18 2015 - 23:00


Hello, I am Kelly from Live. Love. Create. This is my second time as a Moda Bake Shop chef and I am thrilled to be back. My project is a paper pieced quilt block, but for those who have not tried paper piecing, it is a simpler block to start with. My finished quilt measures 60 inches x 72 inches, so it is a generous sized throw. Some tips I have before you begin are the following:
- I found a lot of helpful videos on YouTube just by searching for "paper pieced quilt block" Watch a few of them first before attempting paper piecing for the first time
- Make a practice block before cutting into fabric that you may not have a lot of.
- Go slow and always be aware of what you are cutting! You don't want to accidentally trim part of your block
- Before you cut, make sure the piece you sew on covers the entire spot of the block pattern, with enough of an overhang for your 1/4 inch seam
- Set your stitch length to 1.0-1.2 when you are sewing on the paper to make it easier to tear off
The amount of yardage required for paper piecing can be daunting, since you trim a lot of it away while you are piecing the block together. I usually use solids for the background since they can be more readily available and affordable.
![]()
1 Fat Eighth Bundle of Mixologie by Studio M
4 - Fat Eighths of each Moda Bella American Blue, Moda Bella Ochre, Moda Bella Spray and Moda Bella Buttercup
5 1/2 yards of Moda Bella White for block background
4 yards Mixologie Mimosa in Blueberry for backing
3/4 yard Mixologie Martini Blueberry for binding
Batting piece measuring at least 64 inches by 76 inches
Thin piece of cardboard for folding and trimming
Acrylic plastic sheet to cut templates (optional)
Computer paper to print paper pieced block and template
![]()
Print off your templates, and your block pattern by clicking on the links above. Make sure to print all pages with out "fit to page clicked." The quilt block should measure 6.5 inches when printed correctly. I have included a 1/2 inch seam on the templates to start, you end up cutting off a lot of fabric but I find it is easier to piece with larger templates than to have something too small to begin with. If you decide to make your templates smaller, you need at least 1/4 inch seam allowance. You will need to print four block patterns per quilt block, 120 total for the size quilt I made. I used a plastic template material from the craft store to trace and cut my templates from, so I could use them to help cut my fabric, they were a little more sturdy than cardboard.
From your background fabric, cut 15 strips, 7 1/4 inches x WOF. These will be for your templates #5 and #6. I was able to fit 8 of each template (16 total) per strip. Remove the selvages, but trim as close to the end of the selvage as possible! Carefully lay your templates like I show below and you should be able to cut 16 wedges from one standard WOF.

From your background fabric, cut out your template #2 pieces by first cutting 8 strips 5 1/2 inches x WOF. Remove the selvages, but trim as close to the end of the selvage as possible! Subcut these strips into 5 inches x 5 1/2 inches and then cut each of these into 2 3/4 inches x 5 inches. You can stack these rectangles on top of each other, but I don't recommend cutting more than 4 layers at a time. You should be able to cut 16 of these per strip.

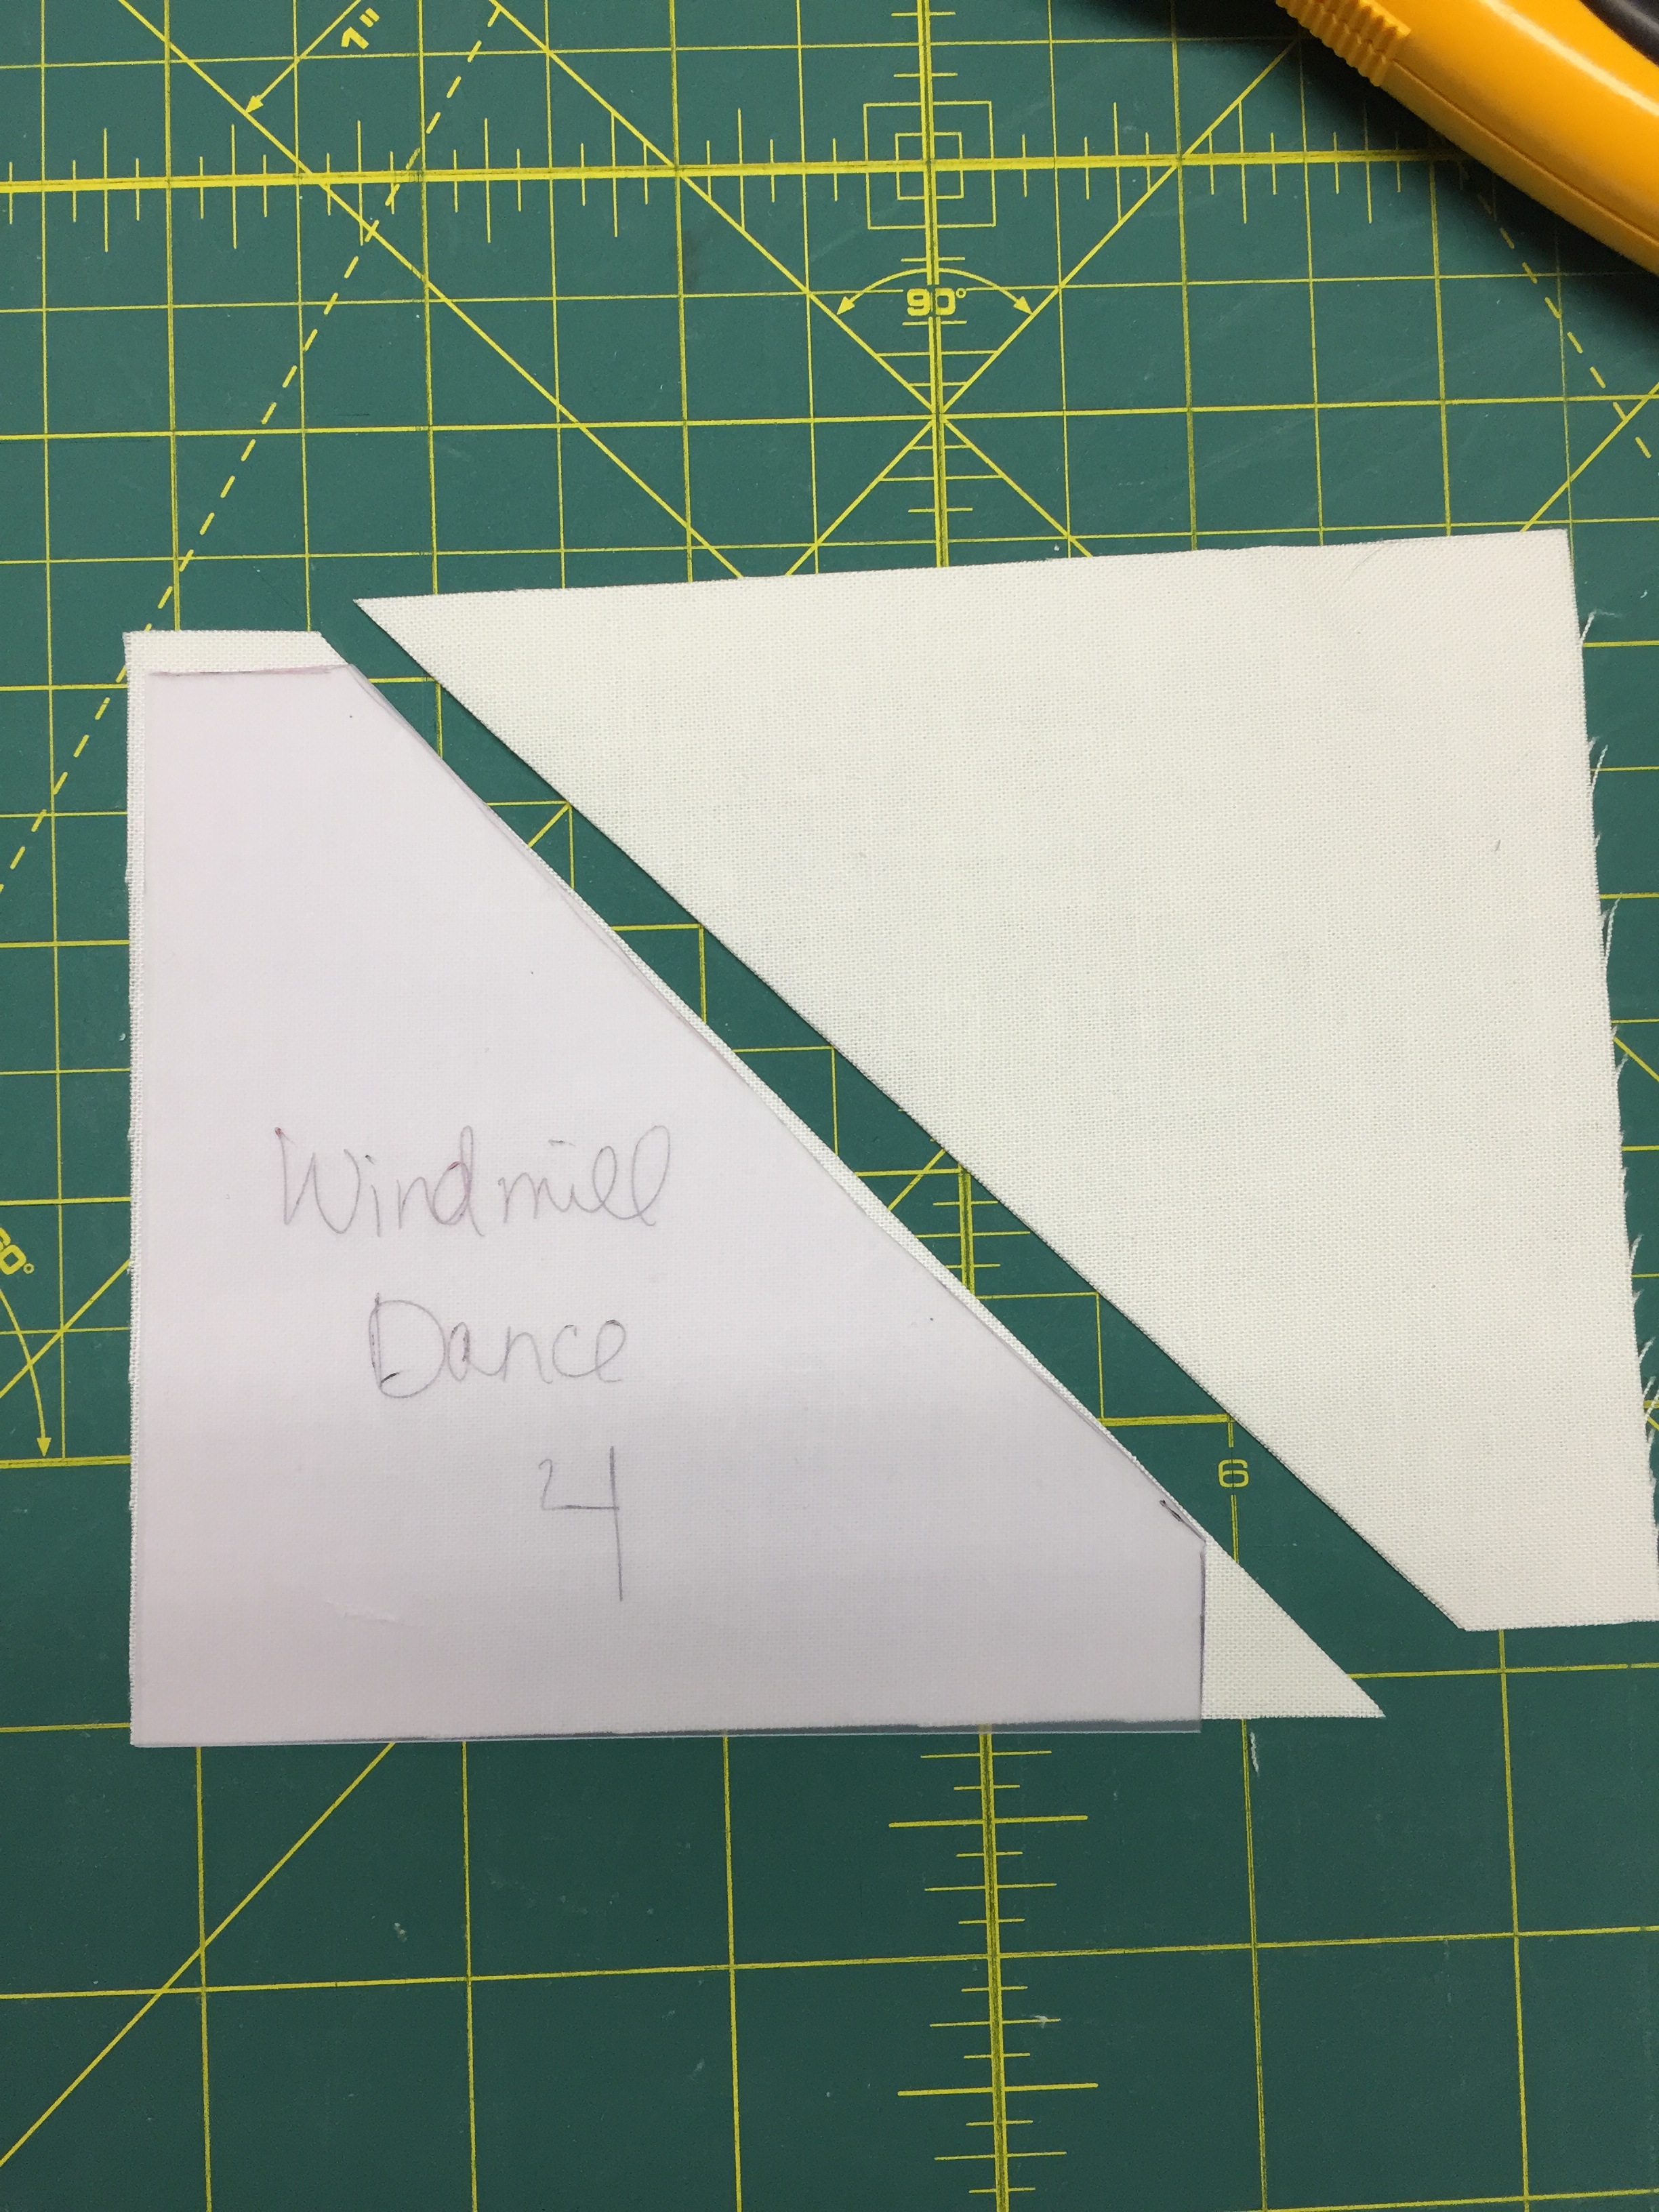
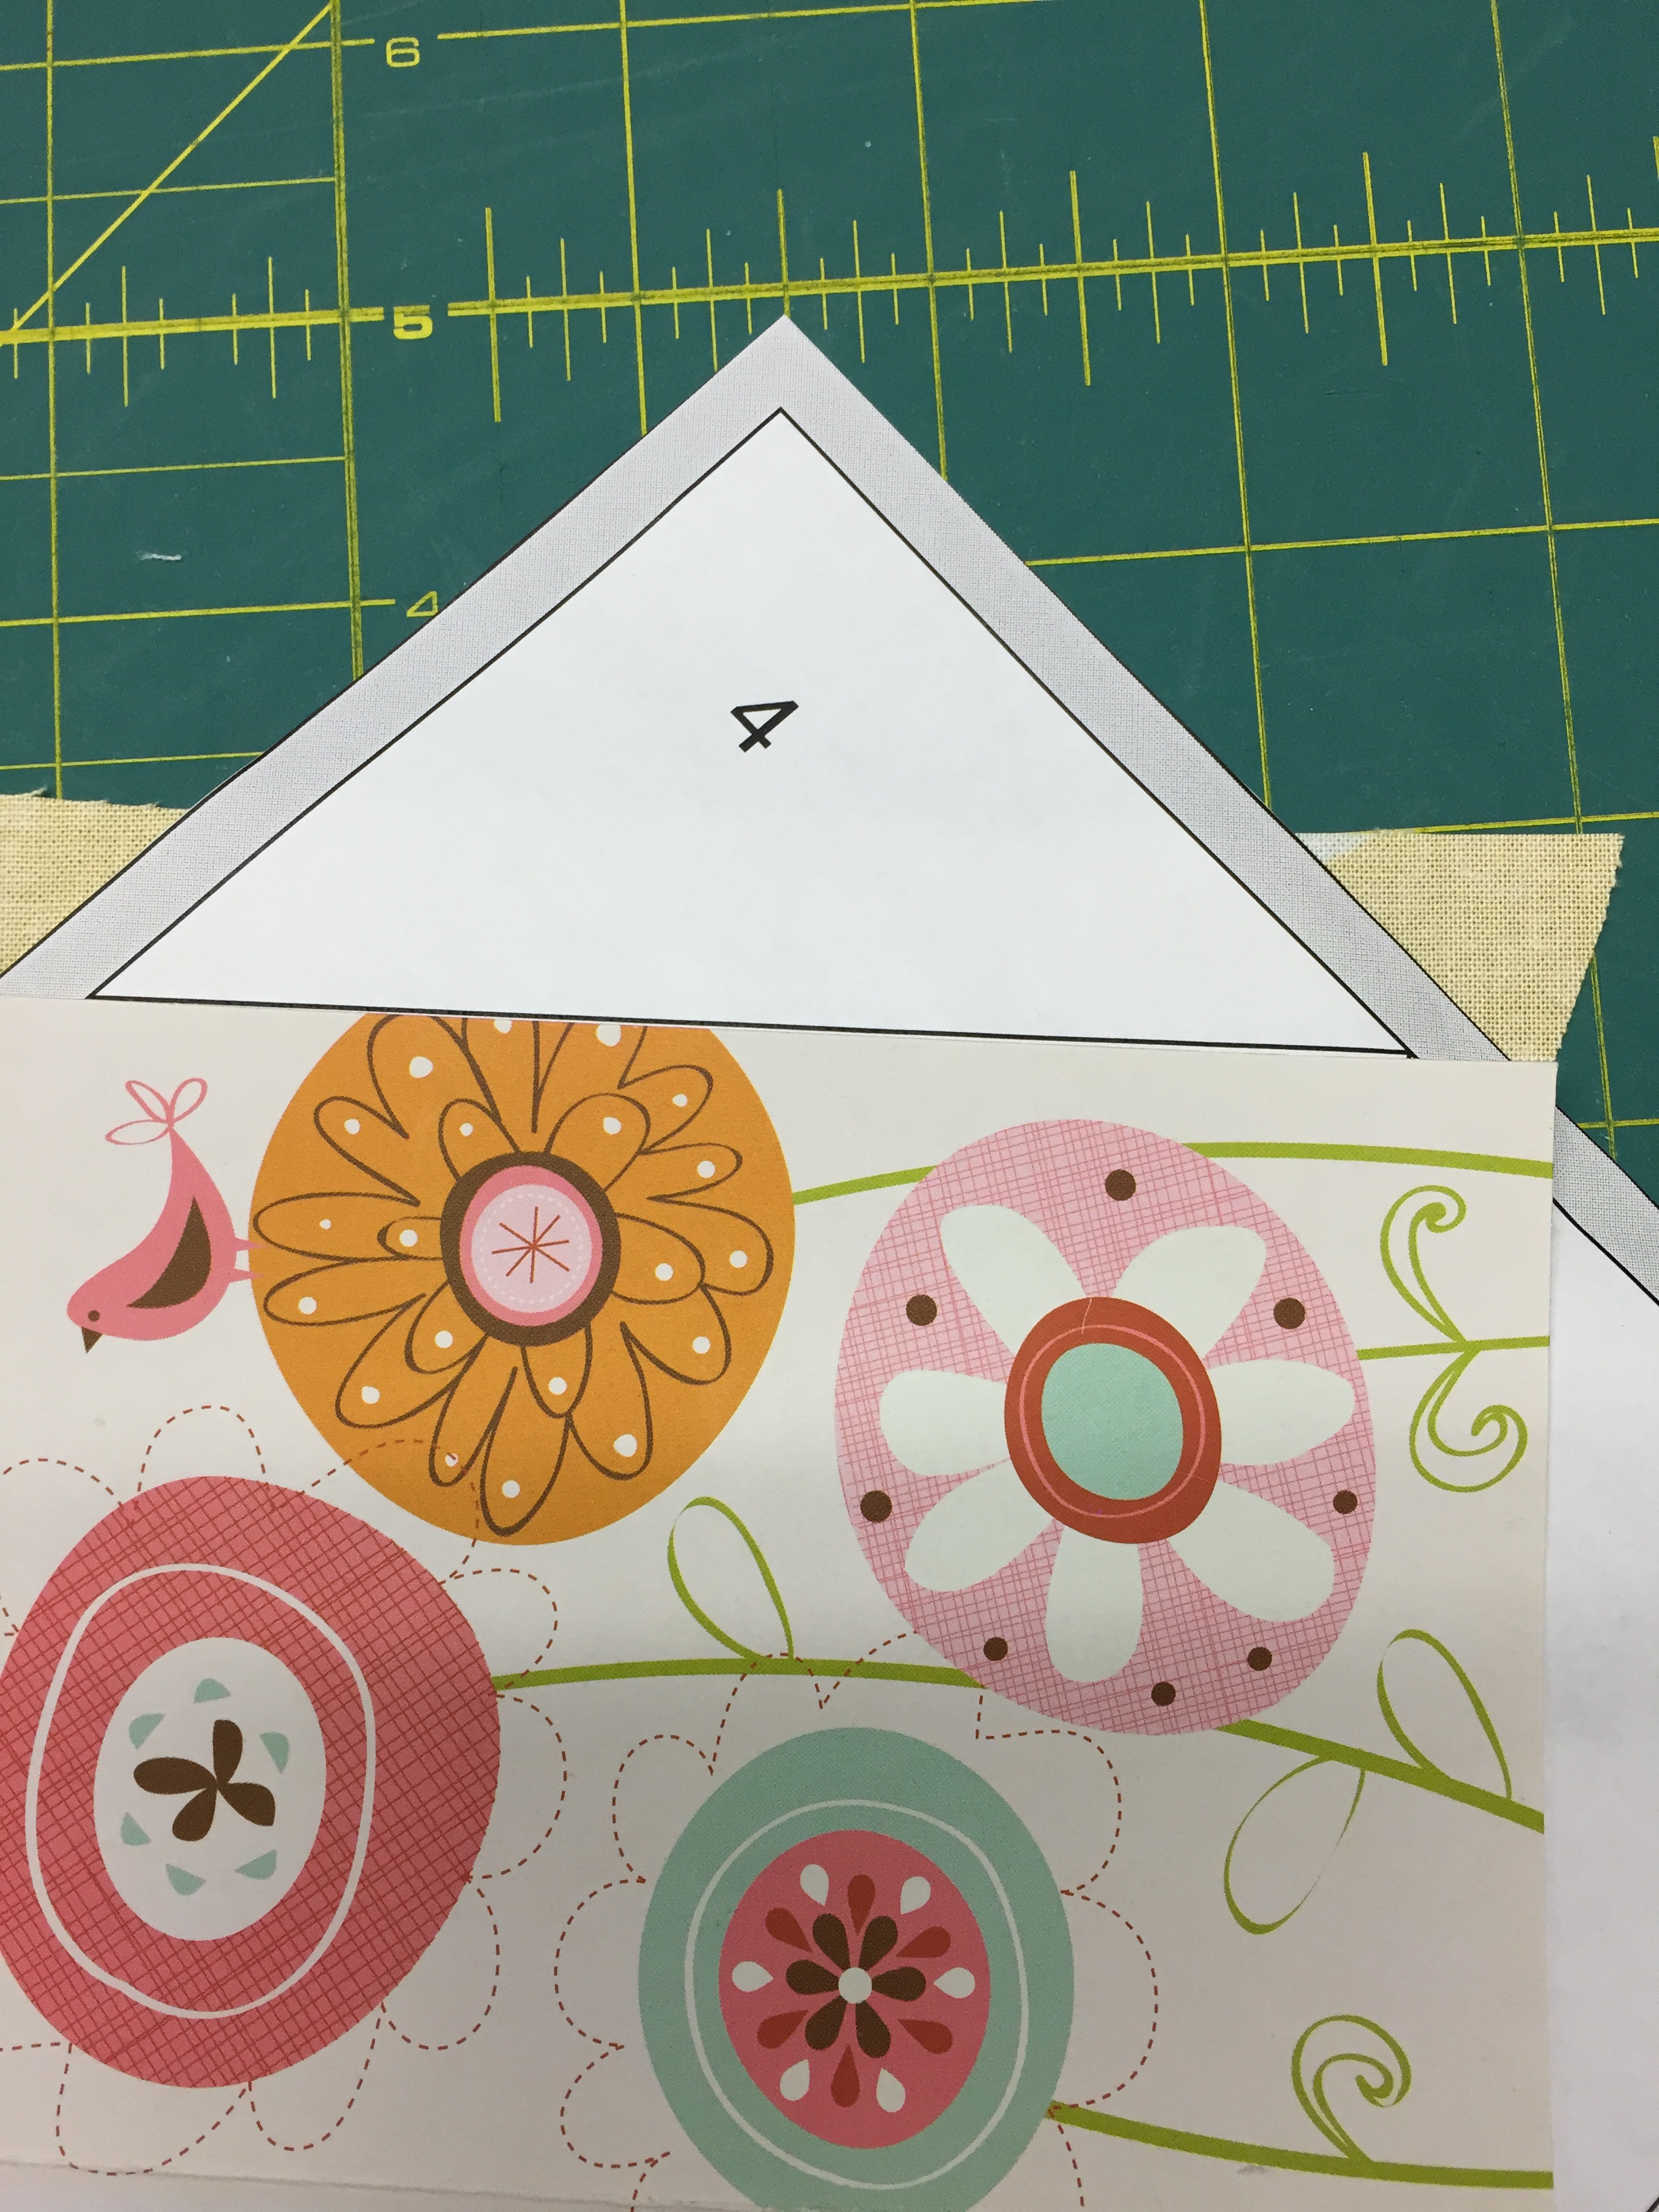
From your background fabric, cut your template #4 pieces by first cutting 6 strips 5 1/5 x WOF. Remove the selvages, but trim as close to the end of the selvage as possible! Subcut these strips into 4 1/4 x 5 1/2 rectangles. Line up your template along one edge and cut diagonally down the center, as shown below. You can flip the template to then cut from the other side, to get 4 pieces from each rectangle. You should be able to cut 20 templates per strip.
Once you have your background cut, I like to stack them with the corresponding template, especially if the paper piecing is more difficult, so I don't forgot which piece I cut for which number.
Cut your #1 and #3 templates from your focal fabric. From each fat eighth, cut 4 of each template #1 and template #3. You can lay these out as shown below. This picture is a little harder to see, but I have the templates laid out next to each other when I cut.

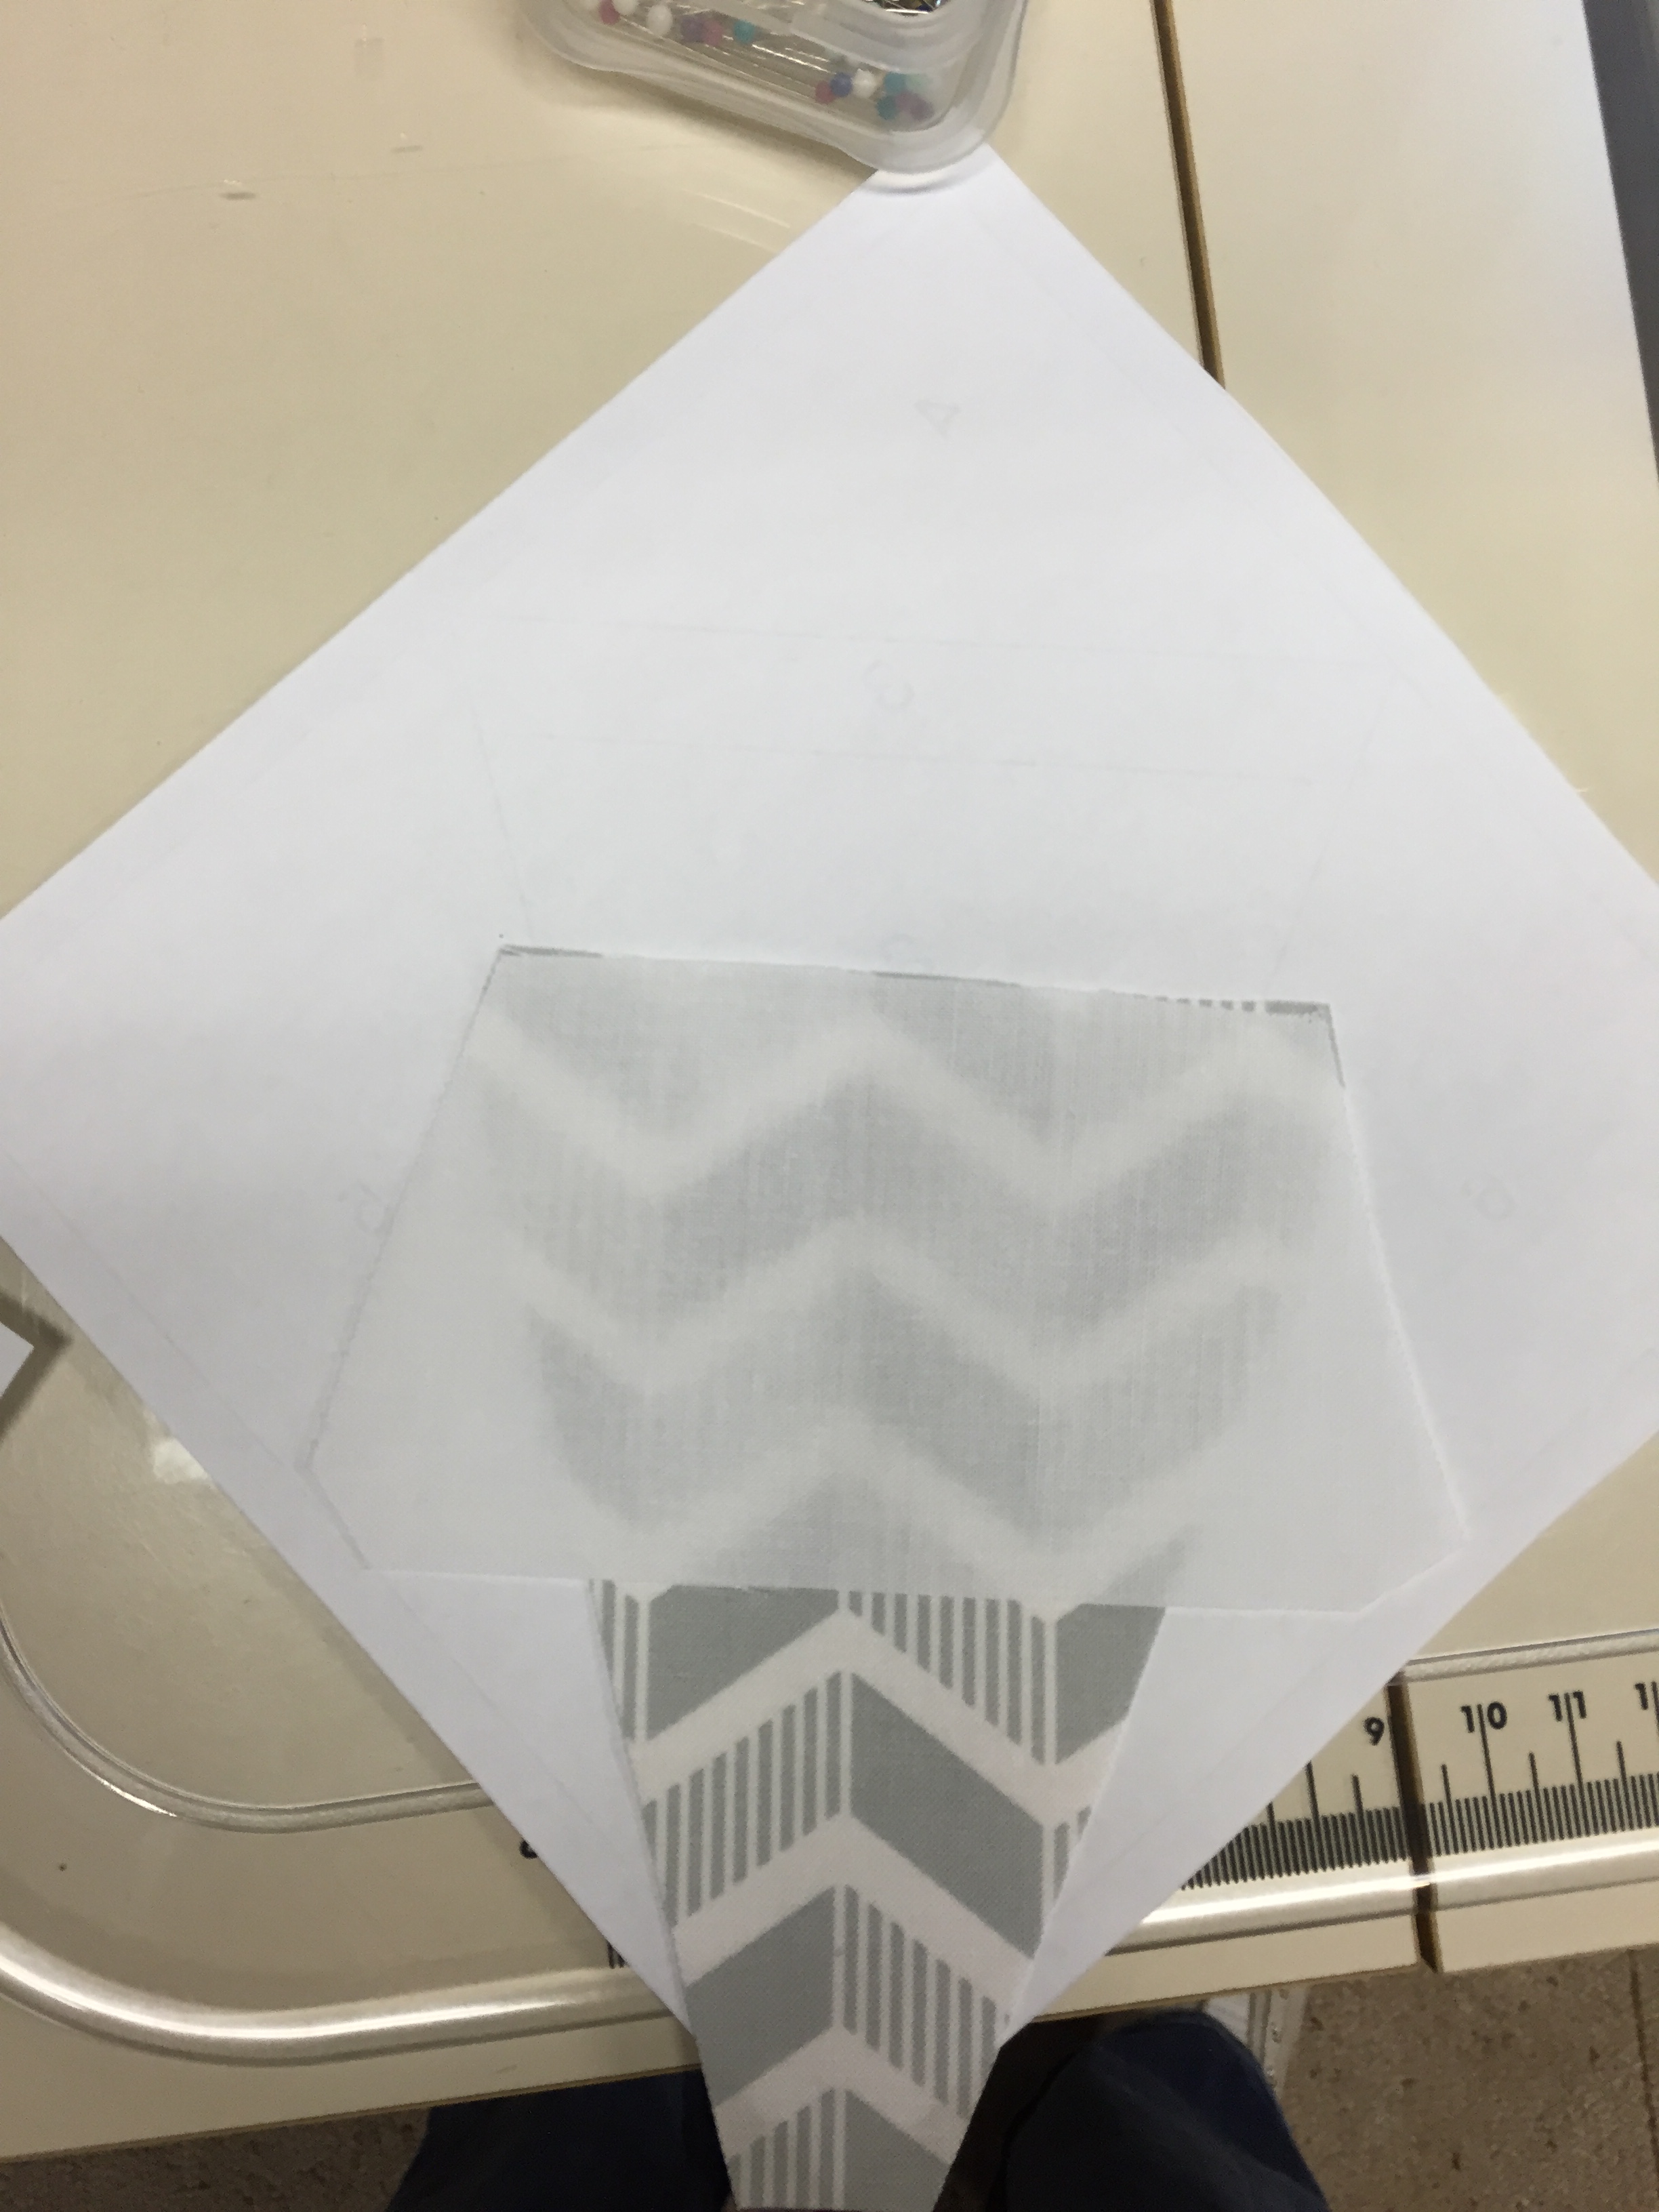
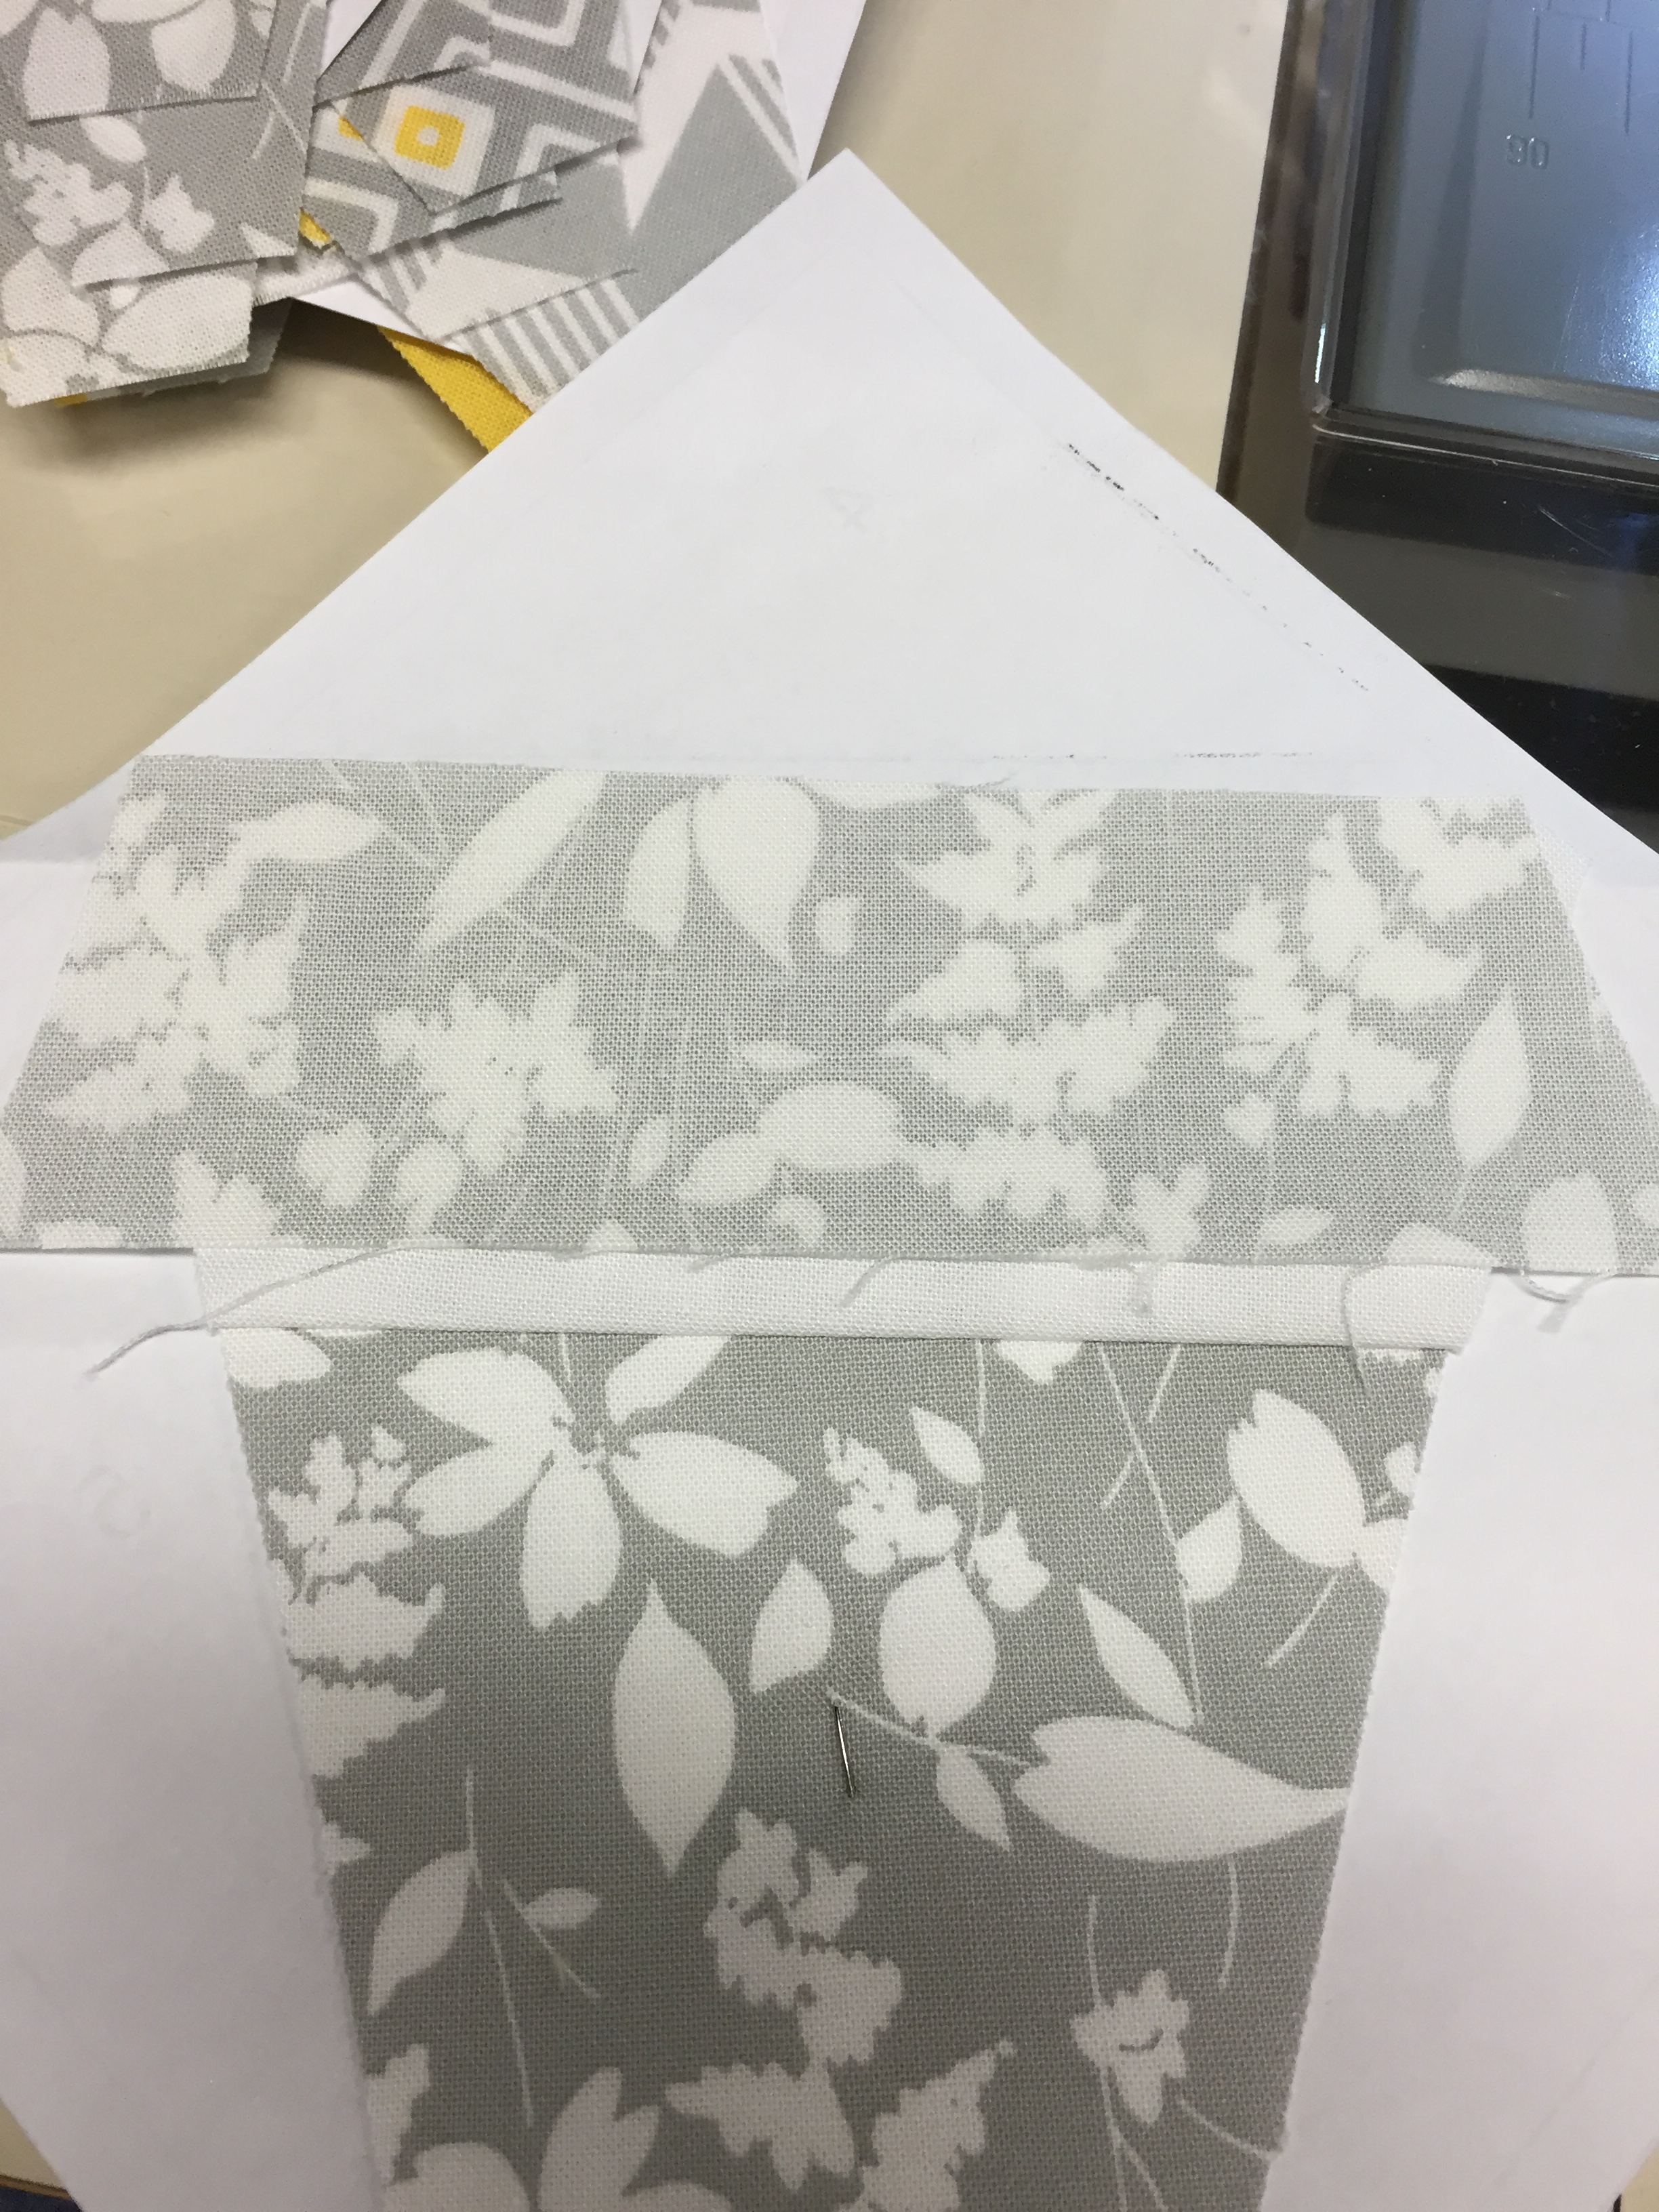
Once all your templates are cut, you can start to paper piece your block. To begin take one of your 6.5 inch pattern block pieces and grab a #1 piece of fabric. On the back of the paper template (the non-print side) you want to pin the fabric with the right side out so that it overlaps the outline of #1 on your pattern by at least 1/4 inch on each side. I usually hold the paper up to the light to make sure I have enough of the fabric sticking over on each side, as you can see in the first picture below. Make sure when you turn the pattern over you have the print side of your fabric facing you, as in the second picture below.


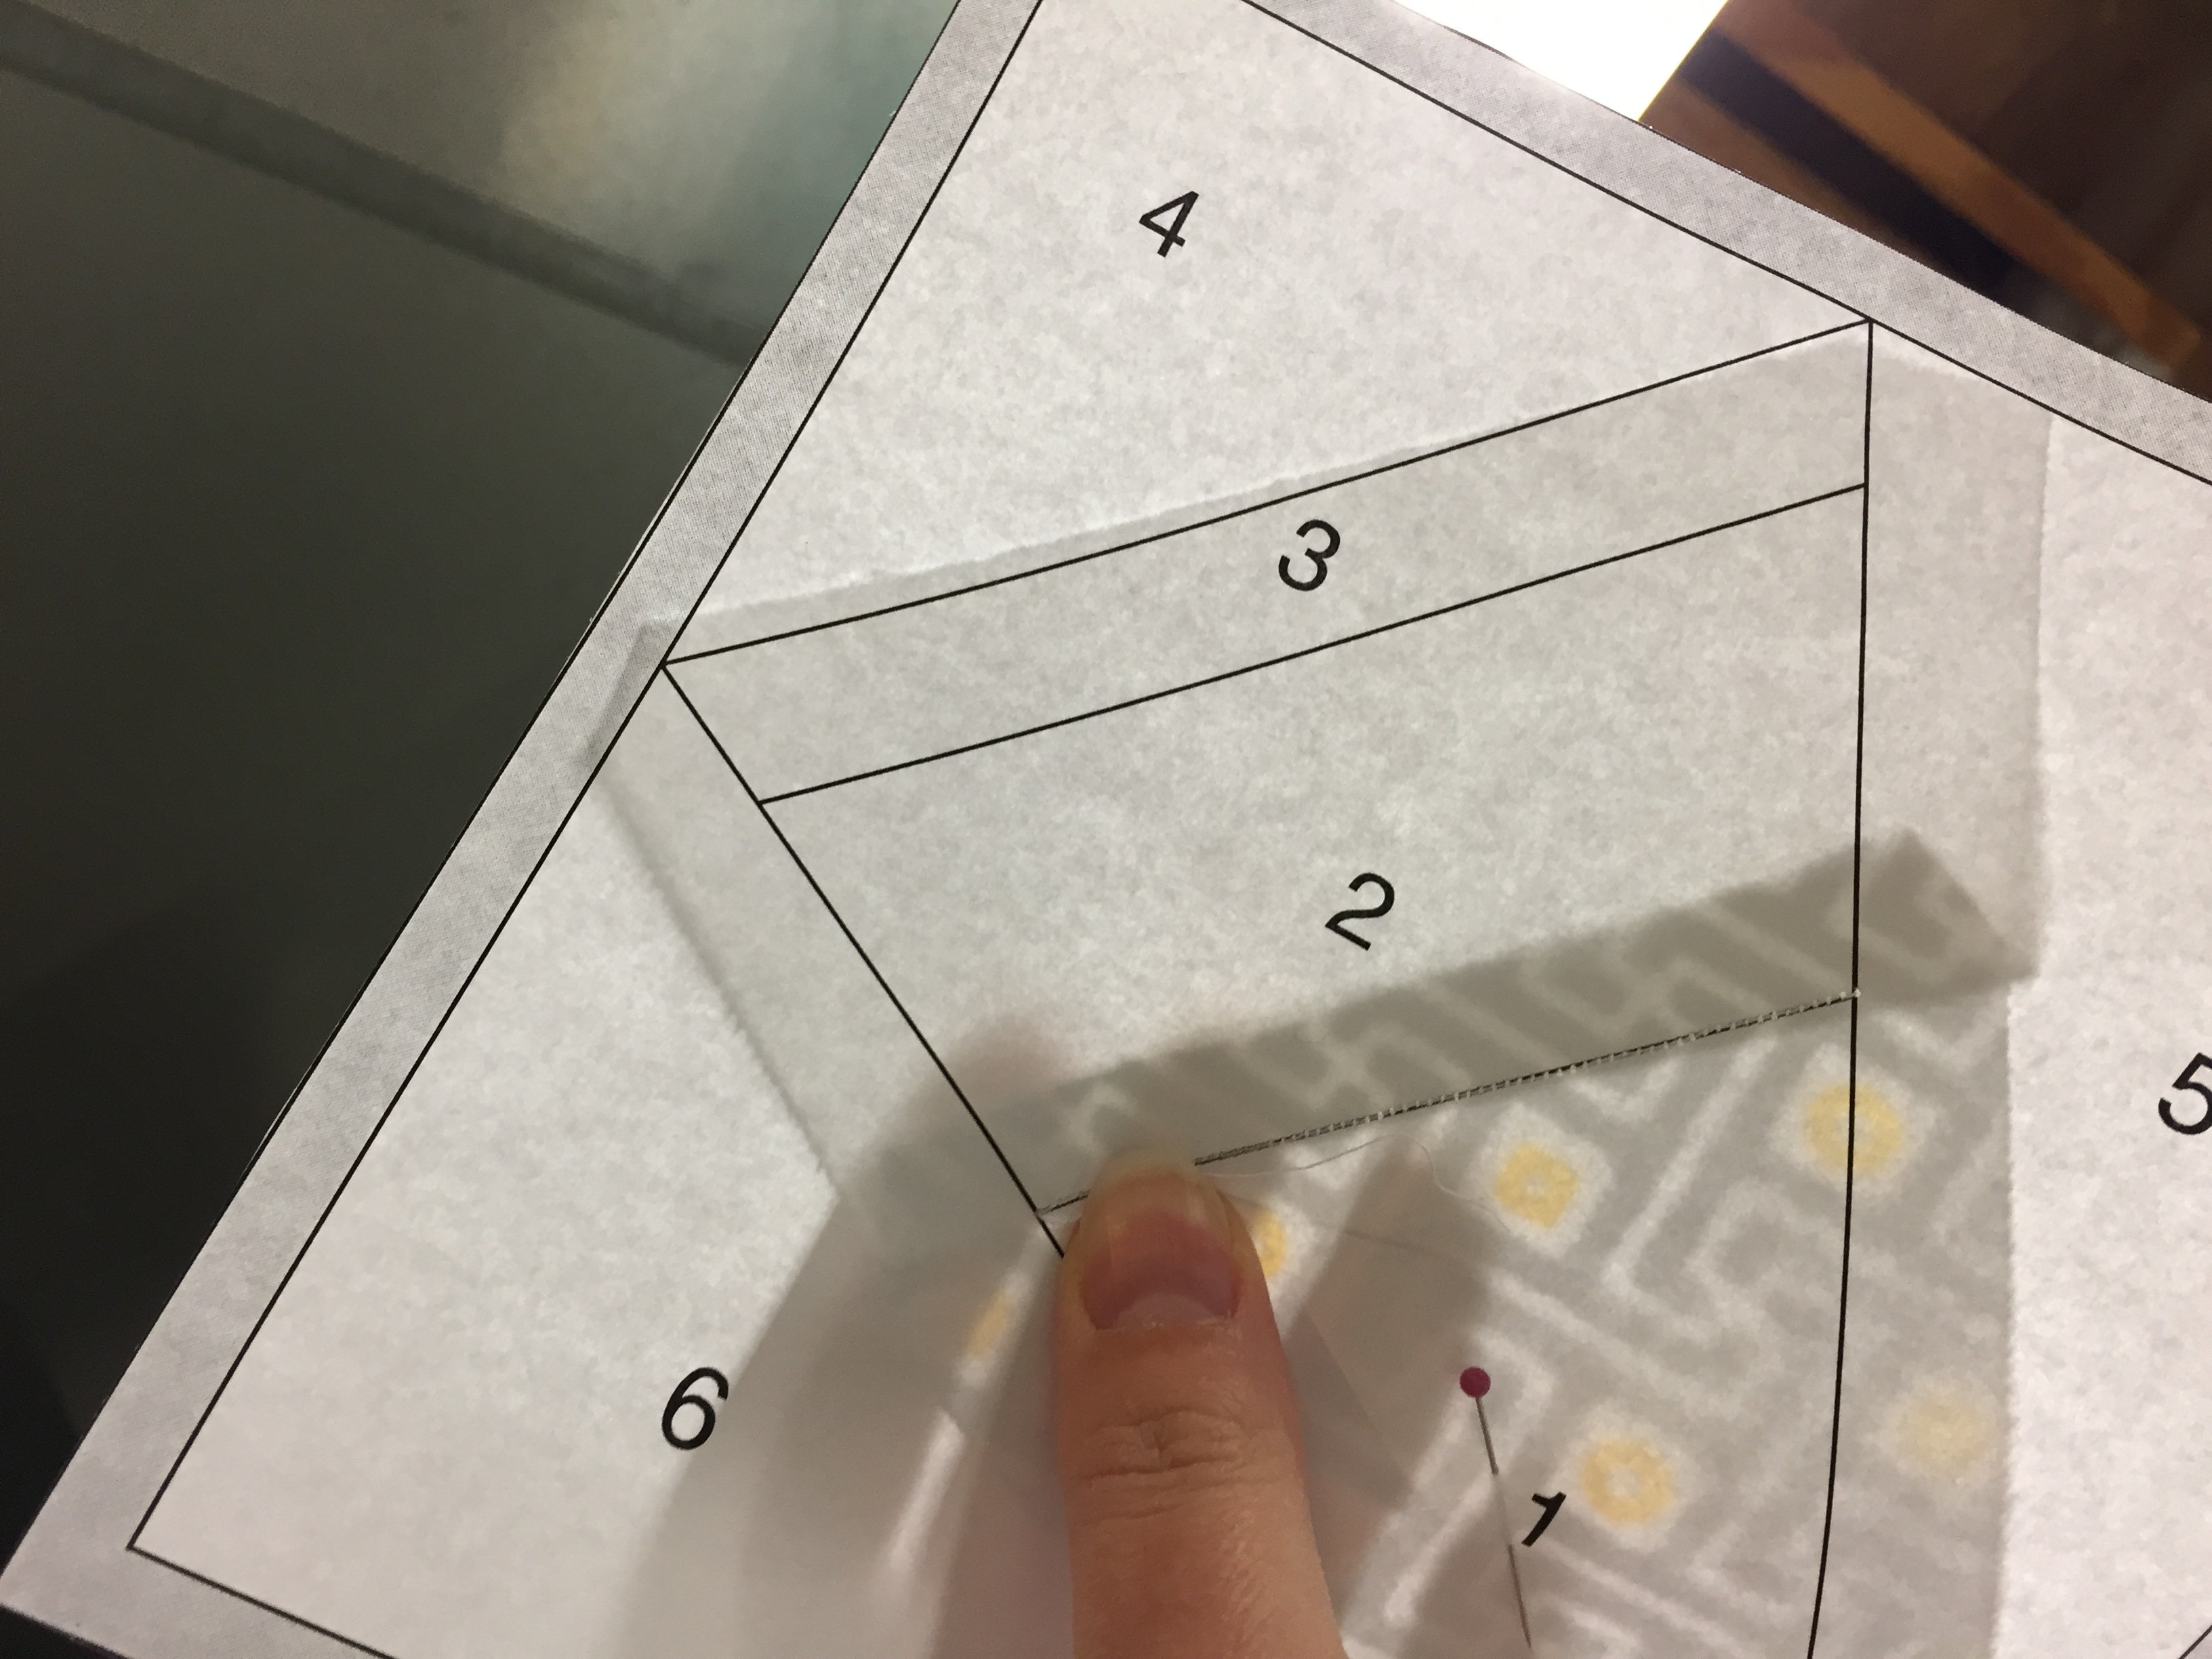
Grab one of your #2 pieces of fabric and lay it, right sides together over your #1 print, lining up the edges at the top.
You can pin these together, but make sure to pin far enough from the edge so you don't sew over the pins in the next step. Next, turn the paper over and carefully sew directly over the line between #1 and #2 on your pattern. I use a small stitch, usually set between 1.0-1.2 in length. This small stitch length will come in handy when your block is complete and you need to remove the paper pattern. Sew only on the black line, try not to cross too far over the intersecting lines on each side.
Bring the paper to your iron and press the #2 fabric up. Check to make sure the #2 template covers all the edges of the pattern by at least 1/4 inch by holding it up to the light.

Next I trim away the excess. I take the paper to my cutting mat, and place it with the pattern printed side up. I then use a thin piece of cardboard (like a blank greeting card) to fold down the line I want to trim. For this piece you want to fold on the line between the #2 and #3.


Trim the fabric piece 1/4 inch from the piece of paper you just folded down. (I usually trim just a smidge over 1/4 inch)

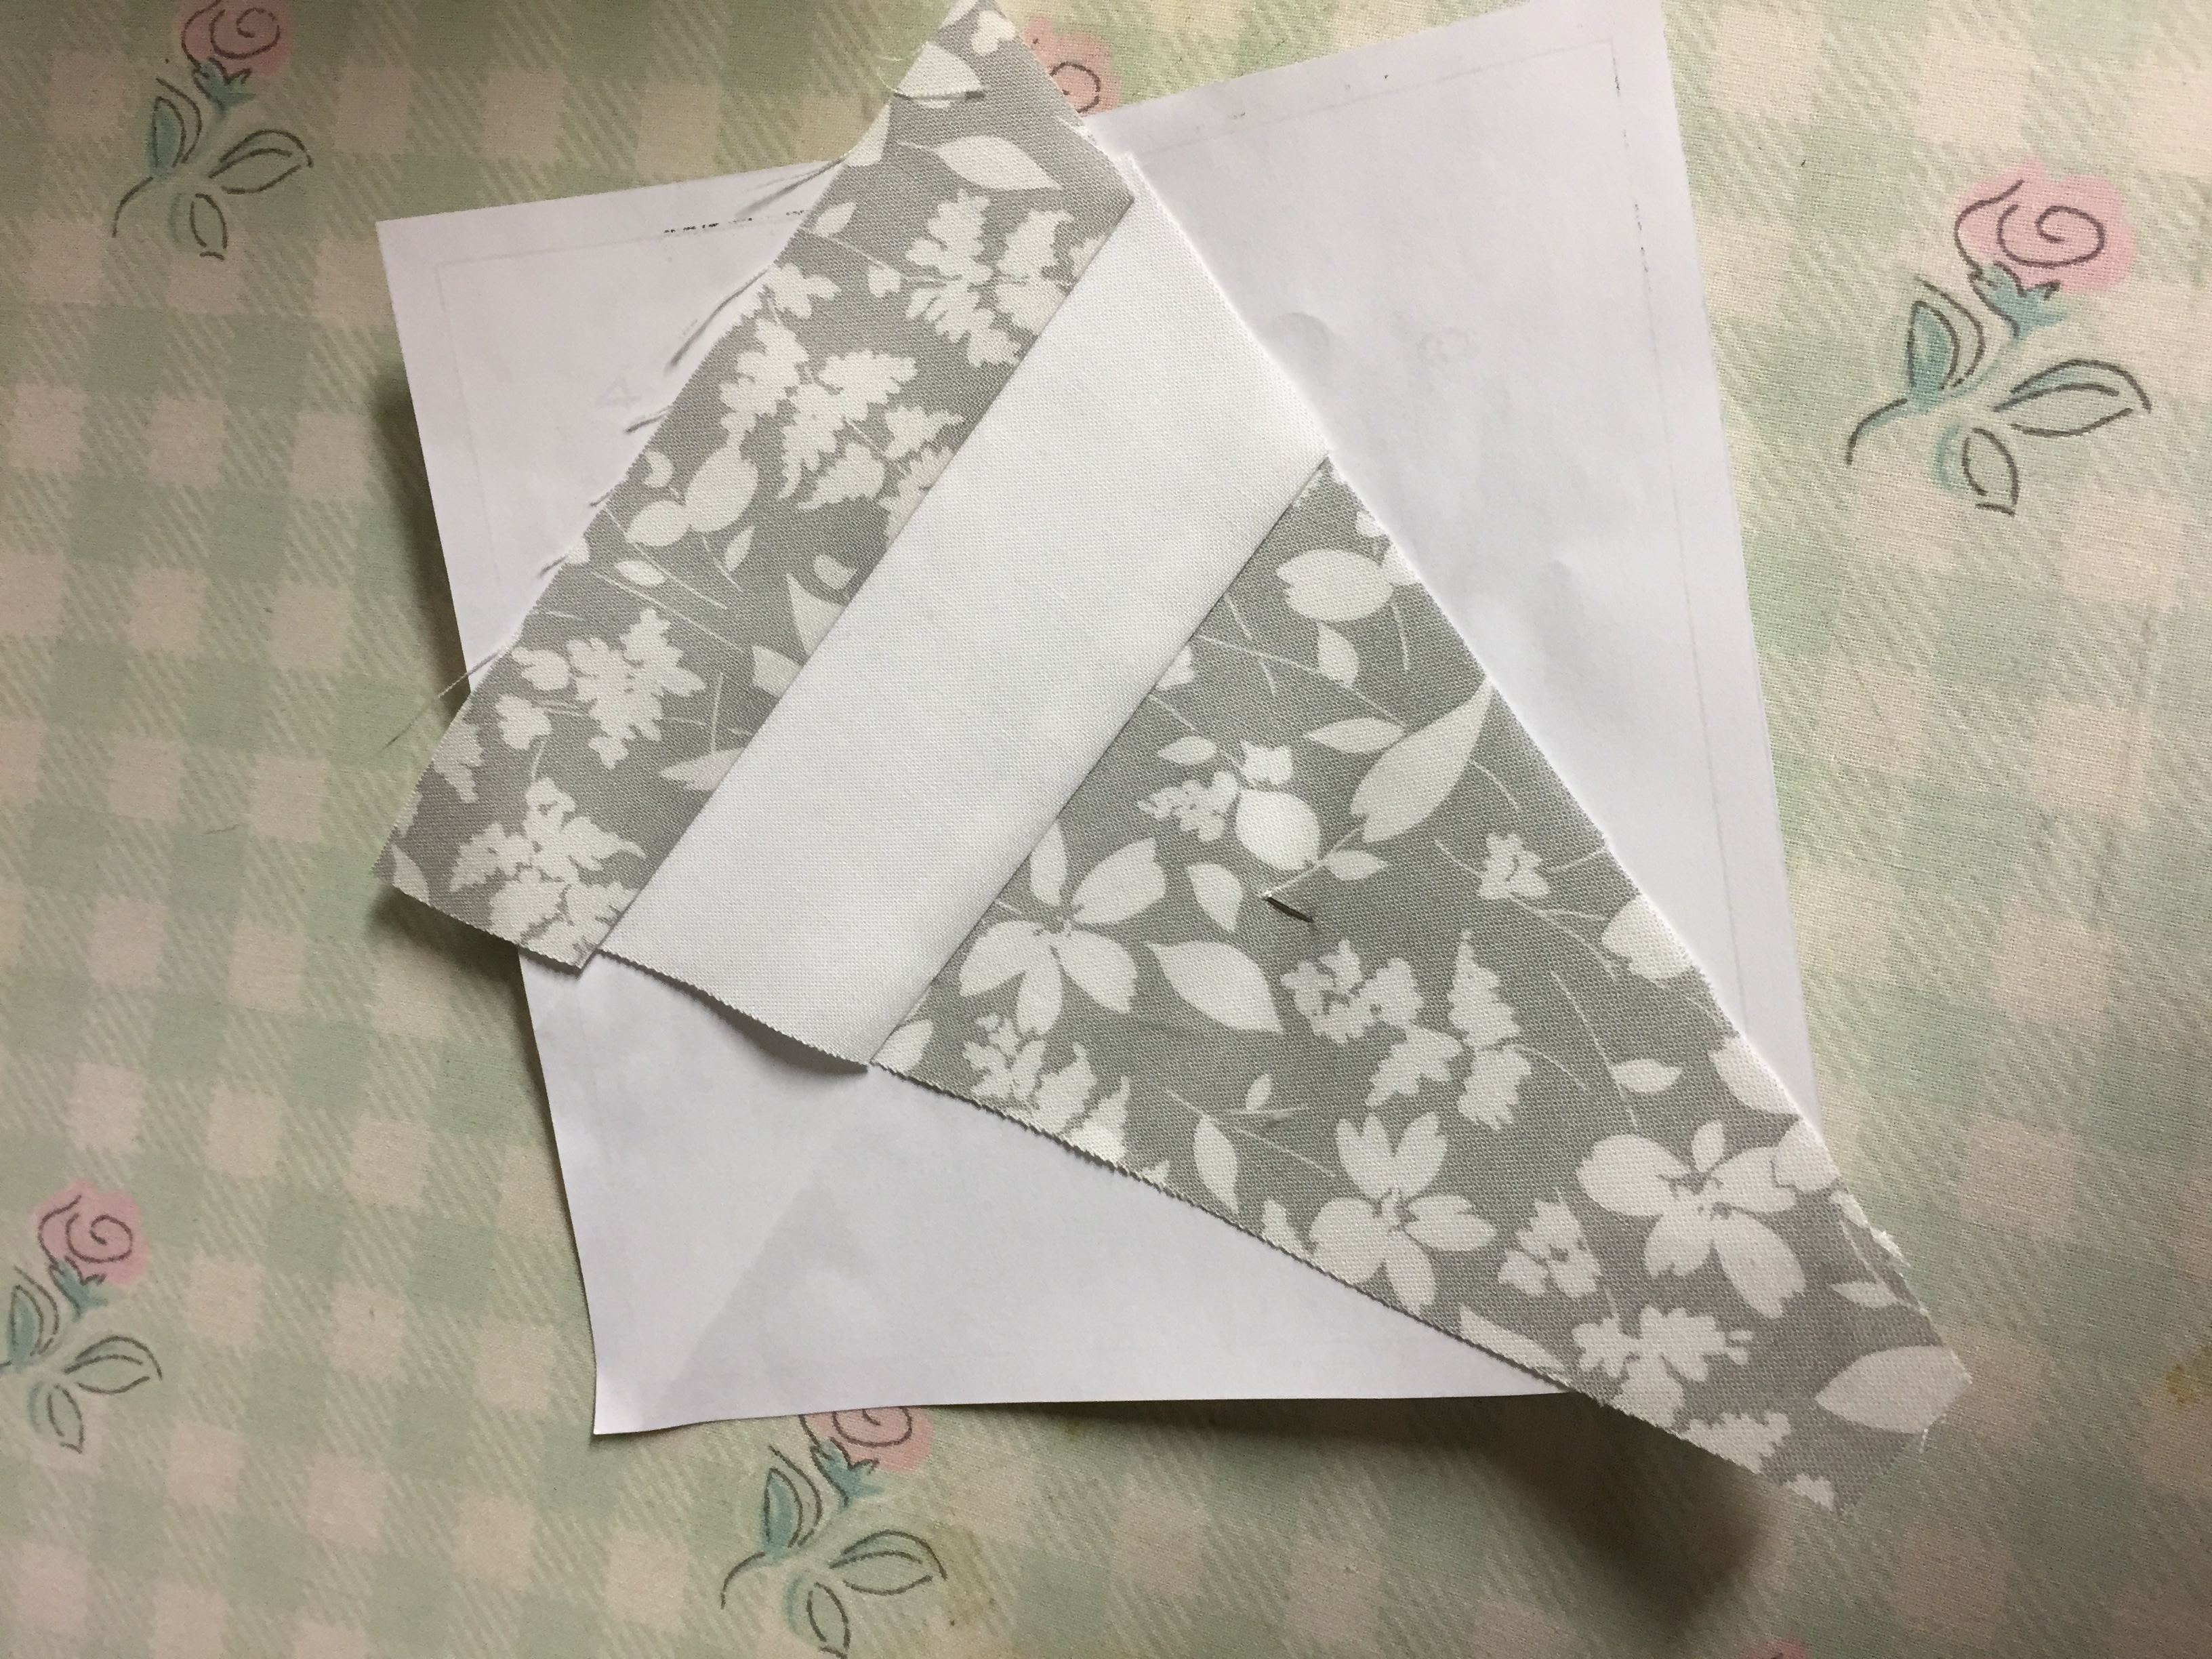
Next take your #3 piece and line it up, right sides together, along the edge of the fabric your just cut. Take it to your machine and again sew directly over the line between #2 and #3 on your printed pattern side of paper.

After you have sew this line, take it to your iron and again press your #3 piece up, and trim the excess fabric. This time you want to fold on the line between #3 and #4 and trim 1/4 inch from that fold.
Line up your #4 piece, right sides together, along the edge you just trimmed and sew on the line between #3 and #4. Press your #4 piece up and take it to your mat to trim the excess fabric. This time you will trim on the line between your 1/2/3/4 pieces and #5. The picture I show below has already been folded and the fabric has been trimmed.
Line up your #5 template, right sides together with the edge you just cut, and sew directly over the line between #4 and #5. When the line goes to the edge of the block, I do try to extend my sewing all the way to the edge of the pattern template. I feel it holds it all more securely when I can sew over the stitch lines.
Repeat this process for the #6 template. When all of the template fabrics are sewn on, take your block to your cutting mat and trim the entire block to fit your pattern piece. Make sure you do not trim off your 1/4 inch seam allowance which is shaded grey. Carefully remove all the paper from your 6.5 inch block.
When you have all four 6.5 inch blocks done for one print you can assemble the block. Lay the pieces right side together and try to line up the inside points of the windmill, pin together and sew with 1/4 inch seam. Don't be too hard on yourself if your points don't match. I will say about 90% of mine do not match, but you cannot tell it once the quilt is done!
When you have sewn together two 6.5 inch blocks, repeat for the other 6.5 inch blocks. Press your seams open!
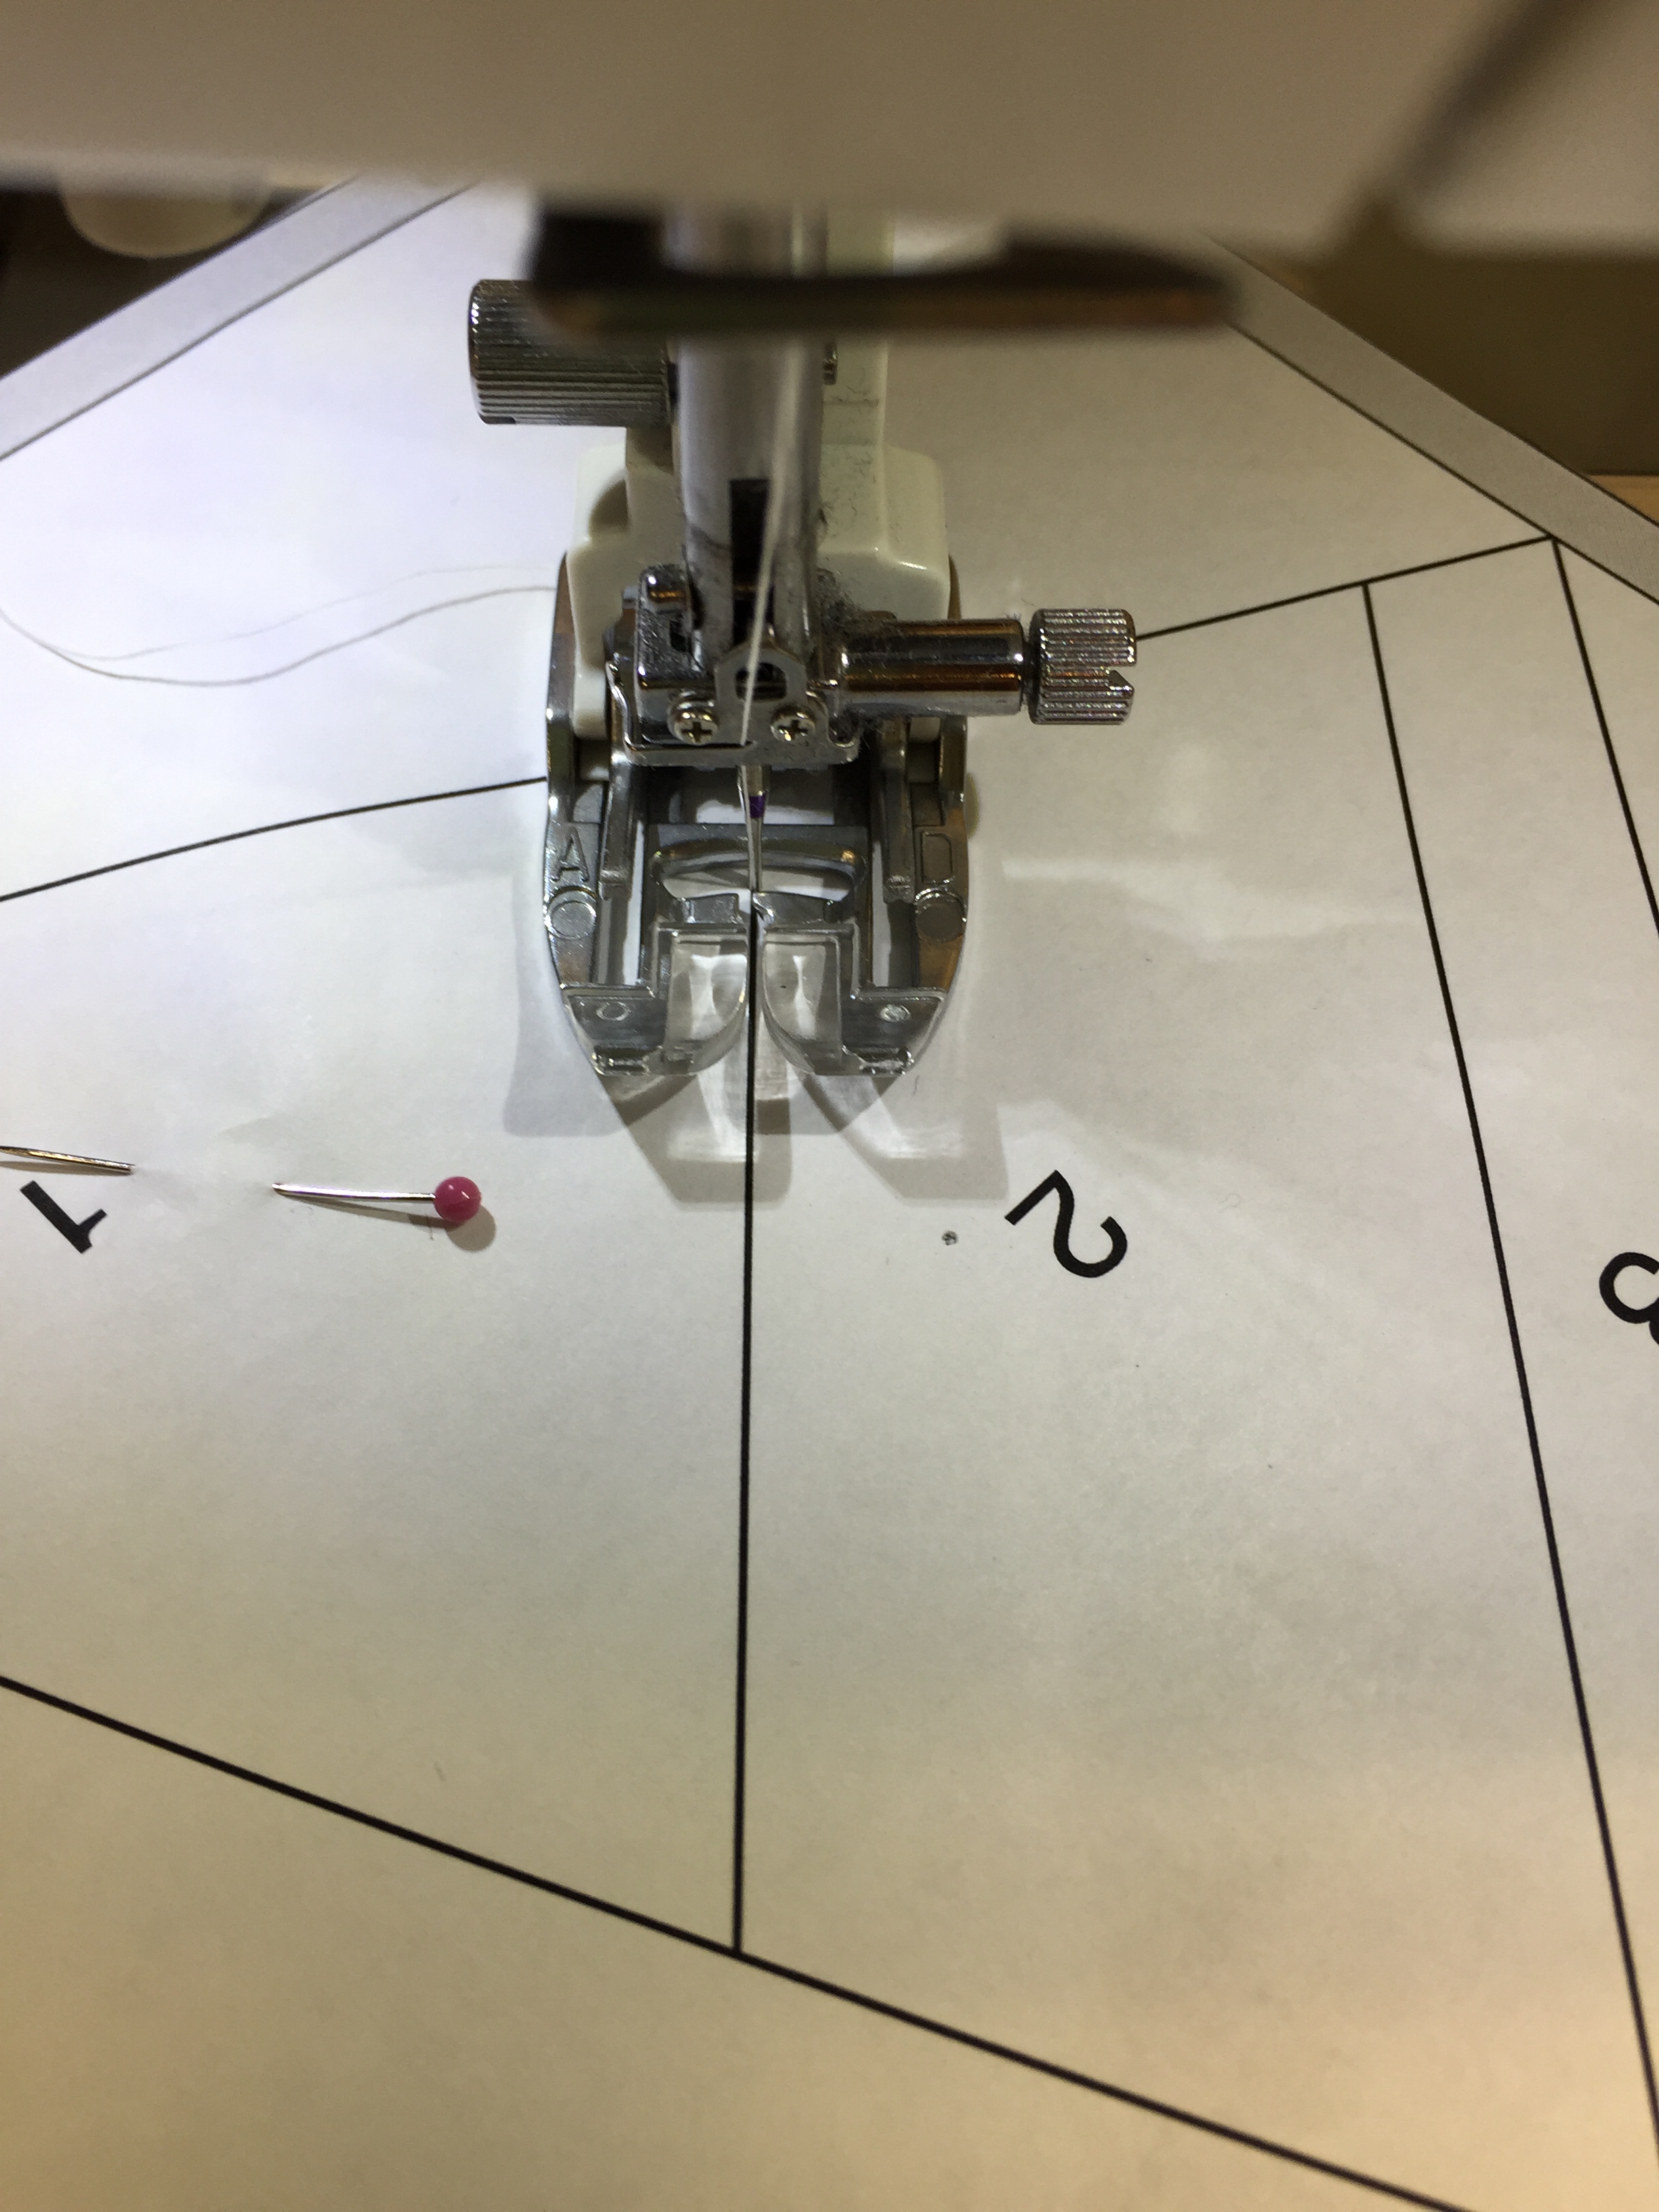
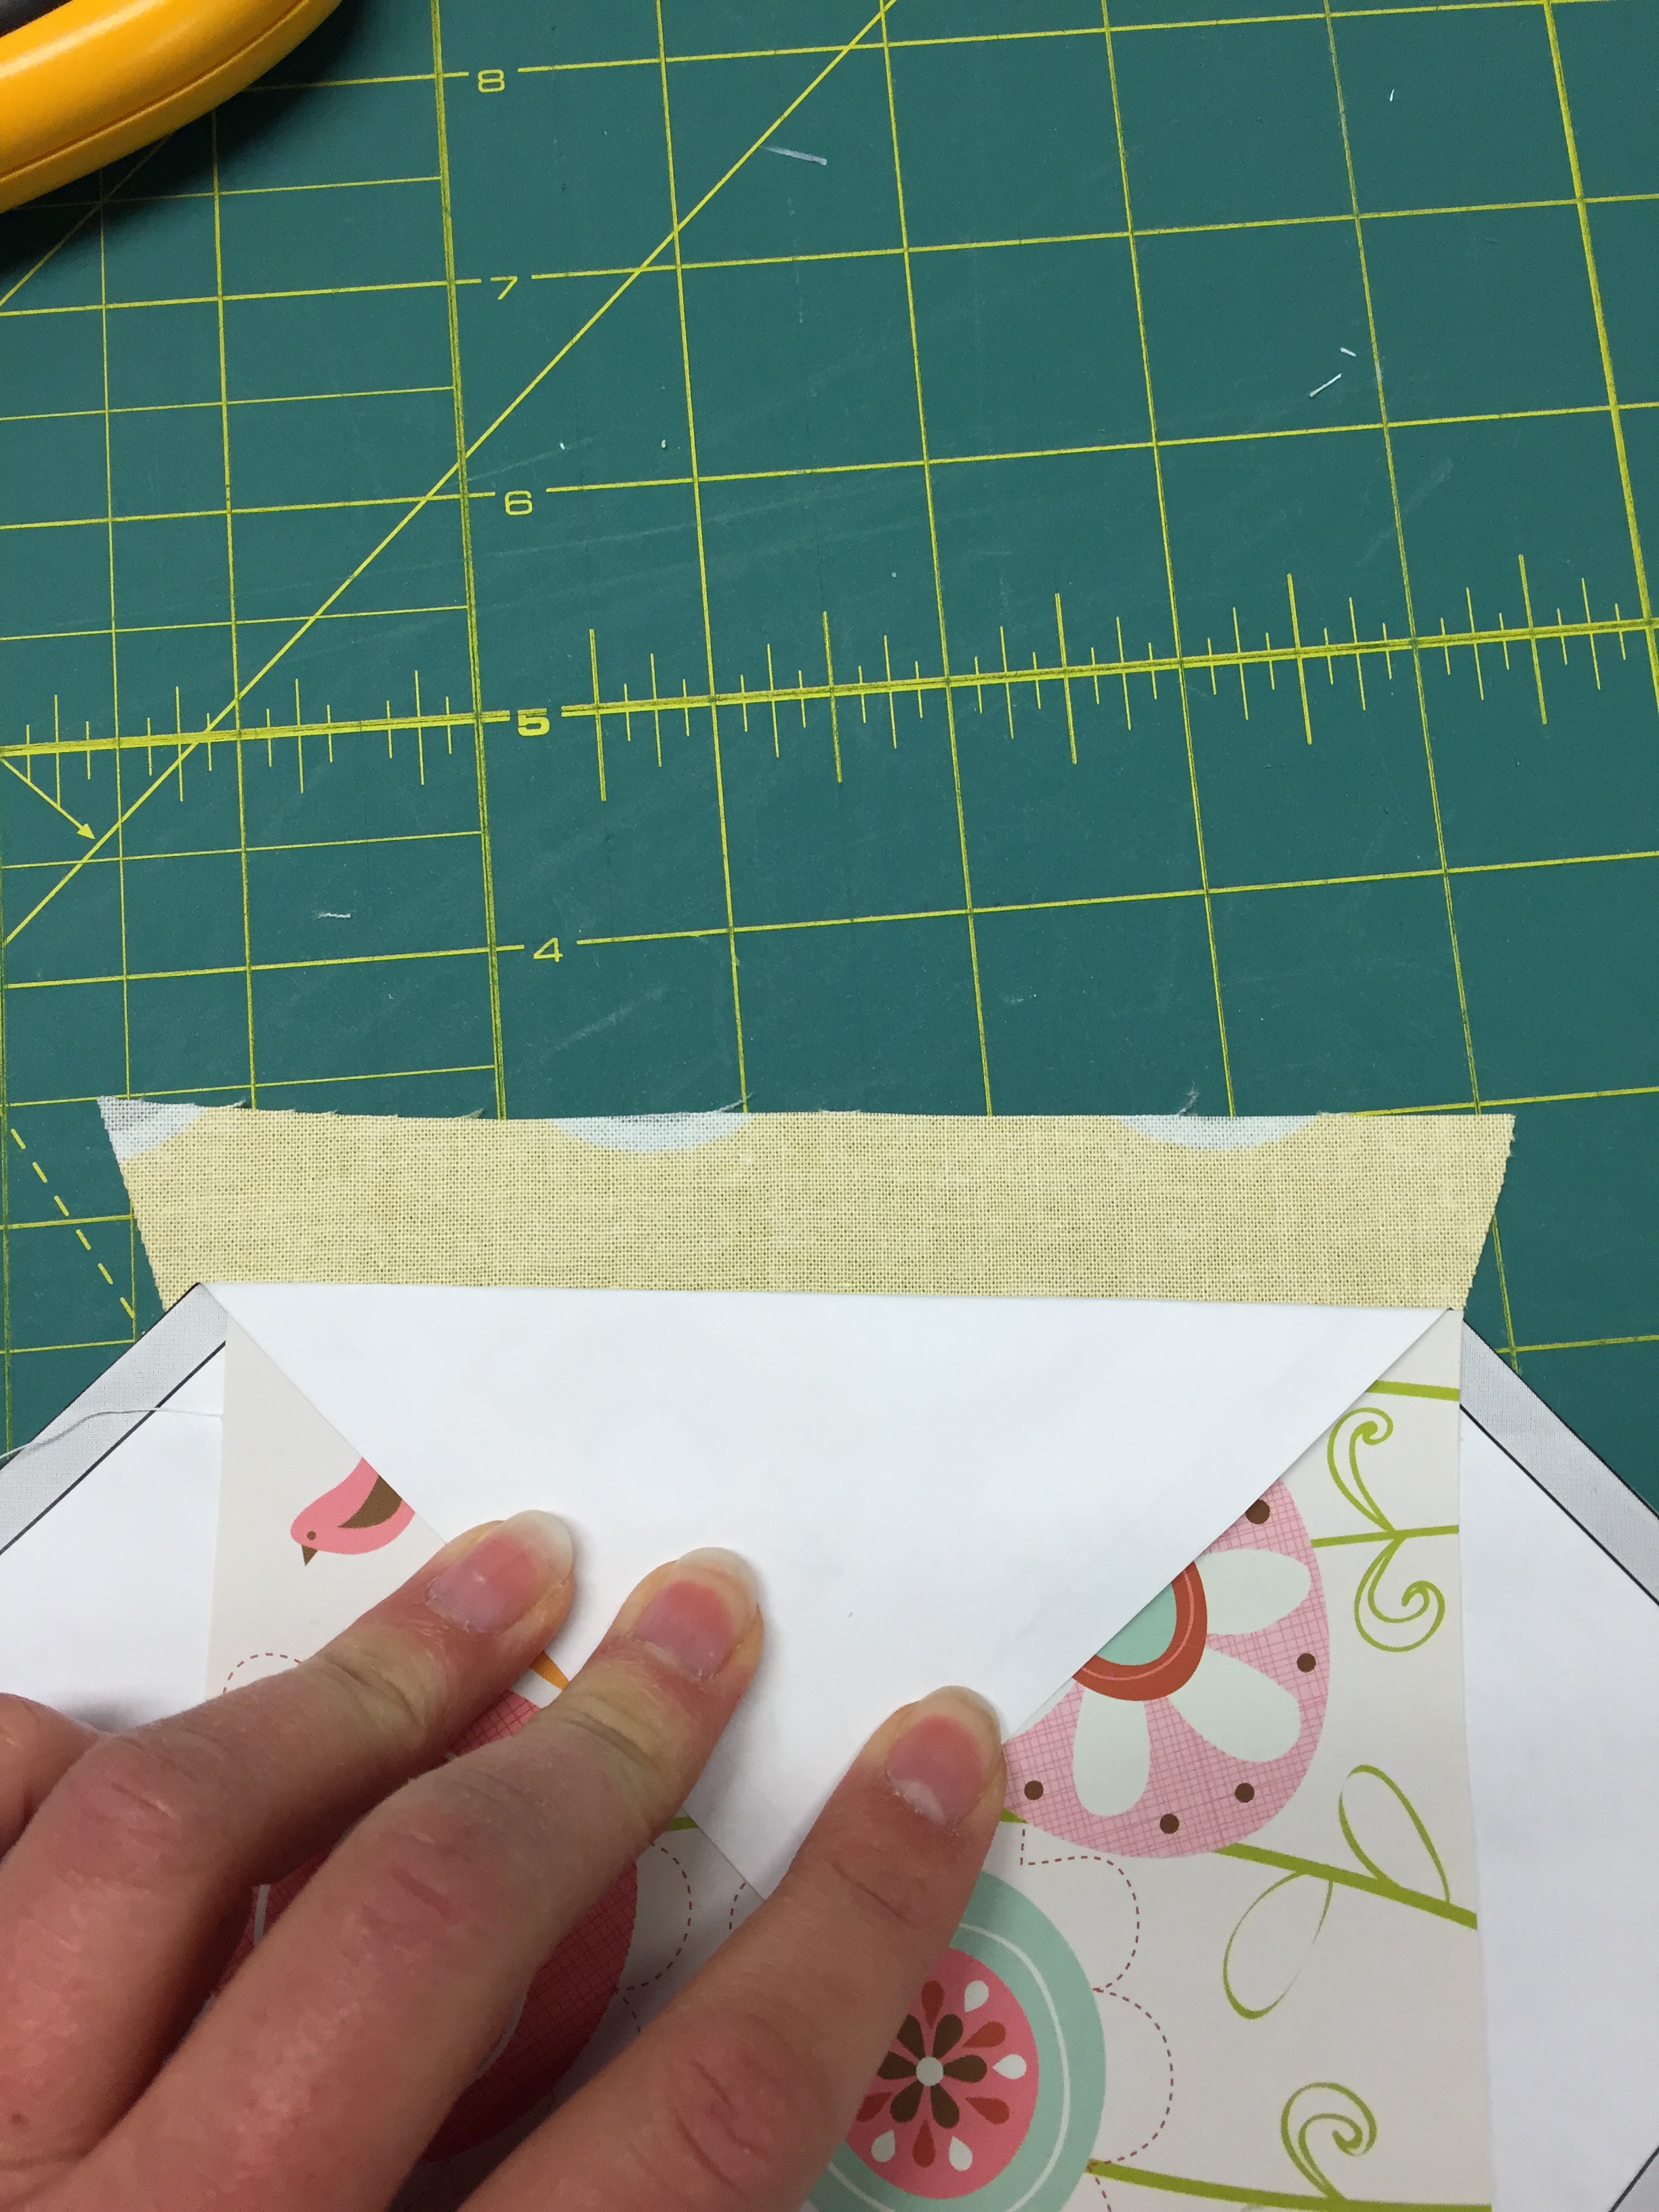
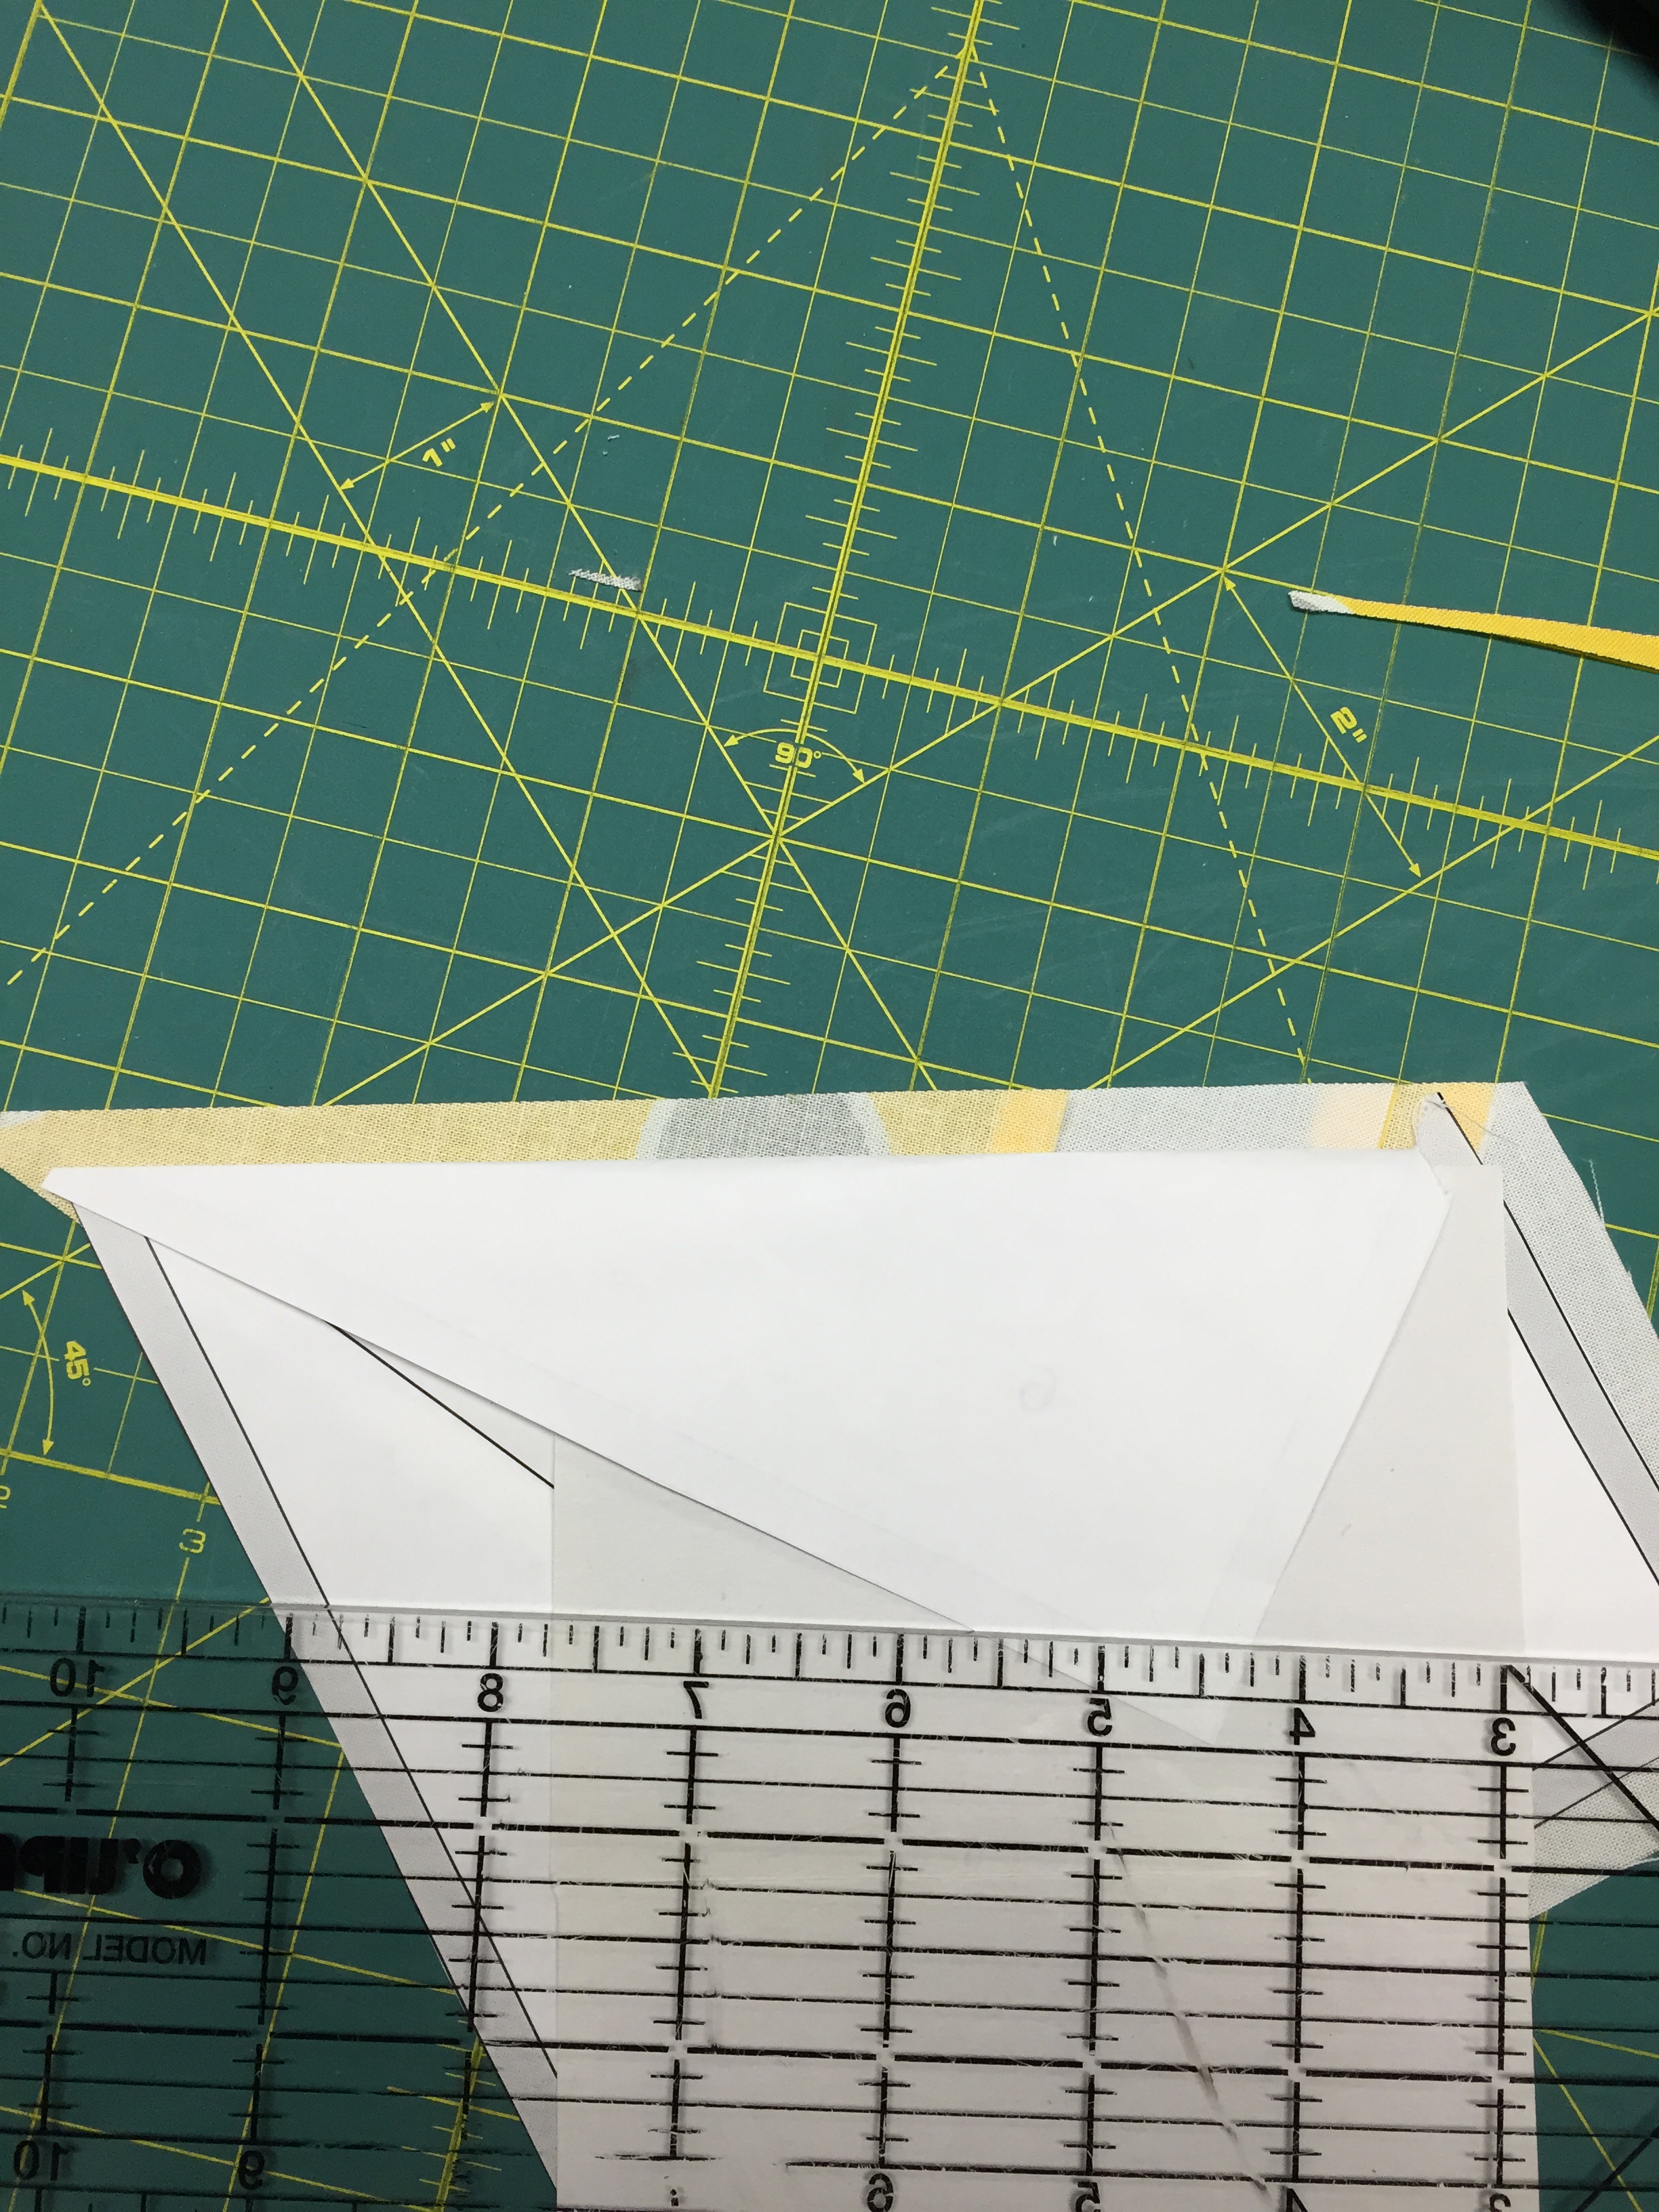
The hardest part of this quilt is the final seam for each 12.5 inch block. The triangle point in the center of each block leads to a VERY bulky seam. My main tips for sewing this seam is to GO SLOW, use a walking foot if you have one, and use a bulkier needle. I set my machine for the slowest possible speed, with a denim needle, and even then it would want to skip stitches. I found that it wanted to skip stitches mainly when I came back down from the bulk, and by placing my handy greeting card ahead of my sewing, I could usually level out my pressing foot and avoid skipped stitches. See the picture below.

After all of your blocks are assembled, mix and match your blocks to find a layout that pleases you. You want 5 blocks across by 6 blocks long. Sew your blocks into rows by carefully lining up the seams, and then sew your rows into your quilt top.
For the backing I cut two pieces of fabric 68 inches x WOF. I trimmed off the selvages and sewed these together on the long edge, which made my back roughly 80 inches by 68 inches.
Assemble your quilt sandwich by cutting a piece of batting at least 64 inches x 76 inches. Baste however you prefer and quilt. I just did an echo quilt on all the white background pieces.
You will need at least 7 pieces of binding cut 2 1/2 inch x WOF. Sew your binding together into one long piece and attach to your quilt by your favorite method. Wash your quilt and enjoy!
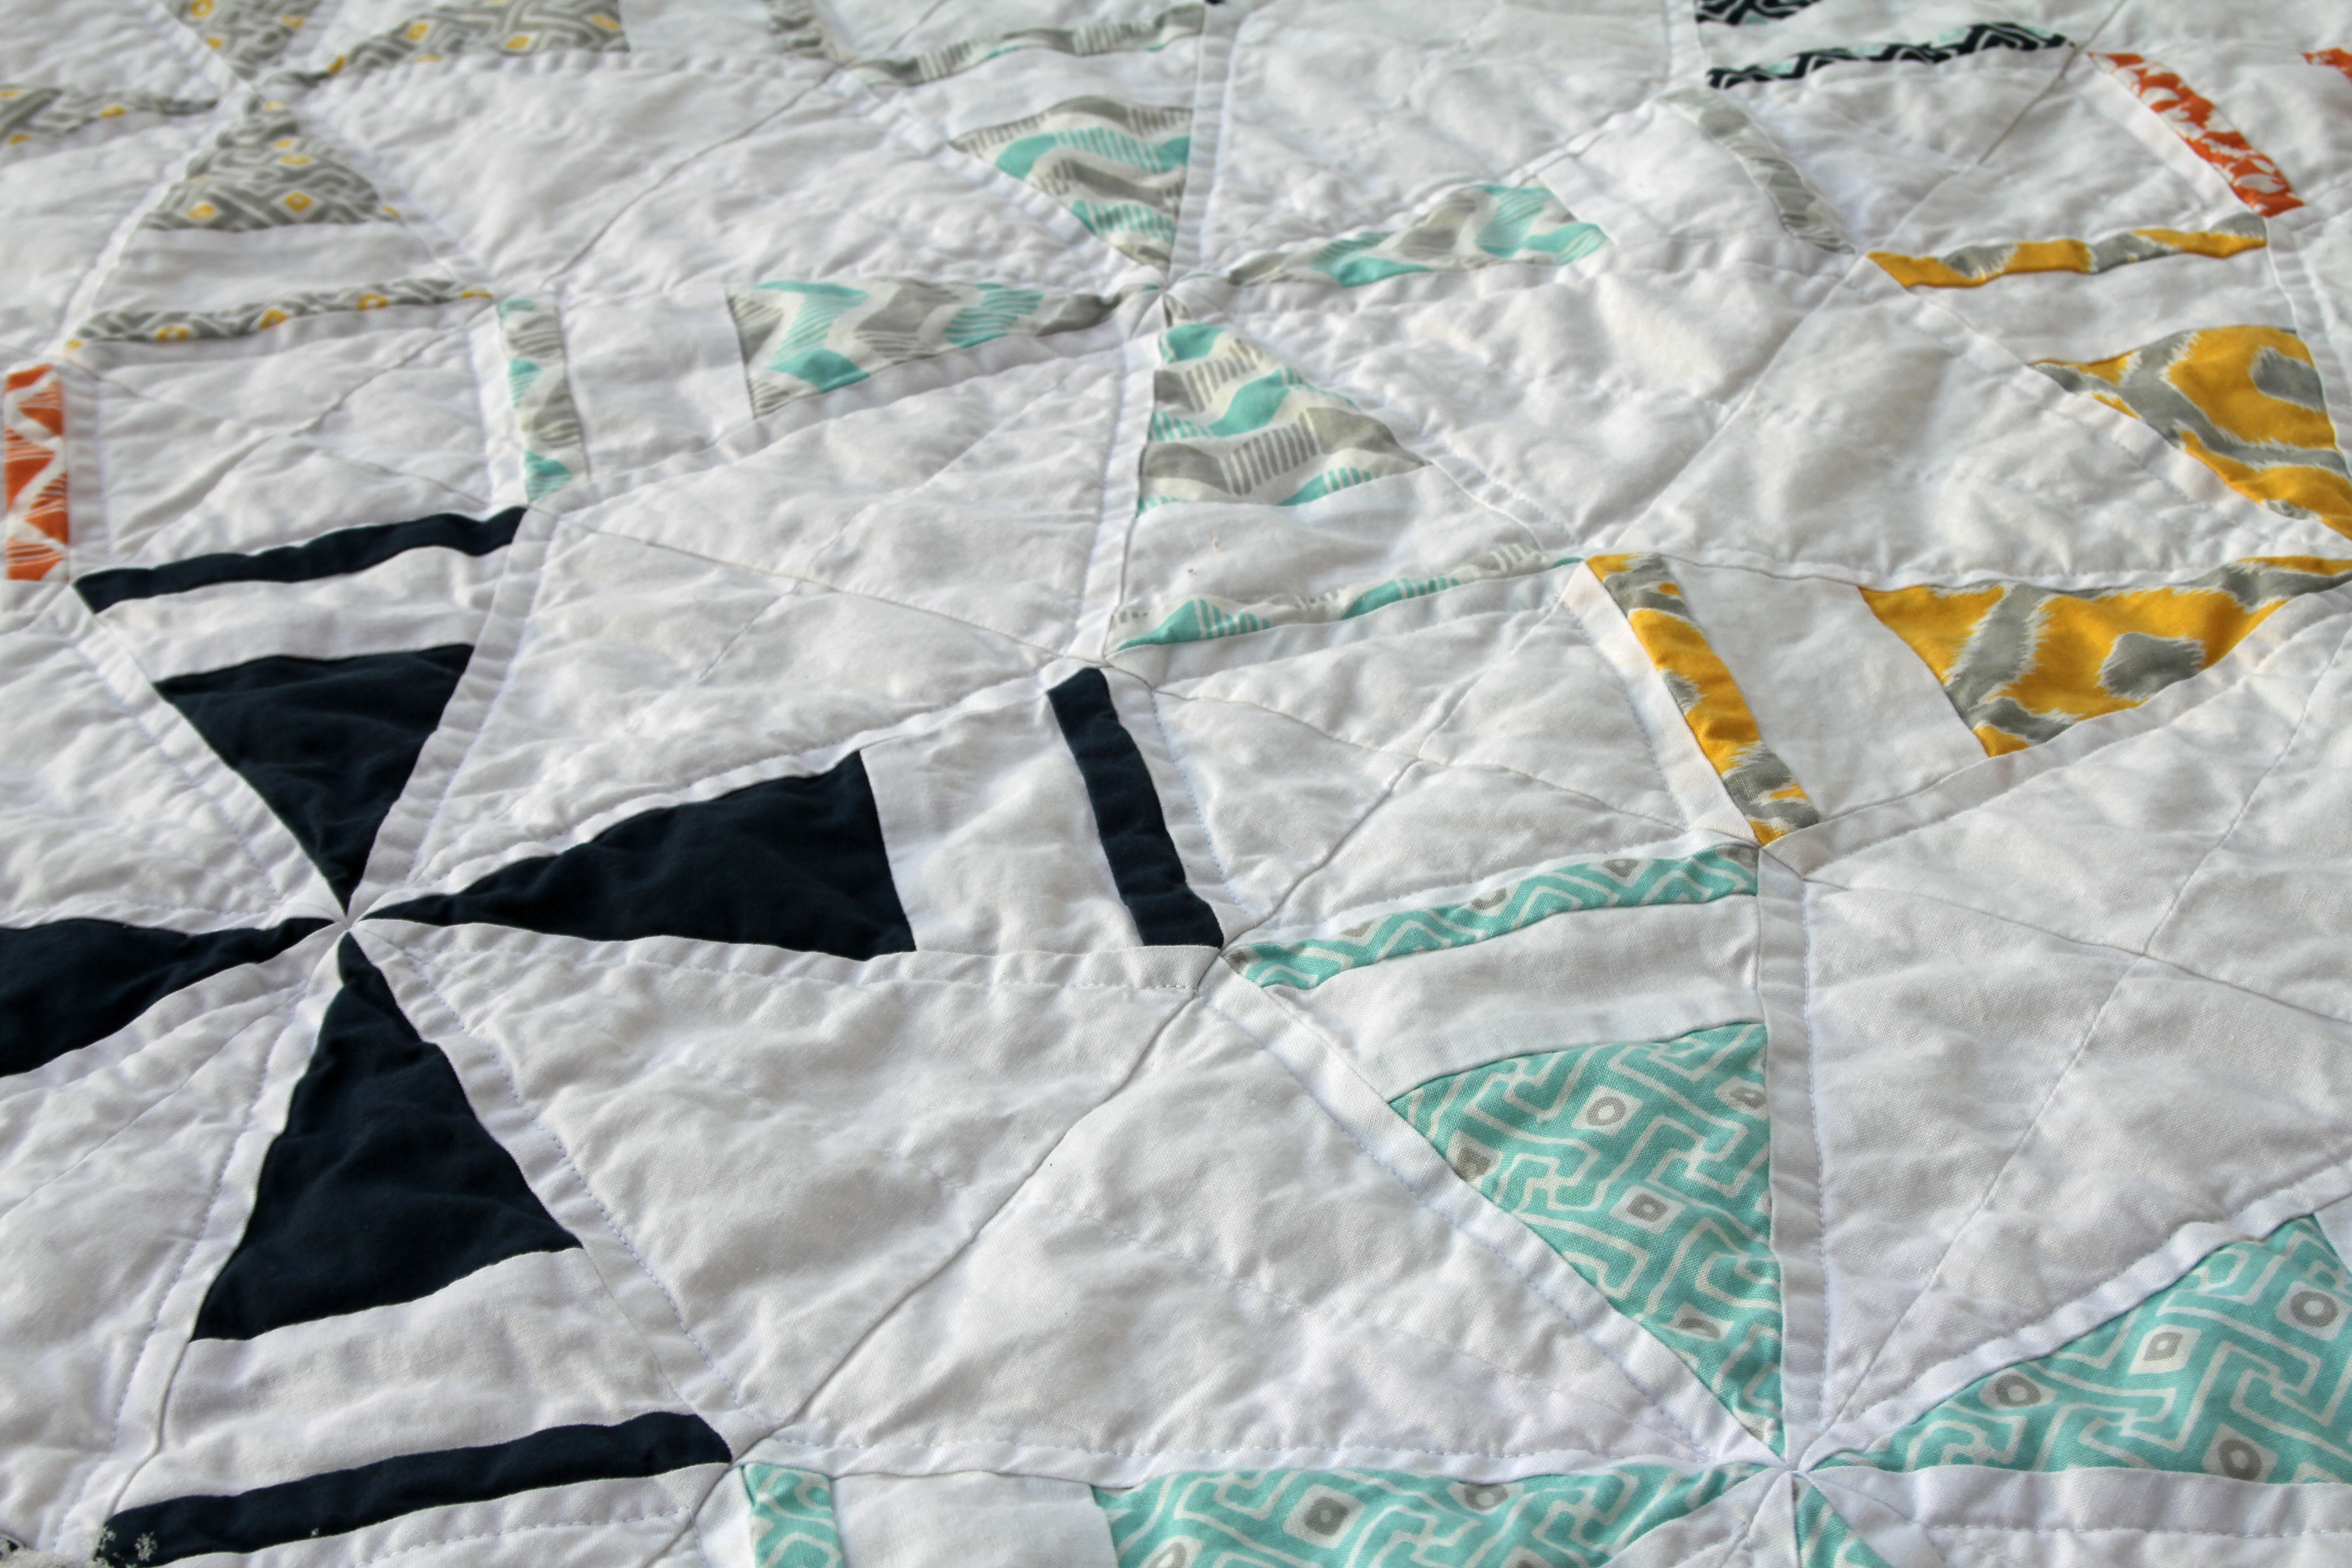
![]()

One generous throw quilt, 60 inch x 72 inches to snuggle under and enjoy. Thank you for taking the time to read this and I hope to see some of your creations!
Kelly Smith
{Live. Love. Create.}
![]()
Posted in: