Welcome to Moda Fabrics!
Jellied Lone Star Quilt
Jellied Lone Star Quilt
Published:
Apr 1 2015 - 22:16
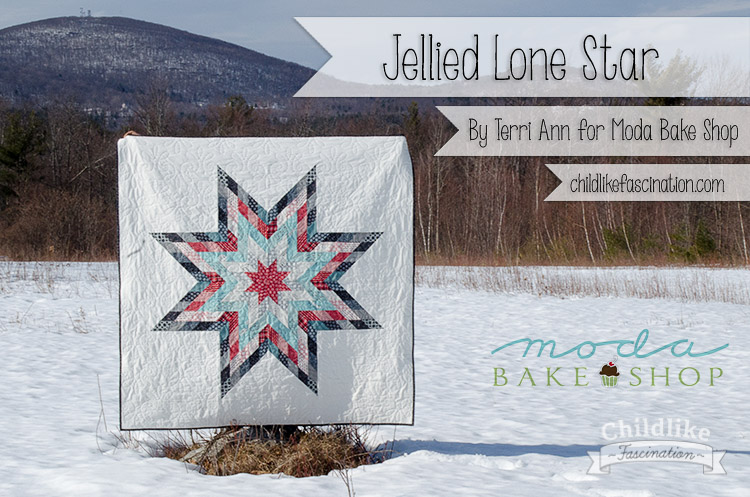

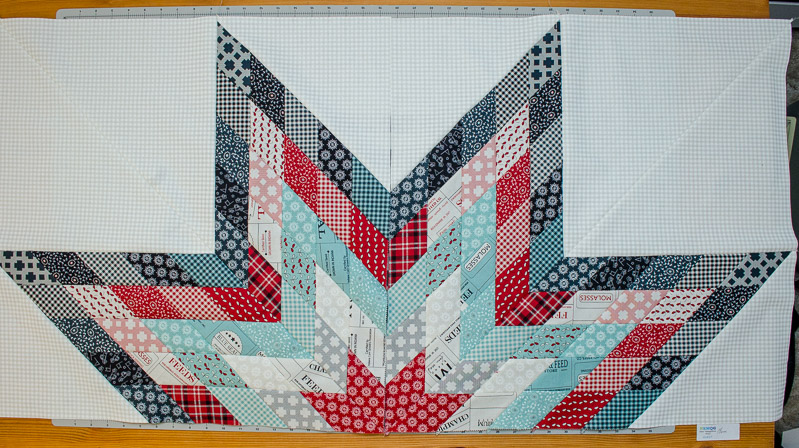
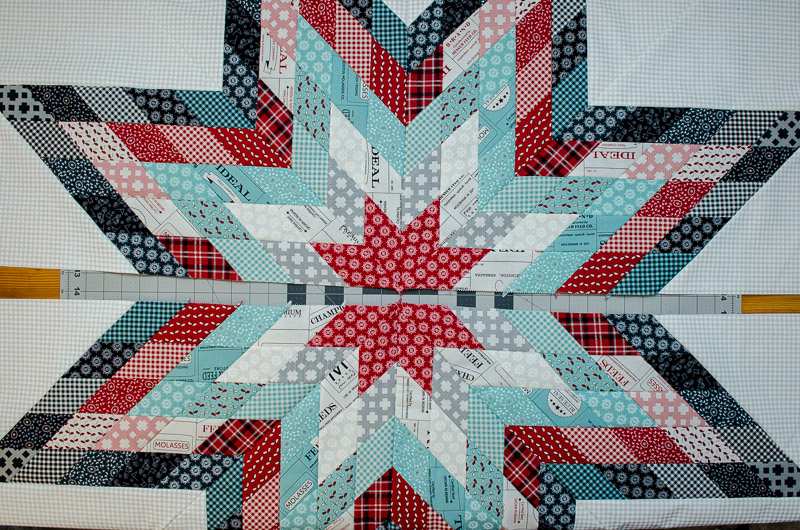
This is my very first Moda Bake Shop design and I'm so excited to bring it to you. Inspired by the lone star block tutorial at the Hopeful Homemaker and modified to use the oh-so-popular jelly roll, it's a great way to bring a contemporary spin on such a traditional quilt design!
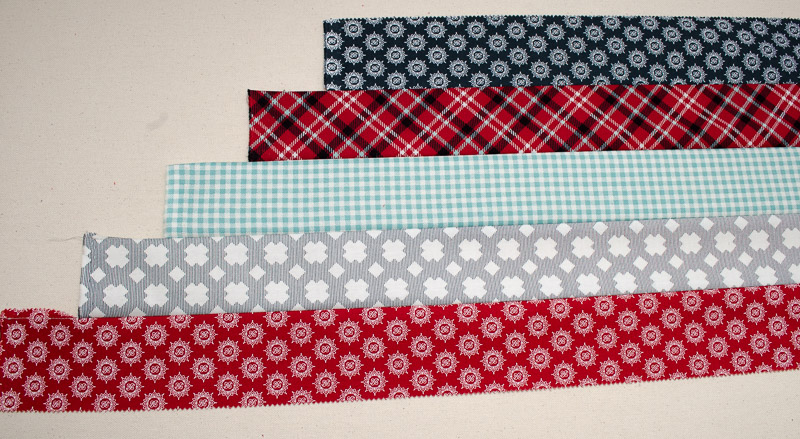
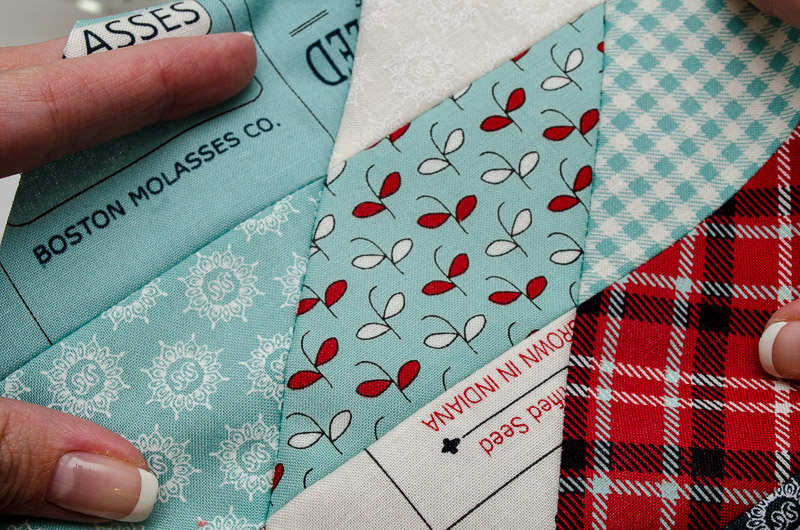
I used the delicious Feed Company by Sweetwater for this quilt with the tone on tone white gingham for the background.
I'll warn you, this is not necessarily a quick quilt. But, by taking your time through the steps you'll end up with a stunning lone star without fussing with 200 little diamonds and no y-seams! This pattern yields a quilt that is 59" x 59″ but would be a great quilt to customize with borders to to make it just the size you need.
![]()
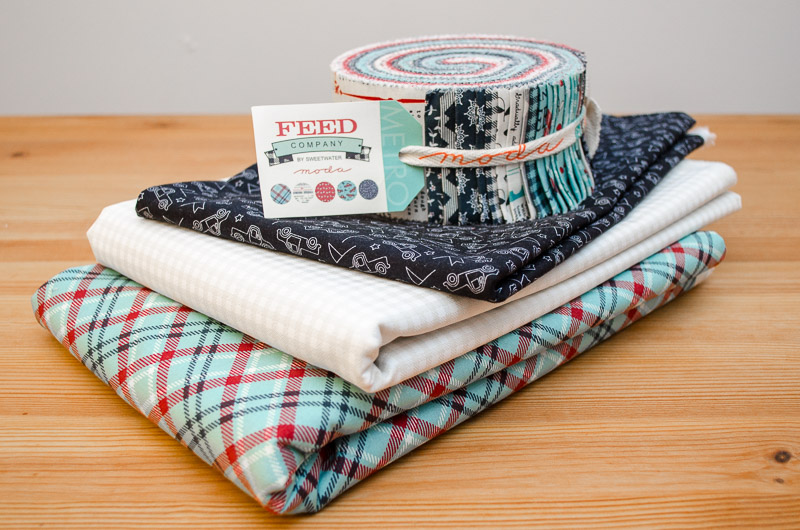
- 1 Jelly Roll of Feed Company by Sweetwater
- 3 yards Feed Company Vanilla (5575 14) for the background
- 1 yd for Feed Company Black (5572 13) for binding
- 4 yards Feed Company Splash (5576 12) for backing
Tools
- Ruler with 45 degree marking (a 24" long ruler is helpful, but not required)
- Chalk pen or other marking pen
![]()
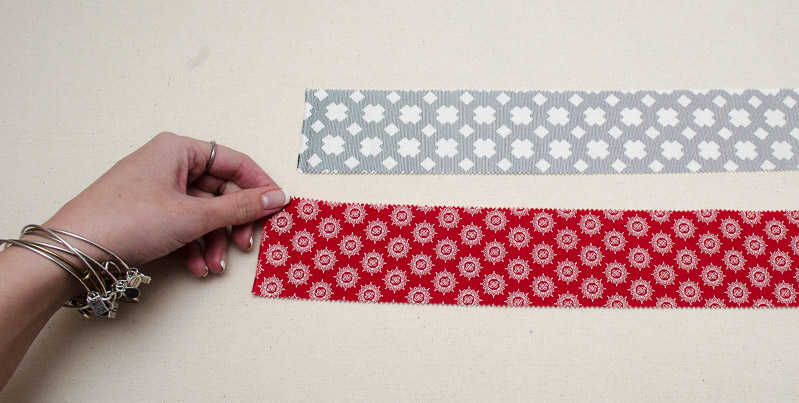
Separate 25 jelly roll strips into by the following colors

- 5 red
- 4 black,
- 5 dark blue
- 5 light blue
- 3 red with white
- 3 white
I highly recommend that you starch the jelly roll strips before getting started!
From your background yardage cut
- 4 @ 11" squares
- 4 @ 15" squares
Update Oct 2017
If you're a sewist that prefers to always use a scant 1/4" then you may want to cut slightly larger squares (it'll get trimmed to size later in the construction) one quilter reported having too-tiny-triangles from the 11" and 15" size squares; they weren't quite big enough. I hope this discrepancy has not inconveniences any of my fellow makers.

- Cut squares in half diagonally yielding 8 small and 8 large triangles

Part 1
Summary
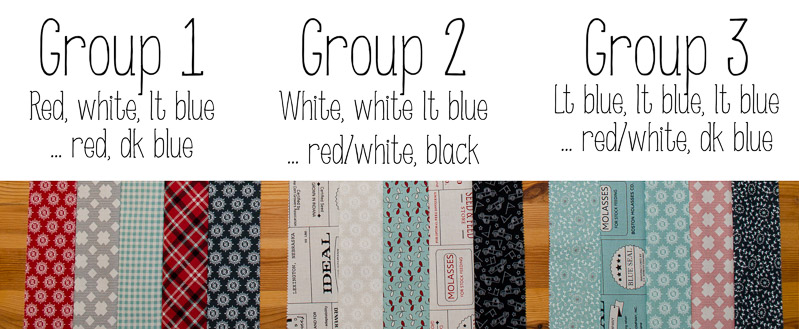
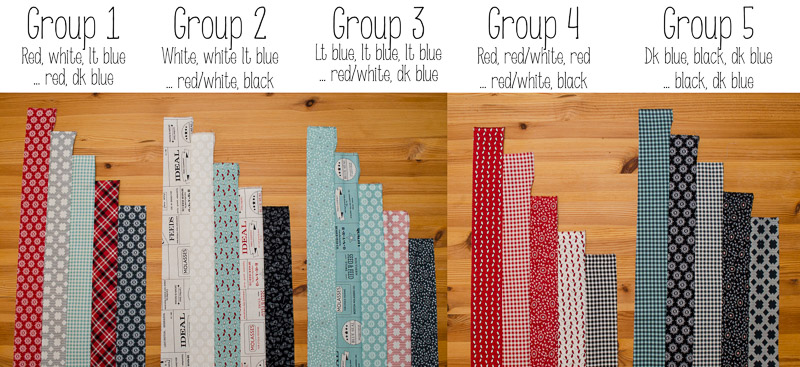
Separate jelly strips into 5 groups in the following order
Group 1: Red, white, lightblue, red, dark blue
Group 2: White, white, blue, white with red, black
Group 3: Light blue, light blue, light blue, red, dark blue
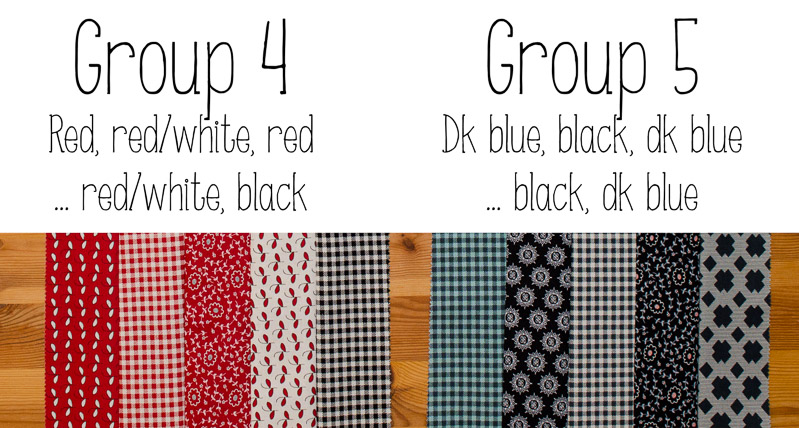
Group 4: Red, white with red, red, white with red, black
Group 5: Dark blue, black, dark blue, black, dark blue
Part 2
Summary
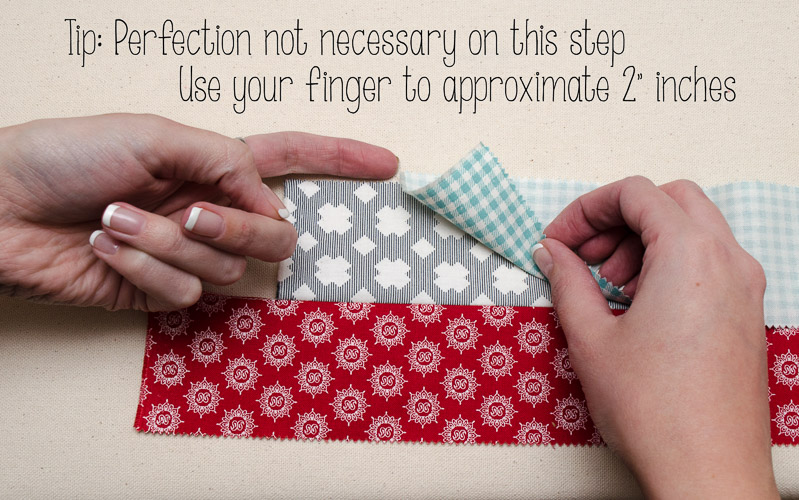
We are going to strip piece the groups together offsetting the ends approximately 2". Go in the listed order for each group above.
- Take the first color in the group and lay it right side up
- Take the next color in the order and lay it on top, right sides together offset 2" to the right
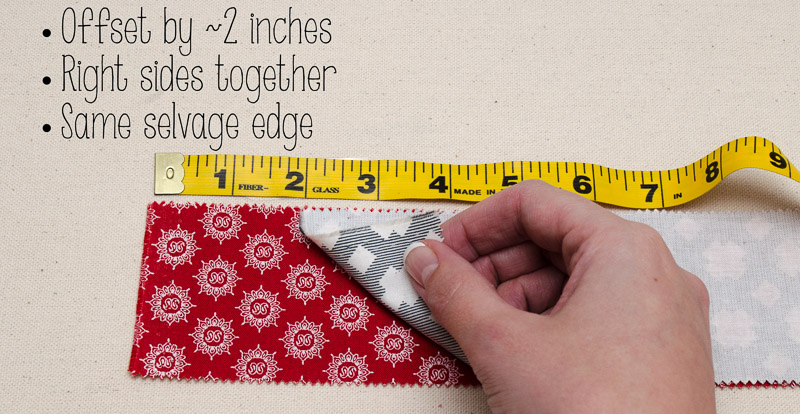
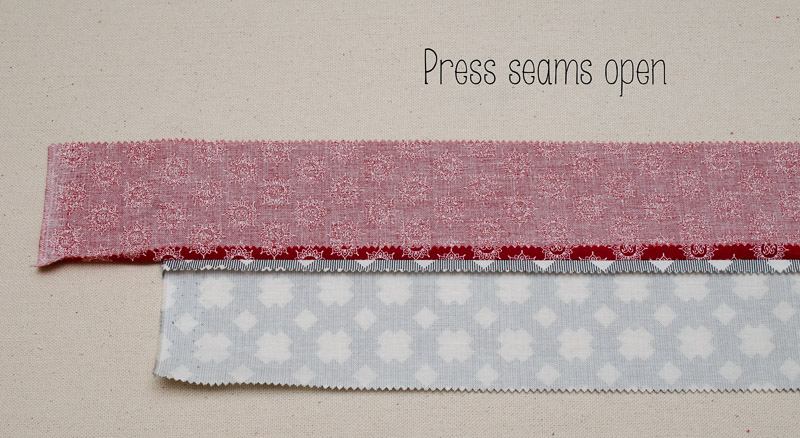
- Sew a 1/4" seam along the top edge

- Set seam and press the seam allowance open
- Repeat with each strip in the group in the order listed above
You're going to repeat this process with each of the groups. Use the order listed above and keep organized by keeping the same selvage on the start end; it makes this pattern much easier to complete.
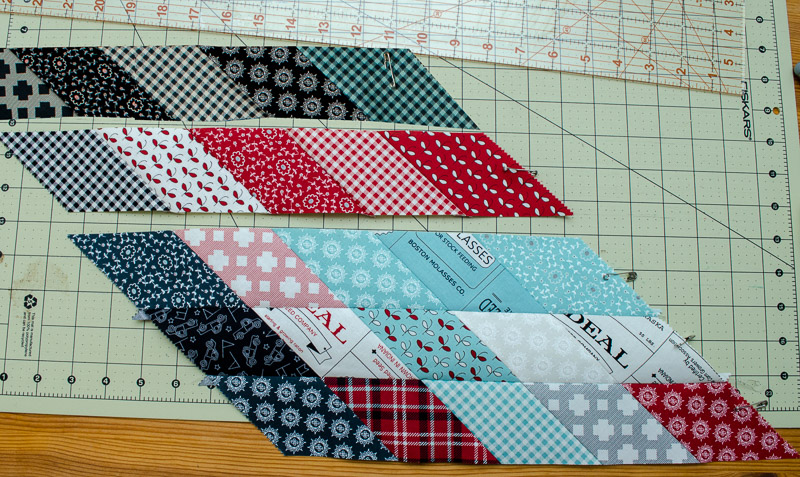
Part 3
Summary
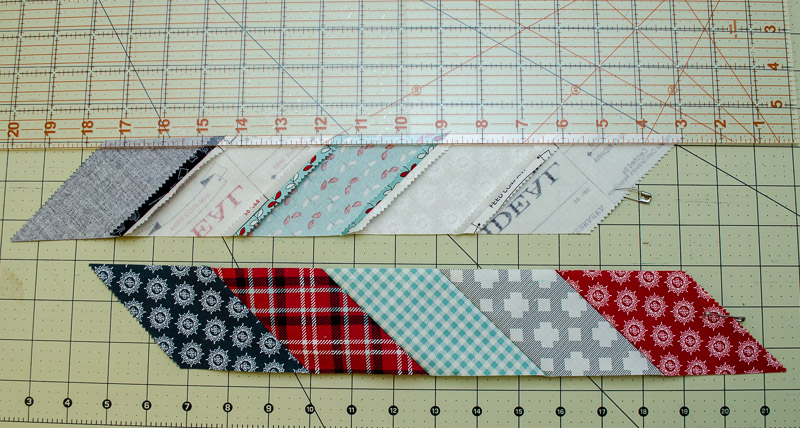
Sub cut 8 strips at a 45 degree angle
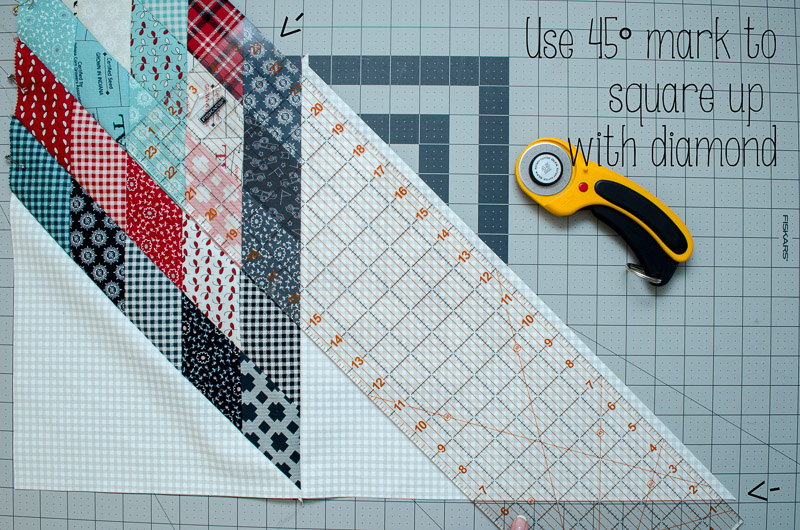
- Lay your pieced strips sideways on your cutting mat and use the 45 degree mark on your ruler and line it up with one of your seams, be sure that the edge of your ruler does not go over the selvage on any strip
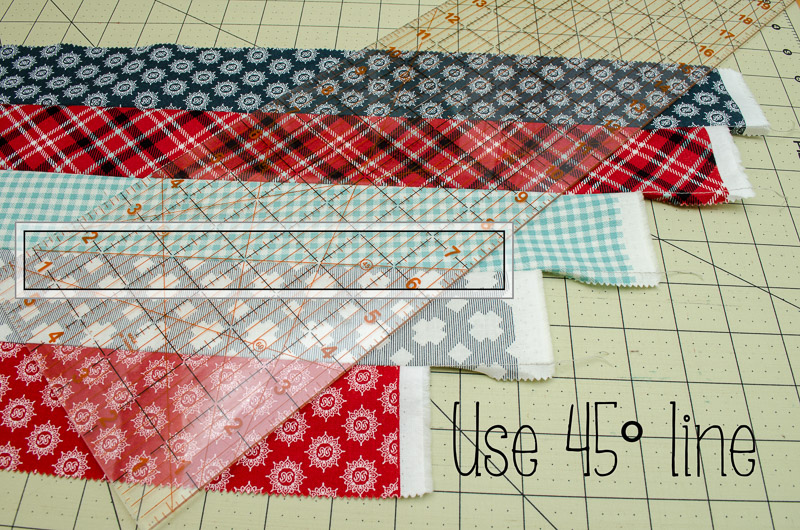
- Flip the strip and cut a 2 1/2" strip from that clean edge
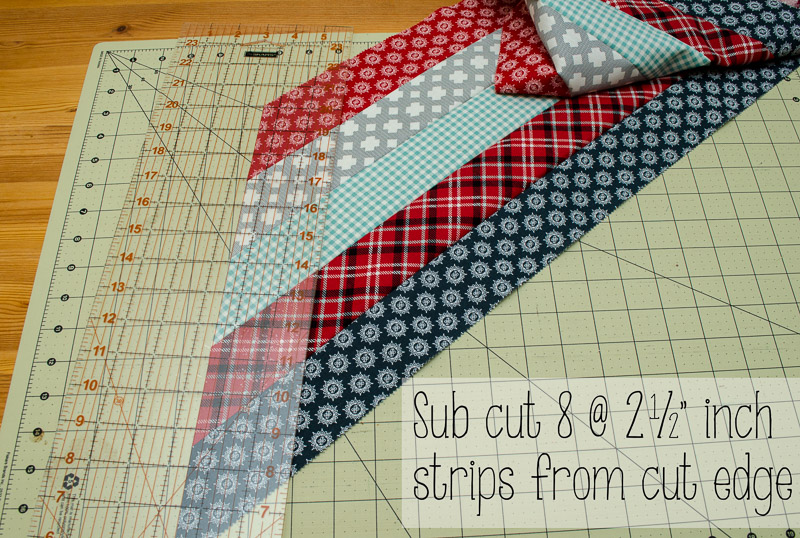
- Cut 7 more (total of 8) of these diagonal strips from this piece
There is a bit leftover incase of mis-cuts and for your scrap bin
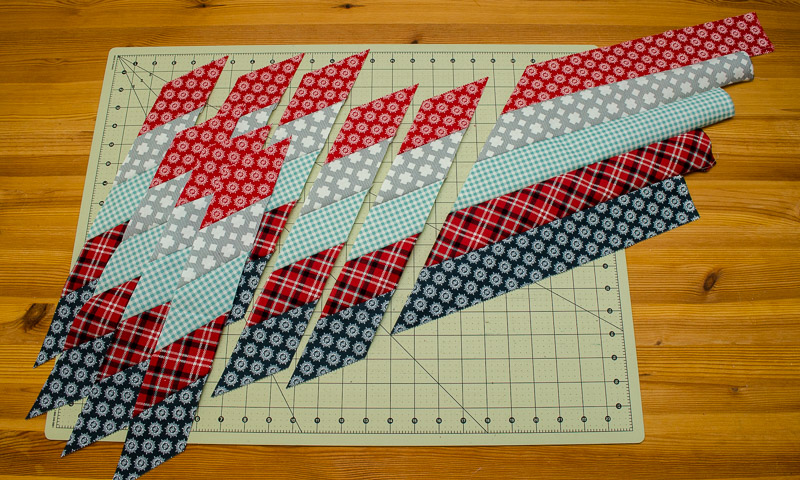
Repeat with all the other groups
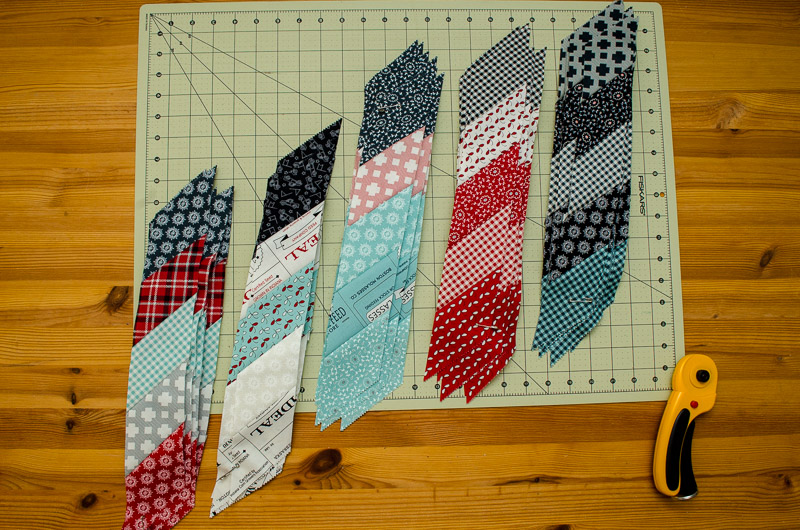
Part 4
Summary
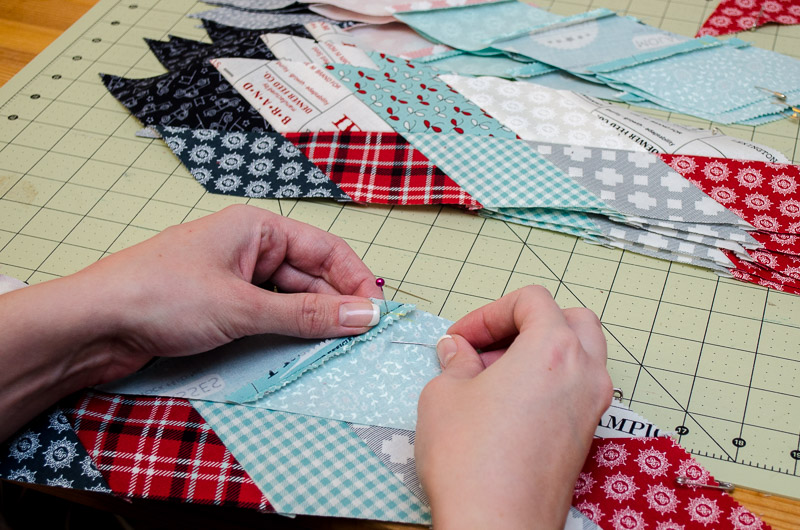
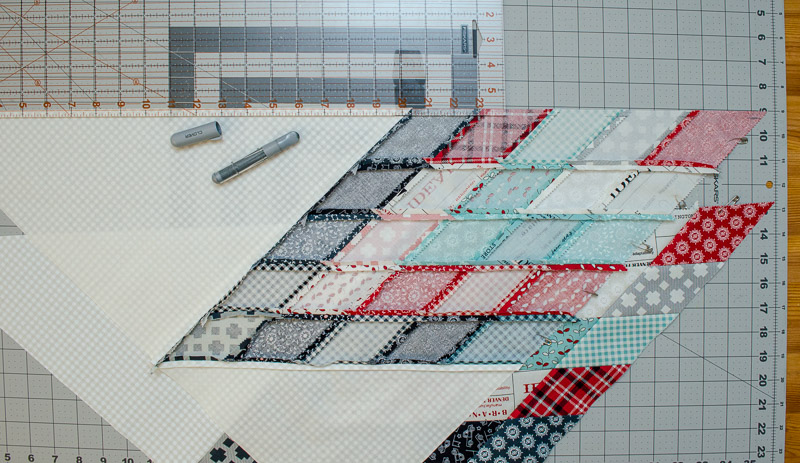
Using one strip from each group, in order we will piece the diamond strips into 8 identical diamond points of the star
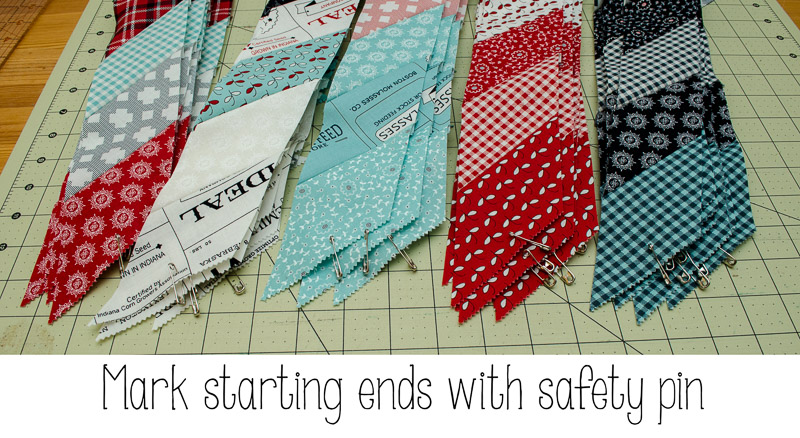
Tip
- Put safety pins in the starting end of each strip to stay organized
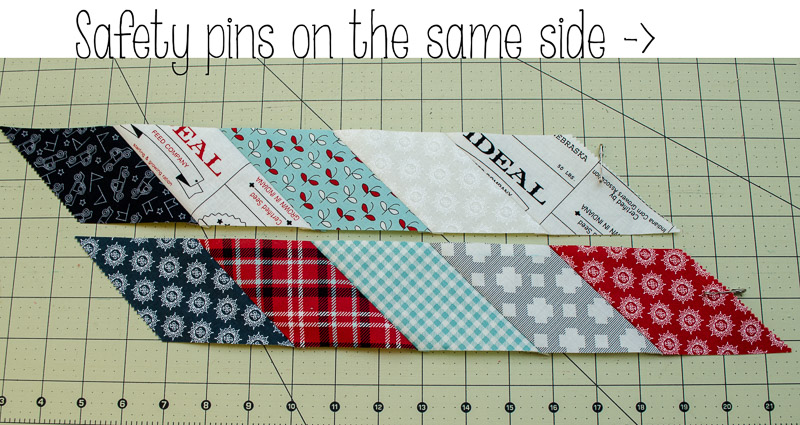
- Lay strip from group 1 down and lay strip from group 2 above it
Offset to match seam direction
Safety pins should be at the same side
- Flip the top strip and use a marking tool to mark 1/4" from the edge
- Put the strips right side together and use the top of that 1/4" mark to align the left and right edges

- To make sure your seams match up push a pin straight through at the 1/4" mark in the seam and check that it comes through in the seam in the back, if it does not you may need to shift the strip a little to make them match up
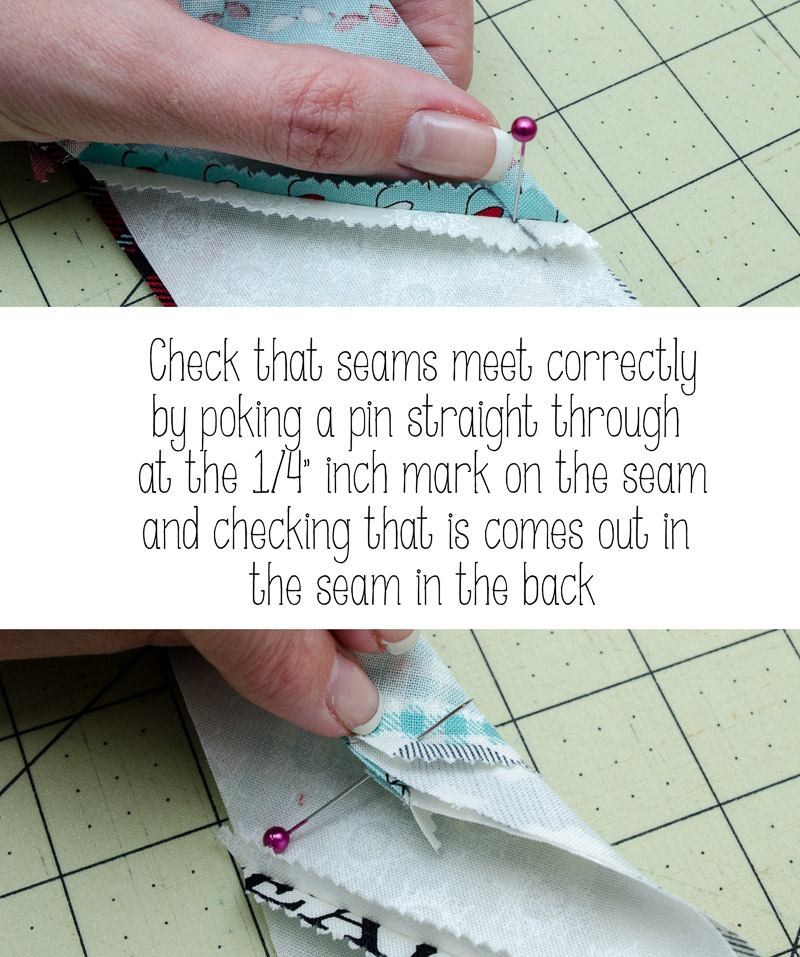
- Use lots of pins; it will help keep your points matching up!
- Sew a scant 1/4" seam allowance across the top edge
The needle should be a hair above the top of the marked edge, do not sew down the middle of the marked line

- Open to see if your seams and points matched up, mine were not always perfect and there were a couple times I unpicked to fix them but remember: a finished quilt is usually better than a perfect unfinished quilt
- Repeat until all 5 strips are sewn together in a diamond
You'll make 8 identical copies of this diamonds
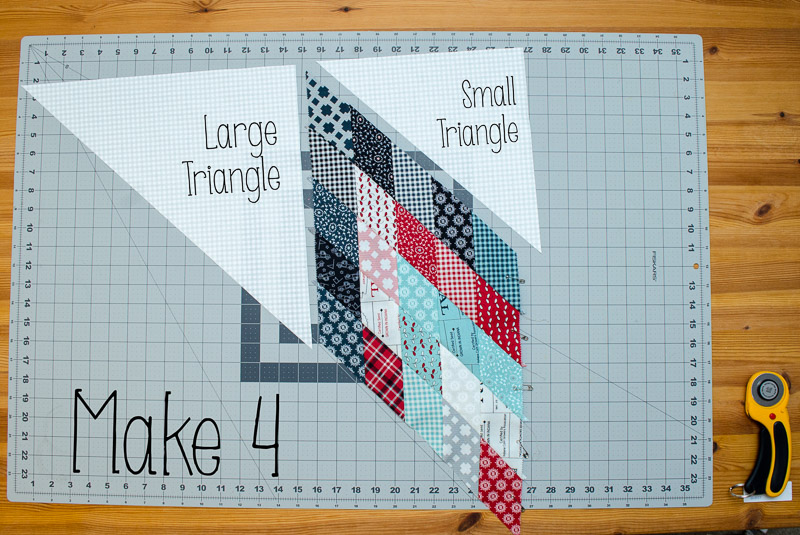
Part 5
Summary
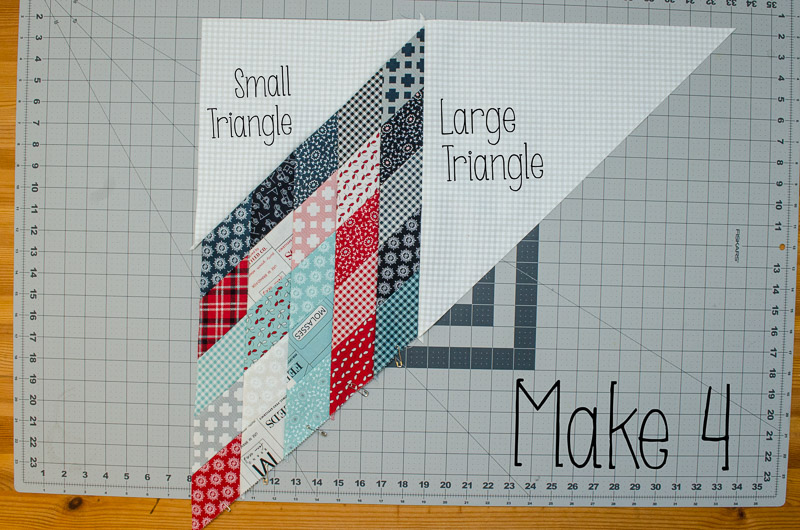
To avoid having to sew y-seams we are going to attach two triangles to the diamond
- Make 4 units facing this direction, use a large background triangle, small background triangle and a finished diamond
Sew on Small Triangle
- With right sides together pin the little triangle to the diamond as shown below
There will be overhand on the right side, that is on purpose - Sew along the right edge and press seam open
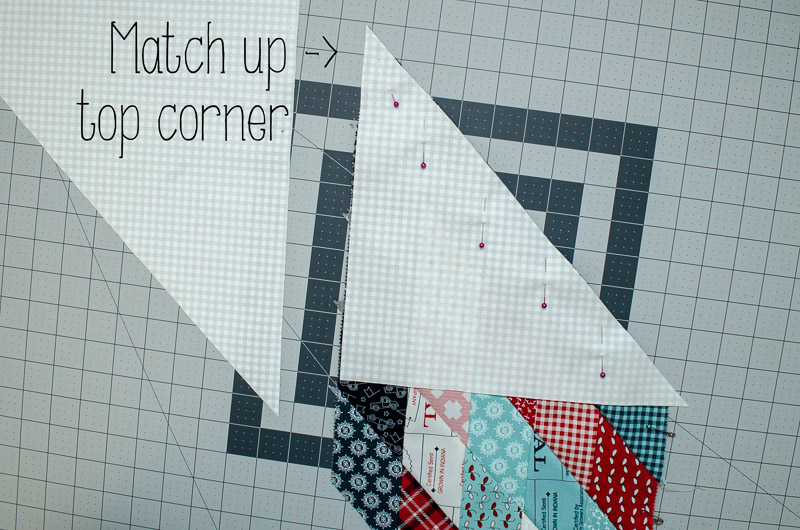
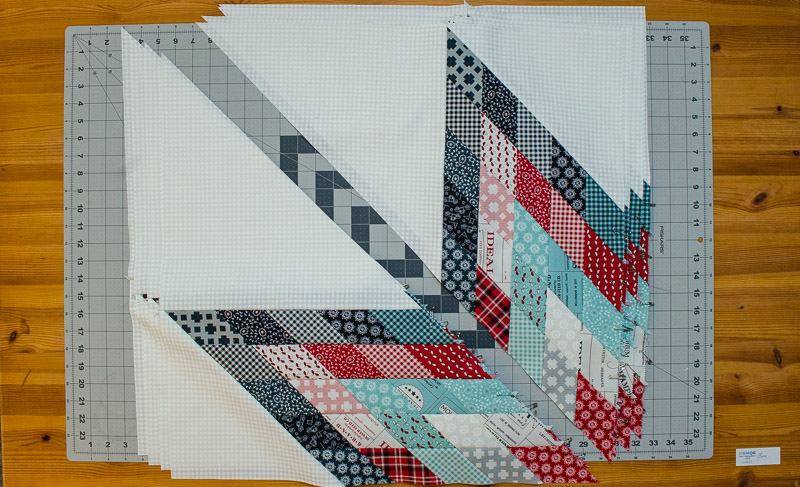
Sew on Large Triangle
- With right sides together match up the top left corner and top edge
Again, there will be overhang at the bottom - Sew along that left edge and press the seams open
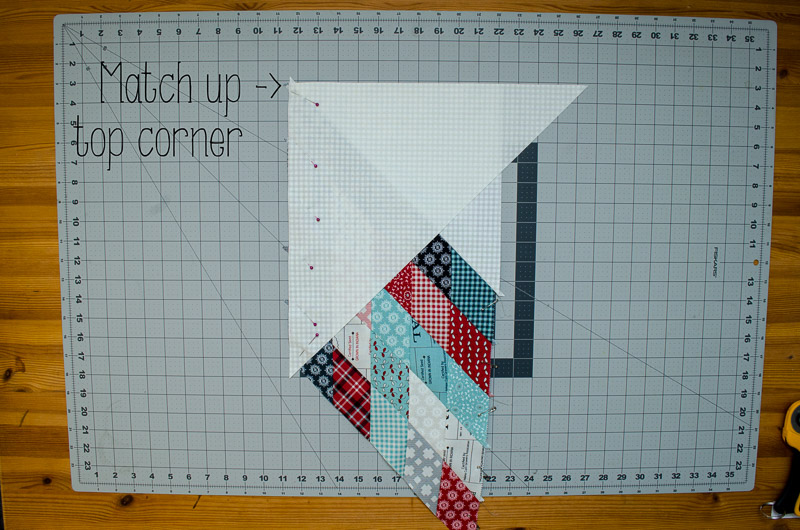
- Use both the 45 degree marker and the edge of the diamond to square up the overhang from the small triangle

- Use both the 45 degree marker and the edge of the block to trim up the overhang from the large triangle
After you've made 4 units in that direction repeat the steps in the opposite direction to make 4 blocks as shown below
Part 6
Summary:
Finishing the star
- Pair up a point block from each direction to create a 4 square blocks
- Mark your 1/4" and use the pin trick above to make sure your points match up
- Sew into 4 square blocks
- Sew two square blocks together as shown below and again, make your 1/4" mark and check that your seams match up with the pin trick
- Press seams open
- Take the two halves of the star and again make the 1/4" mark to match up the seams and complete the star
- Press seams open
Part 7
Summary:
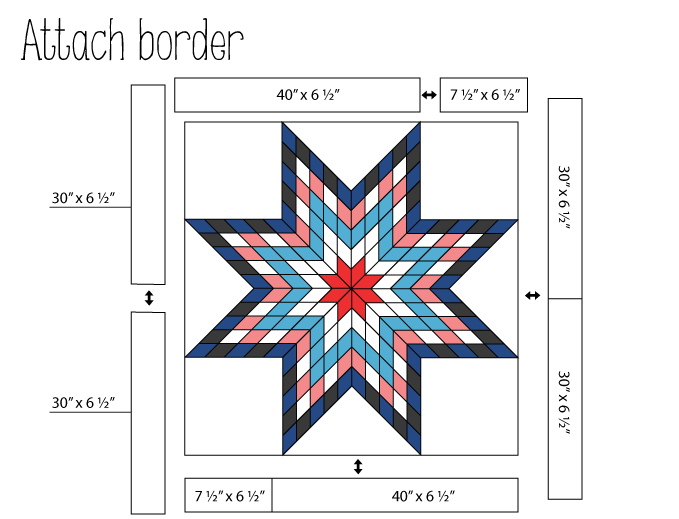
Time to add the border. I tried to get pictures but illustrations will have to do!
- The star measured as a 47" unfinished block*
* I recommend you measure your star and adjust accordingly, these diagonal seams are persnickety - From the remaining background fabric I cut 7 @ 6.5" x WOF strips and cut the pieces in the diagram below to add a border to the quilt
- 4 @ 30" x 6 1/2"
- 2 @ 40" x 6 1/2"
- 2 @ 7 1/2" x 6 1/2"
![]()
All that's left is to baste, quilt, bind & take outside for pictures! :)
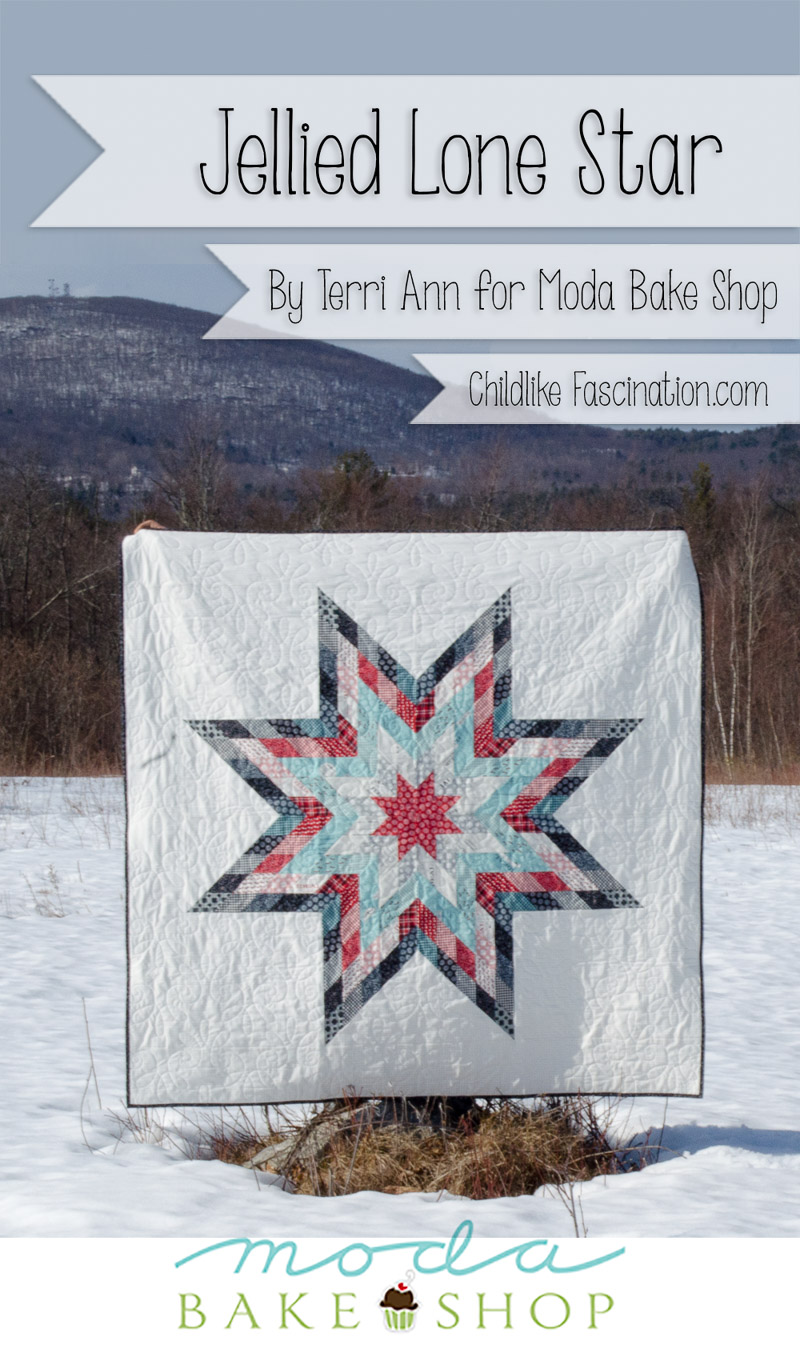
This pattern measures in at 59" x 59" and could be used for a small throw or wall hanging but would also make an excellent oversized base for a medallion with a couple borders to customize to the exact size you want.
Terri Ann Swallow
{Childlike Fascination}
![]()
I love to customize patterns I find to make them my own and I hope you are able to do that with the pattern today! You'll have 15 jelly roll strips to imagine a sweet border with!
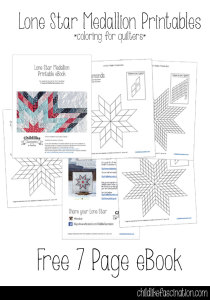
I even have a free 7 page eBook with 5 lone star sizes for you to print and color in your own inspired design you can read more on my Jellied Lone Star blog post. It's a fun quilty adult coloring book :)
For Moda Bake Shop readers you can download the coloring printable for this pattern here.
I hope you all give this fun traditional quilt a try; it'll be so easy to customize and really make your own! Share it on the Moda Bake Shop Flickr group or let me know on my blog Childlike Fascination or in the Facebook group!
Posted in: