Welcome to Moda Fabrics!
Time Flies! Layer Cake Quilt
Time Flies! Layer Cake Quilt
Published:
Apr 14 2015 - 23:00


Hi there and welcome to my first Moda Bake Shop pattern! I have been quilting for over 20 years and love using Moda precuts in my patterns. I'm very happy to bring you my first contribution to the Bake Shop.
Nothing seems to make time fly faster than spending my hours at the sewing machine. The hour glass blocks in this quilt reminds me of the wonderful time spent quilting in my life!
![]()
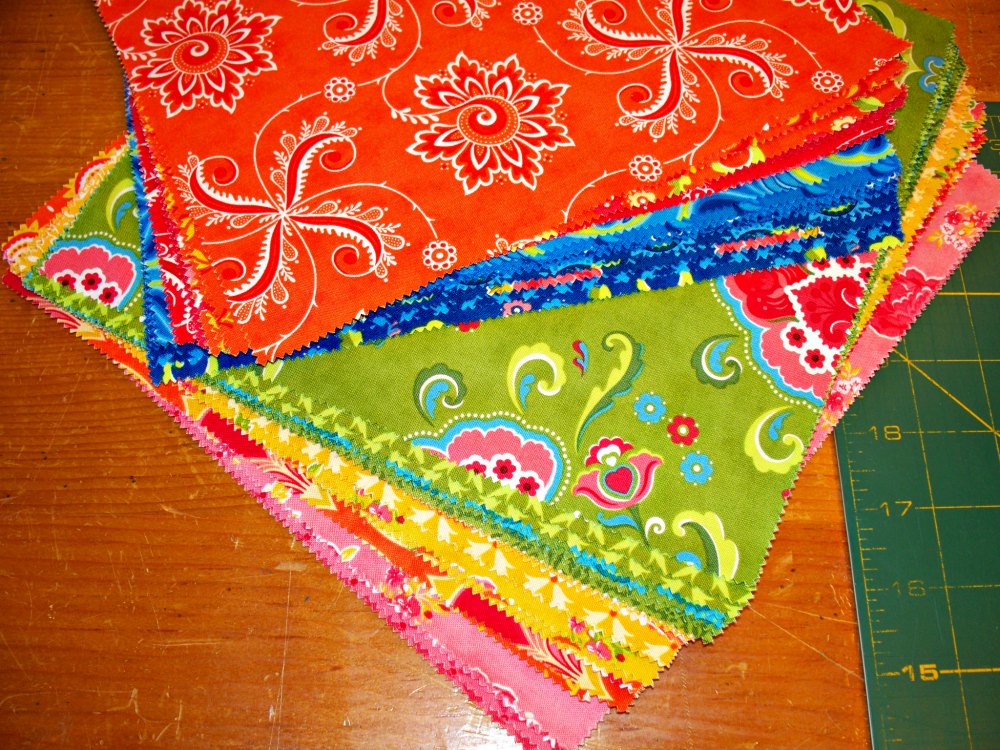
- 1 Layer Cake (42 squares)
- 2 1/2 yards background fabric
- 1 1/2 yards border fabric
- 5/8 yards binding fabric
- I find having an 8 1/2" square ruler helps but you can use any ruler big enough to square up the blocks to 8 1/2"
The sample was made using a Social Club by Eric and Julie Comstock Layer Cake and Grunge #30150 by Basic Grey for the background. The step by step photographs use a Fancy by Lily Ashbury Layer Cake.
![]()
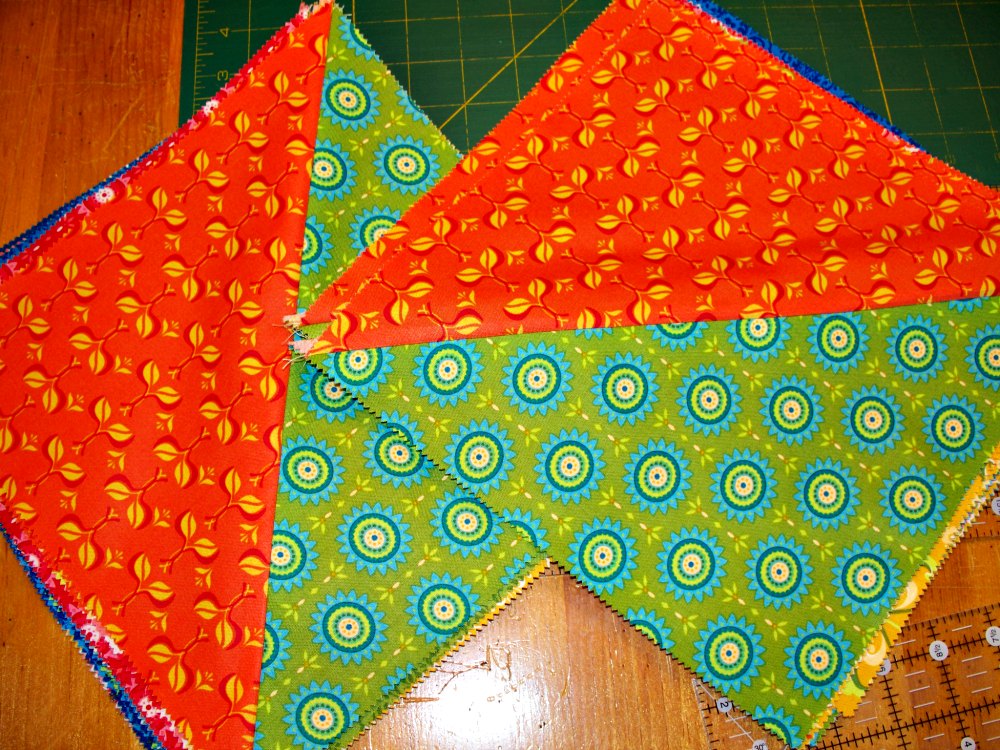
First make 42 hourglass blocks from the Layer Cake!
Sort the Layer Cake into two piles of 21 squares each. Start off by separating the light and dark squares first. You will be left with some medium colors, just separate them between the light and dark pile so that you have 21 squares in each pile.
 Separated into piles of light and dark
On the back of each of the 21 light squares, draw a diagonal line with a pencil. this will be used as a sewing guide. Be careful not to stretch the fabric as you mark it

Layer a light square and a dark square, right sides together, and sew 1/4" on either side of the pencil line. Sew all 21 pairs in this manner, being careful to not stretch the squares as you sew. I like to lay out the pairs ahead of time to get a good mix, especially if there are duplicates in the layer cake.

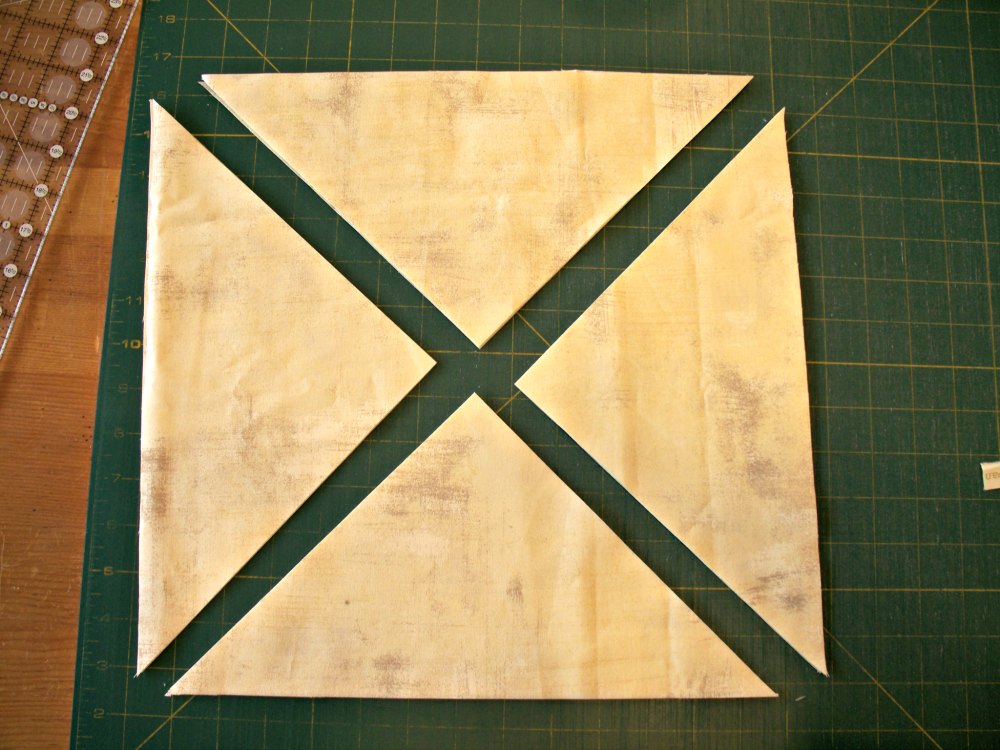
Cut the squares in half to create two half square triangles, using the pencil line as a guide.
 Cut apart on the pencil line
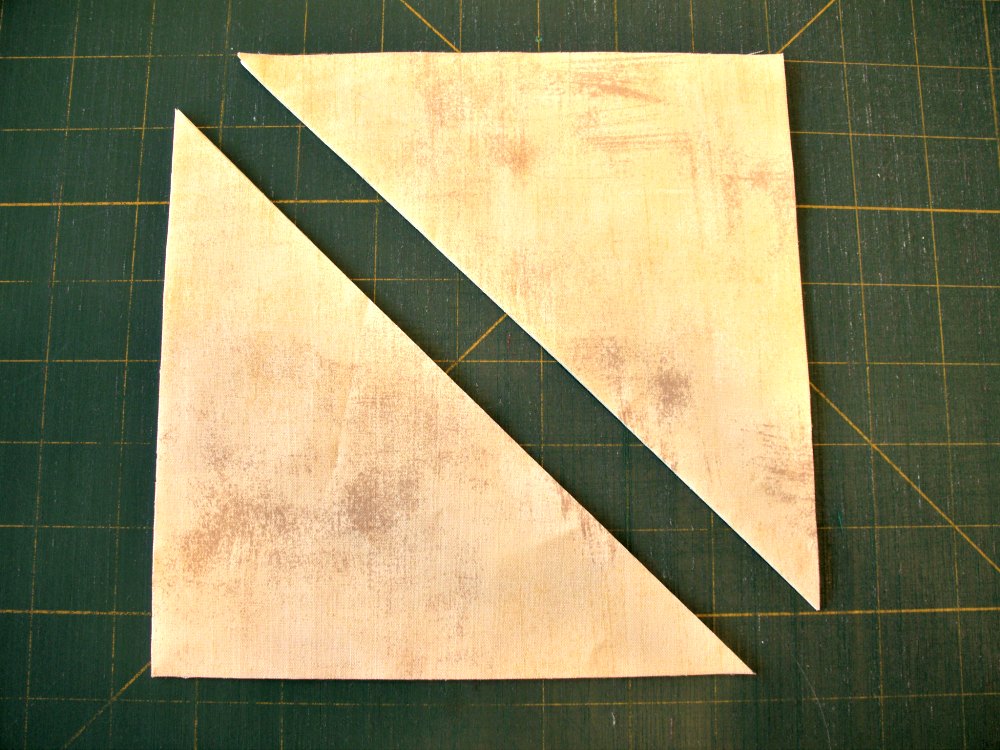
Press open, pressing the seam to the darker fabric. While you are pressing, sort them into two identical piles. I do not trim any of the dog ears at this point - the final squares will be squared up later and that will take care of all the dog ears then.
 Separated into two identical piles
Take one pile and draw a diagonal line on the back, perpendicular to the seam line.
 Diagonal line, perpendicular to the seam
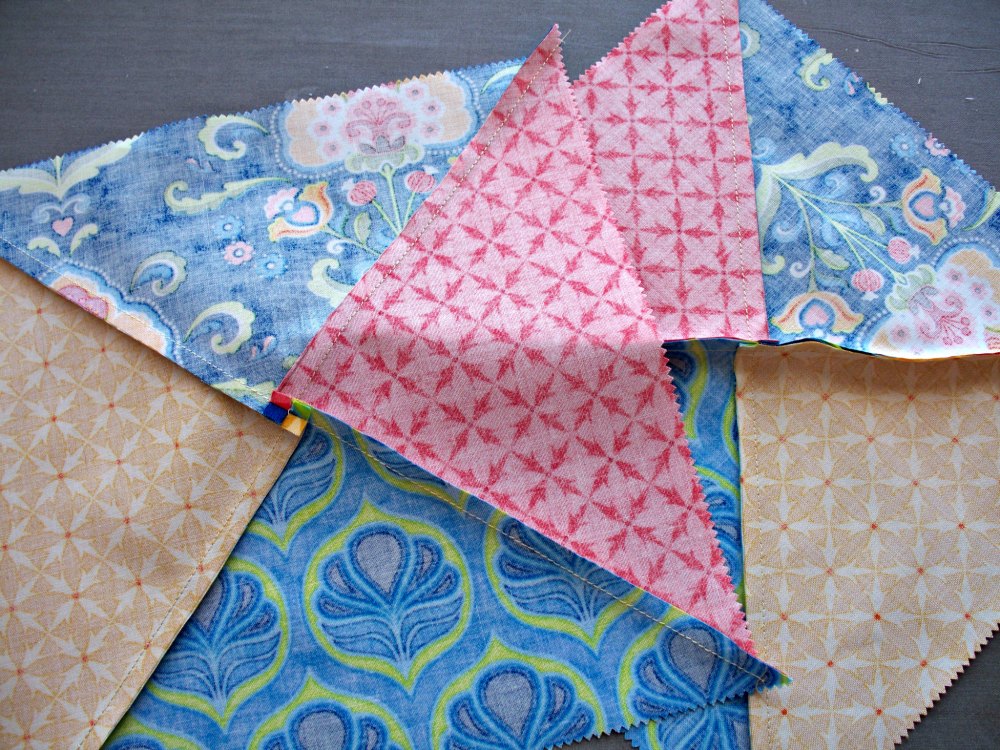
Pair up the two stacks, mixing a marked block with an unmarked block, right sides together. I find it useful to pair them up before I start sewing to make sure that I get a good mix of colors and prints in the pairs. The goal is to have 4 different fabrics in each block.
 sets paired up
The seams will nest and you will have light against dark and dark against light in this set. Focus on nesting the seams in the middle and not so much at the edges as the blocks will be trimmed down. Sew 1/4" on either side of the marked line.
 Close-up of center seam - try to nest as closely as possible
Cut apart on the pencil line and press the block open, spinning the seams on the back. If you are not familiar with spinning the seams, Google the term on the internet, there are a number of tutorials out there. It keeps the block from having such a big lump where all the seams come together.
 blocks cut apart
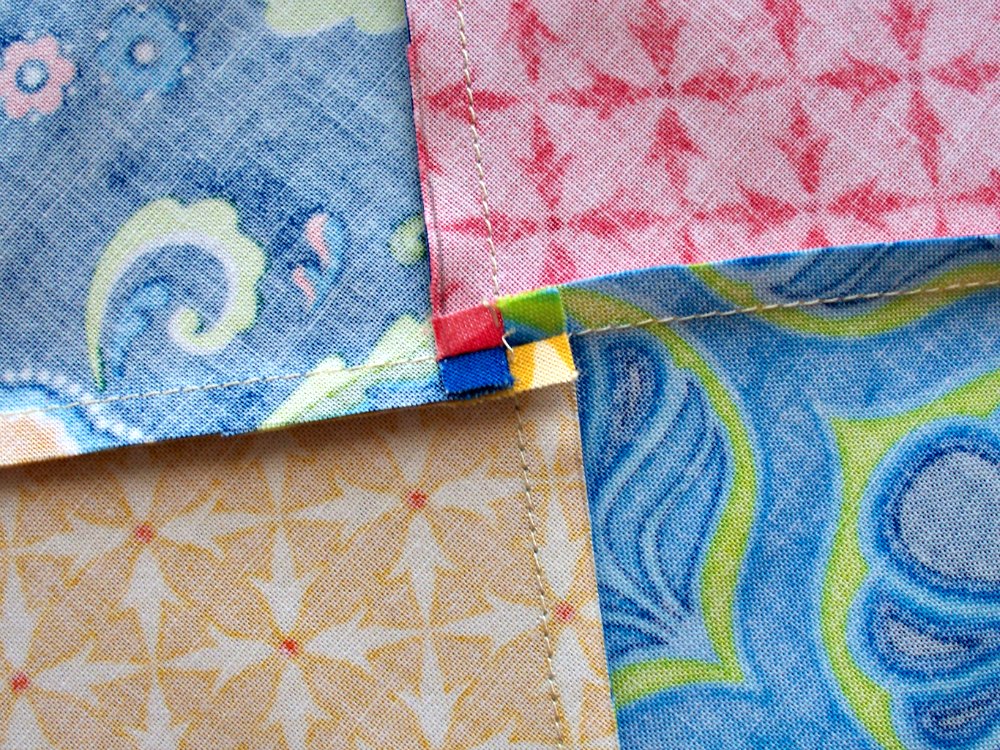 Close-up of seams spun on back of block
Using your square ruler, trim all blocks to 8 1/2" square.
 Squaring up blocks with an 8 1/2" ruler
Now it's time to cut your background fabric!
From the background fabric, cut 6 strips WOF at 8 1/2" wide and 2 strips WOF 13" wide and 1 strip 7" wide.
- from the 8 1/2" strips, cut 30 8 1/2" squares. (you should be able to cut 5 squares from each strip)
- from the 13" strips, cut 6 13" squares. (you should be able to cut 3 squares from each strip)
- from the 7" strip, cut 2 7" squares.
Cut the 6 13" squares into quarters on the diagonal. these will be used for the setting triangles on the top, bottom and sides of the quilt.
Cut the 2 7" squares in half, making 4 triangles that will be used for the 4 corners of the quilt.
Now you are ready to start assembling the quilt!
Starting in one corner, work on the diagonal, one row at a time, pressing the seams towards the background fabrics. If you have the space, you can lay out the quilt on a design wall. this will help both the layout of the hourglass blocks and the orientation of the setting triangles.
 Layout of first 3 rows starting in upper left corner
The setting triangles are cut larger than they need to be so that the points of the blocks will 'float' inside the edge of the quilt top. When you attach the border with a 1/4" seam there will still be about 1/4" of the background between the point and the border. This means all of the points around the edge of the quilt will be very crisp and you don't risk cutting them off when you attach the border, so don't worry as you piece the setting triangles, that they over lap and have larger than a 1/4" seam allowance.
I also trim the dog ears around the edge of the quilt before I attach the border.
From the border fabric, cut 8 strips wof 6 1/2" wide. Sew them together in pairs and trim the selvedge off of the seam. (I sew mine 1" from the selvedge edge and trim down to 1/4"). press the seam to one side.

When I attach borders, I always measure the quilt across the middle and cut my borders to that measurement. this means that opposite borders (top and bottom, right and left) will both be the same size, even if the quilt is not exactly square. This will help square up your quilt.
Measure the quilt across the long dimension at the middle of the quilt, and cut both long borders to this measurement. Pin them on matching the middle and the ends, easing the border to fit the quilt between these points. This will assure that the border is evenly distributed and that both sides are the same length.
Press the seams out towards the border, away from the pieced quilt top.
Now measure the quilt at the middle for the remaining borders and cut both borders to this measurement and attach the way you did the sides, pressing out towards the border.
Ta-Da! Your top is done! you can now quilt how you choose - the background squares give you the option for custom quilting if you like, or you can quilt an all over pattern - it's up to you!
Notes on Binding: the binding fabric gives enough to cut a 2 1/2" double fold binding. If I am finishing the binding by machine, I cut the strips 2 1/2". If I am finishing the binding by hand, I use 2" strips and you will not need as much of the binding fabric.
![]()
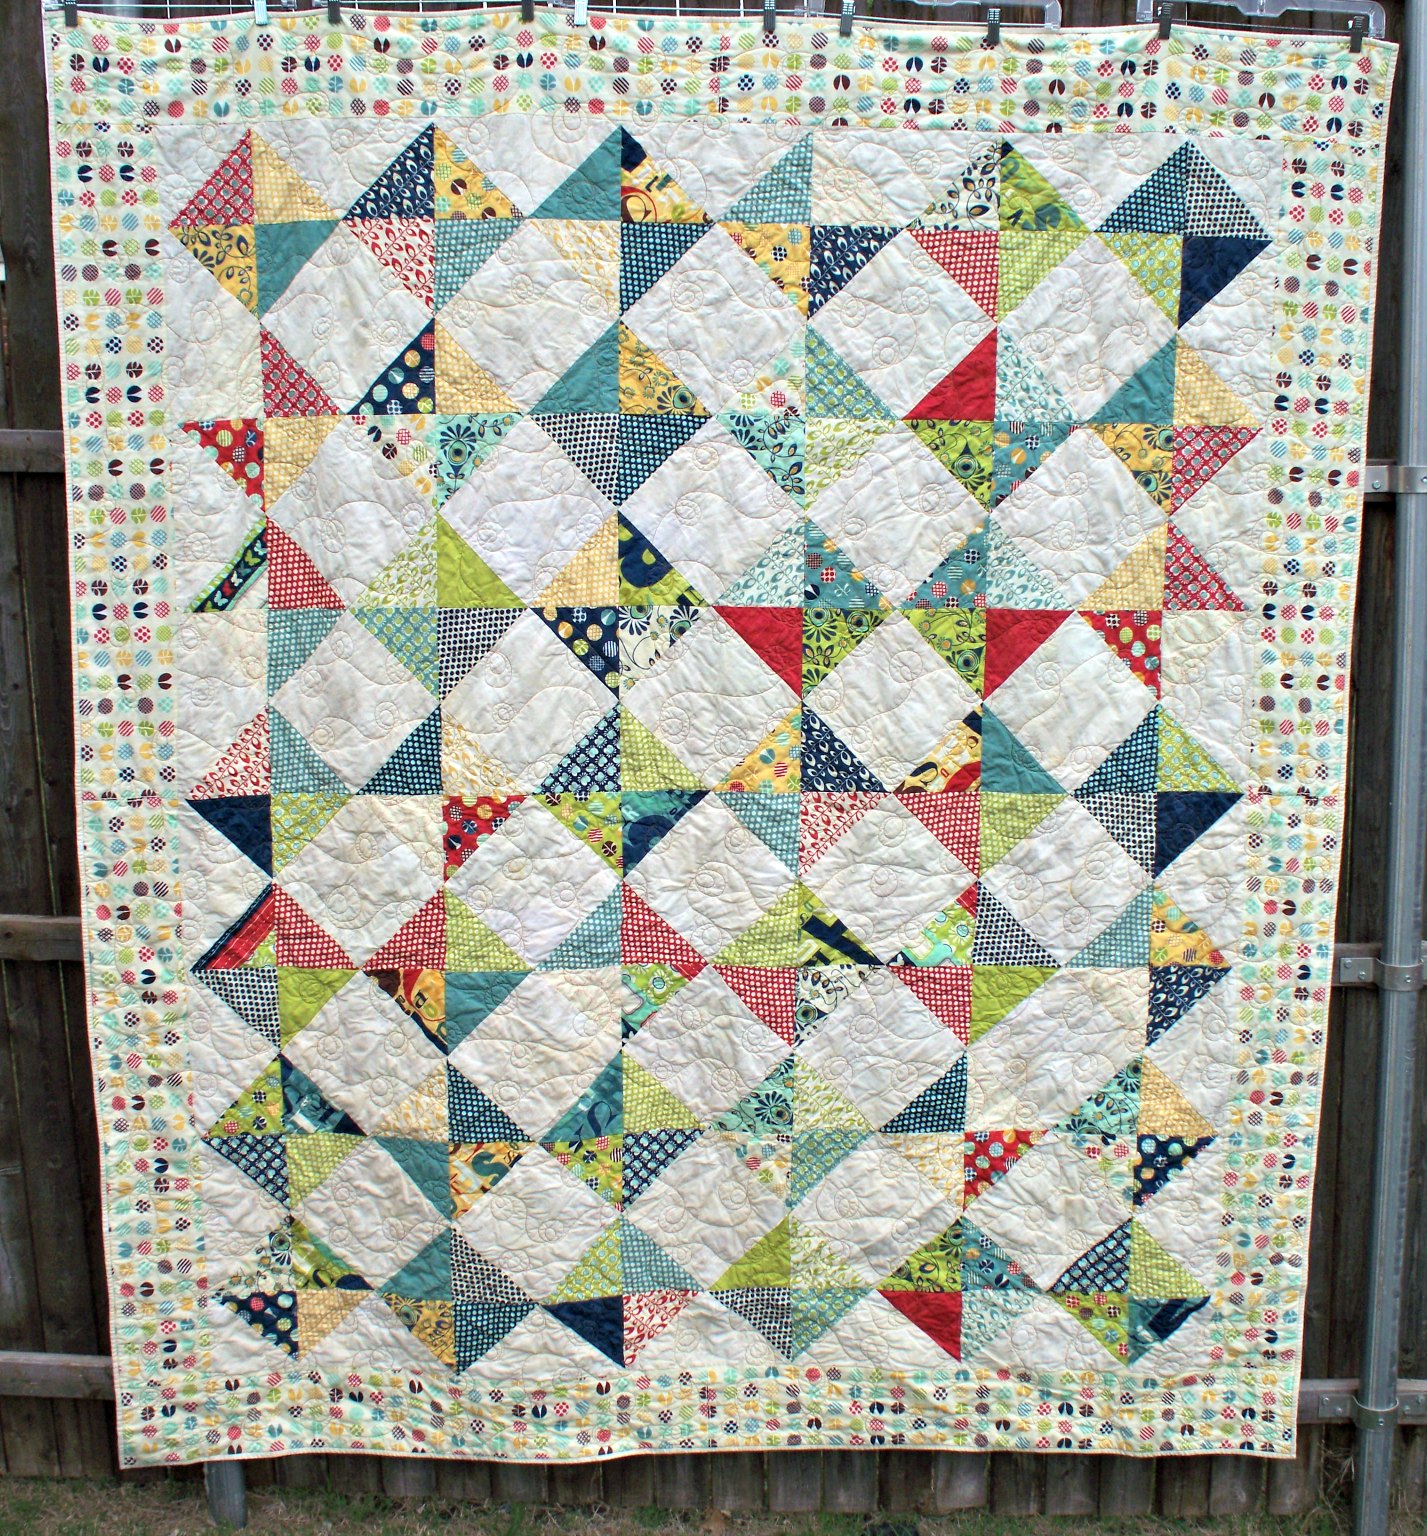
The finished quilt will measure about 82" x 93" - I have two big dogs and a fat cat, so in my world, this is a lap quilt, however the rest of the world would probably refer to this as a twin sized quilt!
Martha Wolf
{pinwheelprodns.com}
![]()
Posted in: