Welcome to Moda Fabrics!
Mini, Small, Little... and Big!
Mini, Small, Little... and Big!
Published:
Jun 12 2015 - 04:00
Happy Friday!
Today is mostly about little quilts - minis, small quilts, etc. - but I do want to mention a blog post that I hope you've read. Barbara Brackman wrote a lovely tribute in memory of her friend and fellow Moda designer, Linda Brannock, who passed away in late May.
Update: Jan Patek also wrote a sweet blog post about Linda, her longtime friend and design-partner. You can read that here.
As Barbara wrote, Linda was an influential quilter and designer with a distinctive style. Because our style of quilt is quite different, you might be surprised to know that I have many of Linda's books, those that she published on her own and several that were in collaboration with Red Wagon. At the time, most of the quilts I was seeing in books and magazines were very traditional. Beautiful, but the individuality and "voice" that is so apparent in Linda's quilts was missing. From the mix of fabrics to the scale and proportion of the different parts of the design, there weren't any rules being followed. Despite the muted colors, I always thought of Linda's quilts as being vibrant and energetic. I still do.
Linda also made small quilts - minis. Though I don't know that anybody was calling them that "back then".
Just so you know, I've been making quilts of one size or another for more than thirty years. Folks were making minis when I started and they're still making them now. More of them? Maybe. I wasn't counting. What I know is this... you can't open a quilt magazine, quilt book or check out "quilts" on Instagram without seeing a whole lot of them.
Why?
Because they're so incredibly cute. And they're d0-able - a long - months, years, longer? - commitment of time isn't required. They're a terrific way to dabble in something different - a color palette that is so "not you", some funky fabric style you've never tried, etc. Practice, practice, practice - they're a great way to try a new technique, a challenging block, paper-piecing or even improve your machine- or hand-quilting. They make awesome gifts for your quilt-y and non-quilt-y friends.
Did I mention that they're cute?

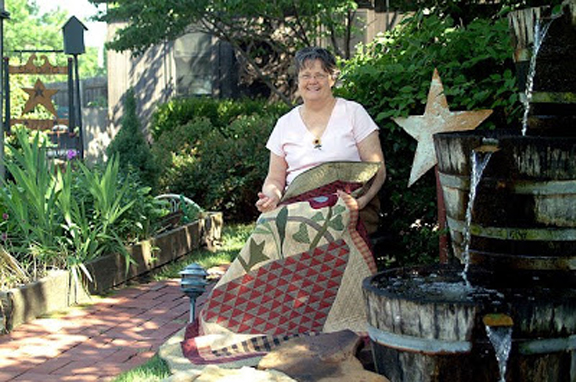
This is one of the most well-known collections of minis - photo shamelessly swiped borrowed from Camille Roskelley of Thimbleblossoms. This wall is one of the reasons why minis are so popular again - and why Camille has done patterns for these quilts.

Even better, there is a whole slew of great patterns for minis now!

From Fig Tree to Primitive Gatherings, This & That to A Quilting Life, there are all sorts of options. Some are teeny tiny blocks - thank you, Lisa Bongean - and some are one big block that makes a quilt measuring less than 20" x 20". (And no, I don't think there are any requirements or limits on size.)
I've probably mentioned this before, but one of my favorite new mini patterns is this one by Corey Yoder - Coriander Quilts.

Well, guess what? I actually made this one - the Gingersnap Mini.
Alright, so I might have changed one thing... I didn't use a white - or color - for a chain. I used more of the mini charm squares from the pack of Tucker Prairie so my little Gingersnap is a little bit... busier.

And I used linen for the background. Oh, I also cut the outer border a 1/4" wider so I'll have a little "skoosh-room" to square it up after I quilt it. (And yes, I will machine-quilt it myself. Eventually.)
While on the subject of "skoosh-room", that's one of the things to mention about making minis... there isn't much. Easing in 1/16" difference in two pieces isn't much of a problem when your squares are 2" between seams, or a side-strip is 6" long. But when there is only 3/4" between seams and the side strips are 2 3/4" long, there isn't much room to work with - there's no "skoosh-room".
To wit, there are a couple of things about making minis that I would like to share.
Seam allowance. Yes, it's that dreaded scant 1/4" again. It probably matters more here than it does for big quilts so if nothing else, this is a perfect place to practice. But the most important thing is still that the seam allowance is straight, even and the edges are perfectly matched.
Pressing. Pressing seams open will help a lot to reduce bulk in the seams and help narrow strips lay flat.
When I first learned to quilt, pressing seams open just. wasn't. done. The end.
There were a lot of good reasons why but most of the those reasons don't apply any more. Our thread is better, our batting is better, our fabric is much better and most of our quilts are pieced by a sewing machine so the stitches are tighter. Meaning, we don't have to worry about batting coming through seams that are pressed open. And in all honesty, we stopped worrying about what the rules were and doing what worked best for us. And that sometimes means pressing seams open.
Trimming. Do you know why you sew with a 1/4" seam allowance? Because it's consistent, workable and economical - that was all that was required to keep it all together. So while we might sew with a 1/4" seam allowance - scant, please - there isn't any rule that says the seam has to stay that size within the quilt.
Even if this is a quilt that might be laundered a lot, it's still quilted in place and the edges aren't exposed so a good quilting cotton isn't likely to start coming apart at the seams if they're trimmed down a bit. Think back to garment sewing - the curves on sleeves and collars are always trimmed, clipped and/or graded. Yet with all the laundering and movement they undergo, they rarely come apart because those seams are enclosed and stitched in place.
Trimming the seam to 1/8". After stitching the seam with a scant 1/4", the seam allowance can be trimmed to 1/8".
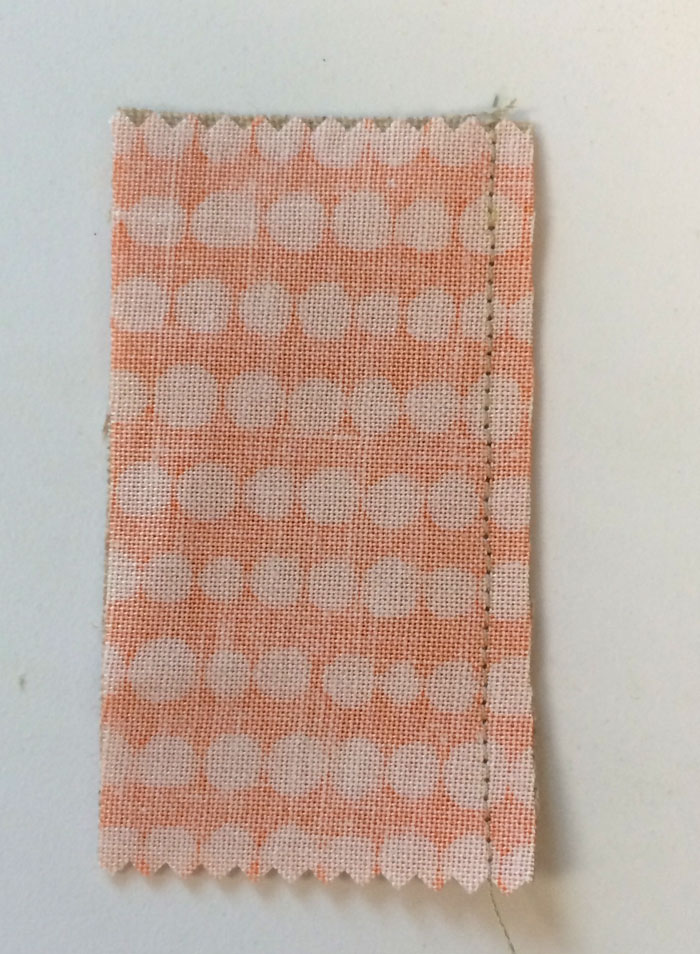
I do this when I'm making small Log Cabin blocks, Dresden Plates, strip sets where the strips will finish at 3/4" or less, and any block where the pieces will finish at 1/2" or less.
Grading seams. This is trimming one layer of the fabric by 1/8".
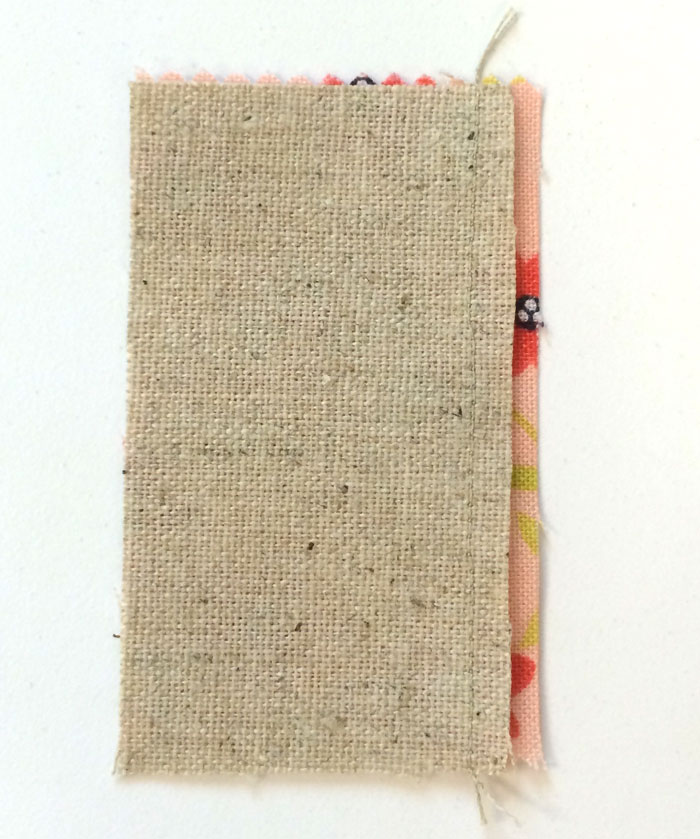
I do this with sashing strips and narrow borders that finish at less than 3/4". It's particularly useful with borders that finish at less than 1/2" - and do both seams, both sides of the narrow strip.
Because Andrea asked...

To make grading a bit easier, I finger-press the seam I'm not cutting back to fully expose the layer of fabric I will be cutting. And yes, I do sometimes use an iron, especially if it's a longer seam or I have several to do.
While it didn't make much difference with the Mochi linen fabric, the fabric trimmed should always be the darker of the two fabrics.
So do you make minis? Do you hang them, or do you do something else with them?
One last thing - Saturday, June 13th is National Sewing Machine Day!
In honor, I will spend the entire day with mine.
Posted in:
Comments