Welcome to Moda Fabrics!
Sunburst Quilt
Sunburst Quilt
Published:
Jul 21 2015 - 23:00


Hi, I'm Lauren from {brightsonwhite.com} and I'm excited to share this pattern today. If you haven't visited my blog before, head over to get in on a great giveaway. For this project, I'm using "Canyon" by Kate Spain. You can get the PDF version here: Sunburst. Let's get started!
![]()

For this pattern, you'll need:
- 12 fat quarters
- 1 yard sashing fabric
- 2 yards background fabric
- 2/3 yards binding fabric
- 2 yards of backing fabric

![]()
From each fat quarter, cut:
- 1 square measuring 6.5" (for the inner star)
- 8 squares measuring 3.5" (for the inner star)
- 8 squares measuring 3" (for the background points)
- 1 strip 2" x 8" (for the background points, not pictured)
- 2 squares measuring 2.5" (for sashing, not pictured and you'll have a few extra when you're all done.)
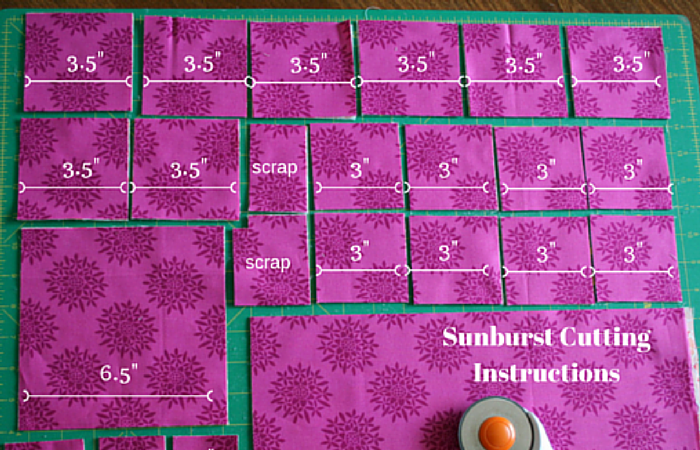

I like to put out some paper plates with the number of squares to cut and dimensions to cut them at written on the side of the plate. It keeps things straight for me. Order the 3"squares and 2" strips together on one plate, and the 6.5" and 3.5" squares on a separate plate to make piecing easier.

From the neutral fabric cut:
- 96 rectangles 3.5" x 4" (for the star)
- 12 strips 2" x 8" (for the corners)
- 48 rectangles 2" x 3.5" (for the corners)
- 31 strips 2" x 12" (for sashing)
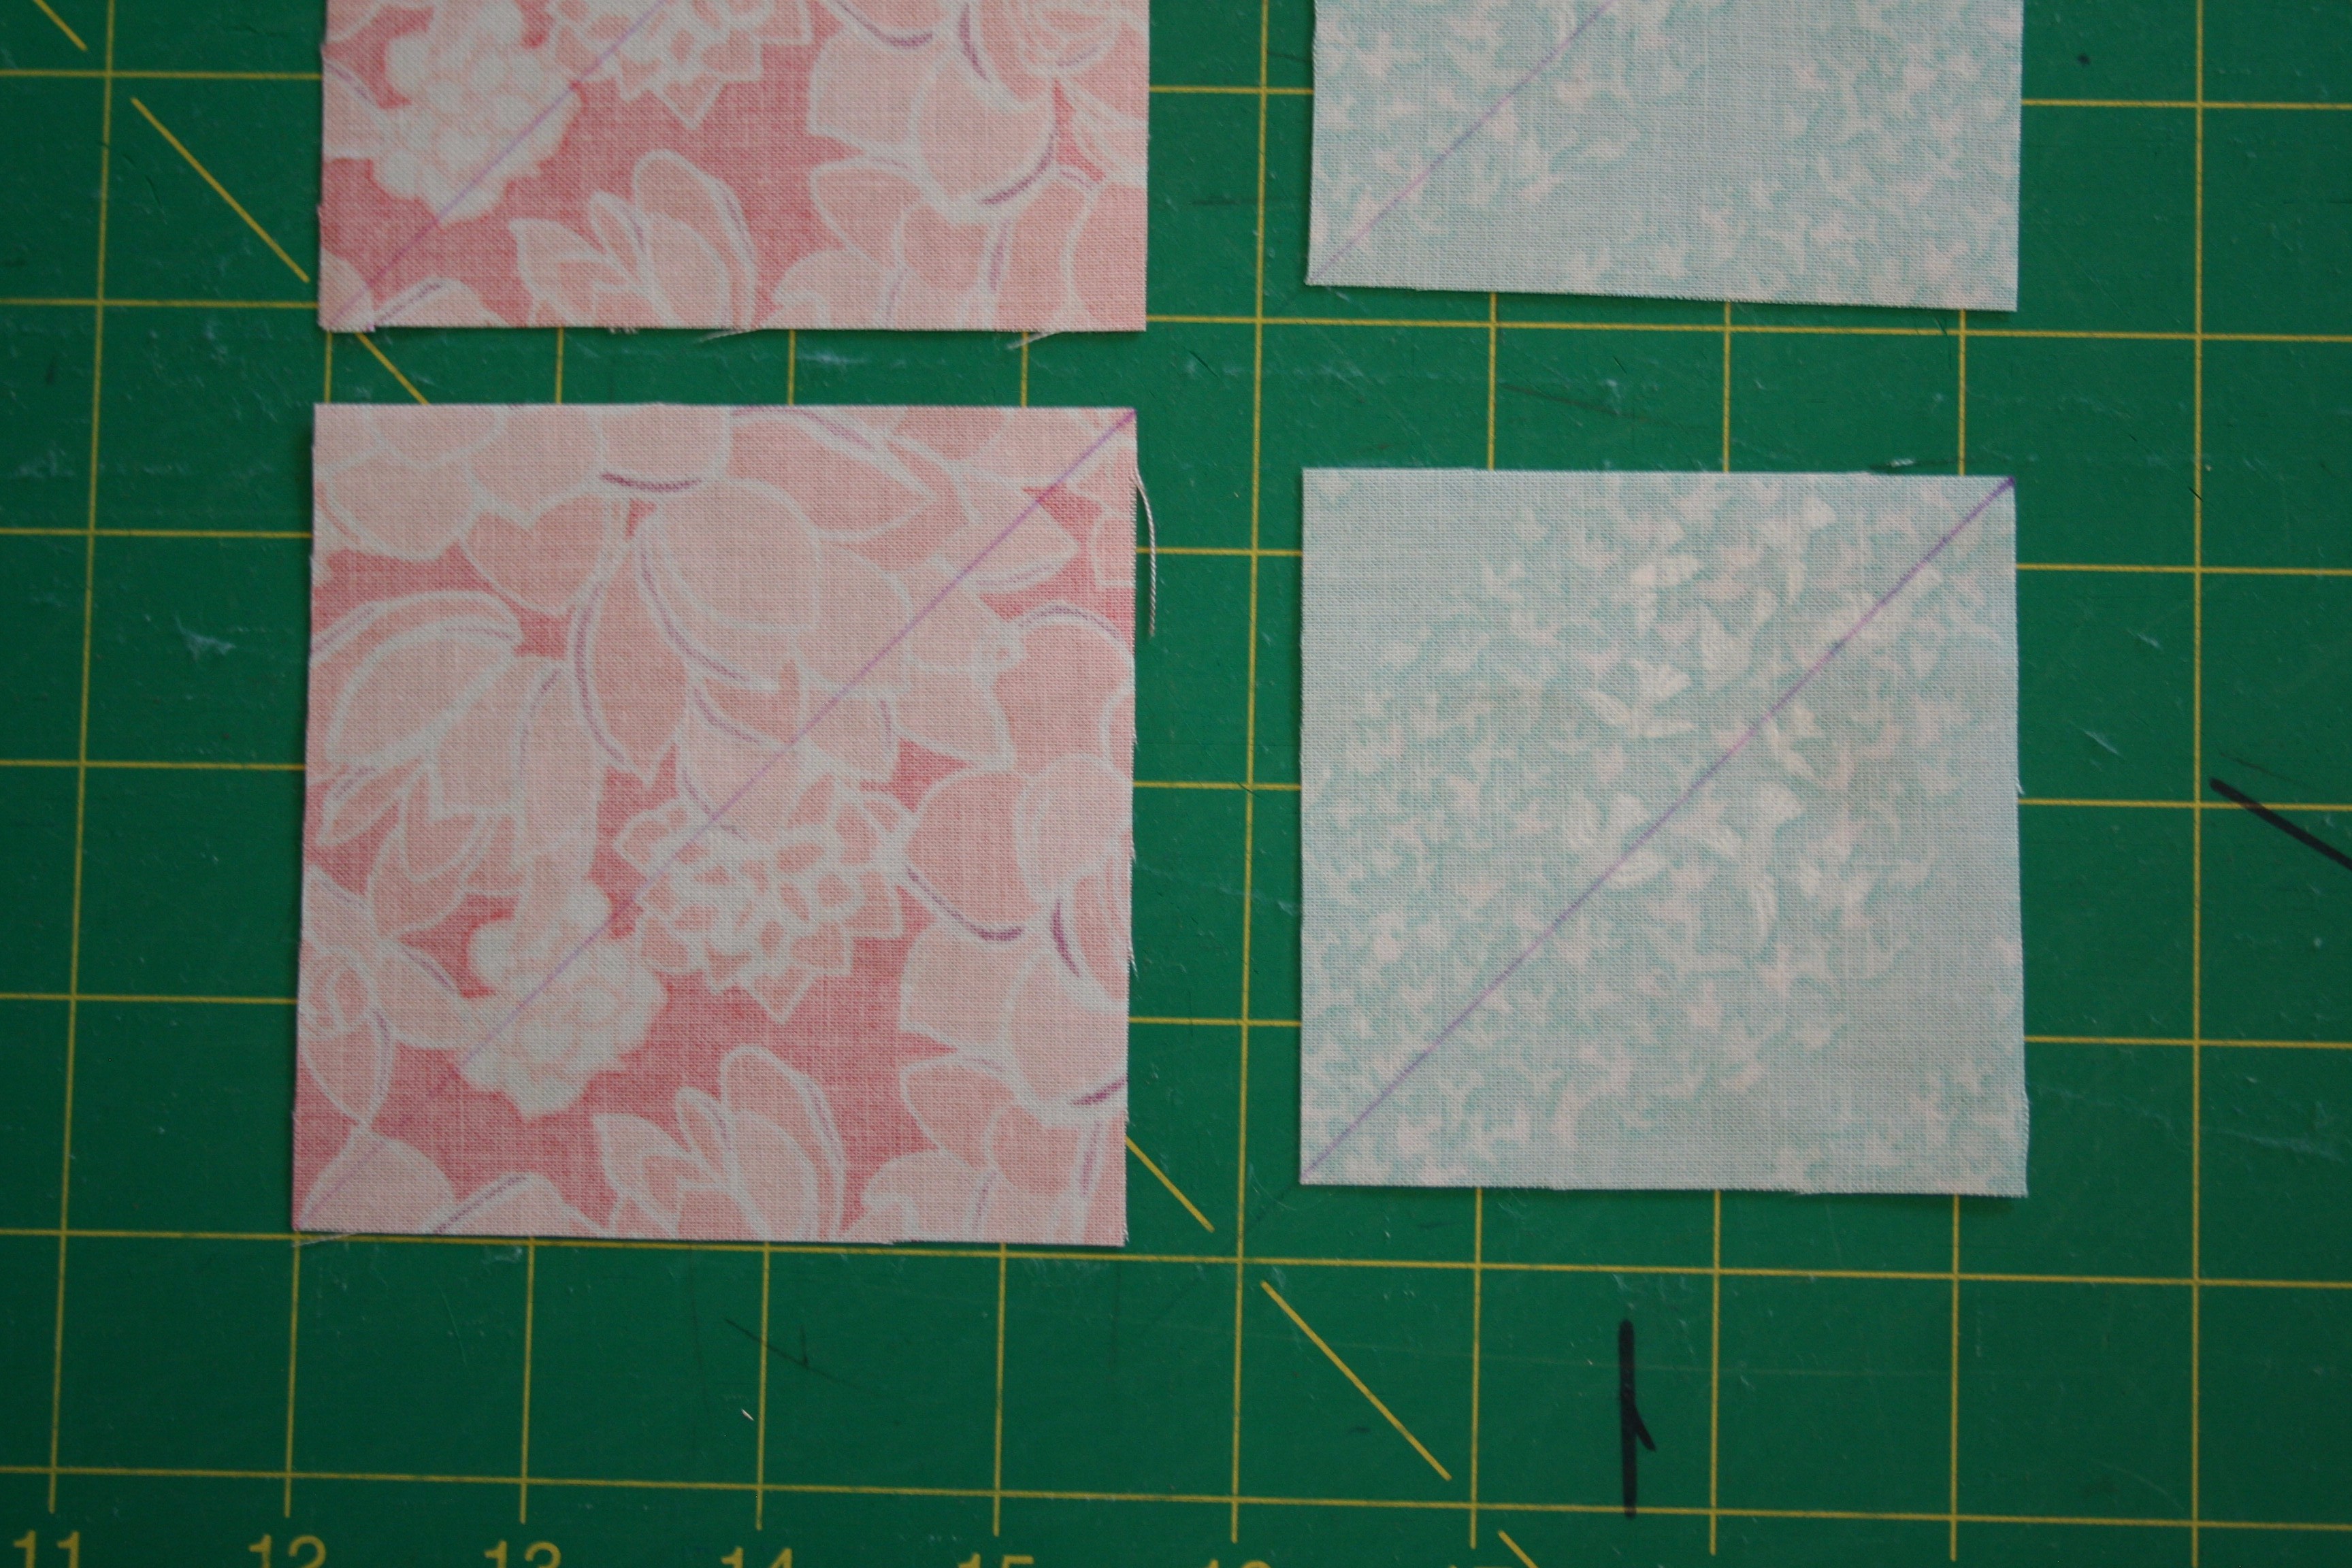
Once everything is cut, draw a diagonal line on all the 3.5" and 3 " squares.
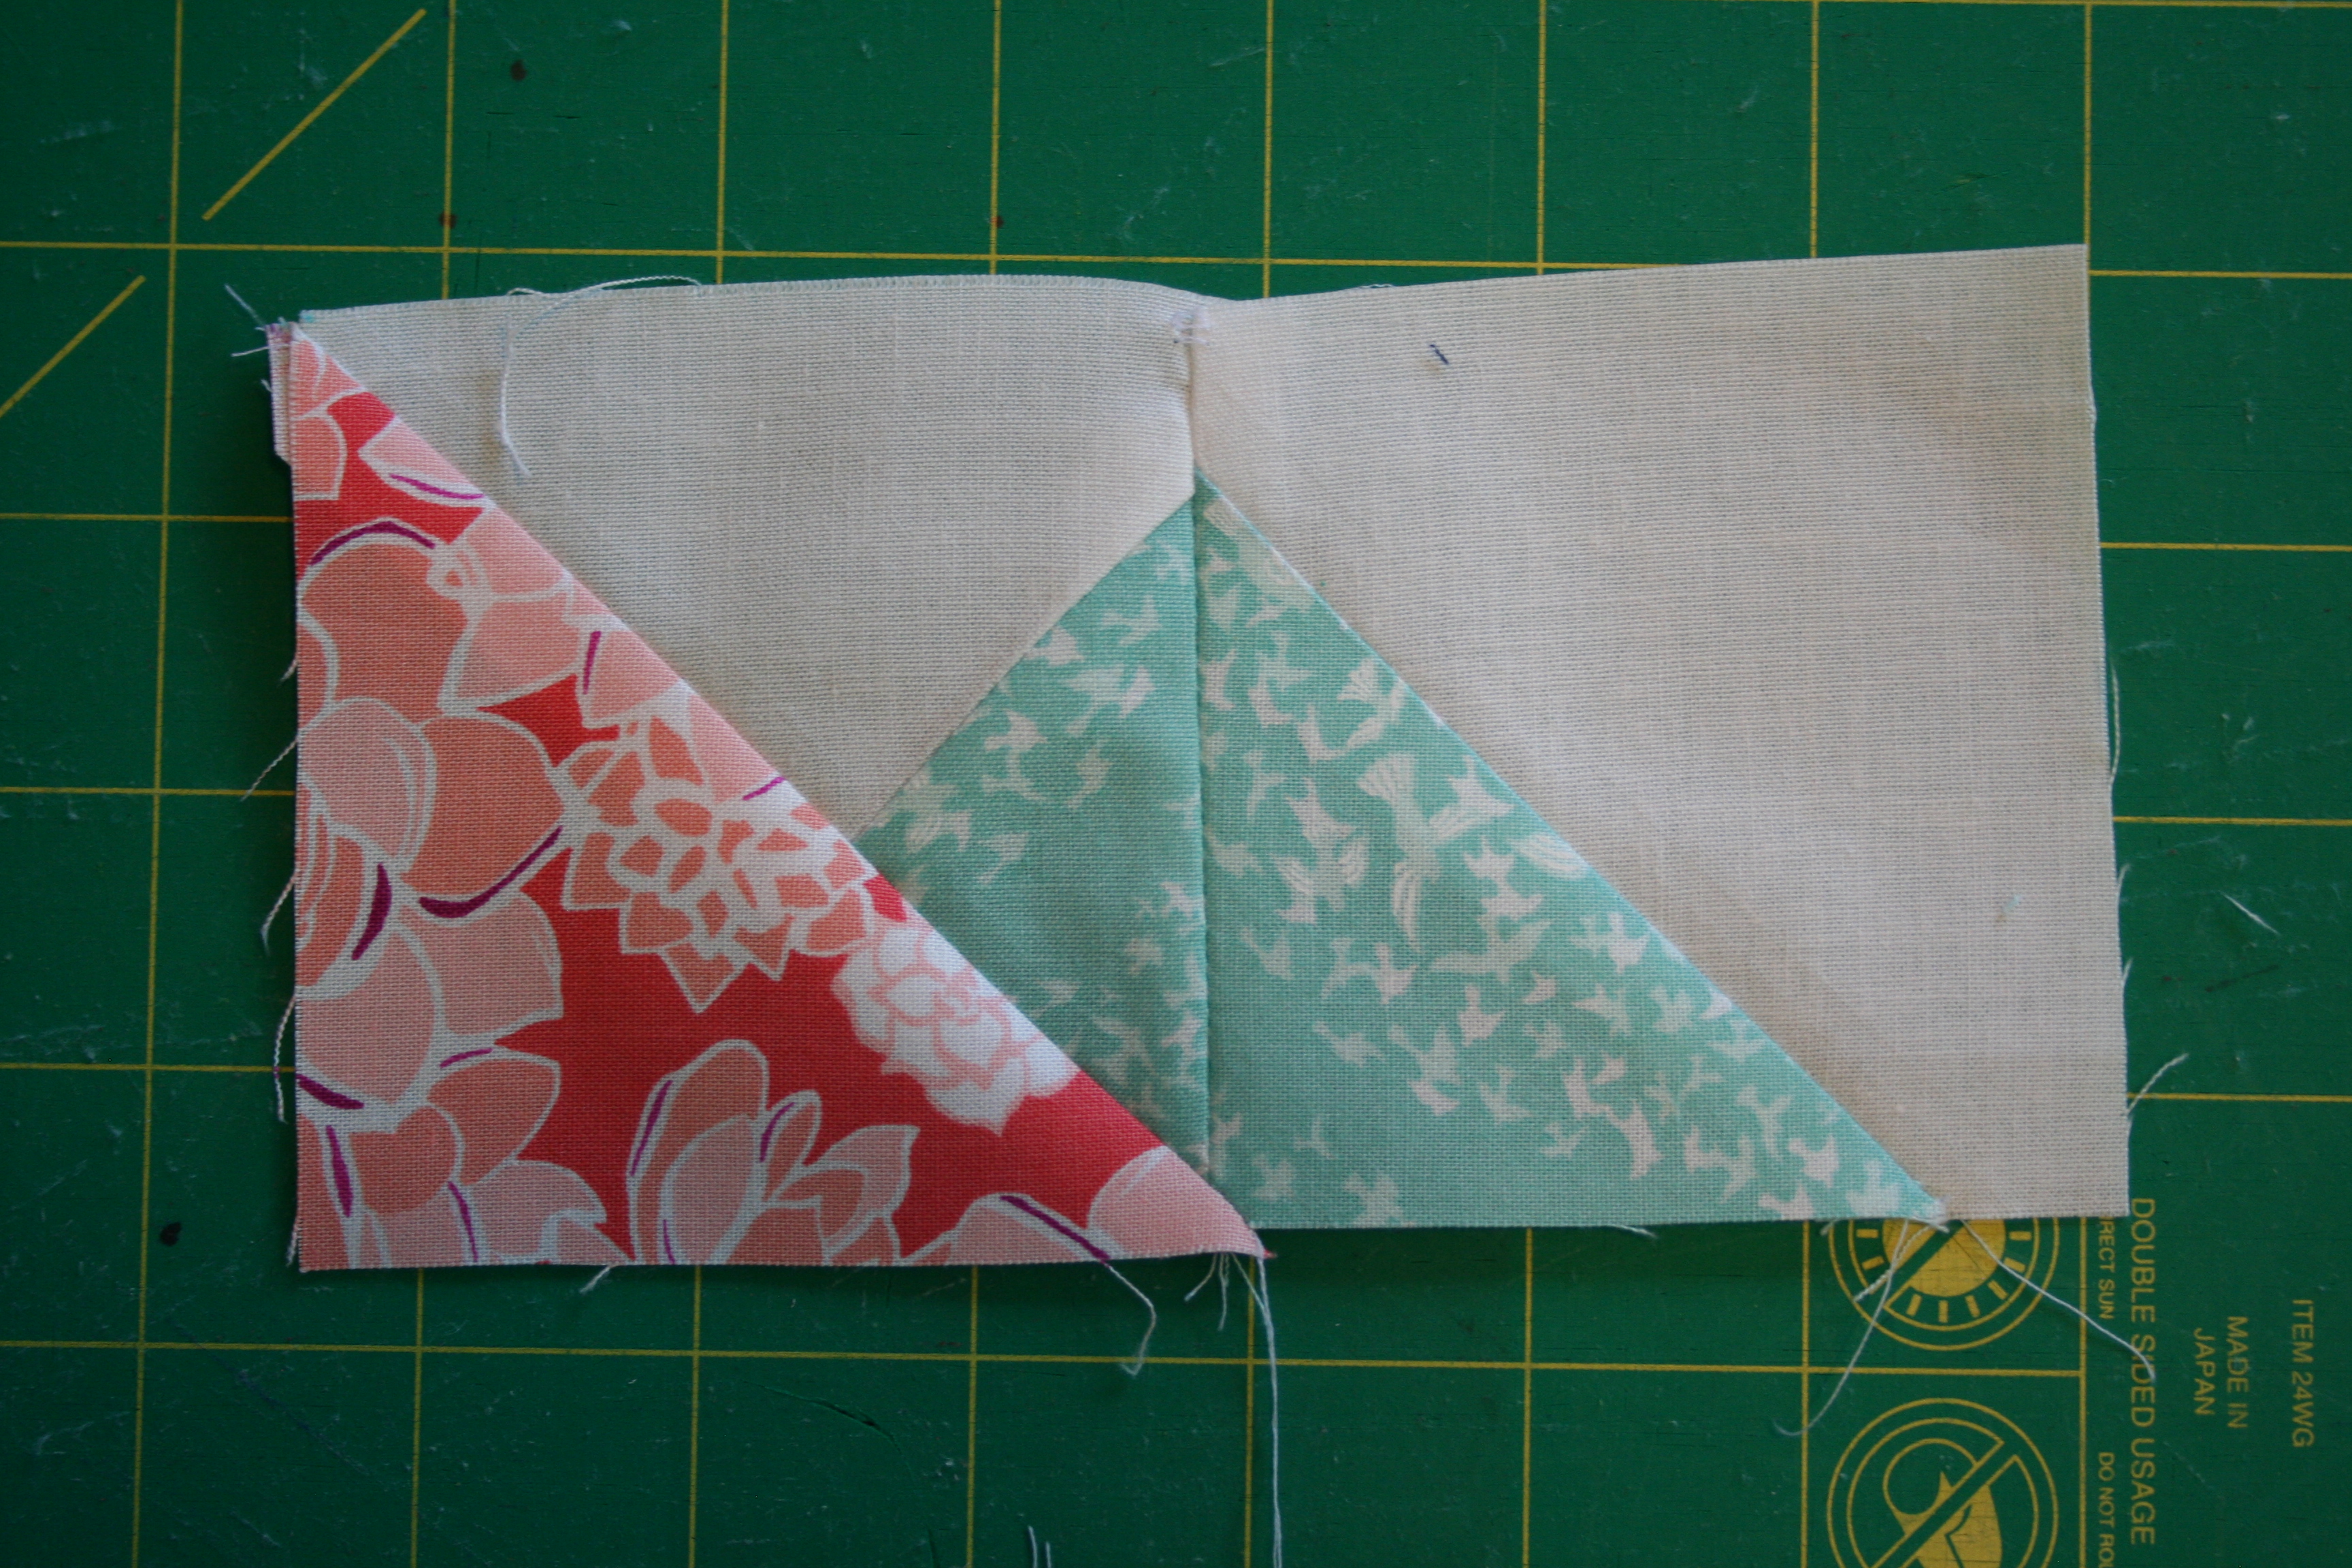
Take two neutral strips measuring 3.5" x 4" and two 3" squares. Lay them out as follows:
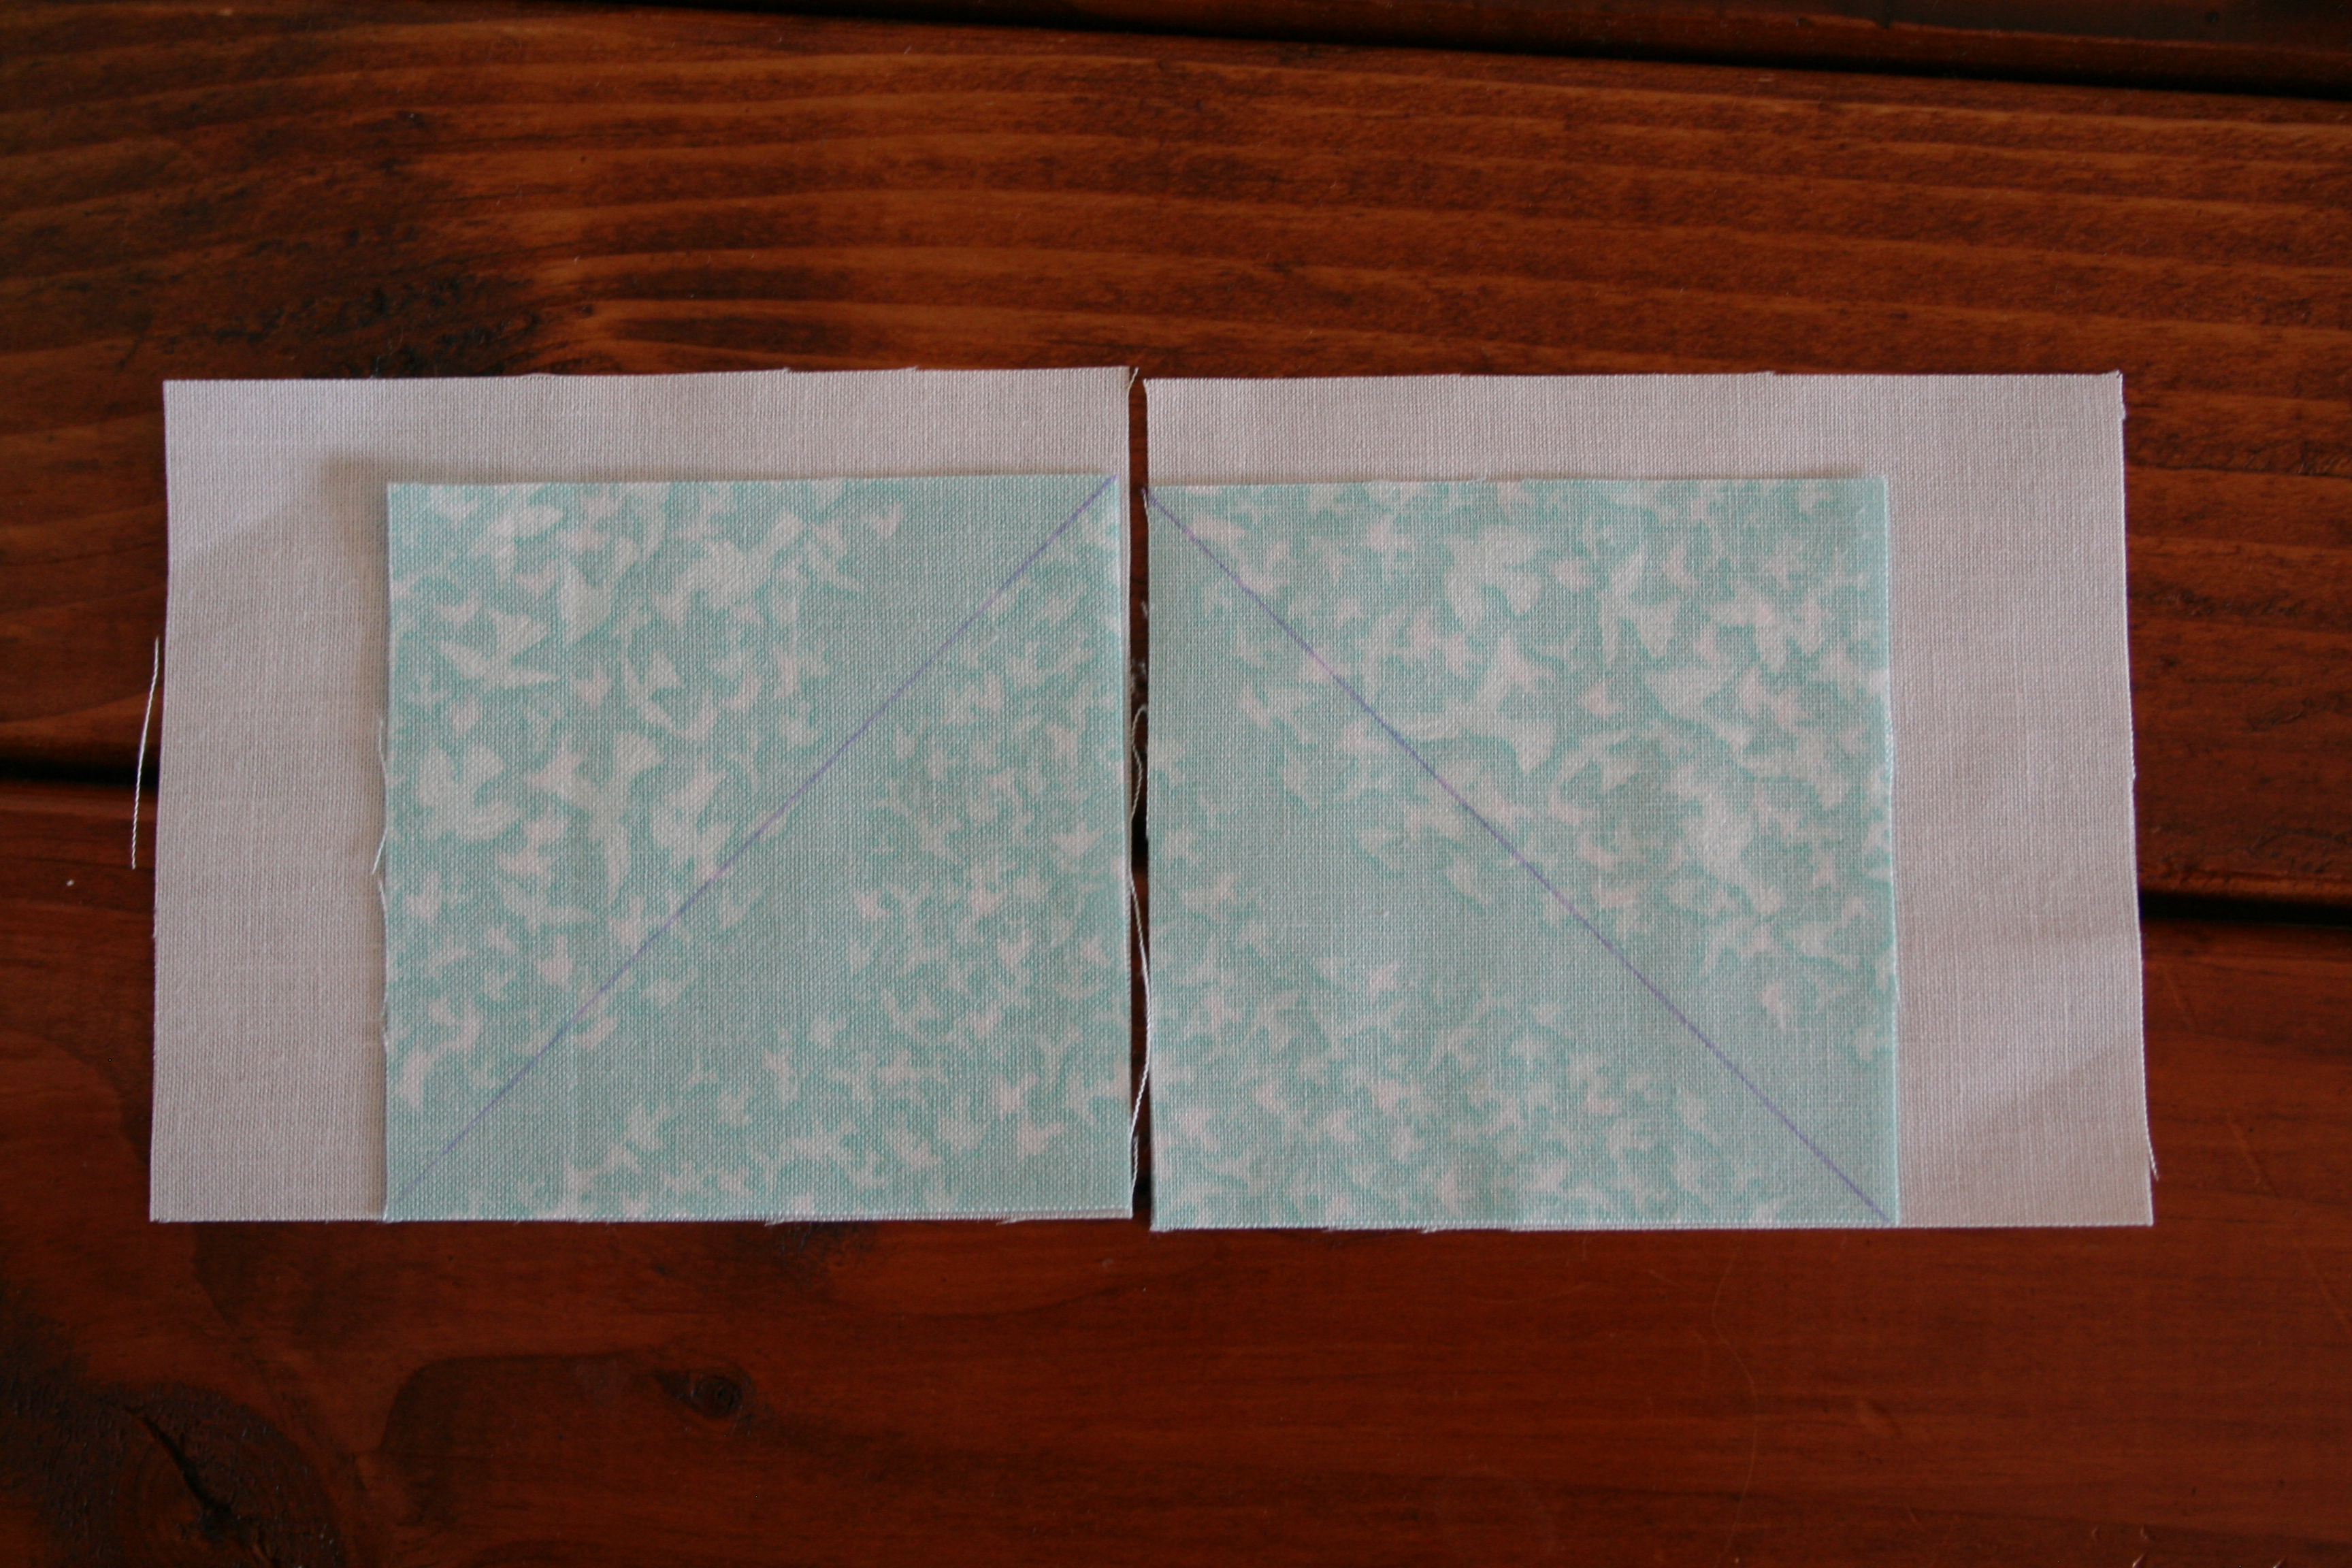
Sew along the diagonal lines and trim the under side at 1/4 inch.

Press one side up and one side down to prepare for nesting.
Sew these together and bring it to the cutting mat. With the seam on the left side, measure from the edge of the fabric to 3.5" and cut off the excess.

Press the strips open, and repeat until you have four.
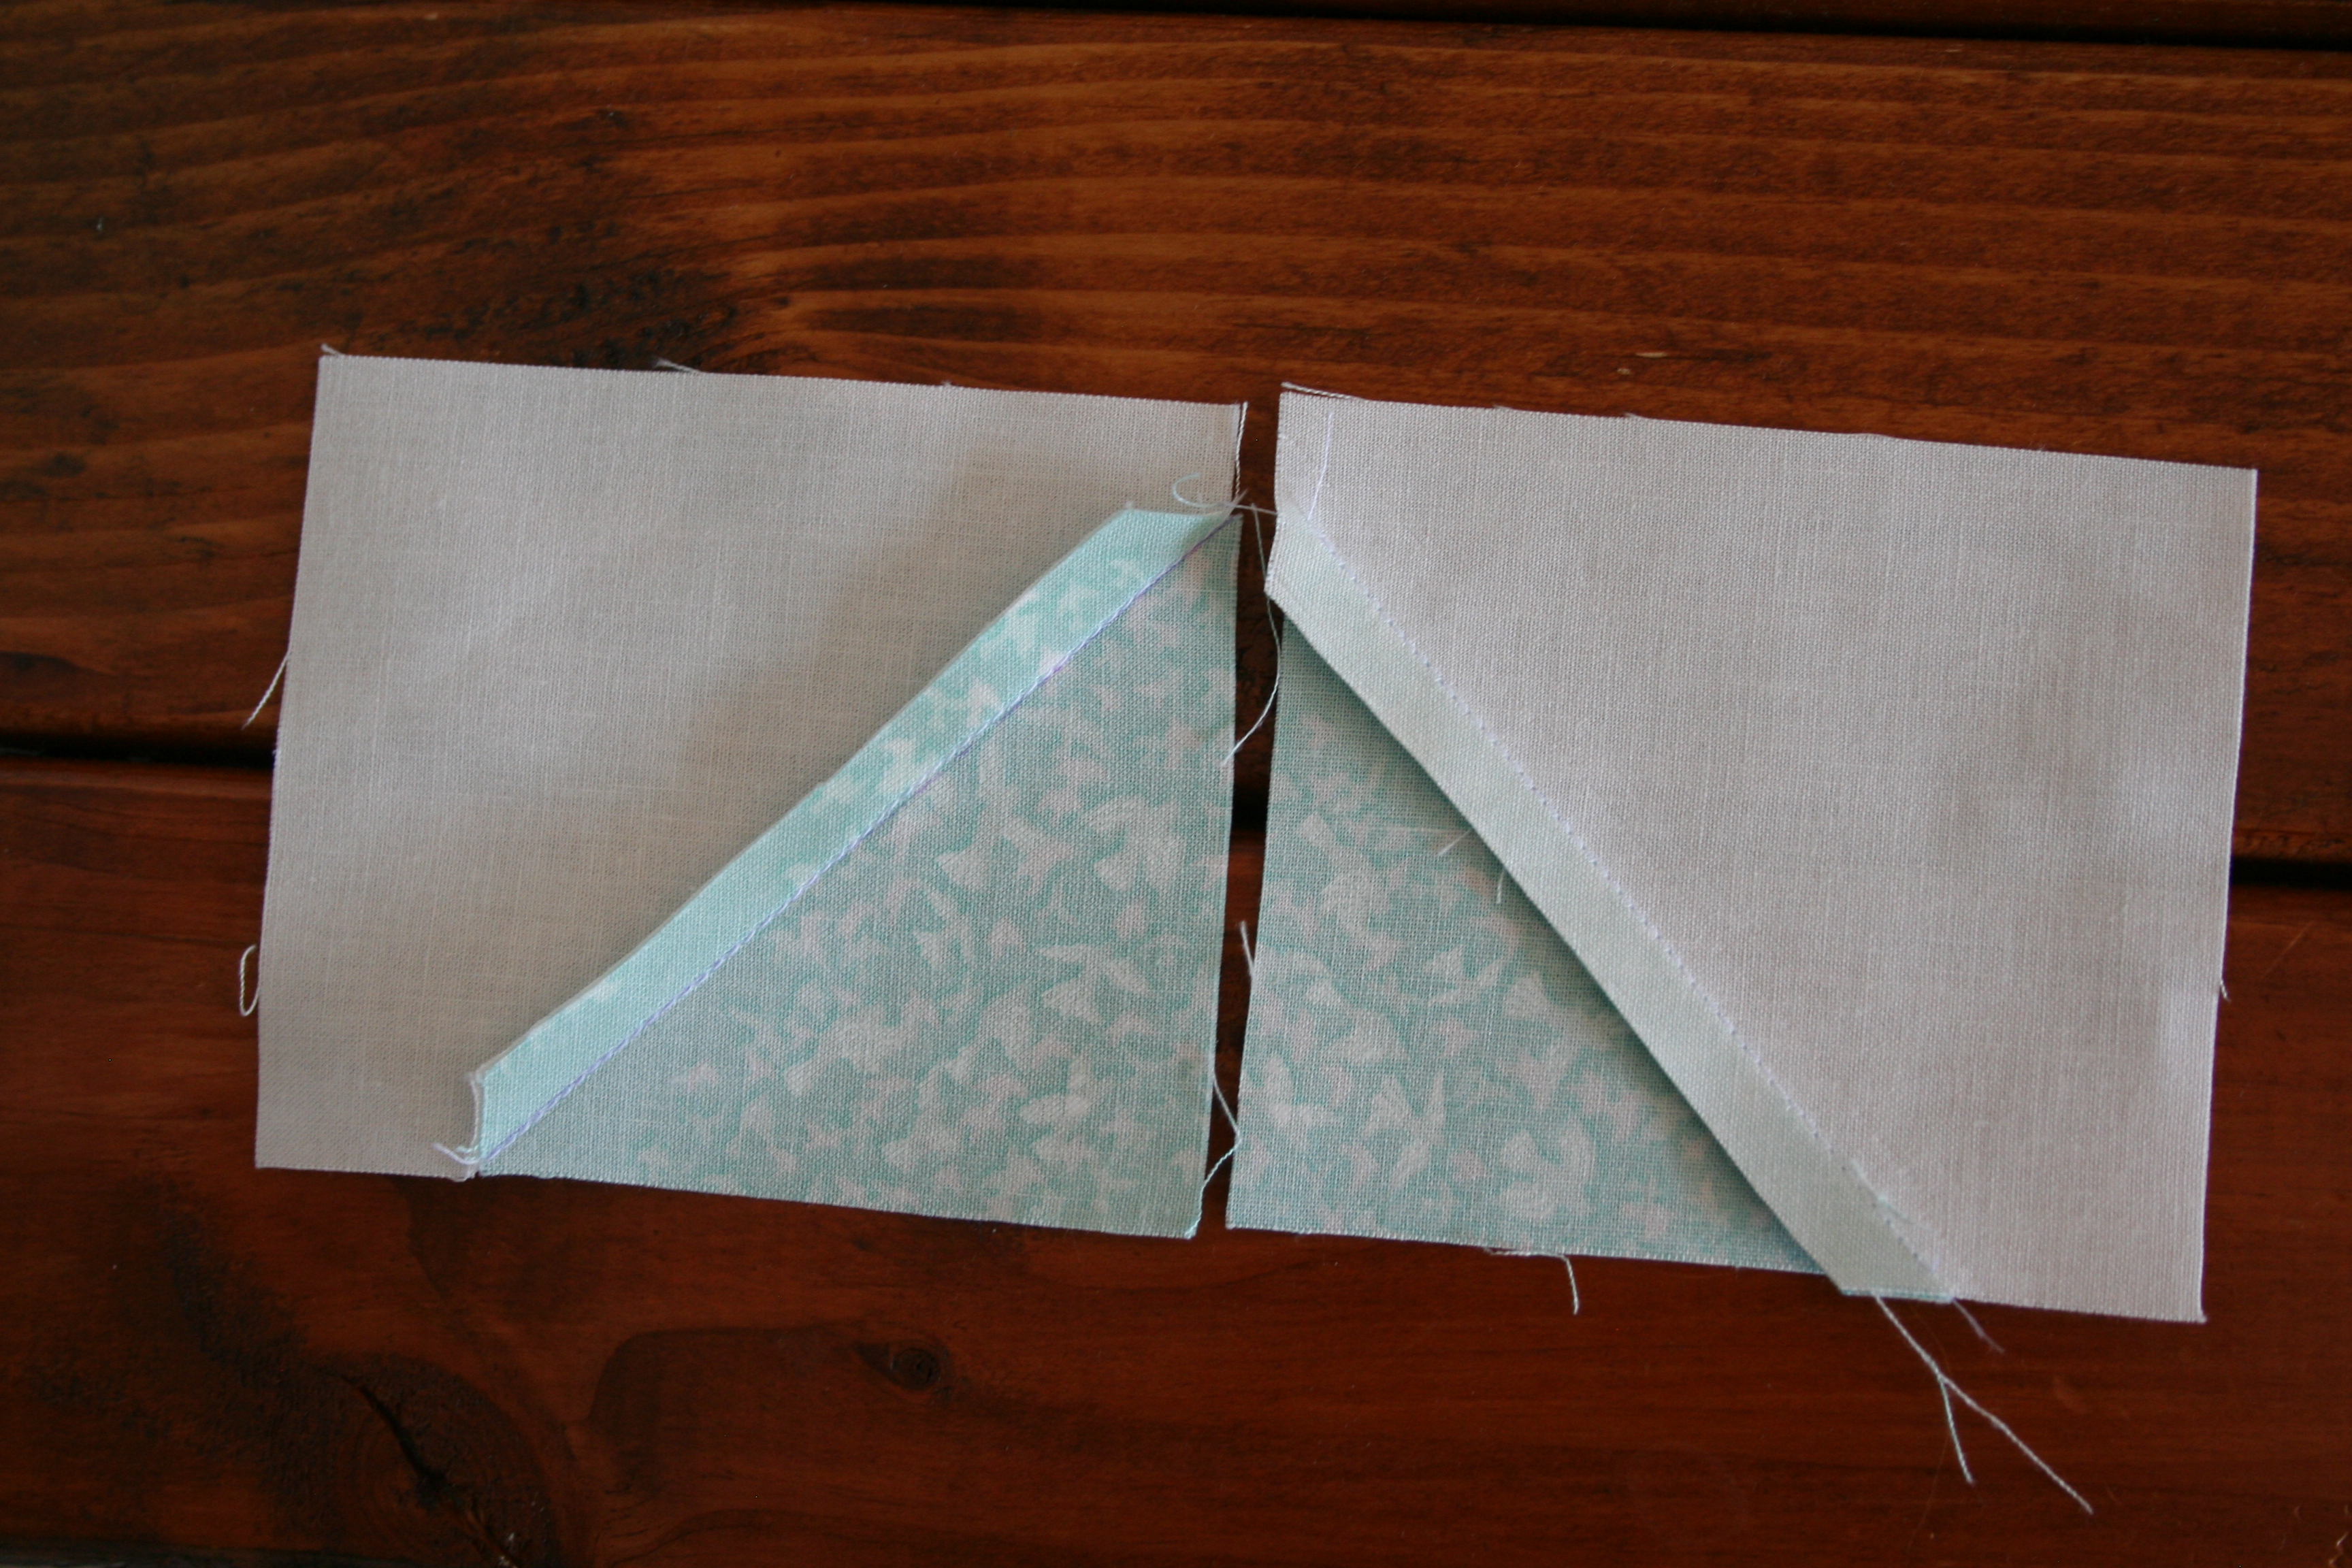
Now you'll follow the traditional method to make a flying geese unit...take a 3.5" square and put it on the strip. Sew along the line you drew.

Clip at a 1/4 inch seam allowance.

Iron the triangle down as pictured.
Put the next 3.5" square on the right side - overlap on the bottom 1/4 inch as shown.

Repeat with the other side.
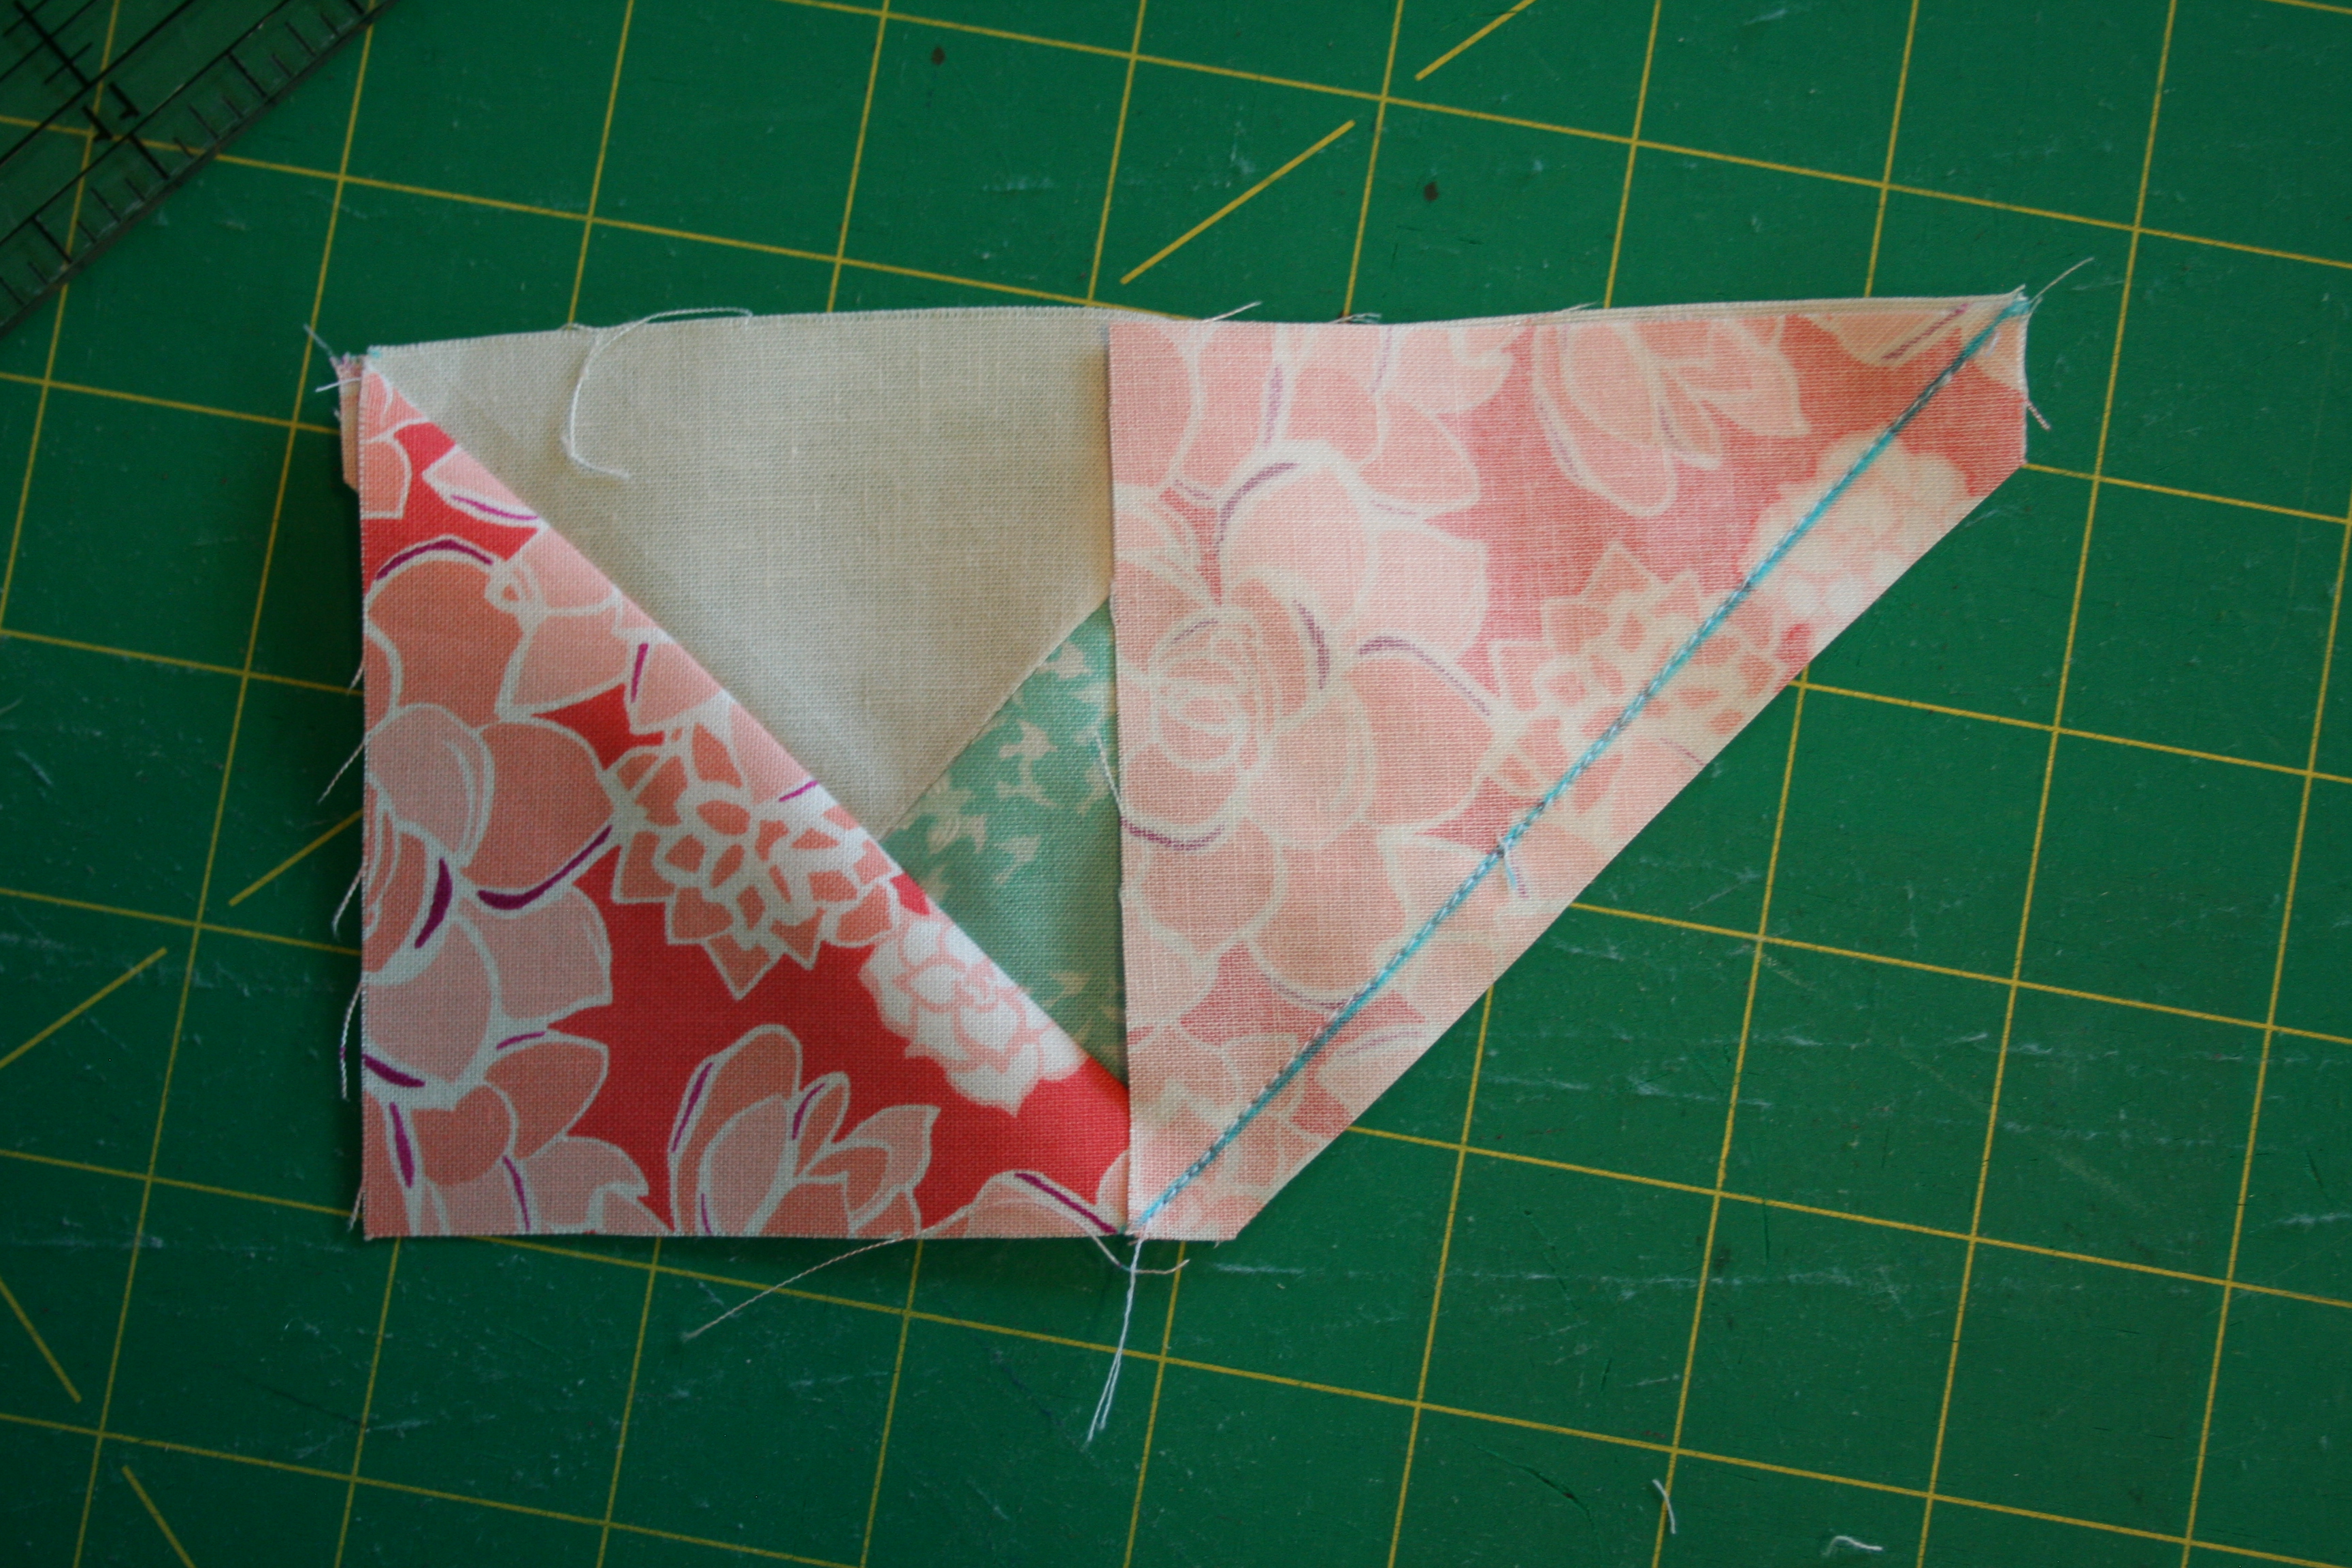
Repeat until you have 4 identical flying geese units.

Now lets make the corner units. Take the 2" neutral strip and the 2" strip that matches the middle point of your flying geese.
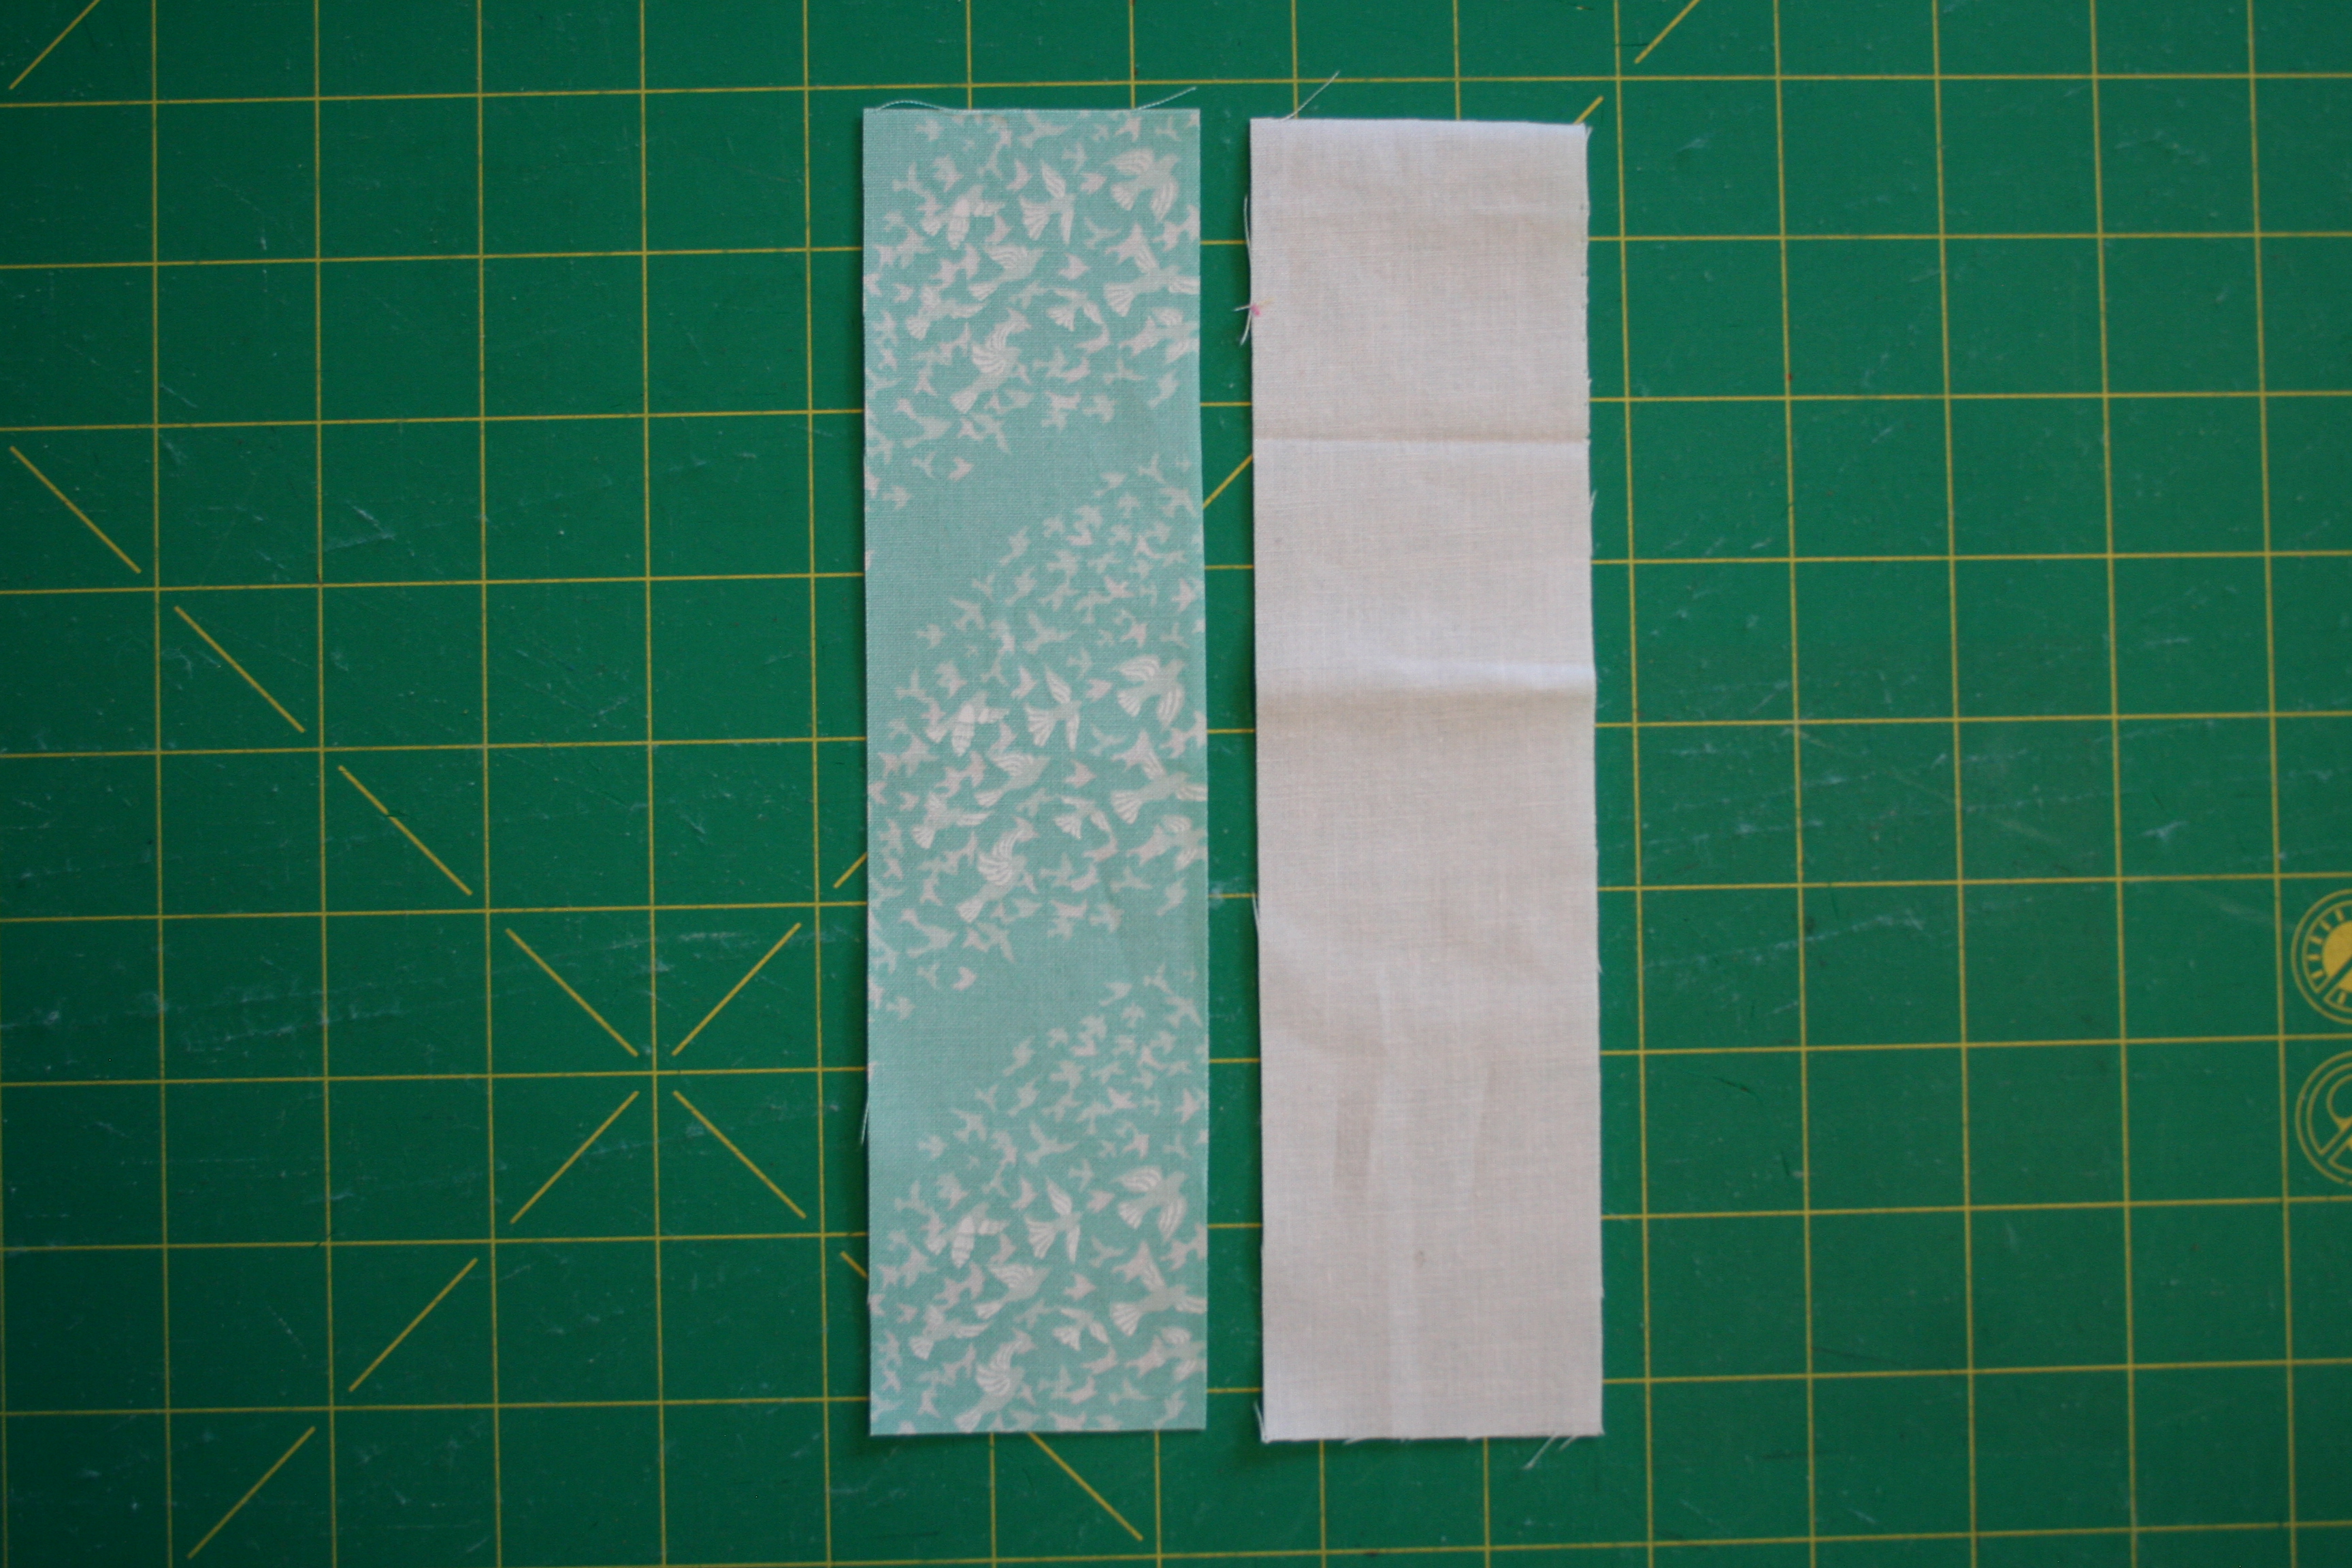
Sew right sides together and press the seam open. Cut the strip at 2" intervals until you have four units like this:

Now attach the 2" x 3.5" strip and iron the seams open.

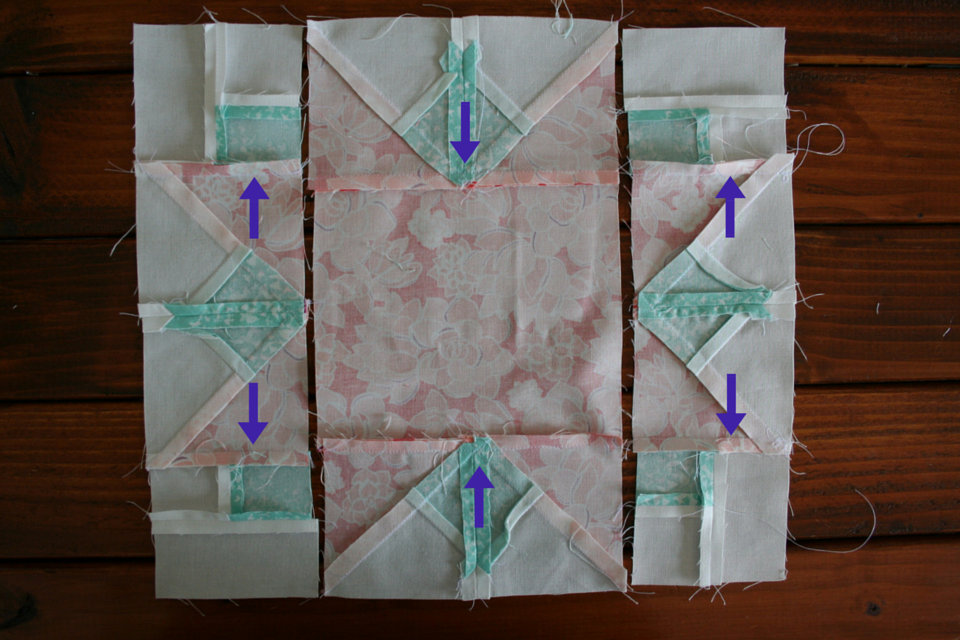
Lay out your star to match mine. Sew together the pieces in three vertical rows, as pictured:
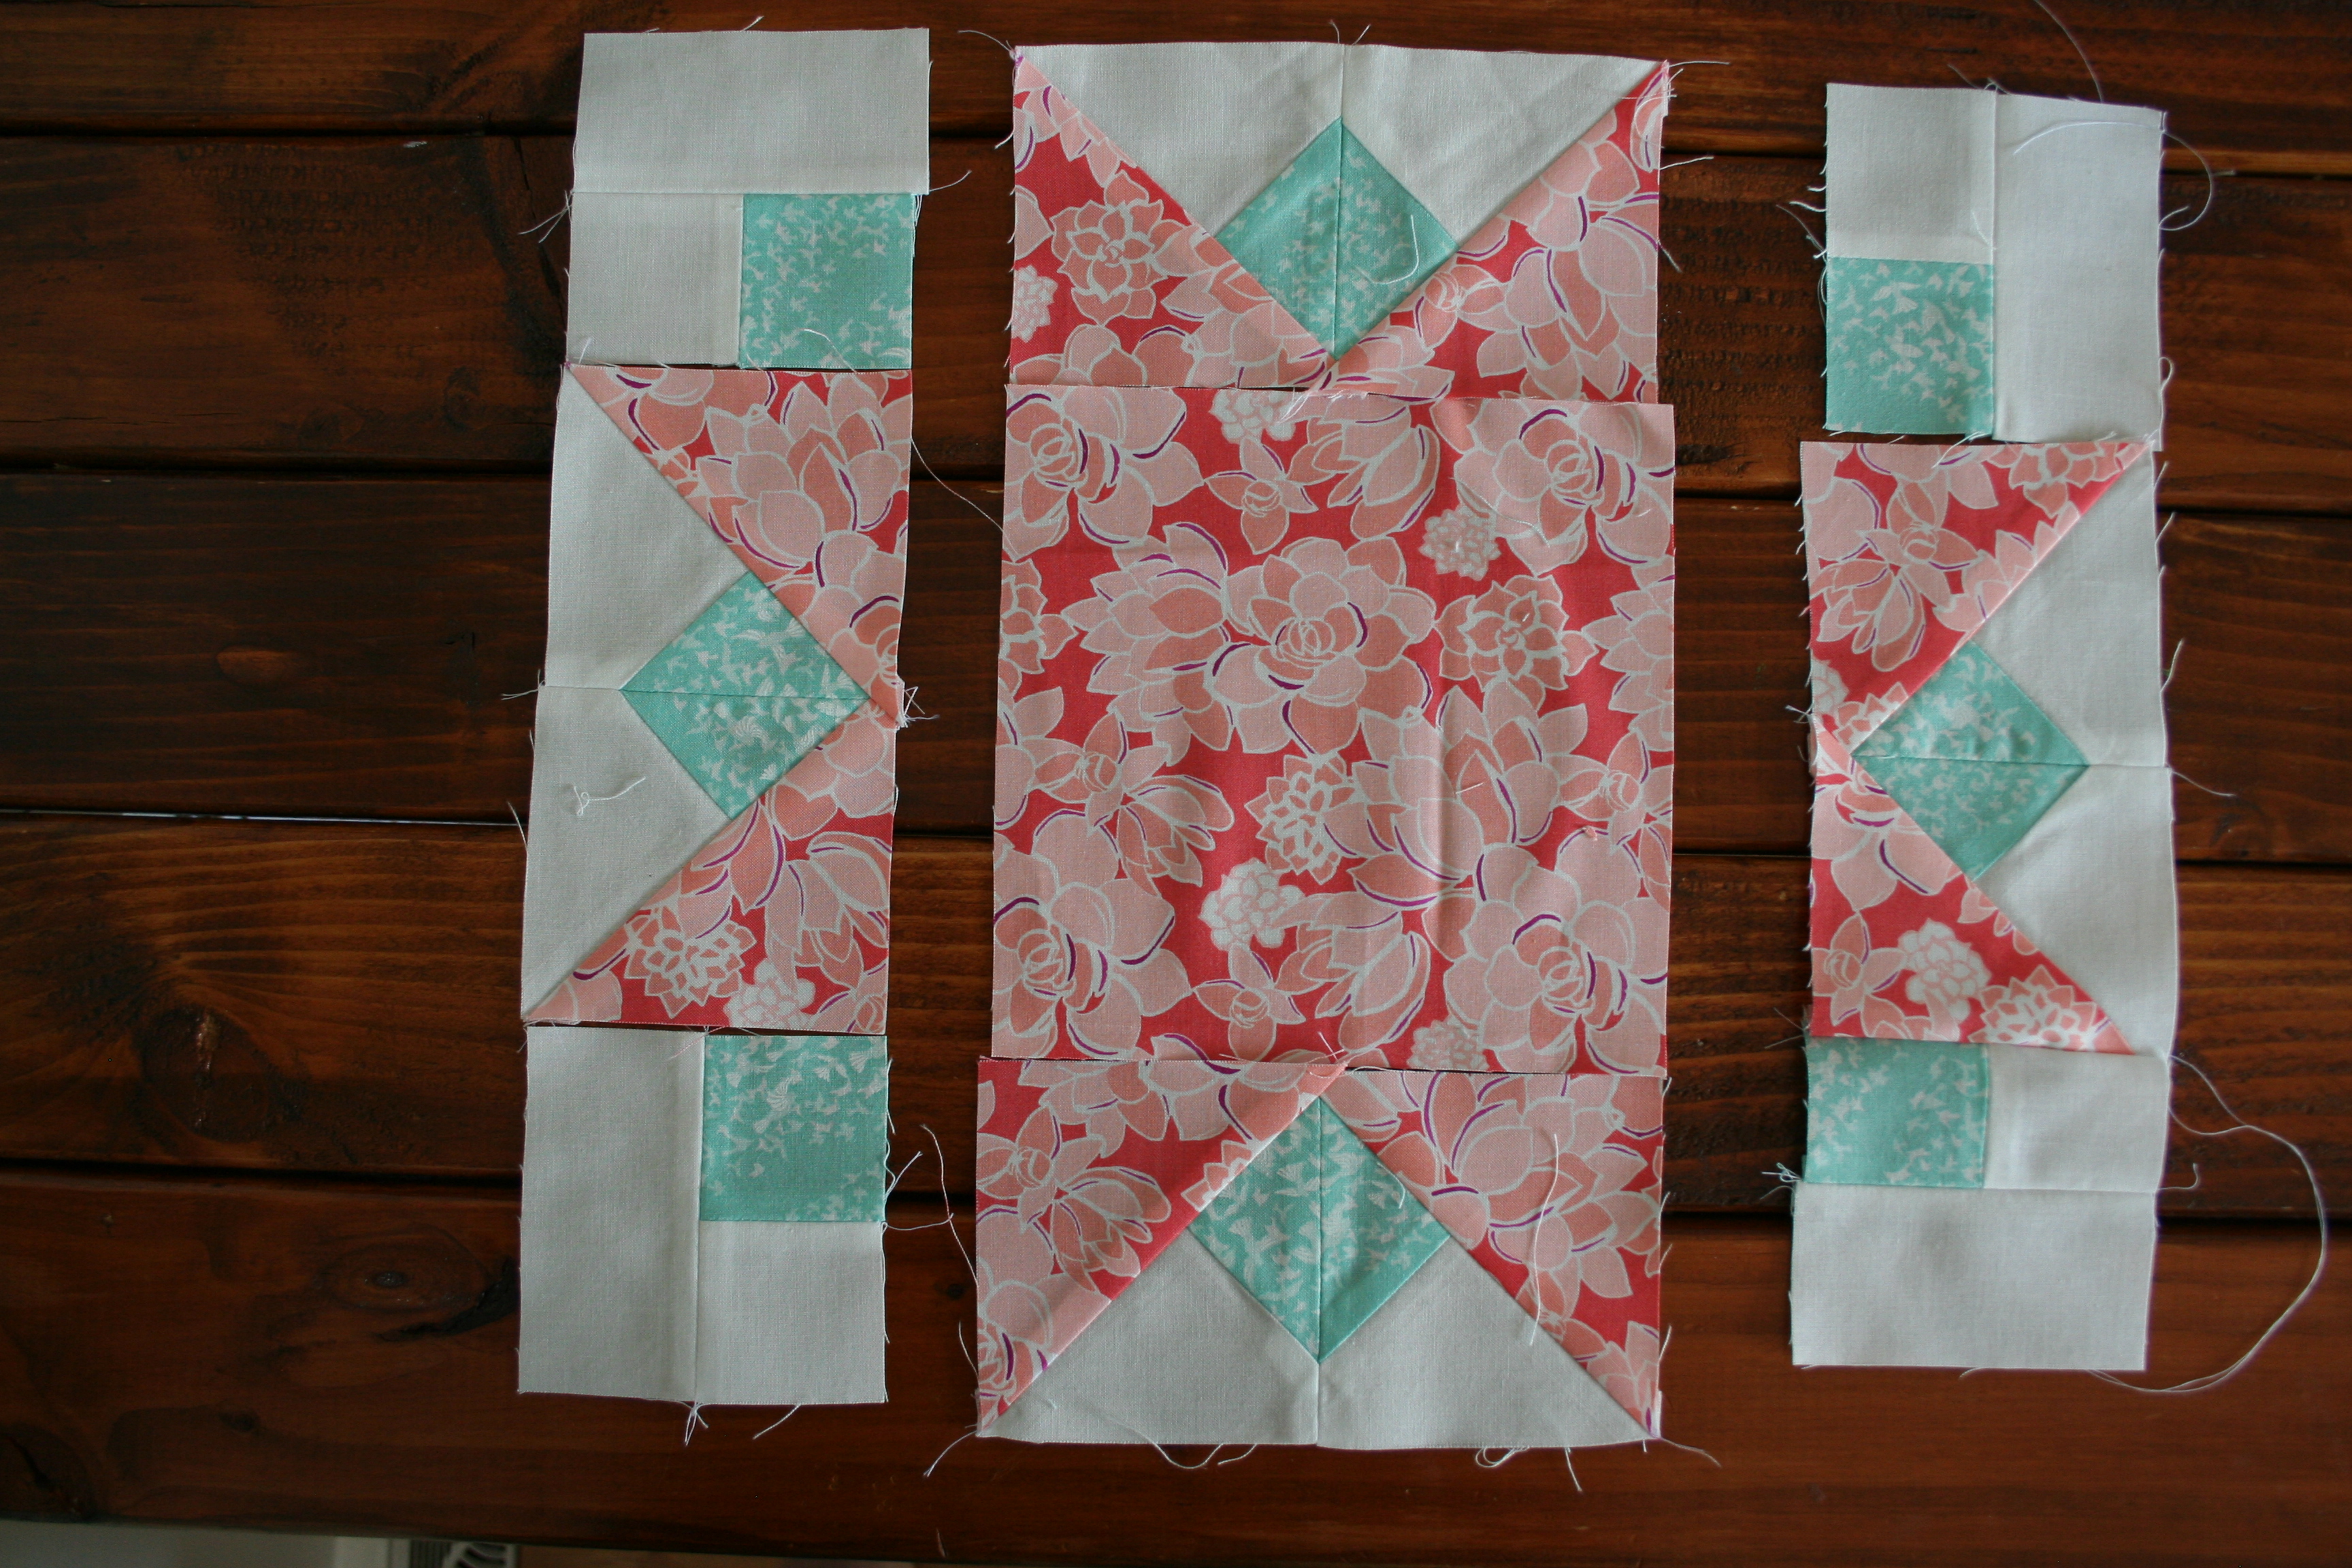
Iron the seams in your middle section towards the center. Iron the seams in the outer sections away from the center to prepare for nesting.
And you're done! Now you just have to do that 12 more times. I did mine with a lot of chain piecing which really sped things up.

For sashing: First, your blocks should be 12 inches square (you can trim them a little if you need to). Lay out your blocks on a design wall (or the kitchen floor…) Take you strips (2″ x 12″) and sew one to the right hand of each finished block, then sew the blocks into rows of three (you'll have four rows of three). Add one more strip on the left hand side of each row. Next take your corner stones and strips and sew five units that look like this: Now sew one unit to the top of each row. Sew the rows together, and add one unit to the bottom of your quilt. Your quilt top is finished! Finish up with basting, quilting, and binding.

![]()
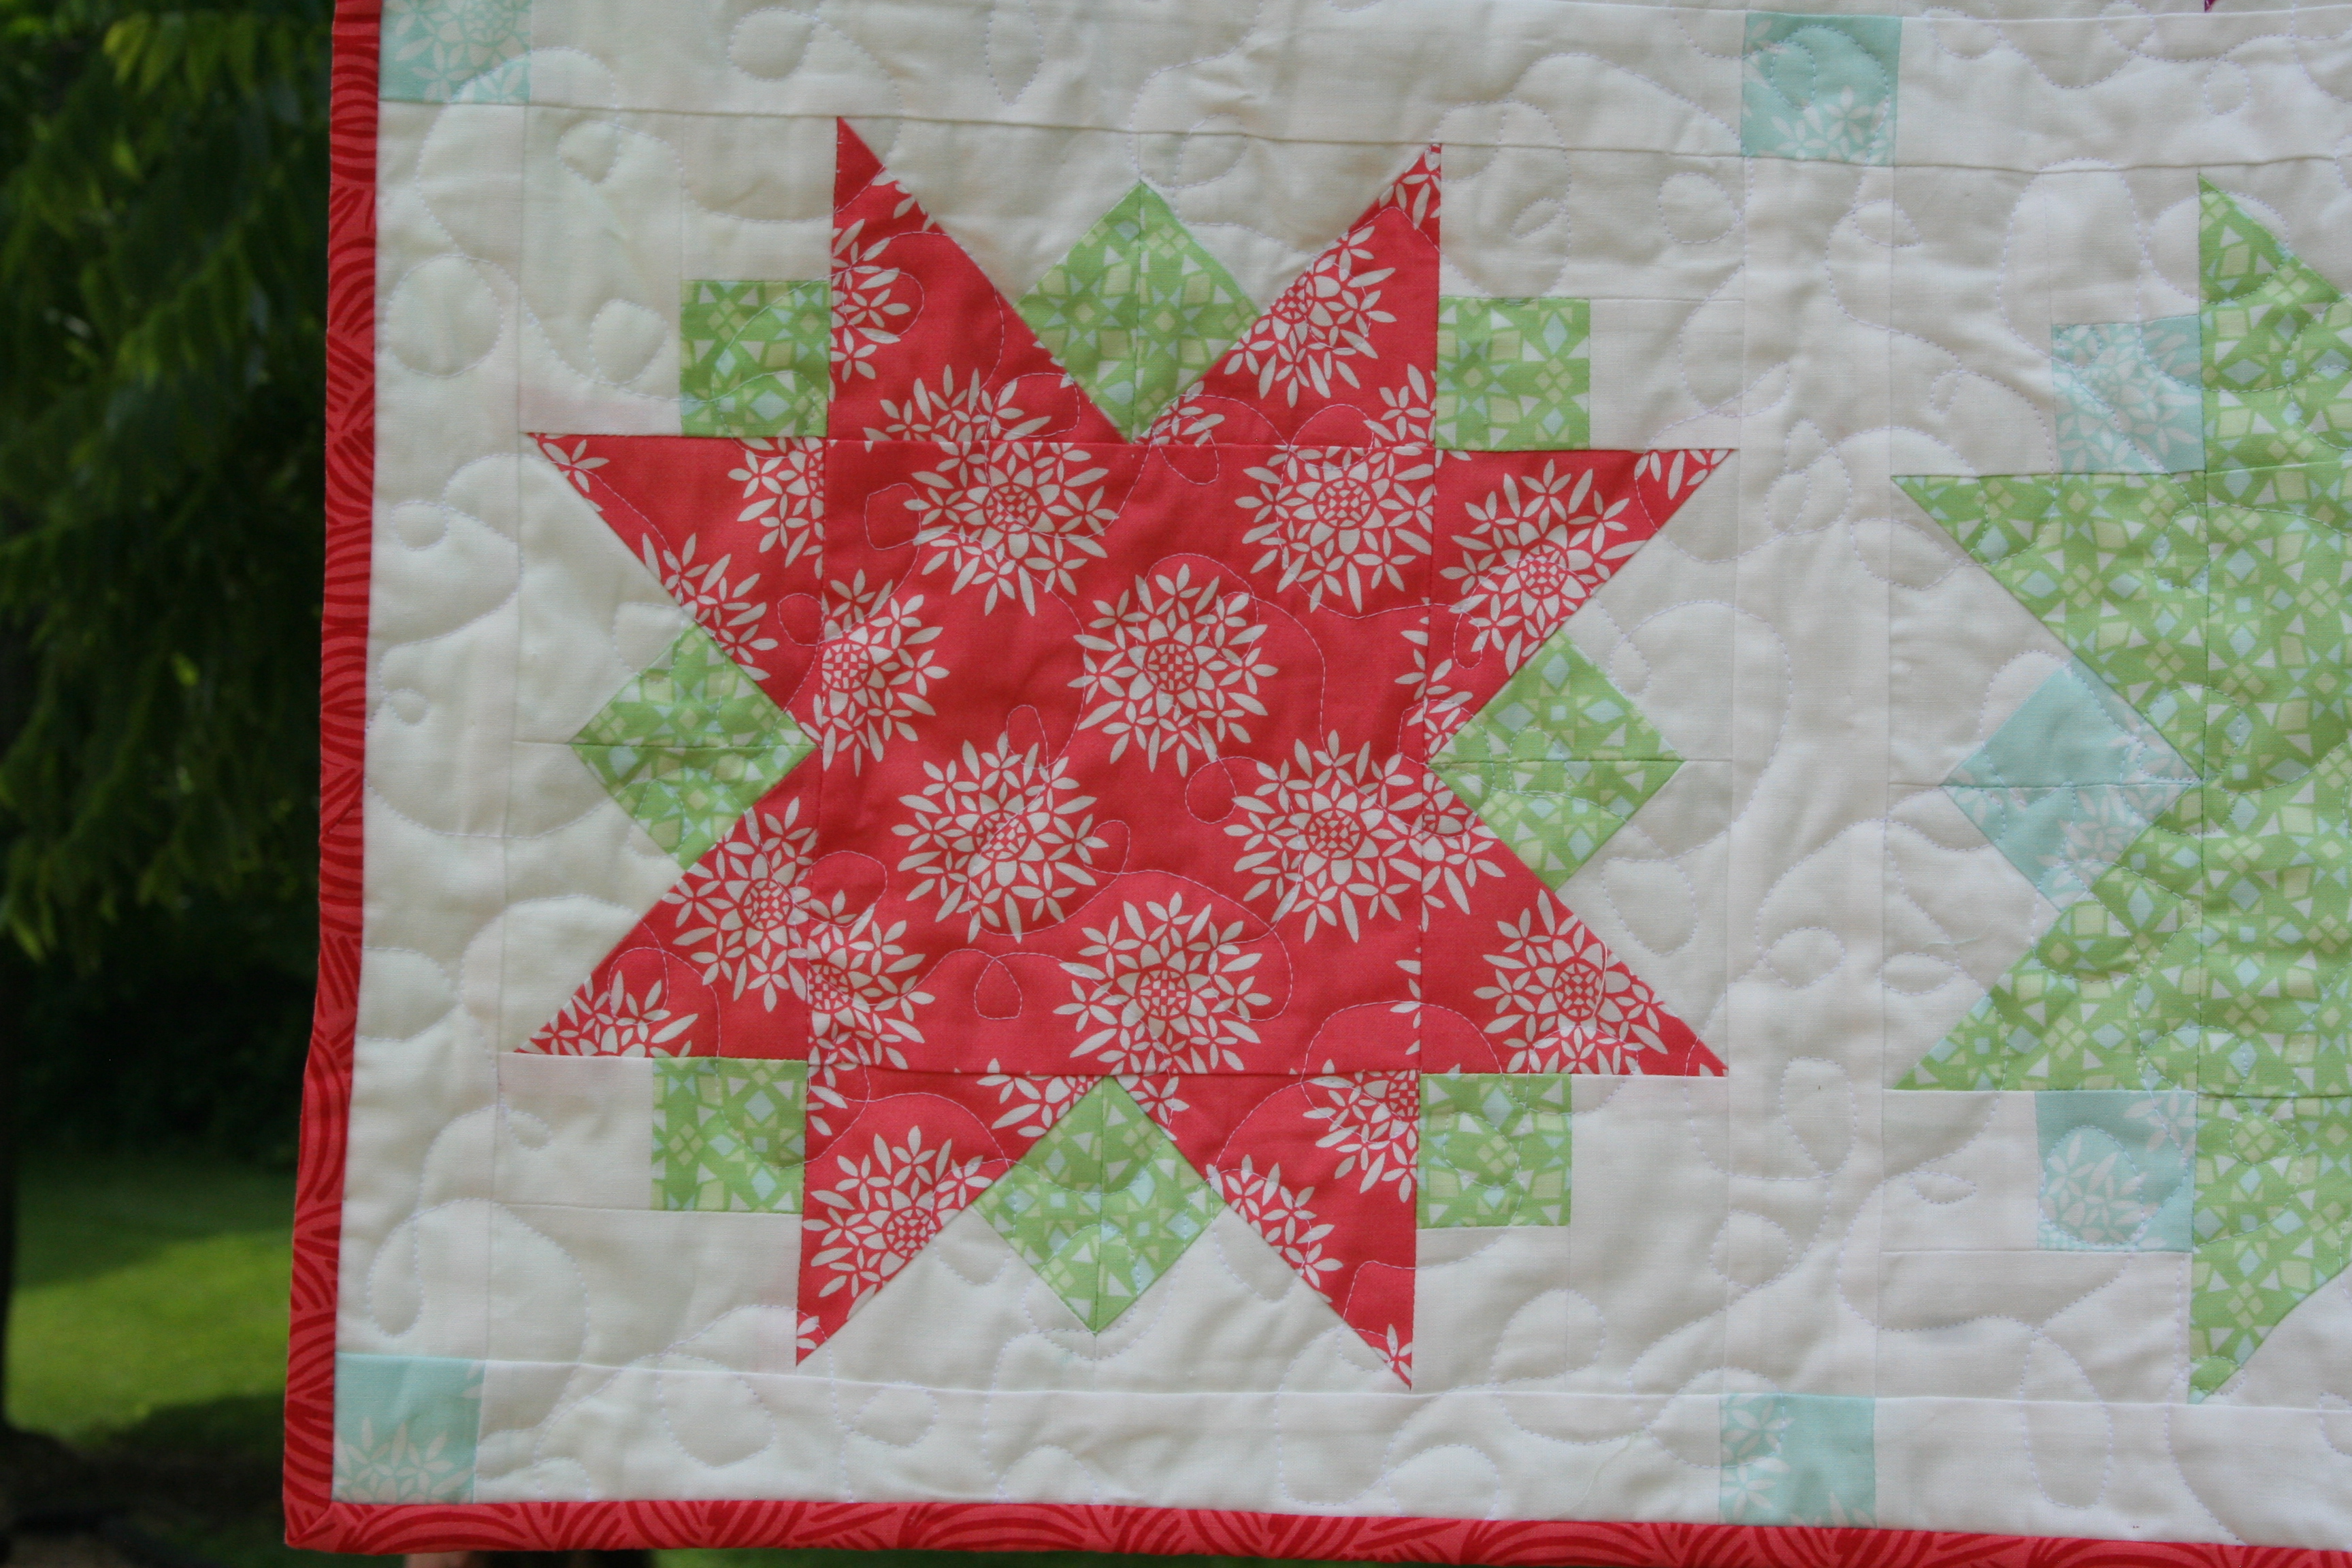
One quilt measuring 54" x 40."


I hope you enjoy this tutorial. Thanks!
Lauren Terry
{flyawayquilts.com}
![]()
Posted in: