Welcome to Moda!
Opposing Pinwheels Quilt
Opposing Pinwheels Quilt
Published:
Sep 24 2015 - 23:00
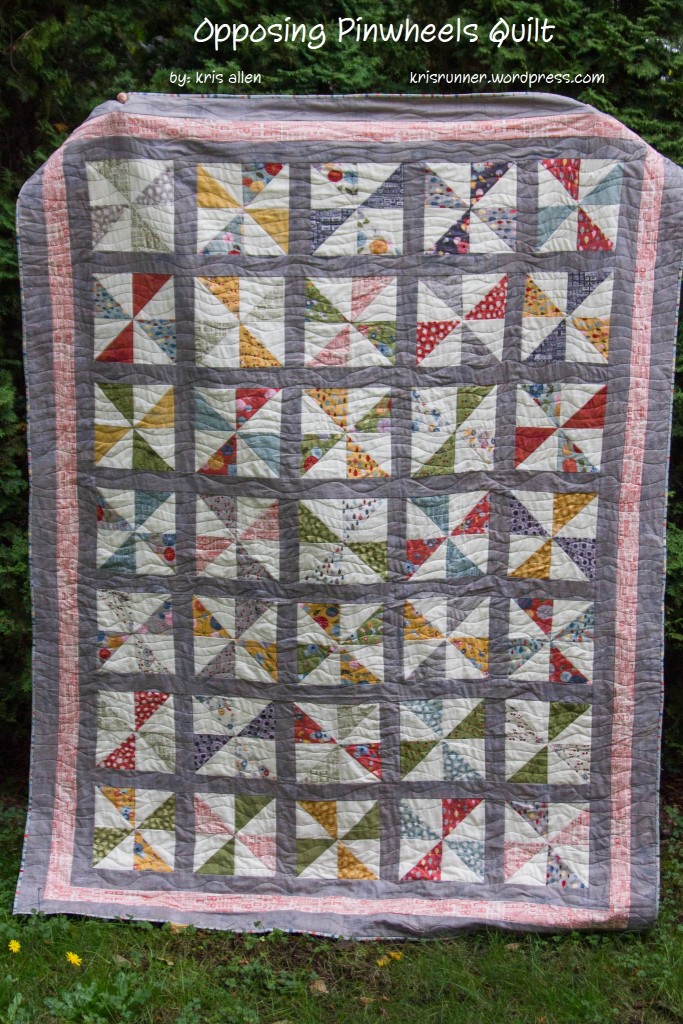

It is great to share this quilt with all of you. My name is Kris Allen and you can me at find my blog here. This quilt design came from noticing a flaw in a quilt (after it was finished and I looked at a photo I had taken). I had made a traditional pinwheel quilt and one of the blocks was reversed. I thought how much fun to make a mixed up pinwheel quilt. Here you have it.
This quilt finishes at 62" x 80".
![]()
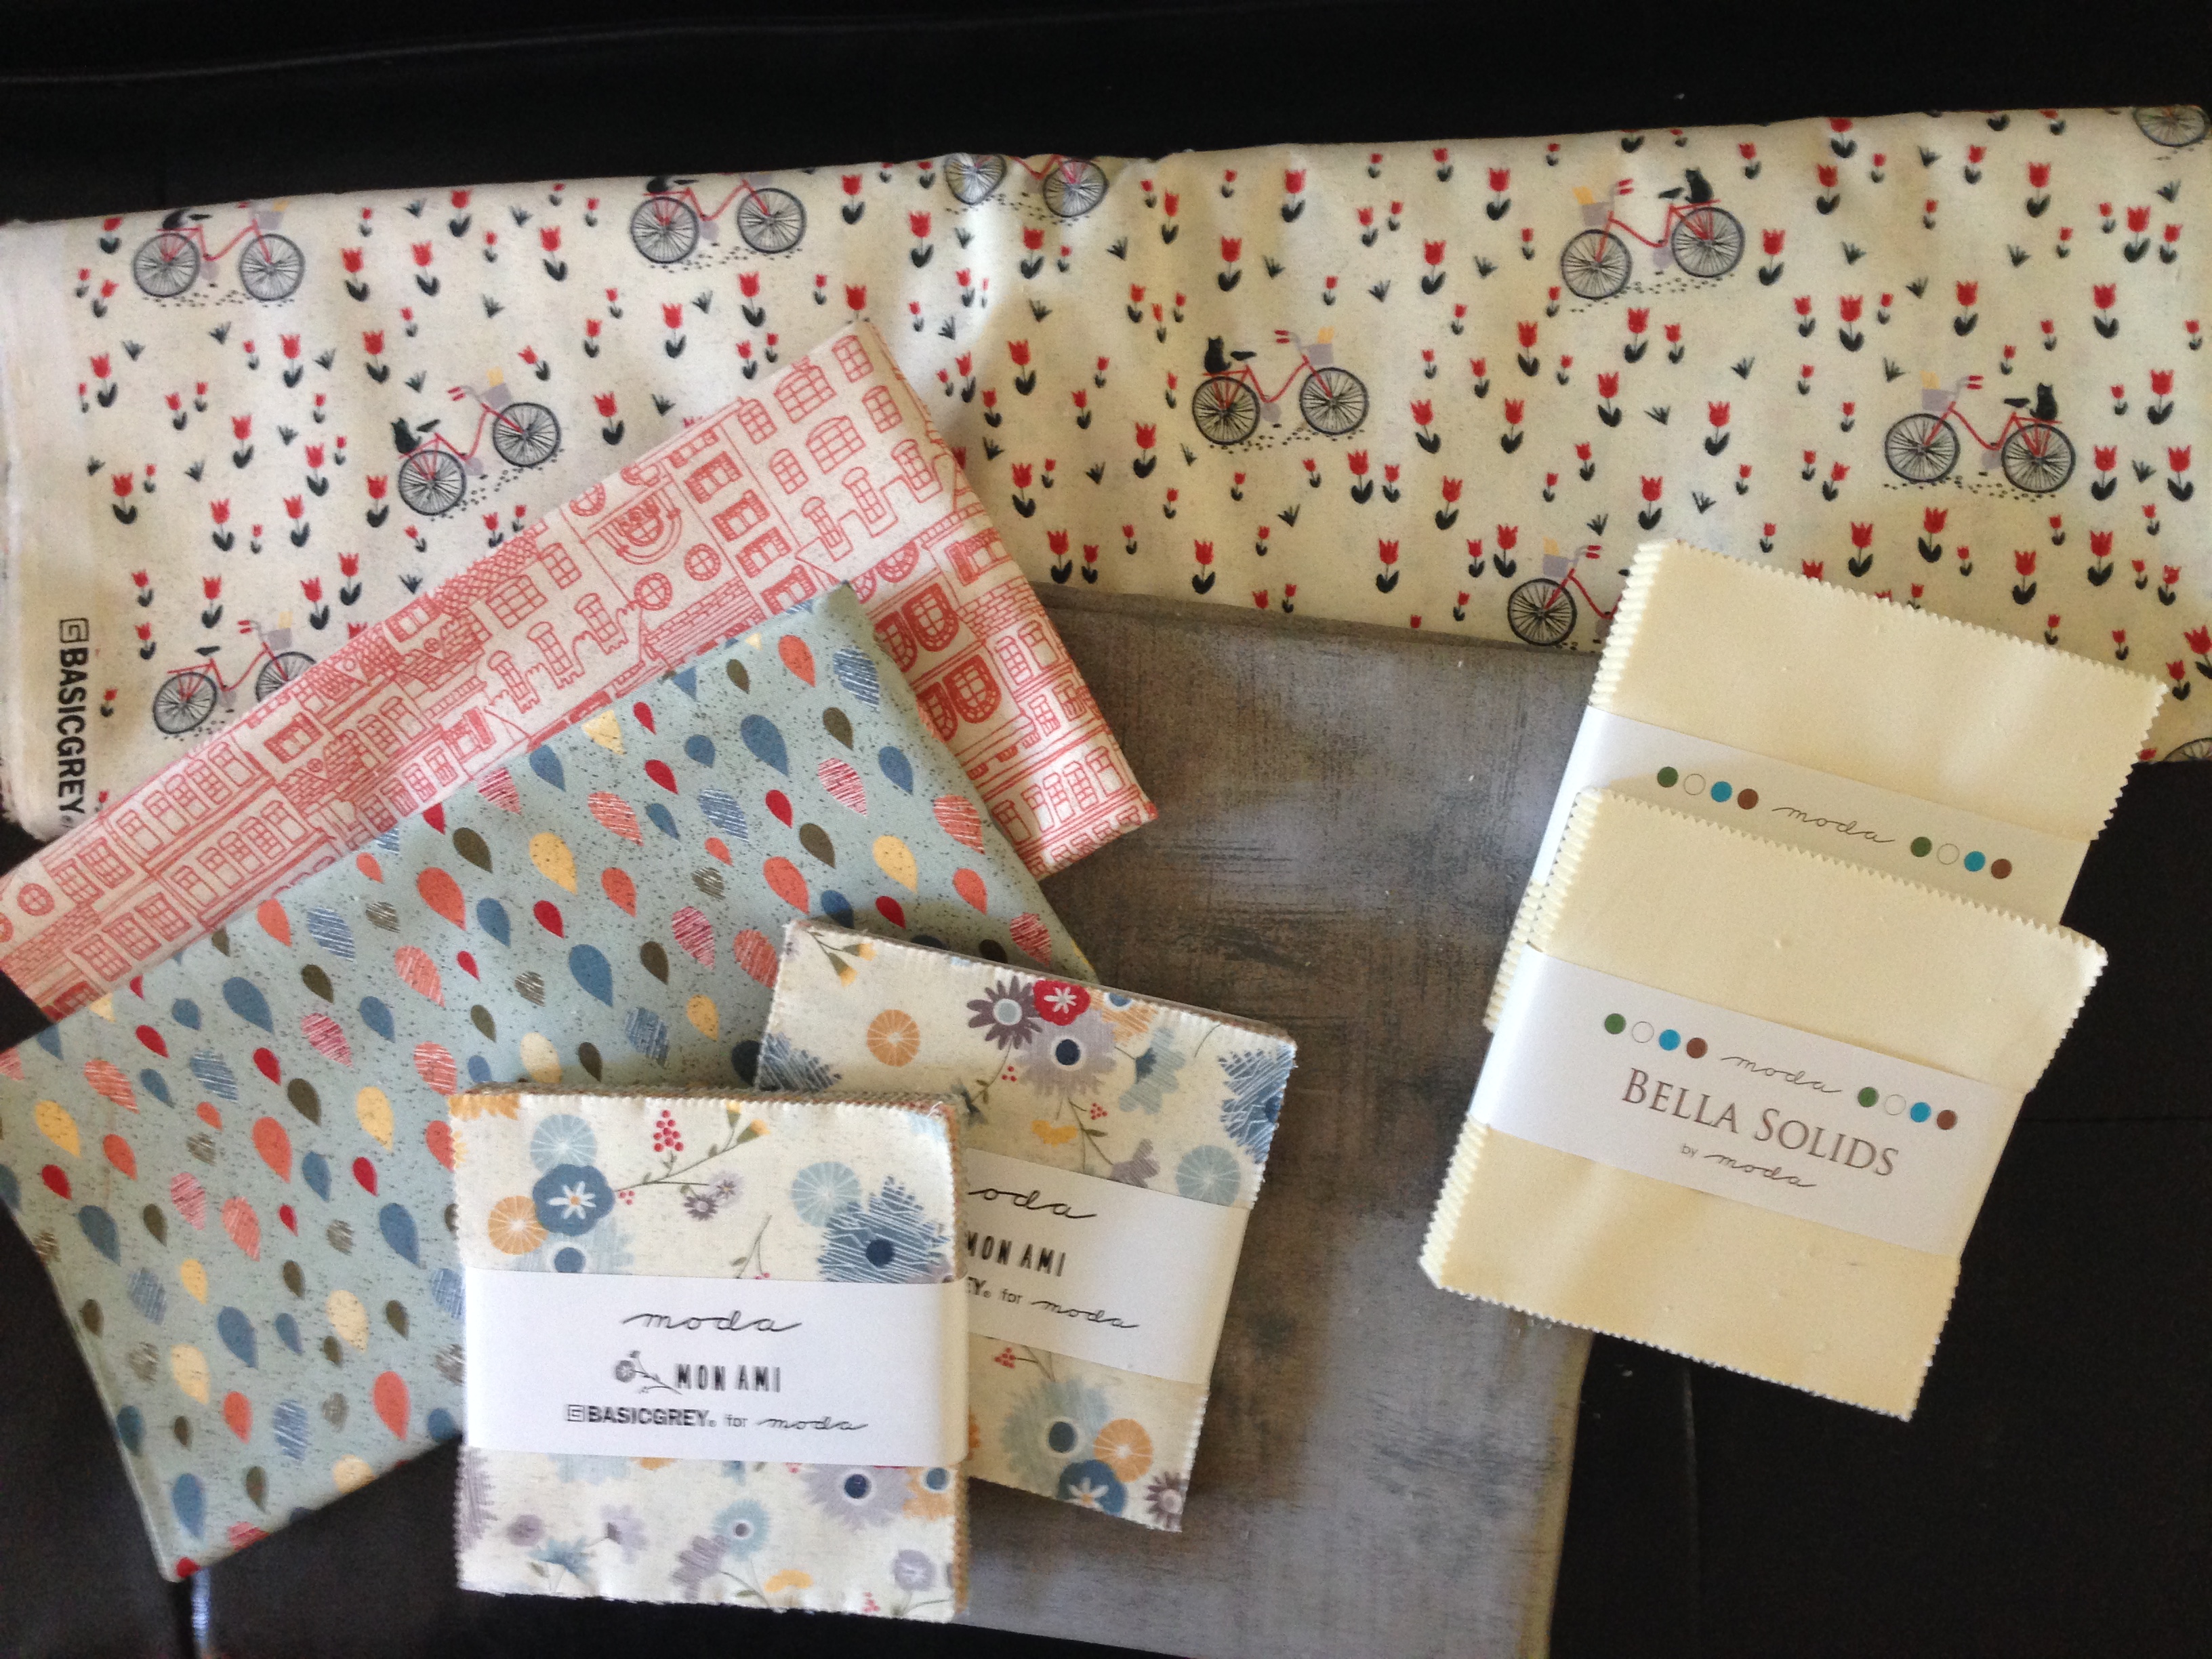
2 Charm Packs of Mon Ami by Basic Grey (3 if you want to create the back of the quilt like mine)
2 Charm Packs of Moda Bella Solids - snow
2 yards for sashing and border of Grey Couture (30150 163) (I love the texture this gives vs. a solid color)
3/4 Yard for border of Cream Rouge (30416 11) - Red homes on cream background.
1/2 yard for binding of Blue (30414 17) - Raindrops material
4 yards for backing of Creme (30413 11) - bikes on a cream background with red flowers
![]()
You are going to be making 35 blocks of two different pinwheel patterns.

Block A:
You will need one charm pack of Mon Ami and of the Bella Solid - snow. You will take 36 (of the 42 charms) and 36 of the snow charm packs. Draw a line on each of the Bella Solid charm packs (5"x5") from on corner to the opposite.

You will them put the solid snow charm pack with line facing up on top of one of the prints with print side up from the Mon Ami line. Using a 1/4 inch seam allowance, sew along one side of your line. Then sew on the other side of the line.
Once you have sewn a line 1/4" of each side of the line you drew you will cut down the line you drew. Creating 2 half sqaure triangles. See picture below:

Press towards the print material and trim to 4 1/2" square. Take 4 half square triangles (I used 2 sets of 2 matching squares - but you could use 4 different half square triangles). Set them up to look like the picture below: Make sure that you prints are in the same position as those in this picture.

- Sew the top left to the top right with a 1/4" seam. Then press the seams towards the print.
- Sew the bottom left to the bottom right with a 1/4" seam. Press the seams towards the print..
- Lay out again to insure you have it lined up correctly as in picture below.
- Matching center seams, sew the top rectangle to the bottom rectangle. Press seams. Trim to 8 1/2" x8 1/2".
REPEAT 17 times til you have 18 blocks of this pattern.
Block B:
You will need one charm pack of Mon Ami and of the Bella Solid - snow. You will take 34 (of the 42 charms - I left out the cream colored blocks) and 34 of the snow charm packs. Draw a line on each of the Bella Solid charm packs (5"x5") from on corner to the opposite.
You will them put the solid snow charm pack with line facing up on top of one of the prints from the Mon Ami line. Using a 1/4 inch seam allowance, sew along one side of your line. Then sew on the other side of the line.
Once you have sewn a line 1/4" of each side of the line you drew you will cut down the line you drew. Creating 2 half square triangles. See picture below:
Press towards the print material and trim to 4 1/2" square. Take 4 half square triangles (I used 2 sets of 2 matching squares - but you could use 4 different half square triangles). Set them up to look like the picture below: Make sure that you prints are in the same position as those in this picture.

- Sew the top left to the top right with a 1/4" seam. Then press the seams towards the print.
- Sew the bottom left to the bottom right with a 1/4" seam. Press the seams towards the print..
- Lay out again to insure you have the correct position.
- Matching center seams, sew the top rectangle to the bottom rectangle. Press seams. You have competed this block.
REPEAT 16 times til you have a total of 17 blocks which have this pattern.
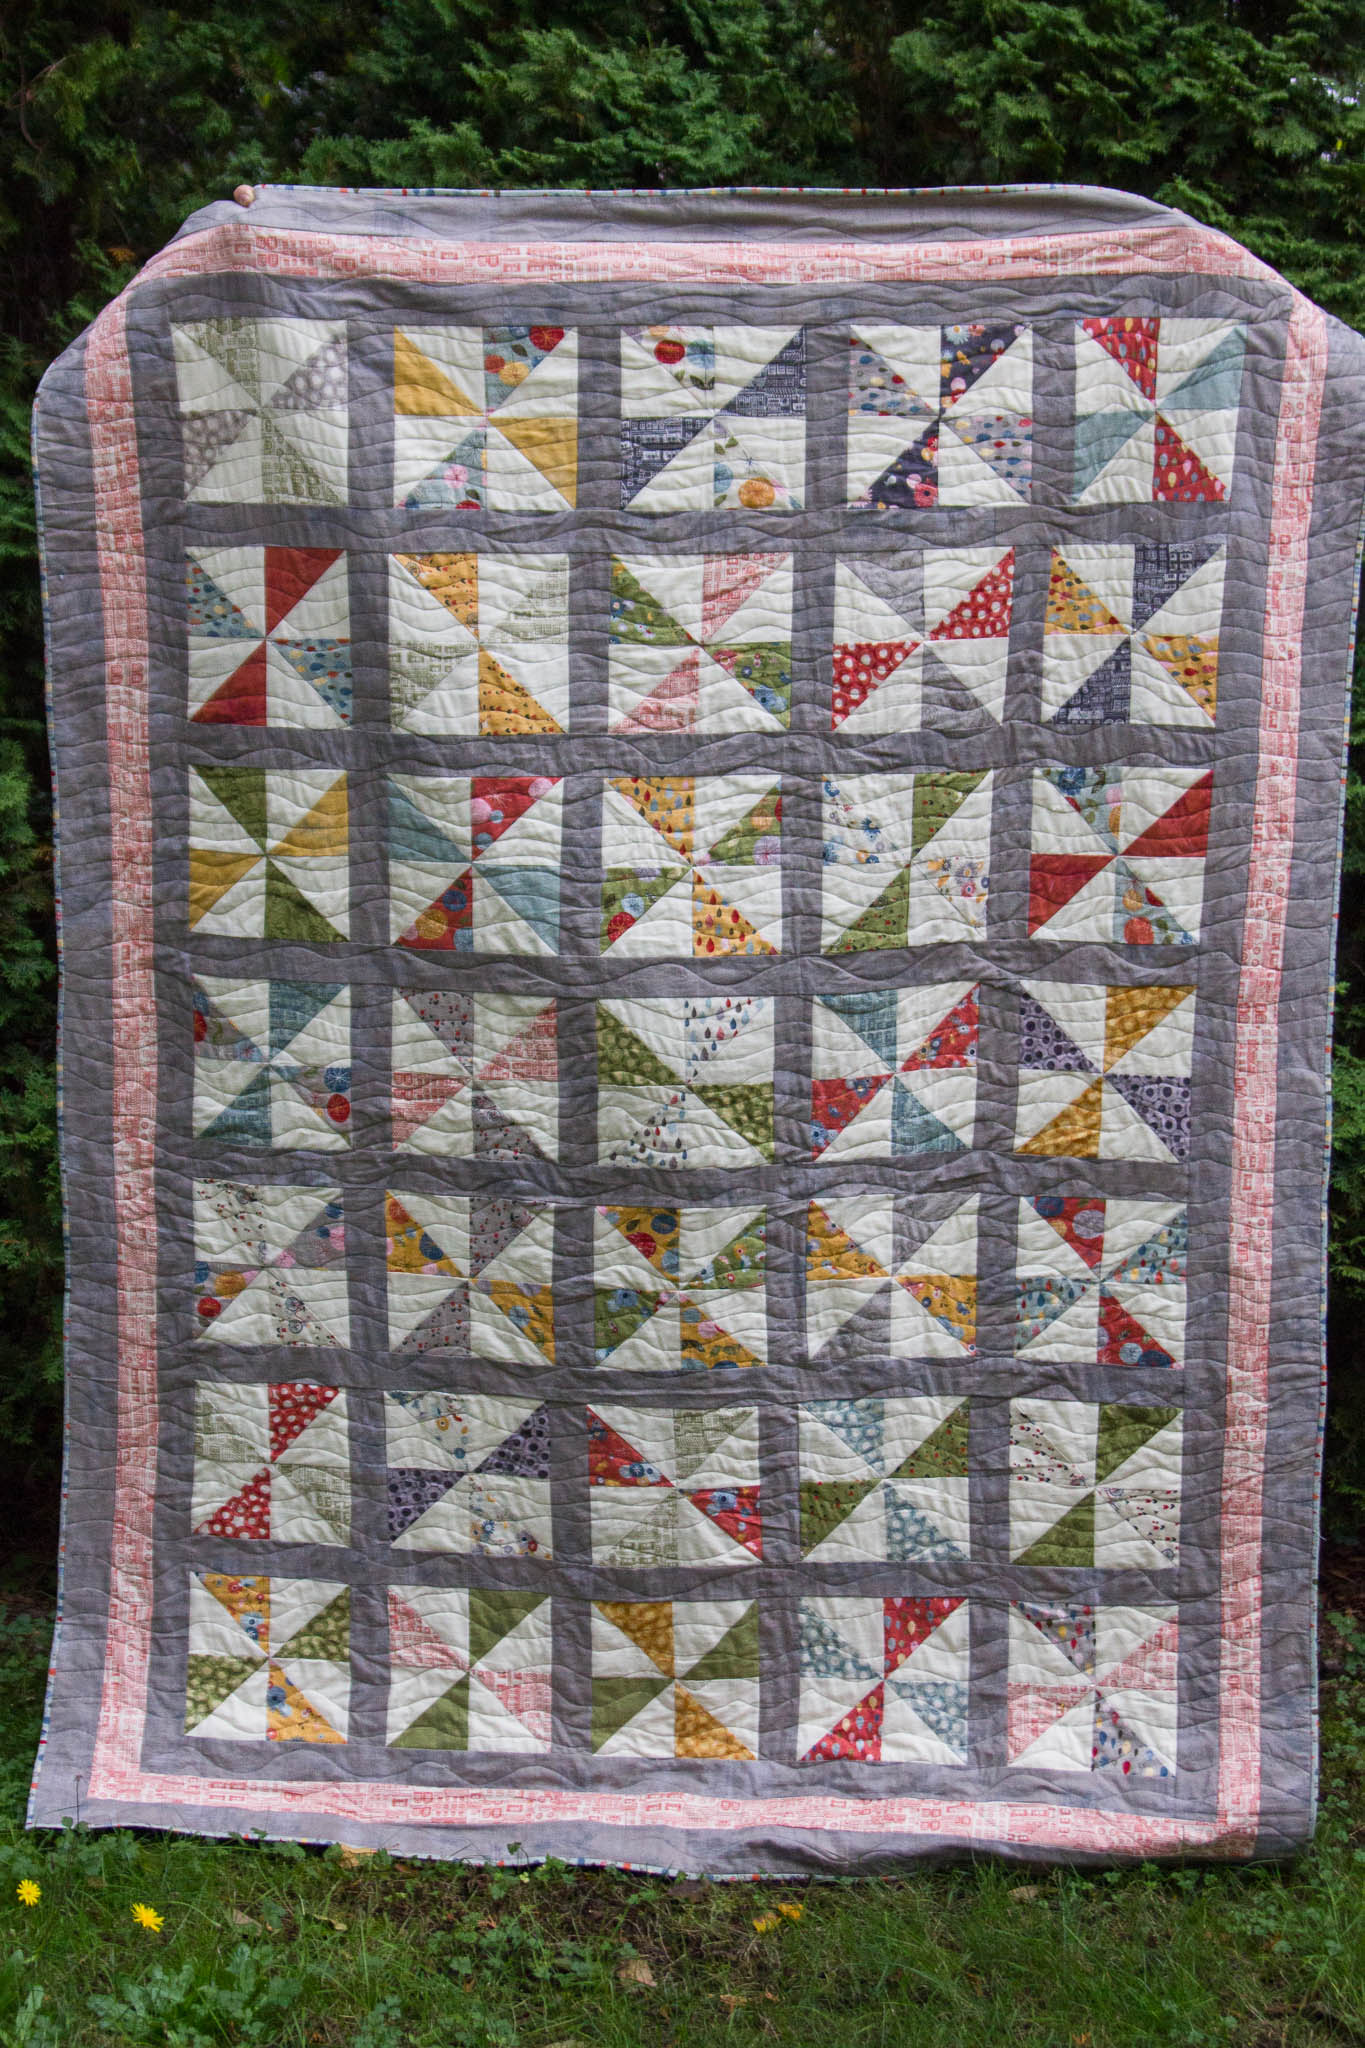
Now to layout your blocks.
You will layout a row of ABABA (A block, B block, A block, B block, A block). Then a row of BABAB (B block, A block, B block, A block, B block). Repeat this pattern til you have 7 rows total alternating between these blocks. you will have a total of 4 ABABA rows and 3 BABAB rows.
This picture will show you how it looks with the sashing and borders:

Sewing the Sashing and first border:
You need to cut 2 WOF x 8.5" strips of you sashing material - I used grey couture.
- SUBCUT into 28 2.5"x8.5" rectangles.
You will now want to sew the sashing on to the blocks in each row using 1/4" seam allowances pressing each seam. Til you have 7 rows of 5 blocks and 4 sashes.
Now you are going to join the rows with a sashing the full width of the row.
Cut 10 WOFx2.5" strips
- Subcut 2 into 9" strips giving you 8 2.5"x9"rectangles.
Sew a WOF x 2.5" strip to a 2.5"x9" rectangle 8 times.
Sew one of these 48'x2.5' strips to the top of each row using a 1/4" seam. (trimming off any extra you might have)
Sew all the rows together.
Sew your final strip to the bottom of your quilt.
Cut 3 WOF x 2.5" strips from your sashing (grey)
Cut one of the strips in half. Sew a half strip to each of the remaining strips. Giving you 2 approx 62 x 2.5" strip.
Sew one on each side of the quilt to create your first border.
Second border:
I used the red house on cream background material for my second border.
Cut 7 WOF x 2.5" wide strips of your border material.
Cut one of the strips in half and sew each of the half to a full strip.
Sew 2 sets of 2 strips together pressing at seams.
Sew the two 2.5" x 60" strips to the top and the bottom of the quilt, trimming off extra material. Press seams.
Sew the two 2.5" x 80" strips to the sides of the quilt, trimming off extra material. Press seams.
Third Border:
I created a 3rd border with the grey which I had used for sashing and the first border.
Cut 8 WOF x 2.5" strips of grey border/sashing material.
Sew 2 strips together 4 times.
Sew a strip to the top and bottom of the quilt, trimming excess material and then Press seams.
Sew a strip to the sides of the quilt, trimming excess material and then press seams.
I bet yours looks great!
For the back of my quilt I took a charm pack of Mon Ami and cut it into 2"x5" strips (2 per charm square). I then sewed them together to make a strip which was 5"x width of Quilt. I sewed this in the top third of my backing material to give it a fun look to the backing of my quilt. See picture below.

Then quilt as you desire. I wanted my quilt to have motion so I quilted with random wavy lines. Loved how the wavy lines look like path for the bikes to ride along on the back.

After you quilt, bind and wash your quilt. Time now to fall in love!
![]()
62" x 80" quilt prior to washing
Hope you have as much fun making this as I did. Would love to see your finished quilts from this pattern!
Kris Allen
{krisrunner.wordpress.com}
![]()
Posted in: