Welcome to Moda Fabrics!
Brake Lights Quilt
Brake Lights Quilt
Published:
Oct 9 2015 - 23:00


Hi! My name is Sarah, from Smiles Too Loudly, and I'm super excited to share a new quilt with you today! A few months ago, I was driving home from a wonderful quilty day with friends and got stuck in traffic. Fortunately, staring at brake lights for an hour or so, led me to this quilt design! It looks really complicated, but I promise it's actually really easy -- there's just a few key steps you need to pay attention to.
This quilt finishes at 60" x 77".
![]()
1 Charm Pack of Bright Sun
1 yard foreground, Golden Rod
3.5 yards background, Horizon Blue
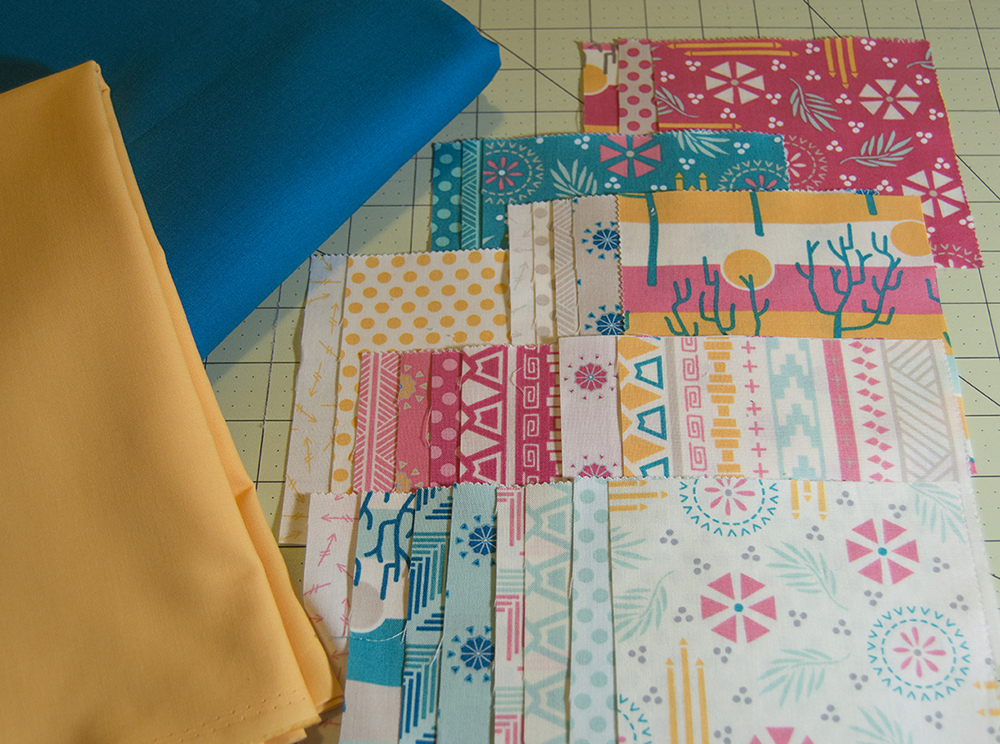
4 yards backing, Horizon Blue
5/8 yard binding, Horizon Blue
![]()
Cutting Instructions
Start by choosing your charm squares. You will only need 28 of them (save the rest for the back!). It helps to choose the charms with the most contrast with the solids.
Cut your chosen charm squares in half. Pay attention to directionality (if that’s important to you), all the pieces will be used ‘vertically’.
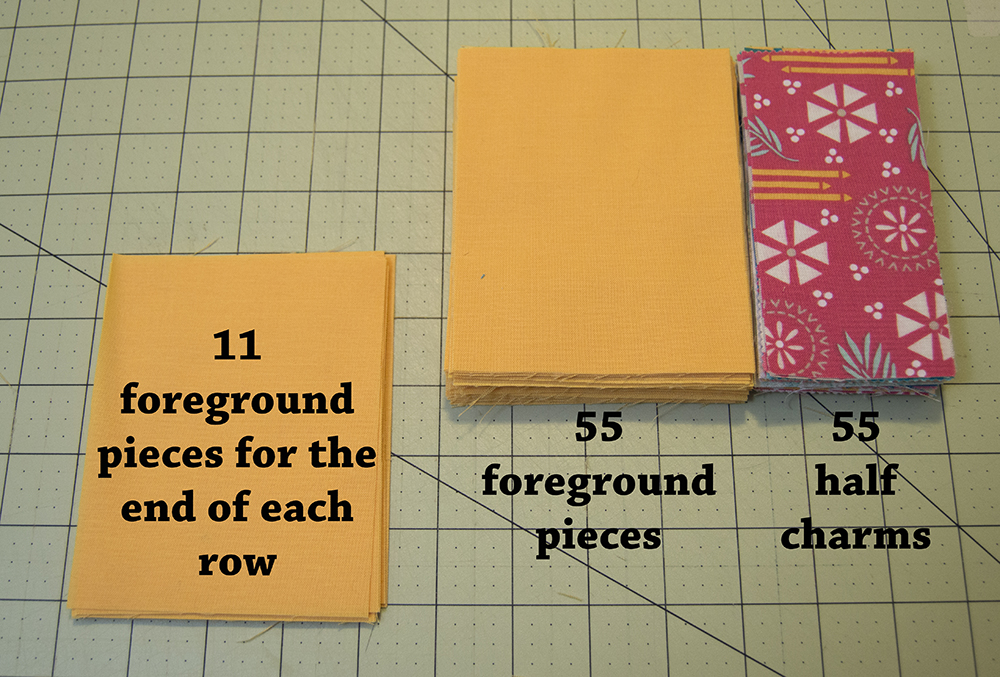
You need 55 half charms.
Cut the foreground fabric into 5” x 4” pieces. To maximize yardage, begin by cutting 5” strips from your 1 yard piece, selvage to selvage. Then subcut into 4” pieces.
You need 66 pieces 5” x 4”
Cut the background fabric. Here is a list of pieces you will need. I know it seems like a lot of pieces, and hard to keep track of, but I made an cutting illustration to help keep track of it all.
1.5” x 5” 1.5” x 11” 1.5” x 16” 1.5” x 22” 1.5” x 28”
1.5” x 34” 1.5” x 40” 1.5” x 46” 1.5” x 52” 1.5” x 58”
25” x 60” 9.5” x 60” 11.5” x 51” 11.5” x 40” 11.5” x 29”
11.5” x 18” 5” x 9”
(In all of these dimensions, the first listed is the most crucial. If the lengths are off, the finished quilt top can be trimmed later)


(The light blue sections are extra/scrap. You can click on the images if you need to see them bigger)
Piecing
To help keep track of the overall quilt top, there’s an illustration below that shows each step. The gray bricks are the half charm squares, the yellow is the foreground pieces, with the blue being the background.

Begin by sewing a foreground piece (yellow) to the left of each of the 55 half charm pieces. There will be 11 extra. These are for the ends of each row.
Layout these subunits as you would like. I like to try and keep all the prints and colors evenly distributed, as much as possible. A design wall (or floor) is helpful here, but you can manage it with just a table. You could also try the completely random approach!
Begin sewing the foreground and charm subunits into rows. Each row, as you go down the quilt, has one more subunit, and each row ends with an additional foreground piece. There are 11 rows total.
The rows are grouped into pairs of two, for the attachment of the background, with each row separated by a thin background strip.
When you are sewing the rows into pairs, make sure to align the half charm pieces across the rows.

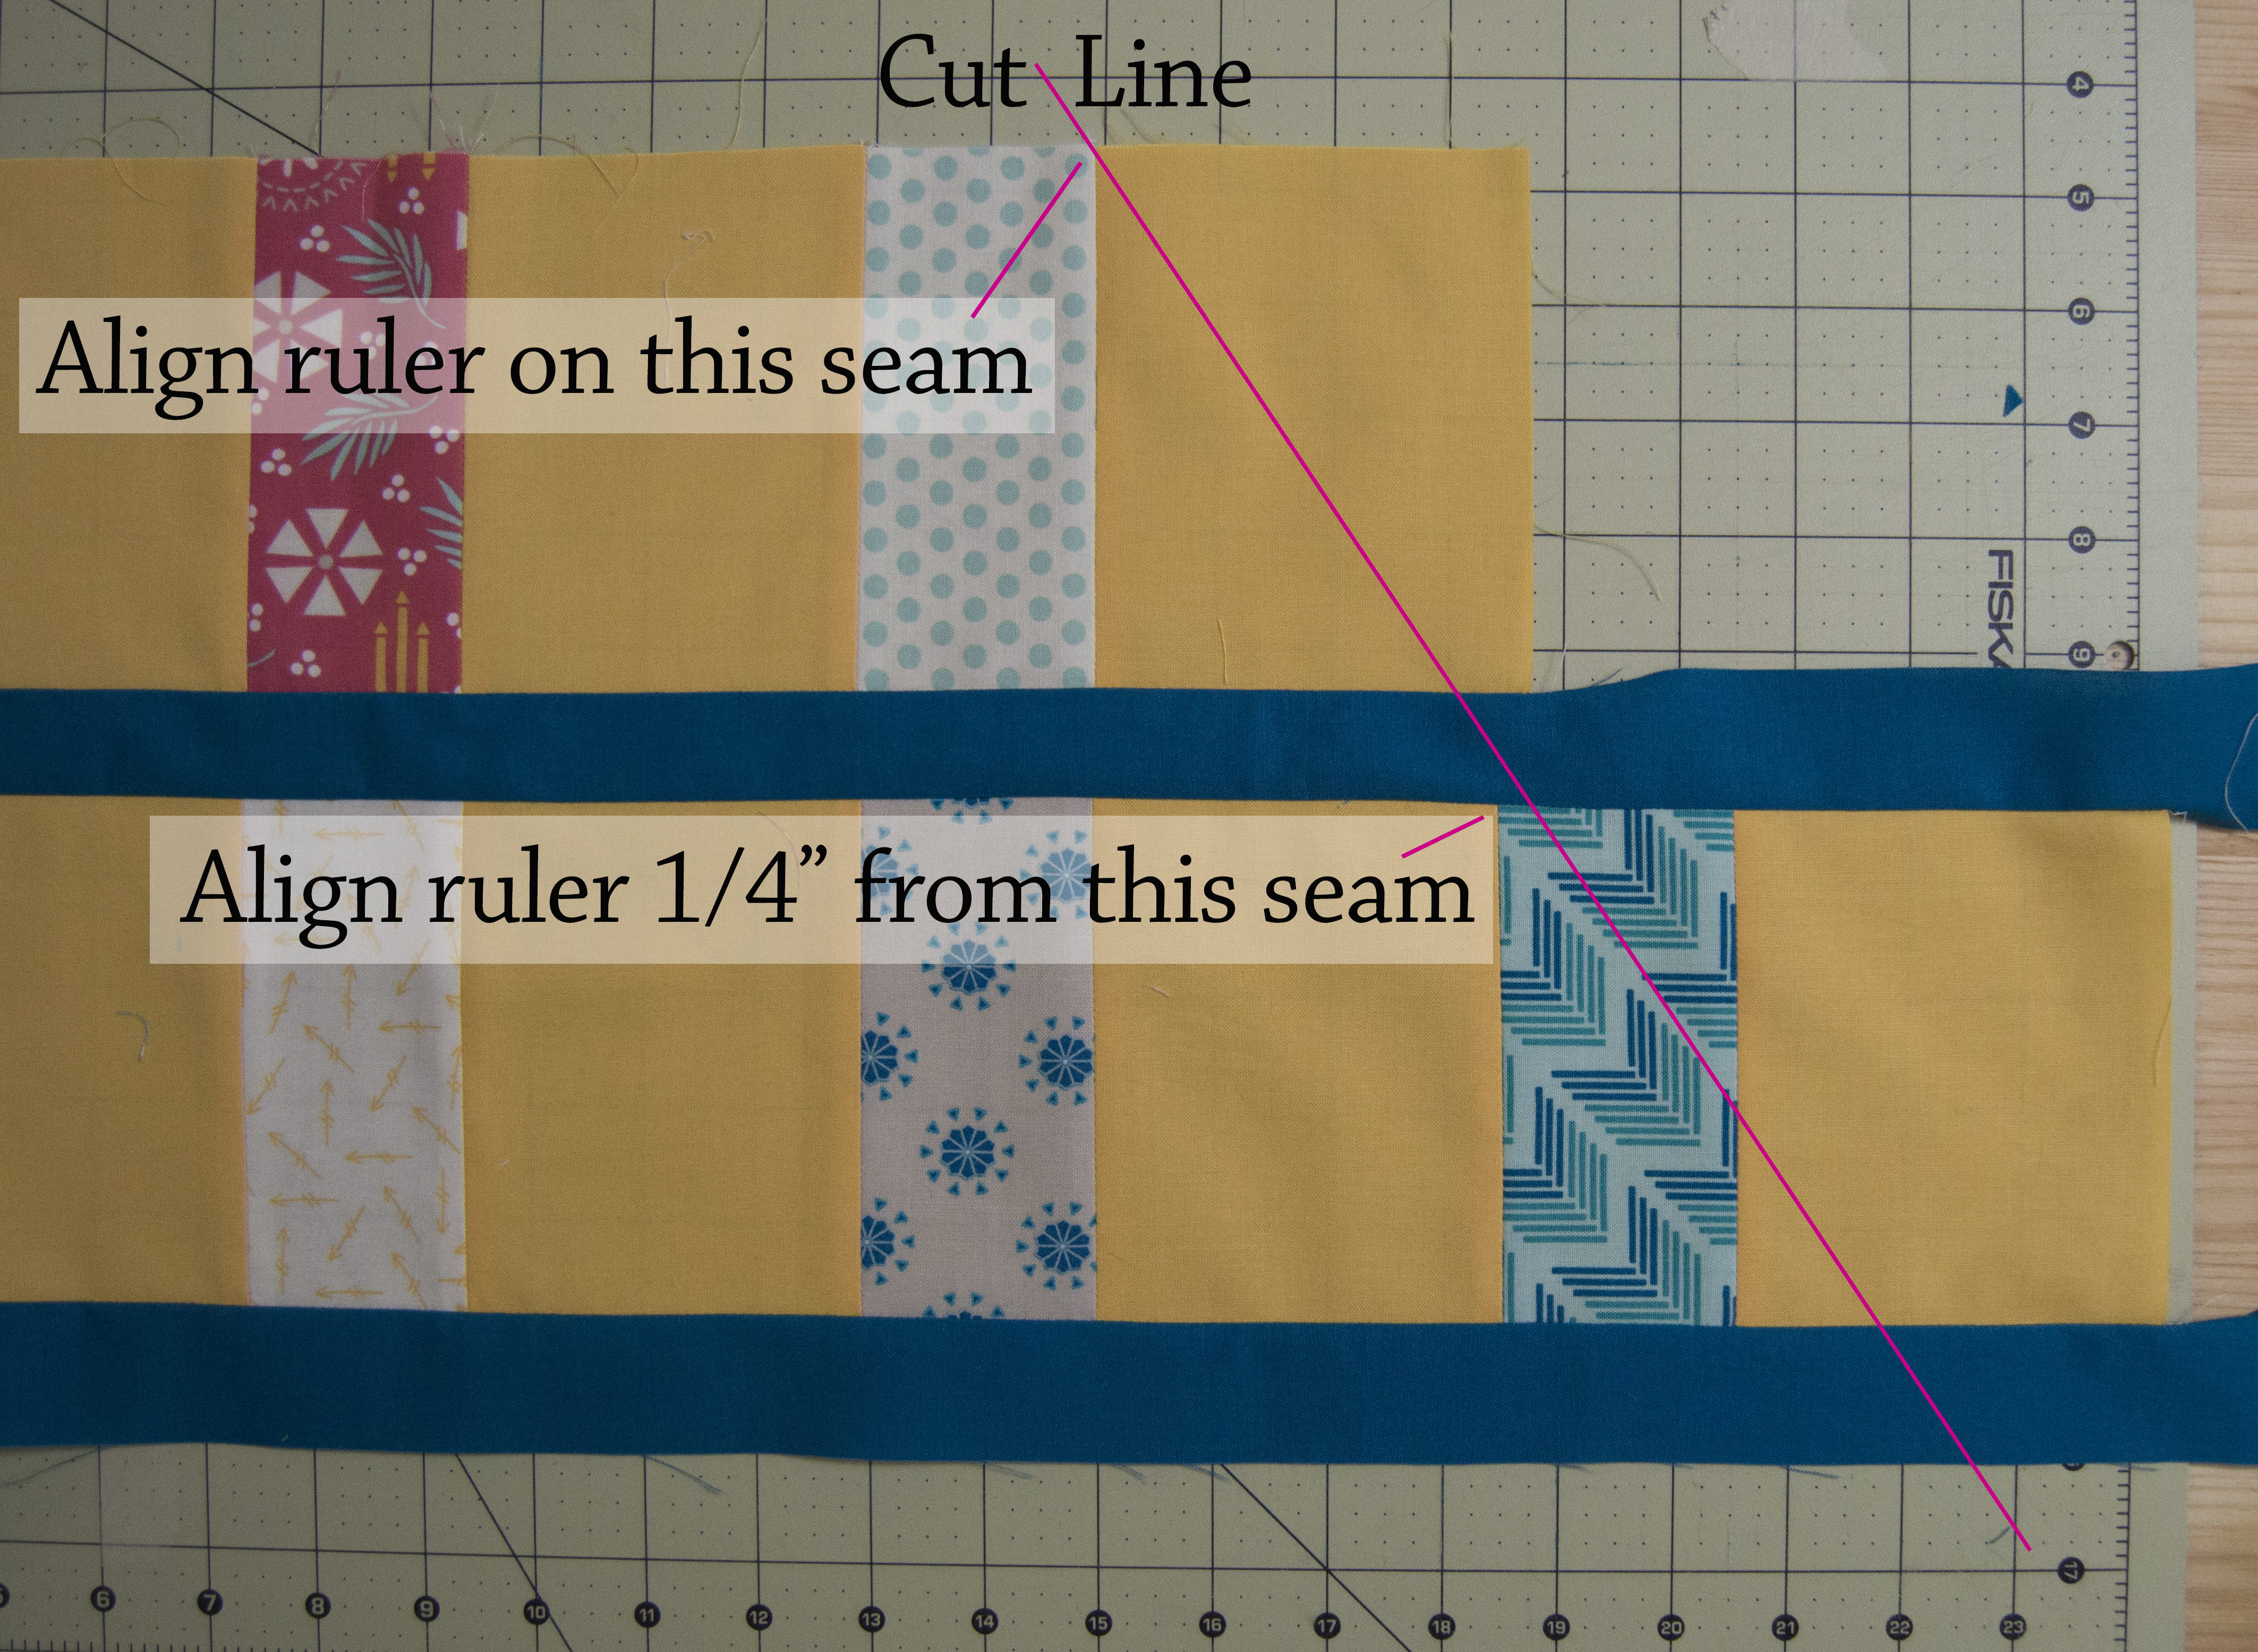
After the rows and thin background strips are sewed into their pairs. You want to trim the staggered edge to a 45 degree angle. Cutting this angle is very crucial and you want to line it up at three points: one the seam of the top charm half, ¼” from the seam of the bottom charm half, and the 45 degree line with a seam of the piece (or the mat if your piece is square with the mat).
The first row subunit will look a little different:

To help with alignment, you will want to cut the ¼” triangle tips of the edges. This will make it super, super easy to line up the two angled pieces, and there won't be any need for trimming after they are sewn together.

Cut a matching 45 degree angle in all the wider background pieces, except the 25" wide one.
Carefully attach the background pieces to the pieced subunit rows. These are all biased edges so you want to use as many pins as you can stand.

Pin and sew each row sub-unit together in order. Make sure to offset the diagonal seams ¼” so they match.

The background edges may not line up on the right. This is okay, you can trim the quilt top so it’s all even. Just take care with pinning and sewing each row so you don’t stretch the rows too much. Using a walking foot is very helpful at this point, if possible.
TIP: If you always sew the rows with the pieced sections on top (closest to the foot/needle) you’ll automatically being sewing the rows in opposite directions, keeping the quilt top square.

Your quilt top is now done!
To make the back, I just took 2 two yard pieces and joined them with the leftover charm squares between.

Baste and quilt as desired. I chose to do straight lines in the foreground section, then figure eights in the background, but really the sky is the limit when it comes to quilting this quilt.
![]()
Finished quilt size is 60" x 77"

I hope you find this quilt as fun and rewarding as I did! If you have any trouble, or questions, please don't hesitate to reach out. I'd be happy to help in any way I can.
Sarah Fredette
{smilestooloudly.wordpress.com}
![]()
Posted in: