Welcome to Moda Fabrics!
Darling Grannies Quilt
Darling Grannies Quilt
Published:
Oct 25 2015 - 23:00
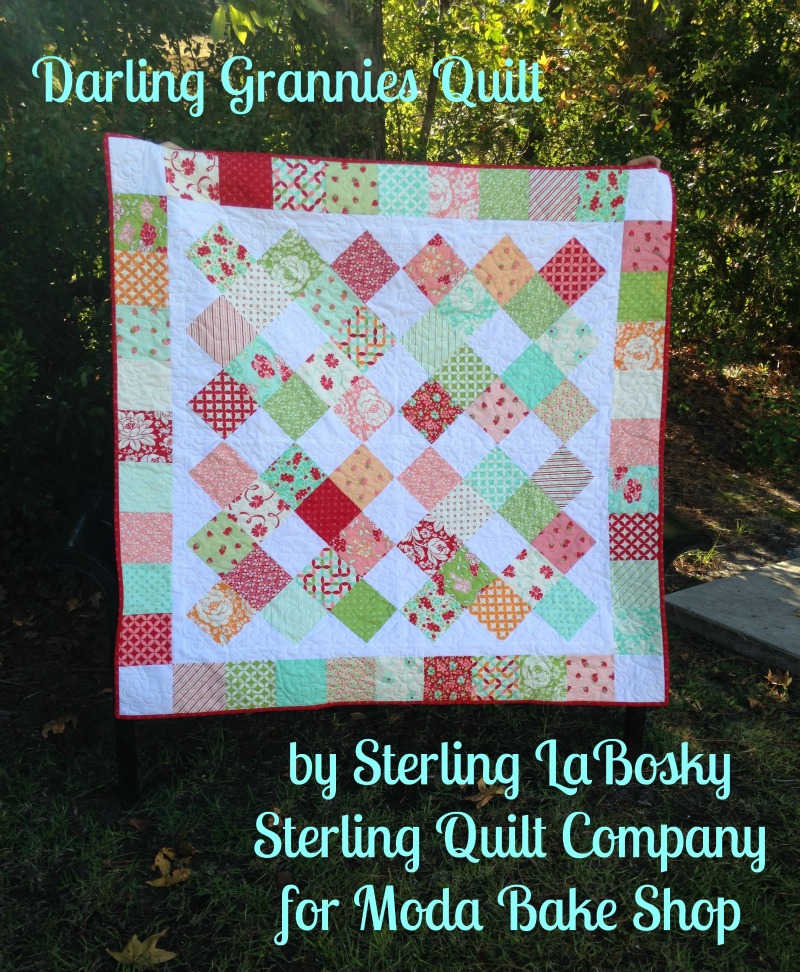

Hi! My name is Sterling LaBosky, owner of Sterling Quilt Company, and I am so thrilled to share my first recipe with you guys! I love charm squares and I love granny squares, so I thought why not combine the two! This easy quilt uses only 2 charm packs with no extra squares left over for you to wonder what to do with. Quick and cute, it can be made up in a weekend.
This quilt finishes at 50" x 50", finished block 19" x 19".
![]()
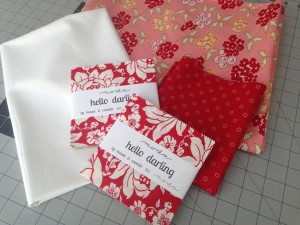
2 Hello Darling charm packs
1 yard background fabric (Bella solid 9900-98)
3/8 yard binding fabric
3 1/4 yards backing fabric
![]()
Cutting:
From the background fabric cut -
- 4 - 1 3/4" x width of fabric strips. Set aside for inner borders.
- 4 - 5 1/2" x width of fabric strips. Subcut each strip into 6 - 5 1/2" squares and 2 - 5" squares. You should have 24 total 5 1/2" squares and 8 total 5" squares.
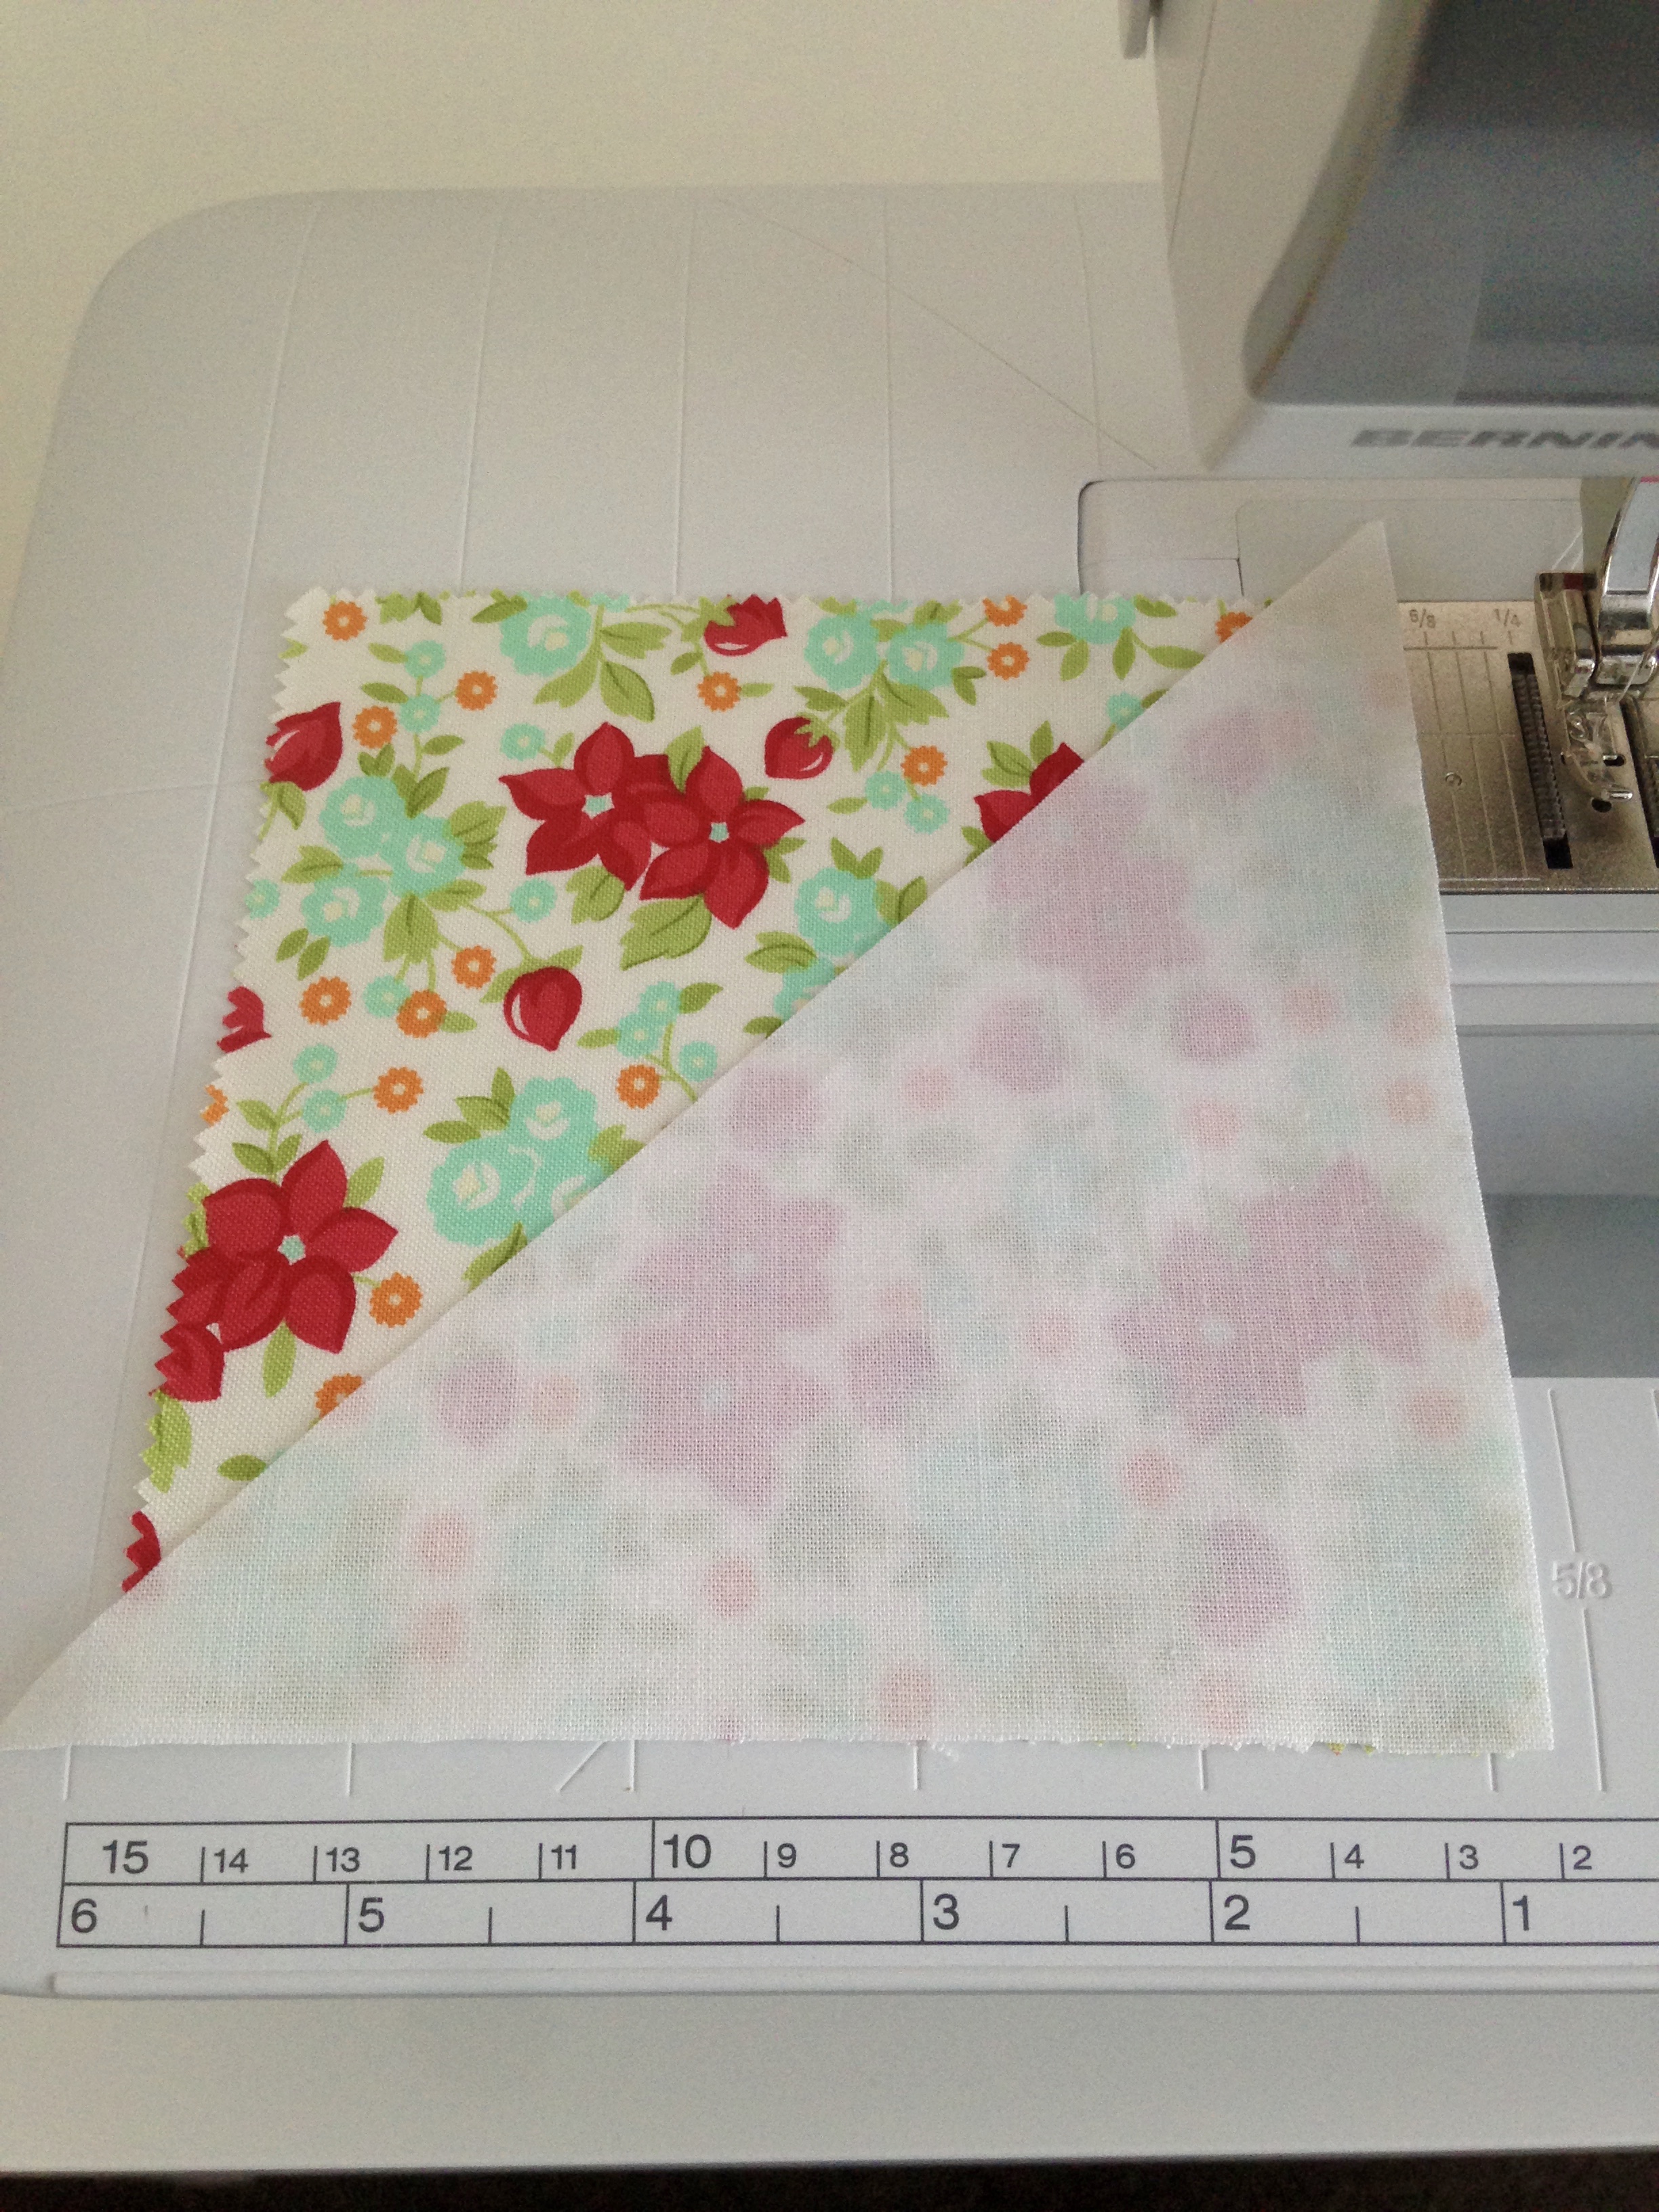
- Take your 5 1/2" squares and cut in half on the diagonal. You should have a total of 48 triangles.
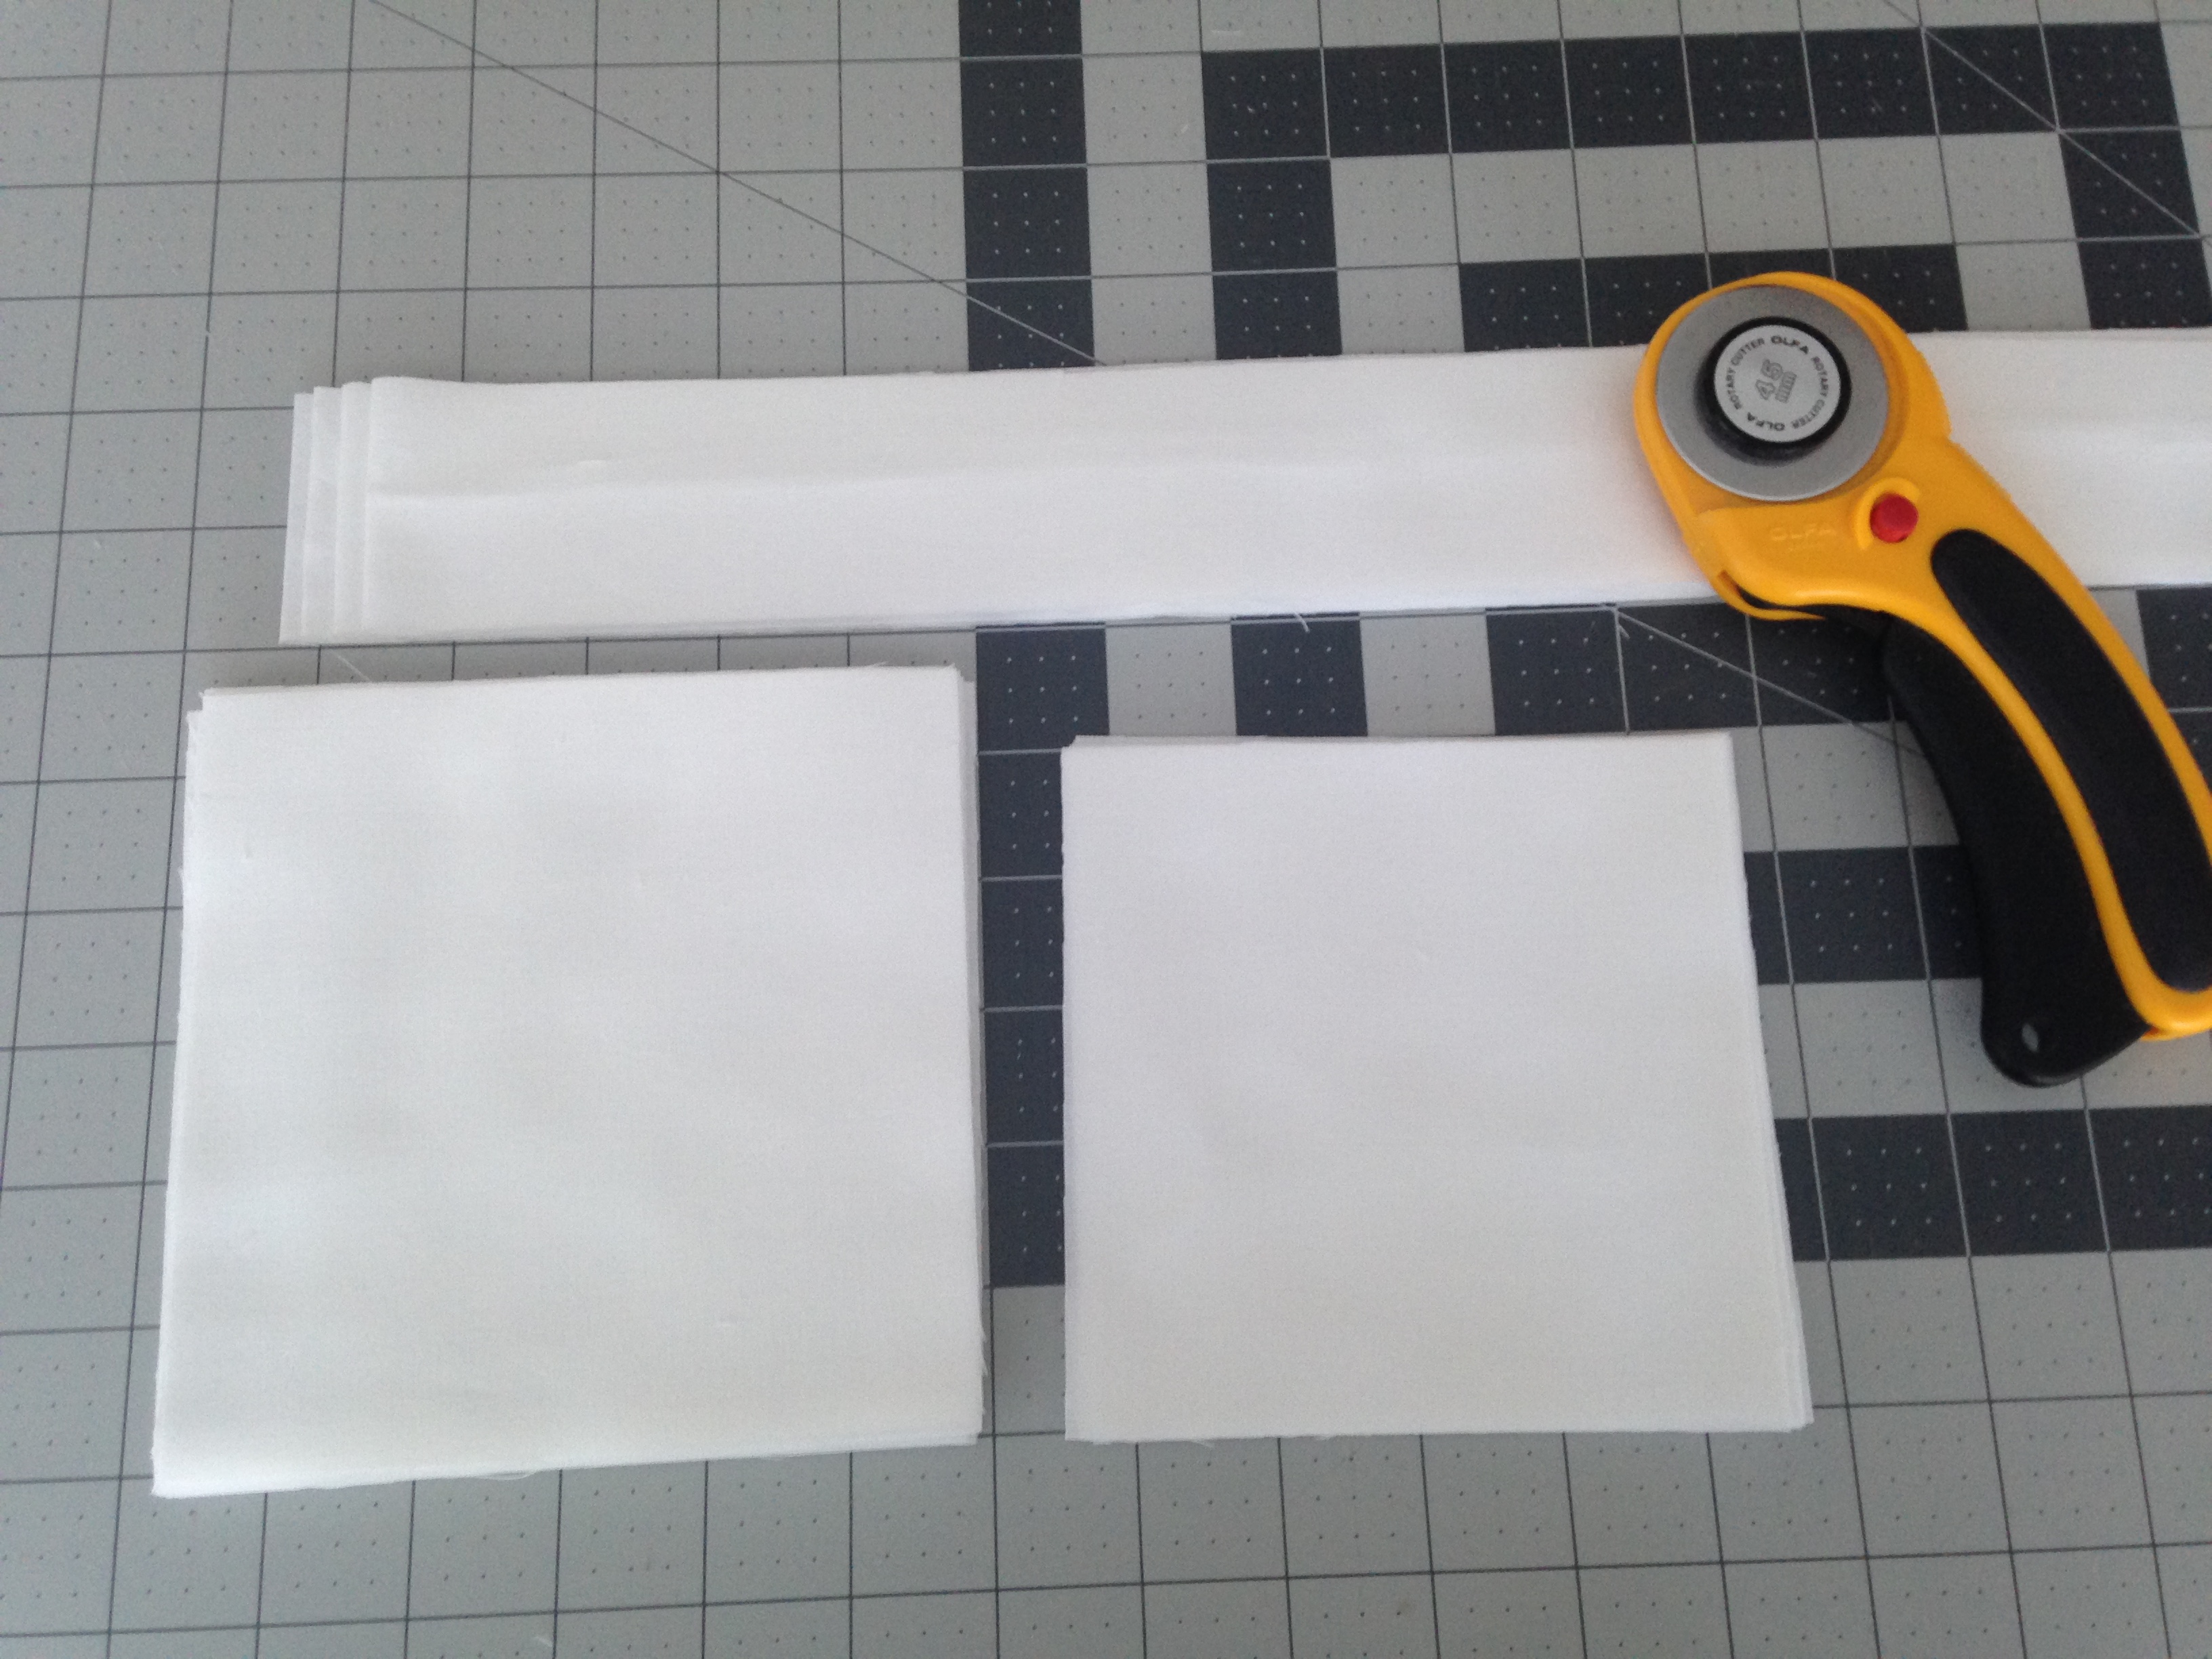

From the binding fabric cut -
- 5 - 2 1/2" x width of fabric strips. Set aside for binding.
Block Assembly:
All seam allowances are 1/4" throughout.
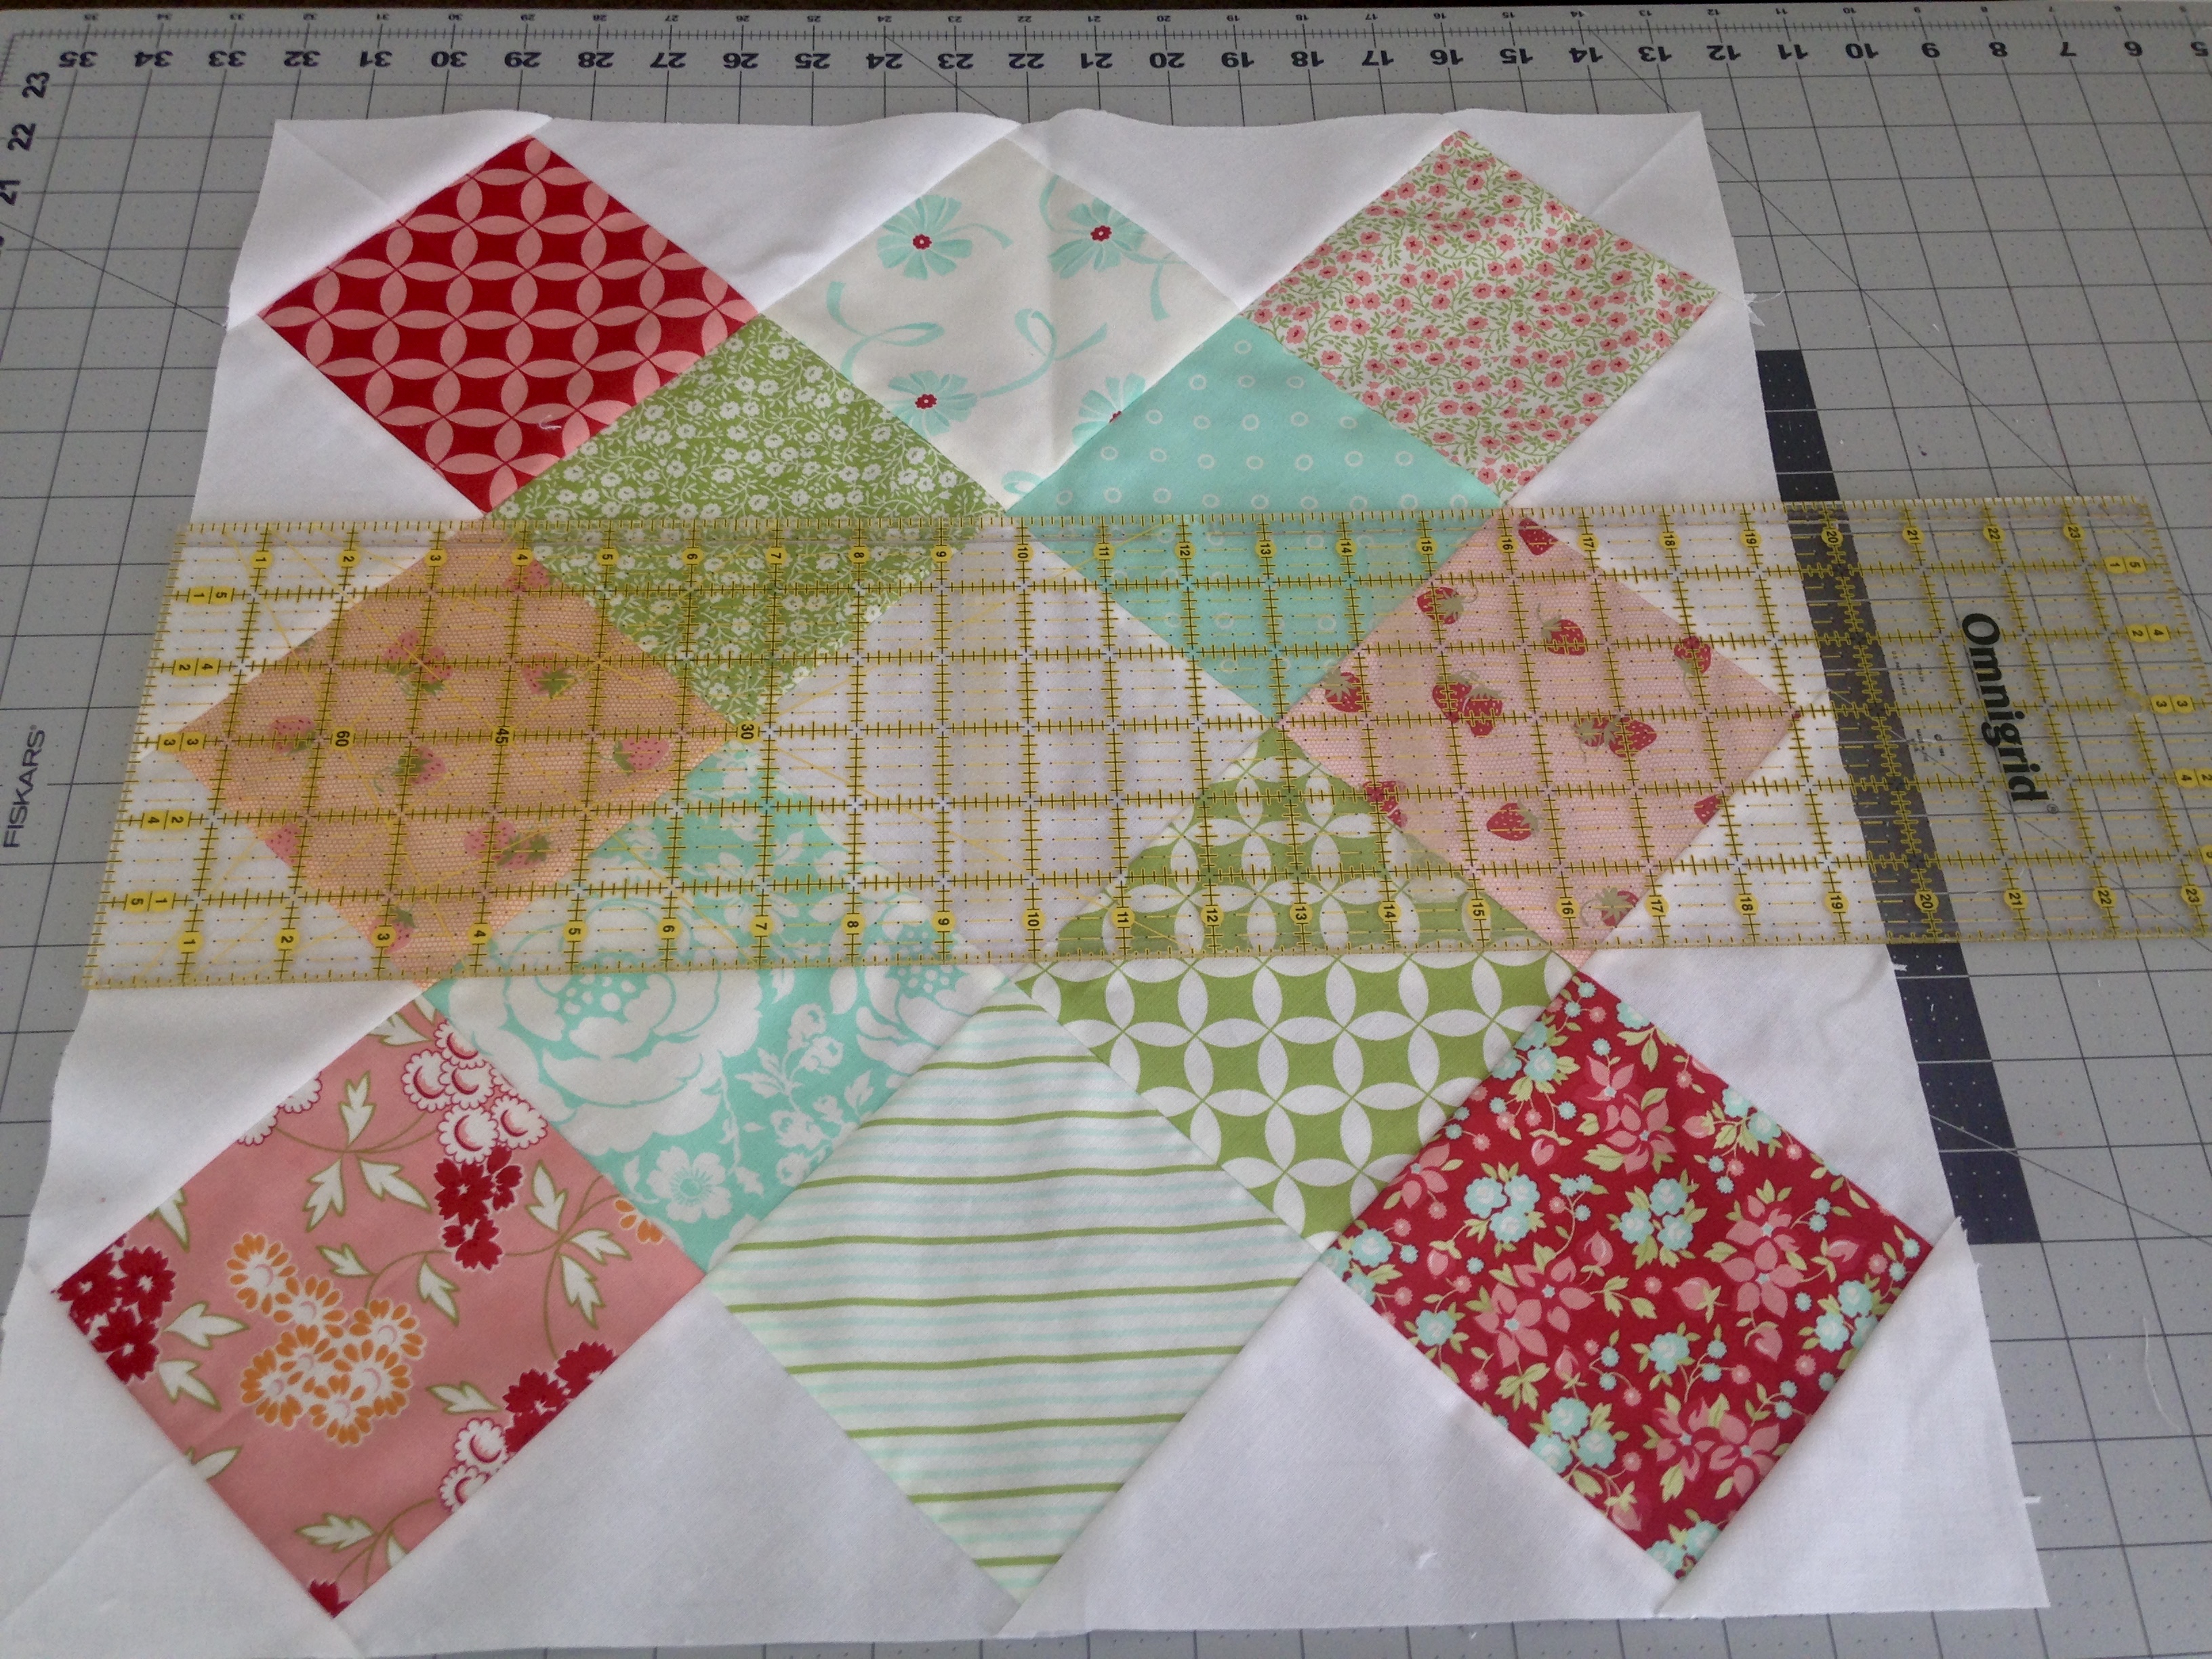
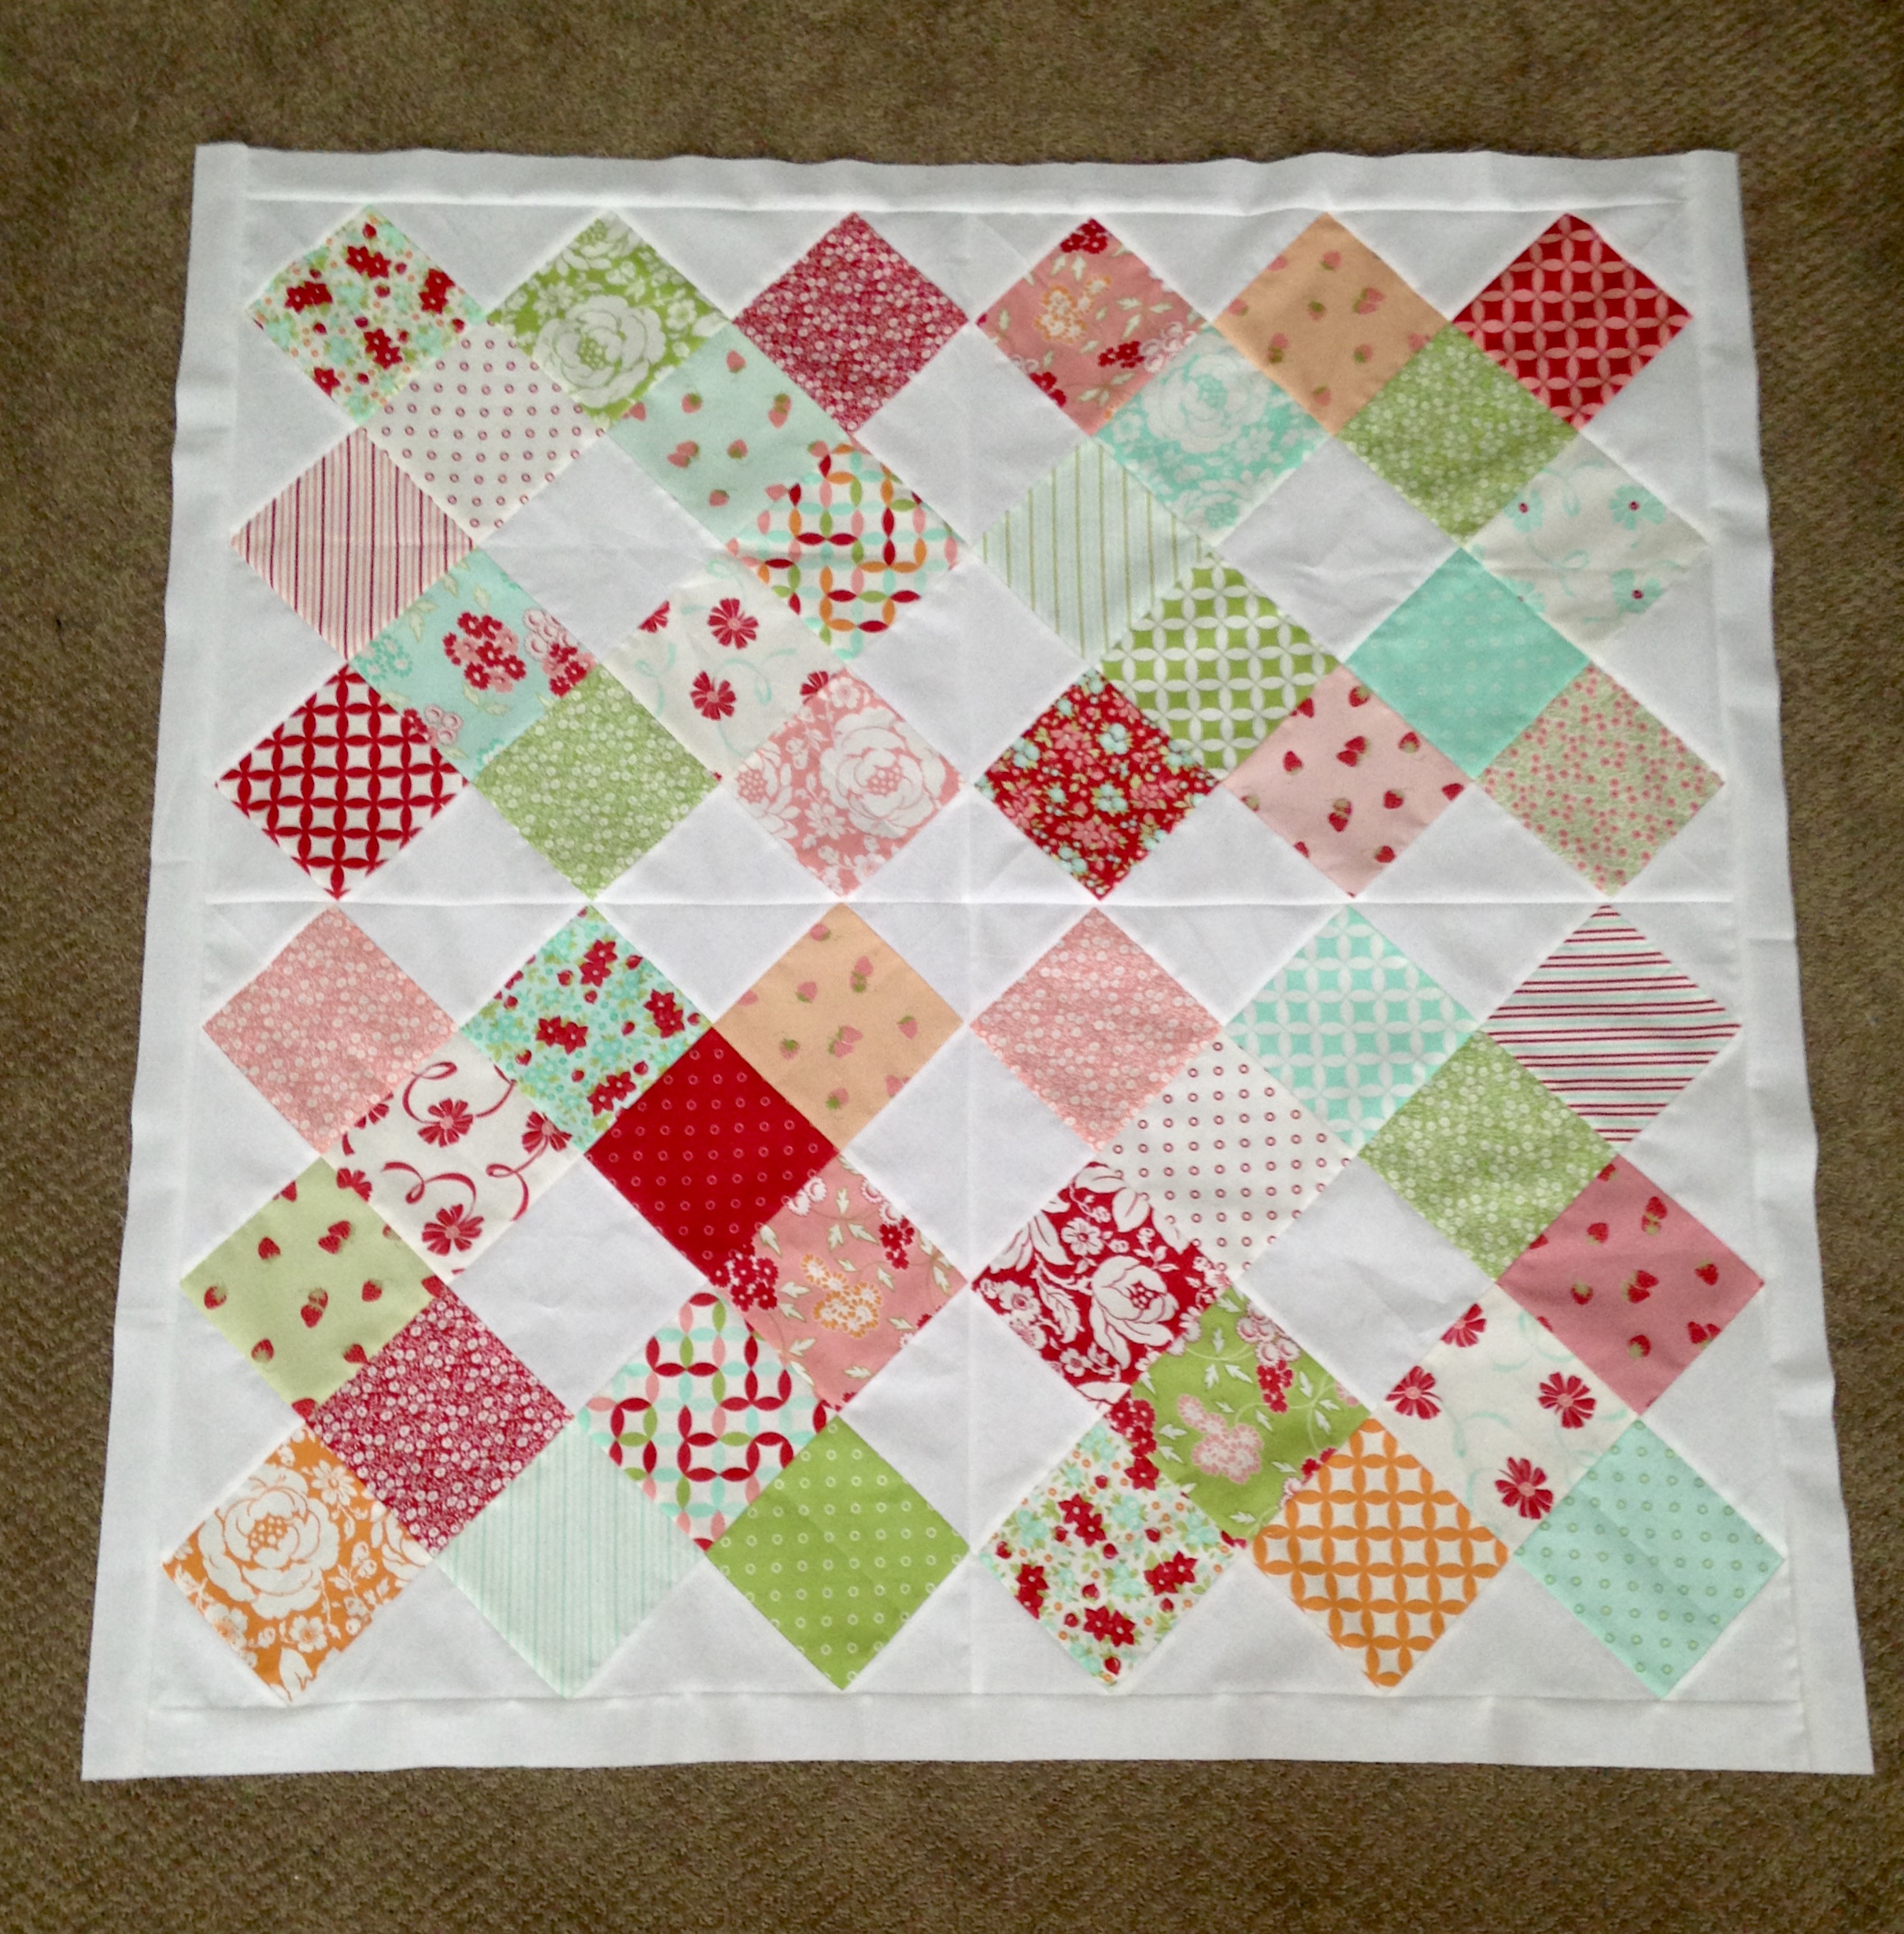
There are only 4 big blocks needed for this quilt. Each block uses 12 charm squares, 12 background triangles, and 1 background 5" square.
- Lay out your blocks according to the picture and sew your diagonal rows together. Press each row in opposite directions.
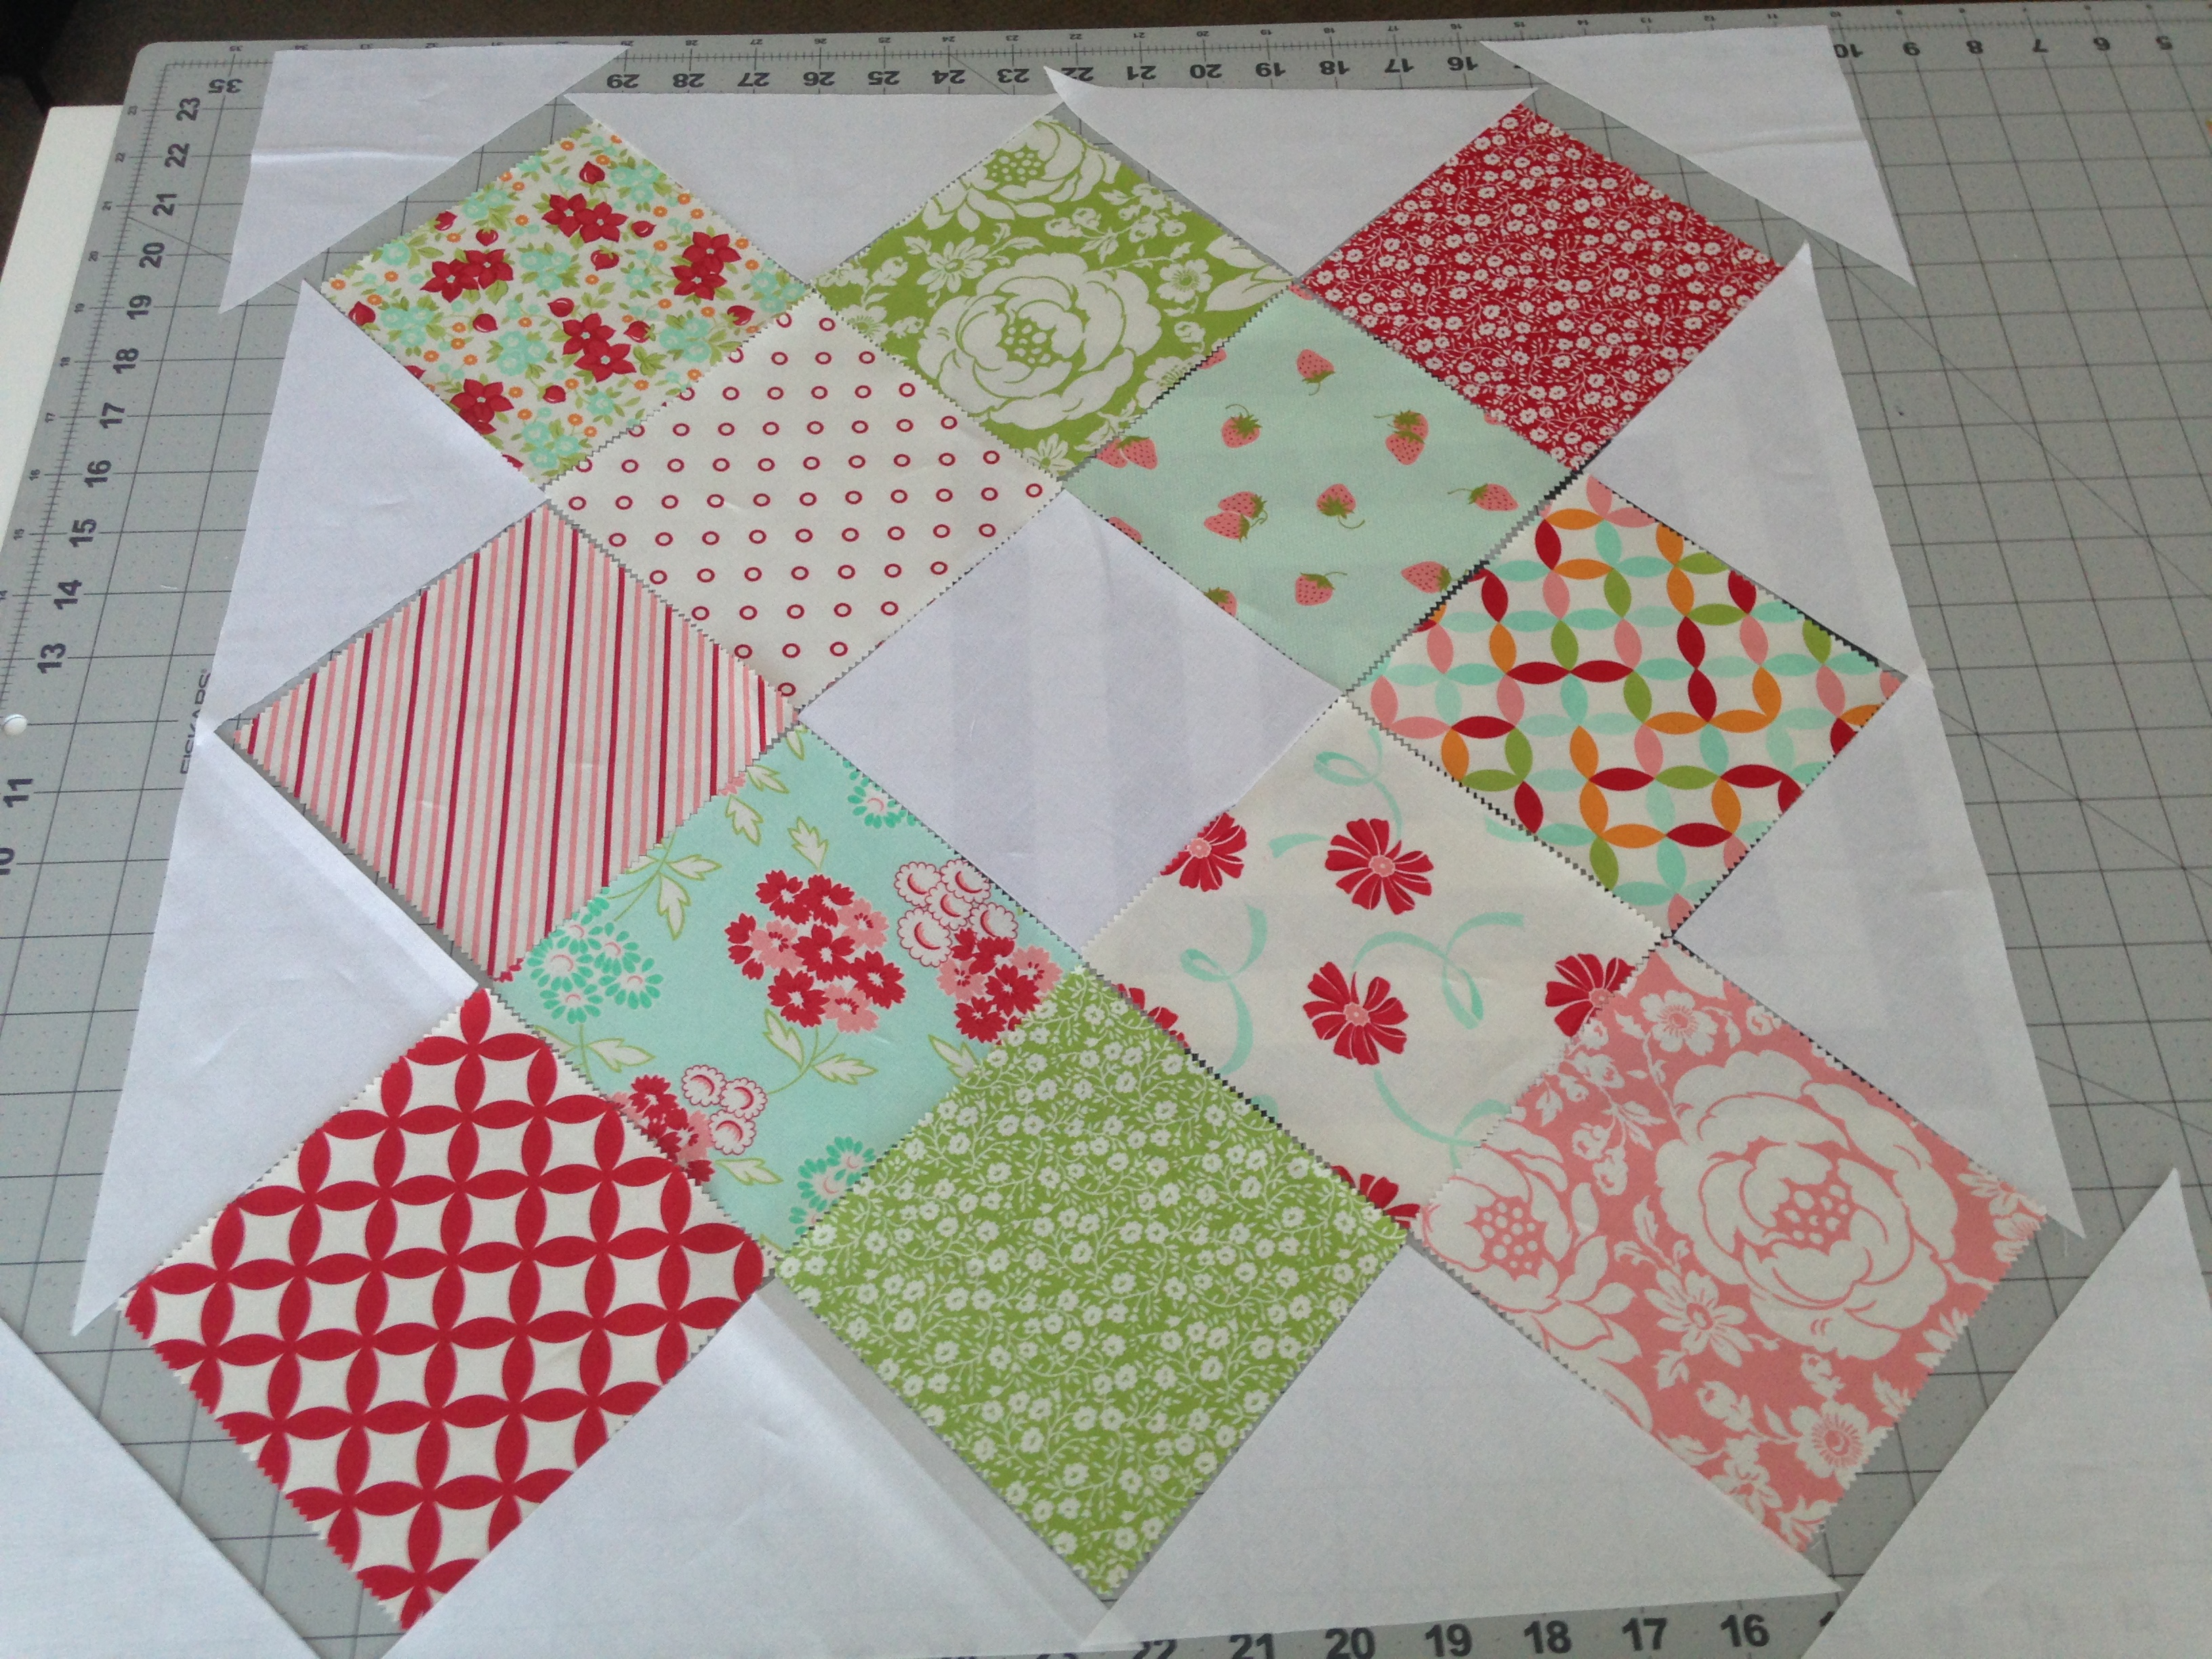
- Sew your rows together, pressing each away from the center row. (Line up the two straight sides of your triangle with the square right sides together leaving the tip of the triangle hanging over about 1/4")
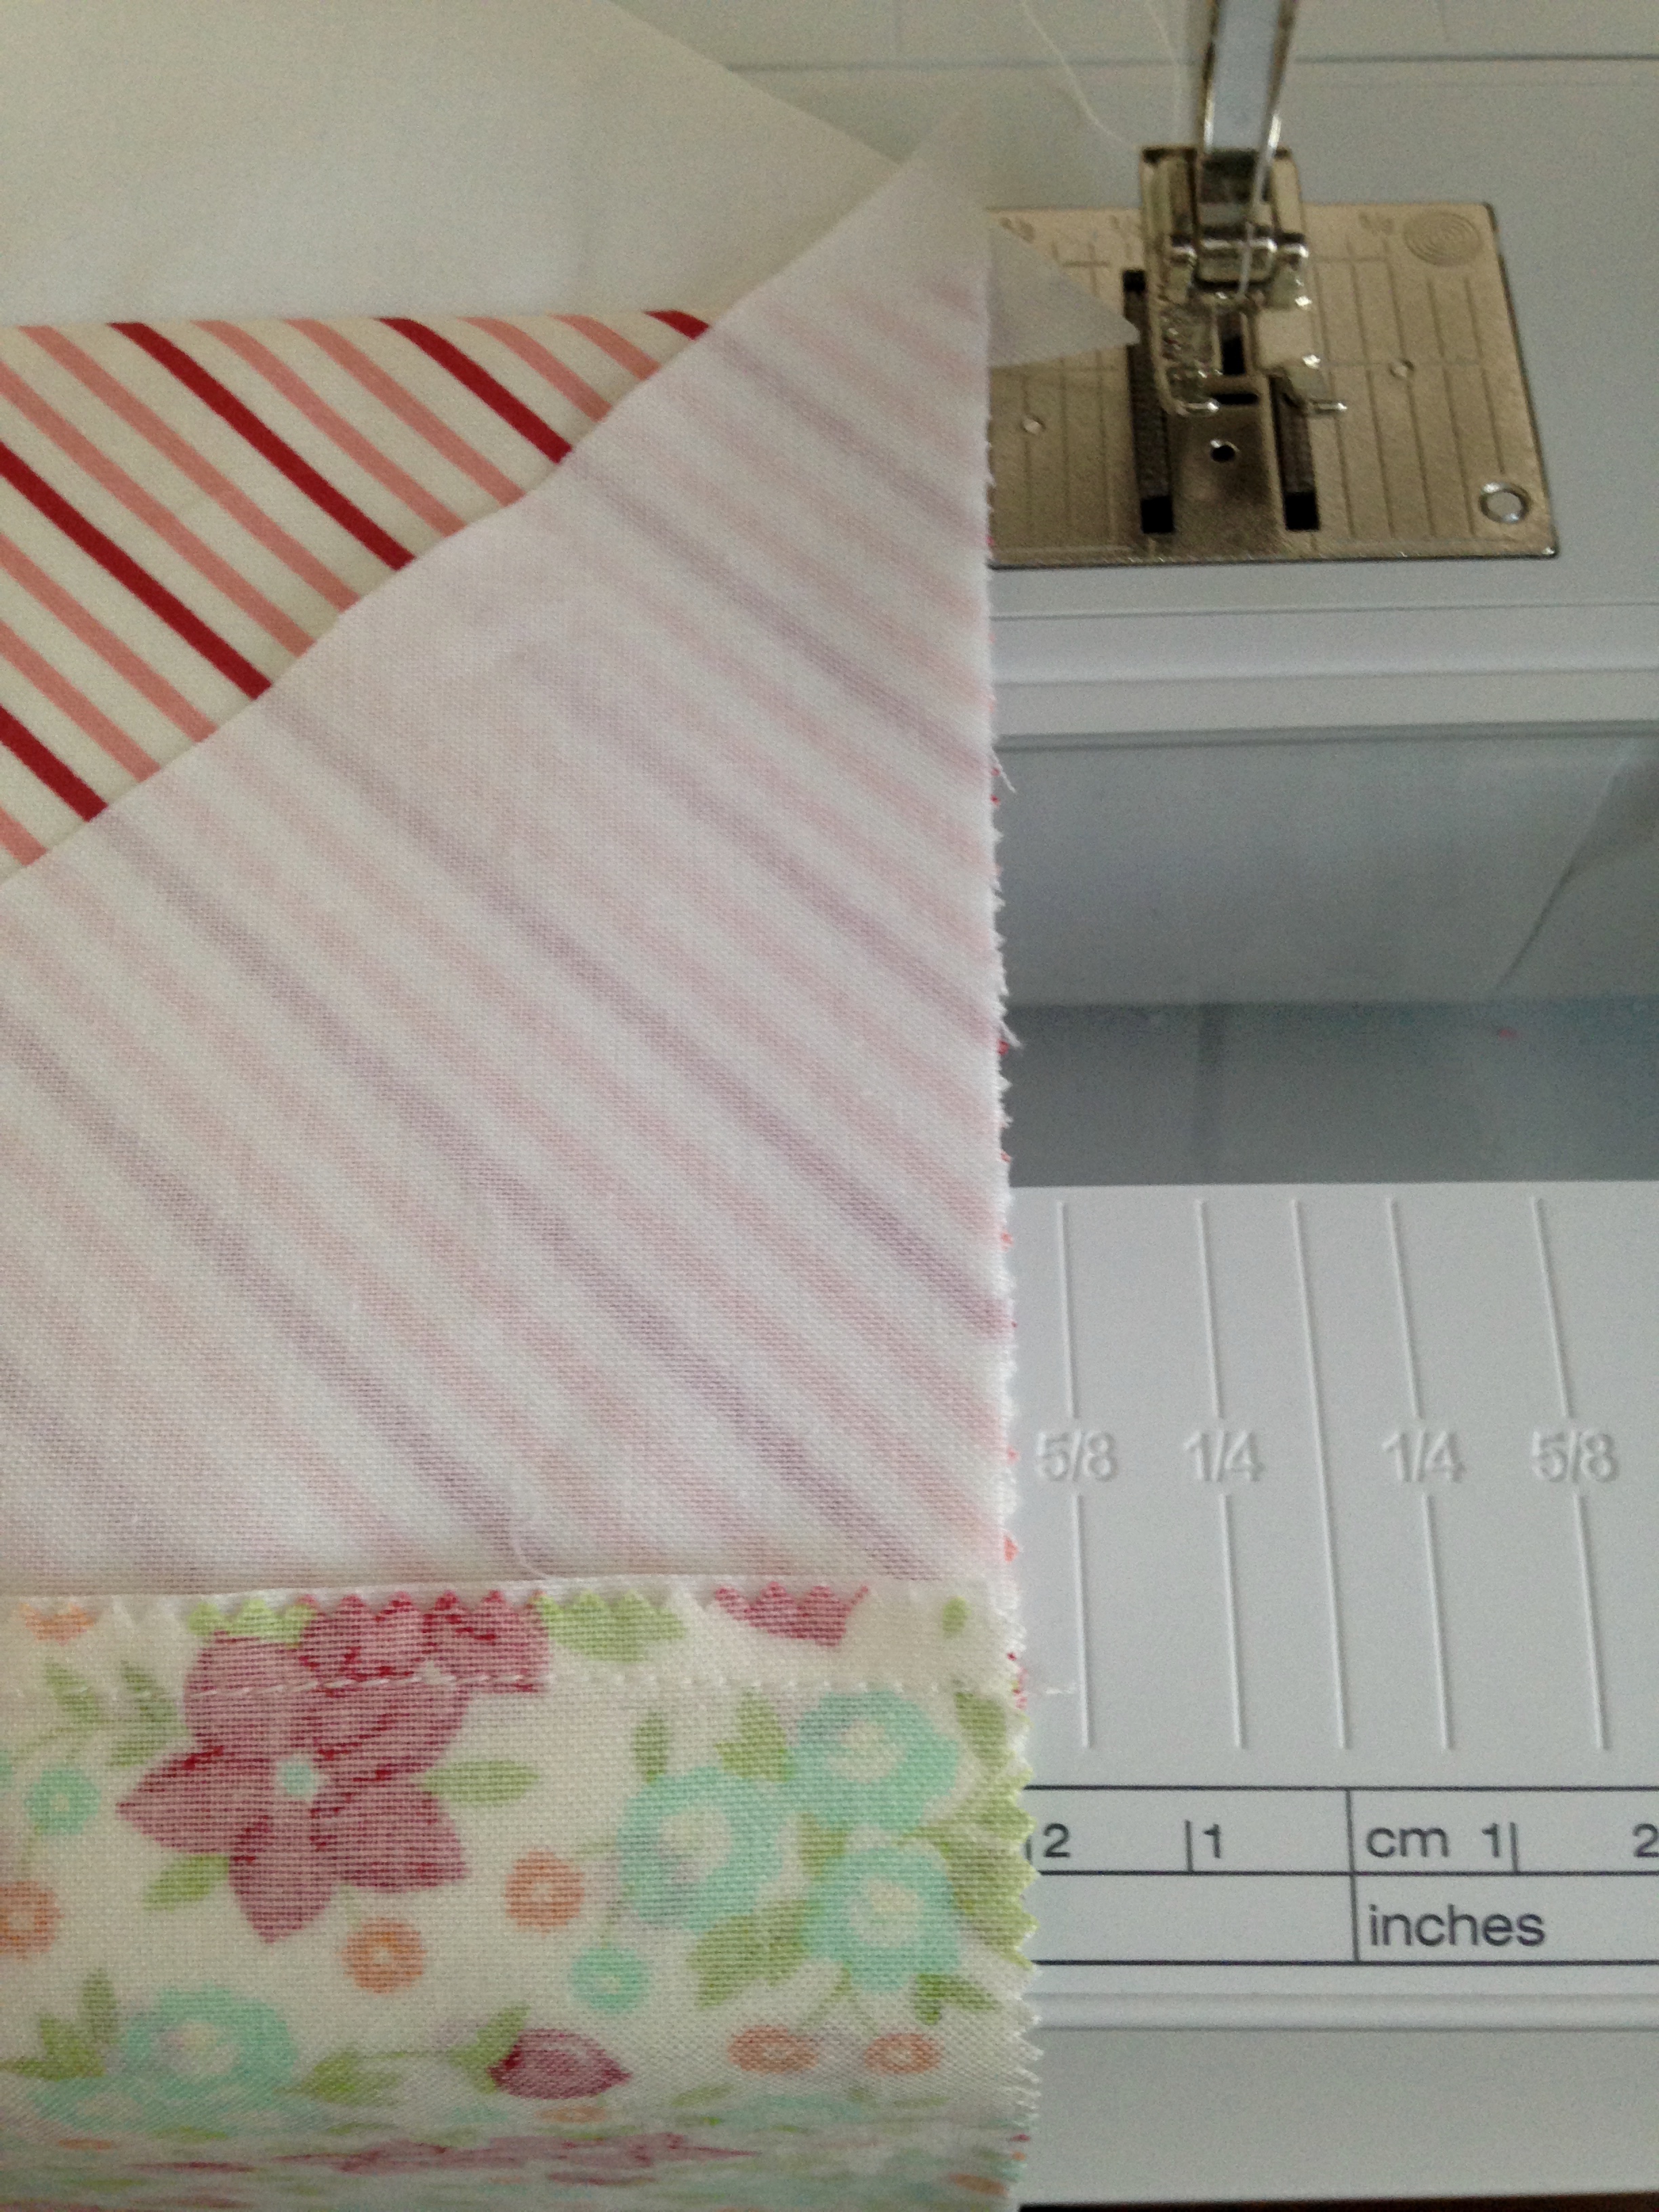
- Add the four corner triangles last. Press two corners away from the center and the other two corners in toward the center. (Press your block and your triangles in half to make sewing the corners on easier. No guessing where the middle of each piece is, the creases will line up with each other.)

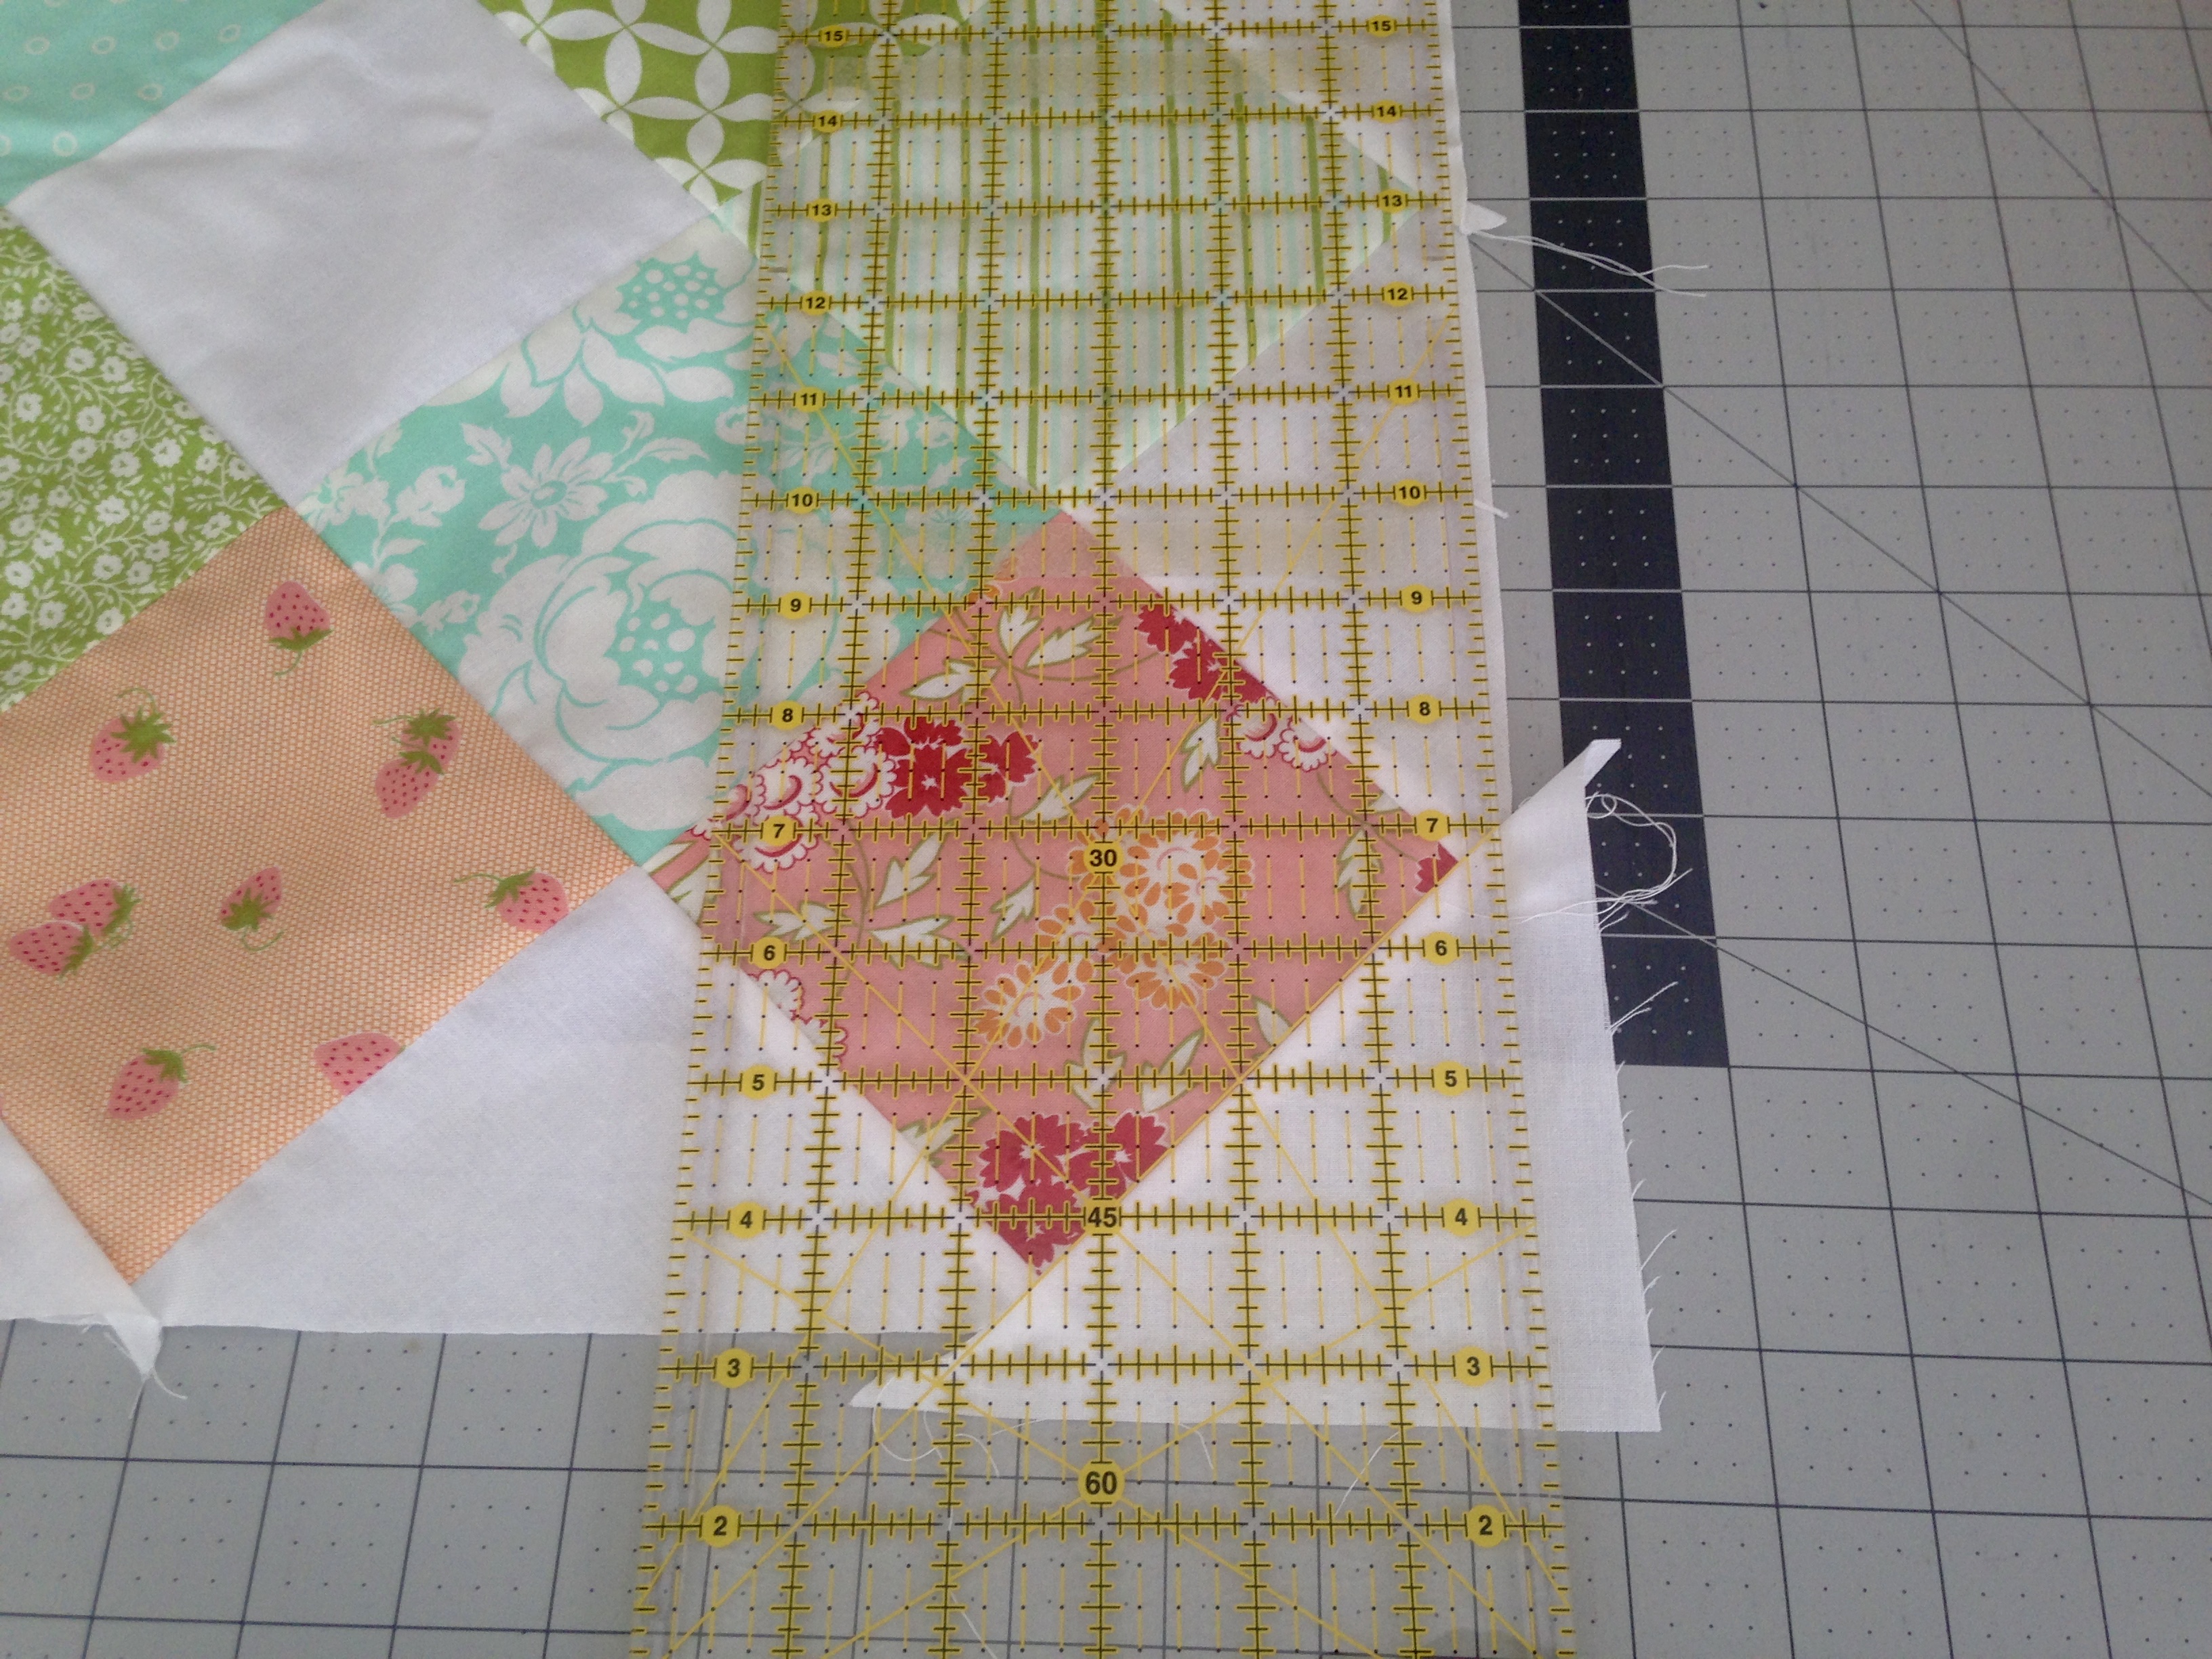
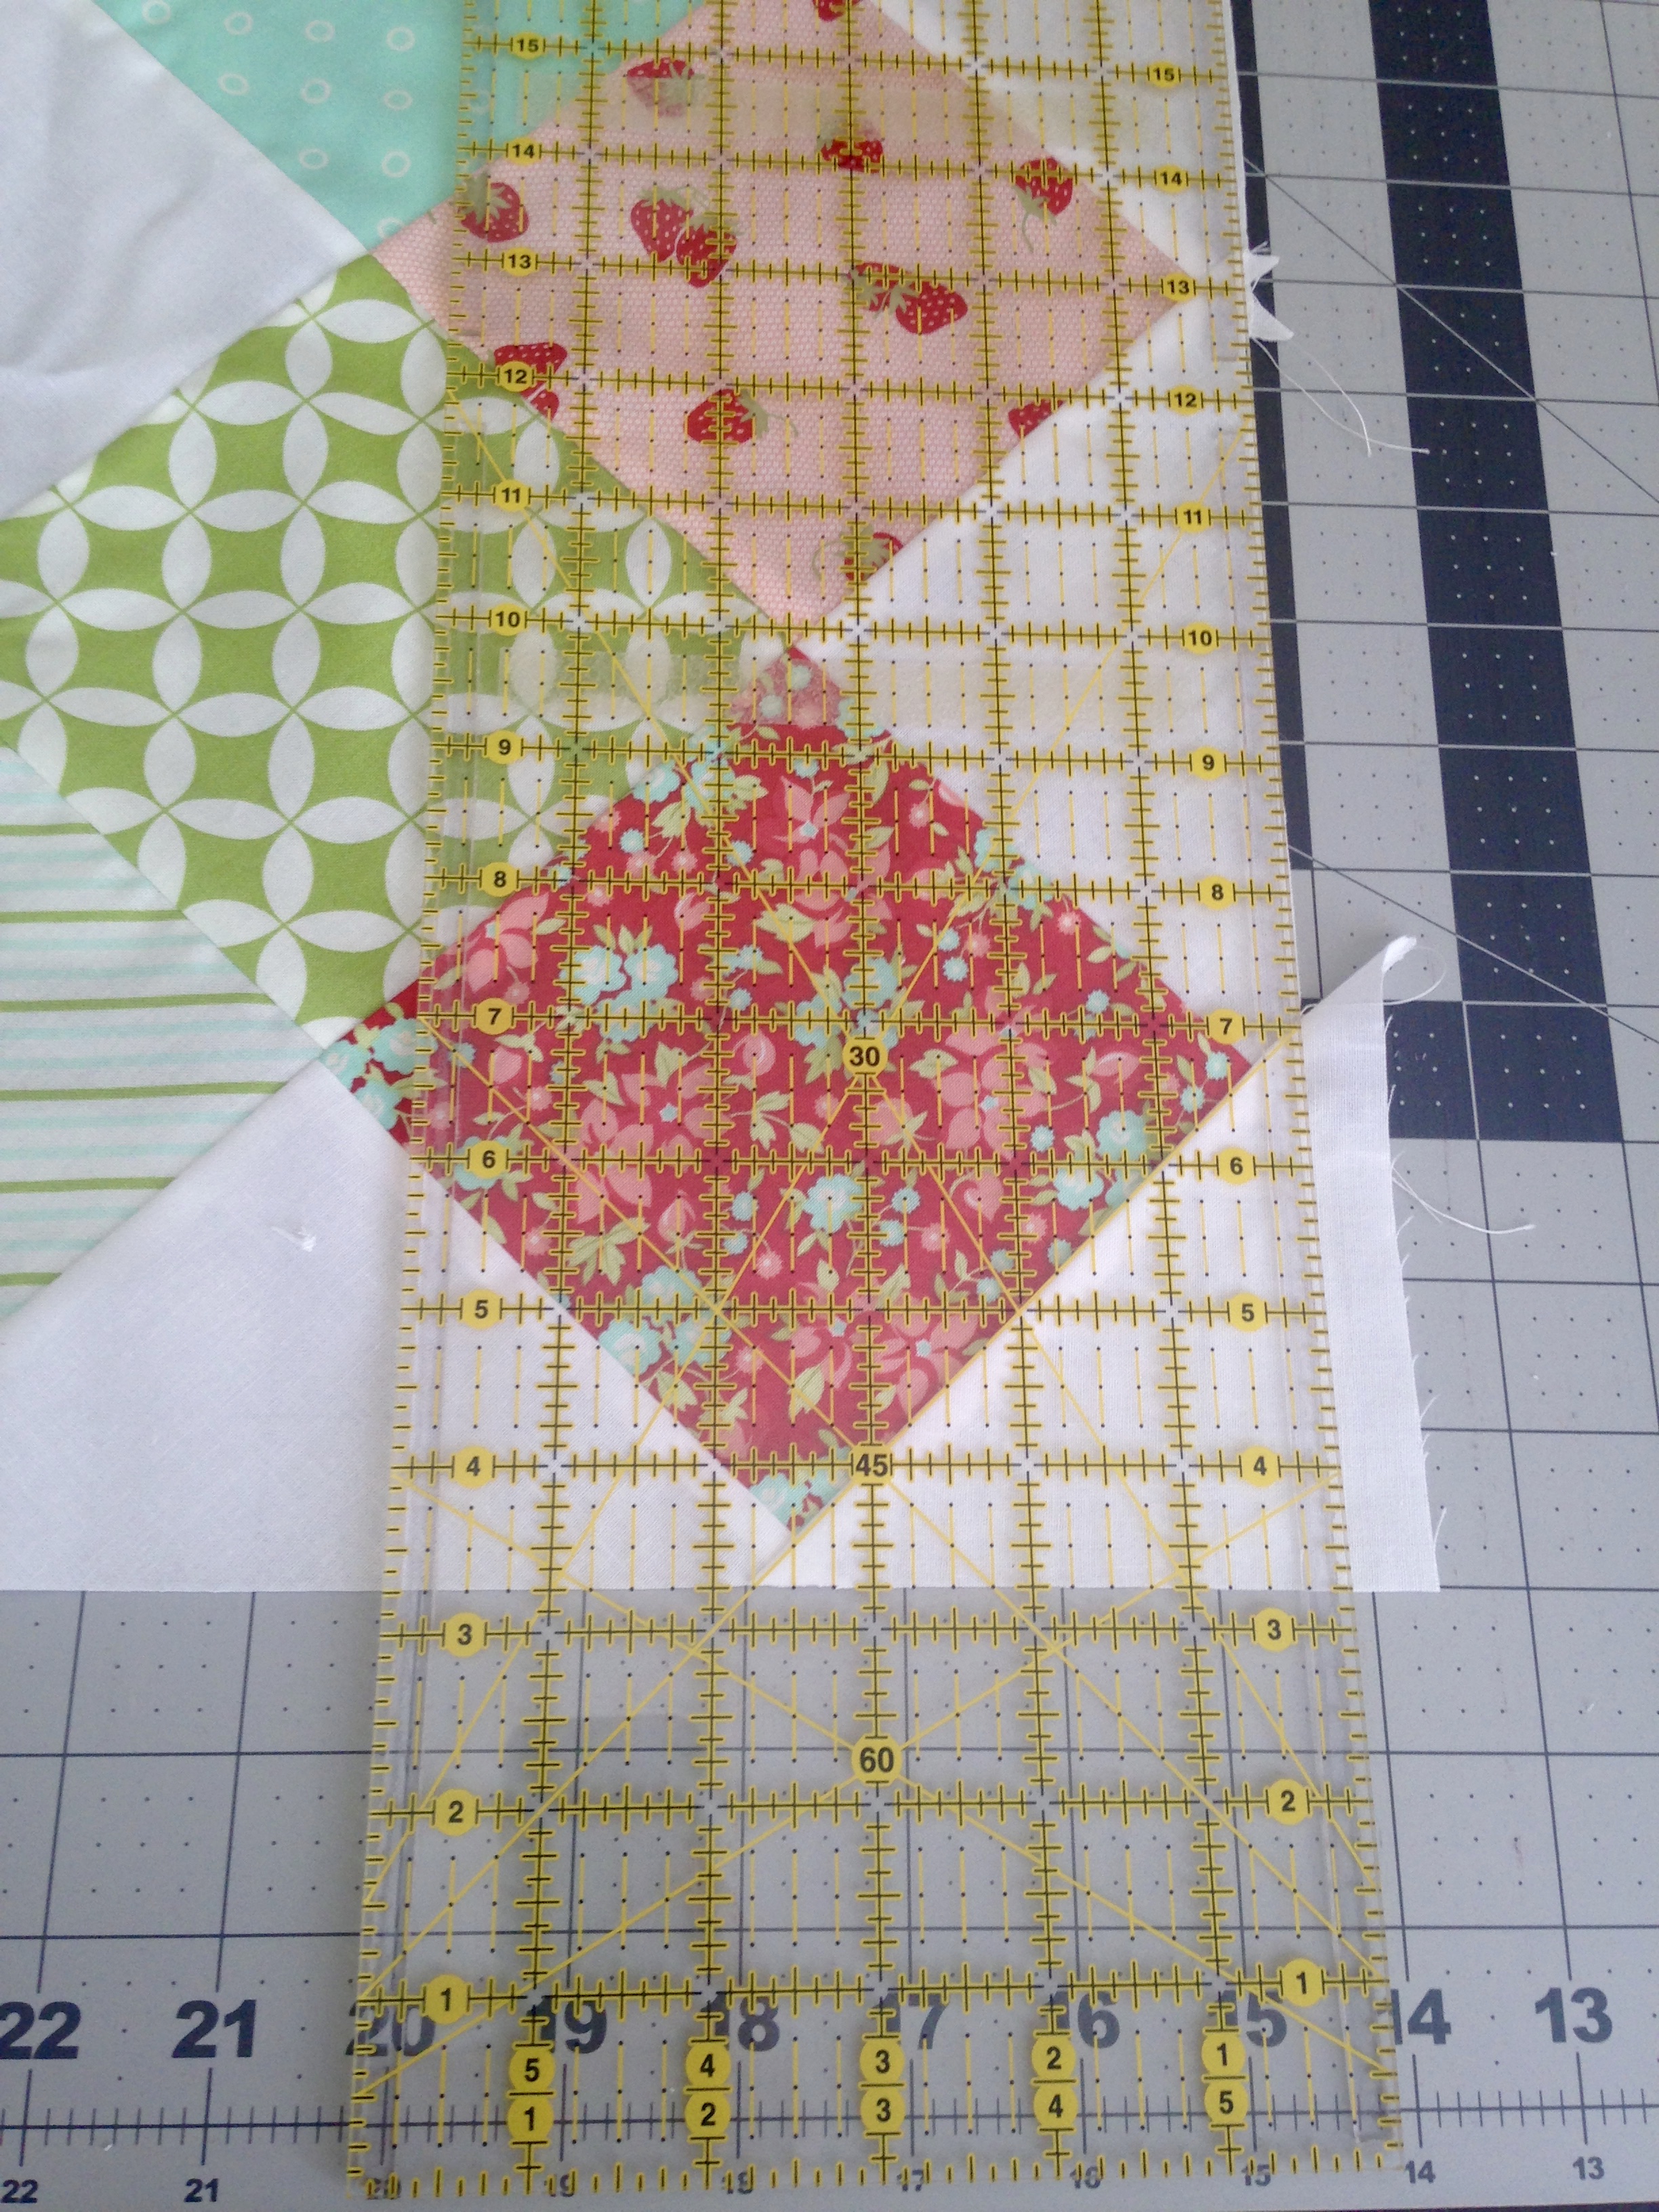
- Trim each block to 19 1/2" square. Line up the 45 degree line on your ruler with the corner seam and straight edge with the side of your block, making sure you have 1/4" past your points, trim. Rotate your block and do the same for all four sides.

Quilt Layout:
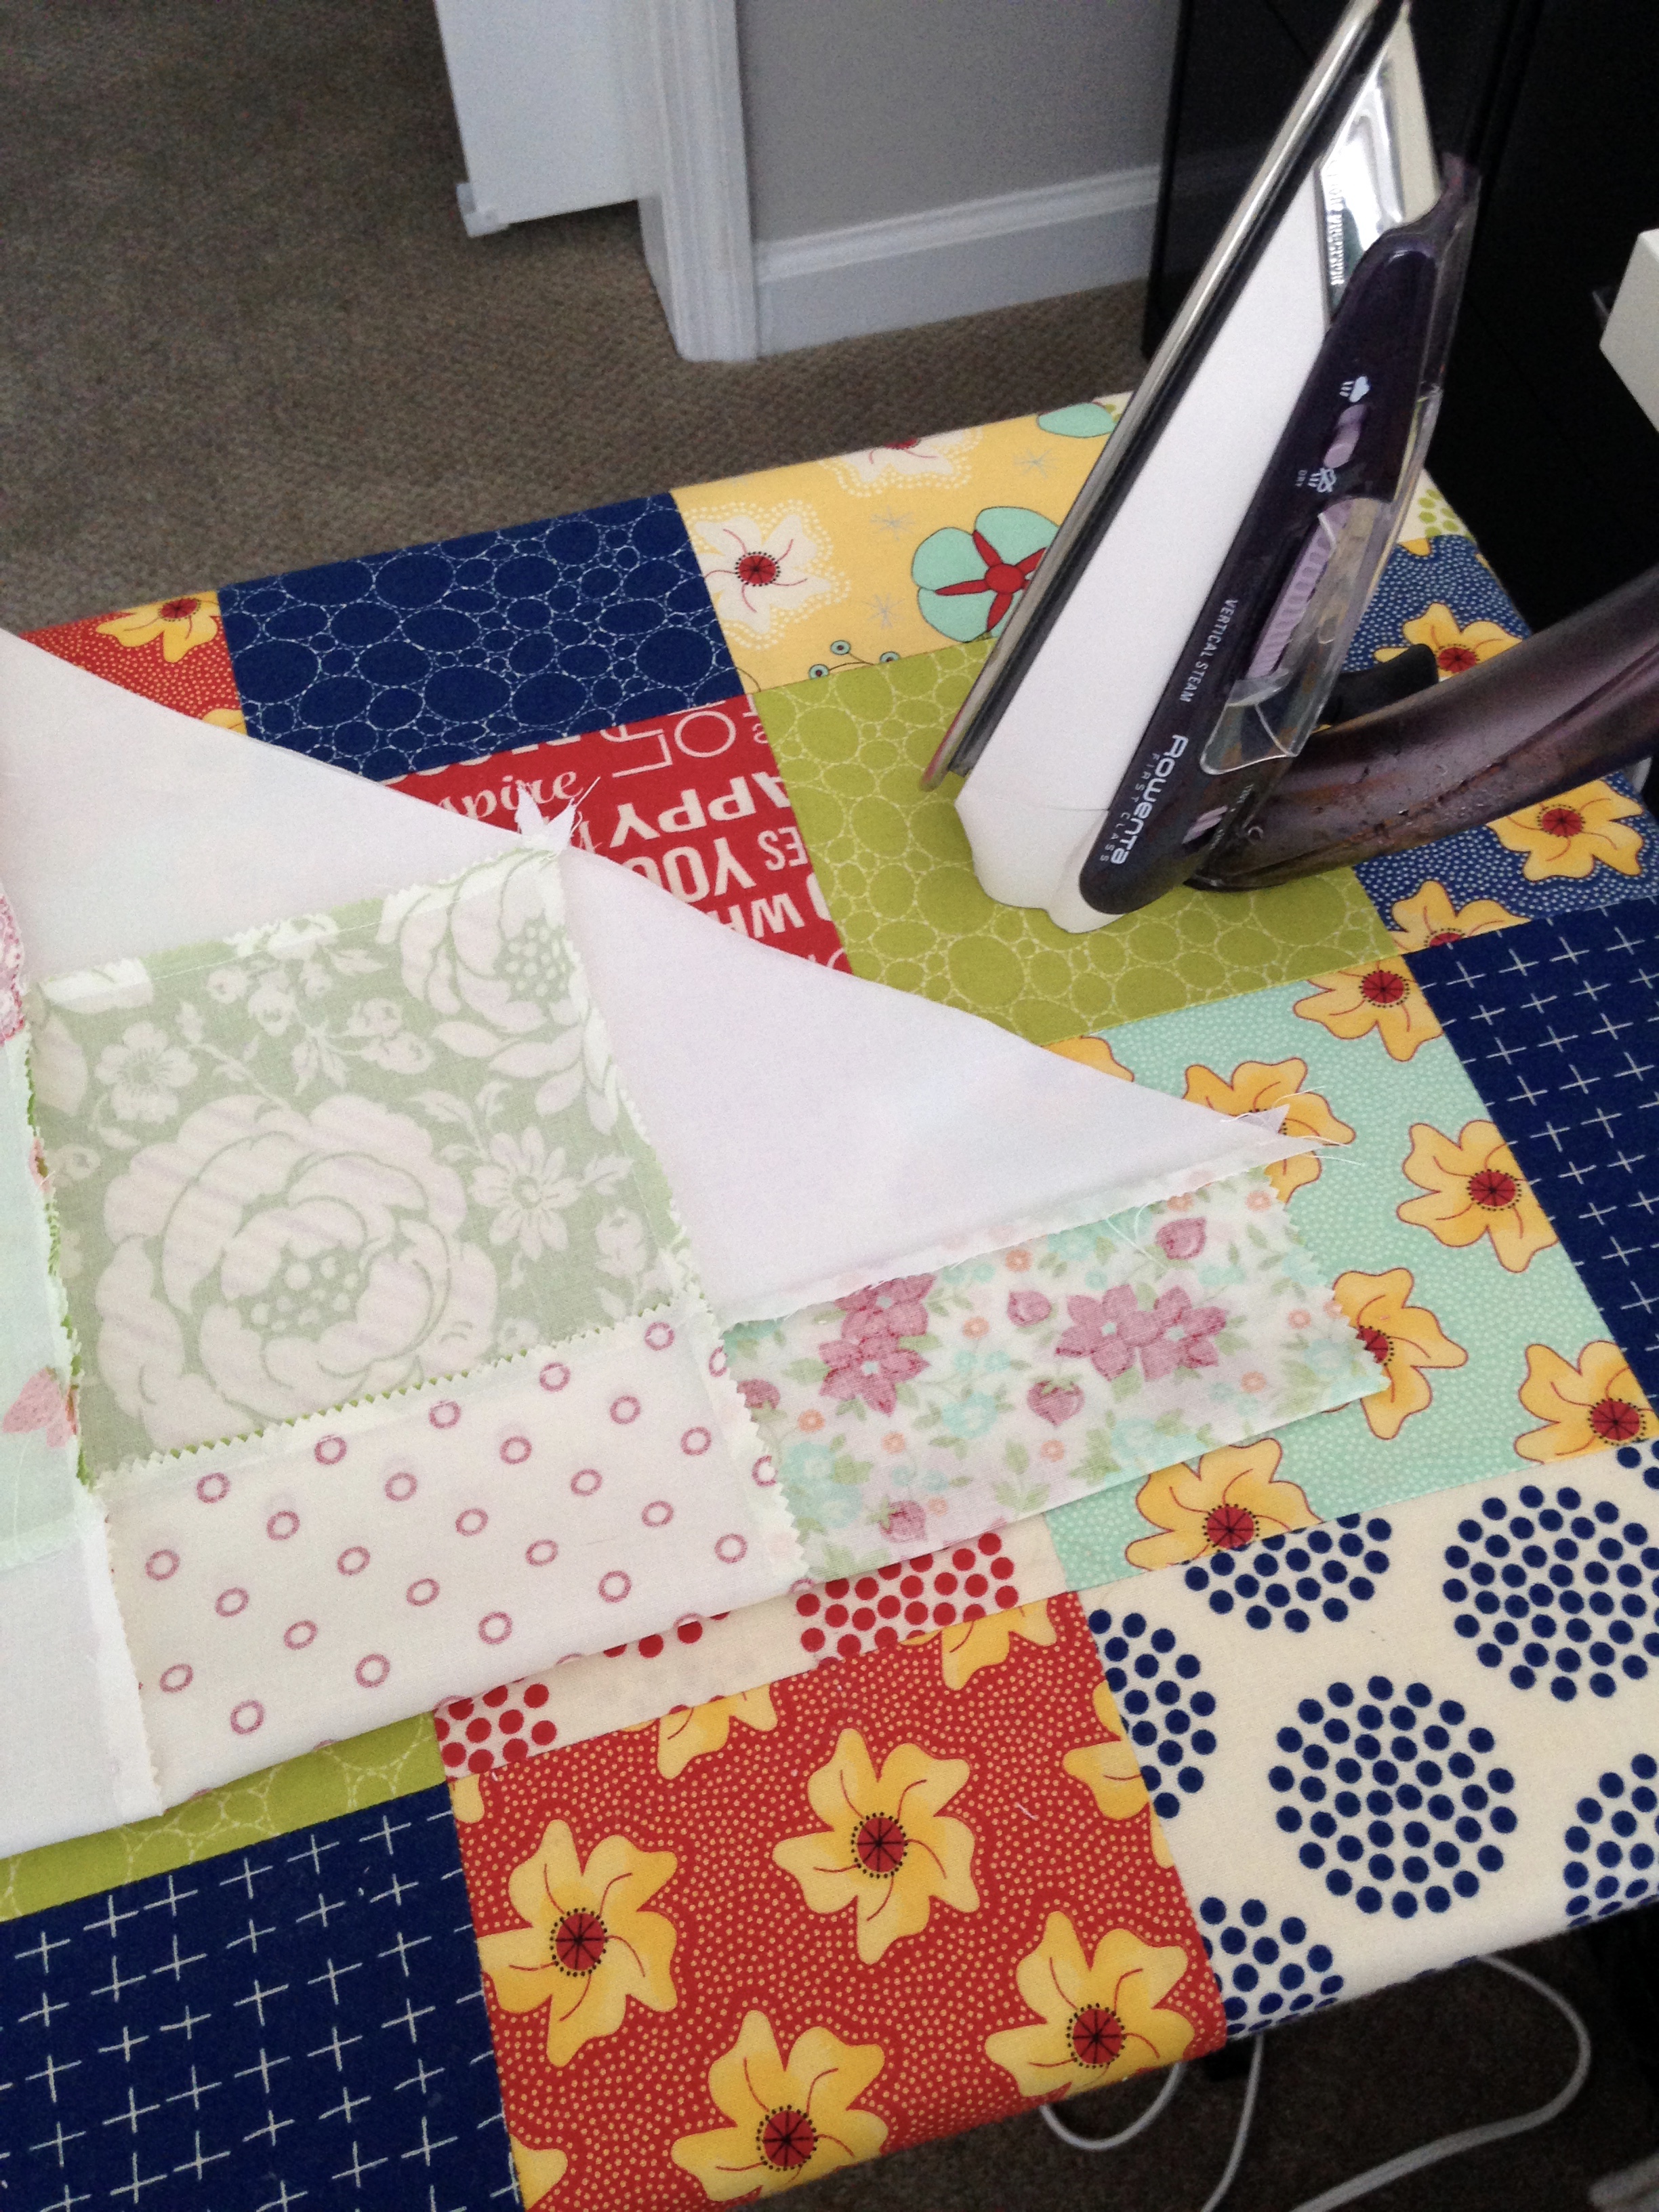
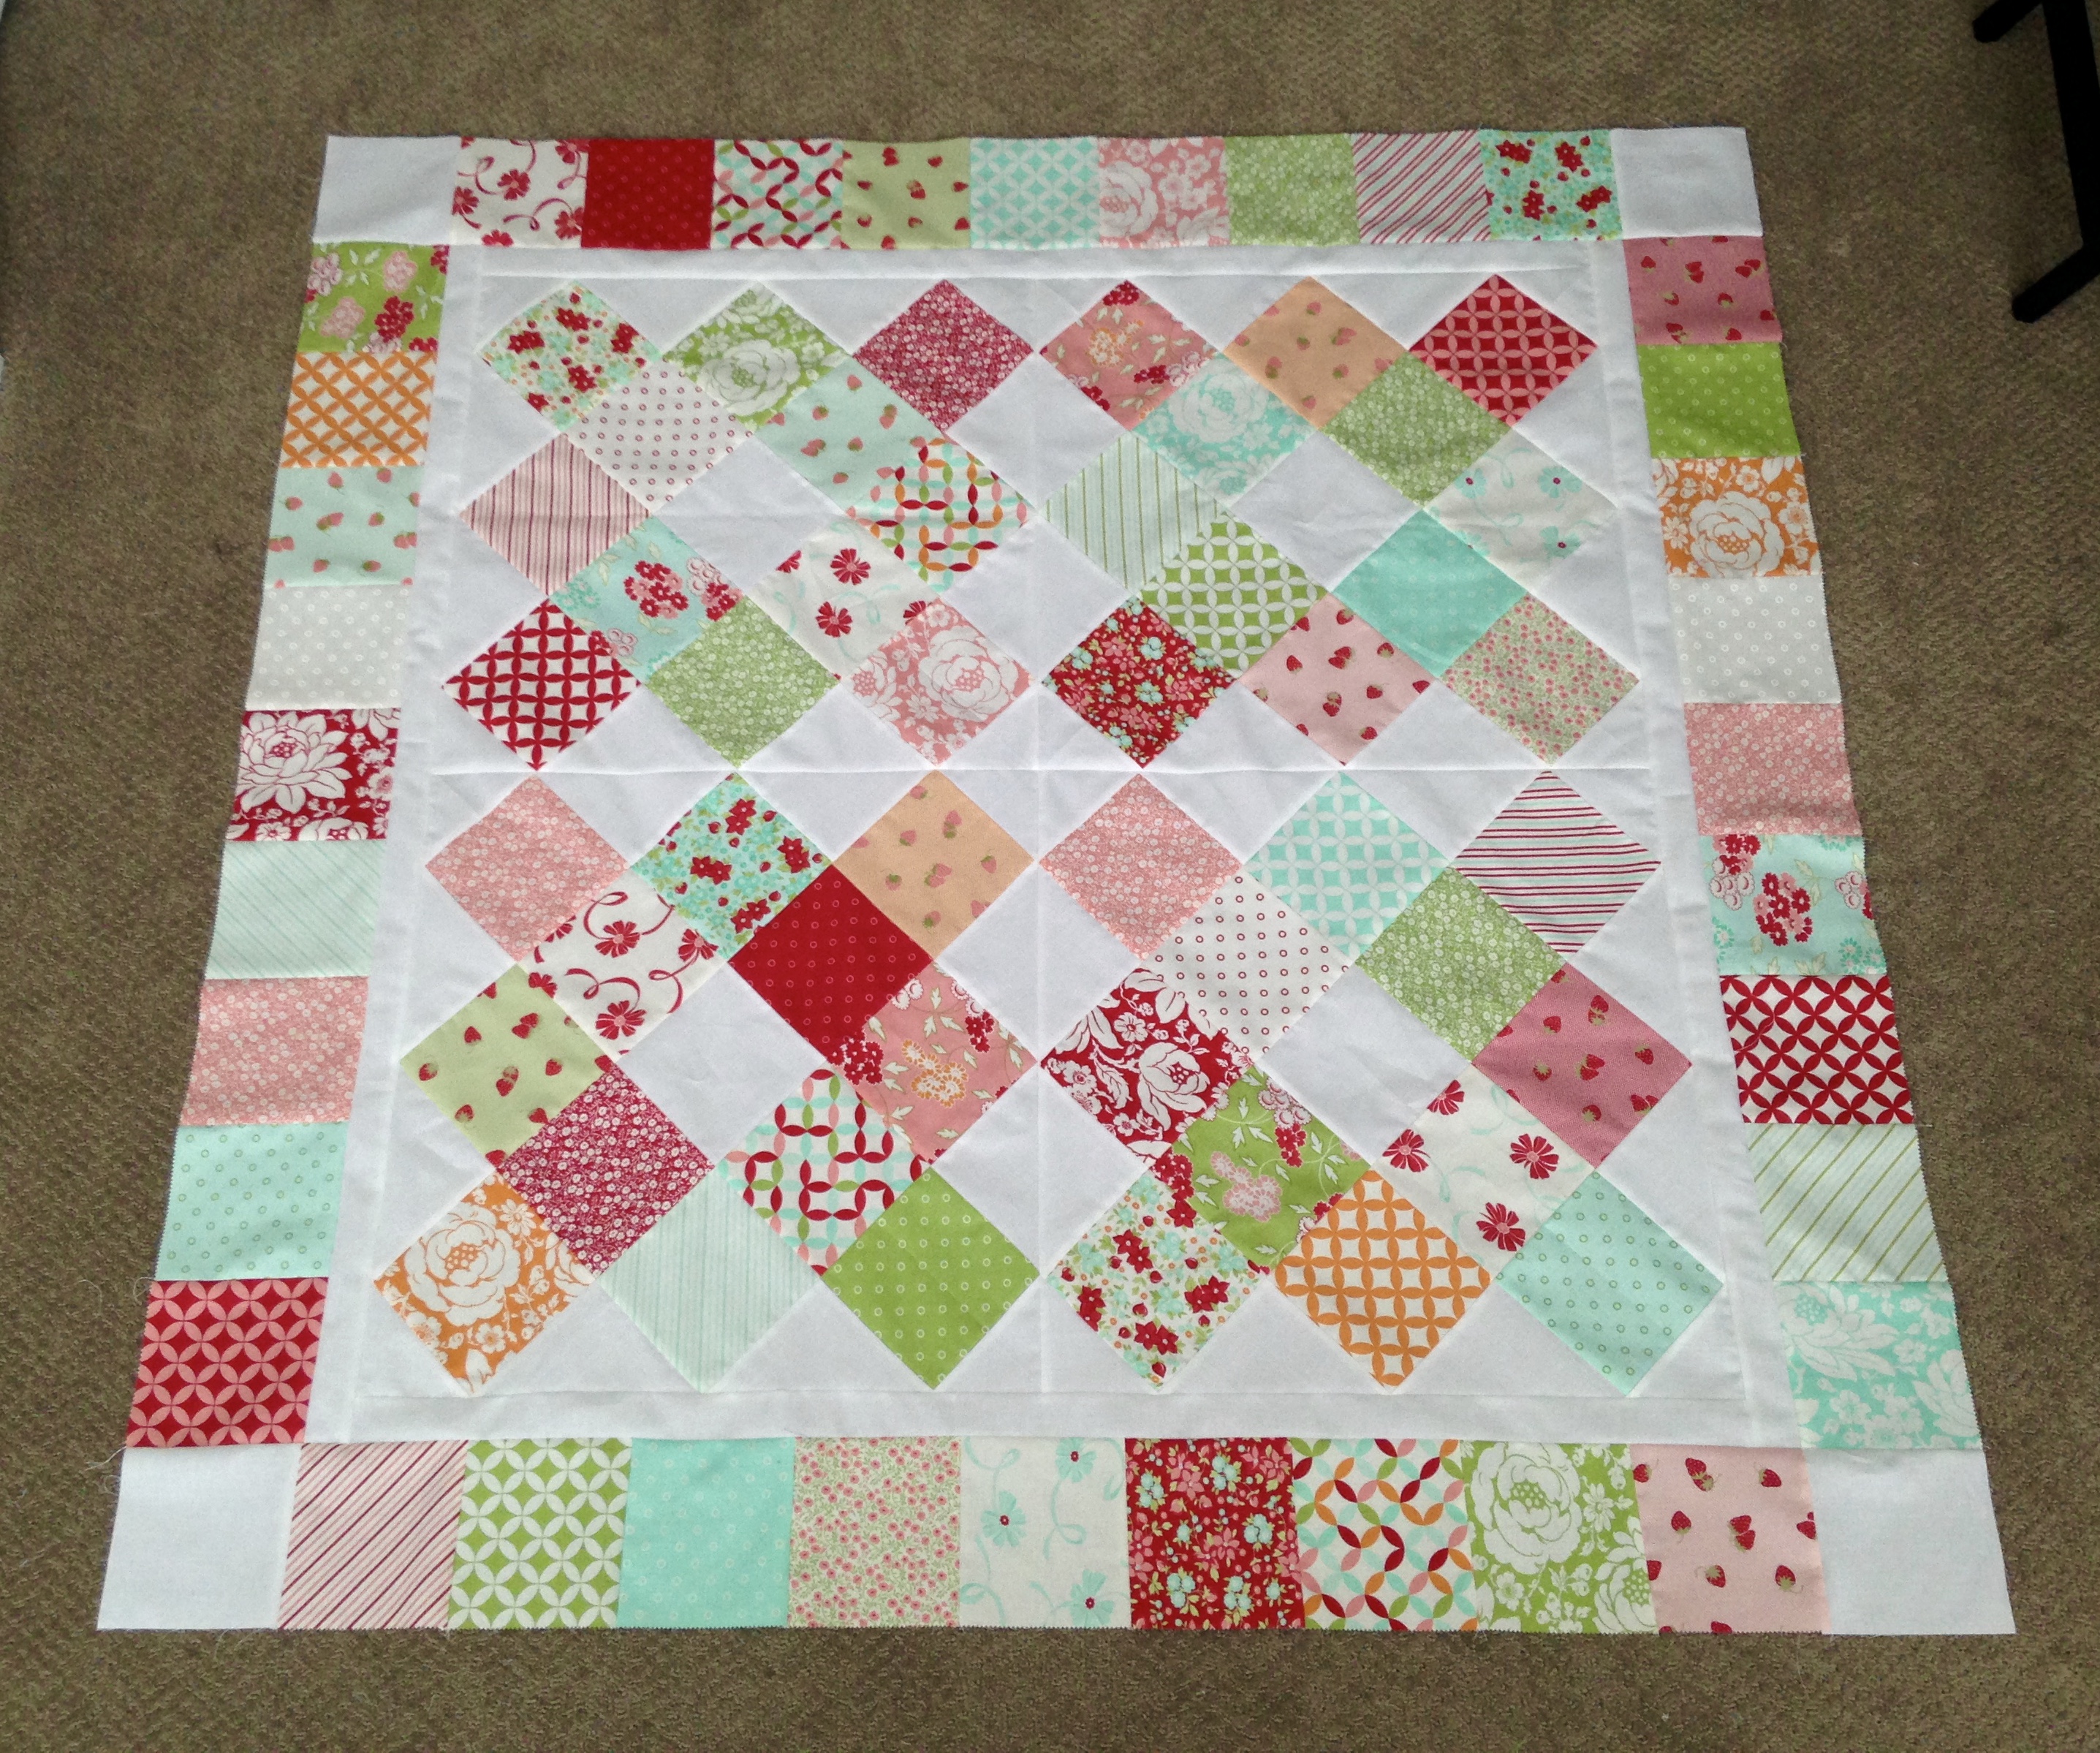
- Arrange your 4 blocks together, turning each so that your seams will nest on the corners. Pin and sew your blocks together pressing the top row to the left and the bottom to the right.
- Pin and sew the two rows together, pressing down. Your top should measure 38 1/2" x 38 1/2".
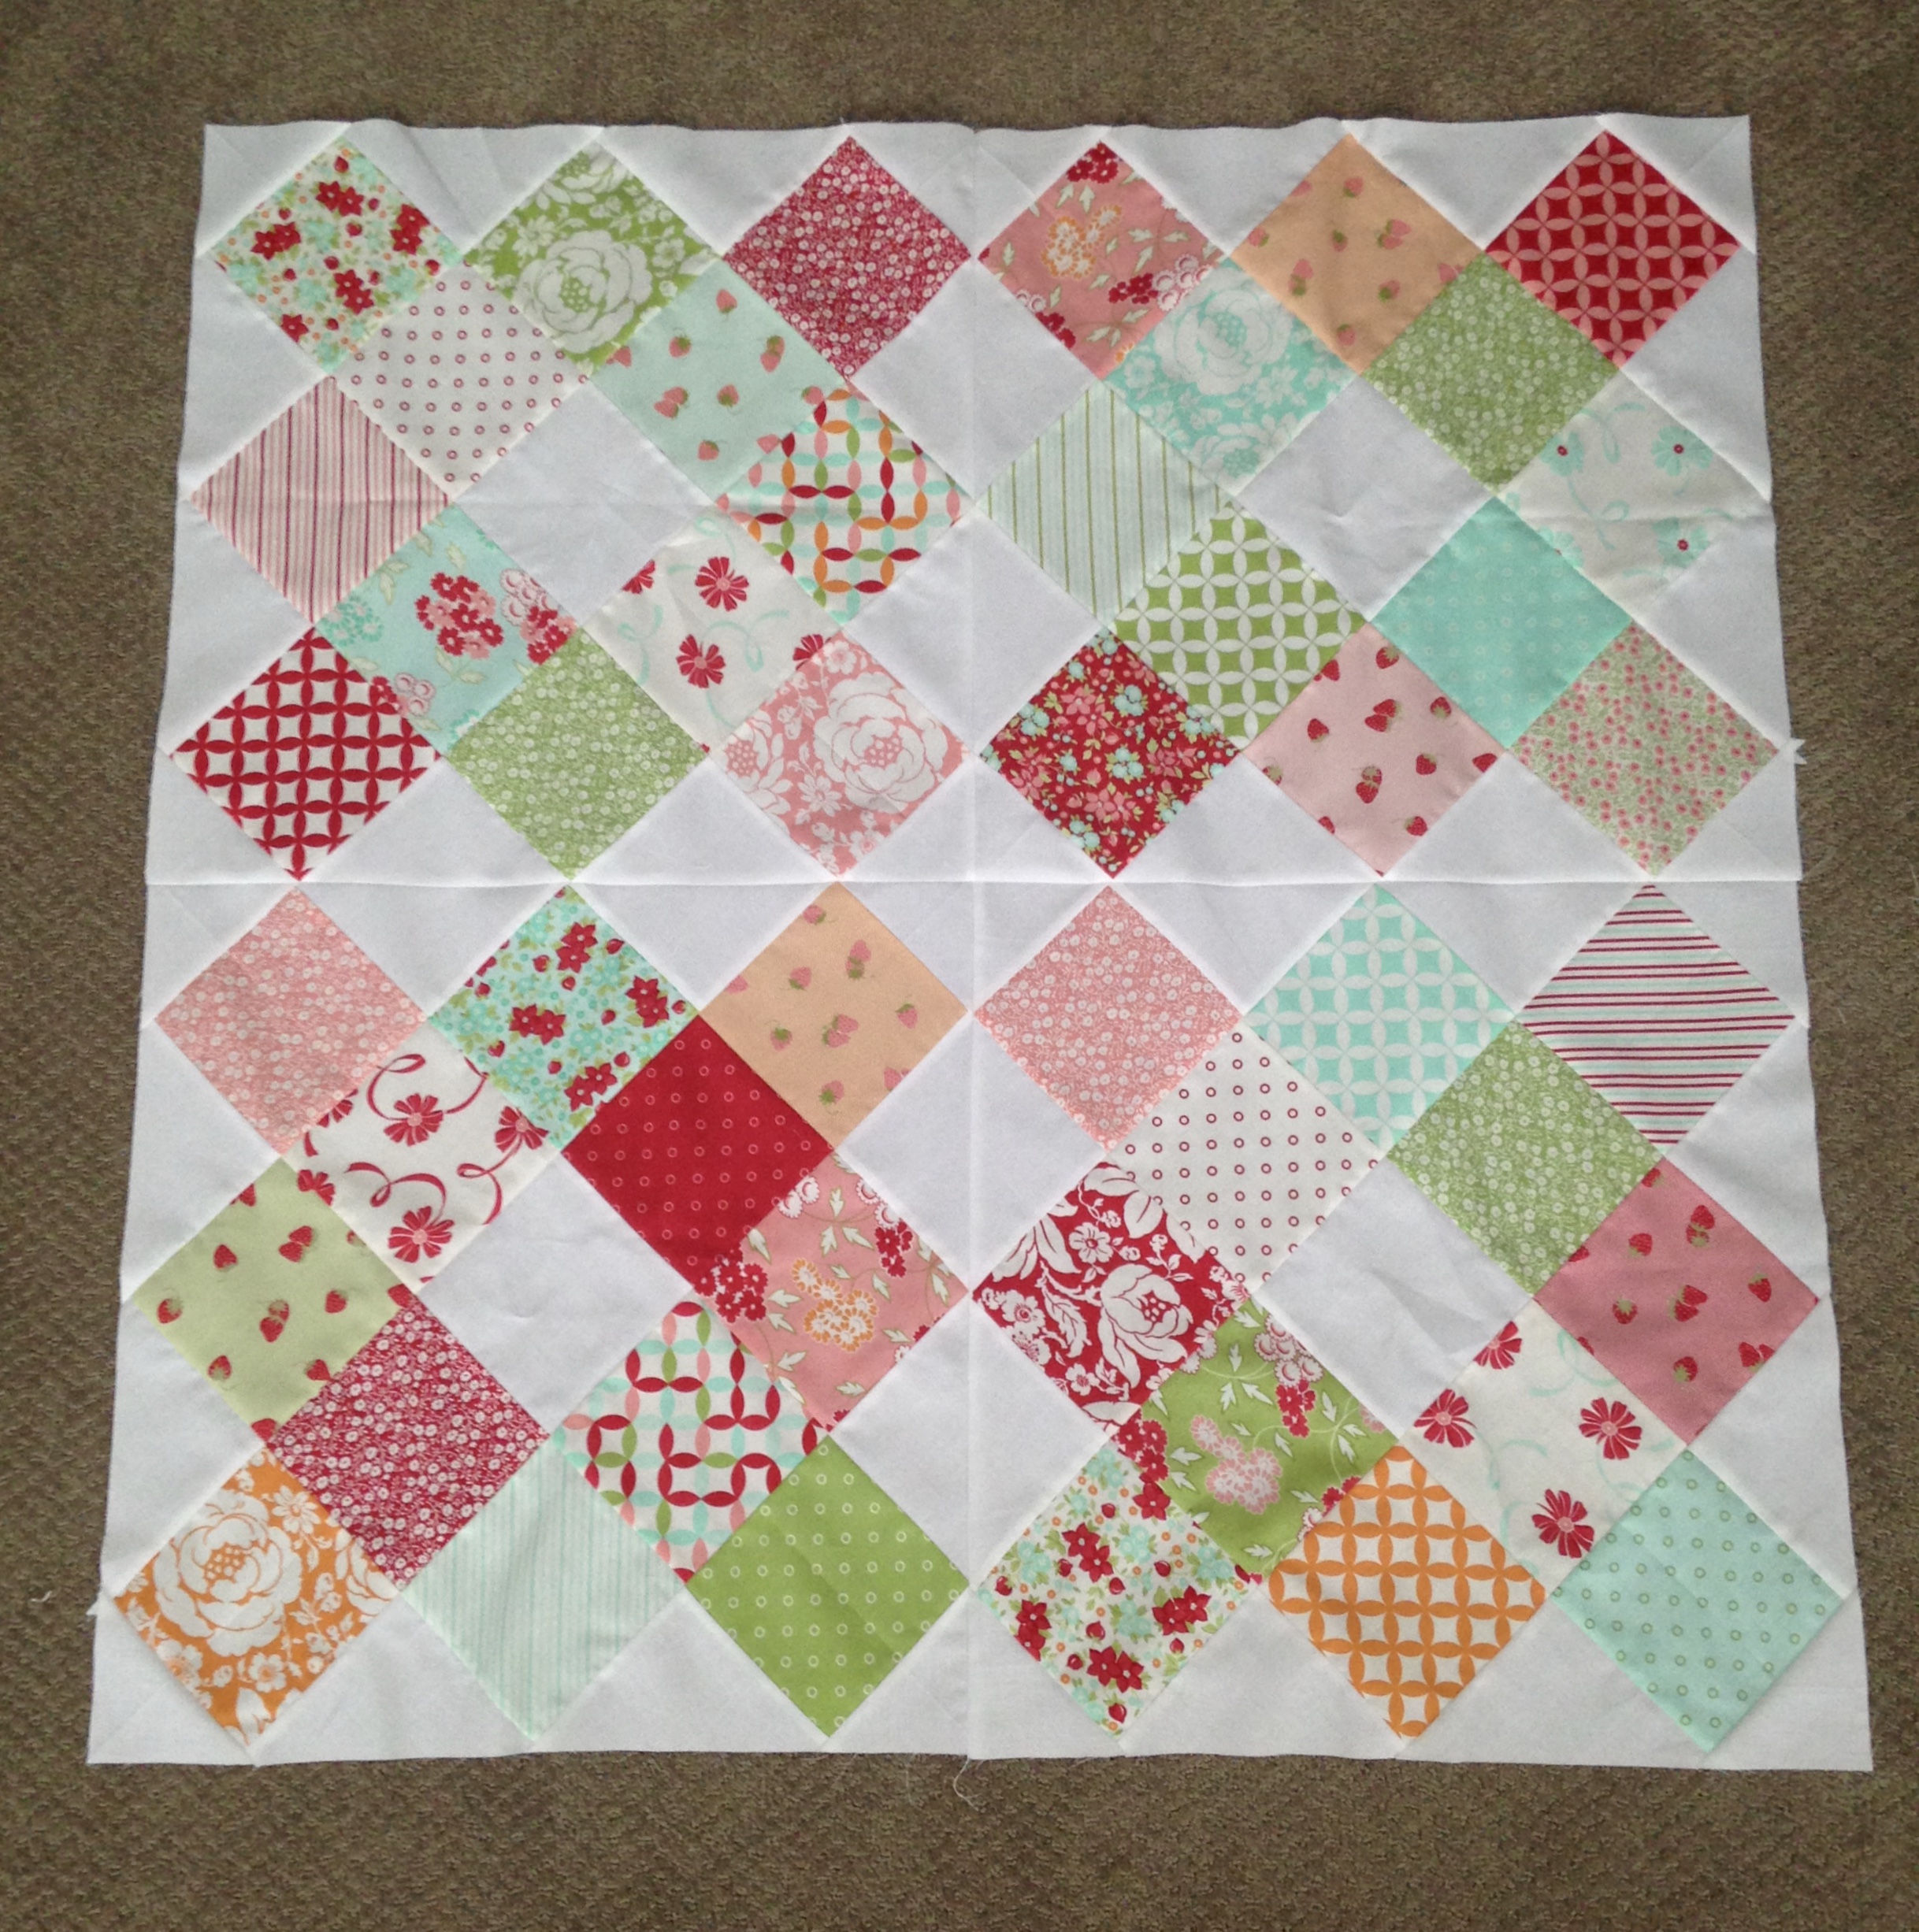
- Attach the small inner background border to your top, pressing toward the border. Your top should measure 41" x 41".
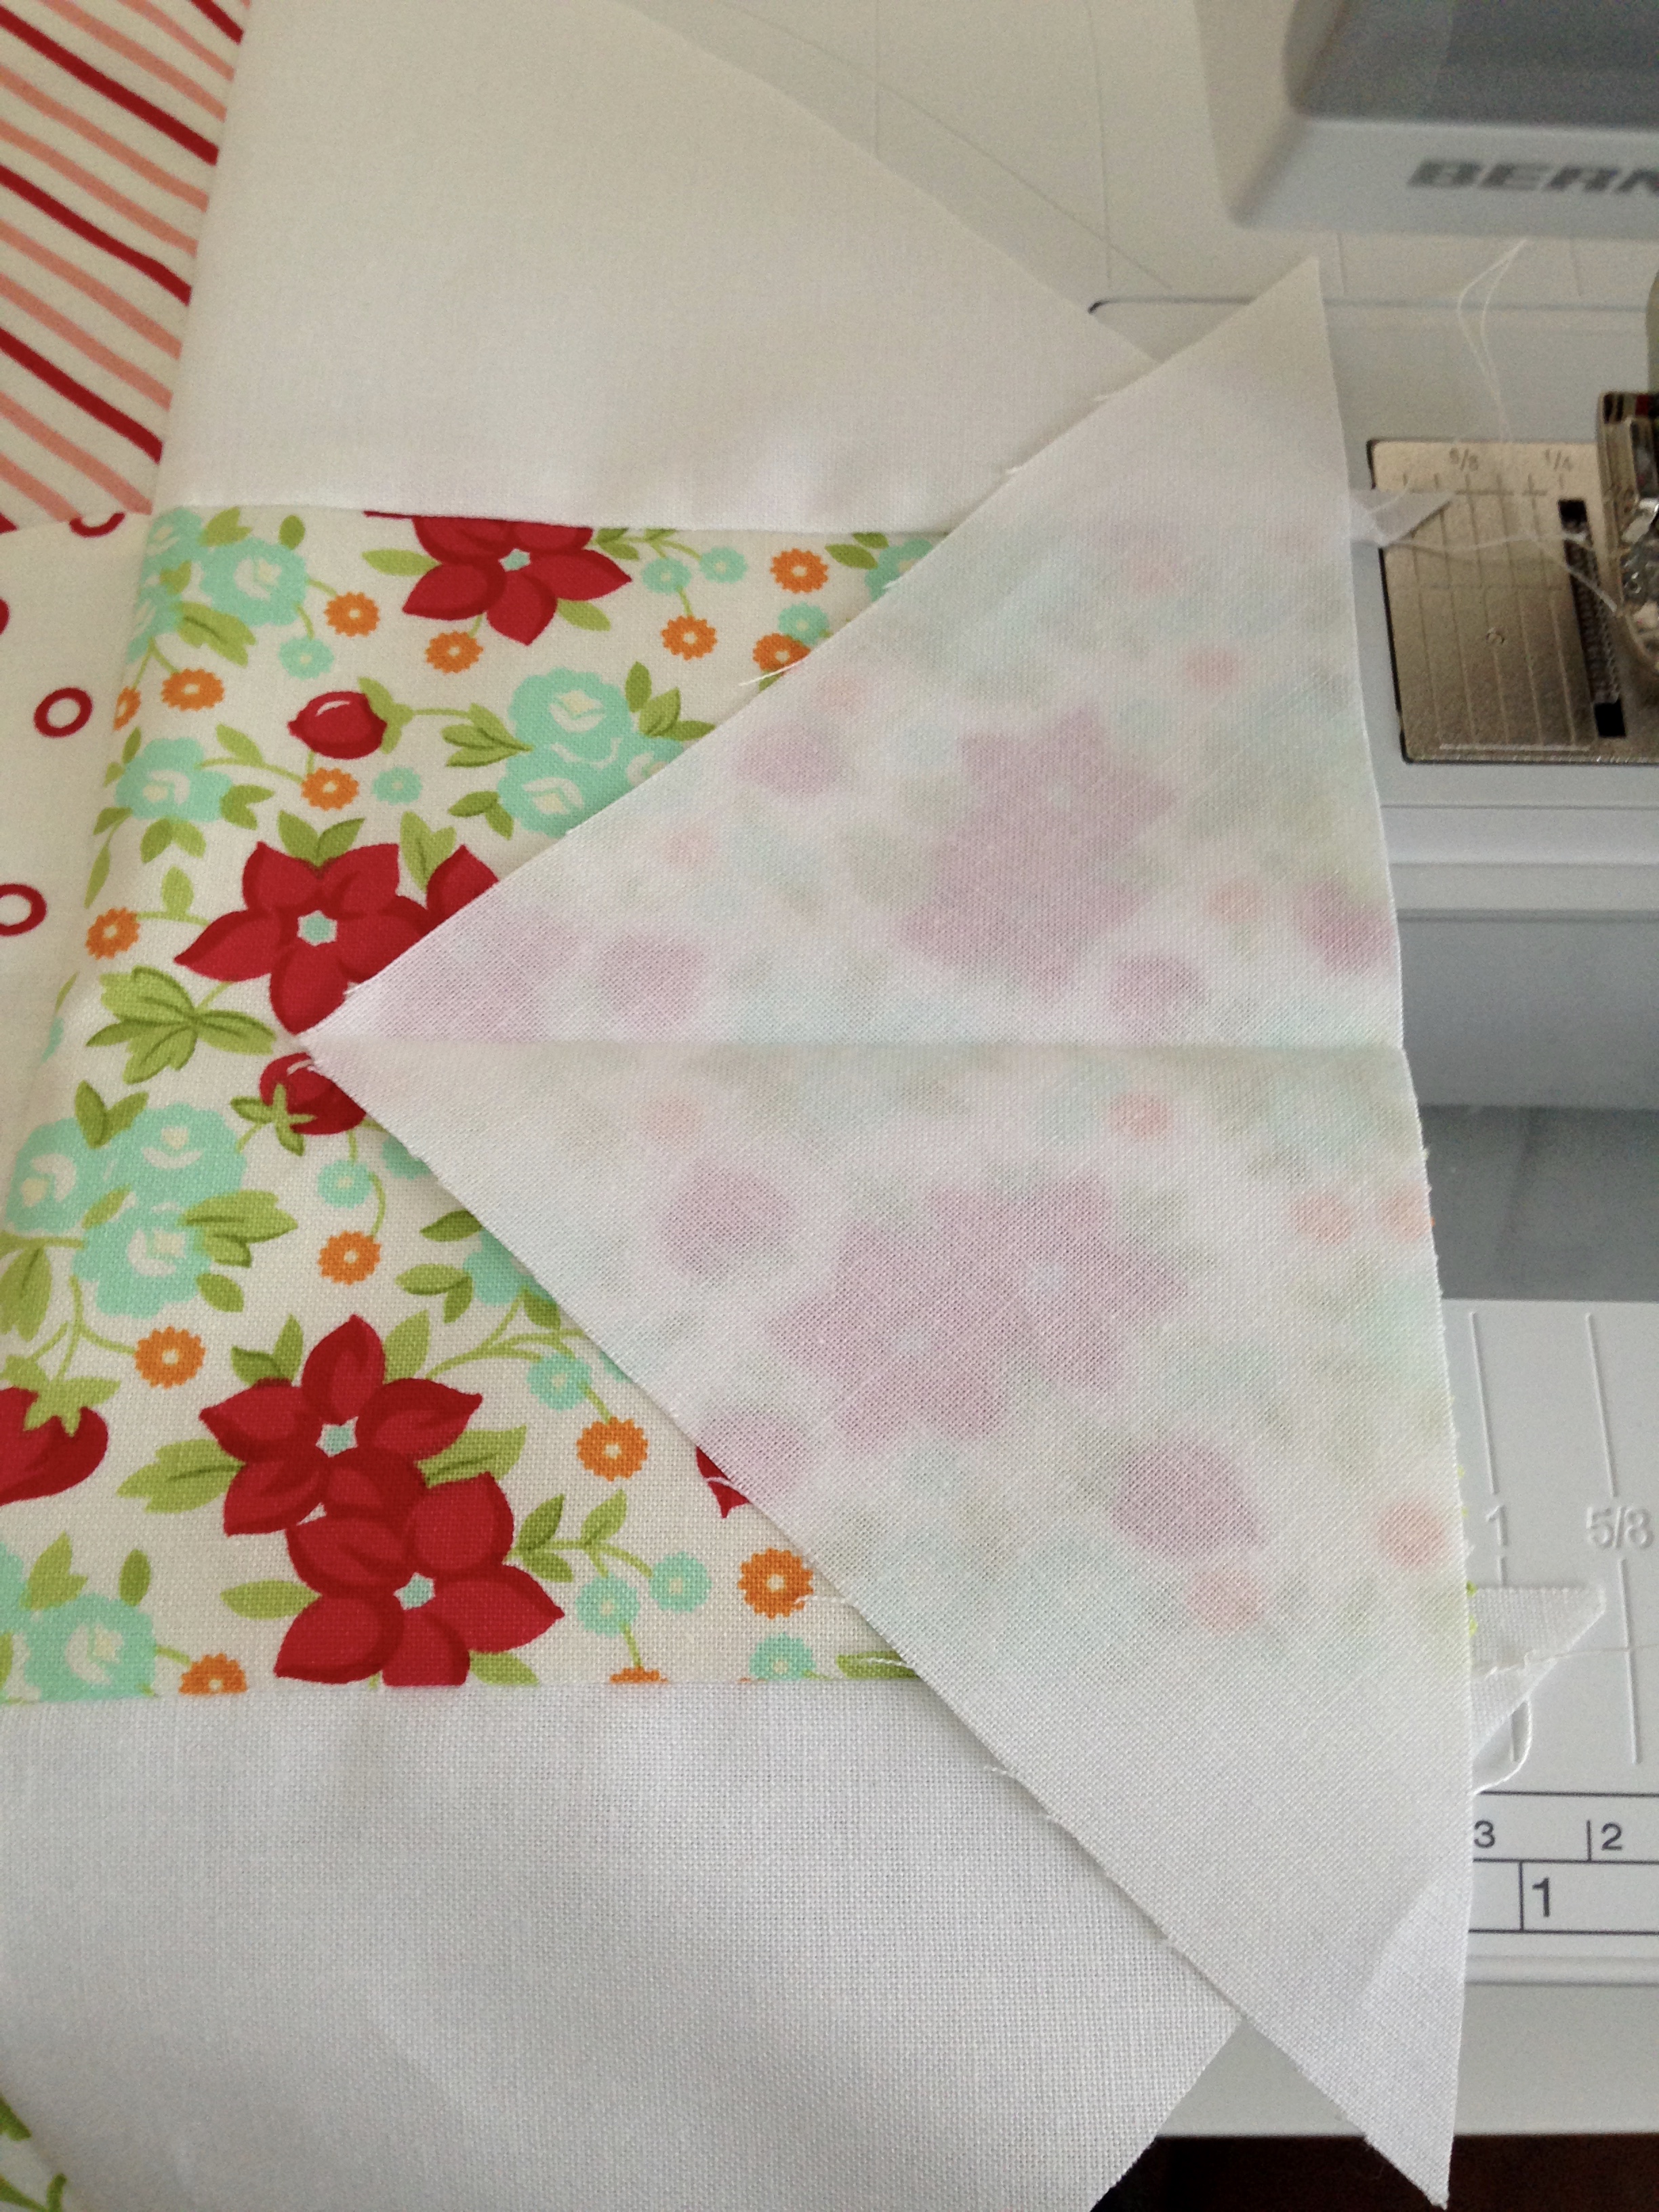
- Take your remaining charm squares and piece together 4 sets with 9 each, pressing in one direction. Add your 5" background squares to the ends of 2 sets.
- Attach your pieced borders to your top, pressing toward the border.
Quilt, Bind, and Enjoy!
![]()
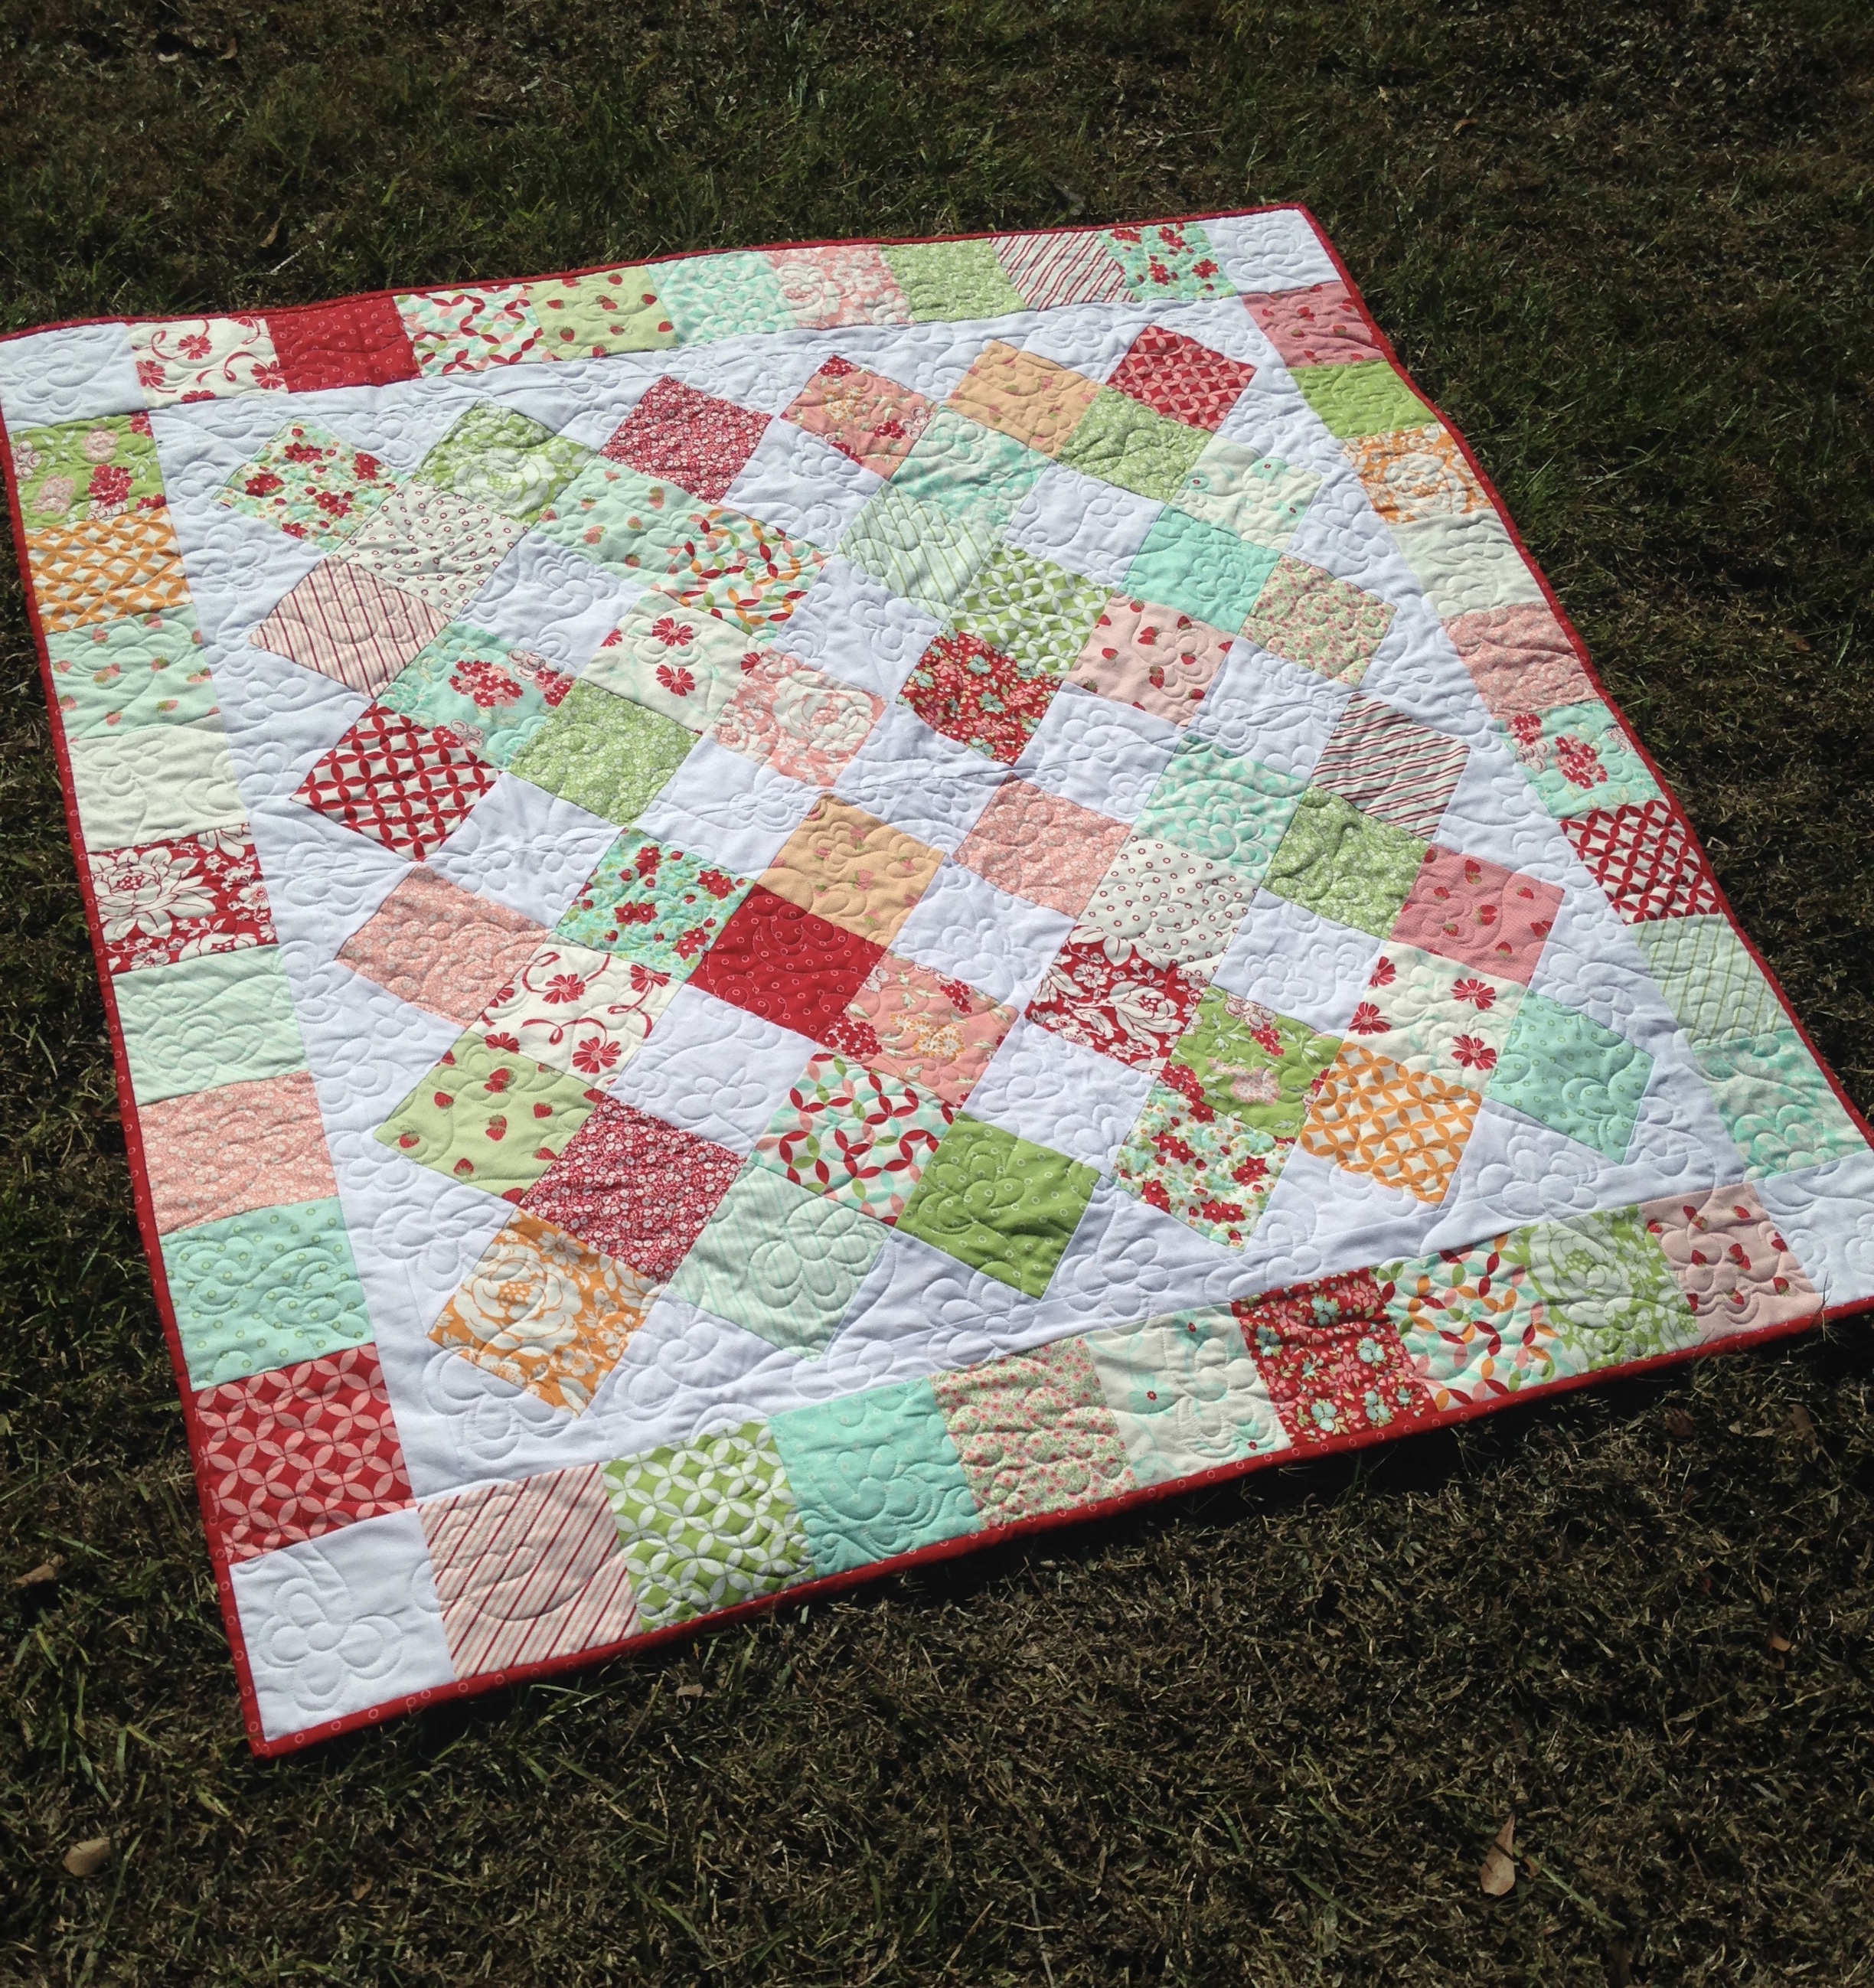
One 50" x 50" cozy lap quilt perfect for snuggling, napping, or even a picnic! I would love to see your Darling Granny creations, just tag me on Instagram @sterlingquiltco using #darlinggranniesquilt.
Sterling LaBosky
{Sterling Quilt Company}
![]()
Posted in: