Welcome to Moda Fabrics!
QAL - Cut, Sew, Press, Repeat
QAL - Cut, Sew, Press, Repeat
Published:
Feb 28 2016 - 11:52


Have you been quilting along with the Moda Bake Shop and having as much fun as I have? These letters are just perfect and a lot of fun to make. I really wanted a new wall hanging for my sewing room, so decided to piece the words "Cut, Sew, Press, Repeat". Of course if I used the full sized letters, that wouldn't really work as a wall hanging! As a result, I made my letters at half the size called for in the patterns. If you are interested in doing the same thing, I have shared instructions for making the smaller letters on my blog here. And given my sewing themed words, I thought I should include a couple of sewing related blocks :) Today I am sharing paper pieced templates to create the Scissors block as well as the Striped Star block. Simply click on the block names to download the pdf template.
This quilt finishes at 25" x 35.5".
![]()
Both of my filler blocks are foundation paper pieced, so I am including some basic paper piecing instructions below.
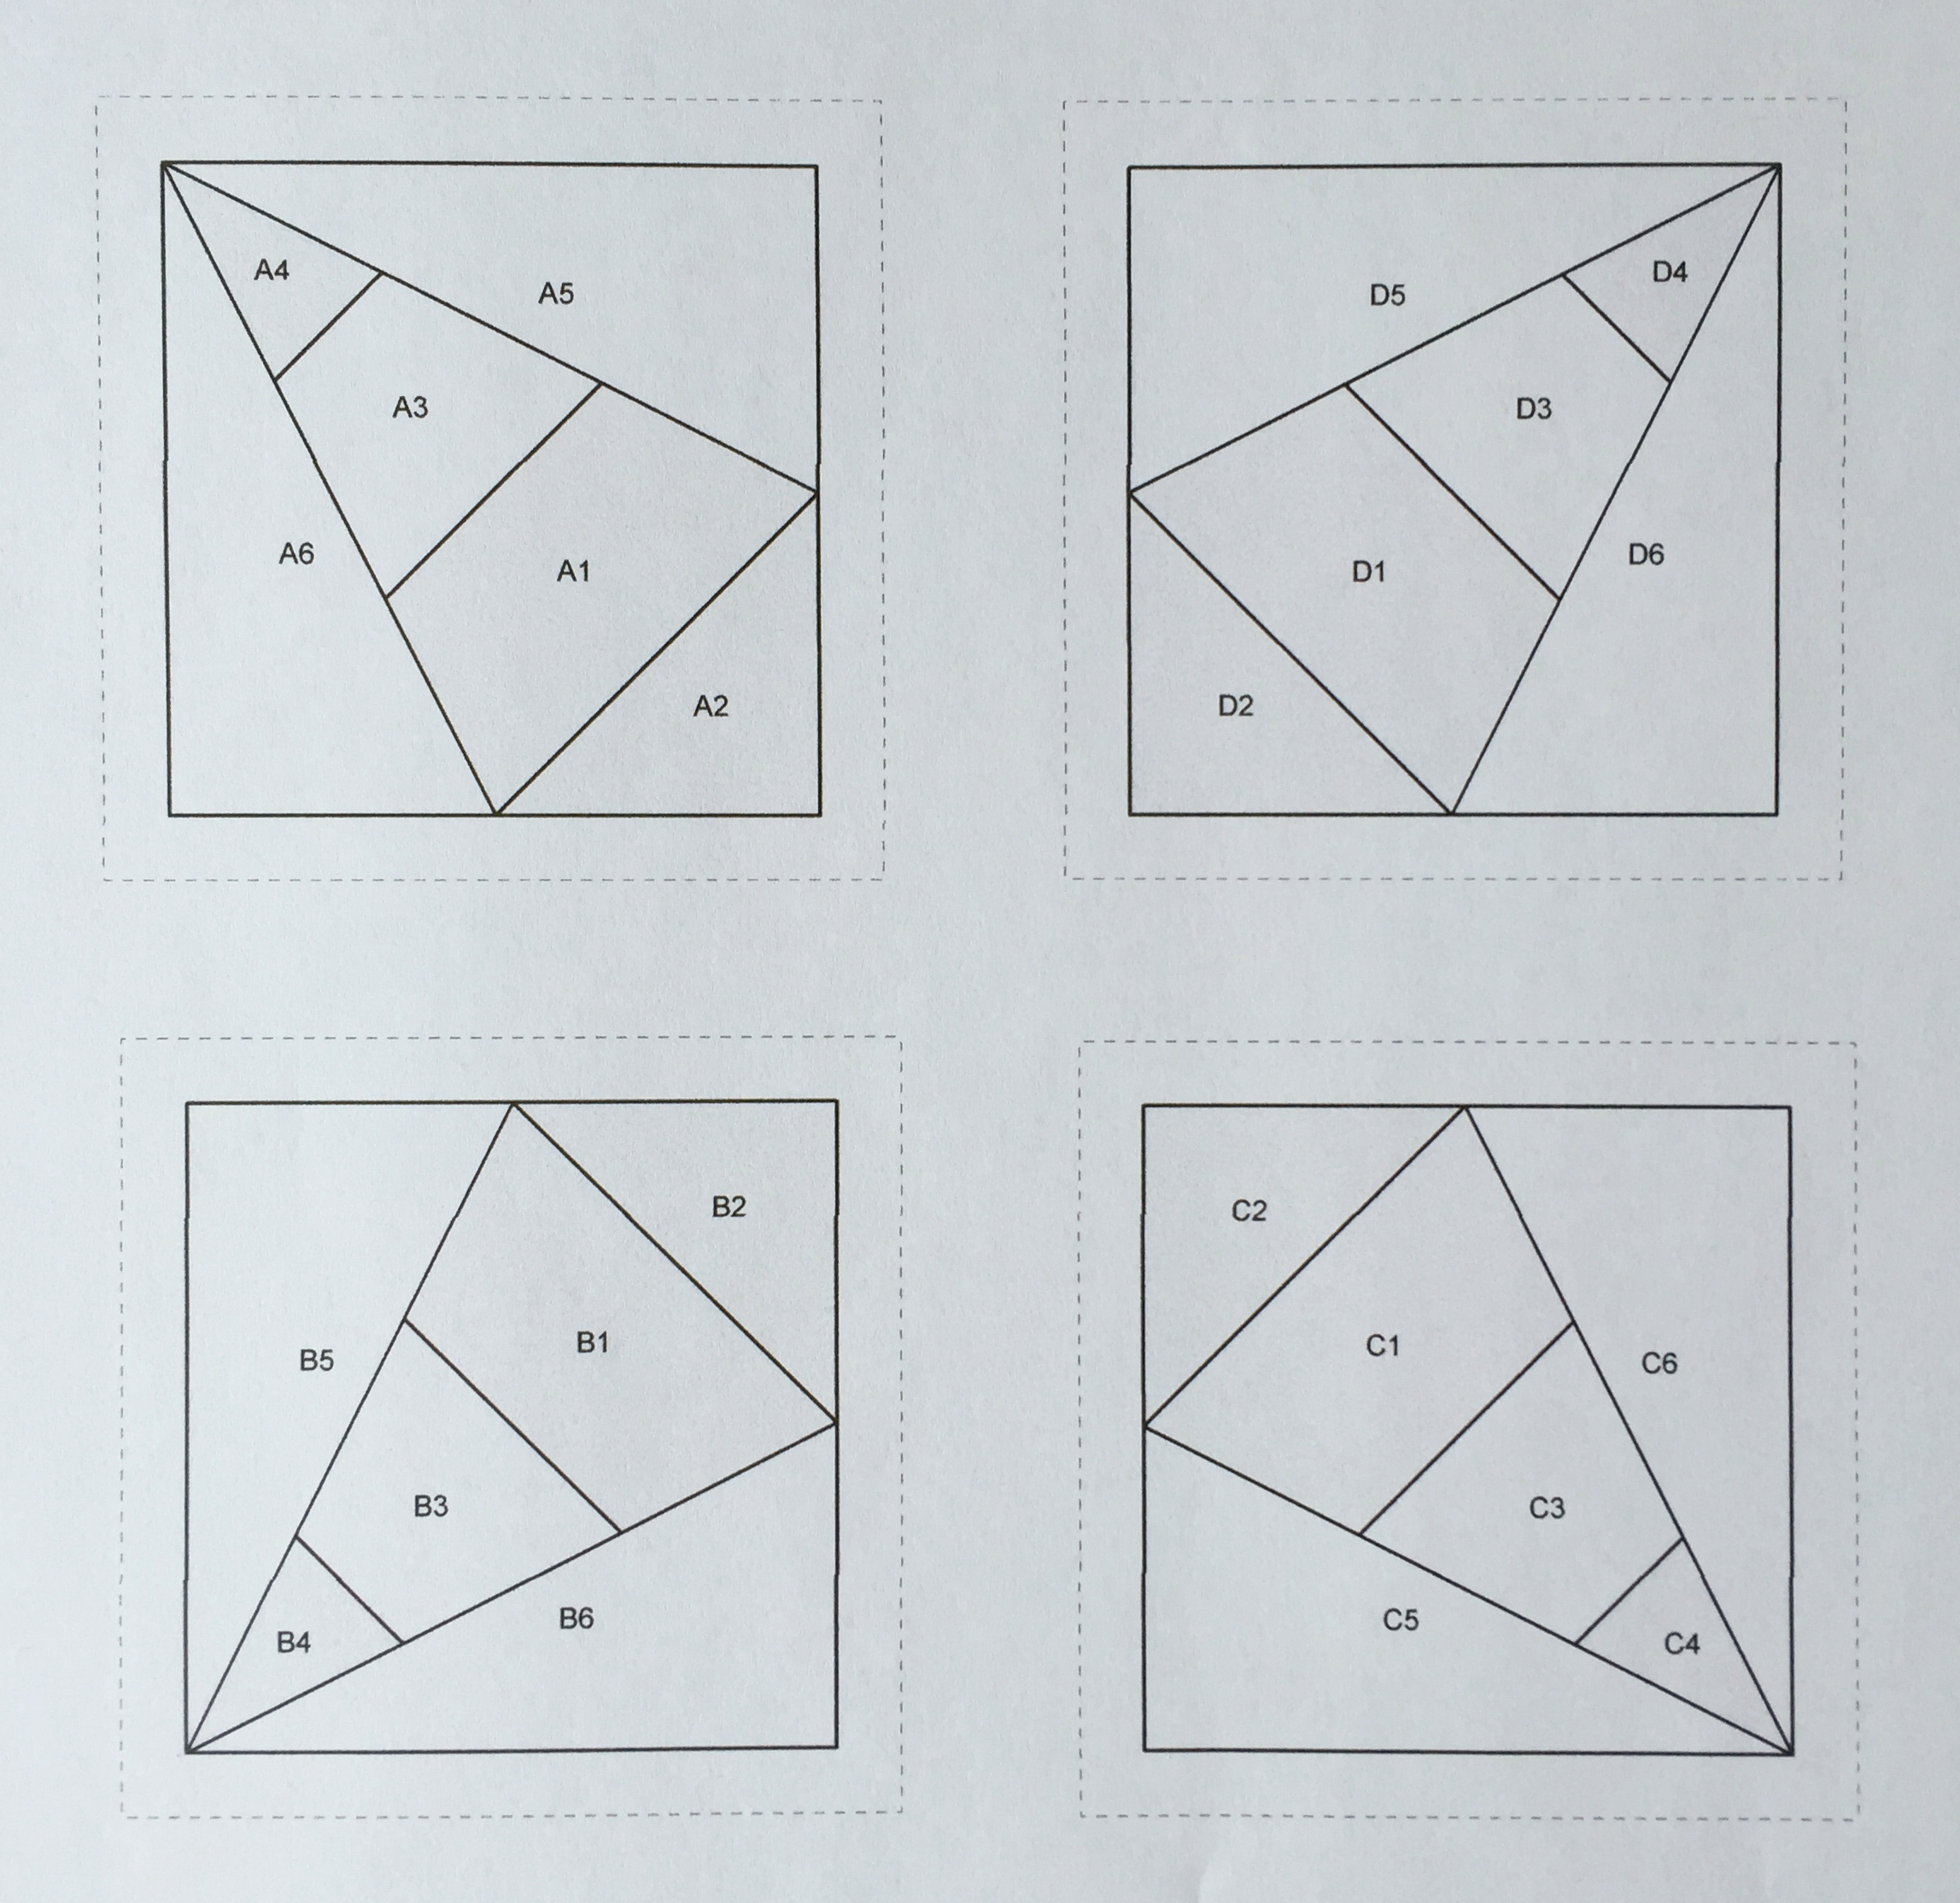
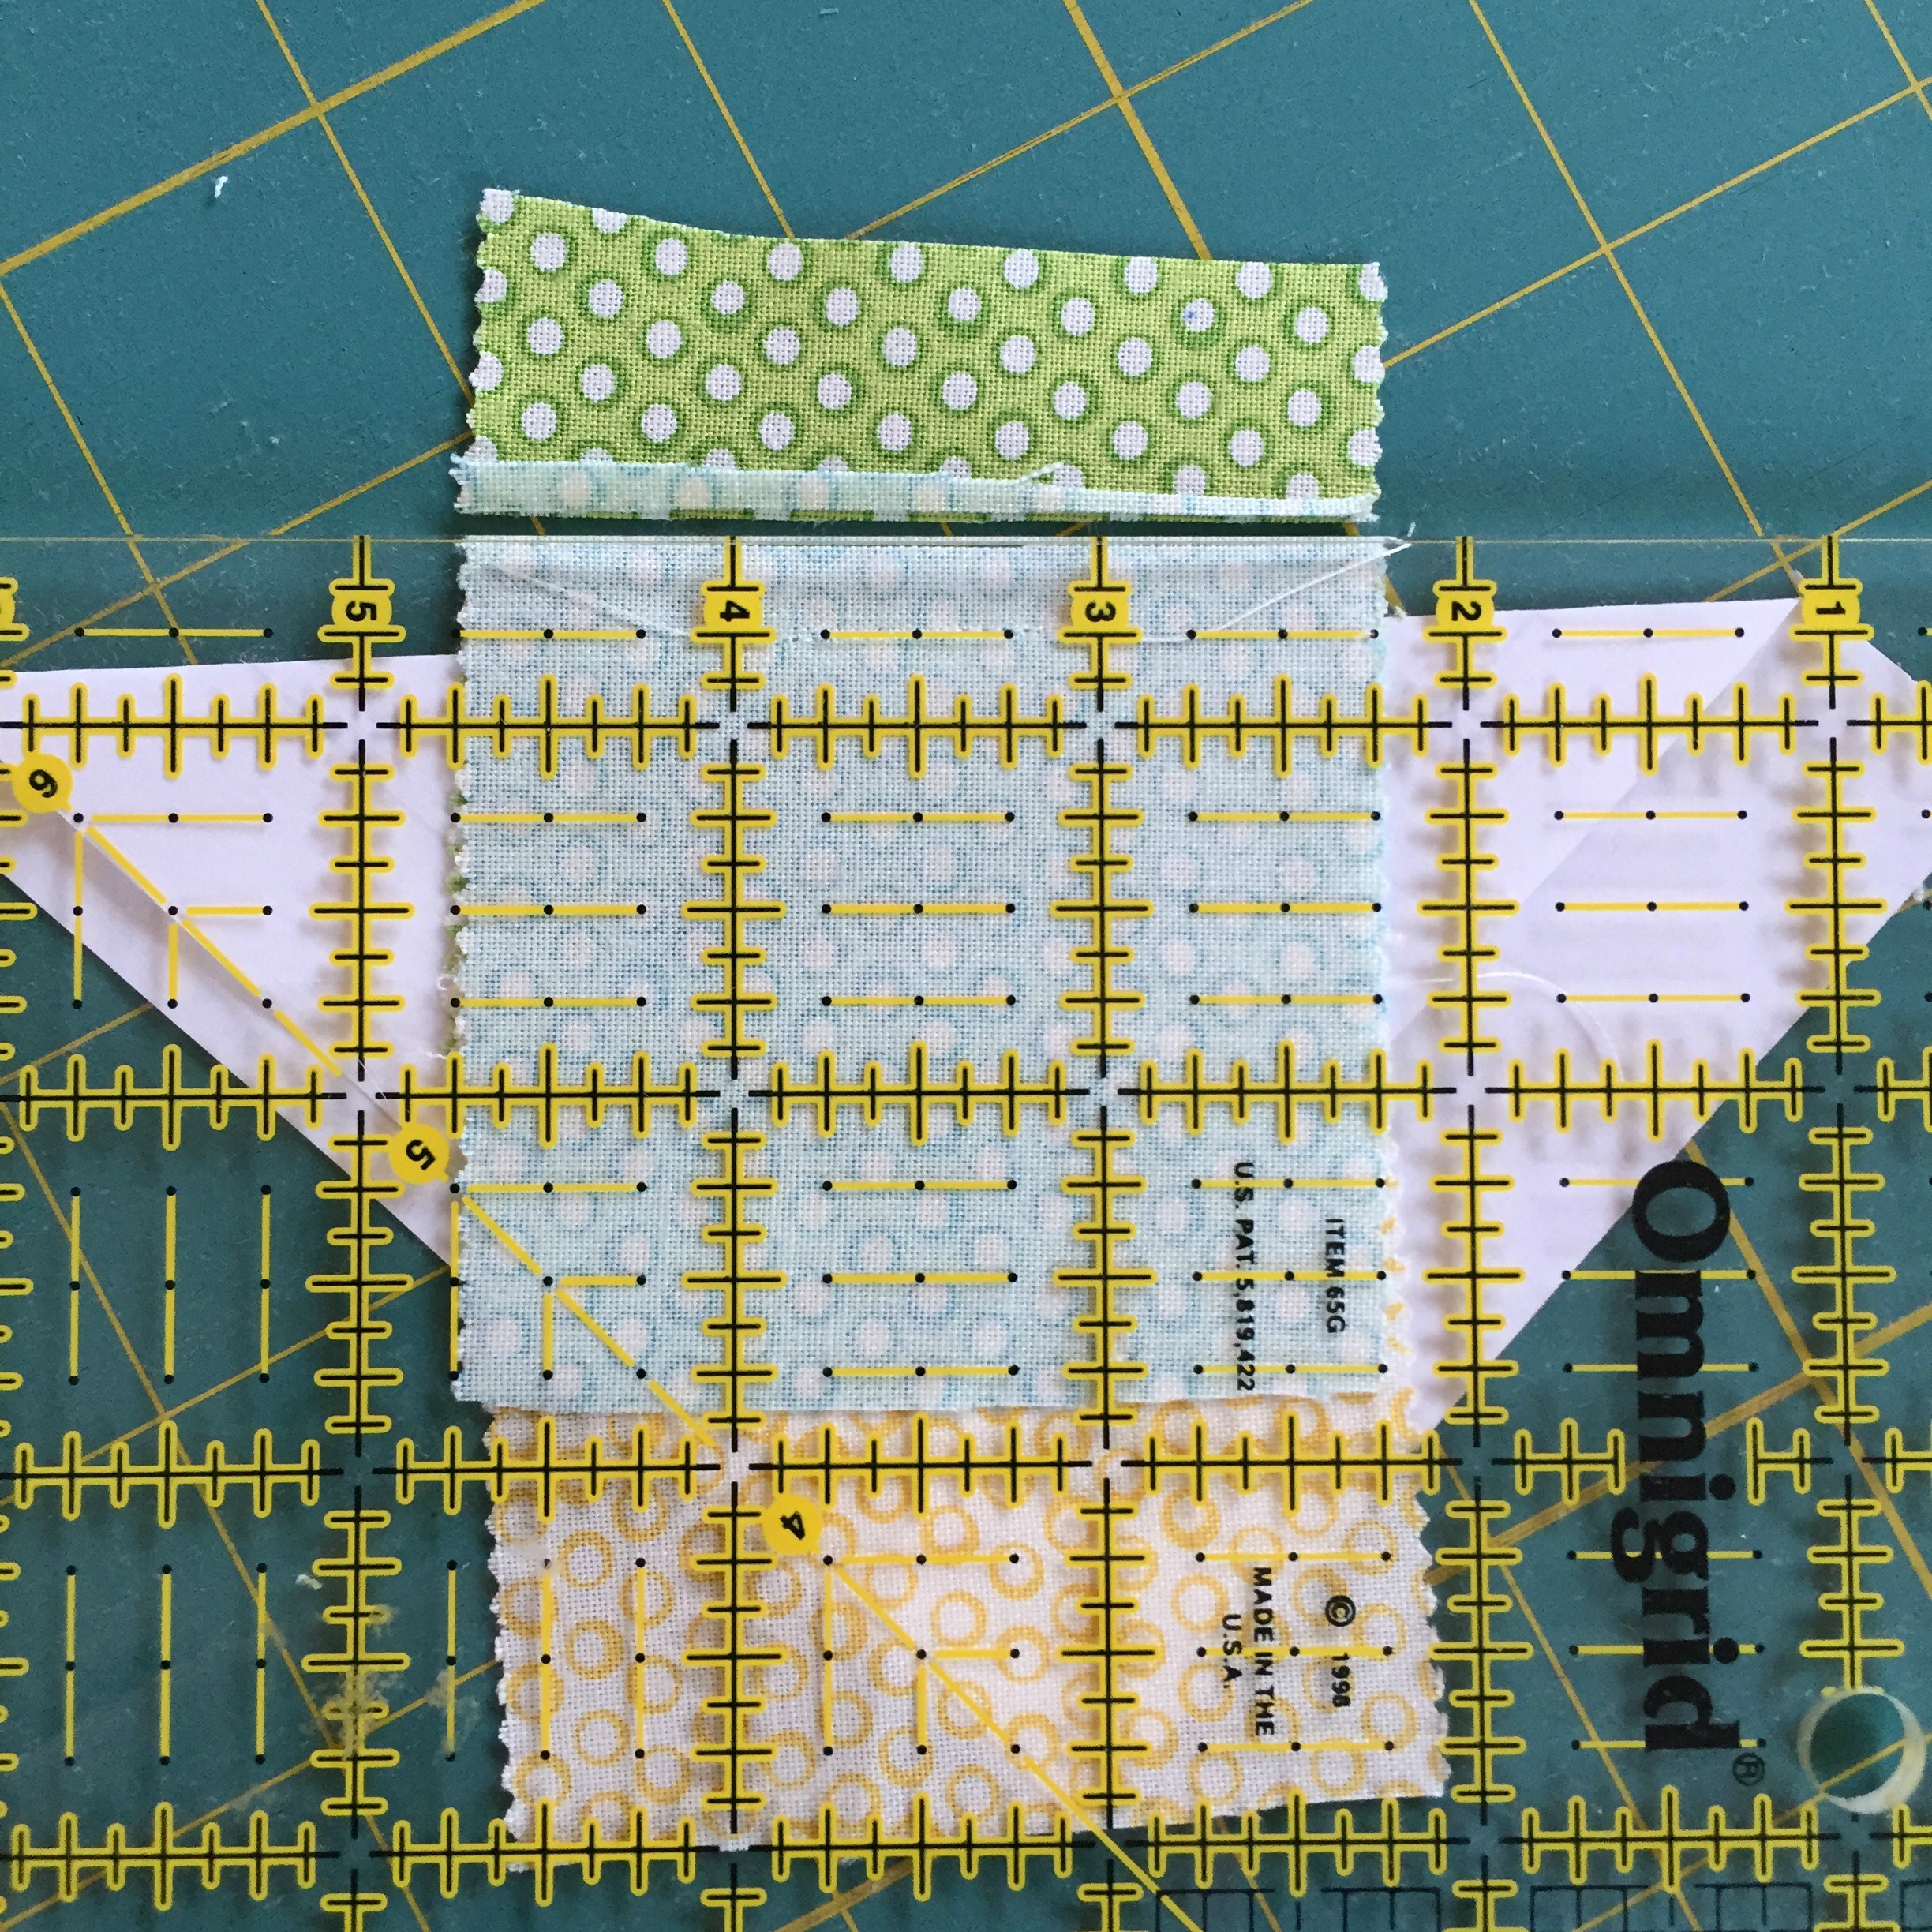
- Using the Striped Star template (shown) cut each section of the template out to create four separate units.
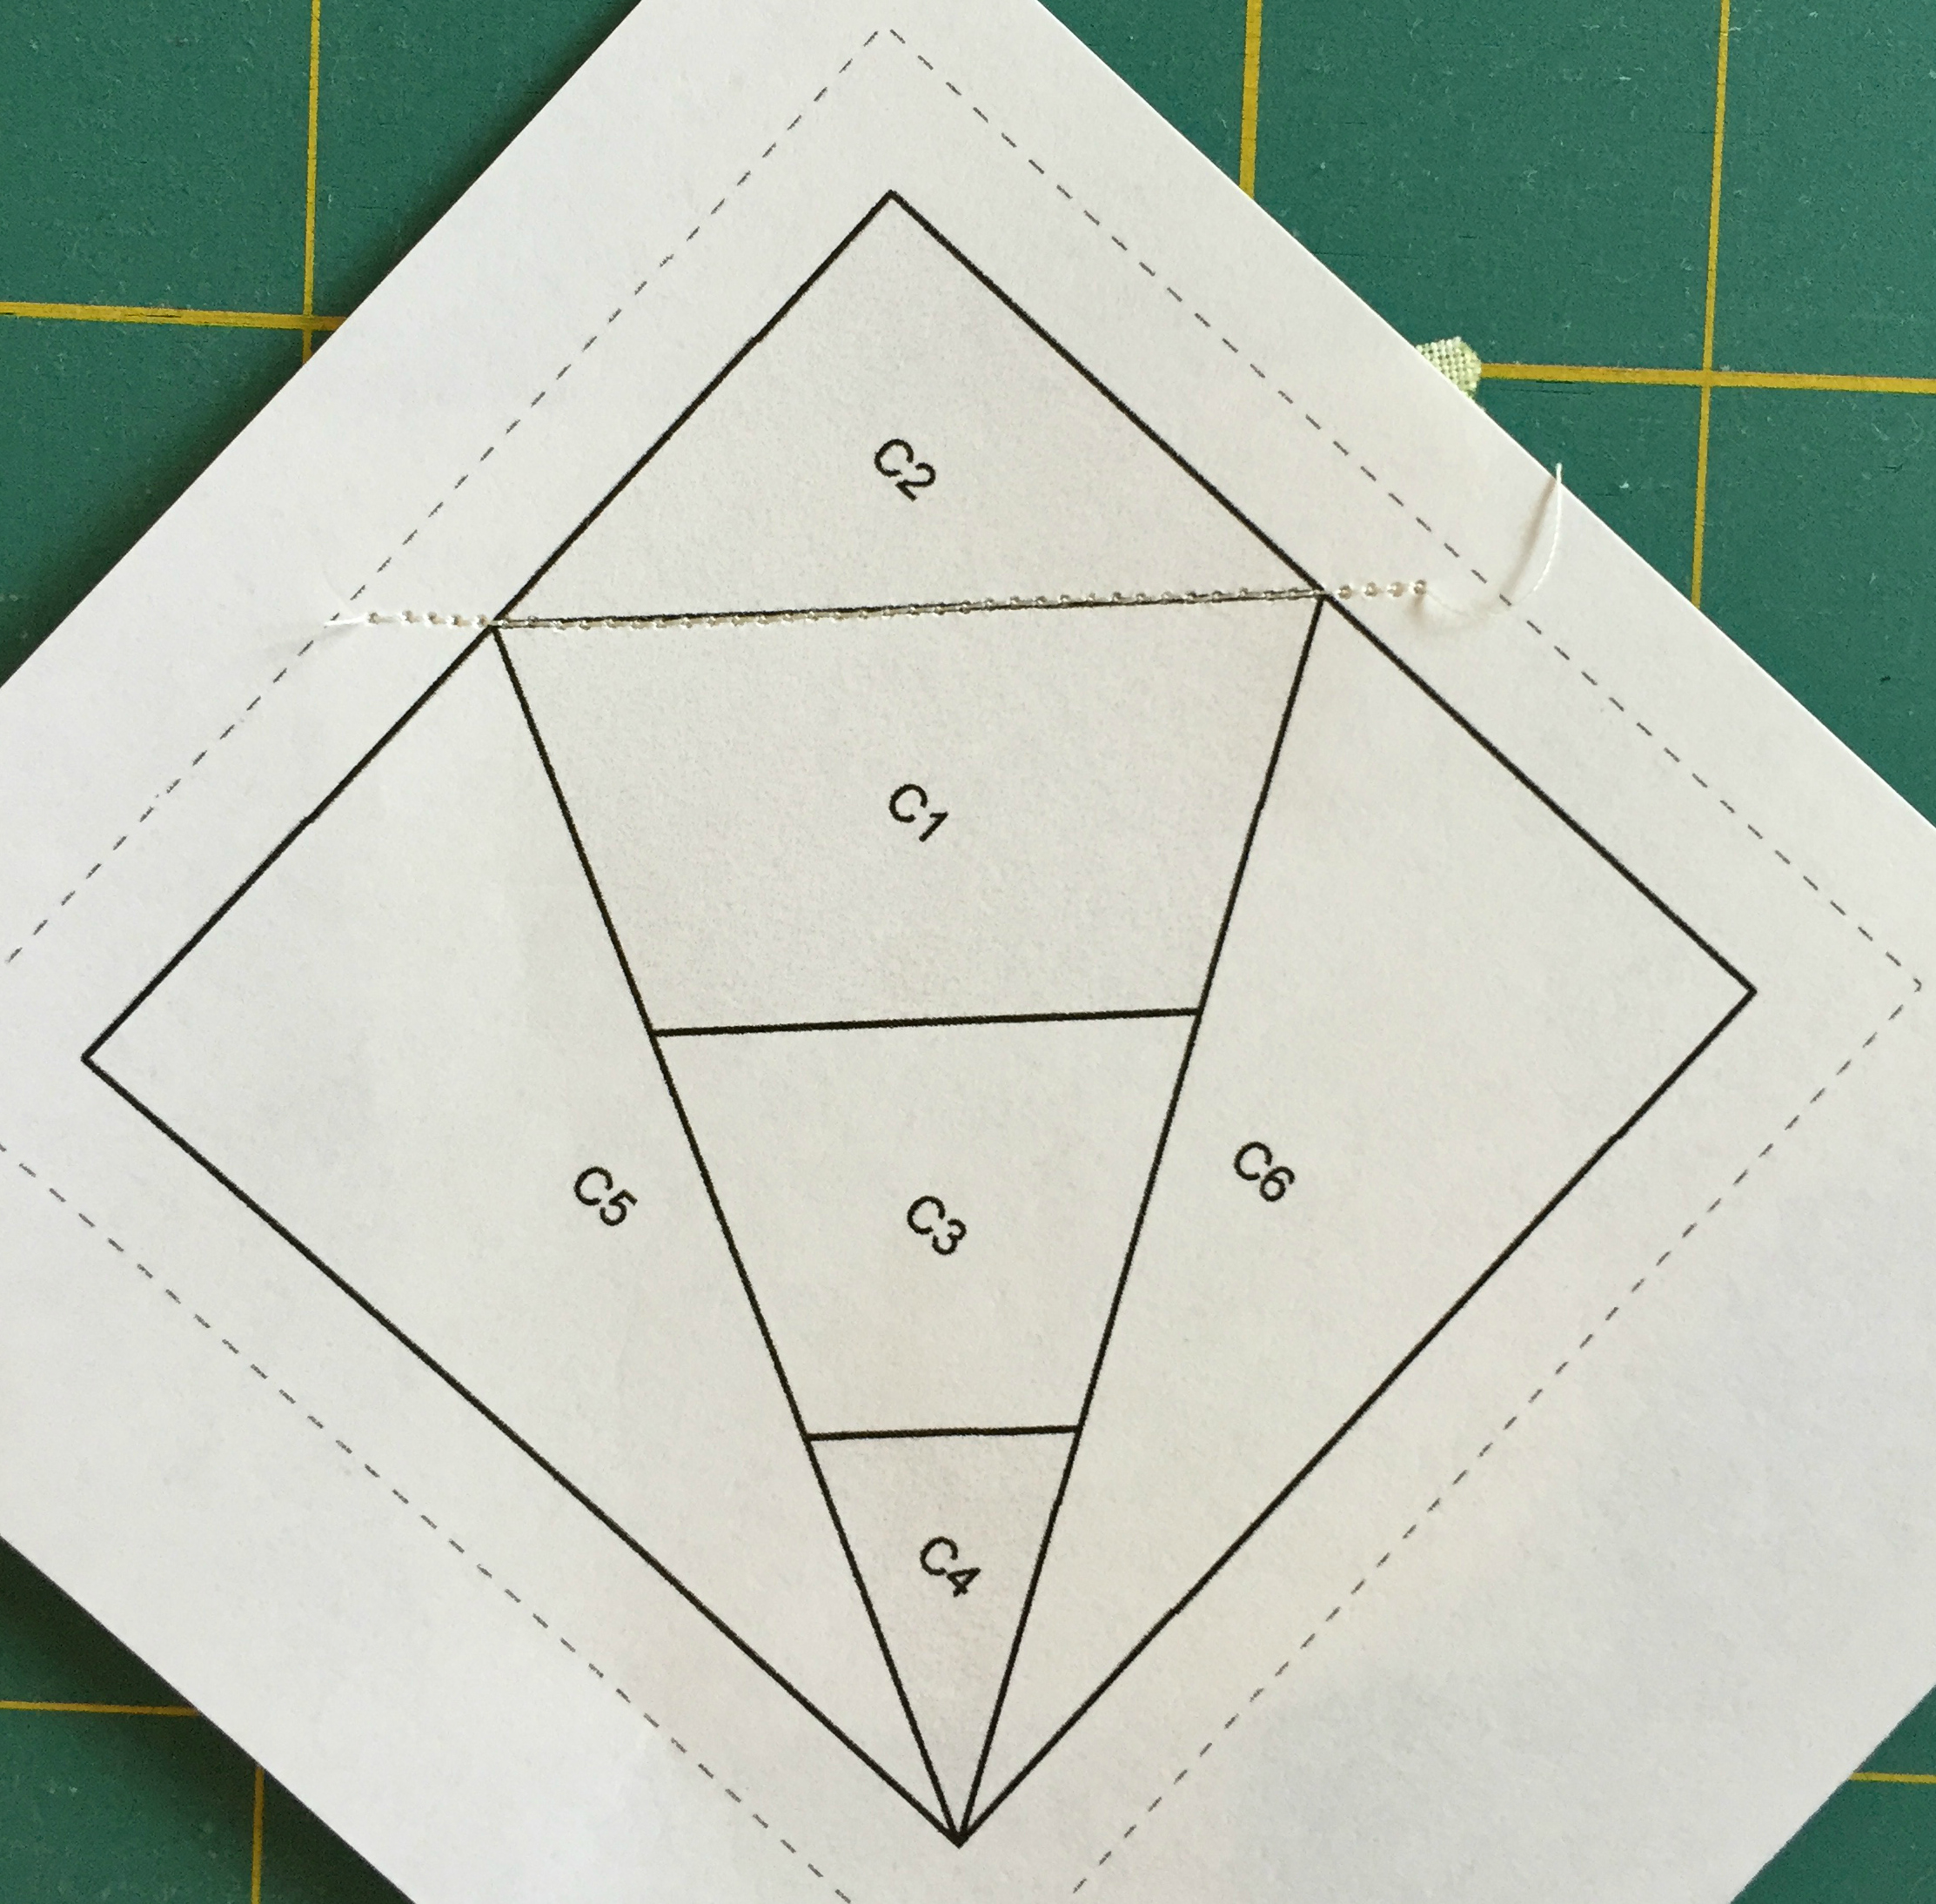
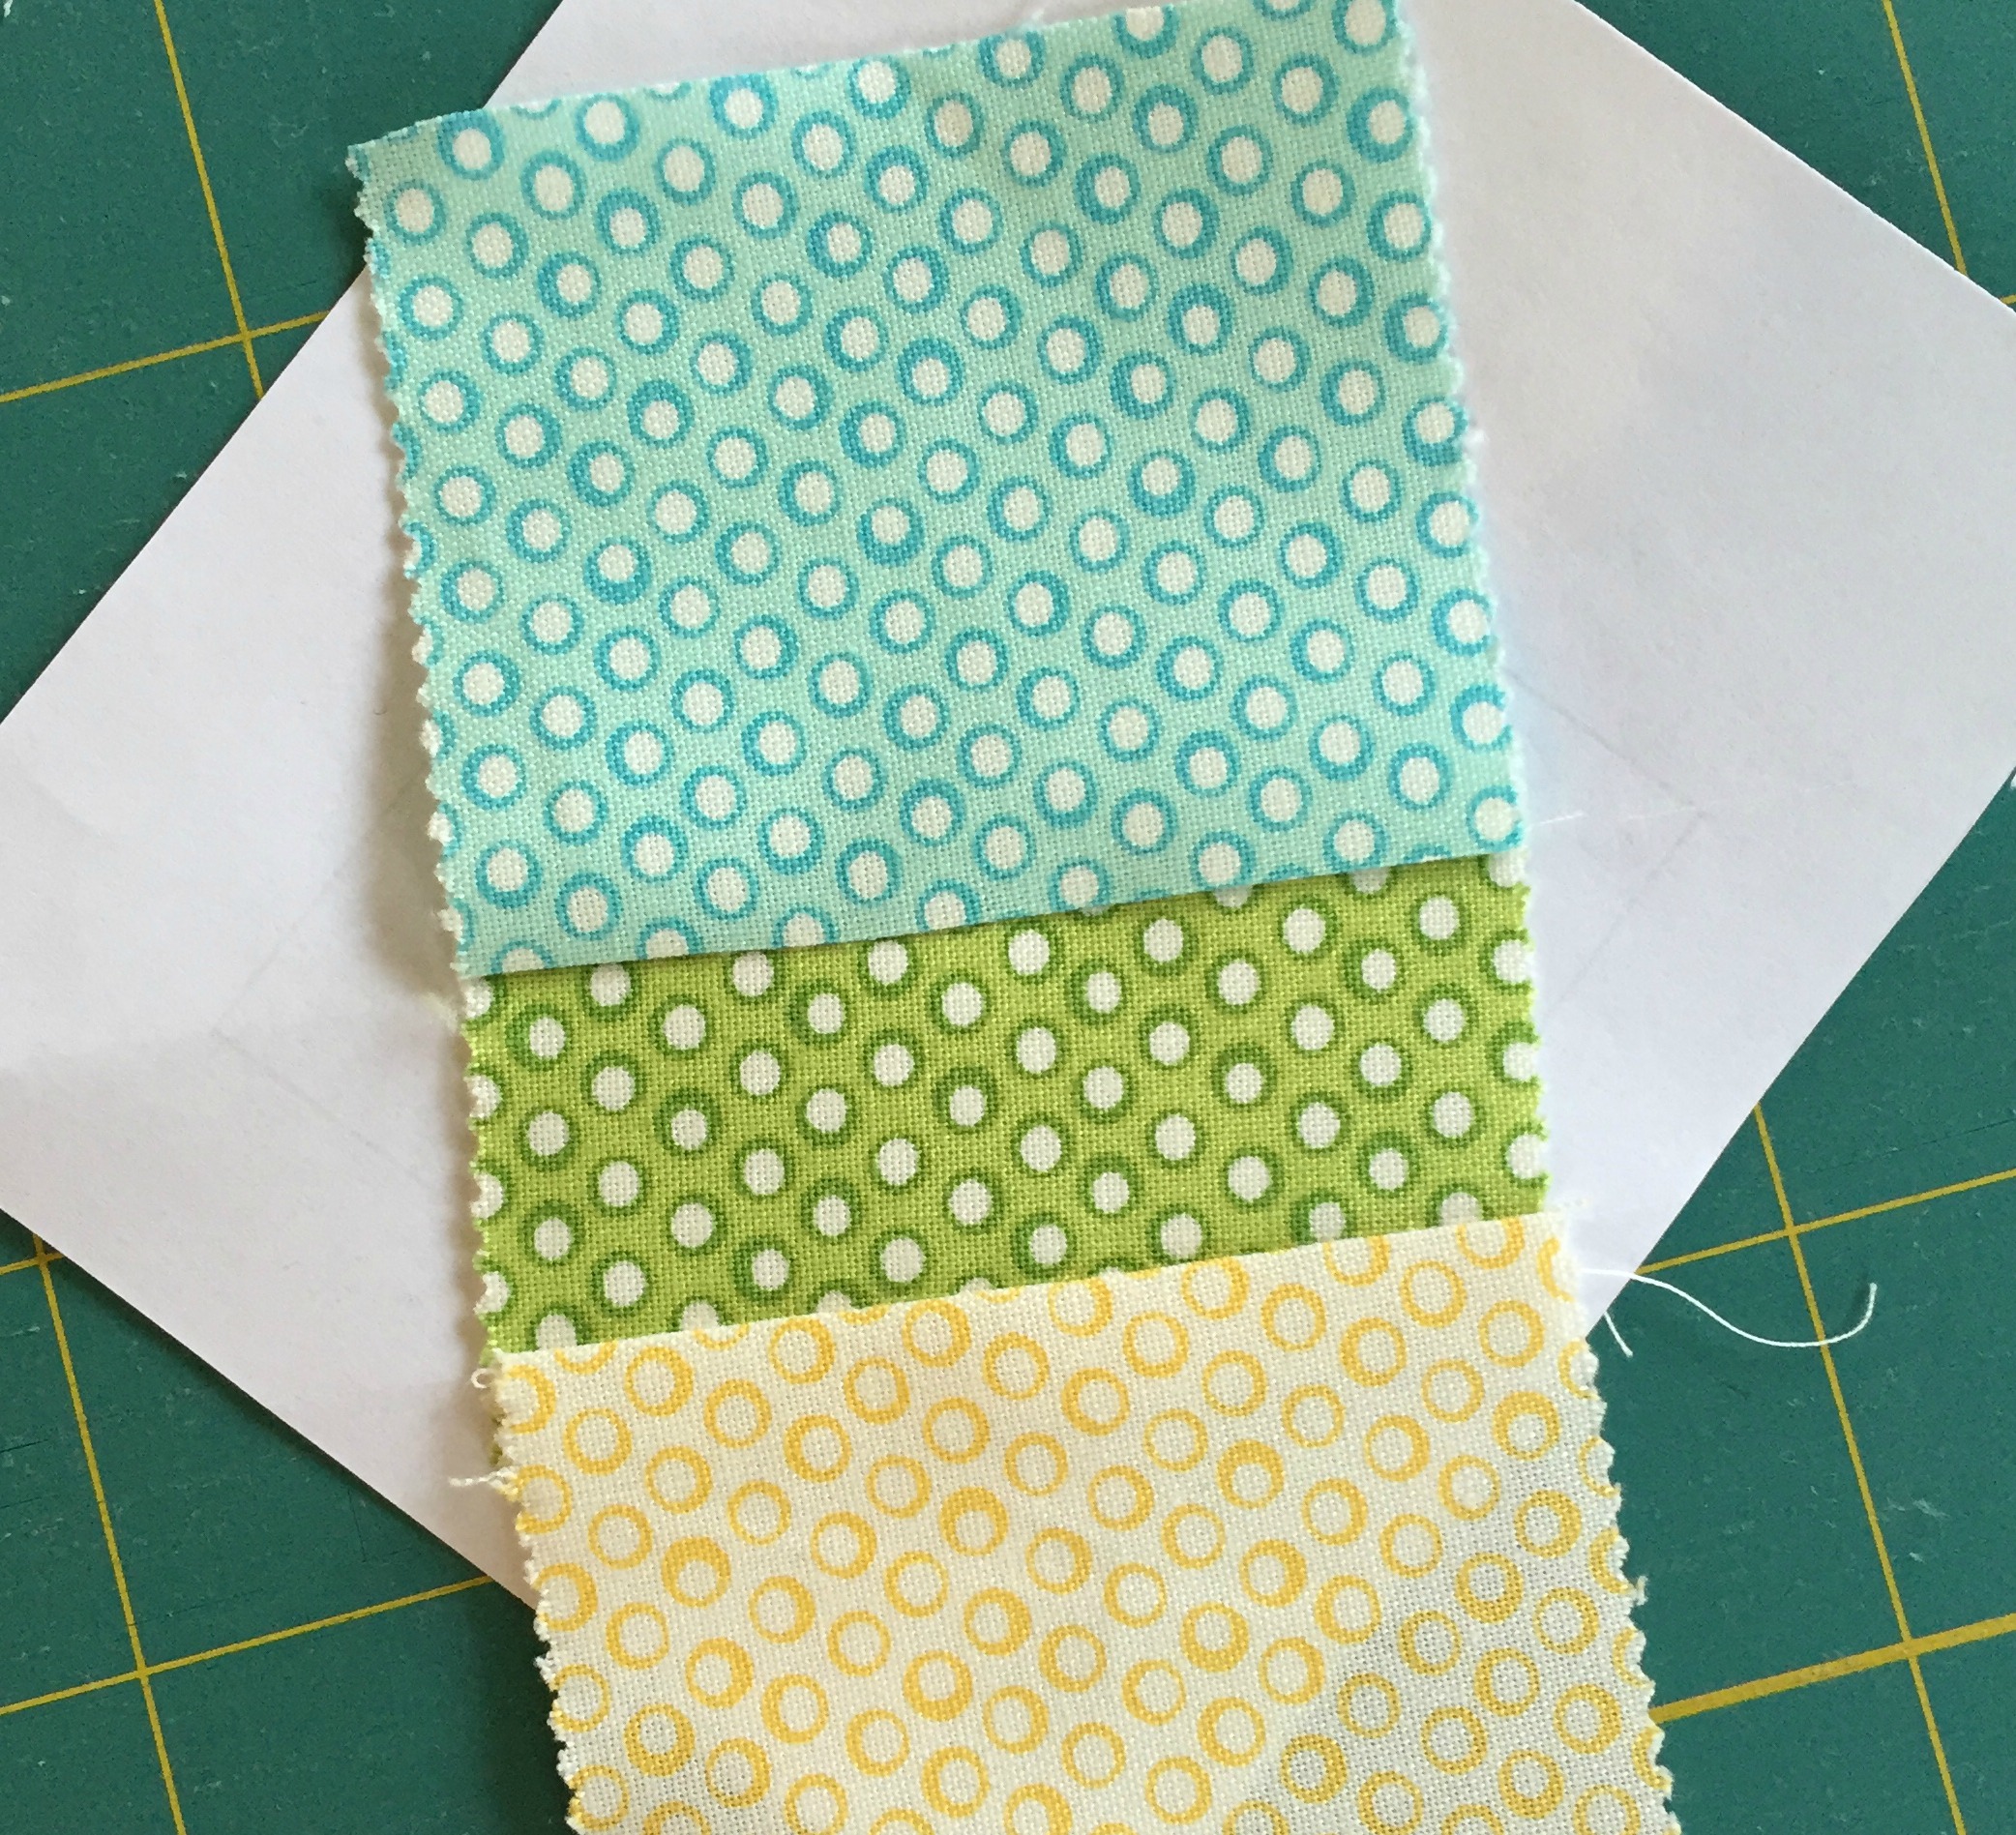
 2. When paper piecing, you will lay the fabric you want to cover the first section of the template (in the below case C1) on the back side of the template paper, right side up (the green dots). Next you lay the fabric piece you want to cover your next section (C2) right side facing down.

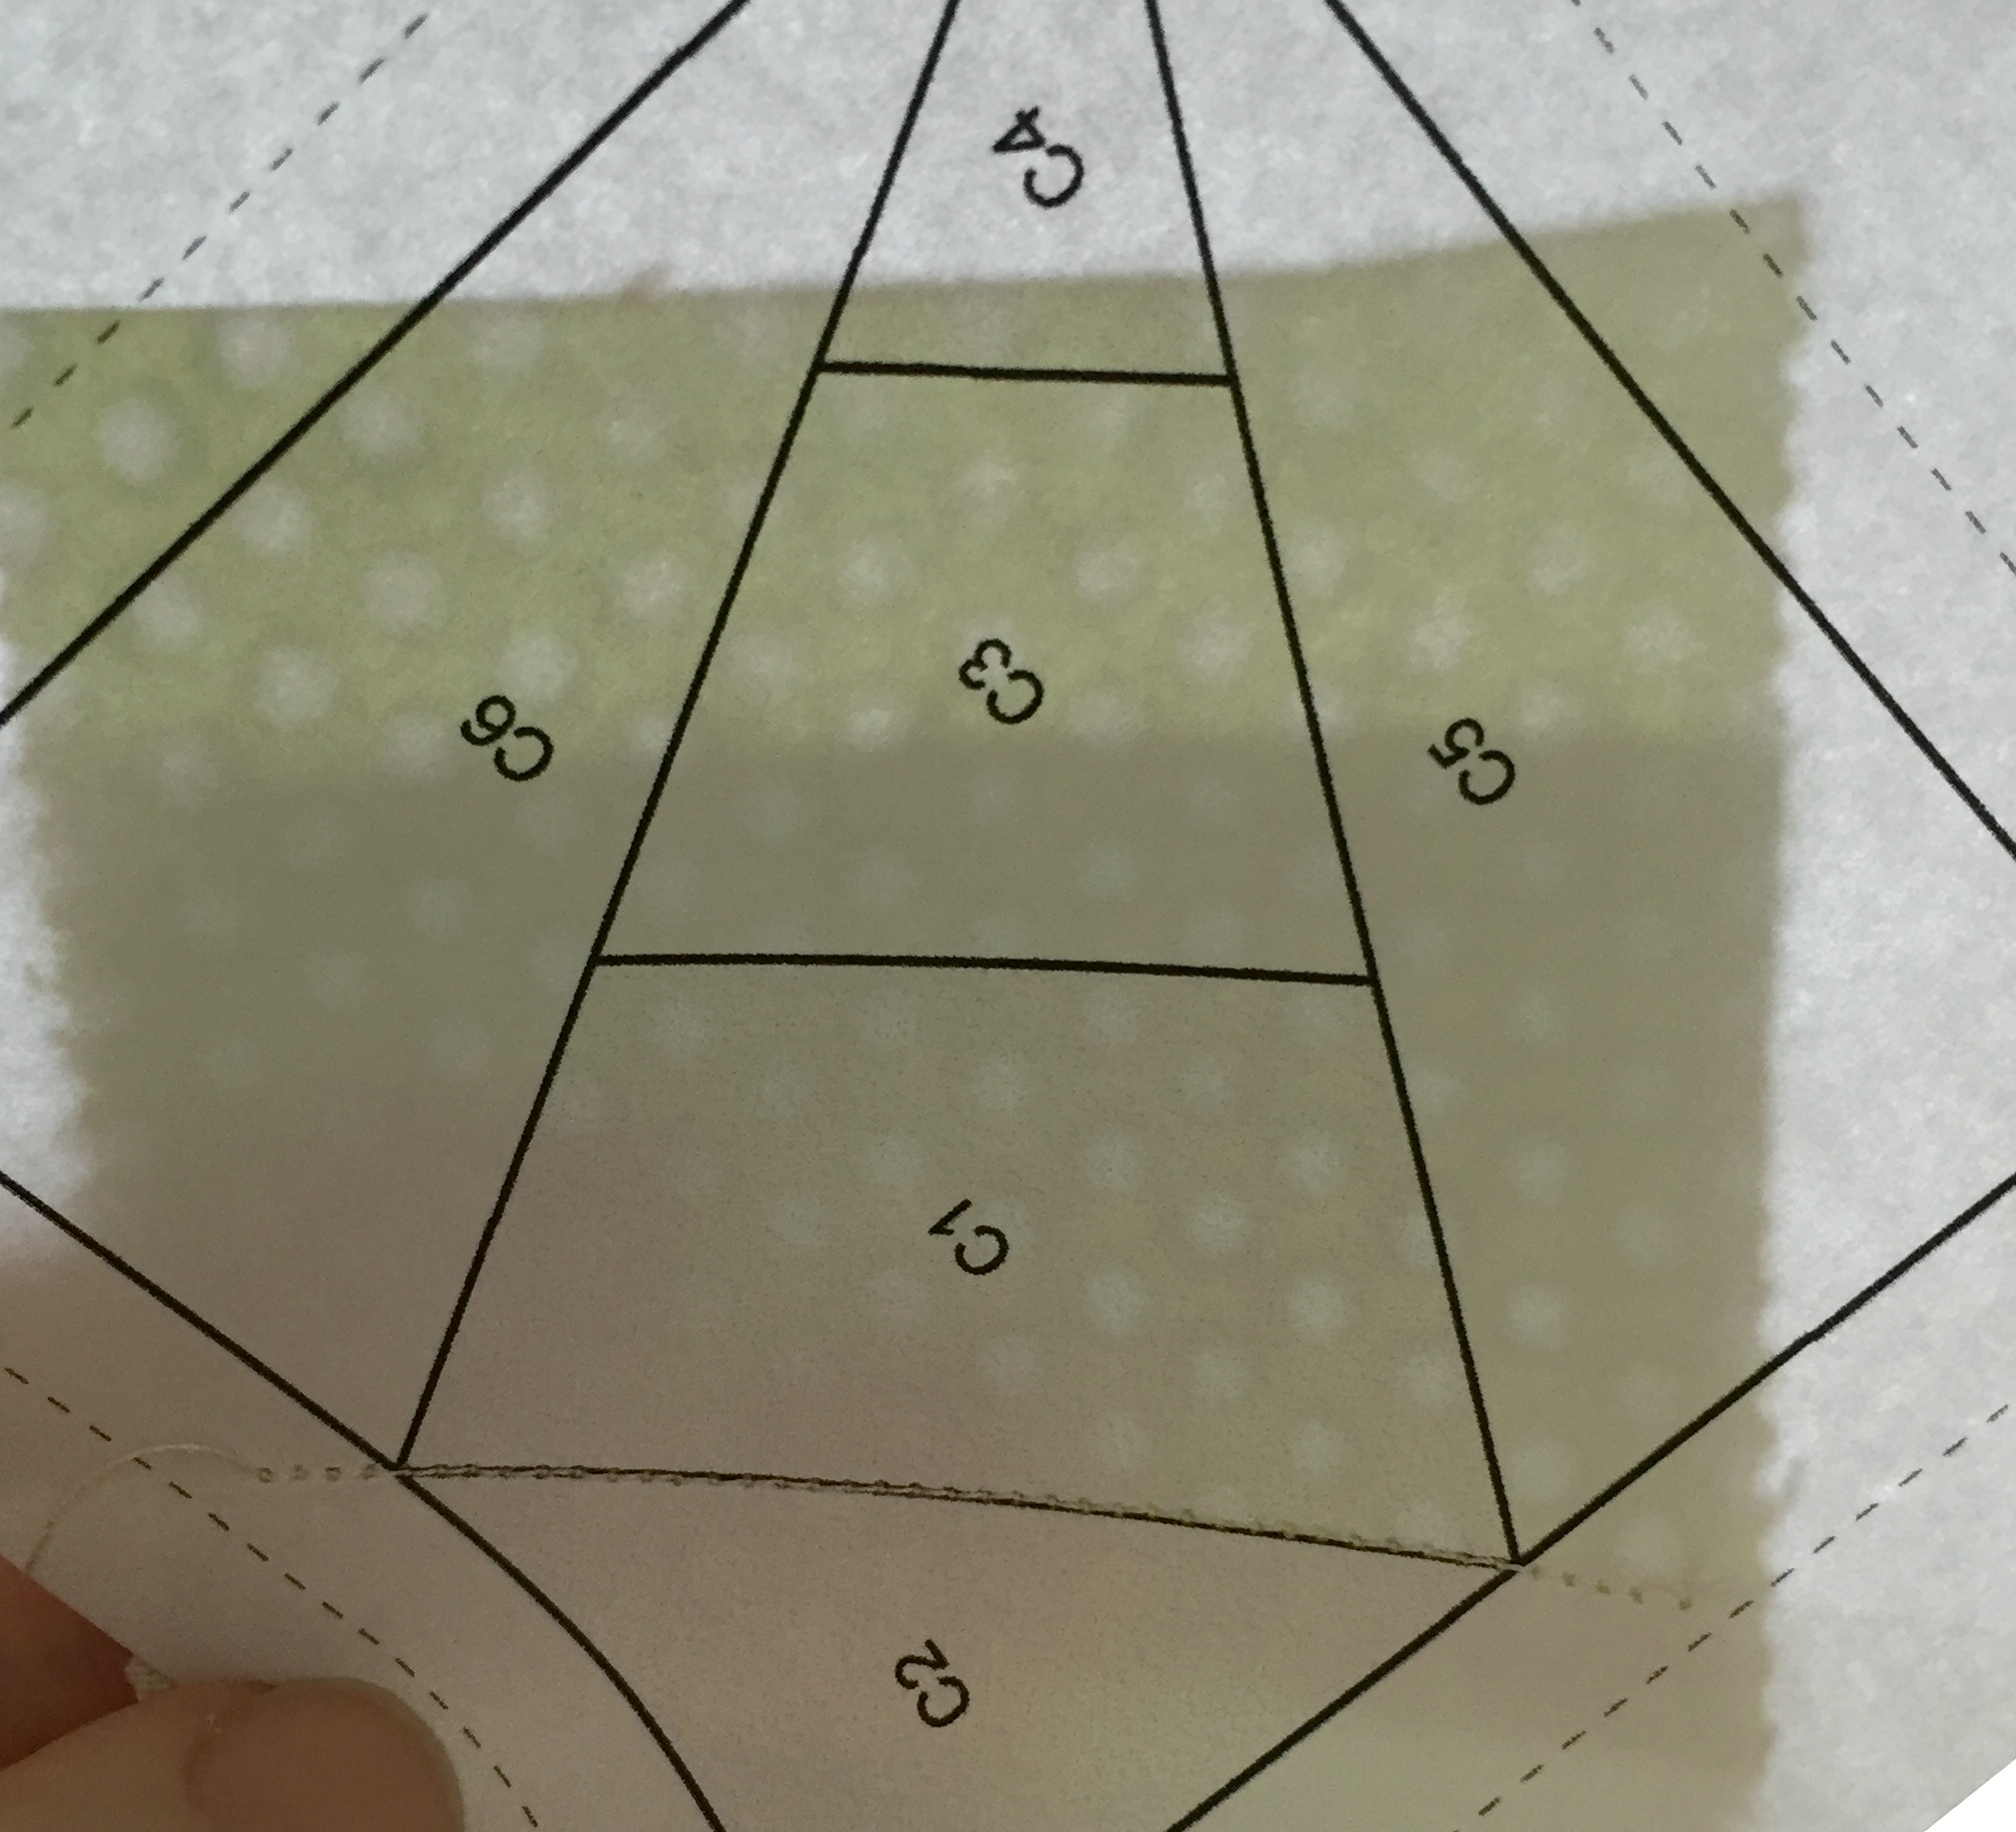
3. Holding those two pieces of fabric in place, flip your paper over and hold up to a light source to make sure that (a) there is at least 1/4" of each fabric above the line you are about to sew on (i.e. the line between C1 and C2); (b) the fabric piece for C1 completely covers that section of the template with 1/4" to spare on each side and (c) the fabric piece for C2 when flipped after sewing down will completely cover that section of the template including 1/4" on each side.

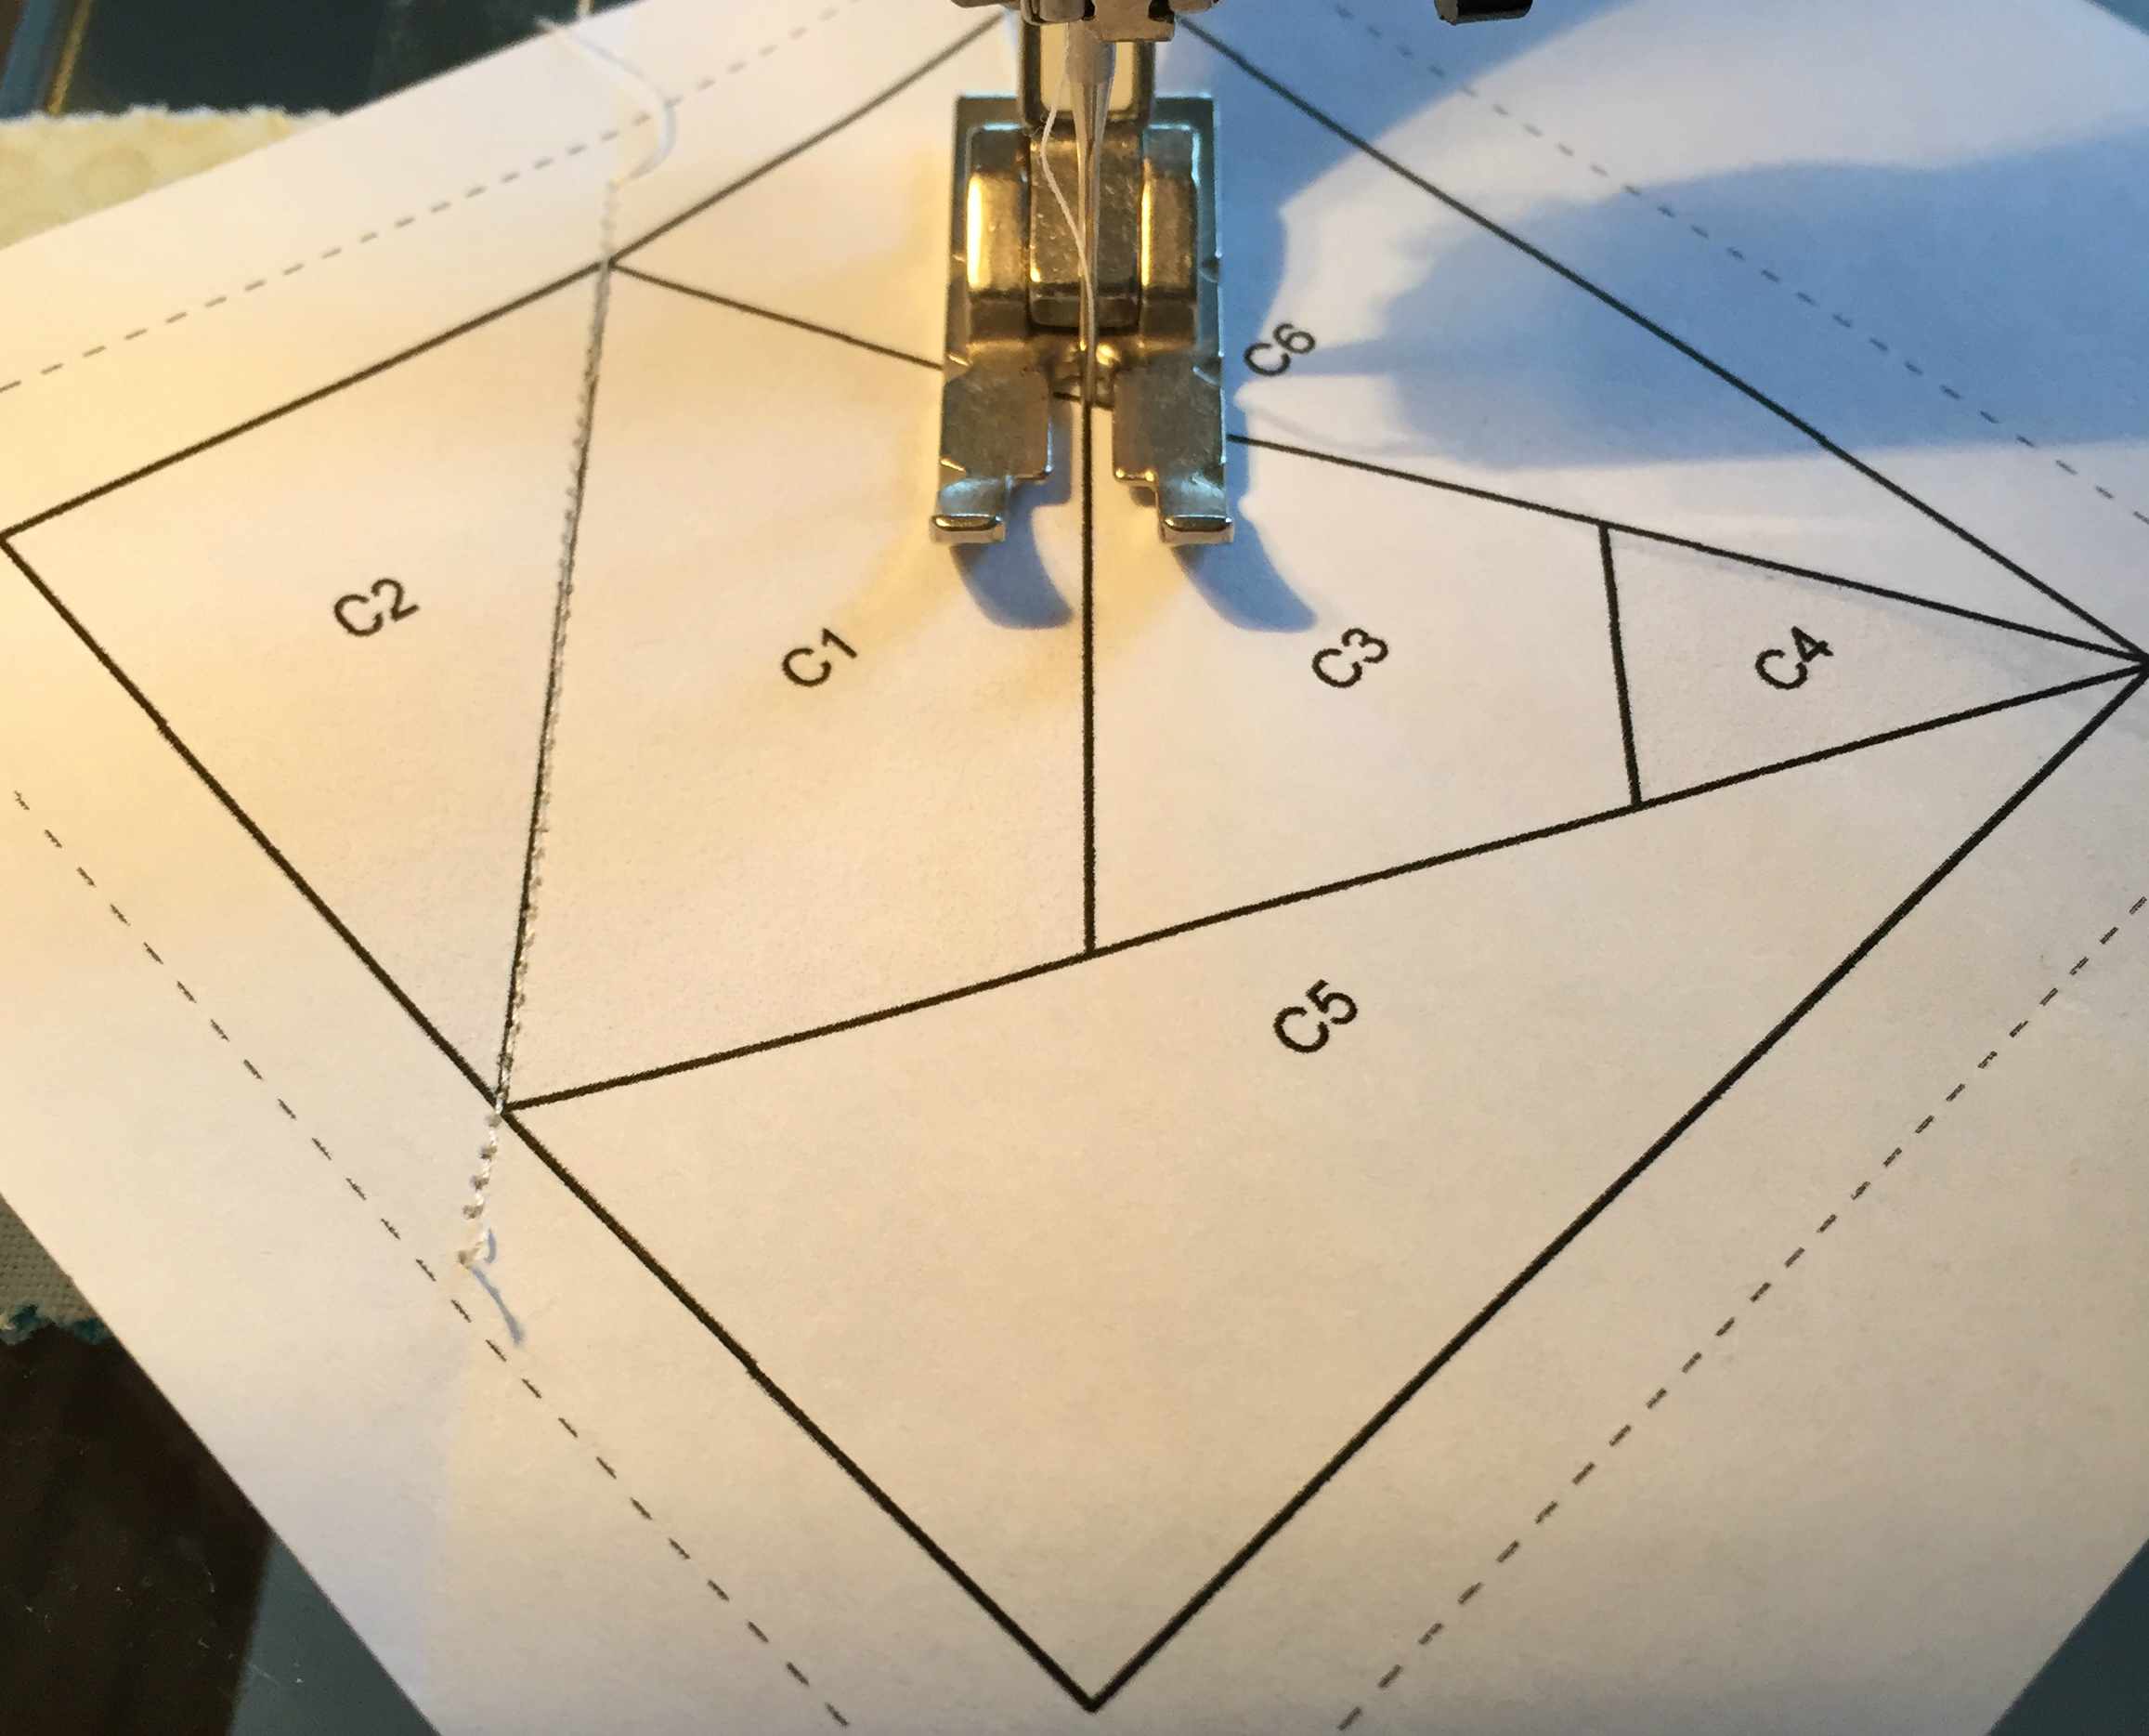
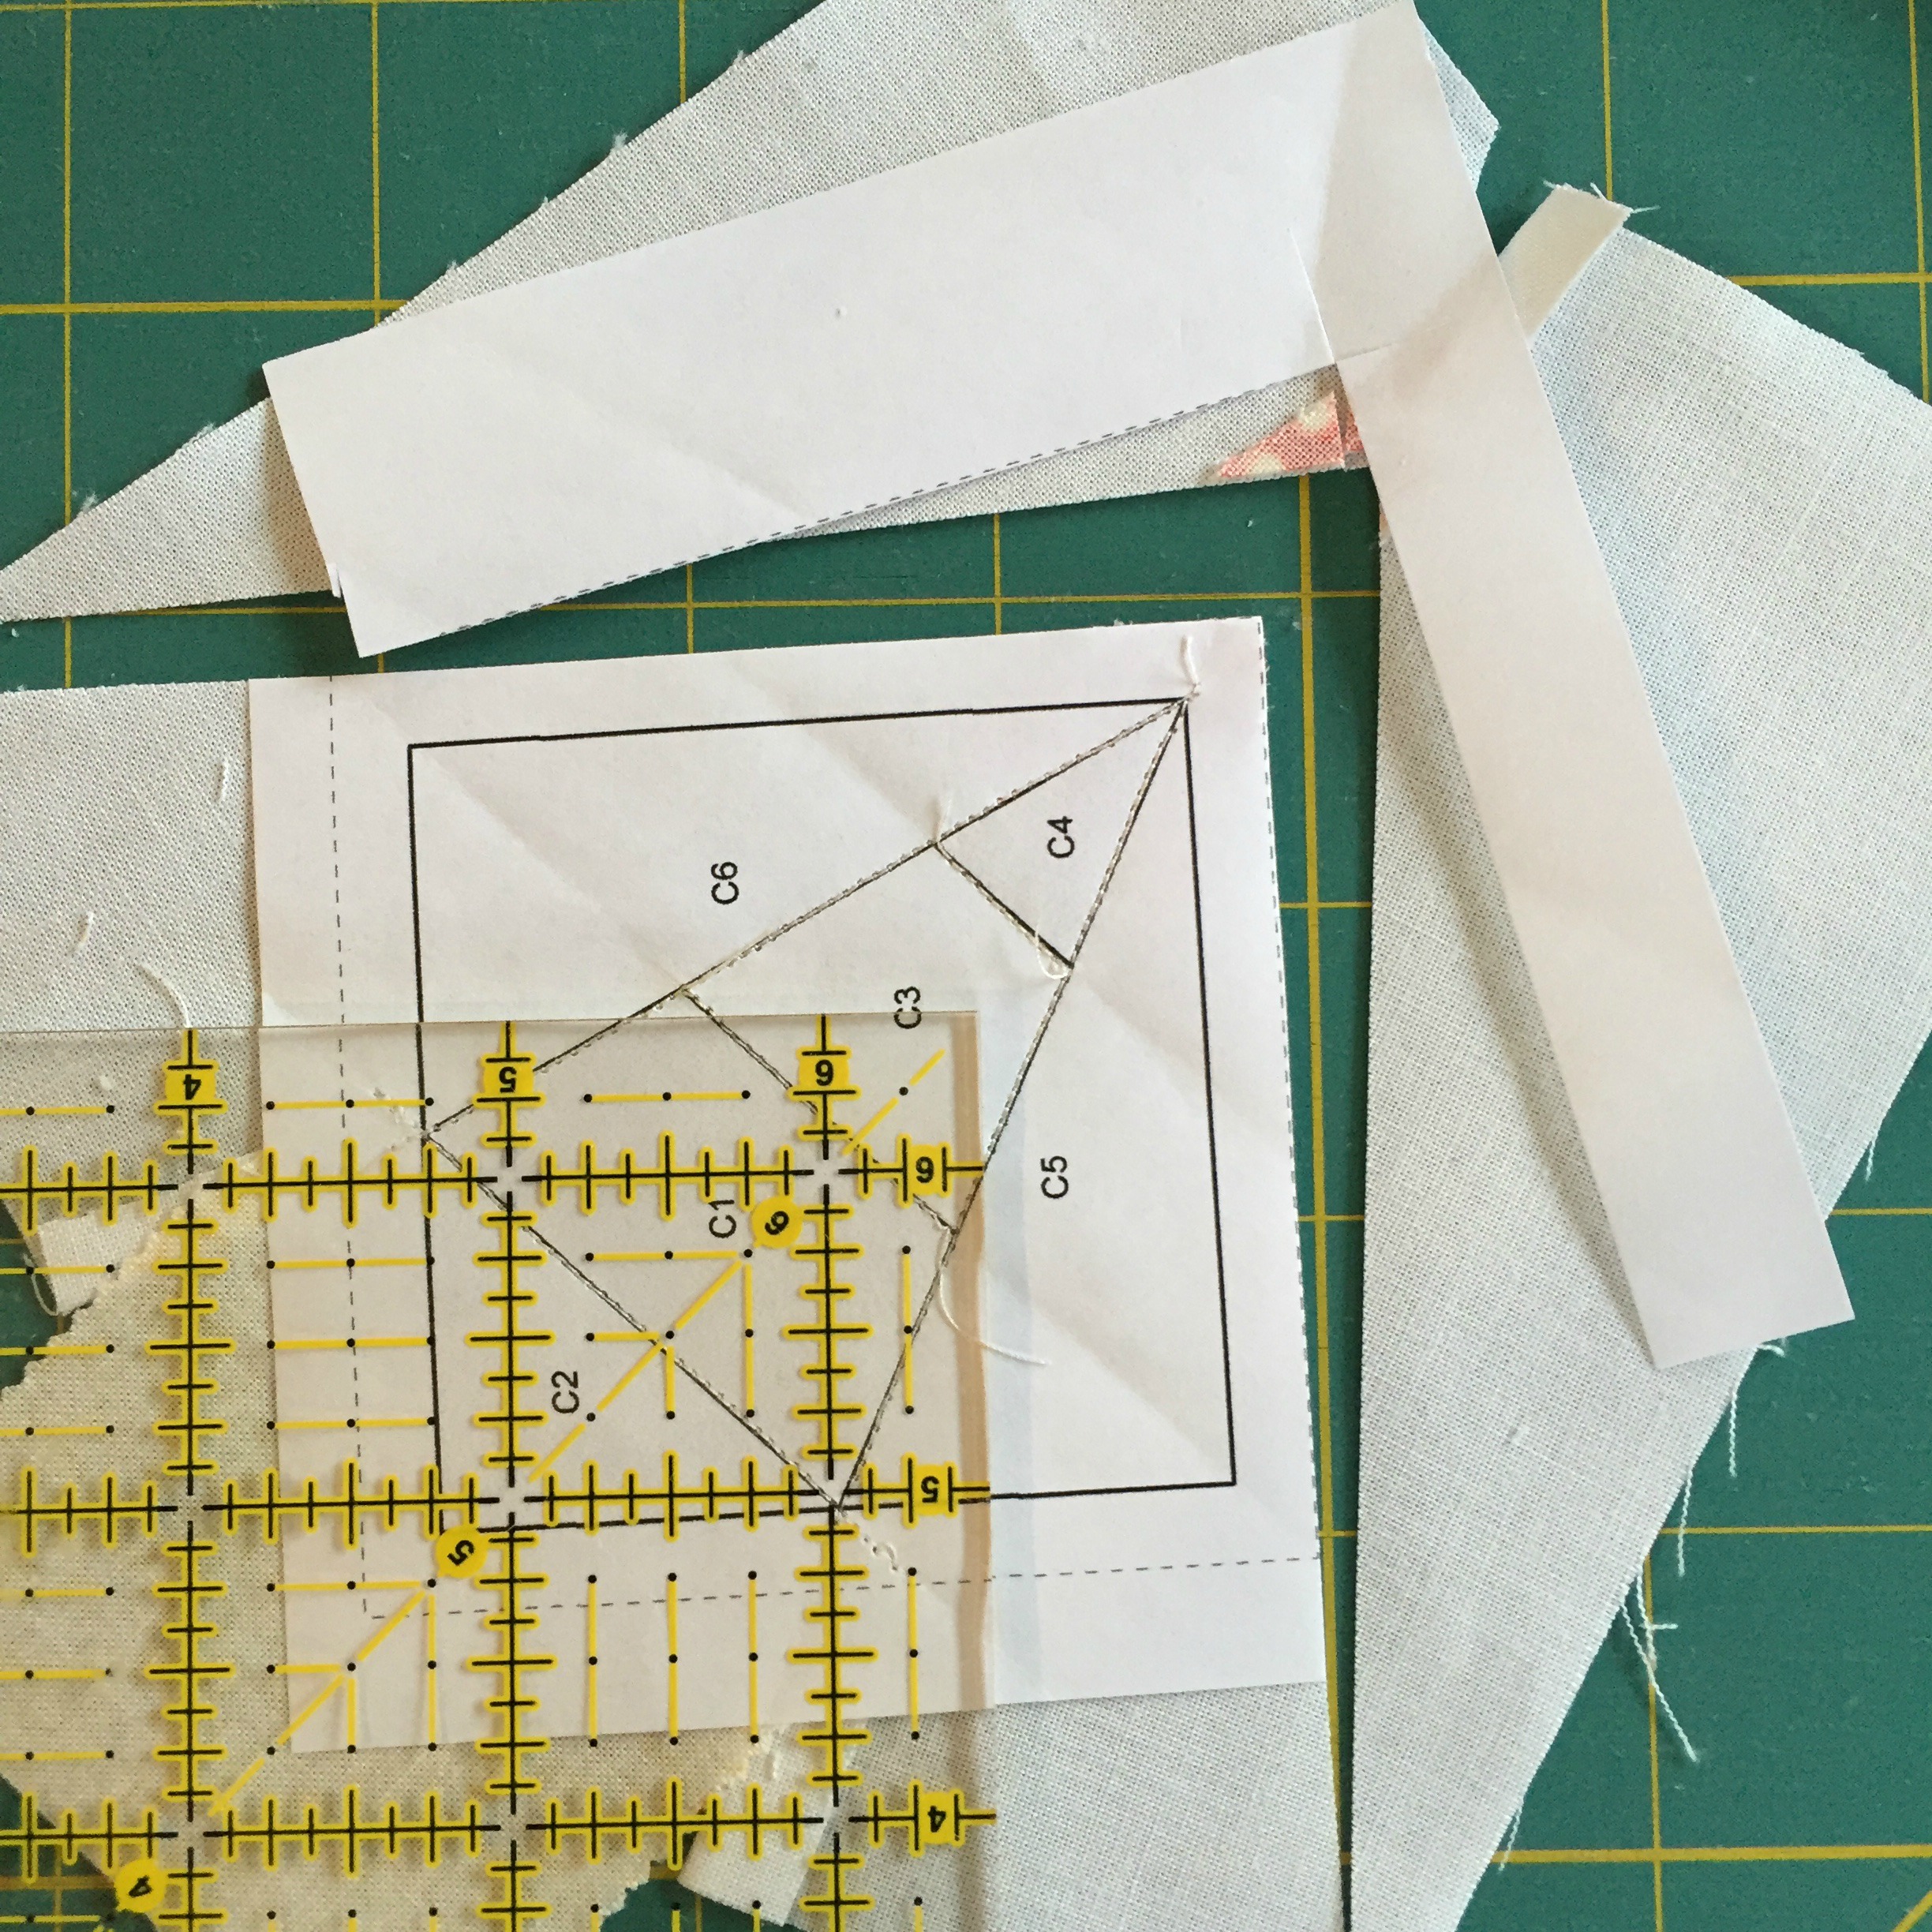
4. Once you are confident all of the above criteria has been met, lay your template and fabric pieces on your sewing machine and sew directly on the line between sections C1 and C2 as shown. Note: If the template line starts or stops at the edge of the seam allowance, sew into the seam allowance for best results.
5. Once you have sewn on the line separating sections C1 and C2, you will flip the template over and it should look like this.

6. Fold the paper template back on the sewn line to allow you to trim the excess fabric at 1/4" as shown below.

7. Once the seam allowance has been trimmed, open up your folded template and fabric pieces and press (either with your fingers or a warm iron).

8. Now you will move to the next section on your template (C3). As before, make sure that you have met all of the criteria in step 3.
9. Now you will sew directly on the line between sections C1 and C3. Note: This line does not run into the seam allowance, so no need to sew beyond the line on the paper, simply start sewing directly on the line.
10. Again, you will fold back your paper template and trim the excess fabric in the seam allowance.
11. Unfold the paper template and fabric pieces and press.
12. Continue these steps going in numerical order, until you have covered all sections on the template.

13. Once all of the sections have been pieced, you will flip it over and trim off any excess paper and fabric at the 1/4" seam allowance lines.
14. Your finished template unit will now look like this.


15. Repeat these steps for all four units in the Striped Star template.

16. Sew the units into pairs as shown.
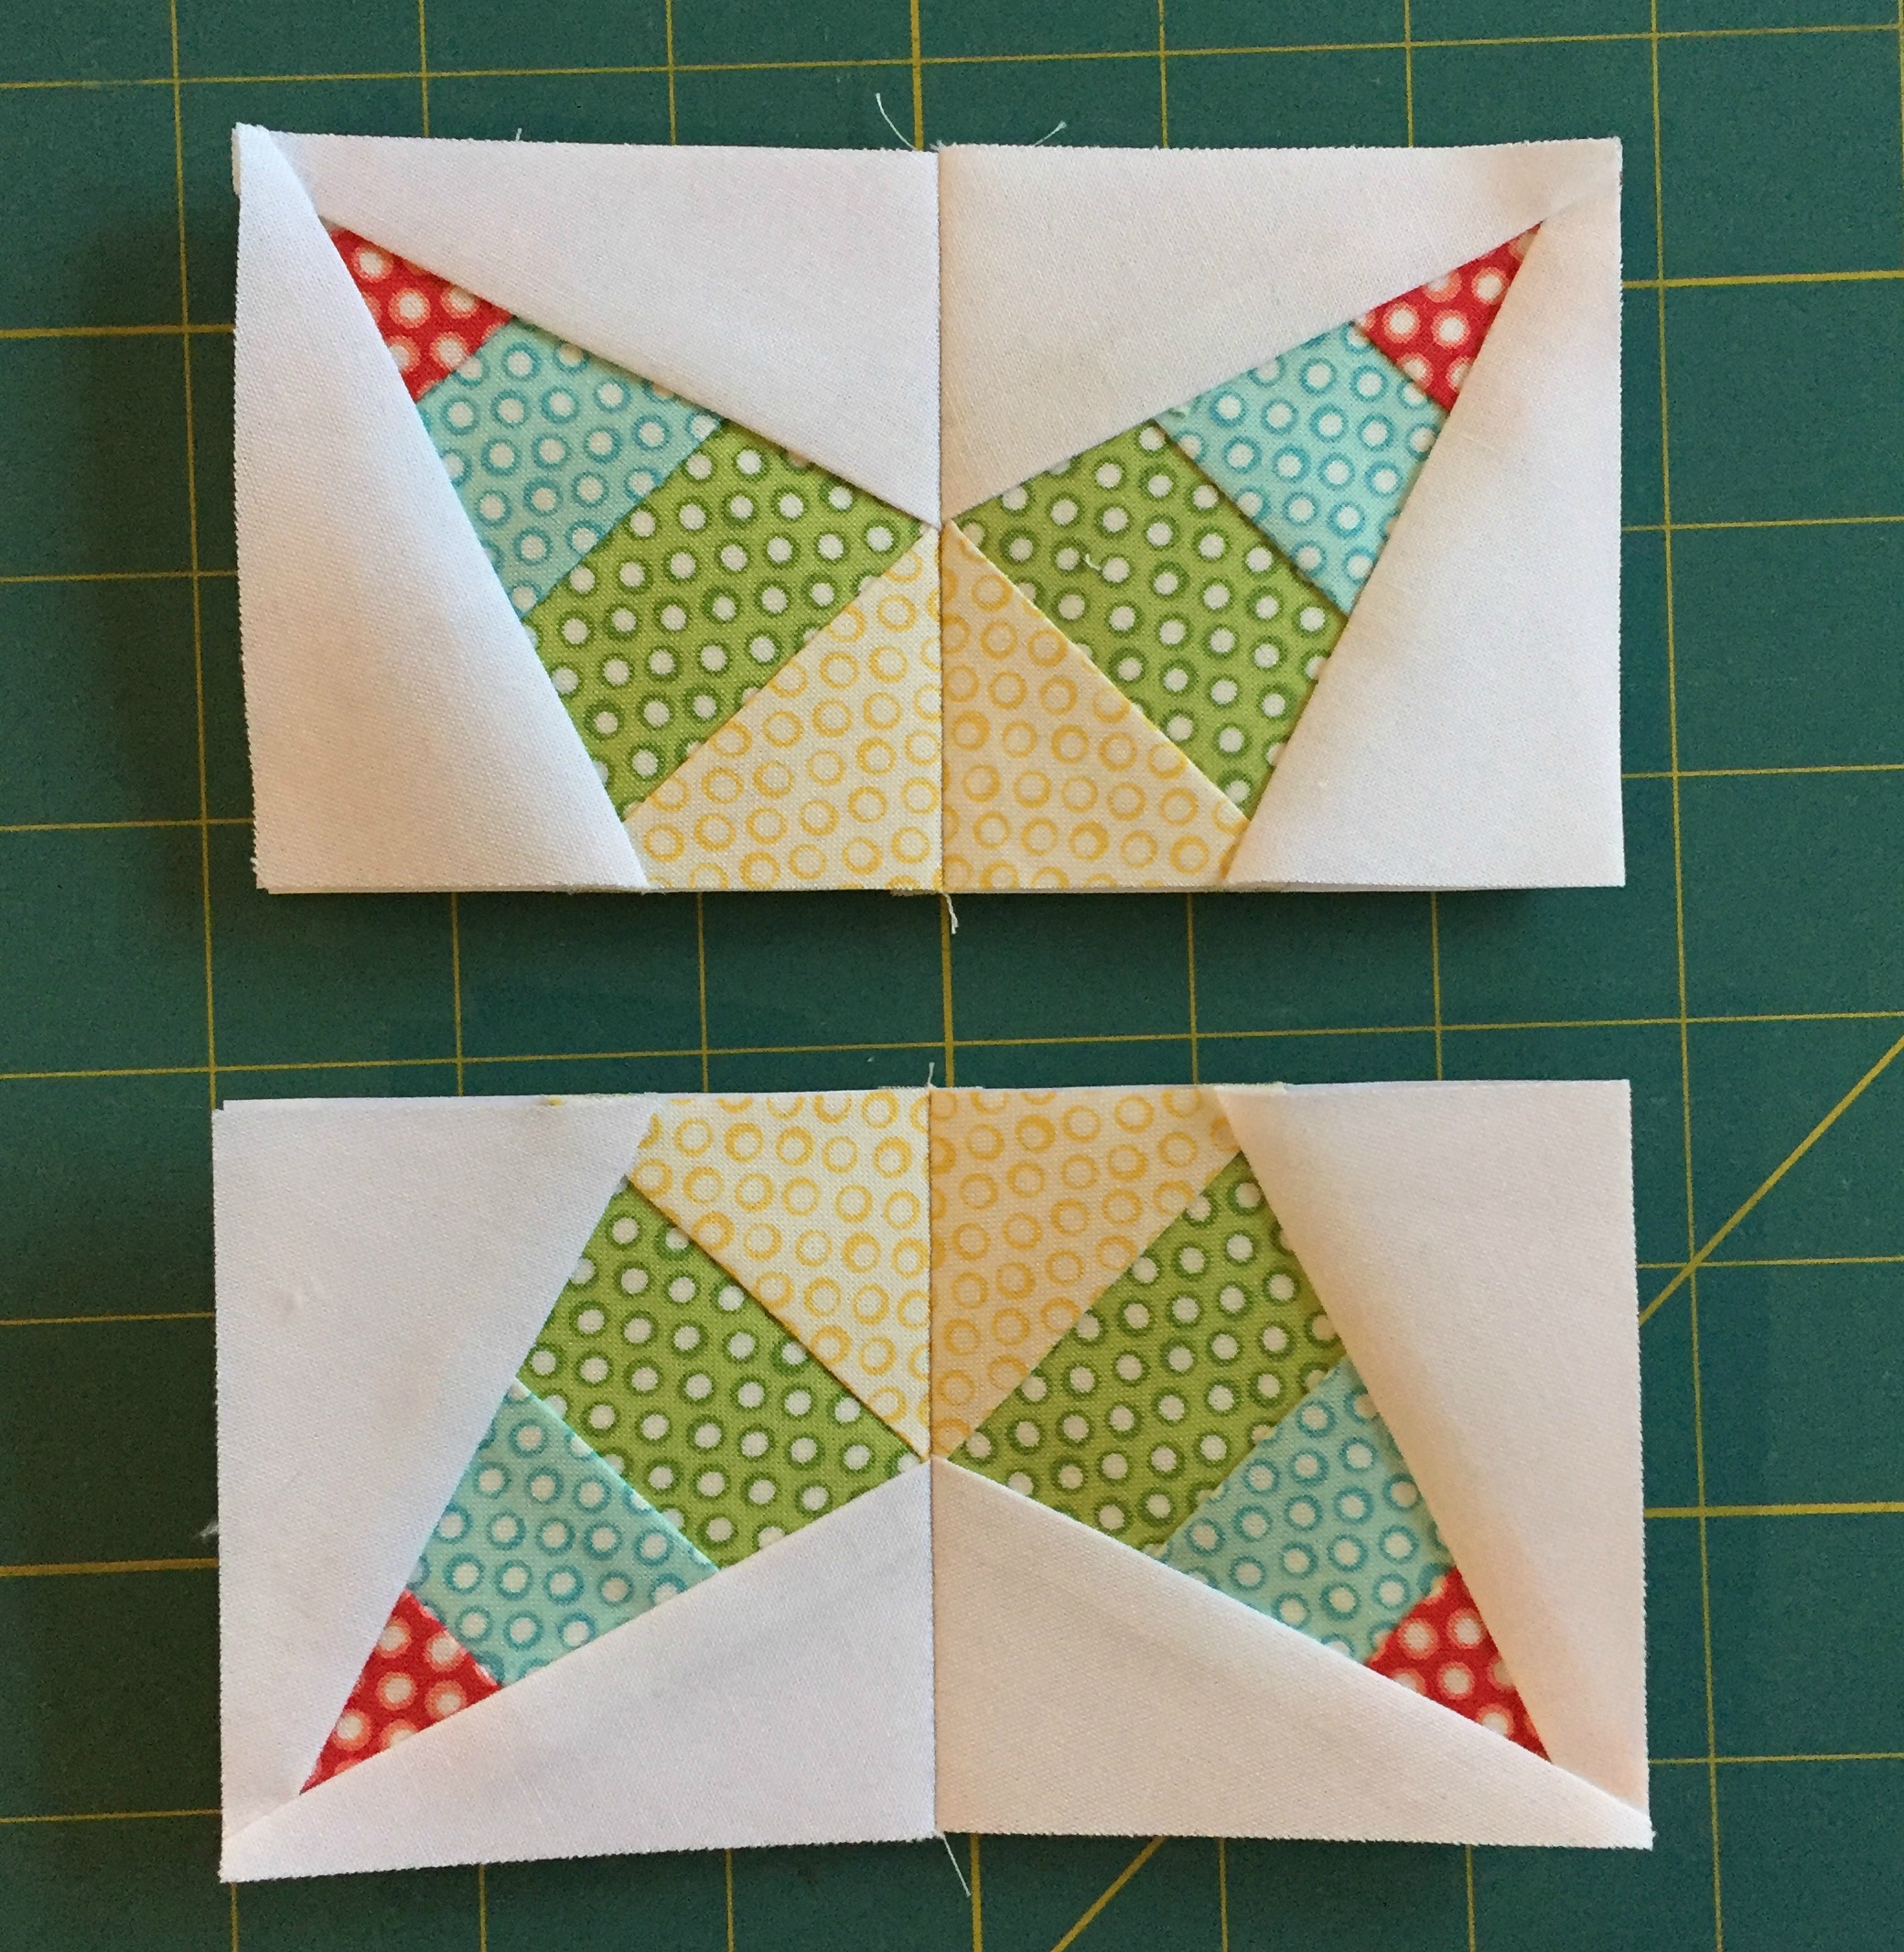
17. Sew the pairs together to create the finished block. Once the block is pieced, remove all of the papers from the back. And you now have a completed Striped Star block.

18. You will use the same basic paper piecing steps to create the Scissors block. Sew each individual unit; sew units A&B together; sew units C&D together and finally sew those pairs together to complete the block.

![]()
This quilt finishes at 25" x 35.5".
Note: To download the pdf template for each block, simply click on the block name or the finished block photo. They are also available in the Printer Friendly file below.
Amanda Castor
![]()
Posted in: