Welcome to Moda Fabrics!
Summer Garden Quilt
Summer Garden Quilt
Published:
Mar 1 2016 - 23:00


Hello! I am Sharon and I am thrilled to be back at the Bake Shop! For this cheerful quilt, I have used the lovely Summerfest created by April Rosenthal. This is a two-block quilt made with one layer cake, and yardage for the background and the border.
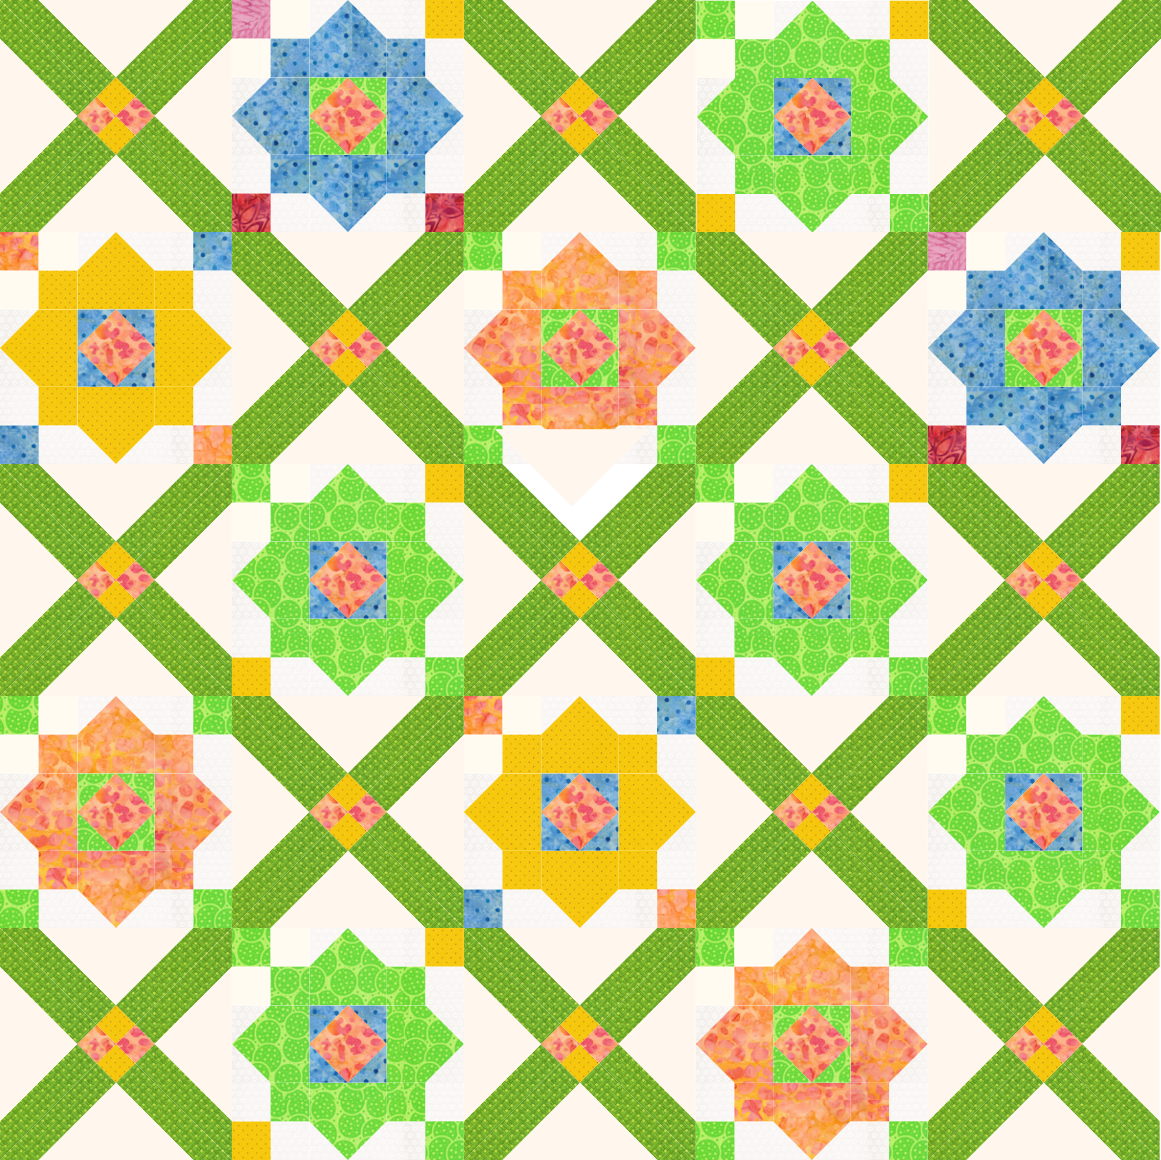
This quilt/project finishes at 62" x62".
![]()
1 Summerfest April Rosenthal Layer Cake
2 yards background fabric {#24033}
1 3/4 yards border and lattice block fabric {#24034)
4 yards backing fabric {#24030}
1/2 yards binding fabric {#24032}
![]()
CUTTING
Layer Cake
Tip: It helps to divide the Layer Cake into different stacks for the parts of the blocks. For the "x" block set aside one LC for the center block. I used yellow.

For the "bloom" block, set aside 12 LC for the blooms, 3 LC for the centers of your blooms, and 3 LC for the cornerstones of the centers. I used green. And 9 LC for the borders.

Bloom Block (make 12)
Choose twelve squares from your Layer Cake. These will be your "blooms".
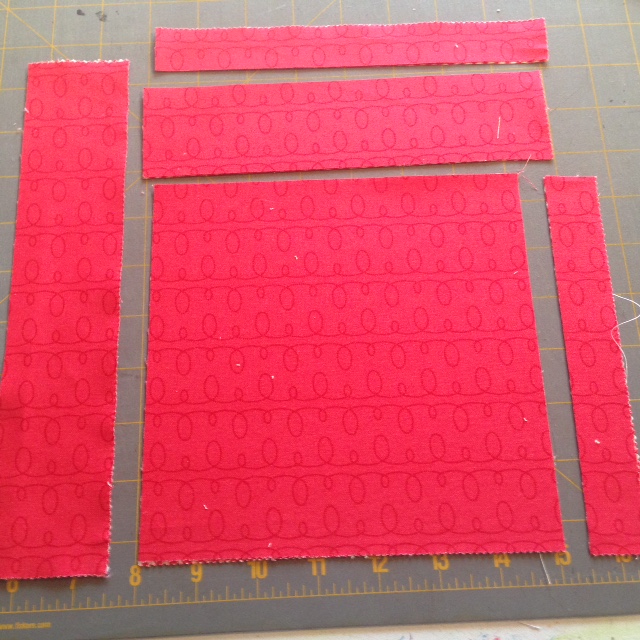
From each LC square, cut a 7" square, subcut into [4] 3 1/2" squares.(c) Cut the remainder of the LC into [8] 2" squares.(a) You will need four of the 2" squares for the blooms, and set aside the other four to be used in the 4-patch units.
Choose three LC squares. These will be the center of your blooms.(f) From each LC square, cut a 7" square, subcut into [4] 3 1/2" squares. Save the extra to be cut into additional 2" squares.
Choose two LC squares for the pieced corners of the center of your blooms, I used green. Cut into 2" squares. You will need [48] 2" squares.
Background Fabric (I used white)
Cut ten 2" x WOF strips. Subcut into [192] 2" squares. (b and d)
X Block (make 13)

Background Fabric (I used white)
Cut (4) strips 8" x WOF. Subcut into (13) 8" squares. Cut on diagonal twice.

Green lattice fabric
Cut (11) 2 1/2" x WOF. Subcut into (52) 2 1/2" x 7 1/2" rectangles.
From one of the LC you have set aside for the center of the x block,
cut (13) 2 1/2" squares.
Inner border: cut (5) strips 2" x WOF.
Outer Border: cut (6) strips 4 1/2" x WOF.
Pieced Border:
Background fabric: cut (4) white 4" x WOF. Cut into (32) 4" squares and
(4) 3 1/2" squares
From the remaining (9)Layer Cakes, cut (32) 4" squares. Each LC will yield four 4" squares.
Bloom Block Construction
 Unit 1
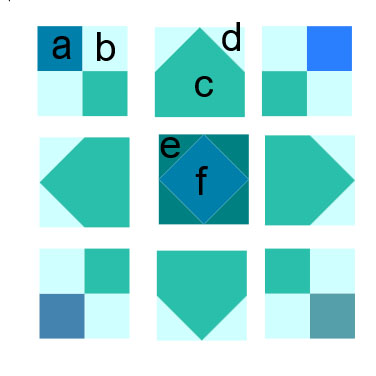
Start with the 4 patch block using the (a) 2" squares and the (b) background fabric 2" squares. Note that the inner corner of (a) will match the fabric you chose for (c) and the outer corner can be a variety from the leftover 2" (a) squares. Construct (4) four units as shown in the diagram for each block.

Unit 2
Use the (c) 3 1/2" squares and two of the (d) 2" squares,. Draw a line diagonally on the 2" squares. Place in the upper left corner, right sides together and stitch on the diagonal line.
Press and trim. Repeat for the upper right corner.
Make 4 units for each block.

Unit 3
Use one of the (f) 3 1/2" squares that you cut for the center of your bloom, and four of the (e) 2" squares you cut for the cornerstones.
Draw a line diagonally on each of the 2" squares. Place a square on opposite corners of the 3 1/2" square. Sew on the diagonal line. Flip, press and trim. Repeat for the other corners. Make one.
Now set the block together as shown in the diagram of the bloom block. Make 12 blocks total and they should measure 9 1/2".
X Block Construction

For unit one: You will use four of (h) 2 1/2" x 7 1/2" rectangles, one of (i) 2 1/2" square, and four of (g) (this is the 8" background cut on the background twice so that you have 4 triangles)
Sew a 2 1/2" x 7 1/2" rectangle to each side of the 2 1/2" square. Sew a Background triangle to each side of the 2 1/2" x 7 1/2" rectangle. Repeat.
Sew each of th ese units to each side of the first unit.
You will have fabric extending past the edges as shown in the diagram.
After the block is sewn, trim the block to 9 1/2". Make 13 blocks.
Setting the blocks toegether in the quilt.
Set the blocks together as shown in the diagram.
Now add the inner borders using the (5) 2" strips you cut earlier. Piece the strips together and cut into 45 1/2" or whatever is the correct measurement for your quilt. Stitch the (4) 2 " corner blocks to each end of 2 of the long strips.
Add a 2" x 45 1/2" strip to the top and bottom of your quilt.
Now add the other 2 strips that have the cornerstones to the sides of your quilt.

Pieced border
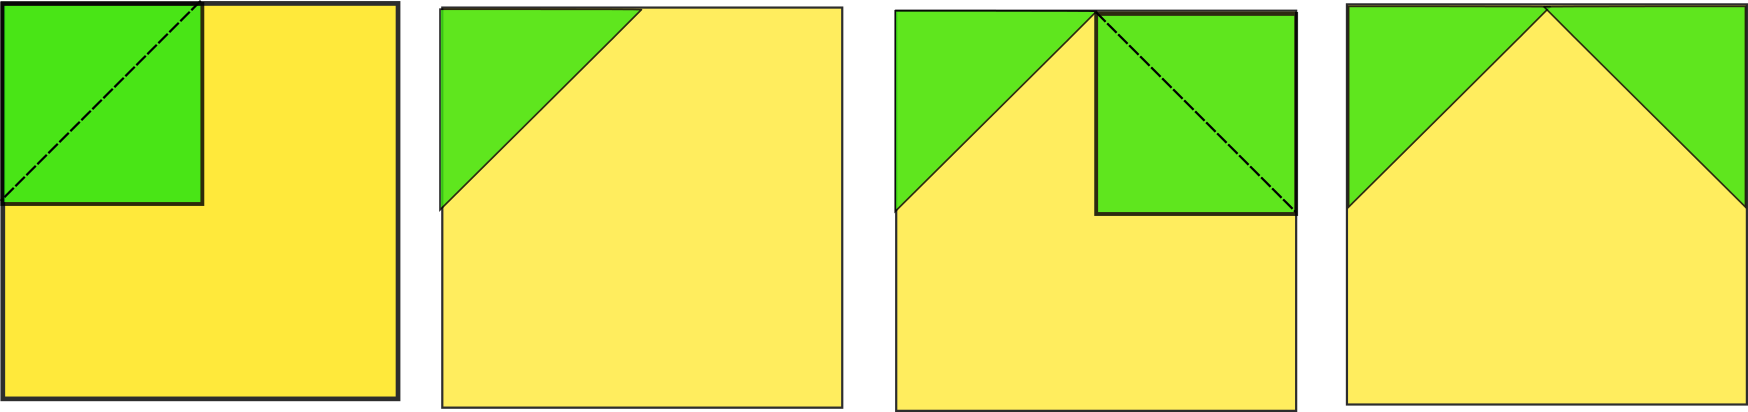
For the pieced border you will use the (32) 4" print squares and the (32) 4" background squares. Layer a print on top of a background square, draw a line on the diagonal, and sew 1/4" to each side of the drawn line. Cut on the drawn line and press each triangle open for a Half Square triangle. You will need a total of 64 HS units.
Sew together as shown in diagram, watching placement. You will have 16 HS in each border.
![]()
On the ends of 2 of the pieced border units sew a 3 1/2" background square.
Sew a pieced border to the top and bottom of the quilt.
Sew the other pieced border units that have the 3 1/2" background squares to the sides of your quilt.
Final Border
Now take the six 4 1/2" strips and sew them together. Cut two strips that measure 54 1/2", or the correct measurement for your quilt. Sew to the top and bottom of your quilt. Now cut two more strips that measure 62 1/2", or the correct measurement for your quilt. Sew these strips to each side of the quilt.
And you are done!
![]()
This quilt finishes at 62"x62"
Hoping you enjoy this design, and I would love to see your quilts! Please visit my blog and let me know if you have made this quilt, or if you have any questions.
Sharon Denney Parcel
{www.yellowcatquilts.com}
![]()
Posted in: