Welcome to Moda Fabrics!
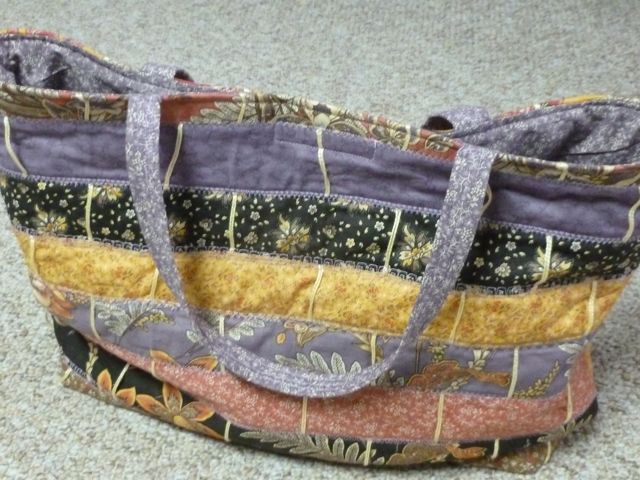
Wild Orchid Pin Woven Jelly Roll Tote
Wild Orchid Pin Woven Jelly Roll Tote
Published:
Mar 22 2016 - 10:28


The technique of pin weaving is not a new one, but I still love the effect it creates with just a bit of effort. I am thrilled to share this technique with you with my second recipe as a Moda Bake Shop Chef. Hi, I’m Carole, and my blog is From My Carolina Home, where I talk about quilting, sewing, crafting, and a lot of other things. Although I enjoy quick and easy like anyone else, sometimes I like to stretch with a difficult or time consuming project. This one will take a weekend, but anyone can do it, just follow the steps.
![]()
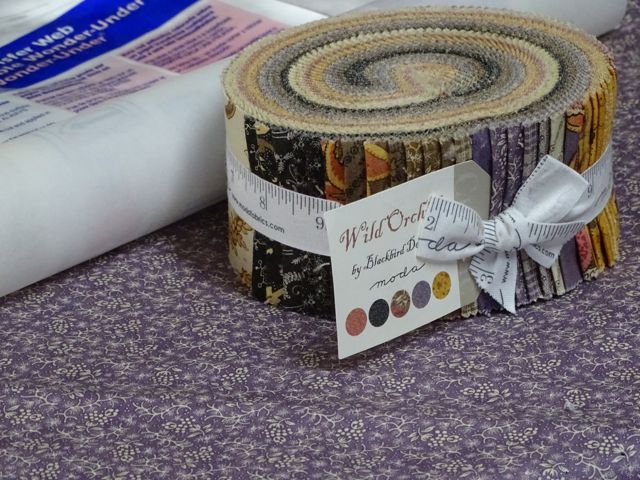
11 Jelly Roll strips, I used Moda Wild Orchid by Blackbird Designs
2/3 yard coordinating print for lining
2/3 yard white Bella Solid - cut two pieces 18x24
2 skeins perle cotton cording
1-1/4 yard paper backed lightweight fusible web like Pellon Wonder Under
2/3 yard batting - cut 2 strips 1-inch by 20-inches, and 2 pieces 18 x 24 inches each
Spray starch or pressing aid
Optional, hook and loop tape for closure
![]()
Select a jelly roll strip that matches the lining print, and set aside. Select another strip for the inside pocket that is a nice contrast to the lining and set aside. For the remaining nine strips, cut each one in half crosswise to make 18 strips 2-1/2 x 22 inches. Divide into two sections with one from each print in each section. Press the long edges of all the strips 1/4-inch to the wrong side, using starch or pressing aid to help keep the edges straight.

Using a gridded cardboard mat, place long pins at two inch intervals, 18 inches apart, for 20 inches. If you don't have one of these mats, make your own with a cardboard box and a ruler, placing dots 18 inches apart with 2 inch intervals between. Place paper backed fusible web with the fusible side up between the two rows of pins. Pin the ends down on each end to hold it in place. Using one skein of perle cotton cord, string the cord around the pins at two inch intervals, going across the area between the rows of pins creating lines of cording every two inches on top of the fusible web.
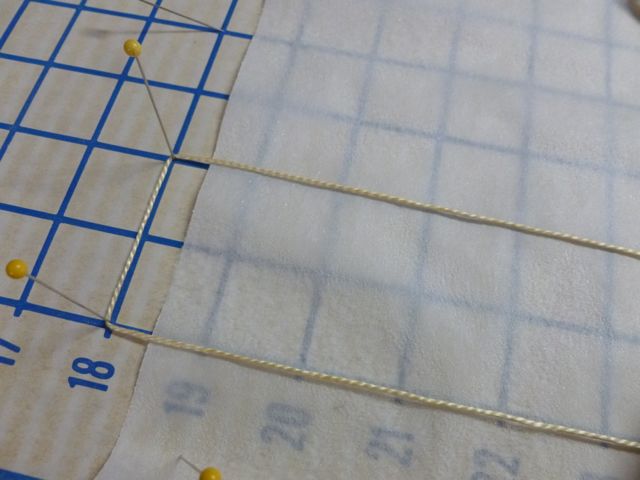
When you reach the last pin, double back over the same pins working back towards the starting point so there are two strands of cording placed two inches apart across the fusible web.

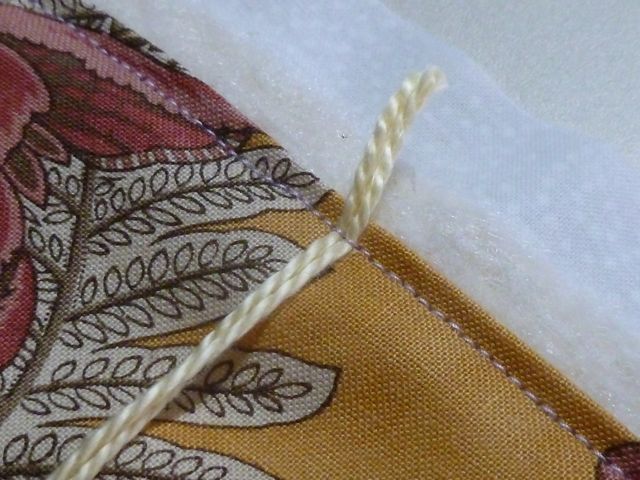
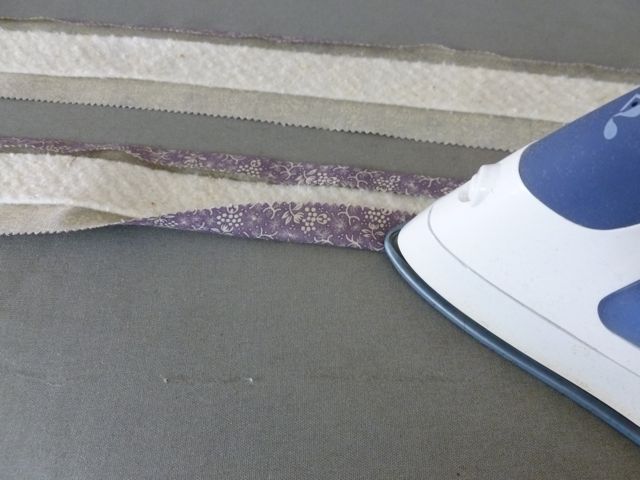
Weave nine pressed strips, right side up, through the lines of perle cotton, butting the edges against each other as you go, and alternating the lines over and under like weaving a basket.

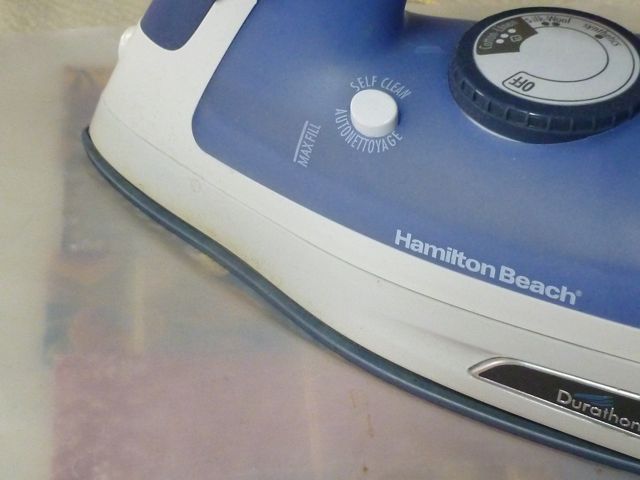
Press the strips on the mat to activate the fusible web and hold the weaving in place. Work from the strip at one end, pressing (not ironing) each strip so it touches the one next to it, careful to keep the raw edges turned under. A teflon pressing cloth helps here to keep any stray fusible from fusing to your iron.

Carefully take the woven front piece off the pins. Flip it over, and peel the paper off the back of the woven piece.

Lay the woven top on one of the batting pieces, fusible side to the batting and press, activating the fusible. Use your teflon pressing sheet to keep your iron clean.
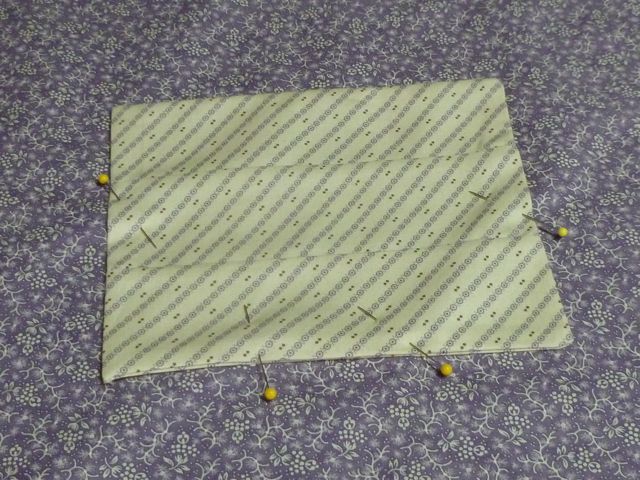
Lay the front woven piece right side up on one piece of white Bella solid fabric and pin baste a quilt sandwich. You'll have the woven piece, fusible, batting, and backing layers together.

Repeat this process to make another woven piece for the back.

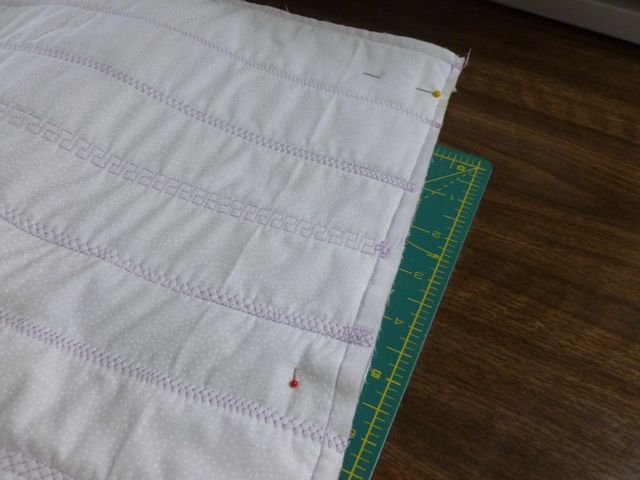
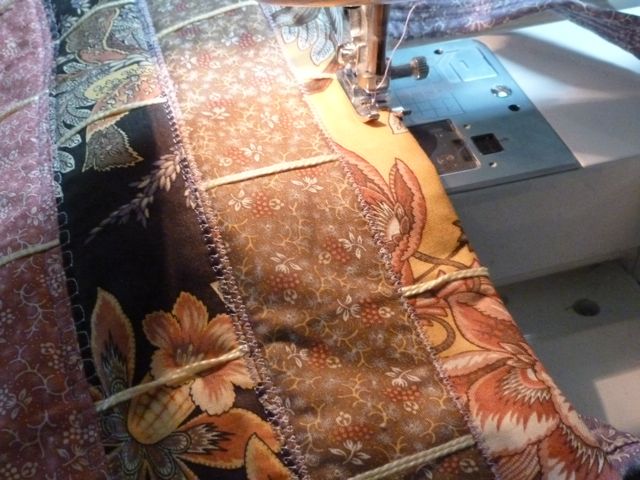
Take the front and back to the sewing machine. Straight stitch a line of stitching along one long edge through the quilt sandwich to secure the loose perle cotton edges.

Working down the front, sew/quilt the woven piece by stitching along the 'seam' lines where the strips edges meet. Work from the top to the bottom, making sure each set of two jelly roll strips meet, and that the stitching secures them together. Now is a great time to use some of the decorative and faggoting stitches on your machine, or if your machine doesn't have those, just use a wide zigzag.

Straight stitch across the bottom to secure the loose perle cotton. Straight stitch down both sides to secure the edges.
Repeat for the back piece. Trim off the excess batting, backing and any selvedge edges of the strips. Re-stitch if the stay stitching is cut off.

Measure your completed front and back. This measurement will vary due to the density of your decorative stitches and the accuracy of the 1/4-inch turn on the strips. Mine was 17x22 inches. Make sure that both the front and back are exactly the same size. Cut two lining pieces this same measurement from your coordinating lining print.
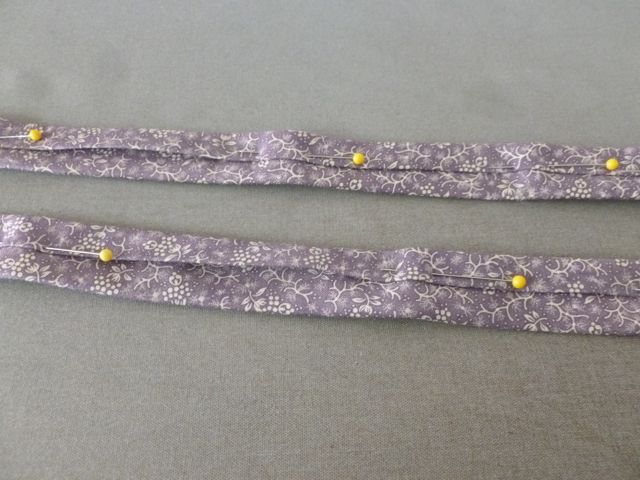
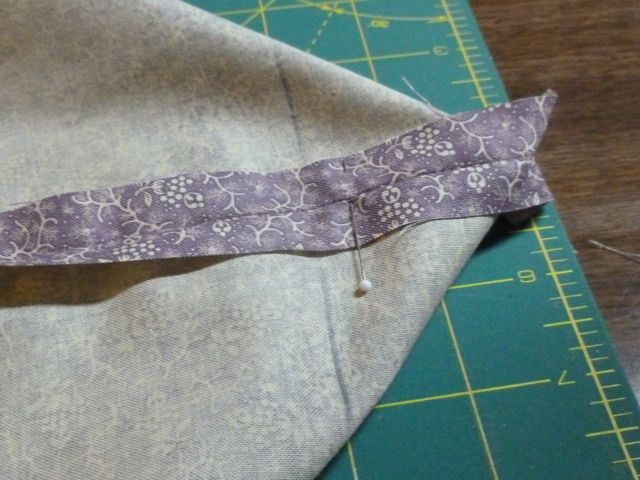
To make handles, remove the selvedge edge, and cut the reserved jelly roll strip in half crosswise. Turn under 1/4-inch on one long side of each strip to the wrong side. Place a 1-inch wide batting strip in the center of the wrong side of the strip.

Wrap the raw edge over the batting and press.
Fold the folded edge over the raw edge to the center of the handle, covering the raw edge, pin and press.
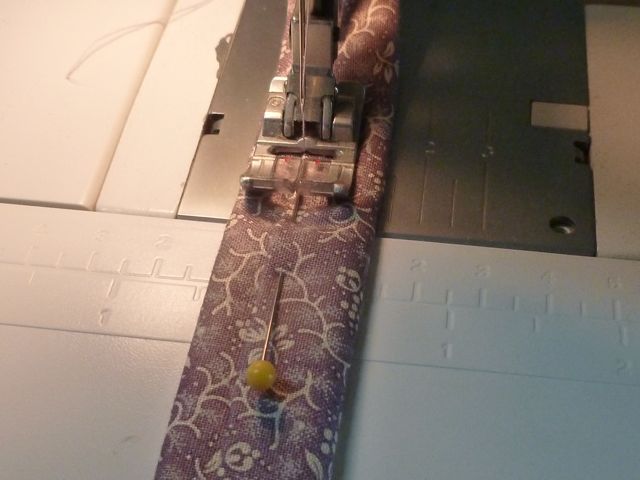
Sew a line of stitching along the folded edge securing the edge. Sew additional lines on either side creating three lines of stitching for handle strength, and decorative interest.
Place the handle edges six inches in from the sides on the long side of the top, seam side up (right sides together). Stay stitch 1/4 inch from the edge. Repeat for the handle on the back.

Place front and back right sides together. Sew with a 1/2-inch seam on the sides and across the bottom. You can see the decorative stitching I used better on the back.
Box the corners by aligning the seams on the side and bottom (right sides together), creating a triangle. Then, measure two inches in from the point, and sew a line of straight stitching across the corner.

Repeat for the other corner. Turn bag right side out.

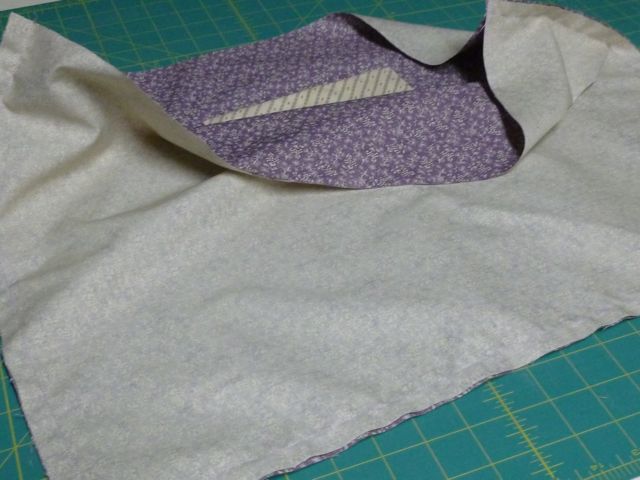
Using the strip set aside for pocket, cut three sections 14" long. Sew together on long sides. Fold in half, wrong sides together to make a pocket unit 7" x 6-1/2". Sew across the top, down the side, and across the bottom, leaving an opening on the bottom to turn. Clip corners, turn and press.

Center the pocket unit on one lining piece, about 4 inches down from the top edge. Sew by topstitching along the sides and across the bottom 1/4 inch from the edge, catching the opening used for turning as you sew.
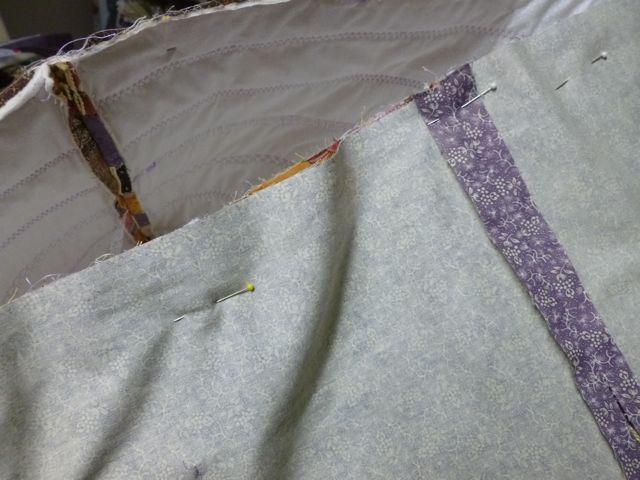
Place lining pieces right sides together. Sew the sides and bottom, leaving an opening for turning on one side, and leaving the top open.
Box the corners of the lining in the same manner.
Place the bag inside the lining right sides together, matching the side seams. Pin the top edge, and stitch with a 1/2-inch seam.
Turn bag right side out through the opening in the lining. Whip stitch or machine stitch the opening in the lining closed. Press the top seam.

Topstitch 1/4 inch from top edge.
If a closure is desired, center hook and loop tape pieces on either side of the inside at the top and topstitch in place.

Enjoy your new tote!

![]()
One great tote bag approximately 17 x 22 inches, fully lined with an inside pocket.
Hope you enjoyed this project! Stop by my blog for more quilting projects and other crafting, gardening, cooking, stamping and sewing projects.
Carole Carter
From My Carolina Home
![]()
Posted in: