Welcome to Moda Fabrics!
Charming Peels Quilt
Charming Peels Quilt
Published:
Apr 15 2016 - 23:00


I enjoy taking classic patterns and giving them a contemporary feel. I’ve always admired orange peel quilts, and came up with a design for a lap quilt using two charm packs and machine appliqué. The gentle curves of the orange peels are easy to master, making this an ideal project for someone new to machine appliqué.
This quilt finishes at 51" x 58".
![]()
Two charm packs (Canyon by Kate Spain)
2 yards of backing fabric
1 yard for inner border and binding
¾ yard for outer border
3 ½ yards for backing
3 ¾ yards of 17" wide paper backed fusible webbing
Small piece of template making material
Piece of batting at least 58” by 66”
![]()
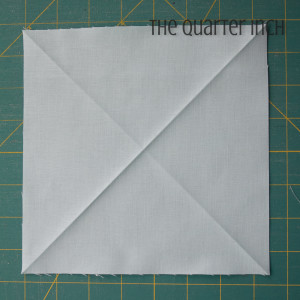
- From the background fabric, cut [42] 7½” squares.
- Iron two creases diagonally across each square. These will help you place the orange peels.

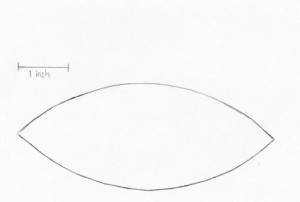
- Make a template using the image provided in the Printer Friendly Version at the bottom of this post. Be sure it prints at the correct size! The peel should measure five inches from point to point. You may wish to make two templates.
- Cut [84] 4 ¾” squares from the fusible web. By cutting the fusible web a bit smaller than the charm square, you will have a bit of wiggle room when lining up the fusible web on the charm square.
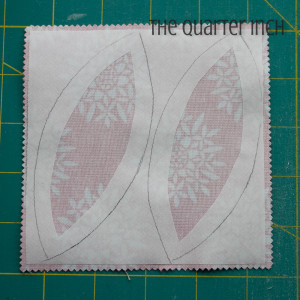
- Using your template, trace two peels, angling each a bit to fit. Since you made each square a bit smaller than your charm squares, it’s fine to draw right up to the edge. The peels are symmetric, so there is no right or wrong side. You might wish to make two templates and lay them both out before tracing to ensure both will fit.
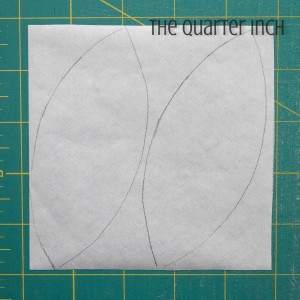


- Cut the center out of the fusible web, leaving roughly ¼” to ½” around from the drawn line inward. No need to be too precise!
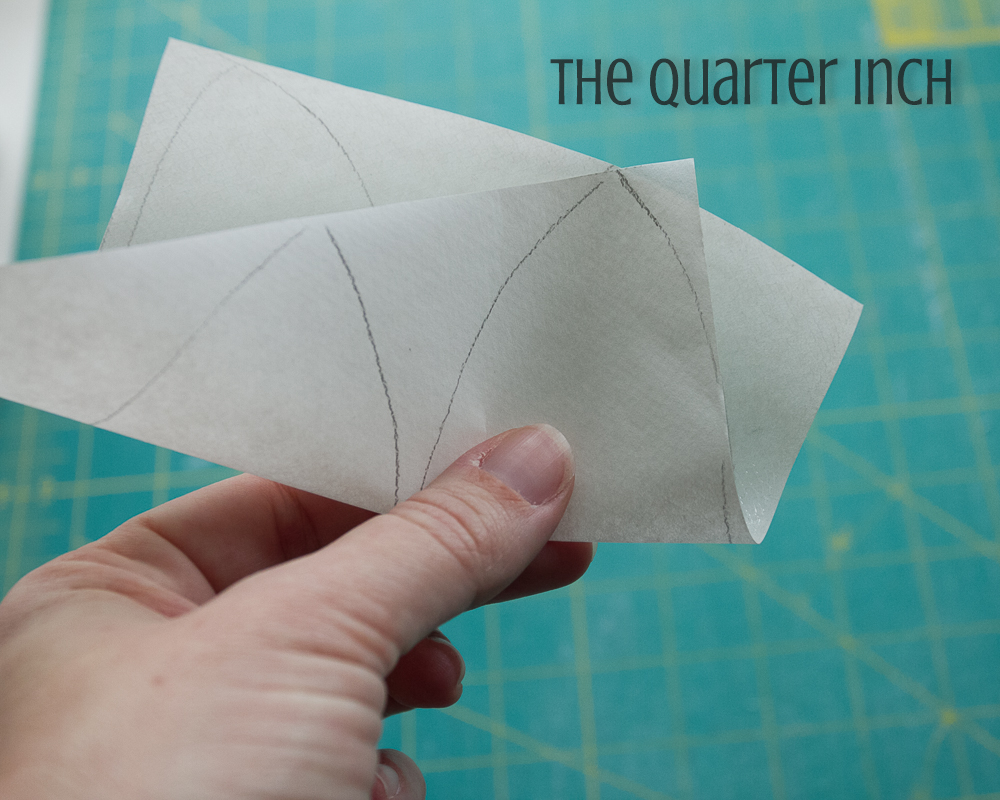

Cutting out the center allows for the peel to have more poofiness. You can clearly see the difference in these test blocks. The one where I didn’t remove the center from the fusible web (on the right) is much stiffer and the quilting doesn't have as much loft.
- Remove the backing paper and carefully position the fusible web on the charm square. Fuse the webbing and fabric together.

- Being careful to cut precisely, cut each orange peel along the traced lines. You will have 168 orange peel shapes.
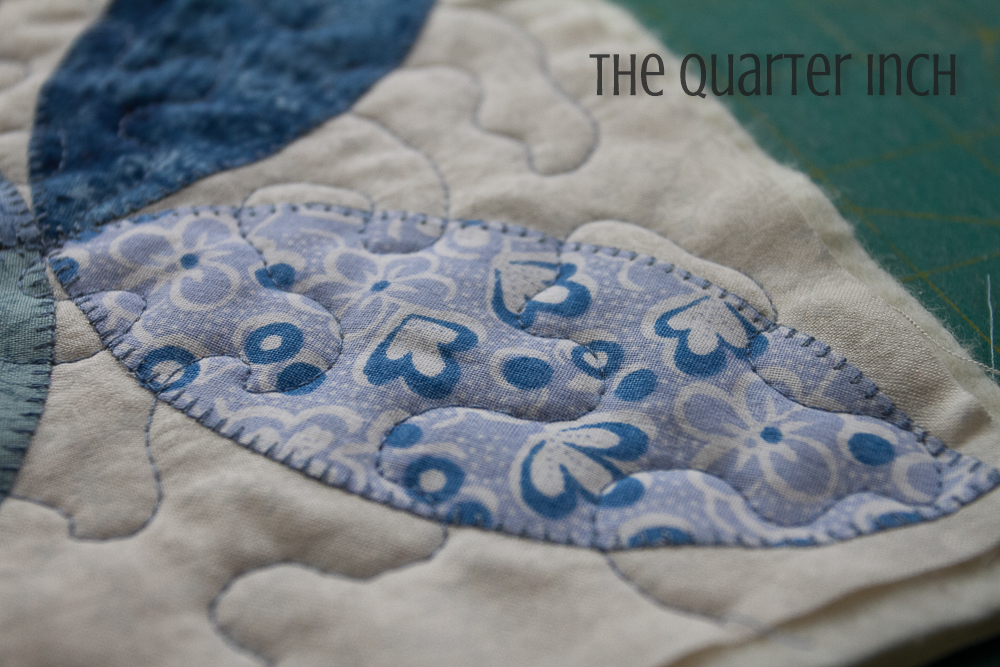
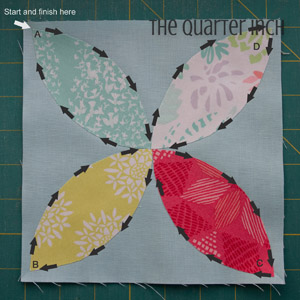
- Take a square of background fabric and four orange peels and carefully position each peel along the folds, with the four tips meeting in the center. Be sure there is a precise quarter inch seam allowance from the tip of the peel to the corner of the background fabric.

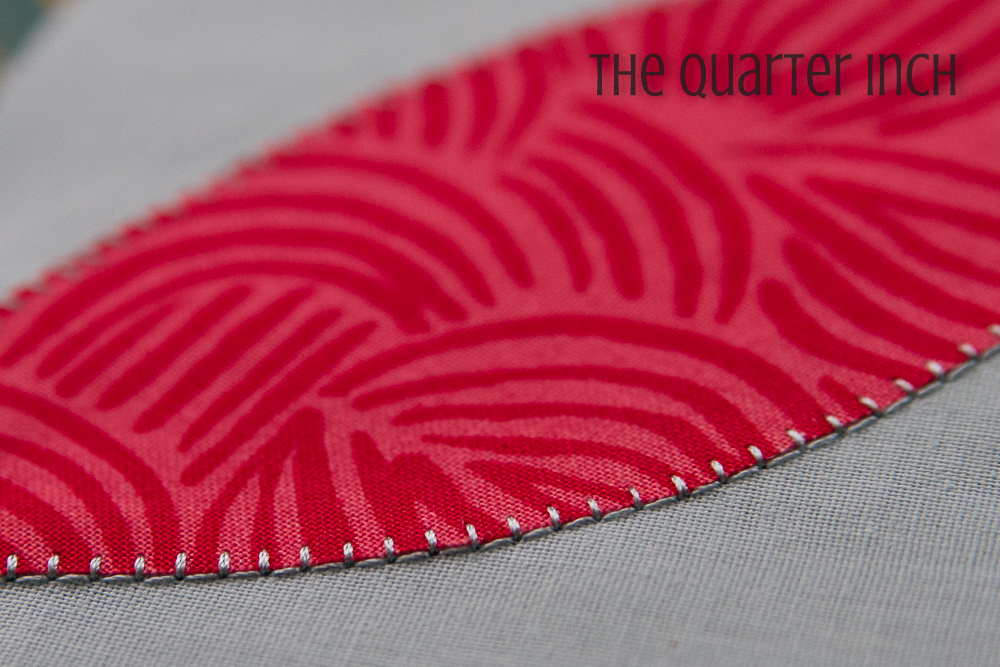
- Stitching around the edge of each peel. I used a blanket stitch in a thread color matching the background. You can also use a zig zag stitch, a straight stitch, or a blind hem stitch. Experiment using scraps and find which stitch works best for you, your machine, and your project.

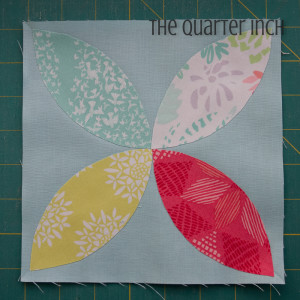
- Starting at one tip, sew around the four peels. You can stitch around all four peels in a continuous motion.
- Lay out your blocks, rearranging until you are pleased with the layout. I try to avoid having to many of the same color peels clumped together in an area. Keep moving blocks around until you are satisfied.
- Make sure the tips of your peels are meeting up and pin blocks together. Sew the blocks into rows. Press seams to the left on even rows, and to the right on odd rows.
- Sew the rows together.
- Cut five 2” strips from the fabric for the inner border. Trim two strips to 42 ½”. Sew to top and bottom.
- Cut one strip in half and sew one half to each of the remaining strips. Trim to 52 ½”. Sew to each side.
- Cut six 3 ½” strips from the fabric for the outer border. Cut two of the strips in half and attach one piece to each of the remaining four strips. Trim two strips to 52 ½”. Sew to sides.
- Trim the remaining two strips to 51 ½”. Sew to top and bottom.
- Prepare the backing. Cut the 3 ½ yard piece of backing fabric in half. Join the pieces together with the seam running horizontally, resulting in a backing piece 63” wide and 84” long.
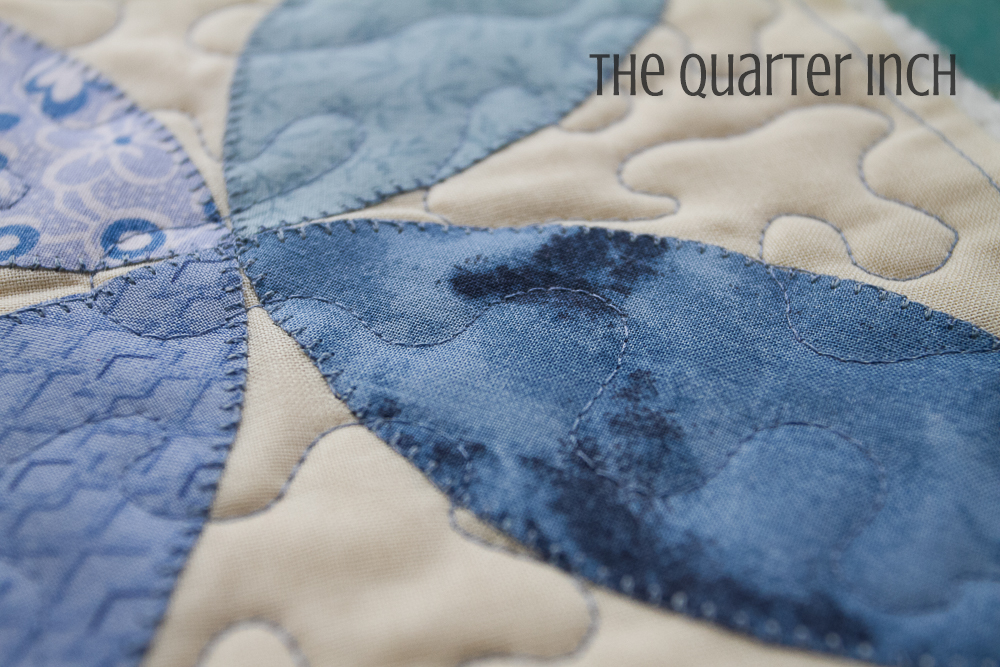
- Layer the backing, batting, and quilt top. Quilt as desired. I quilted the project on a longarm using an all over pattern called Alex. I used aqua thread.
- Trim quilt.
- Cut six 2 ½” strips from the binding fabric. Join together and press. Attach binding.
![]()
One lap quilt, yummy enough to eat, measuring 51” by 58”.
Christine Weld
{thequarterinch.blogspot.com}
![]()
Posted in: