Welcome to Moda Fabrics!
Flower Patch Quilt
Flower Patch Quilt
Published:
Apr 2 2016 - 23:00
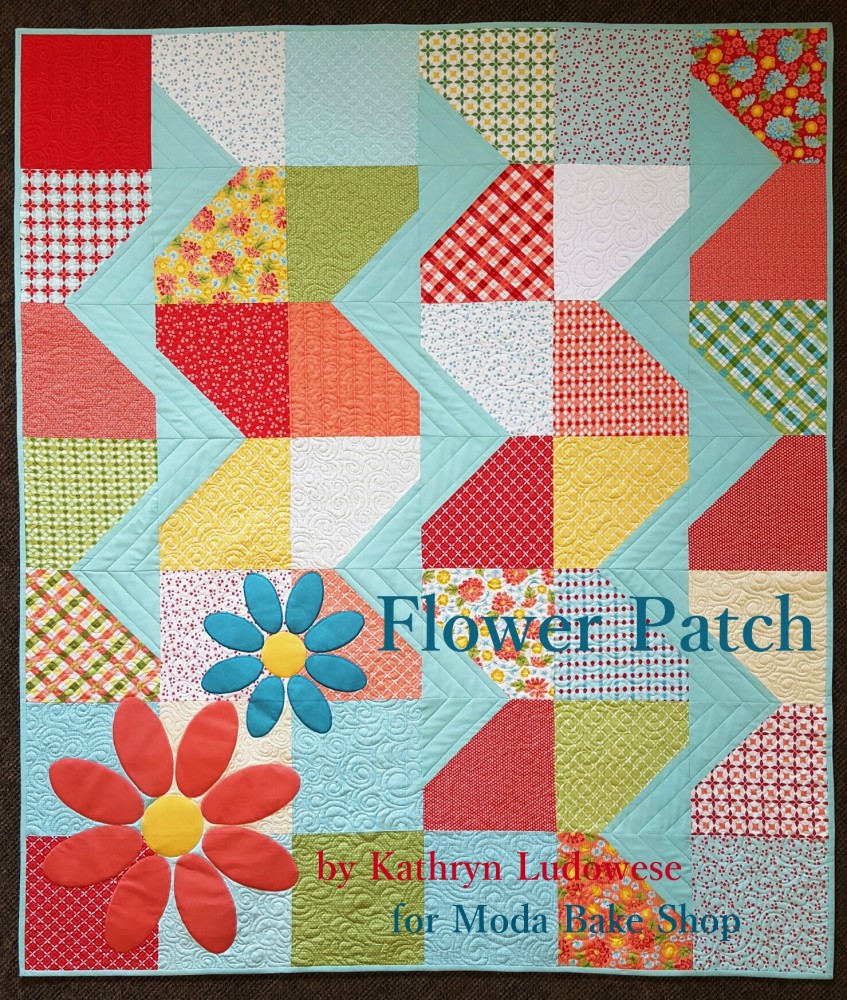

Hi, Kathy here from Gathering Friends to show you how to create this festive 57-1/2" x 67" quilt. I had so much fun making this quilt and it went together so fast. This is a great beginners pattern, just leave off the appliqué. You can make this in time for Spring from your favorite packet of layer cakes, by adding an accent color and a little bit of pop with the appliqué flower. The ribbons of color add happy motion to the quilt, breaking up that block look while still keeping it simple. This pattern allows you to incorporate your favorite color into the quilt to make it unique. The appliquéd flower is just enough so that if you've been wanting to try appliqué, now is your chance. With gentle curves and no points, it's a great beginner appliqué project. This project would look just as sweet without the appliqué, if time is a factor or if appliqué isn't for you. What a fast and easy way to show off your favorite layer cake!
This quilt finishes at 57-1/2" x 67".
![]()

1 Layer Cake® ("Summerfest" by April Rosenthal)
1-1/4 yards accent fabric (Bella Solid Aqua 9900-34)
3-3/4 yards backing fabric
5/8 yards binding fabric (Bella Solid Aqua 9900-34)
Colorful scraps for appliqué OR
1/4 yard for large flower petals
1/8 yard for small flower petals
5" x 20" scrap for flower centers
![]()
I was so excited when the package from Moda arrived. I came home from a 4 day quilt retreat to find this happy little bundle sitting on my doorstep, just waiting for me. Now all I needed to do was find my colors for the appliquéd flowers, so I got to work picking out some more happy splashes. That should add a little pop to the quilt, don't you think? The fabric has been chosen and I'm ready to play. WooHoo!!
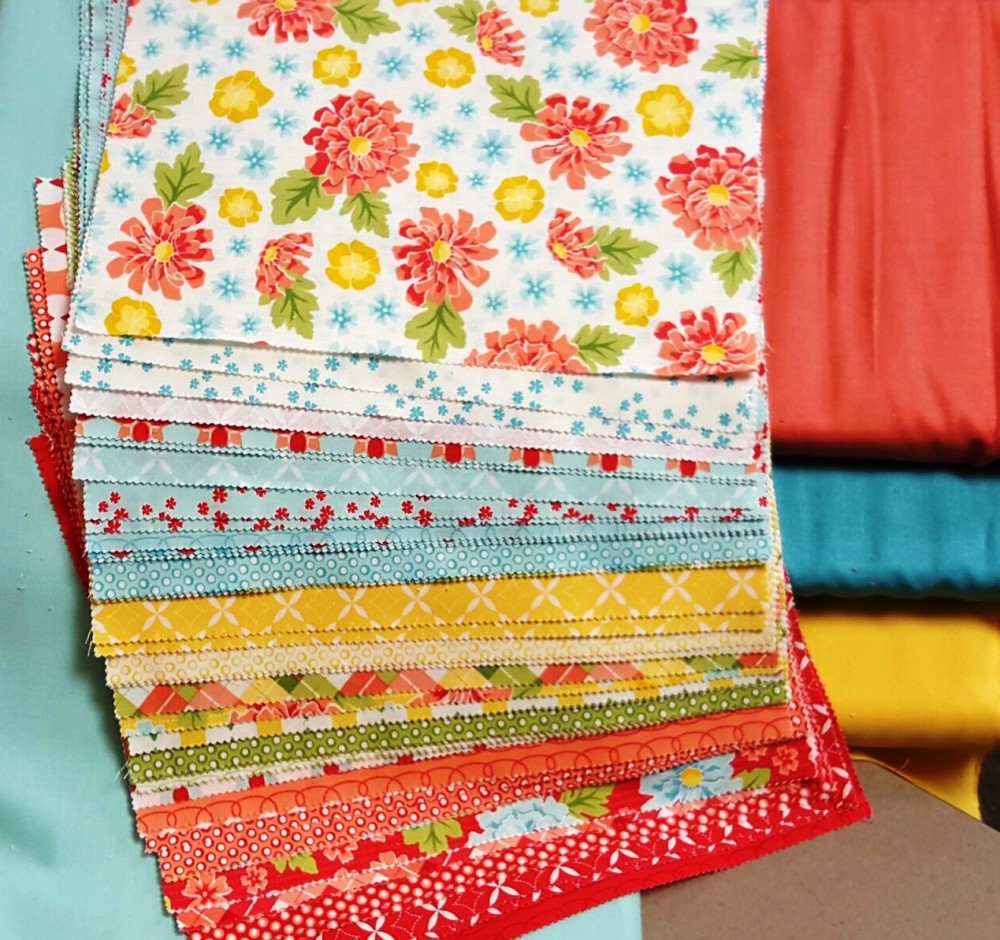
Separate 12 blocks from the layer cake and set these aside, these squares won't have the accent corner. Choose some squares that are closest to the accent color, then you won't need to worry about the accent not "popping" on those. Keep a few different colors also, to have some variety. Use the remaining (30) 10" squares in the instructions below.
CUTTING:
From the accent fabric:
~(30) 7" squares
~(7) 2-3/4" x width of fabric strips (Binding)
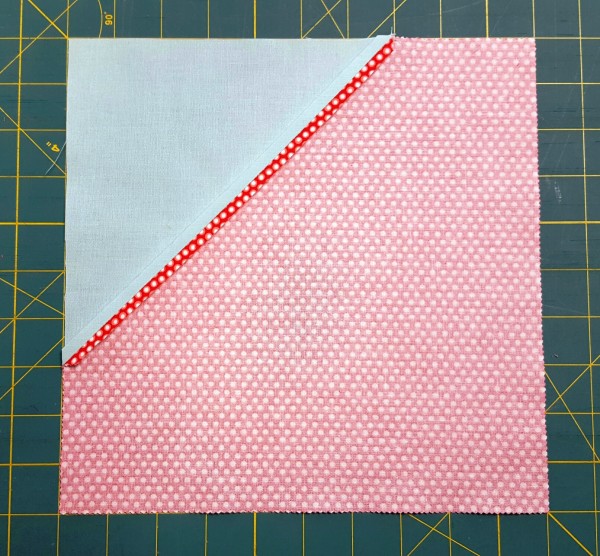
Draw a diagonal line from corner to corner on each of the 7" accent squares. Position the accent square on one corner of (30) 10" layer cake squares, pin it in place and stitch on the line. 
First fold the accent triangle back, to make sure it lines up with the 10" square. Next lay the 1/4" marking on the ruler over the seam and trim the seam allowance 1/4". This will eliminate extra bulk when piecing.


Press the seams open on the squares that you've sewn. Proof to 10". Make 30 accent blocks.

Now comes the fun part, you're all ready to lay out the blocks. Using the 30 accent blocks and (12) 10" squares that you set aside in the beginning, lay them all out so there are 6 blocks across and 7 blocks down. Refer to the picture for placement of 10" squares and accent blocks....on the right, not the left. :) I found that taking a picture of the layout really helped. I could reference it when I was sewing the rows together to make sure they were in the right order, it saved on the ripping!

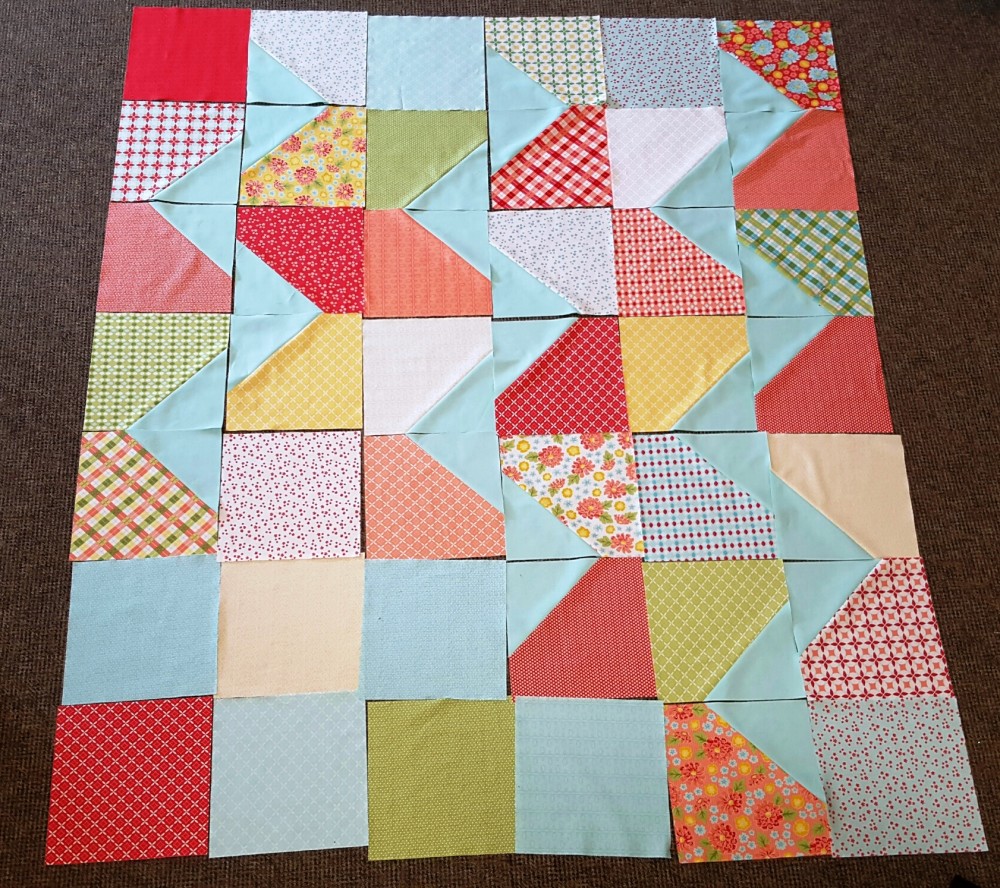
Here's the creative mess! Ahhh, now there's order.
Sew the top 4 rows in strips. Here's a little tip, if you're having a hard time getting your points to line up when sewing the rows together. Stick a pin through the top row and bottom row that you're sewing together, right in the angled seam about 1/4" down. This will ensure that the seams creating a point will line up.

Alternate the seam pressing, pressing the 1st row to the right, second row to the left, third row to the right and fourth row to the left. This way the seams will match up smoothly, for the least amount of bulk. Sew together the first 4 rows. If you won't be adding the 2 flowers, continue to sew the remaining rows in the same fashion.

If you're planning on doing the appliquéd flowers, sew the bottom 3 rows of the quilt in 2 sections. The appliqué will be much easier to do on a smaller section of the quilt. For constructing the bottom 2 sections, continue the seam pressing in the alternating directions. For the left bottom section, press the seams towards the top of the quilt. For the right bottom section, press the seams toward the bottom of the quilt.

Now it's time to appliqué! Because my flower center was light, the background fabric was showing through. I fused 2 pieces of the flower center fabric together, before tracing the circle appliqué template on the fusible web. If you don't want to layer your flower centers, once you've decided the placement of appliqué pieces you could trim a circle out of the quilt for the least amount of bulk. Below is the template for the flower centers and petals. Print the template from the Printer Friendly file or by clicking on the image below. If you'd like your flowers the same size as mine, enlarge the template 160%. Trace (8) large petals, (8) small petals, (1) large flower center and (1) small flower center on the paper side of the fusible web.
 Following the manufacturers instruction, apply the fusible web to the wrong side of the fabrics of choice for the petals and centers. Here I'm working on the small petals.

Cut on the traced line and remove the paper backing. Position all the pieces on the left bottom section of the quilt where you want them, then press with a hot iron. Sometimes a damp towel or moisture will help it adhere to the quilt.

Buttonhole stitch or satin stitch, using a short stitch length and a medium zigzag around the shape. I did a satin stitch on my quilt. Hint: Use Tear Away on the bottom of the quilt, for stability when appliquéing.
Sew the bottom left and bottom right sections together. Press the seams toward the bottom right section. Sew this to the top section of the quilt and press. Quilt should measure 57-1/2" x 67".
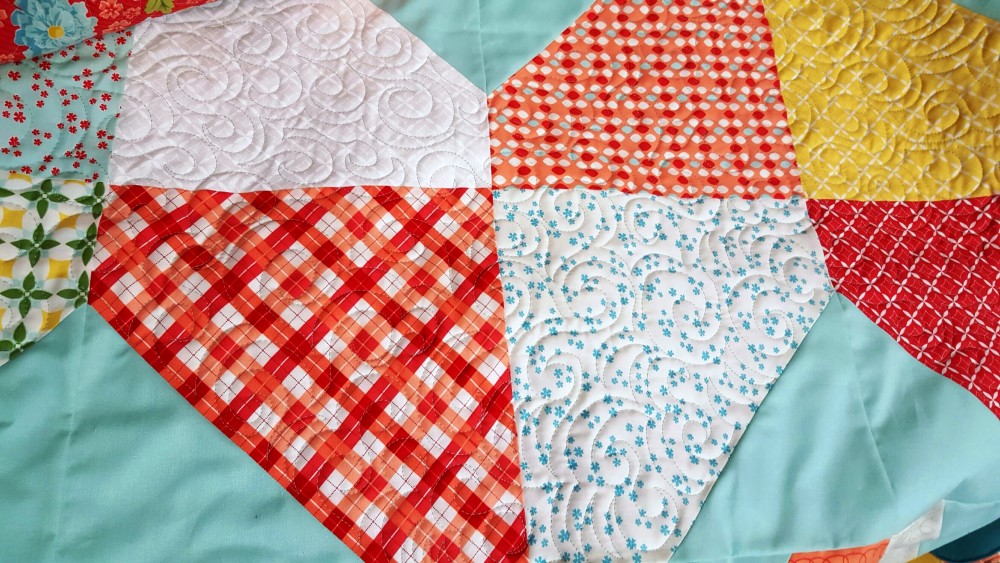
Layer with batting and backing. Quilt as desired. I did an all over wind pattern with a light aqua thread, staying away from the appliquéd flowers. I echo stitched around them in the same color as the petals and center, to make them pop.
To trim the quilt, I measured 9-3/4" away from the seam all the way around. That way even if the quilt isn't perfectly square, it will appear symmetrical and your corners will be square.


Sew together the (7) 2-3/4" x width of fabric binding strips, piecing them diagonally. Bind using your favorite method.
Optional Ideas to make it yours: This quilt would be adorable with an inner and outer border for added size. You could also take those leftover triangles and piece them together in the outer border for a unique touch or use them to make another project. So many ideas!!
![]()

This quilt finishes at 57½" x 67". I absolutely love it!! It's so happy and bright. What a
great way to add that splash of spring color we're all looking for,
especially after the long winters here in the Midwest.
When you're done making this quilt, please share a picture of your project. I love to see them!
Kathryn Ludowese
www.GatheringFriendsQuiltShop.com
![]()
Posted in: