Welcome to Moda!
Bake Shop Basics: Labeling Your {Bee-utiful} Quilt
Bake Shop Basics: Labeling Your {Bee-utiful} Quilt
Published:
Aug 30 2016 - 23:00

![]()
Well, hello again quilty friends! If we haven't yet been introduced, I'm Pamela Morgan from Sweet Little Stitches. I also designed this summer's Bee-utiful Quilt-a-long for the Moda Bake Shop.
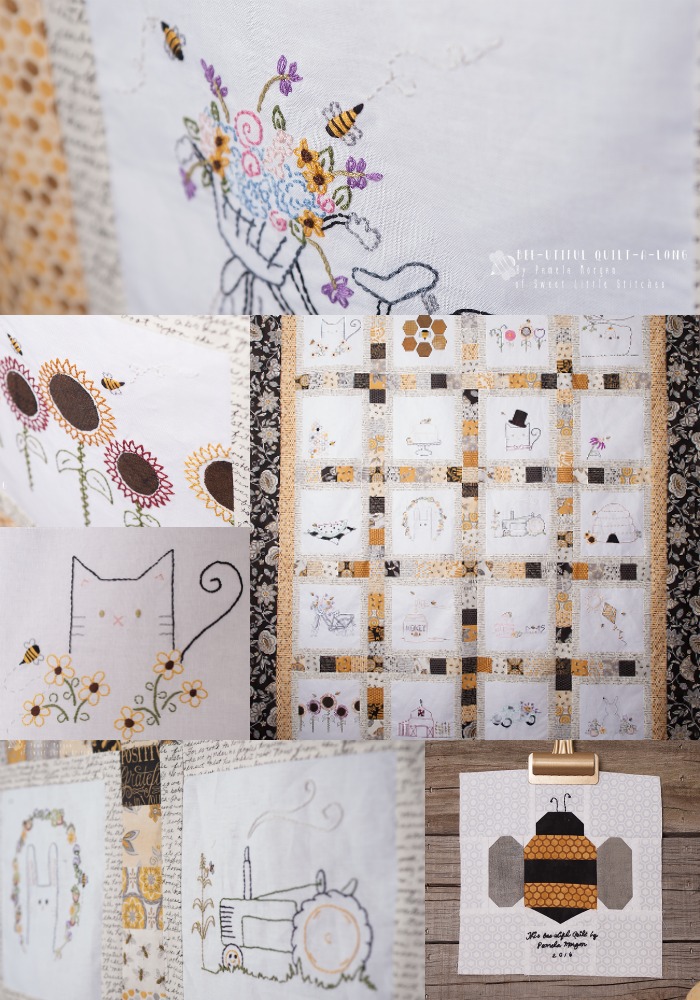 Isn't it BEE-utiful?
I've always been told that a quilt has no value until it has a label. I don't know if this is true or not, but I like to think of it like an artist signing his or her work; it's not really complete until it's been signed. That being said, I usually consider my entire quilt my "canvas." I subscribe to the notion that the back of my quilt should be just as beautiful as the front.

So, for me personally, my labels have become almost as important as the quilt itself. I started designing a unique label for each quilt I piece. While it might seem tedious, I feel it makes each and every quilt truly special and unique.
More recently, I've started piecing my labels into the backing of the quilt. It really makes it seem like it was an intentional part of the design process instead of just an afterthought. And so, today I'm going to share with you how easy it is to incorporate your label into your quilt back...

...as well as the pattern for the label and bonus block I designed for the Bee-utiful Quilt-a-long!
 This block can be swapped out for any/all of the embroidered blocks if desired. Once you've squared up your block, just continue by framing the block with the 1.5" strips, as indicated in the piecing instructions found {here}.
![]()
{for the quilt back}
4 yards backing fabric (I chose a black honeycomb print from the Bee Creative line by Deb Strain)
1/2 yard coordinating print
{for the label}
1 fat quarter Moda Muslin Mates in White 9970 11
1/8 yd cut Moda Marbles in Jet 9880 59
1/8 yd cut Moda Grunge in Grey Couture 30150 163
1/8 yd cut Moda Bee Creative in Gold 19757 13
black 6-strand embroidery floss
4 inch embroidery hoop
embroidery needle
Add-a-quarter ruler (optional, but highly recommended)
![]()
{cutting}
From your backing fabric, cut into 2 pieces - 2 yards x WOF. Then trim each of these pieces 33 inches wide. From the coordinating print, cut into 2 pieces, 8.5" x WOF. Trim your selvedges and set aside.
From your white Muslin Mates print, cut:
2 rectangles - 3.5" x 3"
2 rectangles - 1.5" x 3.5"
2 - 3" squares
1 - 2.5" x 2" rectangle
1 - 2.25" x 3" rectangle
Set aside the remainder of your Muslin Mates print, as well as the remaining fabrics for the label. We will cut these as we paper piece our cute little bee together.
{piecing}
Click {HERE} to download the PDF pattern for foundation paper piecing your label. This will be the first step in making our label. If you're new to foundation piecing, click {HERE} to watch a video tutorial. There is more than one way to FPP, but this is how I prefer to do mine ;) Refer to the pic below as a reference for where to place which fabric.
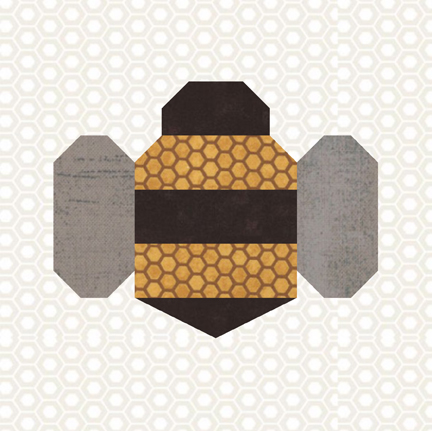
Once you've completed your FPP sections, take Section A (the bee's head) and the 2.5" x 2" rectangle you cut from the Muslin Mates. Lay them out as shown below, then stitch together. Press. Because we're working with such small pieces, I recommend pressing seams open. It helps your pieces lay nice and flat, and keeps your seams from getting too bulky. This seems to be a hot button topic right now in the quilting world, so take my advice or leave it. It's your quilt!

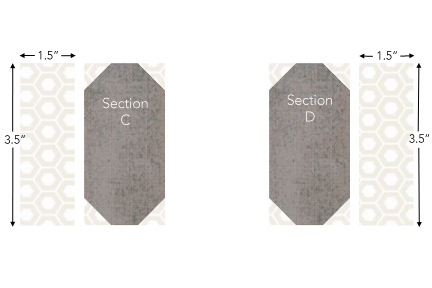
Next, take your wings (sections C and D) and your 1.5" x 3.5" rectangles. Lay them out as shown below, making sure that you have a left wing and a right wing. Sew together and press.
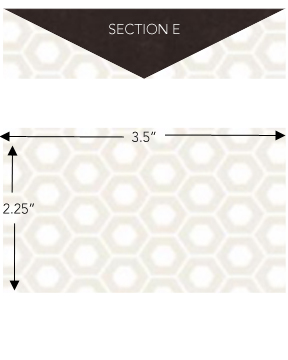
Now, take your stinger (section E) and the 2.25" x 3.5" piece you cut from the Muslin Mates print. Piece following the diagram below, then press.
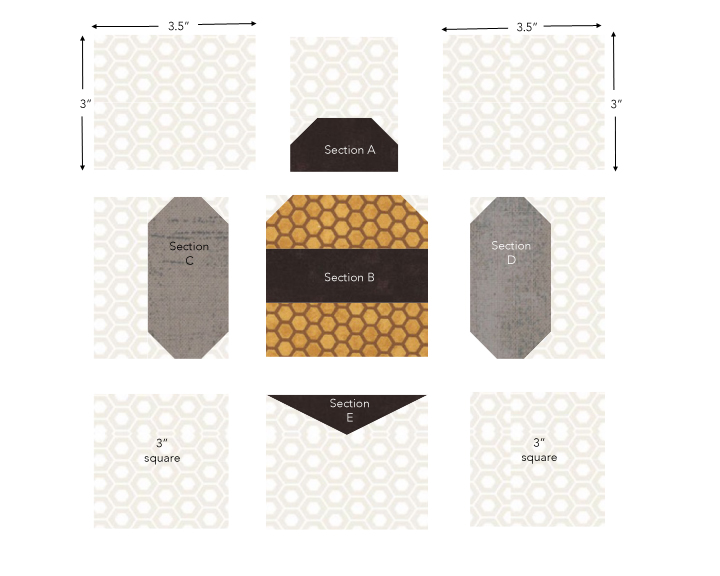
Now, gather all the sections you've assembled, and the remaining cuts from your Muslin Mates print. Assemble one row at a time, in the layout pictured below. Press after each row, and then join the rows together and press again. You should now have an 8.5" square bee block!
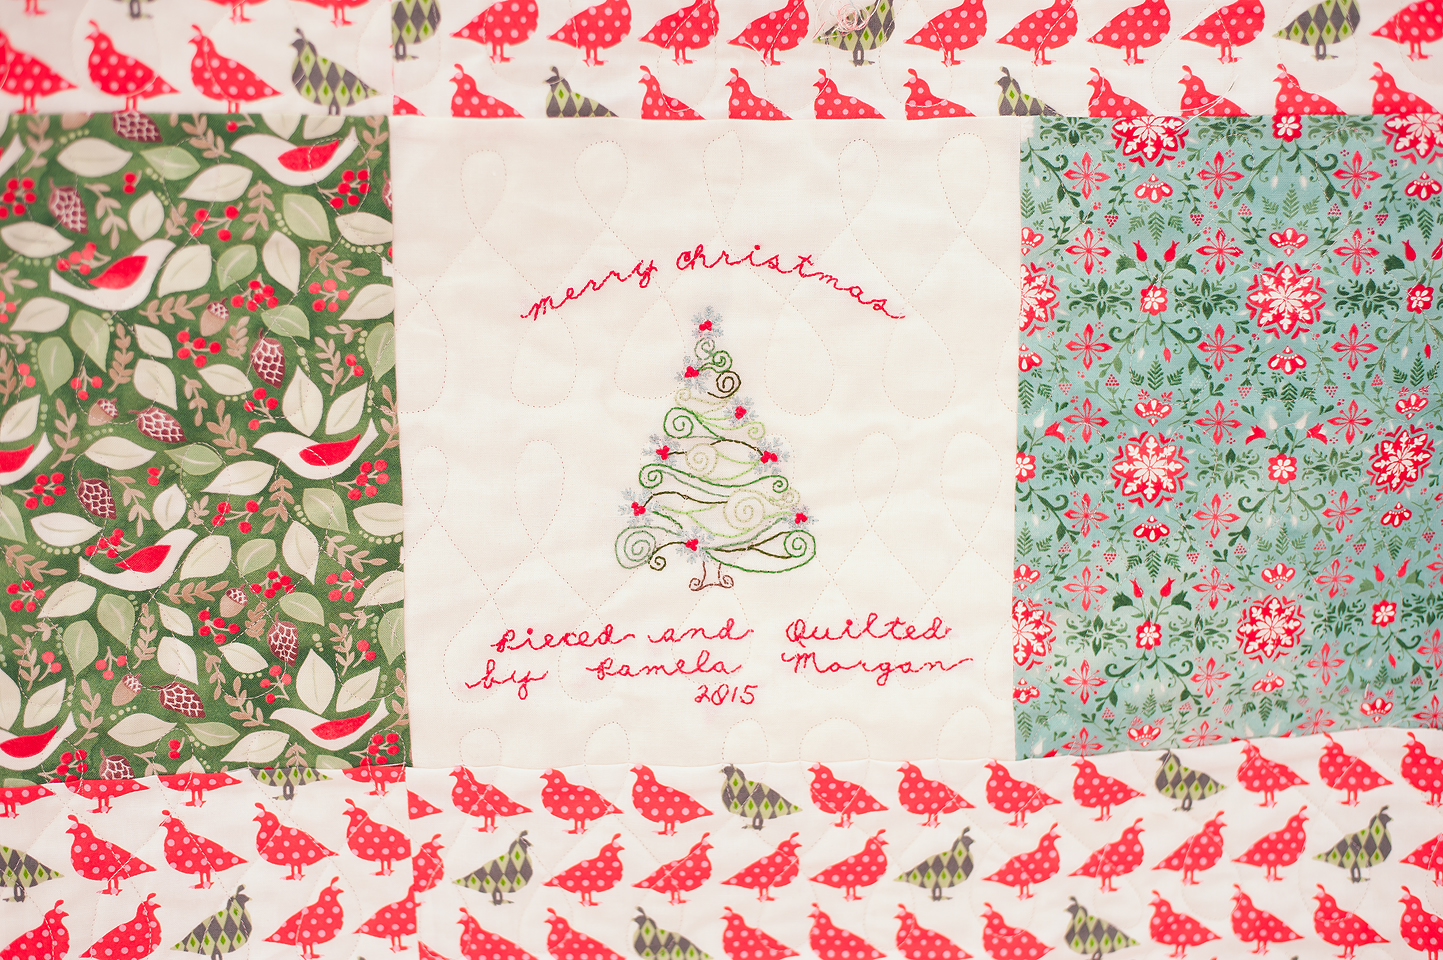
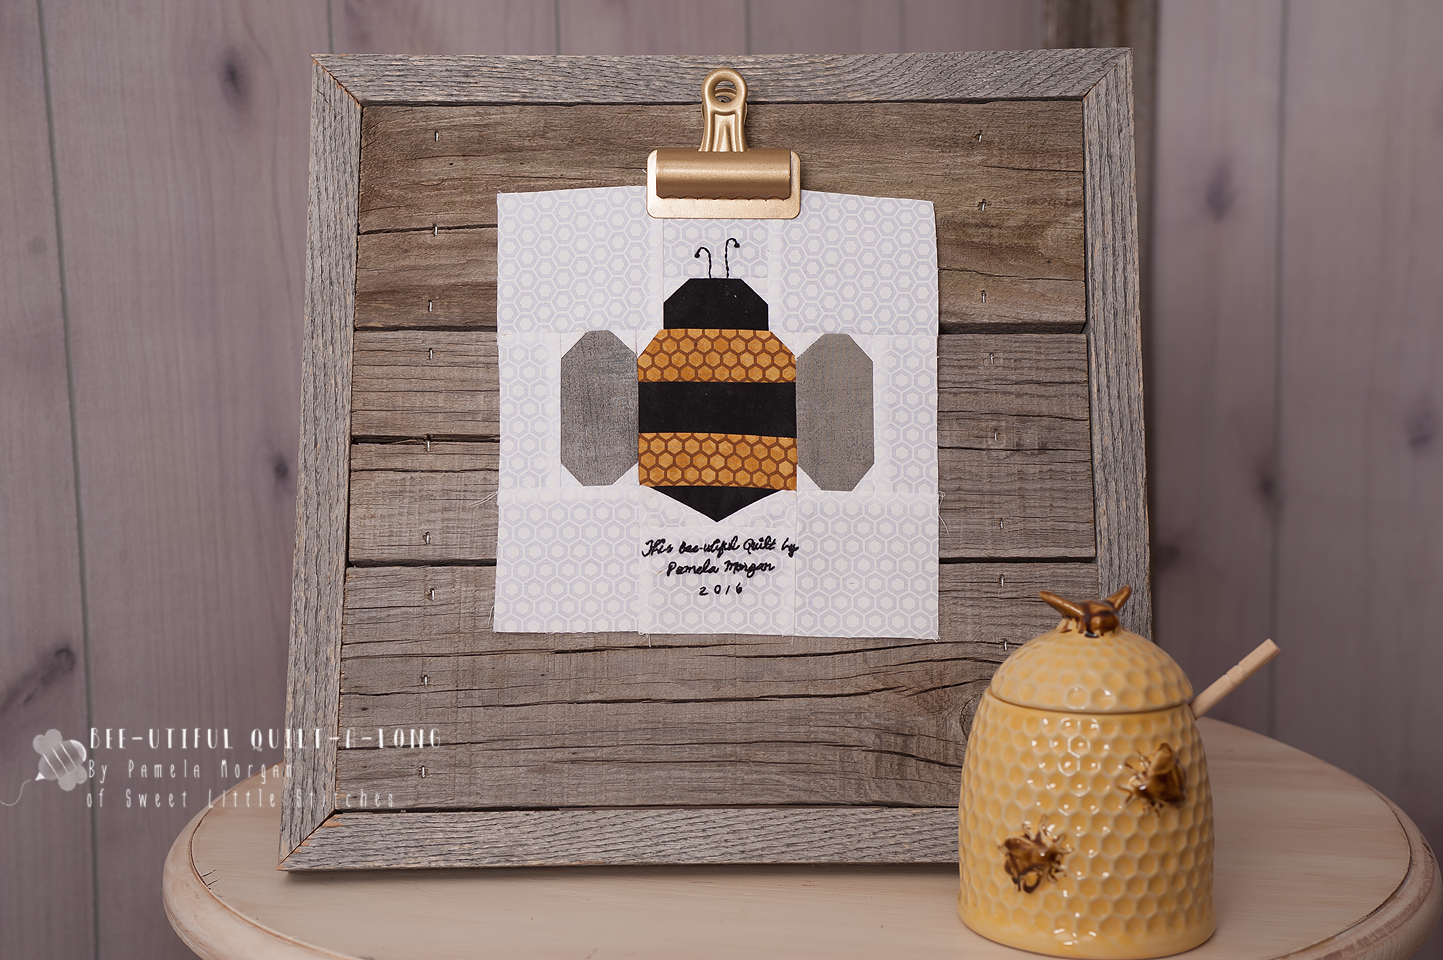
Now, that you've gotten your bee assembled, it's time to add the embroidery. When I'm labeling my quilt, I usually write a small phrase or quote that adds meaning to the quilt, but what I write depends on who the quilt is for. Then I "sign" the quilt with my name and the year it was completed. Typically, I type the saying, along with my signature and date, in a word processing program, and then I print it out onto my favorite Sulky Water Soluble stabilizer sheets. This time, I used the font Sunshine in My Soul, which can be downloaded for free {HERE}. It was a perfect choice for this label because it so closely resembled the handwriting print I used to frame the embroidery blocks! Here is how I "signed" this quilt.
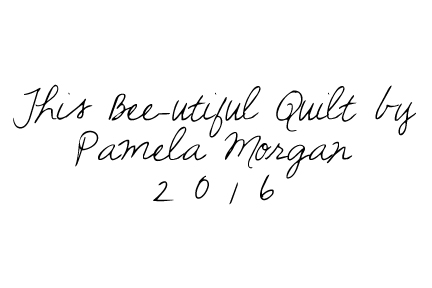
Obviously, you would put your own name. And in case you were wondering how I got the date to look like that -- it's simple! Just add a space between each number ;) Hindsight is always 20/20, and if I could go back, I would have only used two strands of black floss instead of the three I used. I also added two antennae to my bee. The writing and the antennae were done in a simple backstitch, and then I added french knots to the end of each antenna. Now....How did I piece this into my quilt back?
Well, this is so easy you'll find yourself wondering why you've never thought of this yourself!
First, take the pieces of backing fabric that you've cut 33"x 72". Sew together lengthwise. Open up and press seams OPEN! You should now have a quilt back that is roughly 65.5" x 72". Then, take your coordinating print that you've cut 8.5" x WOF. Sew one 8.5 edge to either side of your bee block. Again, press seams OPEN and set aside.
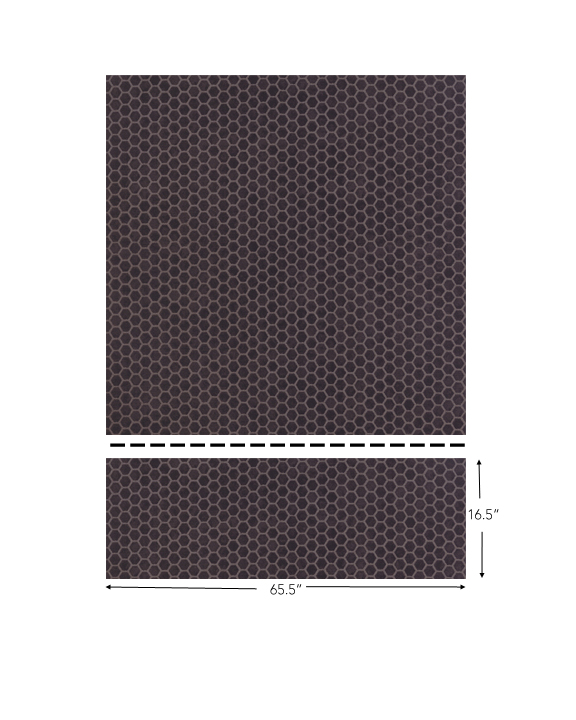
Now, measure 16.5" up from the bottom of the large quilt back section. Taking care to cut nice and straight, use your rotary cutter and ruler, and cut yourself a 16.5" x 65.5" strip of fabric. I've made you this handy dandy diagram to show you what the heck I'm talking about.
Using the center seam of what is now TWO pieces of backing fabric as your guide, attach your long strip with the label block to the 16.5" x 65.5" section. I usually line up one of the seams of the label block with the center seam. This will help you keep your quilt back nice and "square," and it offsets your label from the center of the quilt ever so slightly, which, in my opinion, makes it look prettier. Note: You will have excess material on either side of the strip containing the label block. This isn't a problem, though. Once you've pressed your seam, use your rotary cutter and ruler to trim the excess from either side. Now, add the larger piece of back fabric, lining up the same seam from the bee block with the center seam. Press.
And there you have it!!!
![]()
One bee-utiful quilt back!

Thank y'all for joining me! Until next time, happy stitching!
-Pamela
![]()
Posted in: