Welcome to Moda Fabrics!
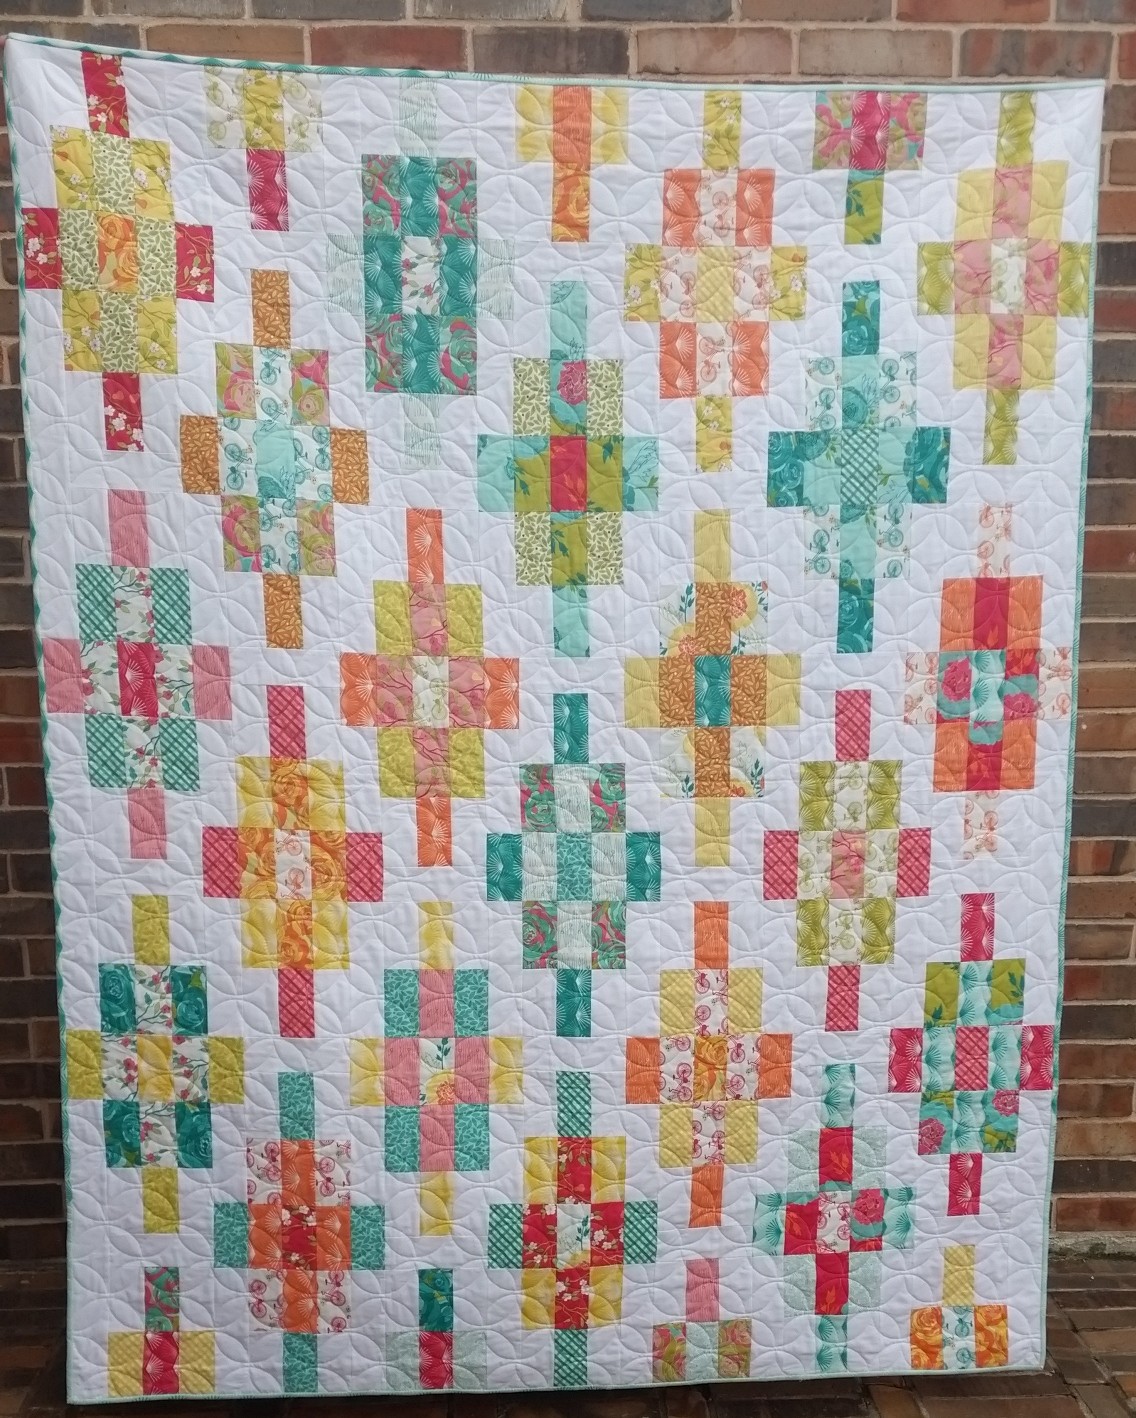
Granny's Insanity Quilt
Granny's Insanity Quilt
Published:
Sep 7 2016 - 23:00
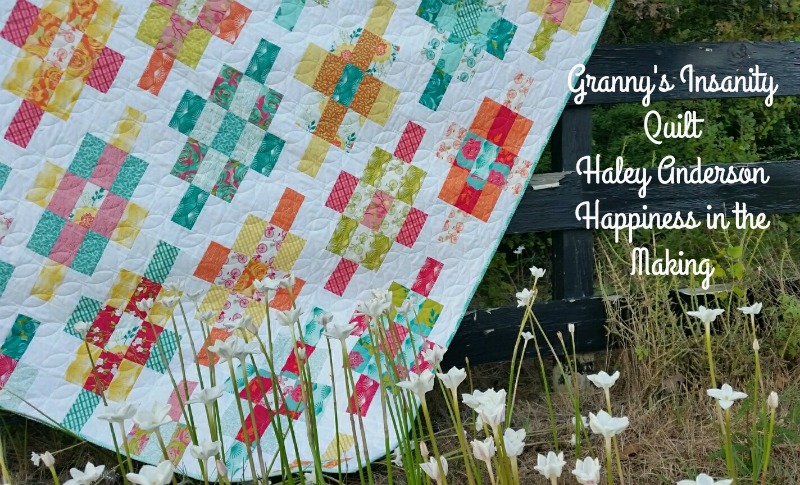

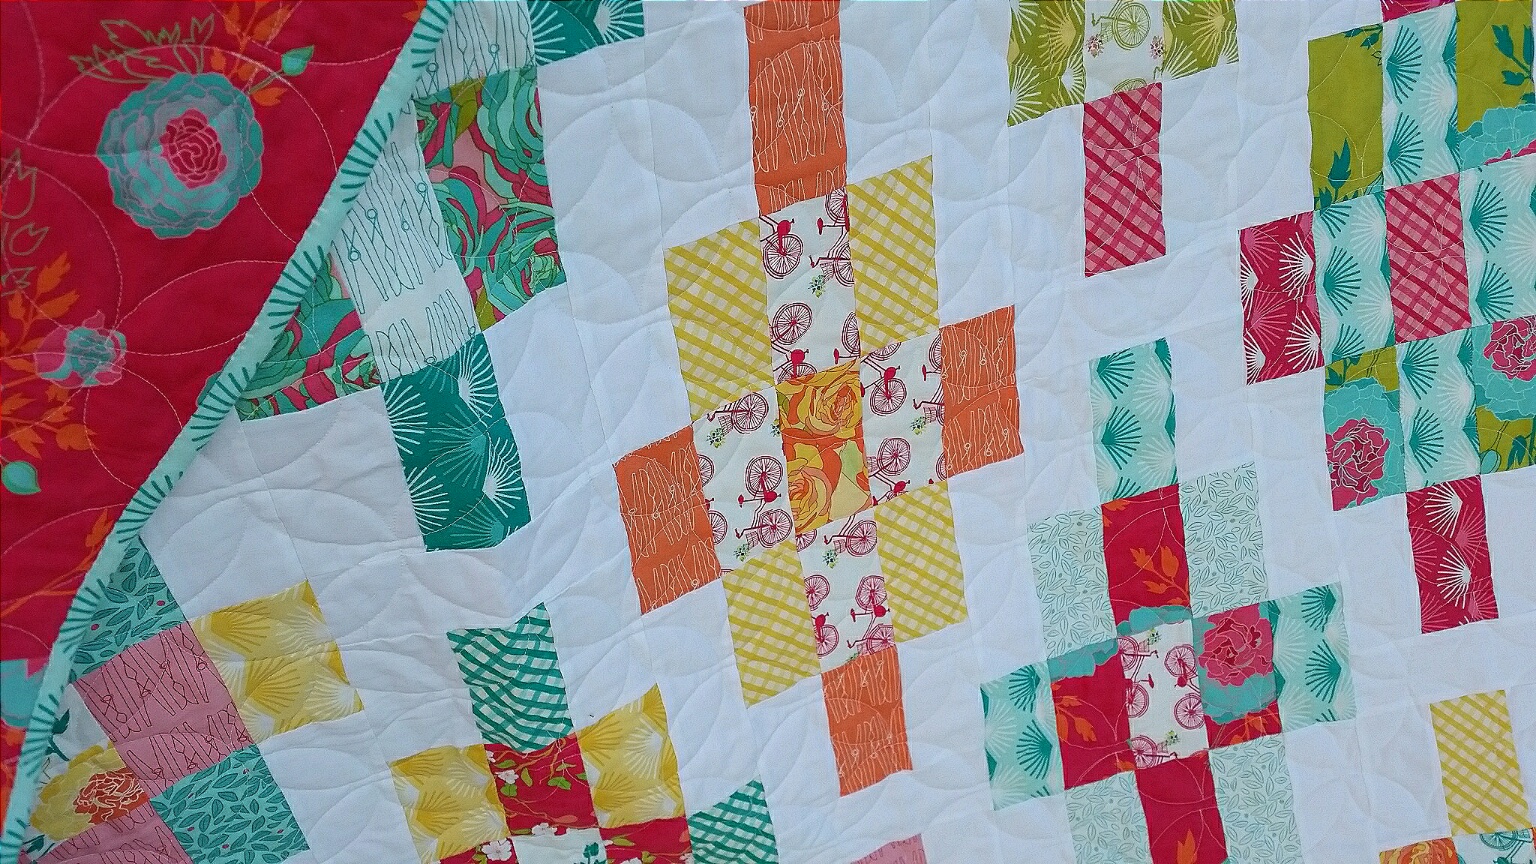
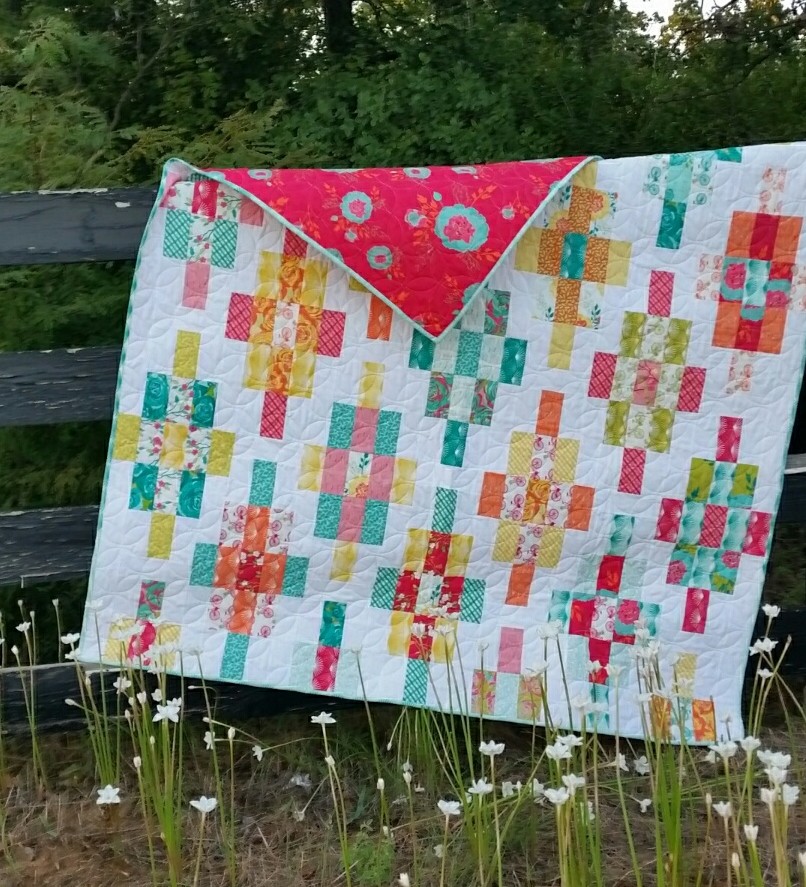
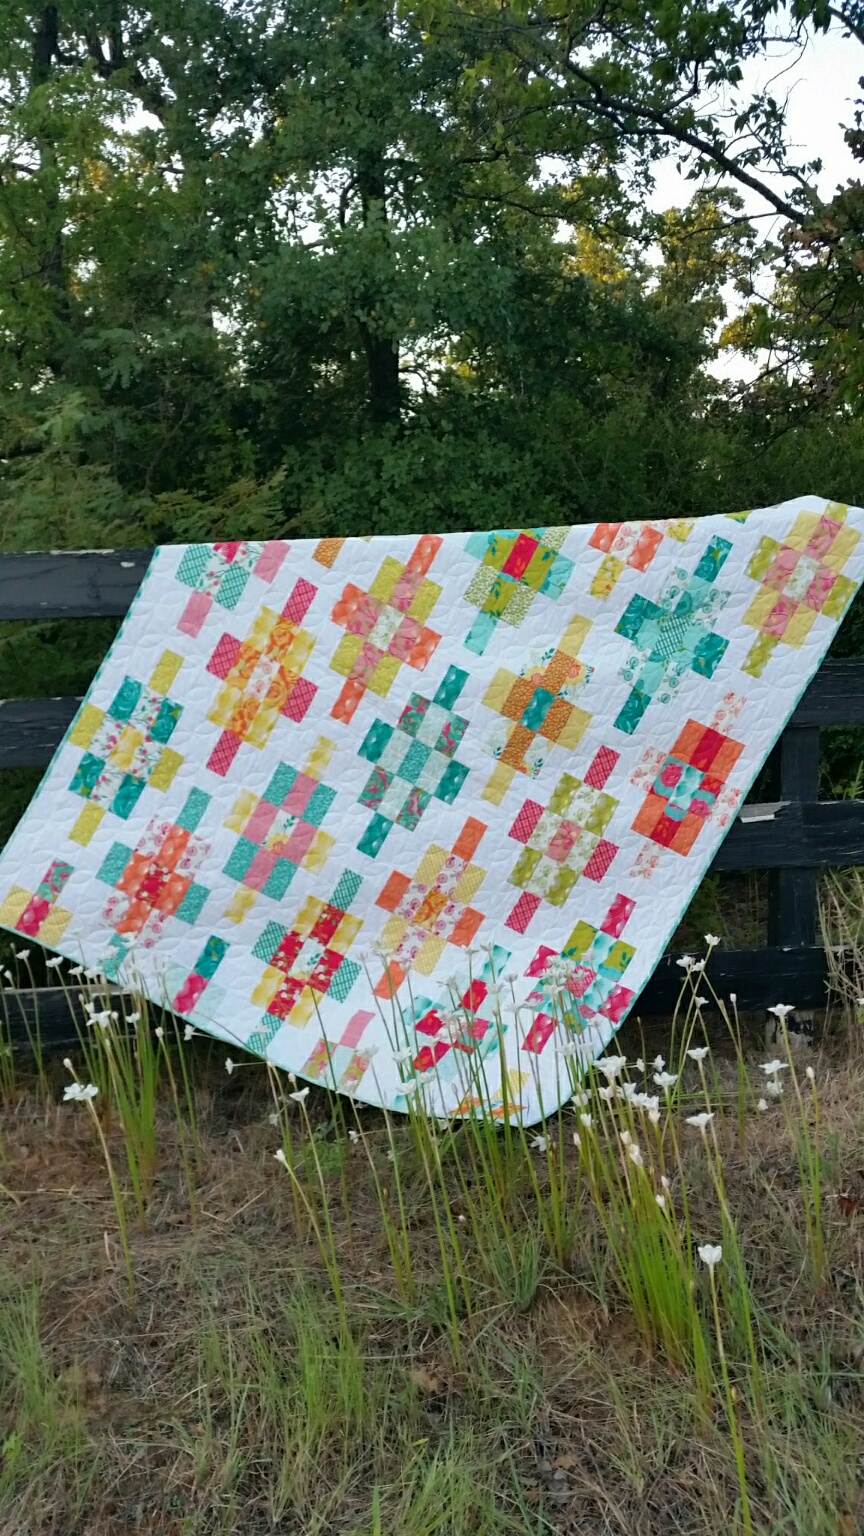
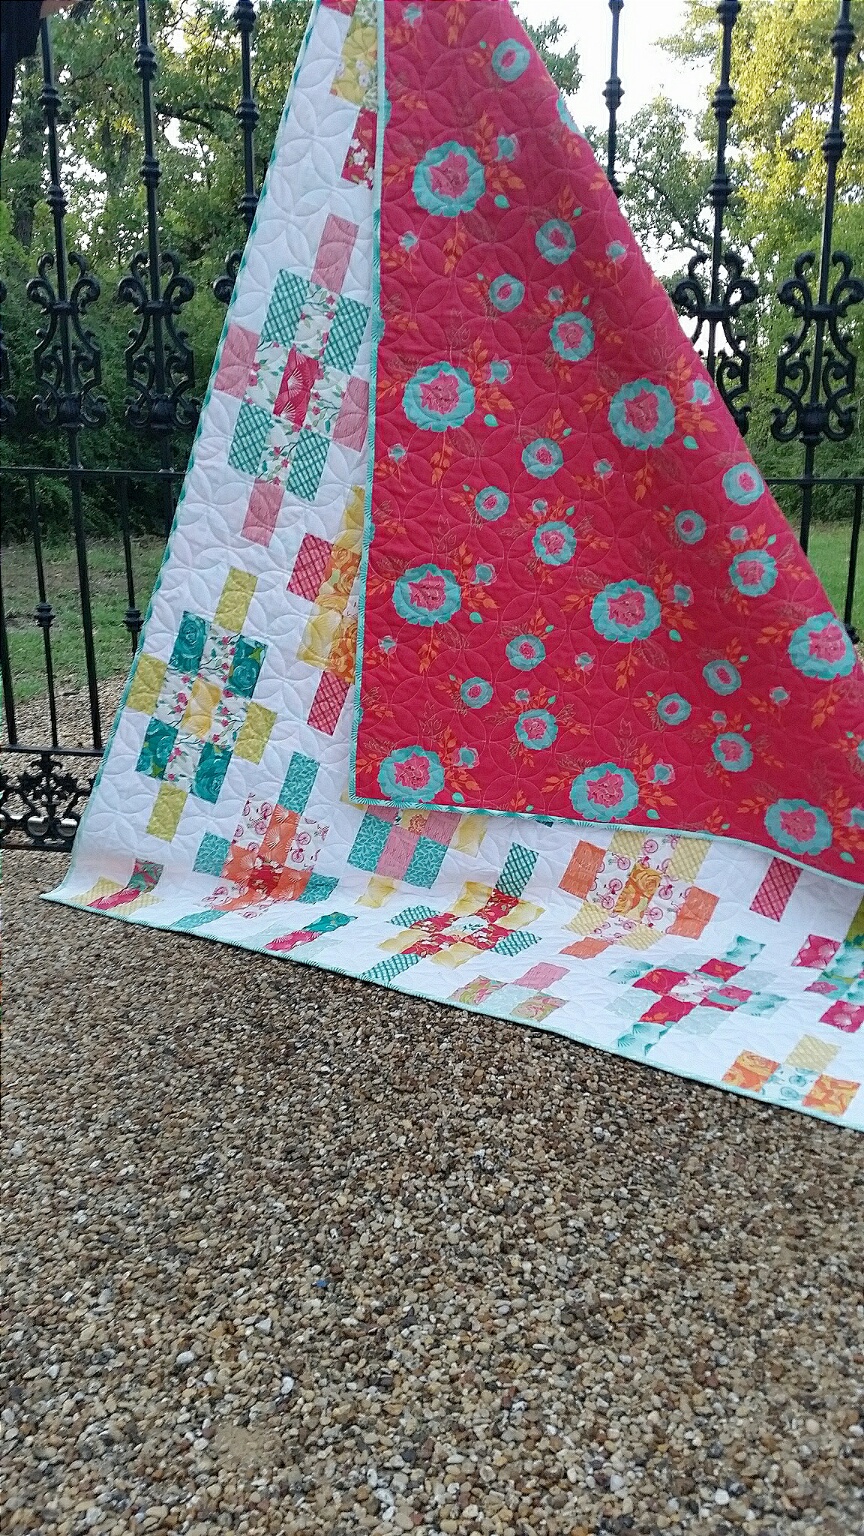
Hello everybody!! My name is Haley Anderson. I'm a quilter, sometimes blogger over at Happiness in the Making, as well as the face behind @happinessinthemaking on Instagram. I have been quilting for almost 10 years, and am so excited about sharing my first pattern with you all! I have been a long time lover of insanity quilts, but have never wanted to do the paper piecing necessary to get the diamond effect that it creates. So I had the idea of combining a traditional granny block with some jelly roll strips to create that same diamond look without the hand stitching! My quilt is called Granny's Insanity quilt. It comes together quickly and is perfect for featuring your favorite prints or solids. Who isn't always on the hunt for a perfect jelly roll pattern? I hope you enjoy making it, and would love to see it! Tag me or use the hashtag #grannysinsanityquilt to share your project! Thanks for stopping by! Happy Sewing!
This quilt finishes at 74" x 58".
![]()
1 Jelly Roll print fabric {Acreage by Shannon Orr}
1 Bella Solid Jelly Roll or 2.5 yards of background fabric {Bella Solids 9900 98}
4 yards backing fabric
3/4 yard of binding fabric
![]()
CUTTING BACKGROUND
If you are using solid yardage for your background, cut it into (31) 2.5 inch x WOF strips. Use as directed.
Using 12 strips, cut 98 4.5 x 2.5 inch strips
Using 9 strips, cut 42 6.5 x 2.5 inch strips
Using 7 strips, cut 32 8.5 x 2.5 inch strips
Using 3 strips, cut 6 18.5 x 2.5 inch strips
CUTTING PRINT JELLY ROLL
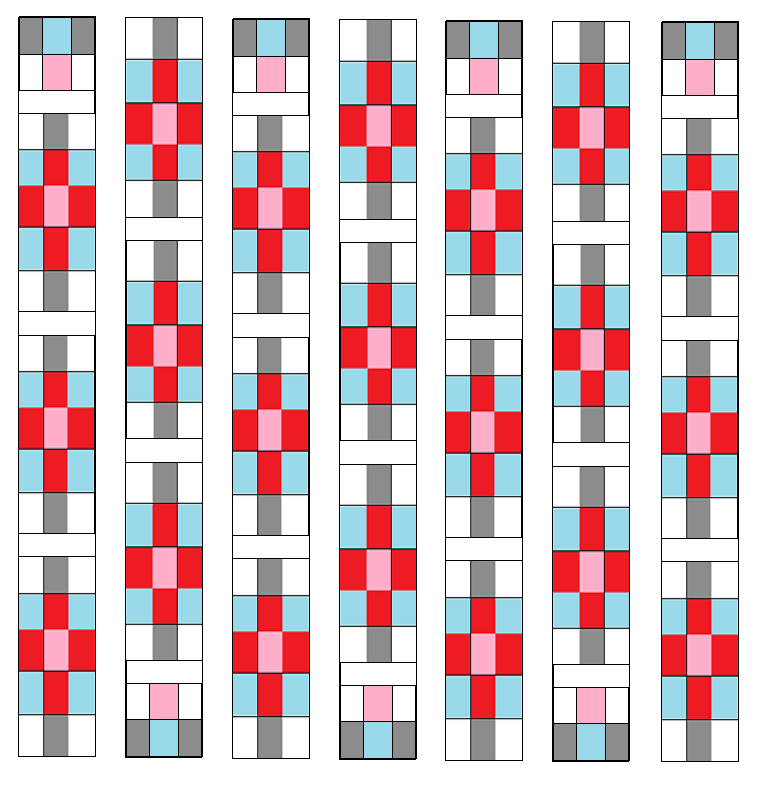
Chose 35 of your jelly roll strips, and cut each strip into 9, 4.5 x 2.5 inch strips. My jelly roll had 2 strips of few prints, so I took out the doubles, and was able to still represent each print evenly. Each full size block will require 13 of these pieces. 3 sets of 4 prints, and 1 individual print to use as the center of your block. I made mine one block at a time, but if you would like to separate them into piles now, go ahead.

BLOCK TYPE 1
Layout your pieces in the pattern you would like to create inside your granny block. Sew on the long edges, to create 3 strip sets, pressing your seams all the same direction. Sew those strips together to create a 9 patch. This will be the center of your block.
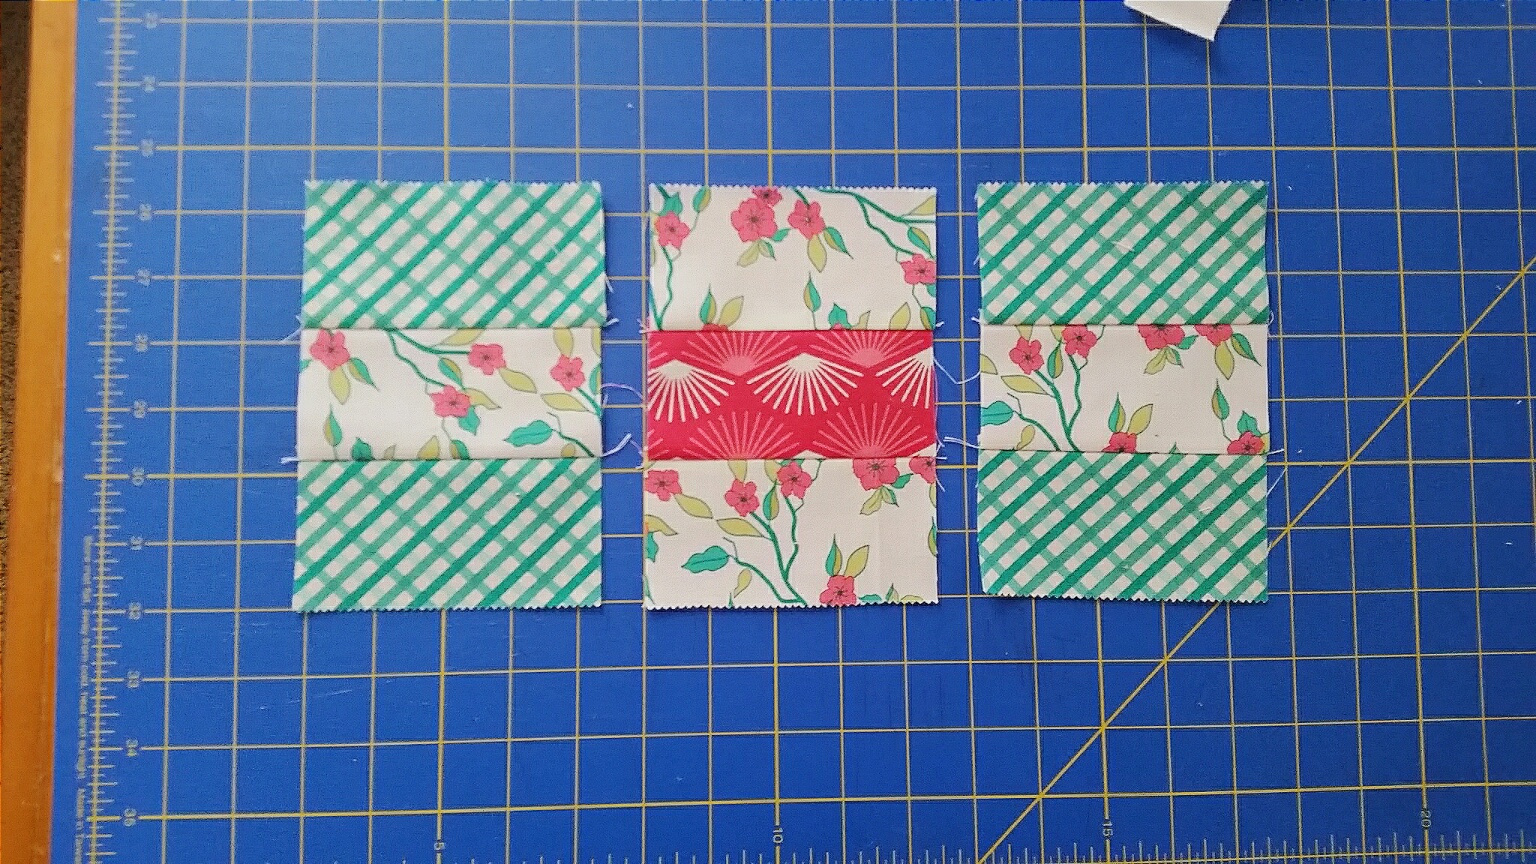
With the last set of your print fabric, and four 2.5 x 4.5 inch strips of background fabric, you will add 1 more strip set to each end of this block.
*Save the remaining 2 print strips to add later on the outside of these blocks, and complete the outside layer of your granny block. I pinned mine to the center of each block so they stayed together while I was continuing to work.

Repeat these instructions, until you have 21 blocks.

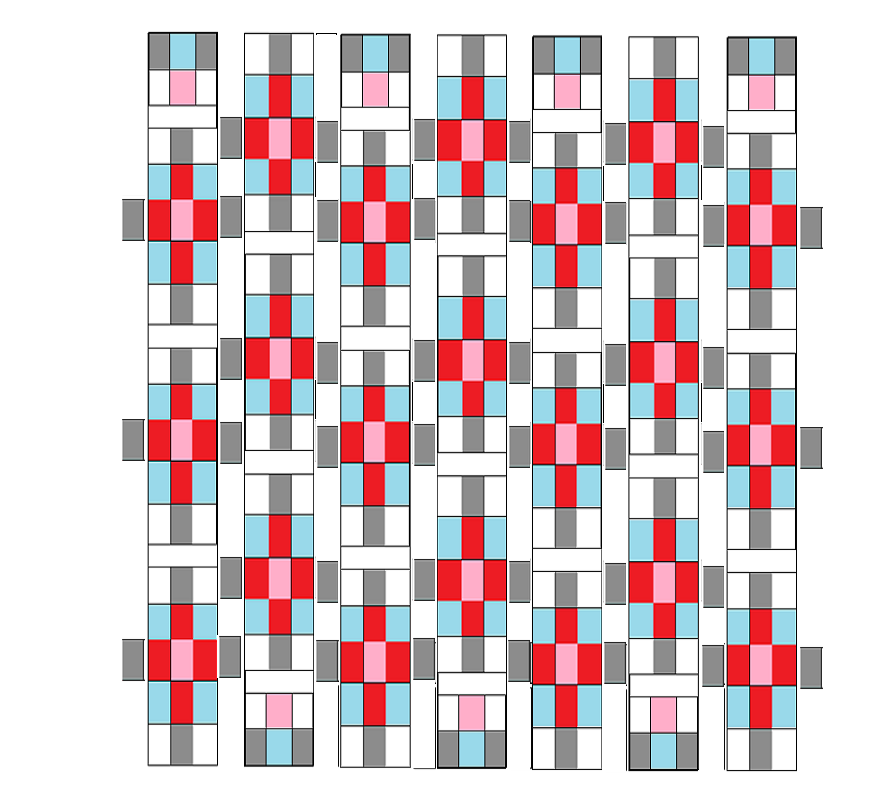
BlOCK TYPE 2
With the remaining pieces of your jelly roll prints, you will create an end block, to start and finish your rows.
Use 2 pieces of the same print, 2 misc. print strips, and two, 2.5 x 4.5 strips of background fabric to create this block. Your first strip will be background fabric on both sides of a print, and you second will be the same print on both sides of a different print strip.
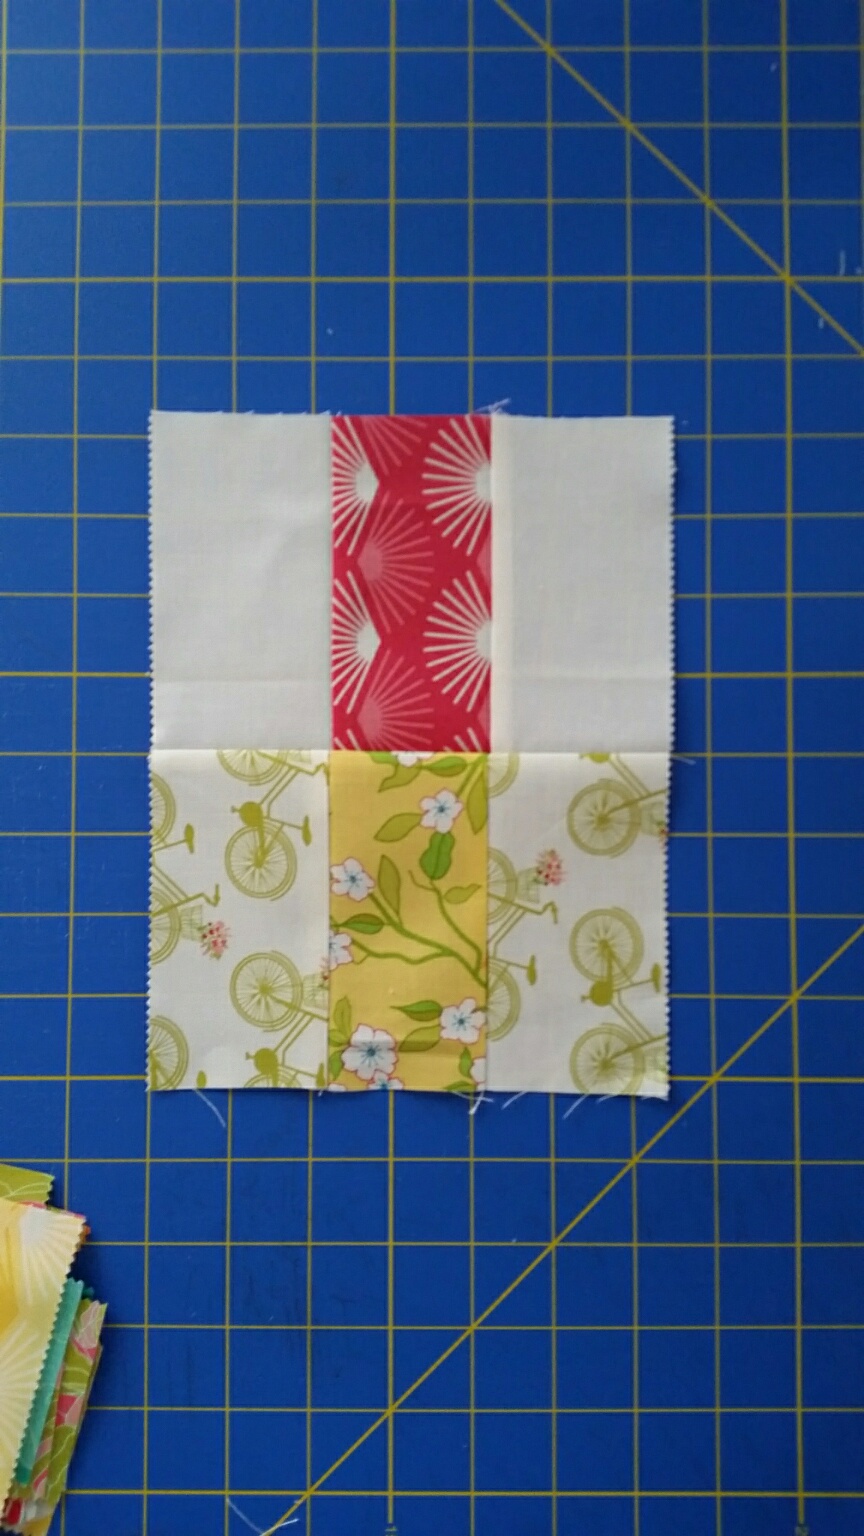
Join them together to create your block. You will repeat these steps, and make 7 total of block type 2.
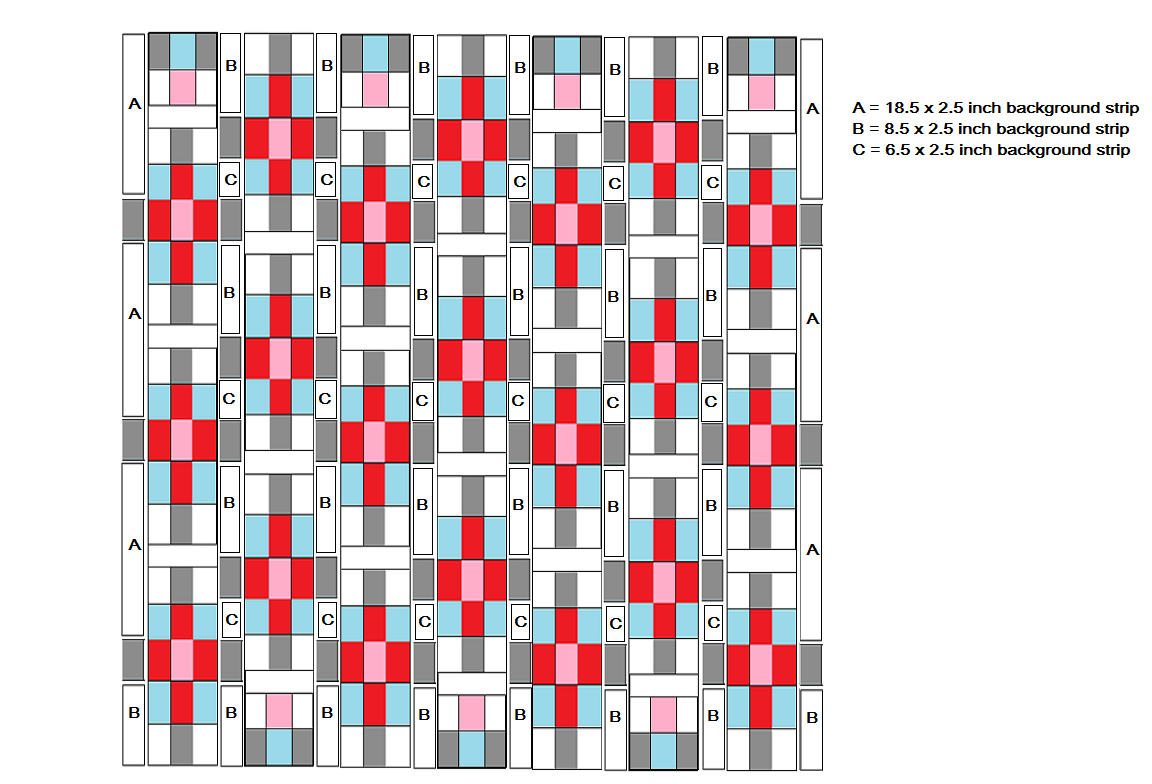
LAYOUT
Step 1
Layout your blocks in your desired positions. Every Row will have 3 full size blocks, and 1 end block. Alternate every other row either starting, or ending with block type 2. You will join your blocks with 2.5 inch x 6.5 inch background strips.
. 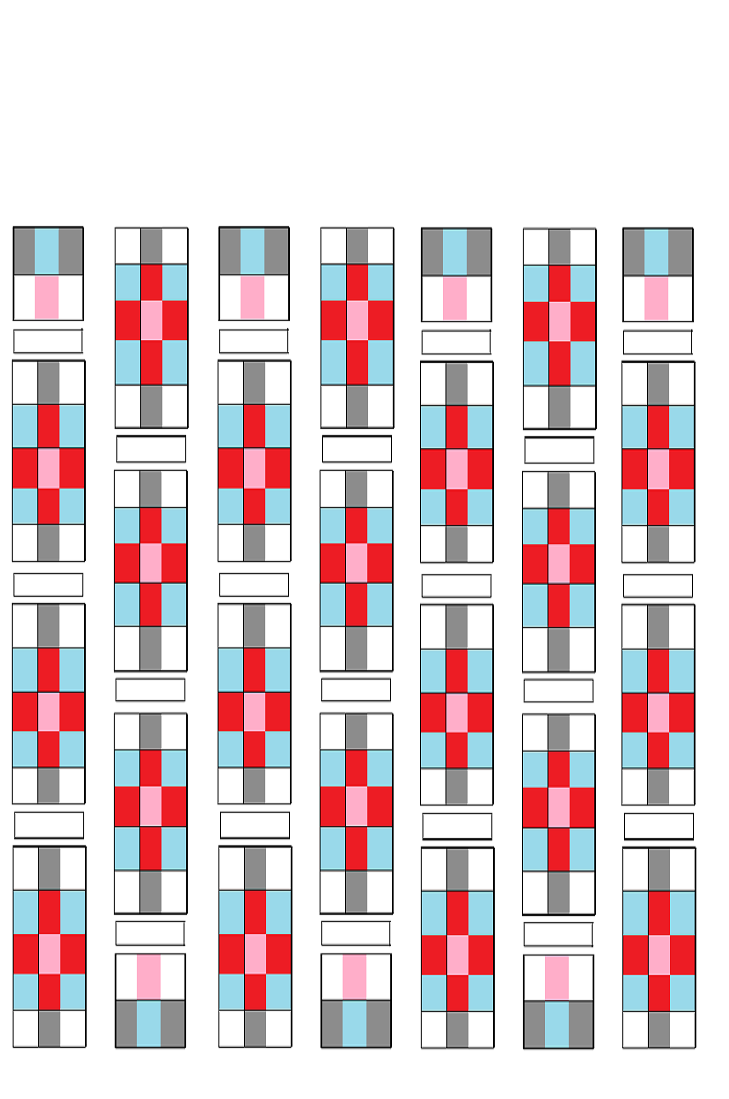
Step 2
Sew together to create 7 strips.
Step 3
Now is when you will need those 2 extra pieces of print fabric that match the top and bottom print of your granny blocks. Lay them out to the side of each matching block.
Step 4
With the remaining strips of your background fabric, fill in your layout as follows.
Your 6, 18.5 inch strips will be used on the very outside edges of your quilt.
The center rows all go as follows; 8.5 inch strip of background fabric, print strip, 6.5 inch strip of background fabric, print strip, 8.5 inch strip of background fabric, print strip, 6.5 inch strip of background fabric, print strip, 8.5 inch strip of background fabric, print strip, 6.5 inch strip of background fabric, print strip, ending with an 8.5 inch strip of background fabric. Sew all 8 columns together
.
Step 5
Sew together your second set of strips, being extra careful to keep your order correct. When this is done, you can assemble your top!

![]()
This quilt finishes at 74" x 58".
I hope you love this as much as I do!
Granny's Insanity is quilted in an Orange Peel pattern, by Katie Garrett, or @Katiegarrettquilts
Haley Anderson
Happiness in the Making
![]()
Save
Save
Posted in: