Welcome to Moda Fabrics!
Christmas Ornaments
Christmas Ornaments
Published:
Dec 14 2016 - 23:00
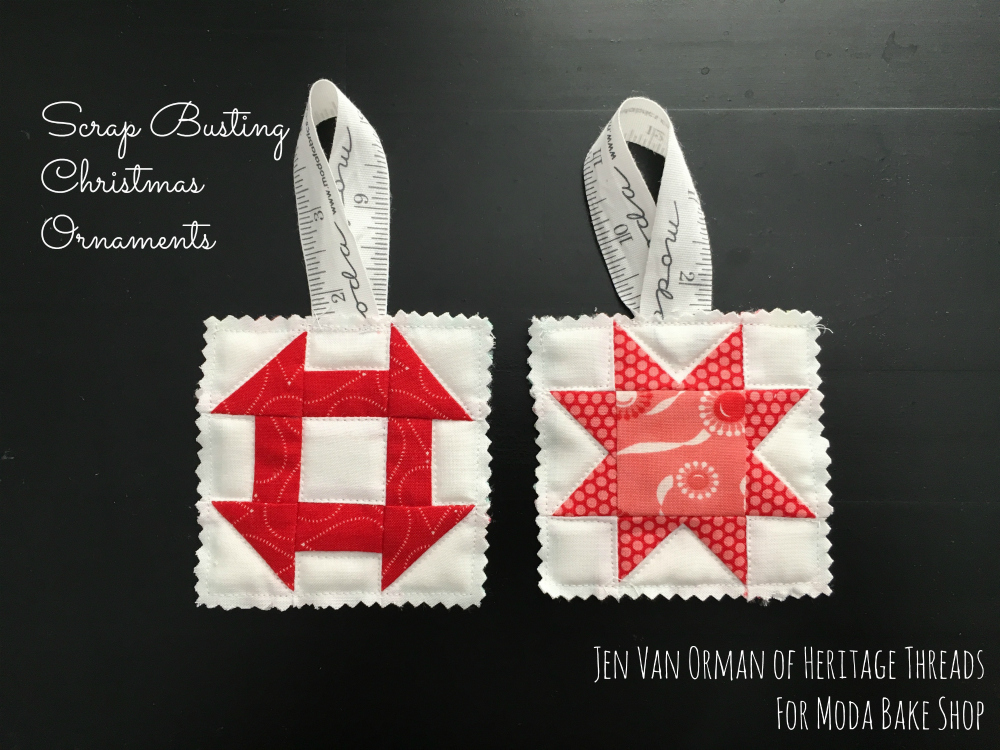

Hello all of you holiday bakers! I am so excited to be back again on Moda Bake Shop, this time to share a fast, fun scrap busting project. I love making handmade ornaments and these tiny little things are no exception. I love the Christmas Wish theme here on Bake Shop and my Christmas wish would be for more hours in the day to get everything done I need to/want to. Wouldn't that be nice?!
This quilt/project finishes at 3-1/2" x 3-1/2".
![]()
Scraps of various prints (Layer Cakes, Fat 8ths and Fat Quarter scraps will all work nicely)
Scraps of background (1 Fat Quarter is enough to make 6 to 8 ornaments)
Scrap batting
Moda ribbon left from precuts
![]()
I'll go through the instructions for each block type individually, then come back together at the end for assembly of the ornaments. Let's start with the Churn Dash block first.
Churn Dash:
You'll need to cut:
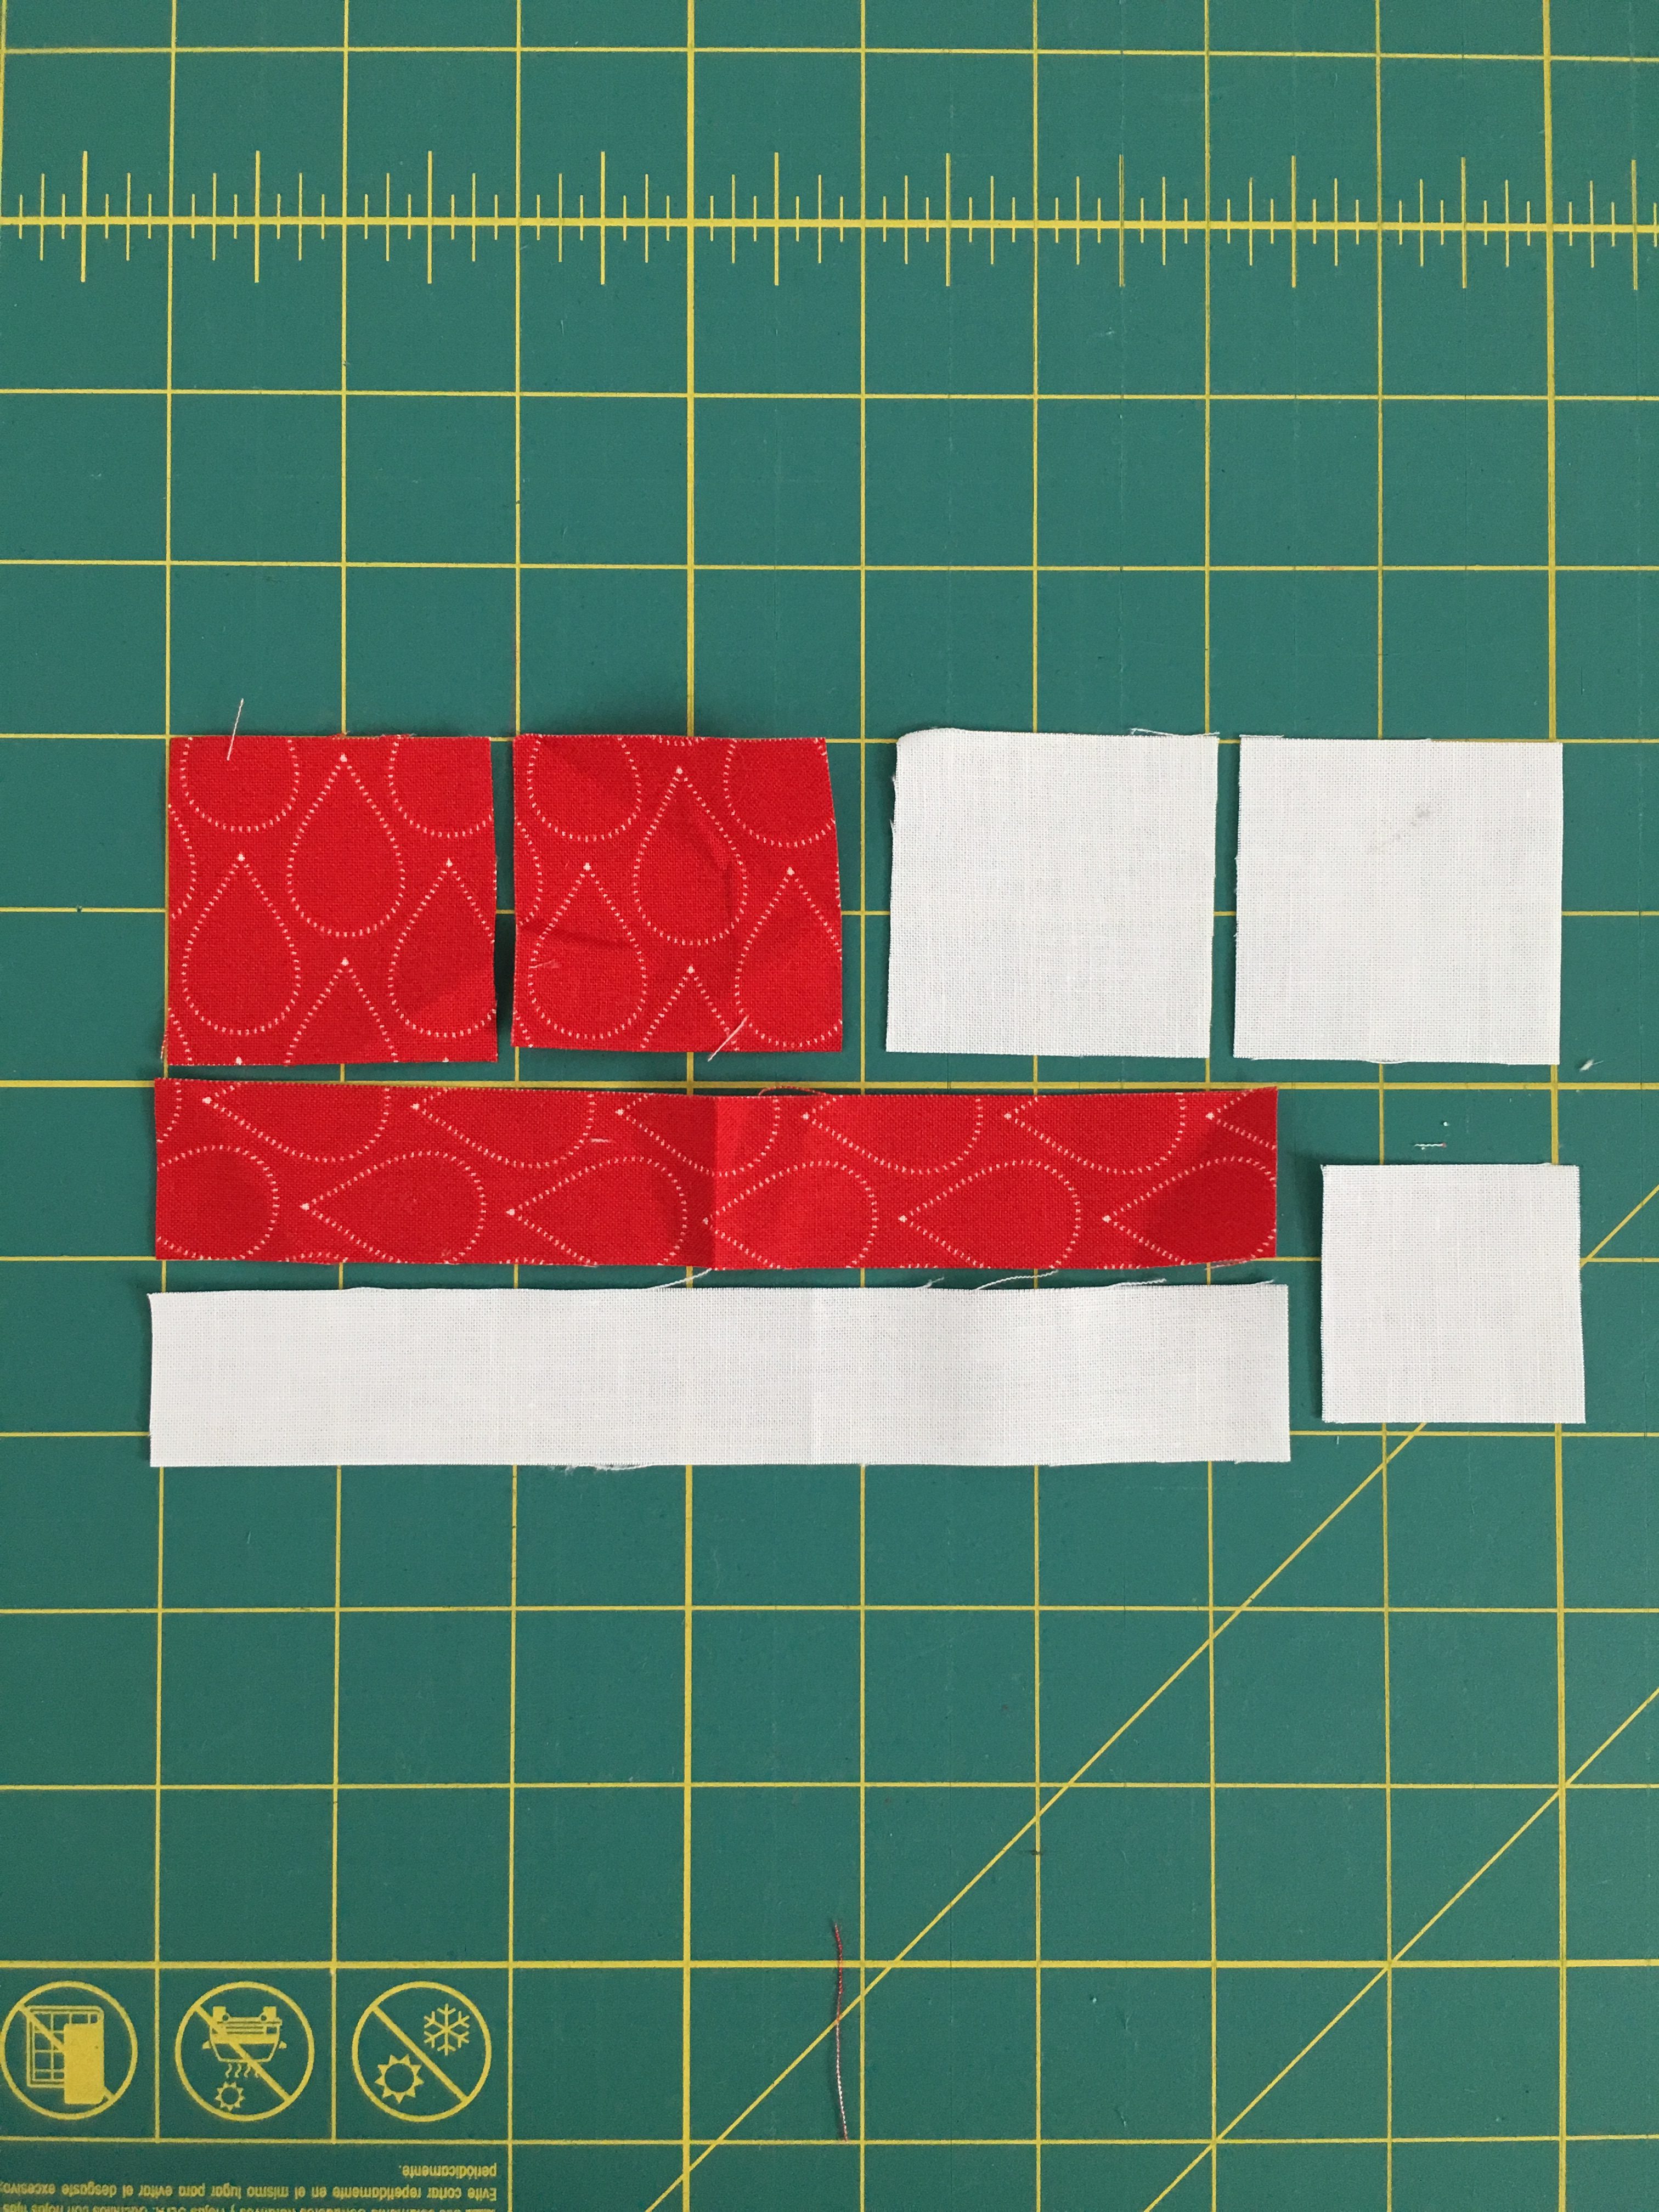
(2) 1-7/8" x 1-7/8" background
(1) 1" x 6-1/2" background
(1) 1-1/2" x 1-1/2" background
(2) 1-7/8" x 1-7/8" print
(1) 1" x 6-1/2" print
Pair the 1" x 6-1/2" background with the 1" x 6-1/2" print, wrong sides together. Sew together along the long side and press toward the print. Cut (4) 1-1/2" x 1-1/2" squares from this long strip. You will have a small amount of waste, as seen below.

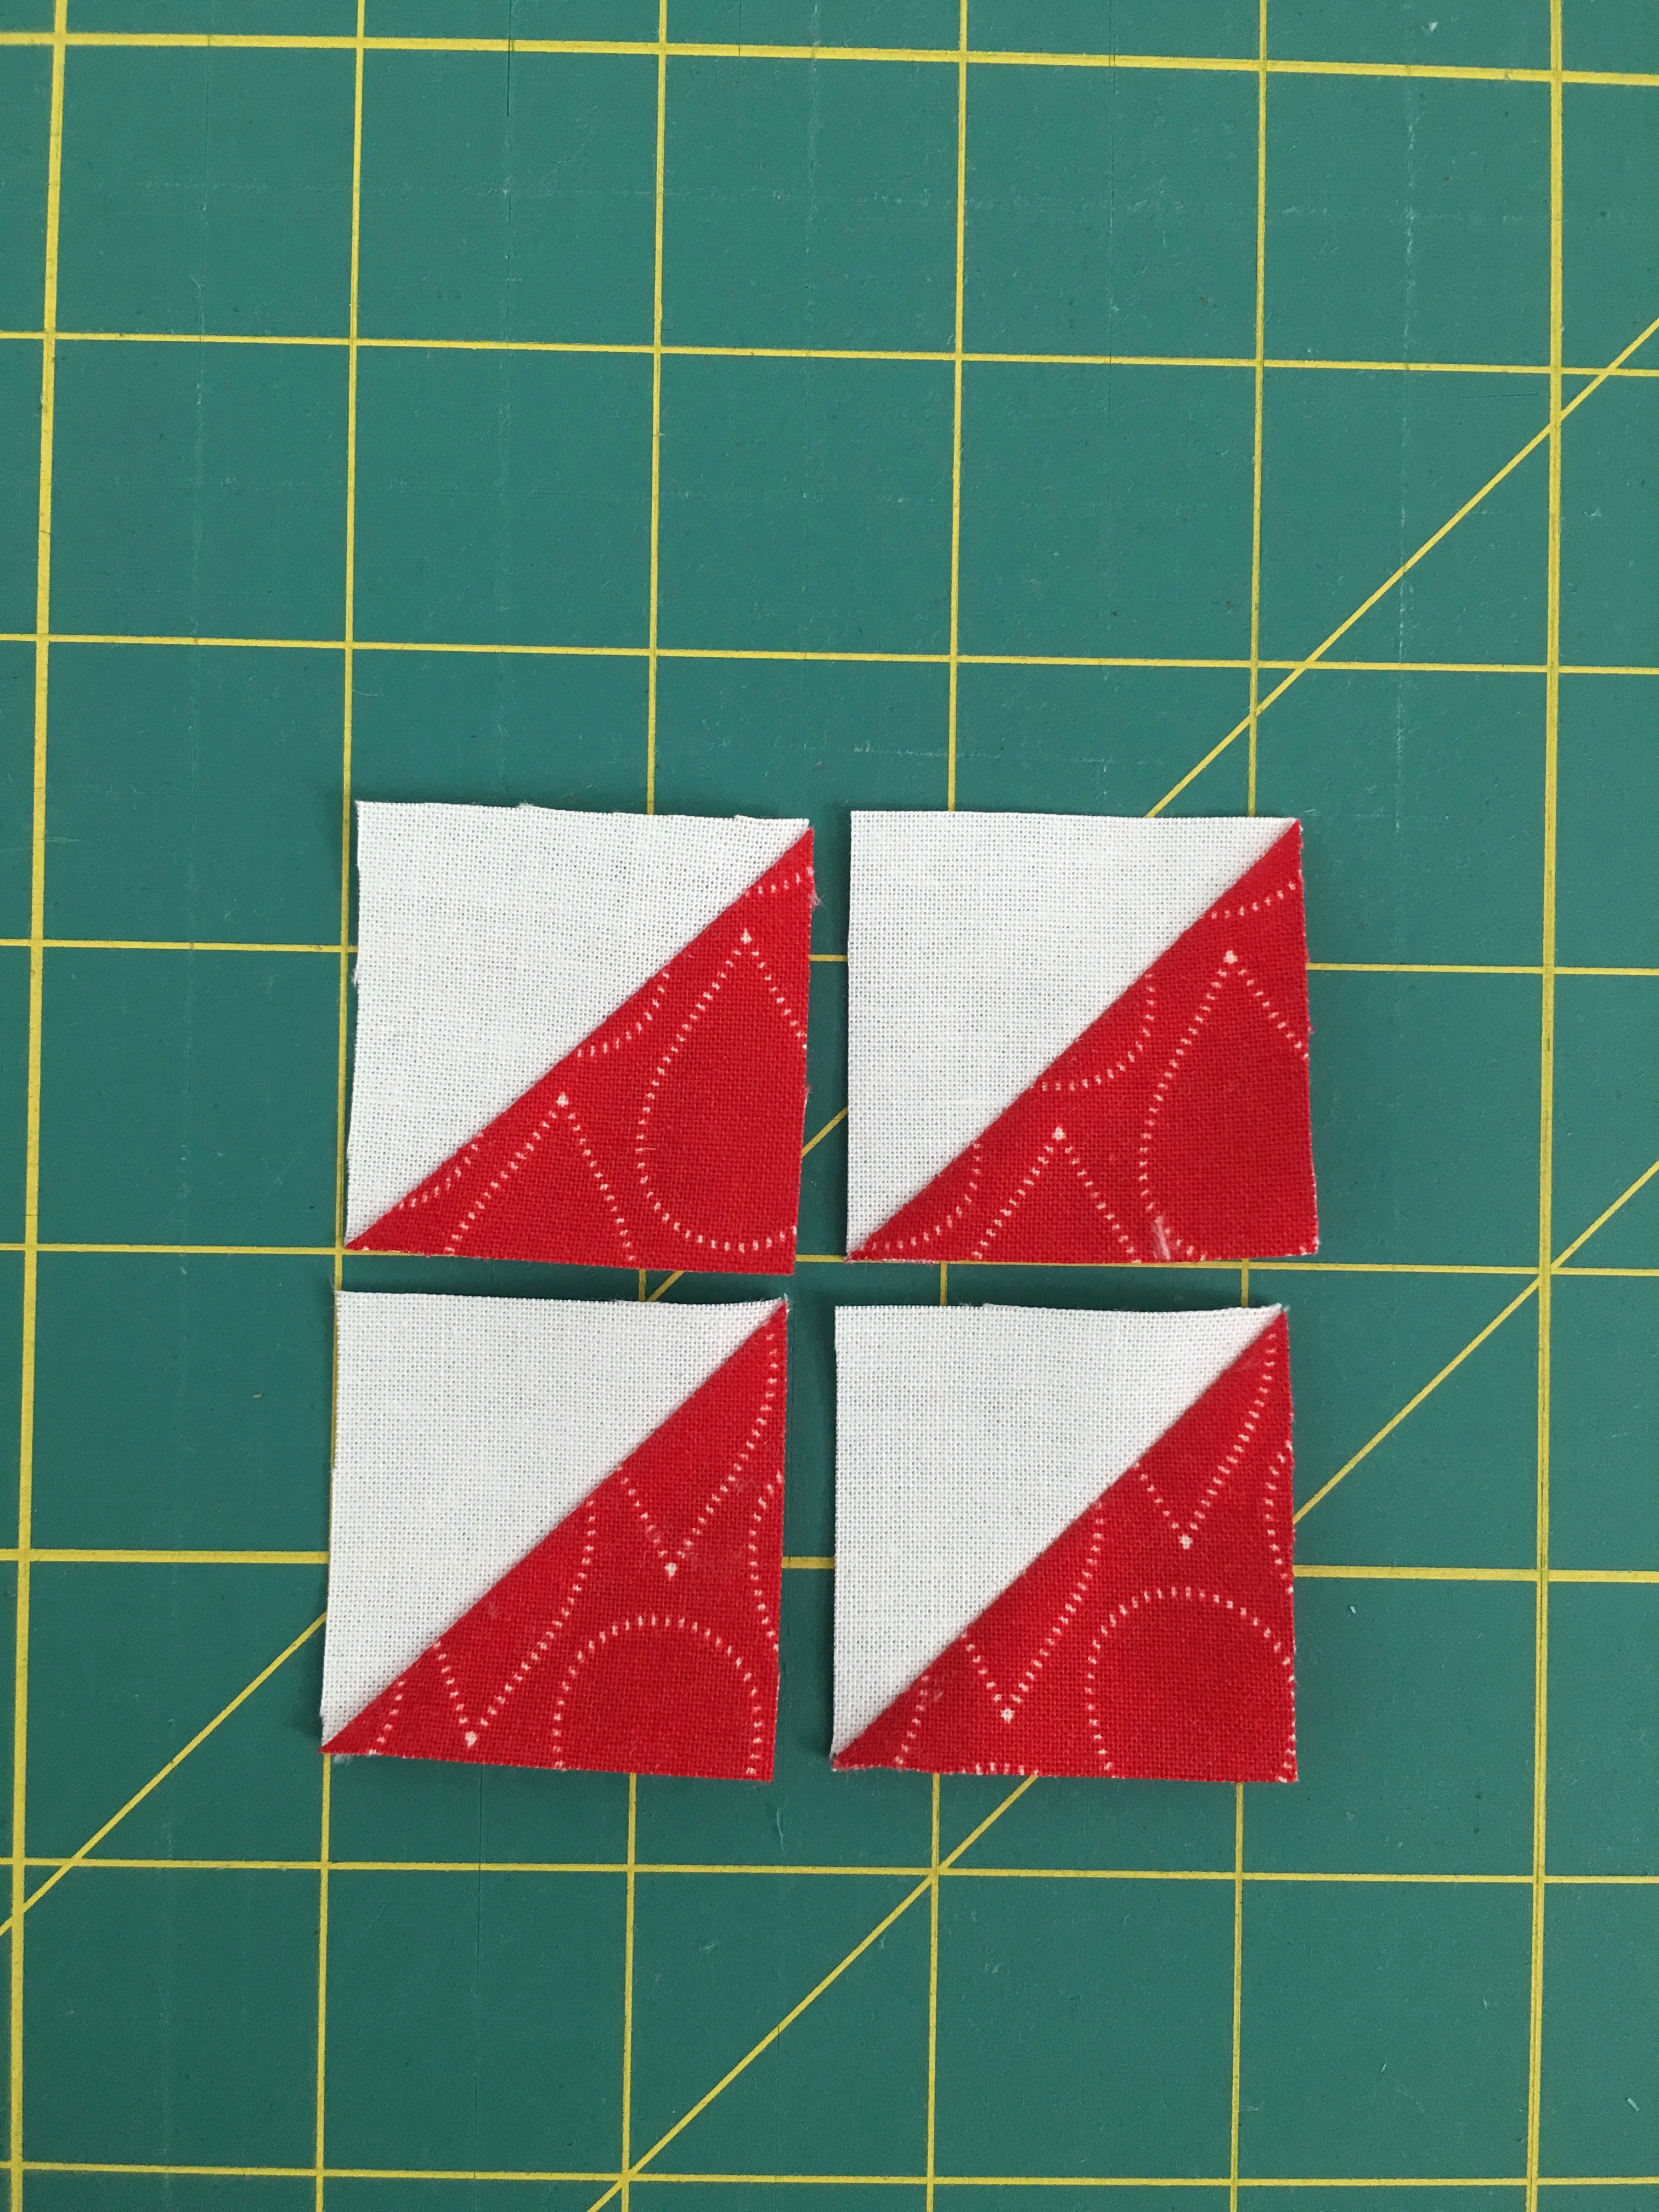
Next, draw a line down the center of each background 1-7/8" x 1-7/8" square. Pair these up with the (2) 1-7/8" x 1-7/8" print squares, wrong sides together. Sew 1/4" away from the center line on both sides, cut down your drawn line, and press toward the print to make 4 half square triangle (HST) units. Trim these HST's to 1-1/2" x 1-1/2".
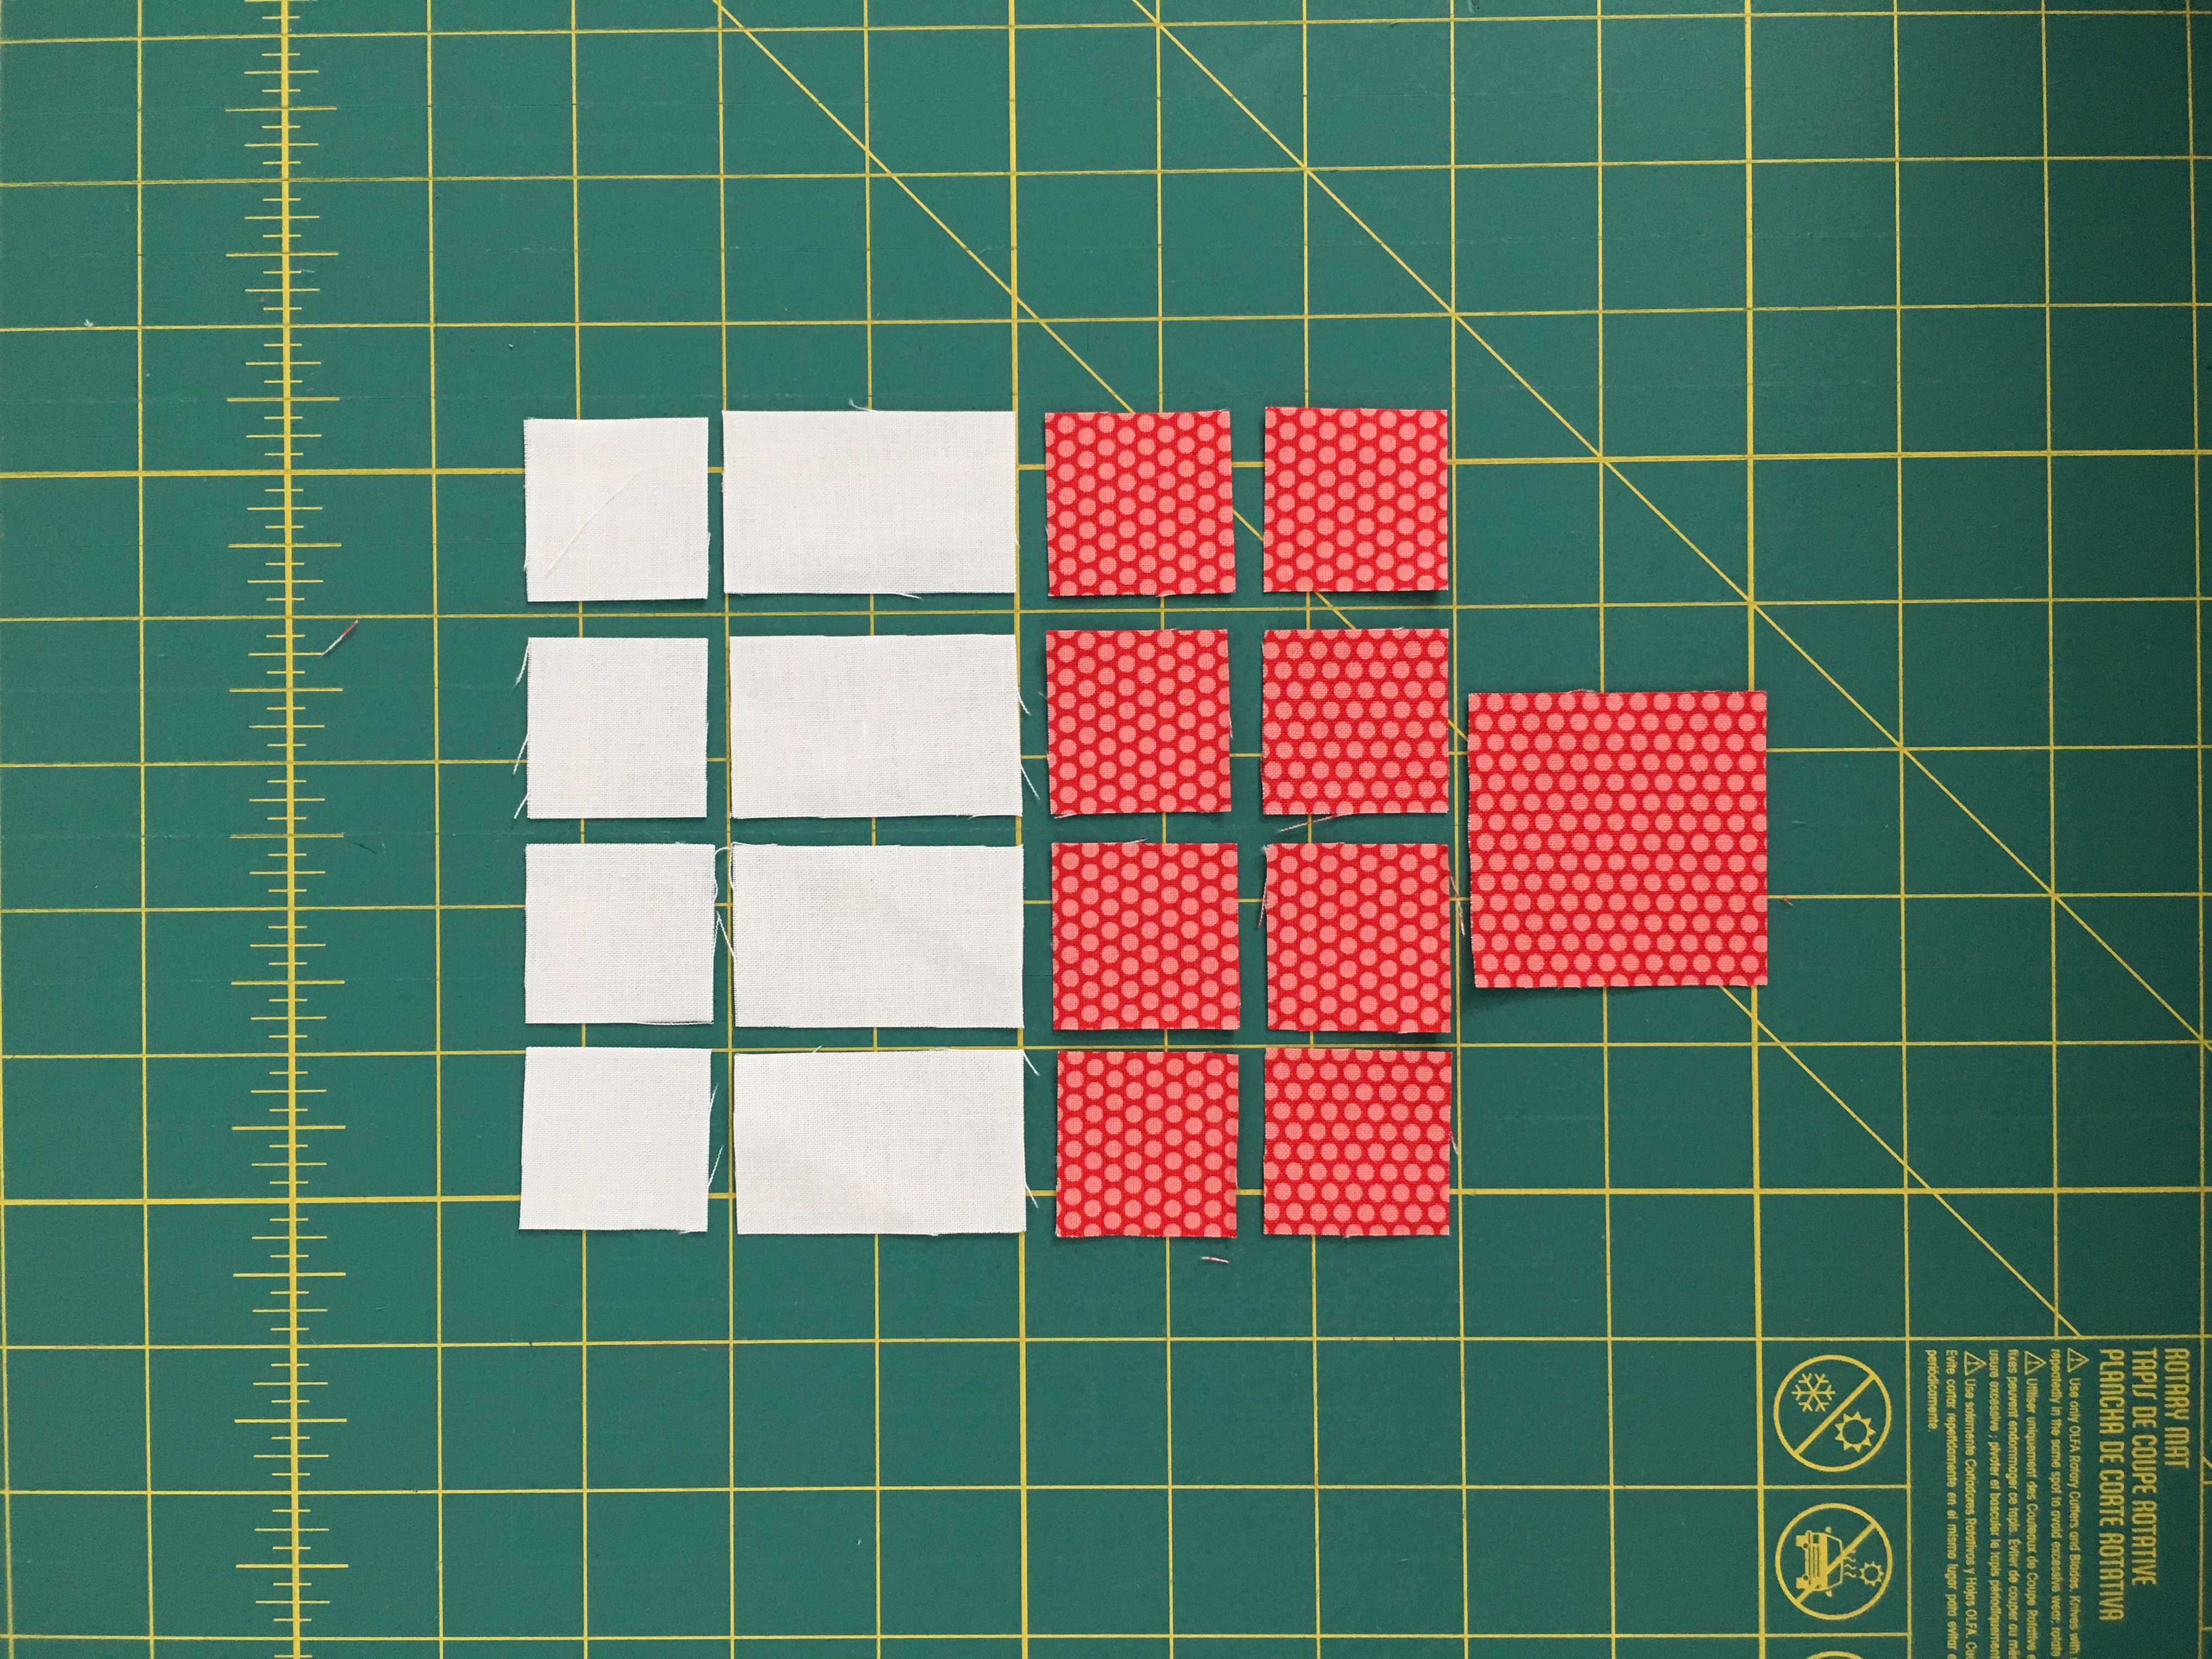
Lay out the Churn Dash block, sew together into rows, then into a finished 3-1/2" x 3-1/2" block. Don't worry about trimming it to be exactly square at this point.

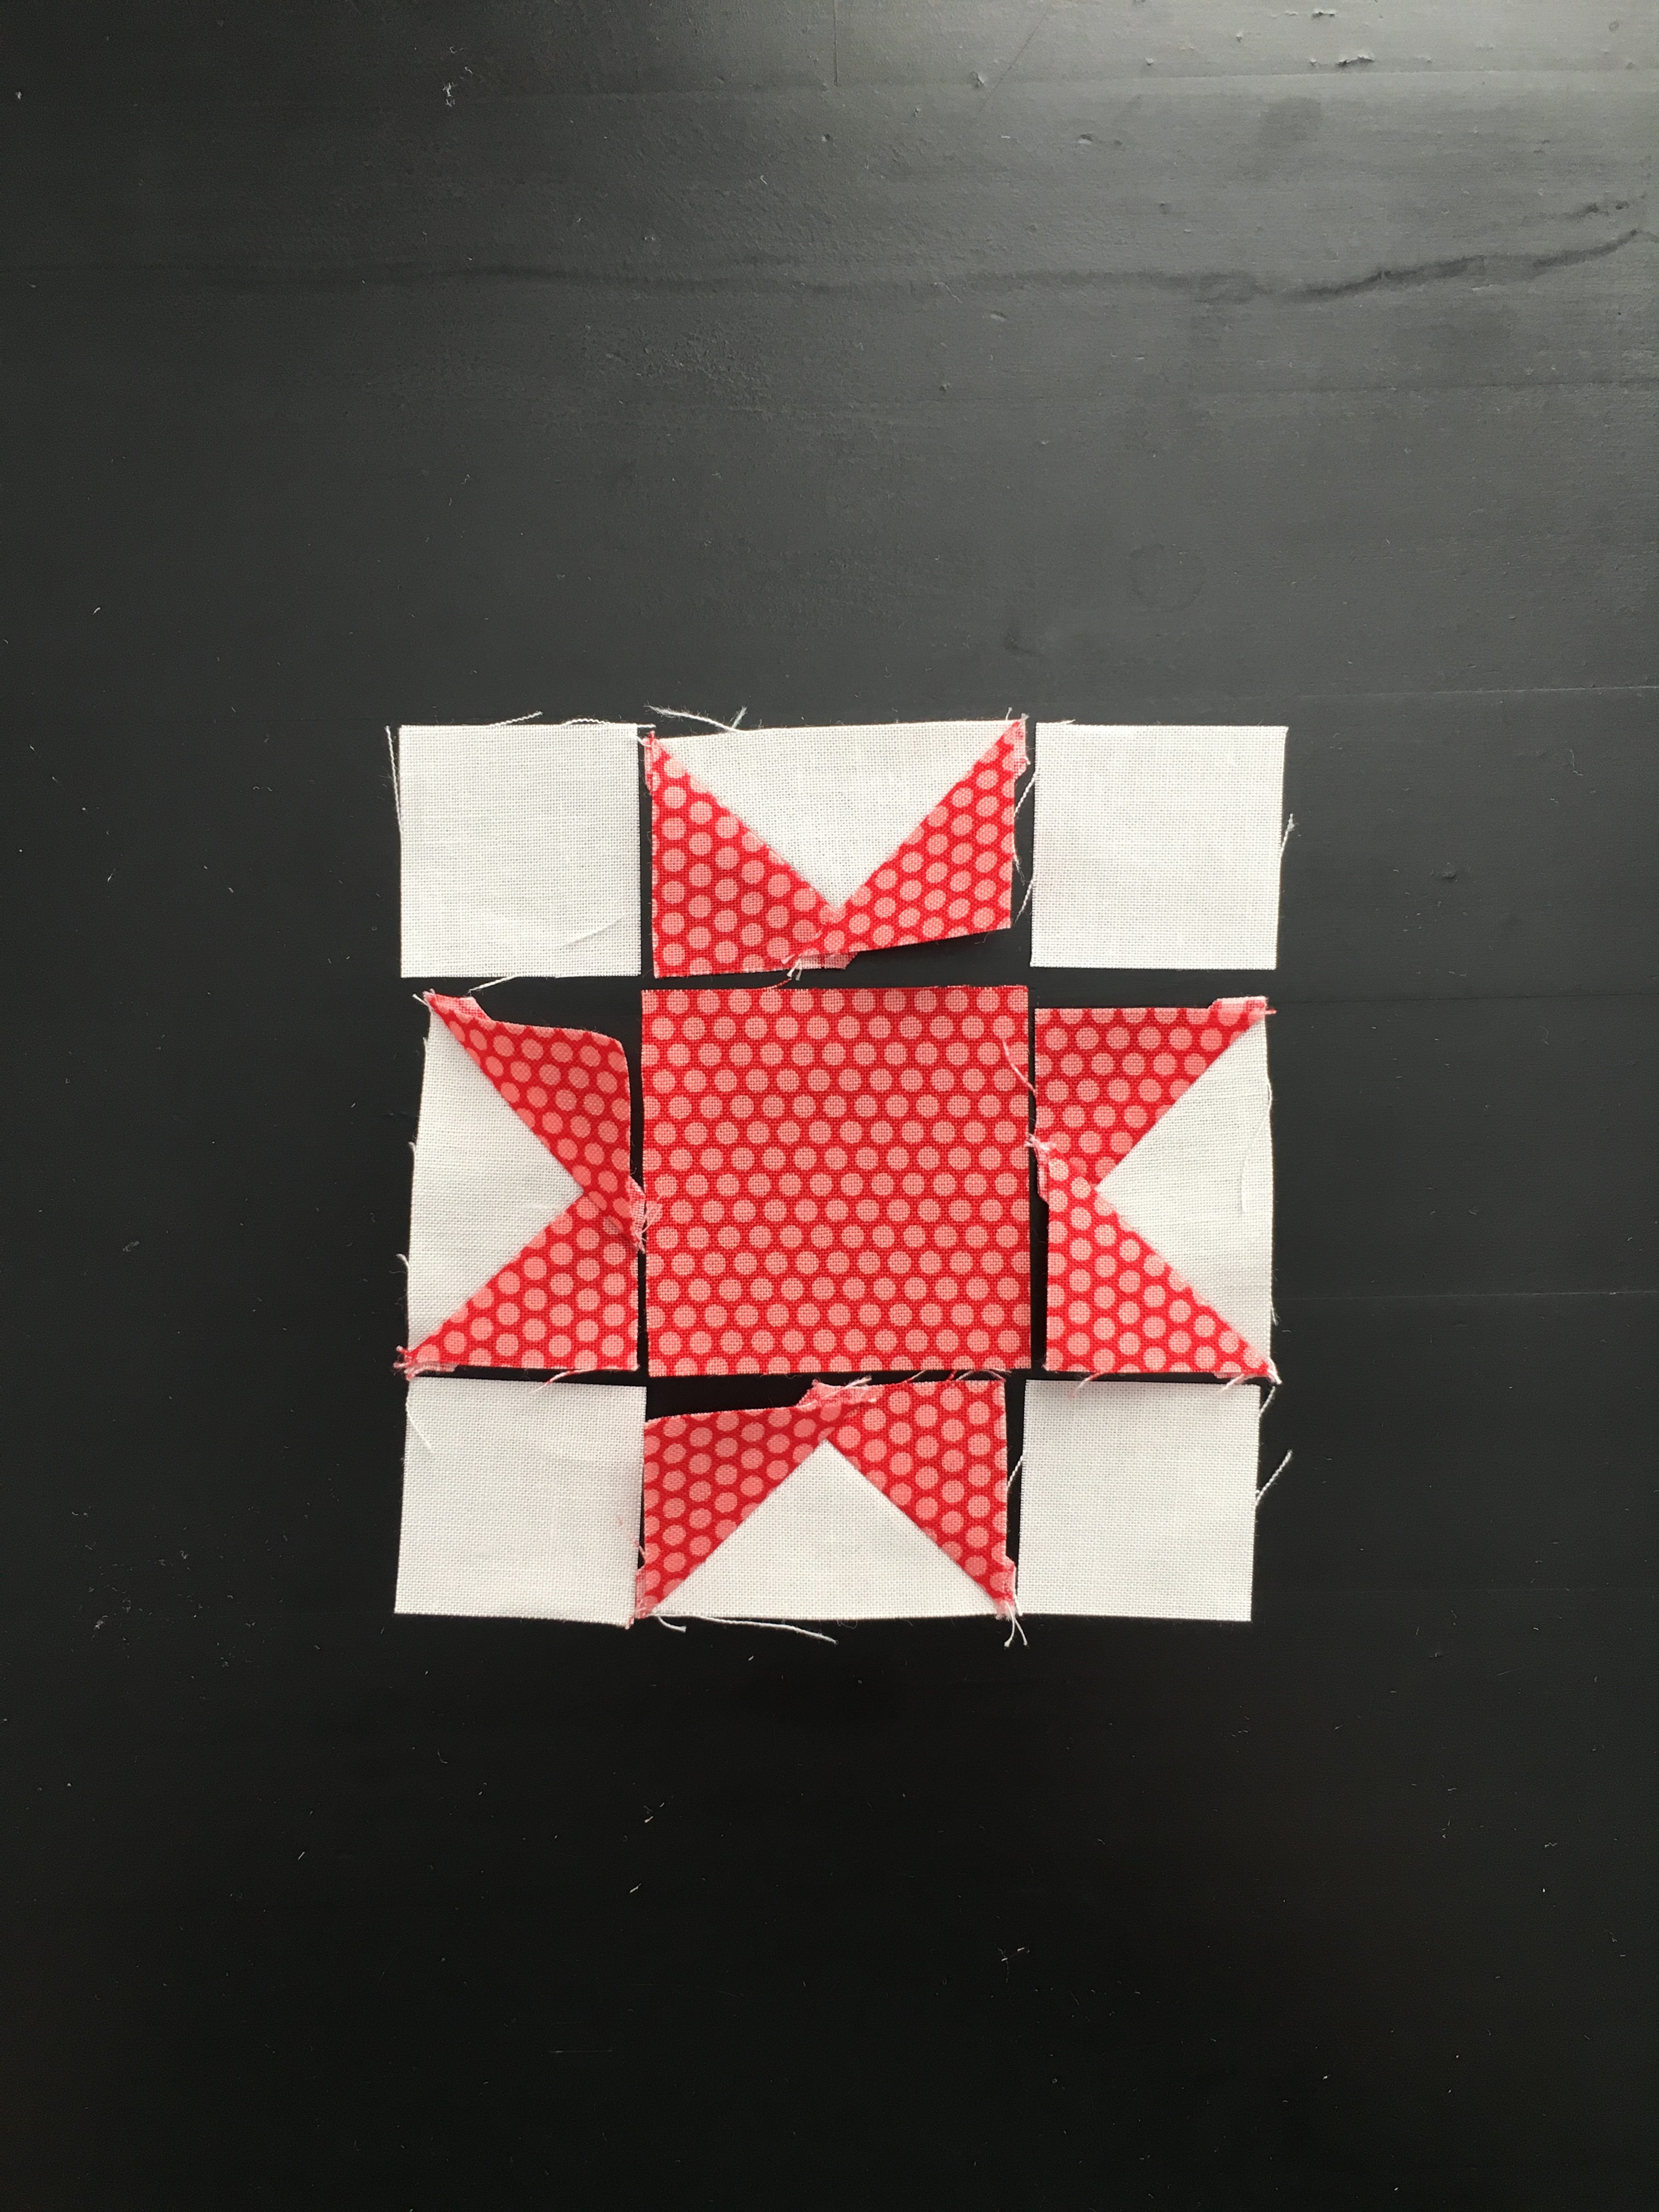
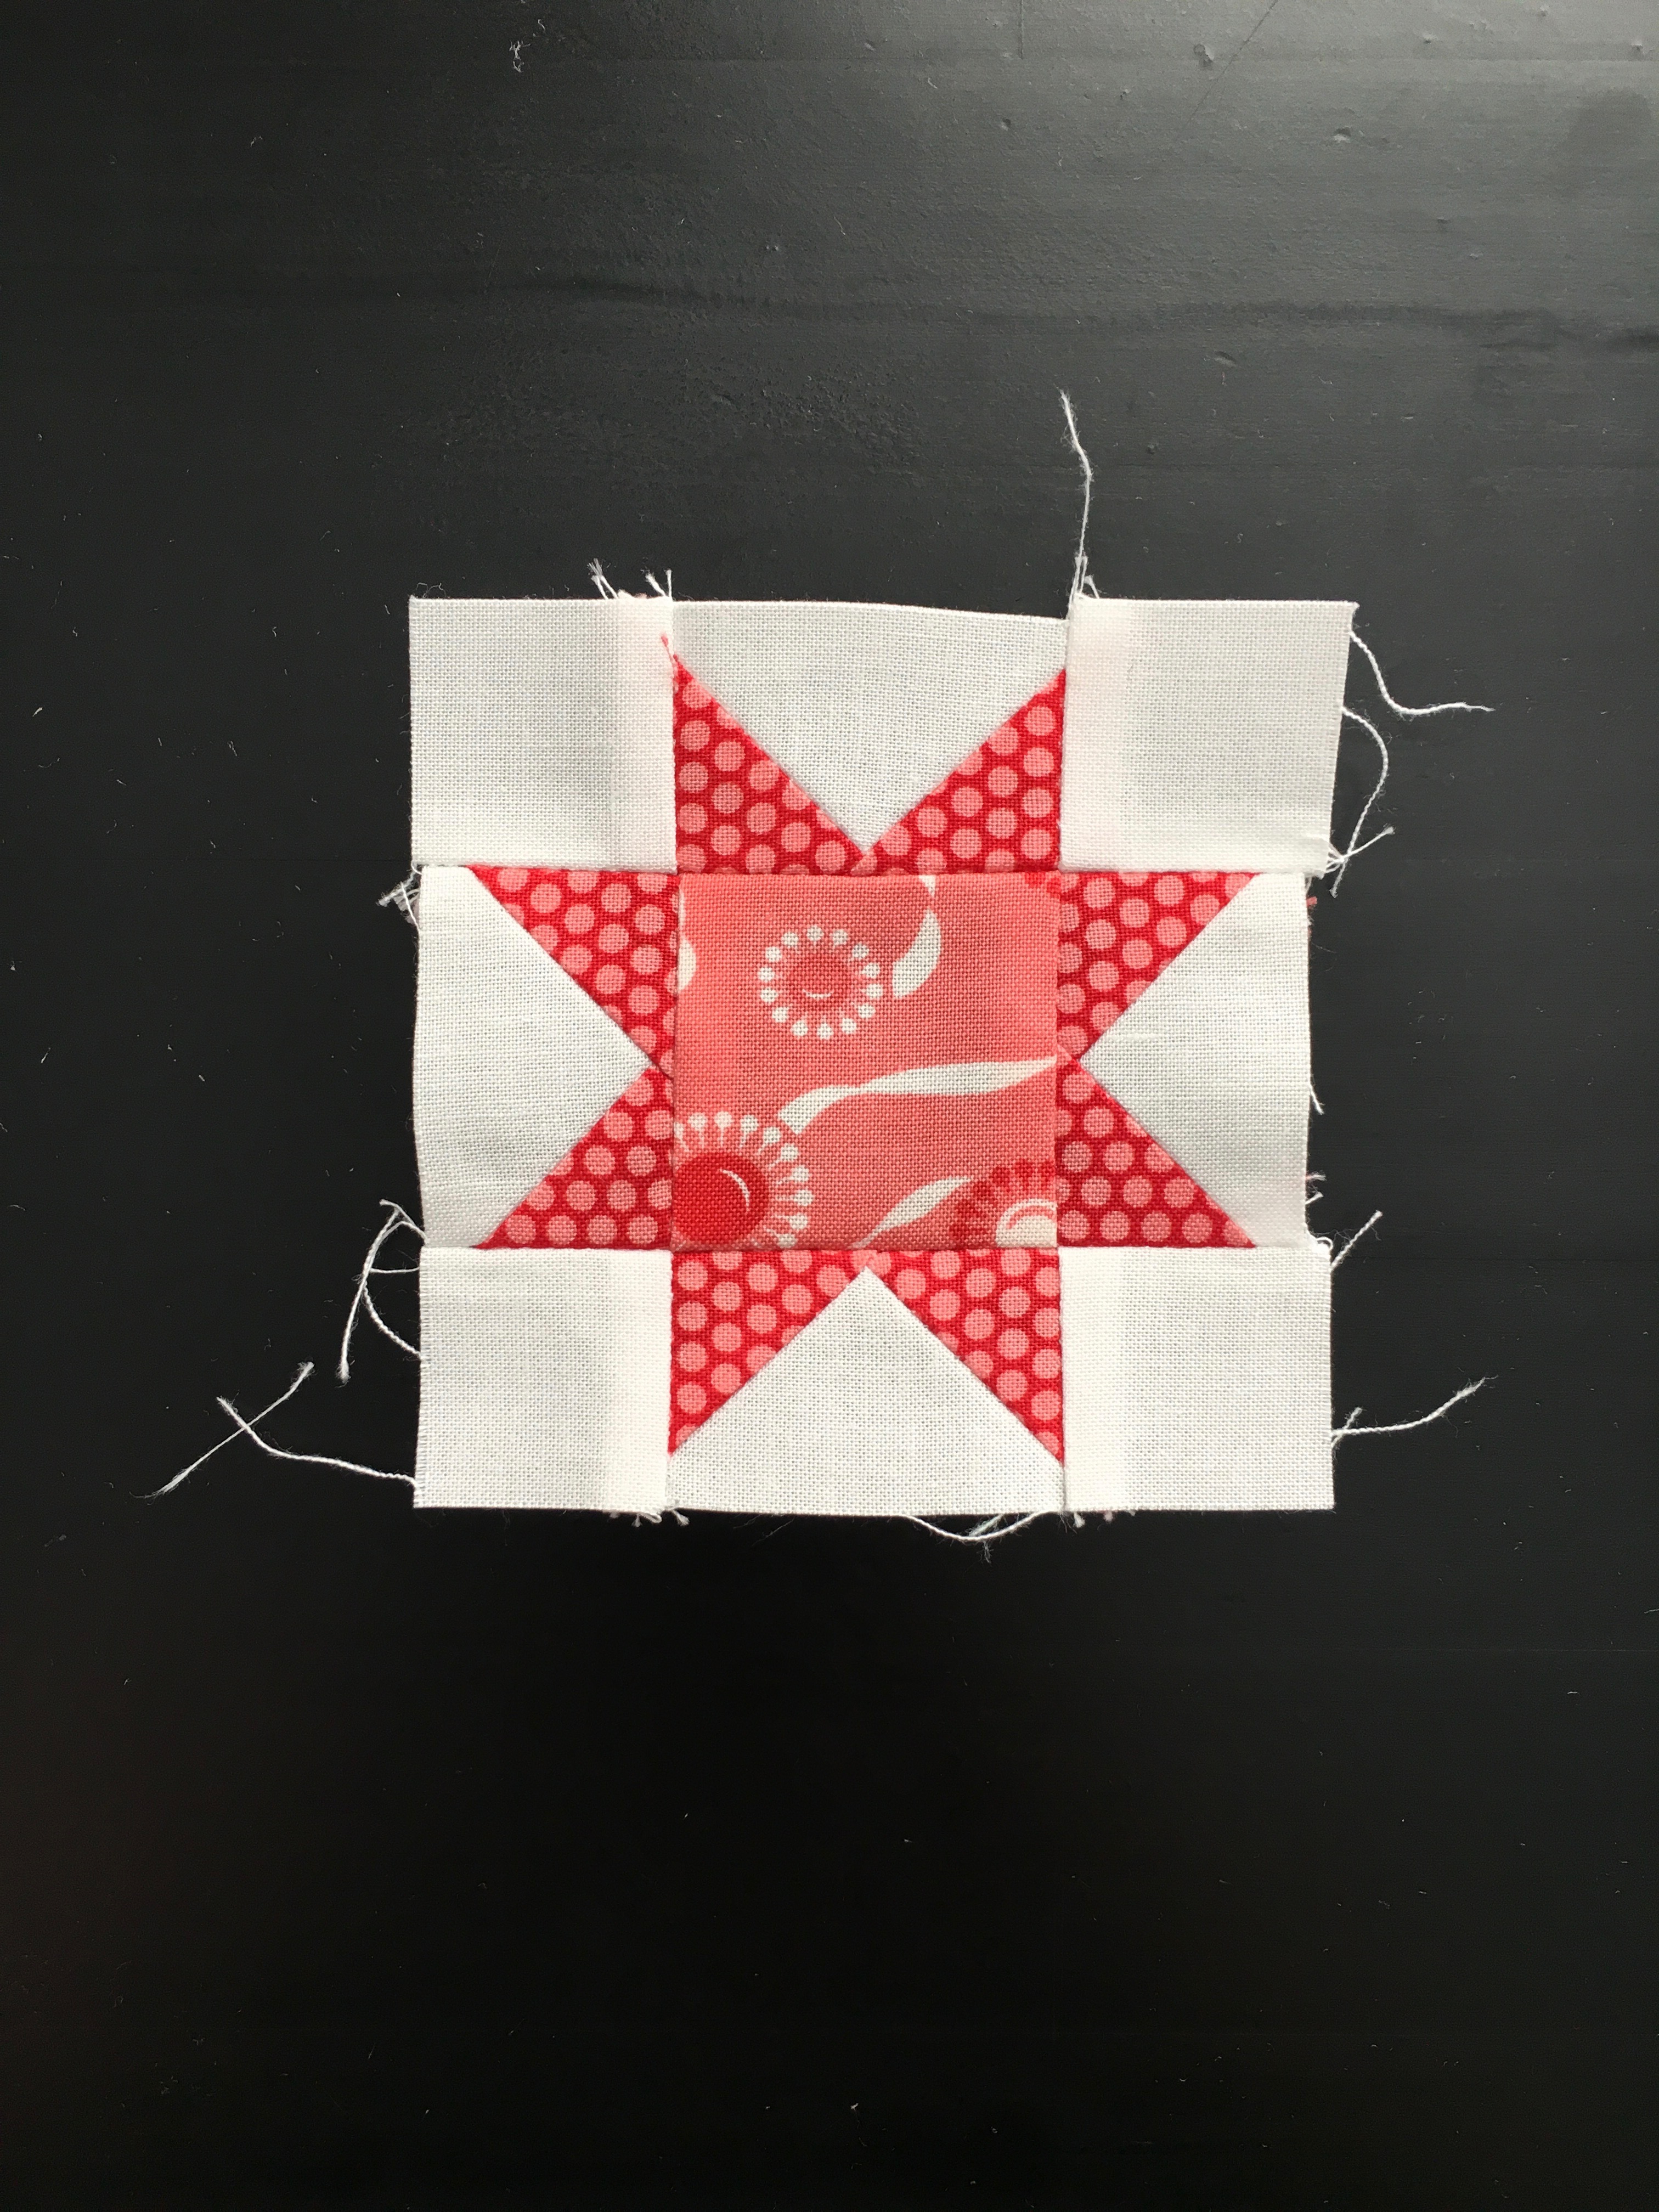
Sawtooth Star:
To make the Sawtooth Star block, you can either dig into your scrap bin, or use any orphan 5" charm squares you have as your print. You'll need to cut:
(4) 1-1/4" x 1-1/4" background
(4) 1-1/4" x 2" background
(1) 2" x 2" print
(8) 1-1/4" x 1-1/4" print
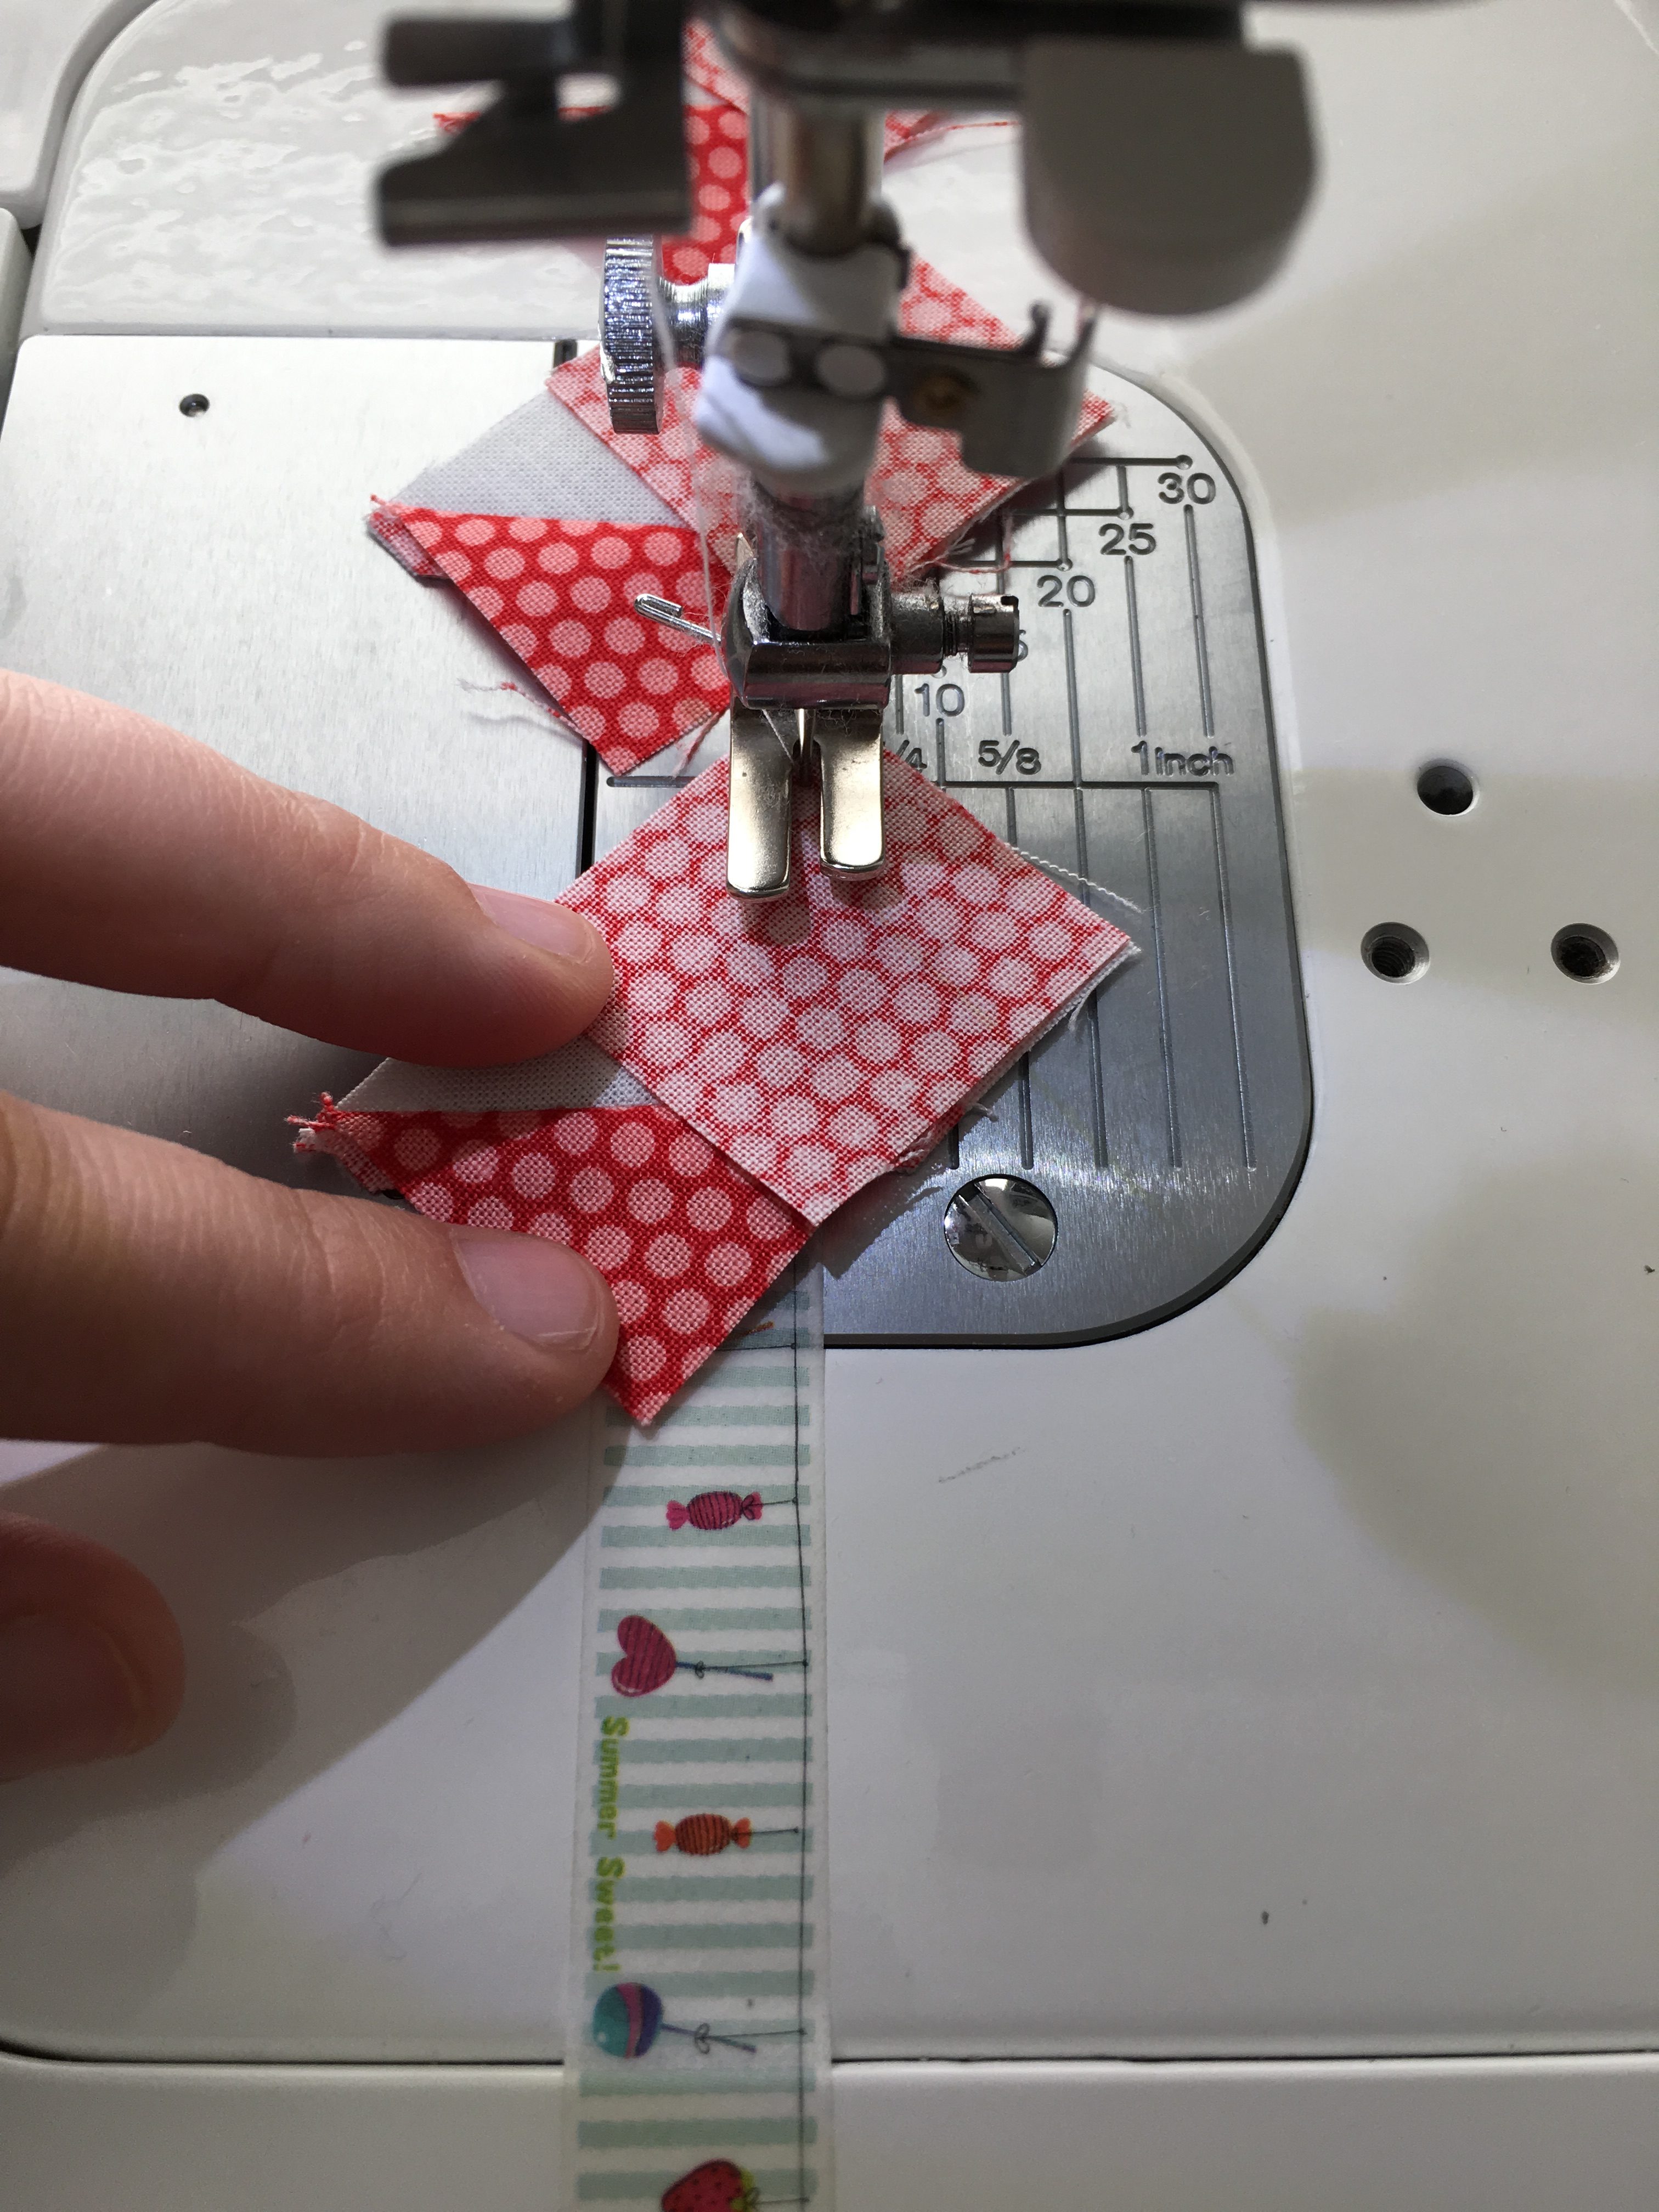
Draw a line down the center of each of the (8) 1-1/4" x 1-1/4" print squares. Assembly 8 flying geese, using the 1-1/4" x 2" background pieces as well as all (8) 1-1/4" x 1-1/4" print squares. If you're new to flying geese, I've included a few step by step photos. You will notice that with pieces this small, I do not use pins. It take some practice, but I find it much more accurate for tiny pieces. I do use pins when I need to match points, such as when assembling an entire block, however.

Layout your block. Once I had my original block laid out, I thought it would be fun to change out the center 2" x 2" square to a different print to add a little scrappy variety. Then sew it all together into a 3-1/2" x 3-1/2" block. Once again, don't worry about it being completely square or without random threads at this point.
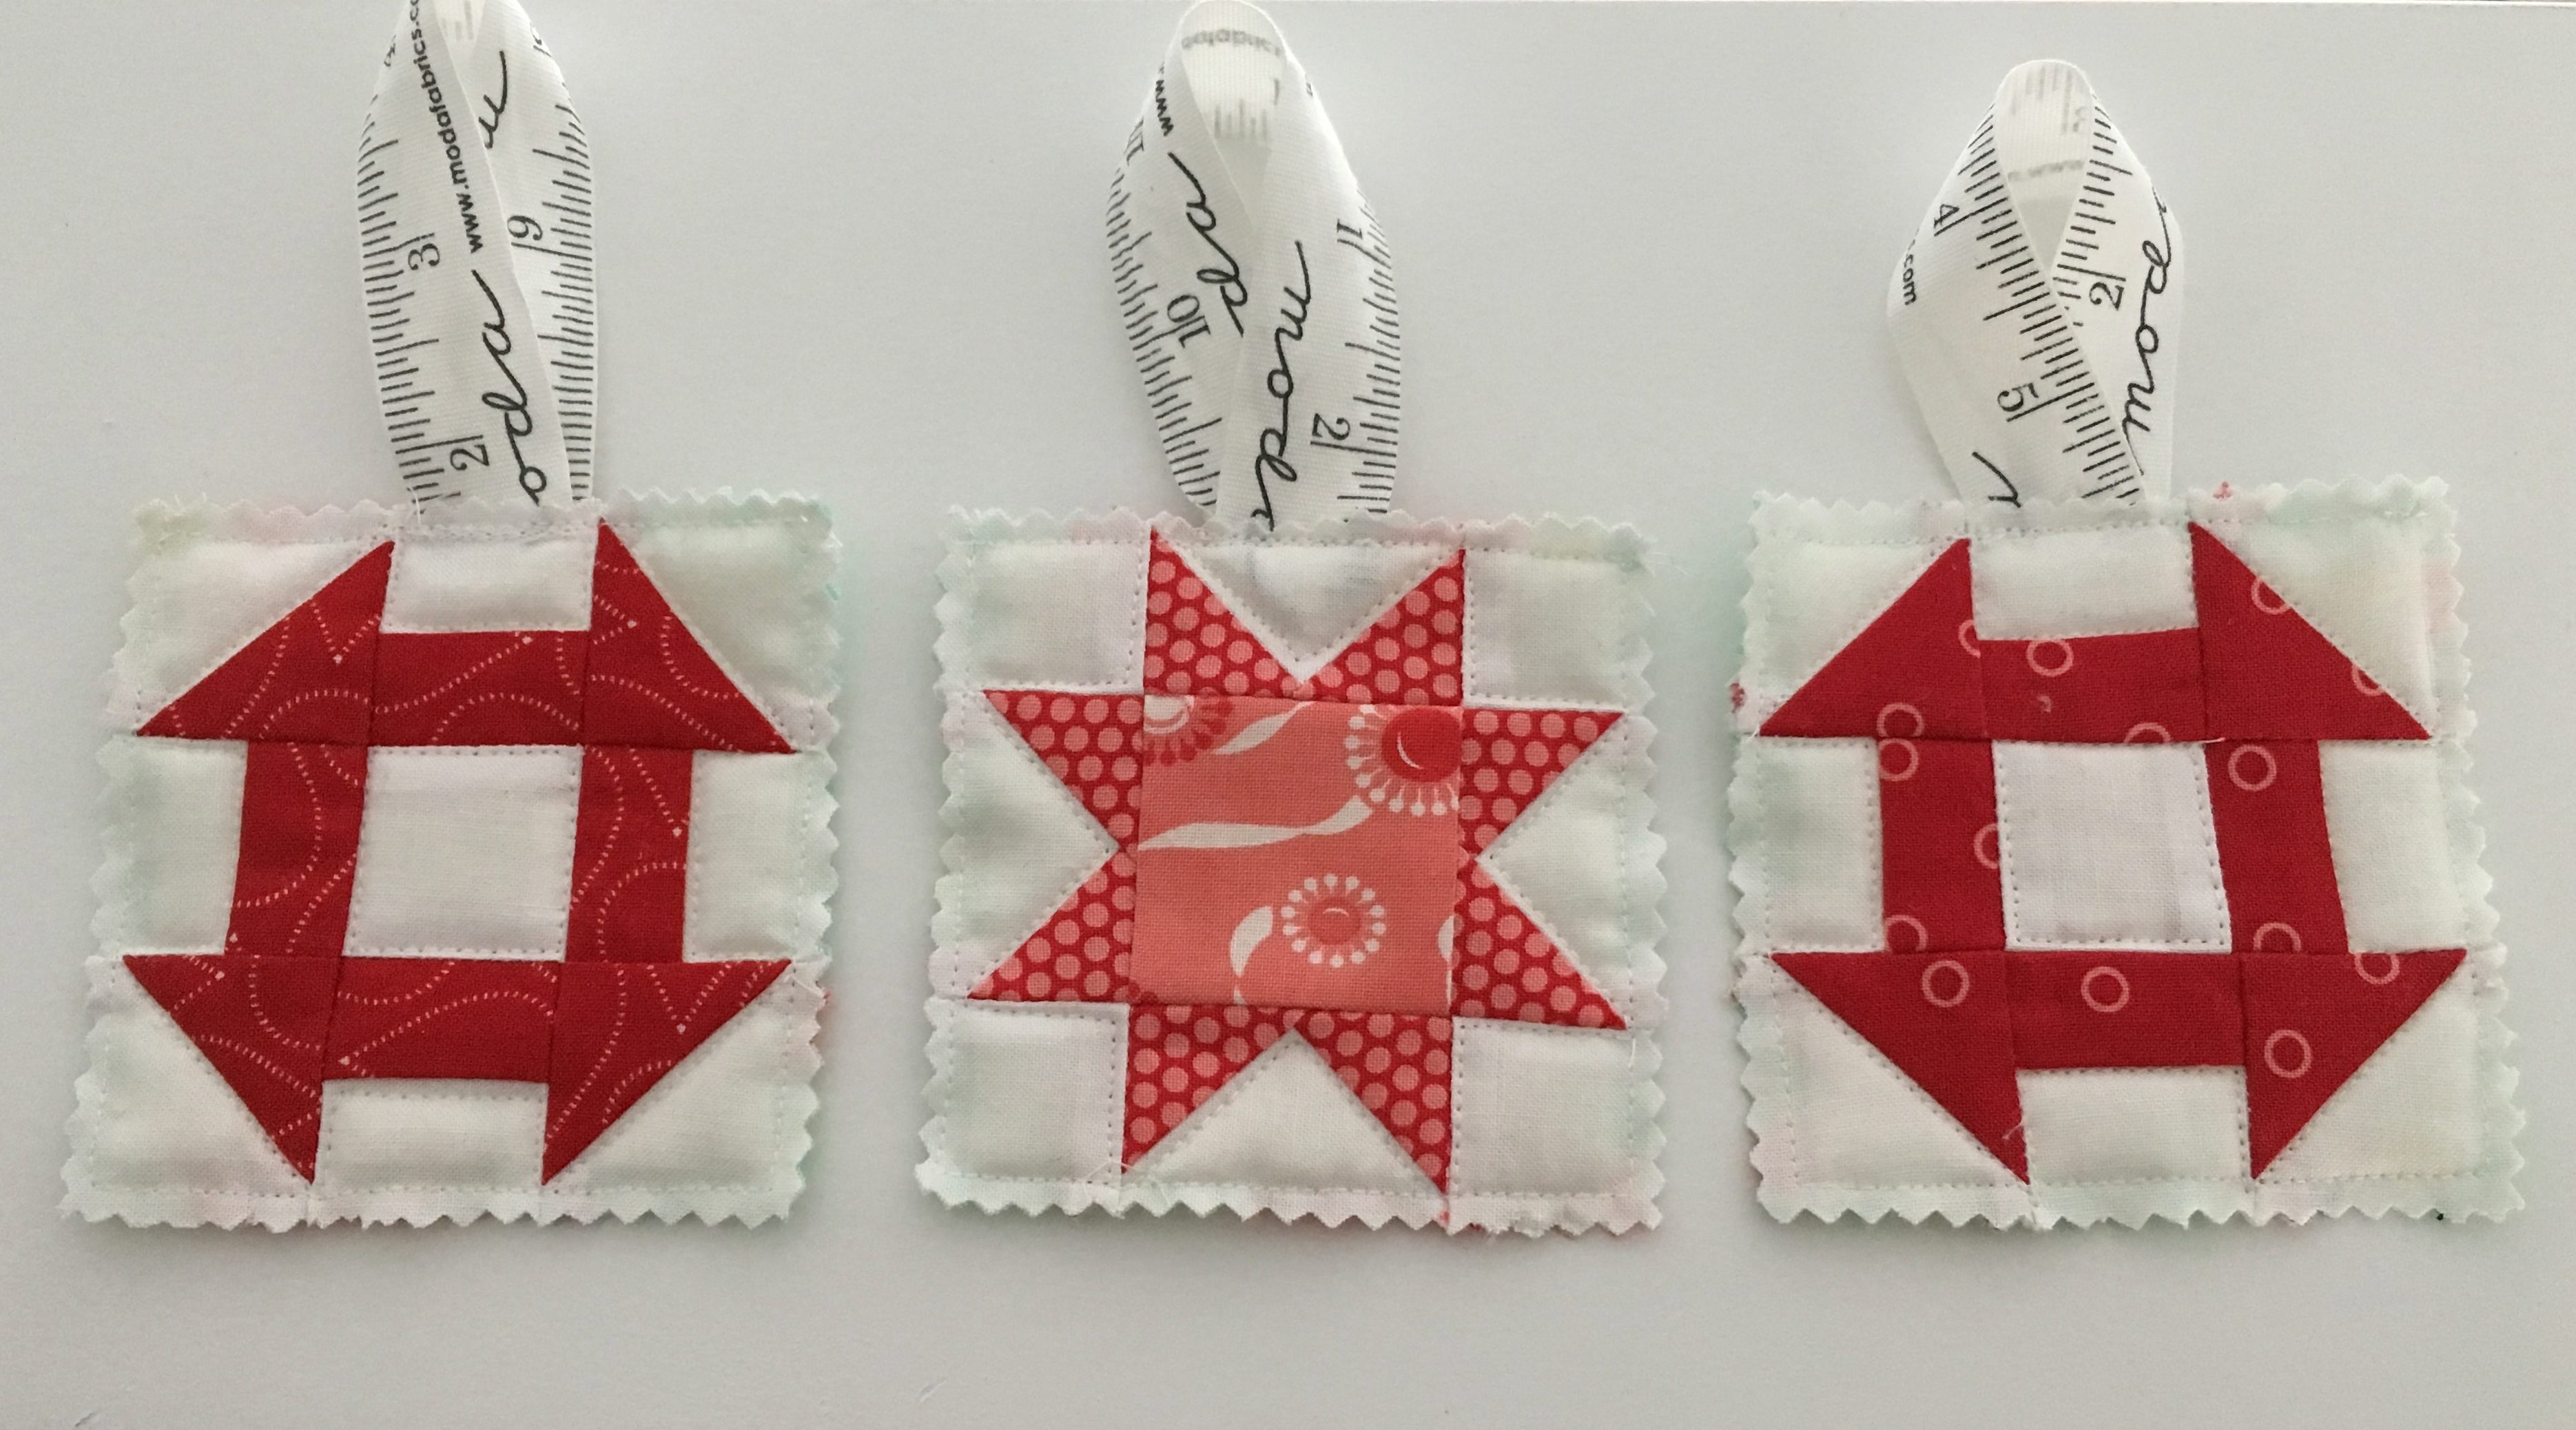
Ornament Assembly:
To assemble your ornament, you'll need:
(1) 3-1/2" x 3-1/2" print for backing per ornament
(1) 3-1/4" x 3-1/4" piece of batting per ornament
6-7" length of Moda ribbon from your precuts
Make a quilt sandwich, layering the "backing", the batting, and the "top". Sew along 3 of the 4 sides, leaving the 4th side open at this point. I did this differently when I made my initial two ornaments and really struggled to get the ribbons in.
Pink around the edges next using either a rotary pinker or pinking shears. Do this before you insert the ribbon or sew up the final side. Insert the ribbon in the open side, pin it into place, then sew the ornament closed. I found it easier, once again, to quilt these after I had finished all of the construction of the ornament.
![]()
These ornaments finish at 3-1/2" x 3-1/2".
I hope you love making these as much as I do. I will warn you, though, it is kind of hard to stop once you start making tiny blocks. They are just so cute, fun, and a wonderful way to use up some scraps. I think these would be the perfect addition to any neighbor gifts you might still be baking up. I'd love to see your ornaments when you make some! Tag me on instagram @heritage.threads, if you're on instagram as well.
Jen Van Orman
{heritage-threads.com}
![]()
Posted in: