Welcome to Moda Fabrics!
Every Which Way Quilt
Every Which Way Quilt
Published:
Dec 4 2016 - 23:00
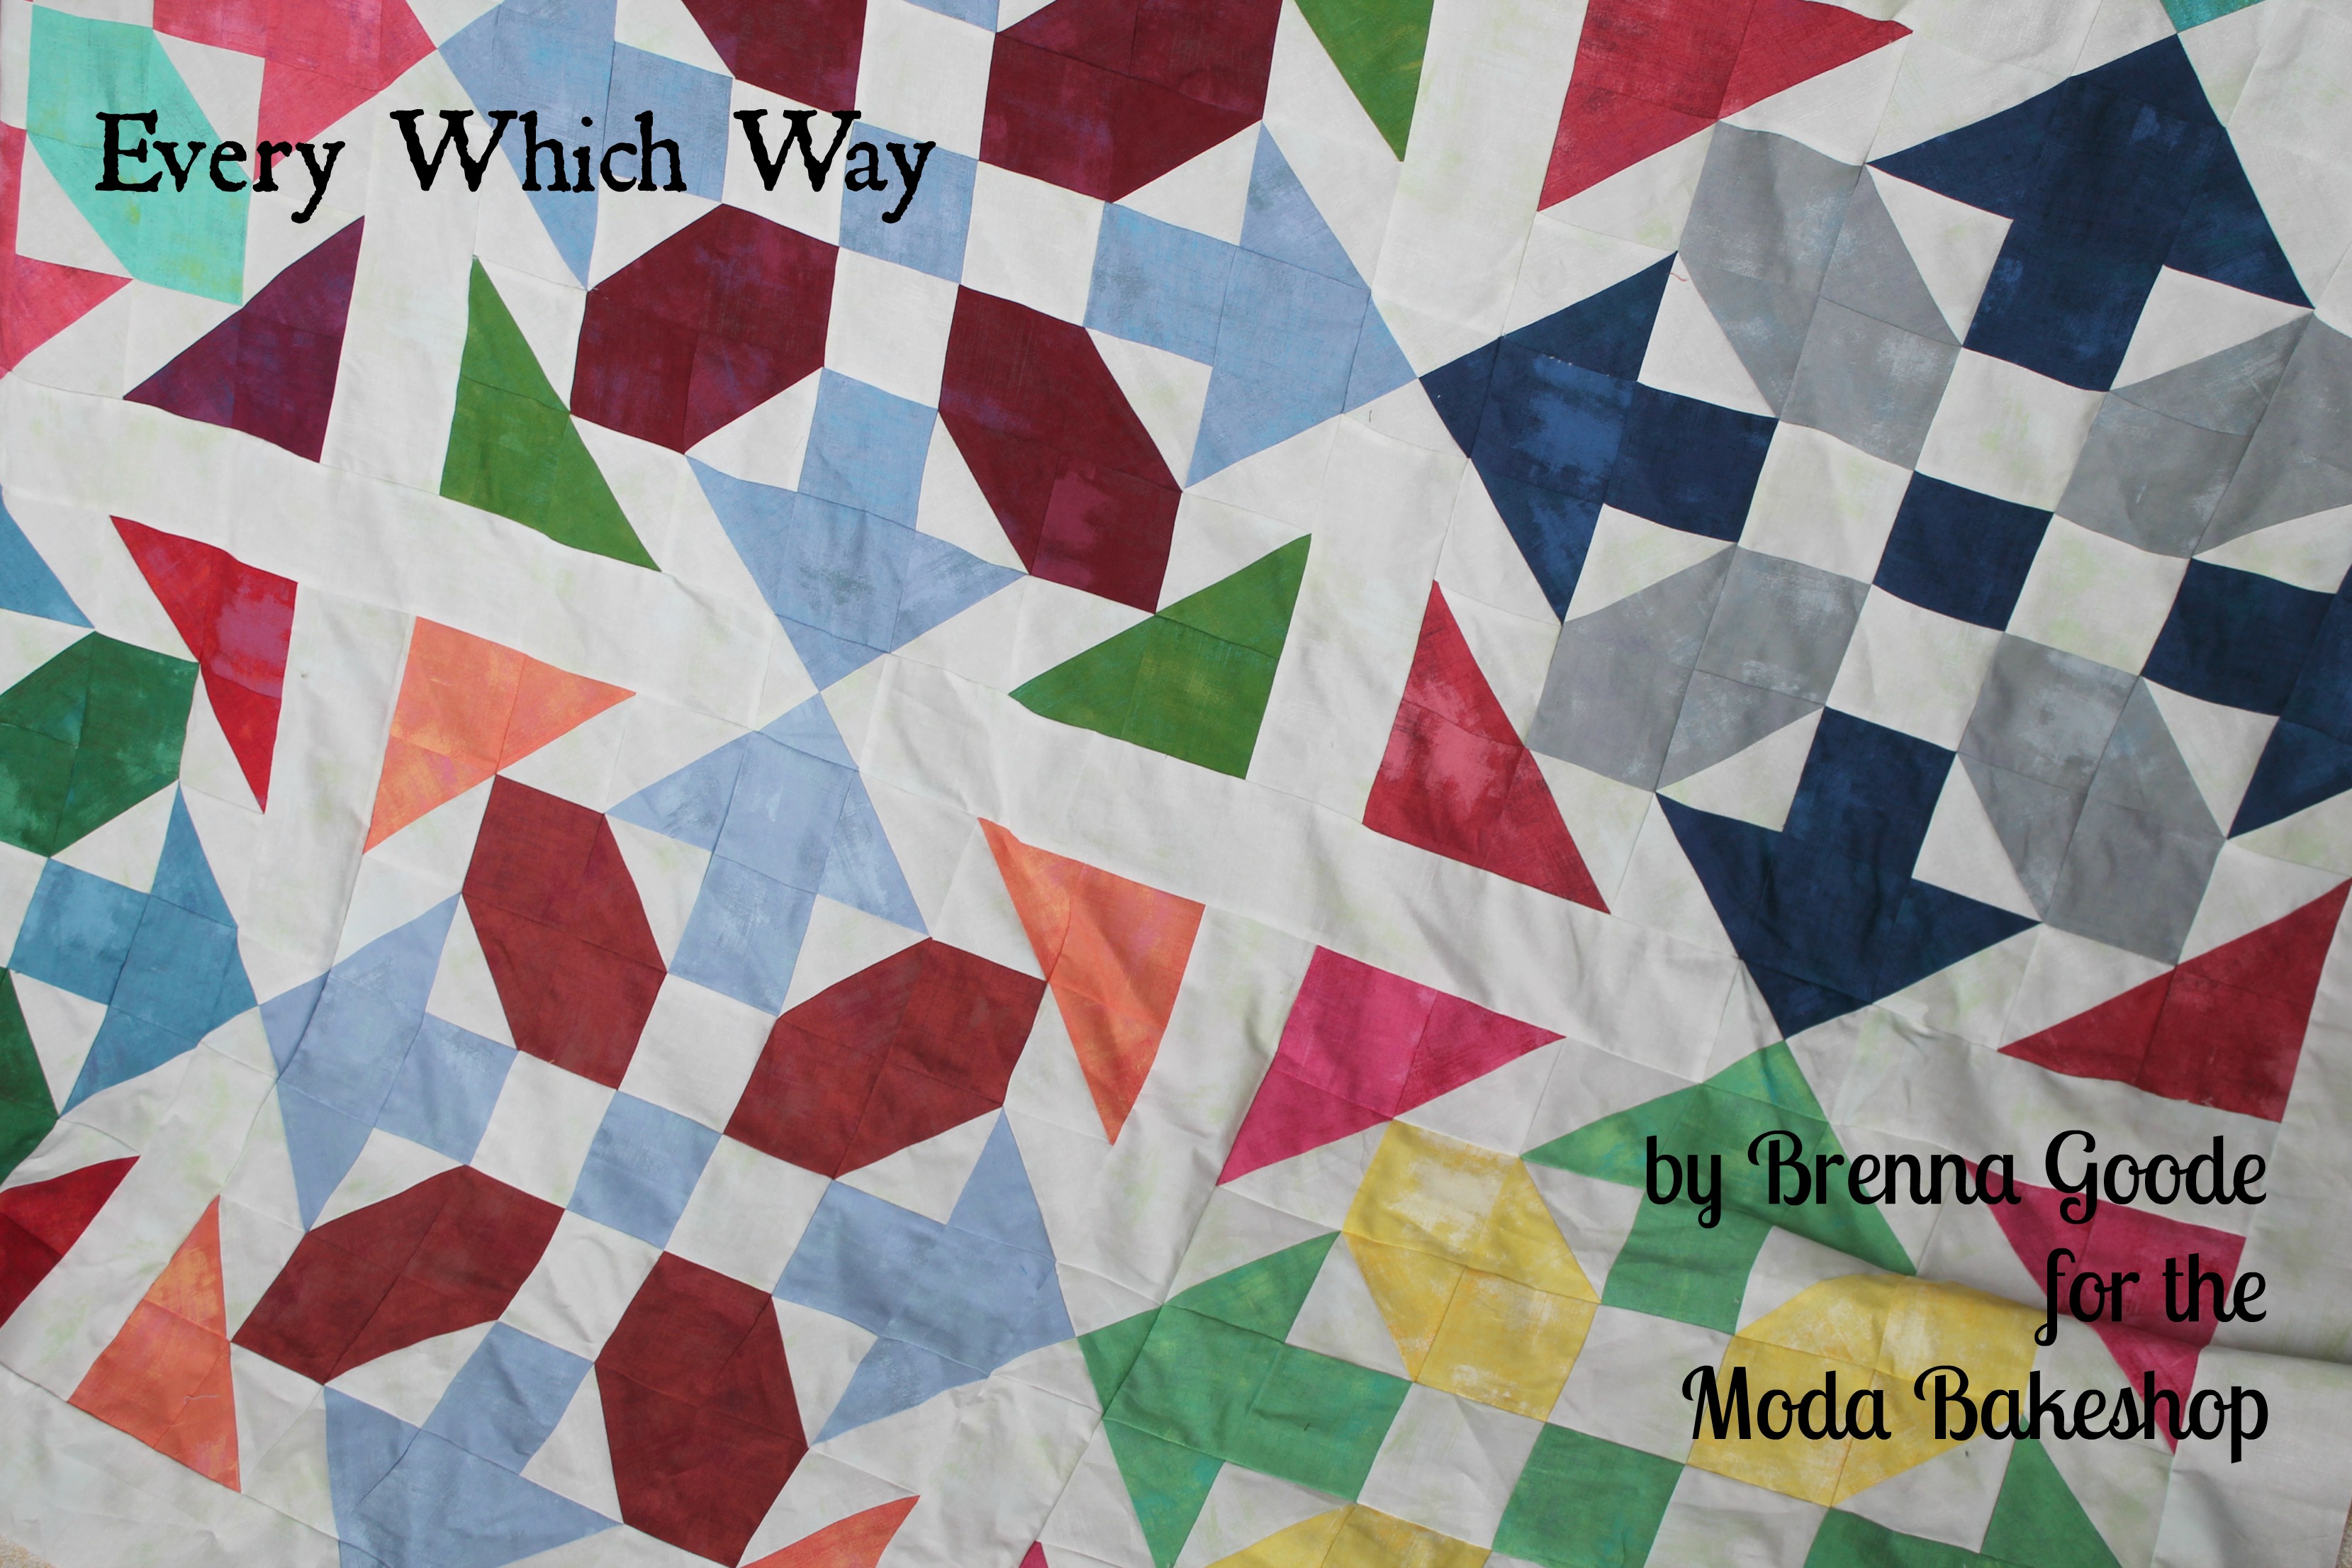

Welcome back to the Bake Shop! I'm here with a fun, easy to do large-block quilt made with some of the fabulous Moda Grunge fabrics. These are such fun fabrics to work with. They can be used as solids, but the slight variations in them keep things interesting. I think they work well in this particular format, and I hope you enjoy this project.
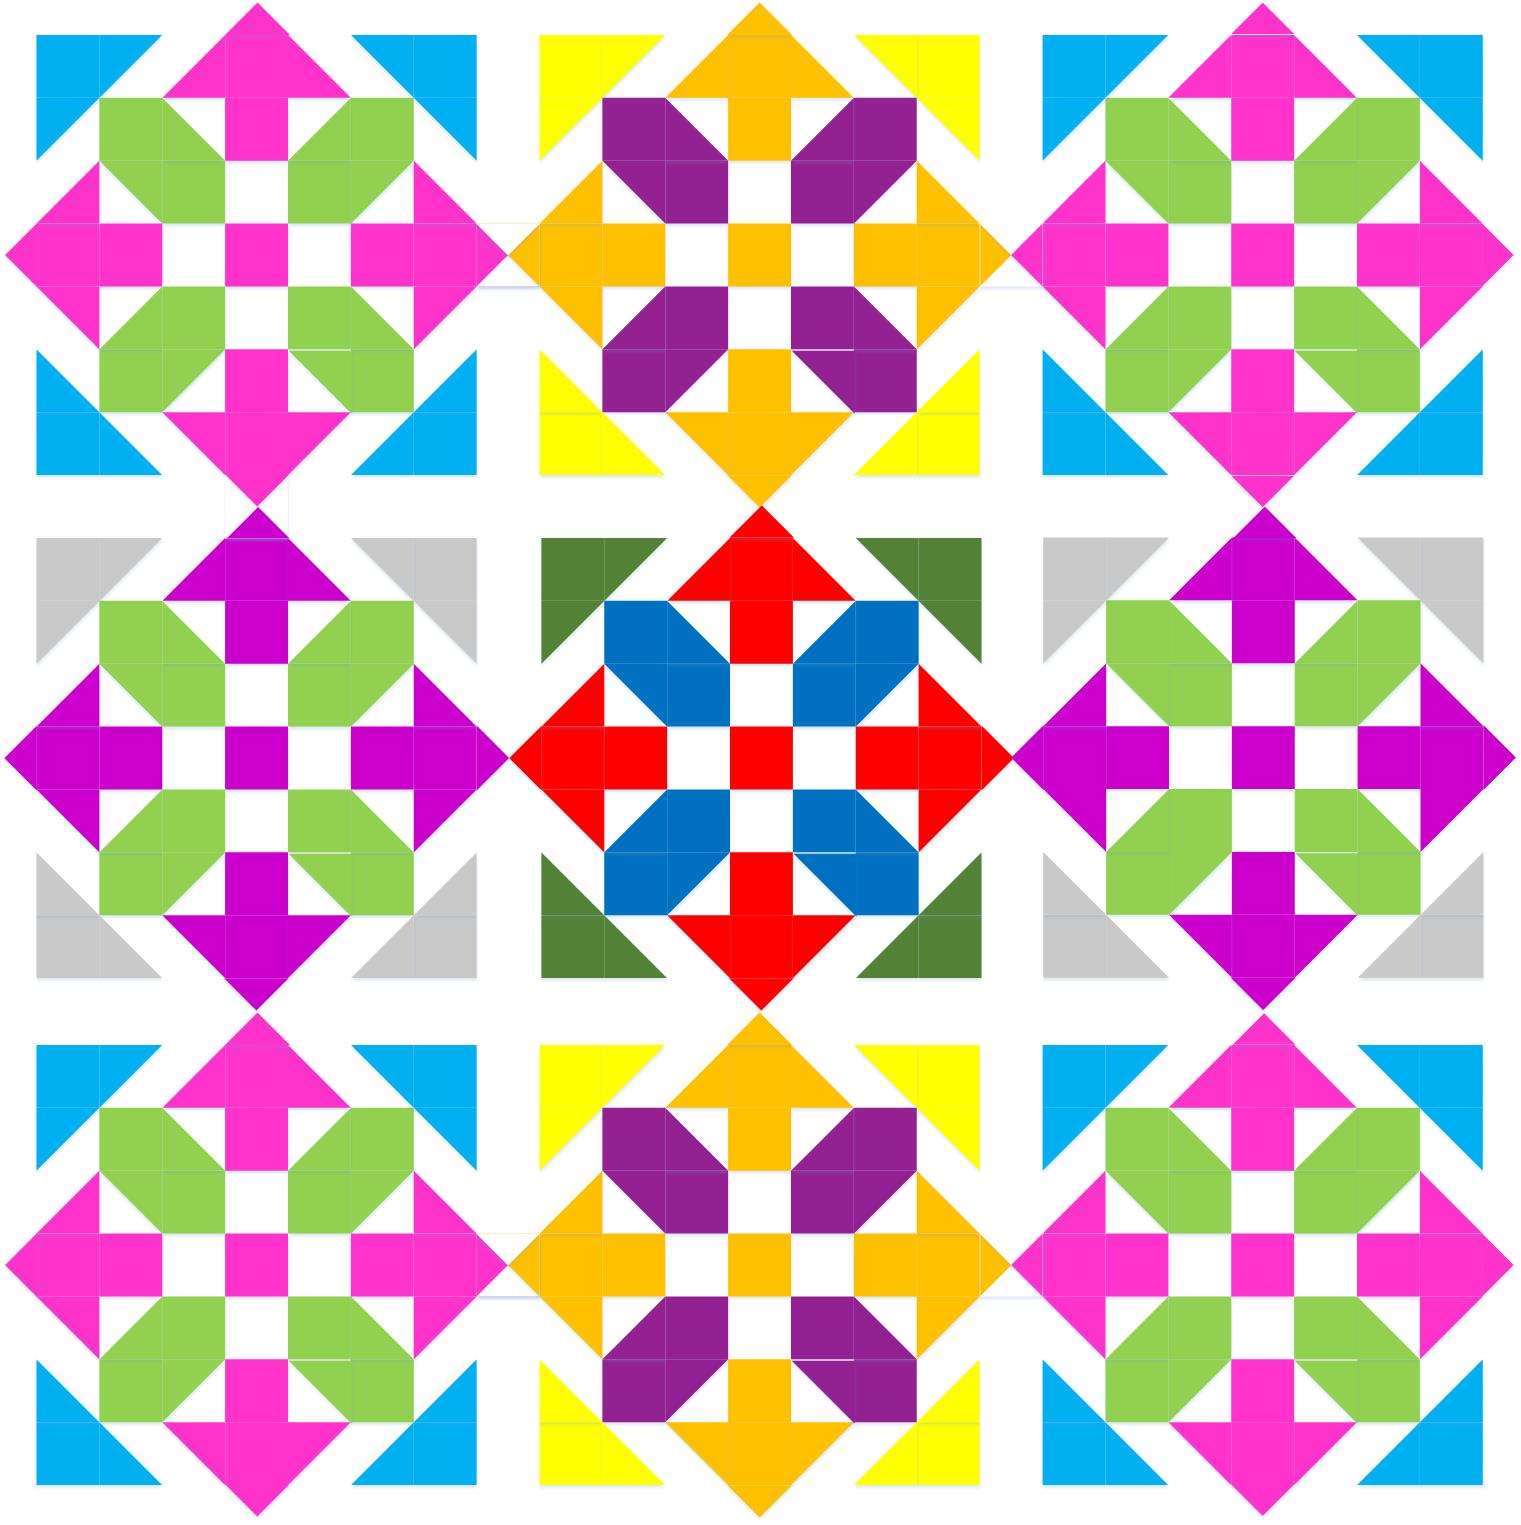
This quilt finishes at 75" x 75".
![]()

1 Fat Quarter Bundle Moda Grunge
5 yards Grunge Basics White 30150 58 (background)
2.5 yards 108" Grunge Ash 11108 354 (backing)
1 yard Grunge Basics Kelly Green 30150 232 (binding)
Strip Tube ruler by Cozy Quilts
![]()
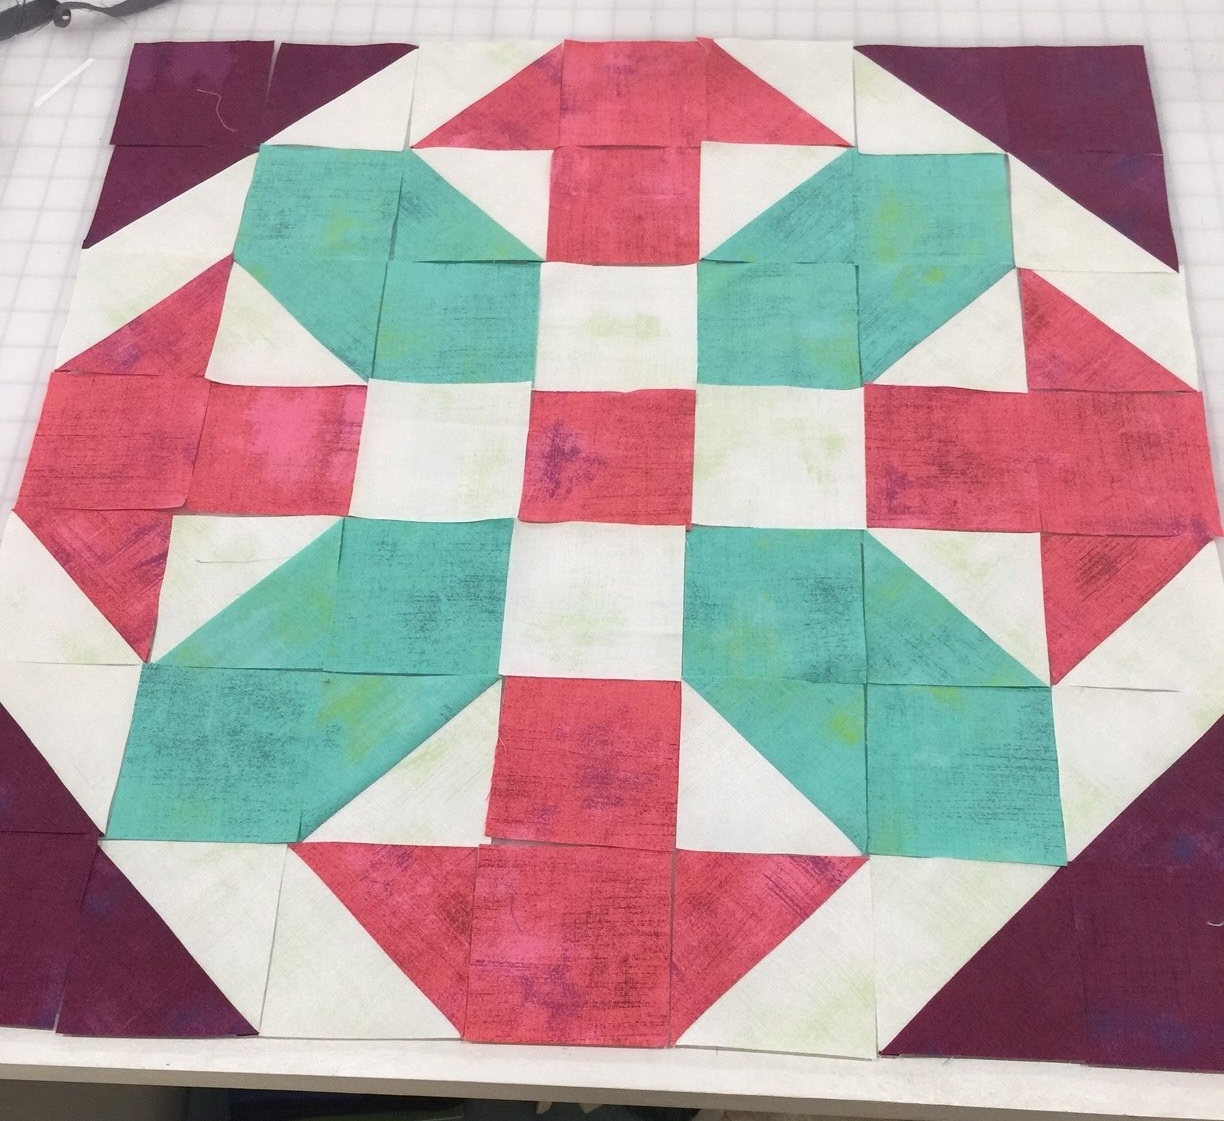
This quilt has nine blocks, and you'll need three fat quarters for each block.
Press your fat quarters, and group into sets of three. For each block, there is one color for the arrows, one for the corner triangles, and one for the oblong hexagons.
Cut your background fabric:
Cut five strip 18 inches wide by the width of fabric. Subcut into strips 3.5 inches wide by 18 inches long. You'll need six strips per block, so 54 strips total. Cut the remaining strips into 36 3.5 inch square blocks.
Cutting and assembly instructions for one block:
For the arrow color, turn the fat quarter with the long edge towards you.
- Cut two strips 3.5 inches wide x 18 inches long
- Cut 9 squares at 3.5 inches
For the hexagon color, turn the fat quarter with the long edge towards you.
- Cut two strips 3.5 inches wide x 18 inches long
- Cut 8 squares at 3.5 inches
For the corner color, turn the fat quarter with the long edge towards you.
- Cut two strips 3.5 inches wide x 18 inches long
- Cut four squares at 3.5 inches
From the background fabric
- Use six 3.5 inch stripes
- Use 4 3.5 inch squares
We are going to use the Strip Tube ruler to make all of the half-square triangles. I find it to be an excellent tool for making multiple similar HST's.
Match up a background strip with each of your colored strips.

Sew along each edge with a 1/4 inch seam allowance, forming a tube.
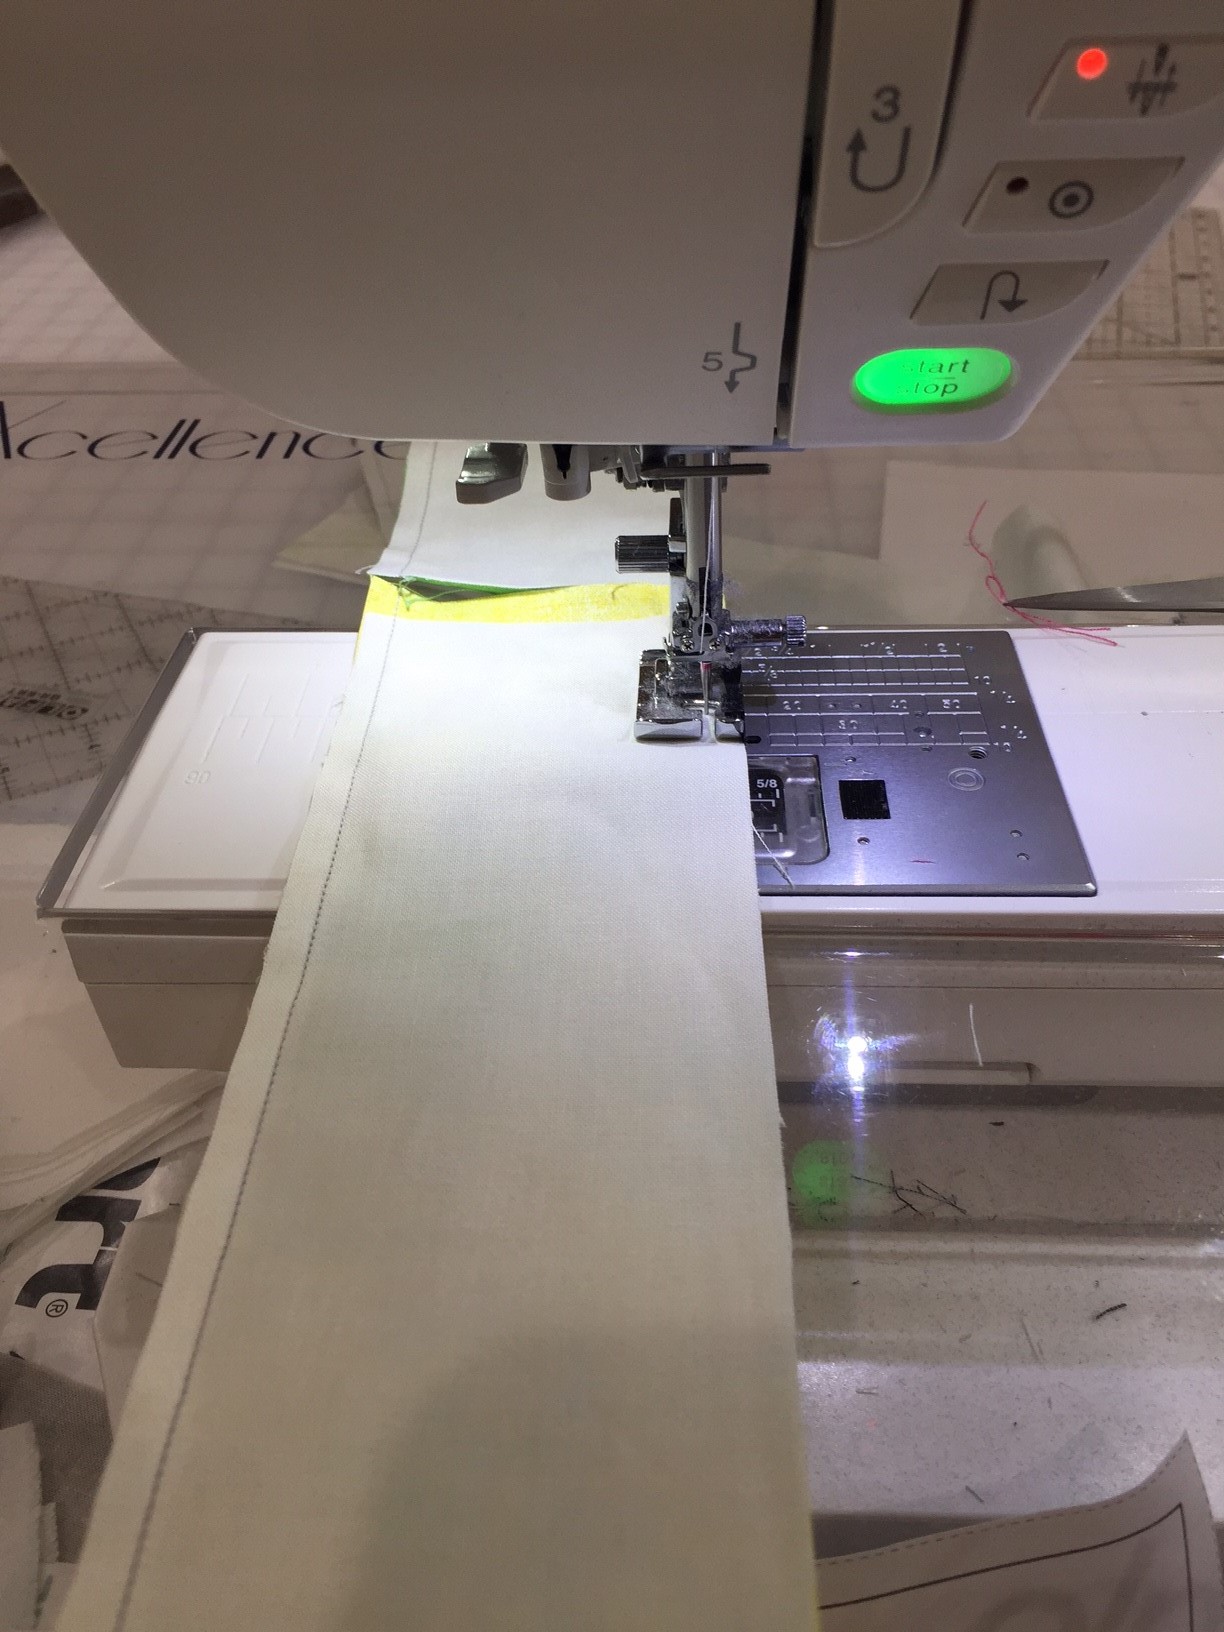
Press with starch. The HST's will have edges along the bias, so the starch is essential for helping to keep the squares squared.

Find the 3 1/2 inch mark on your Strip Tube ruler. Line it up with the seam on one side of your tube, and cut along either side.
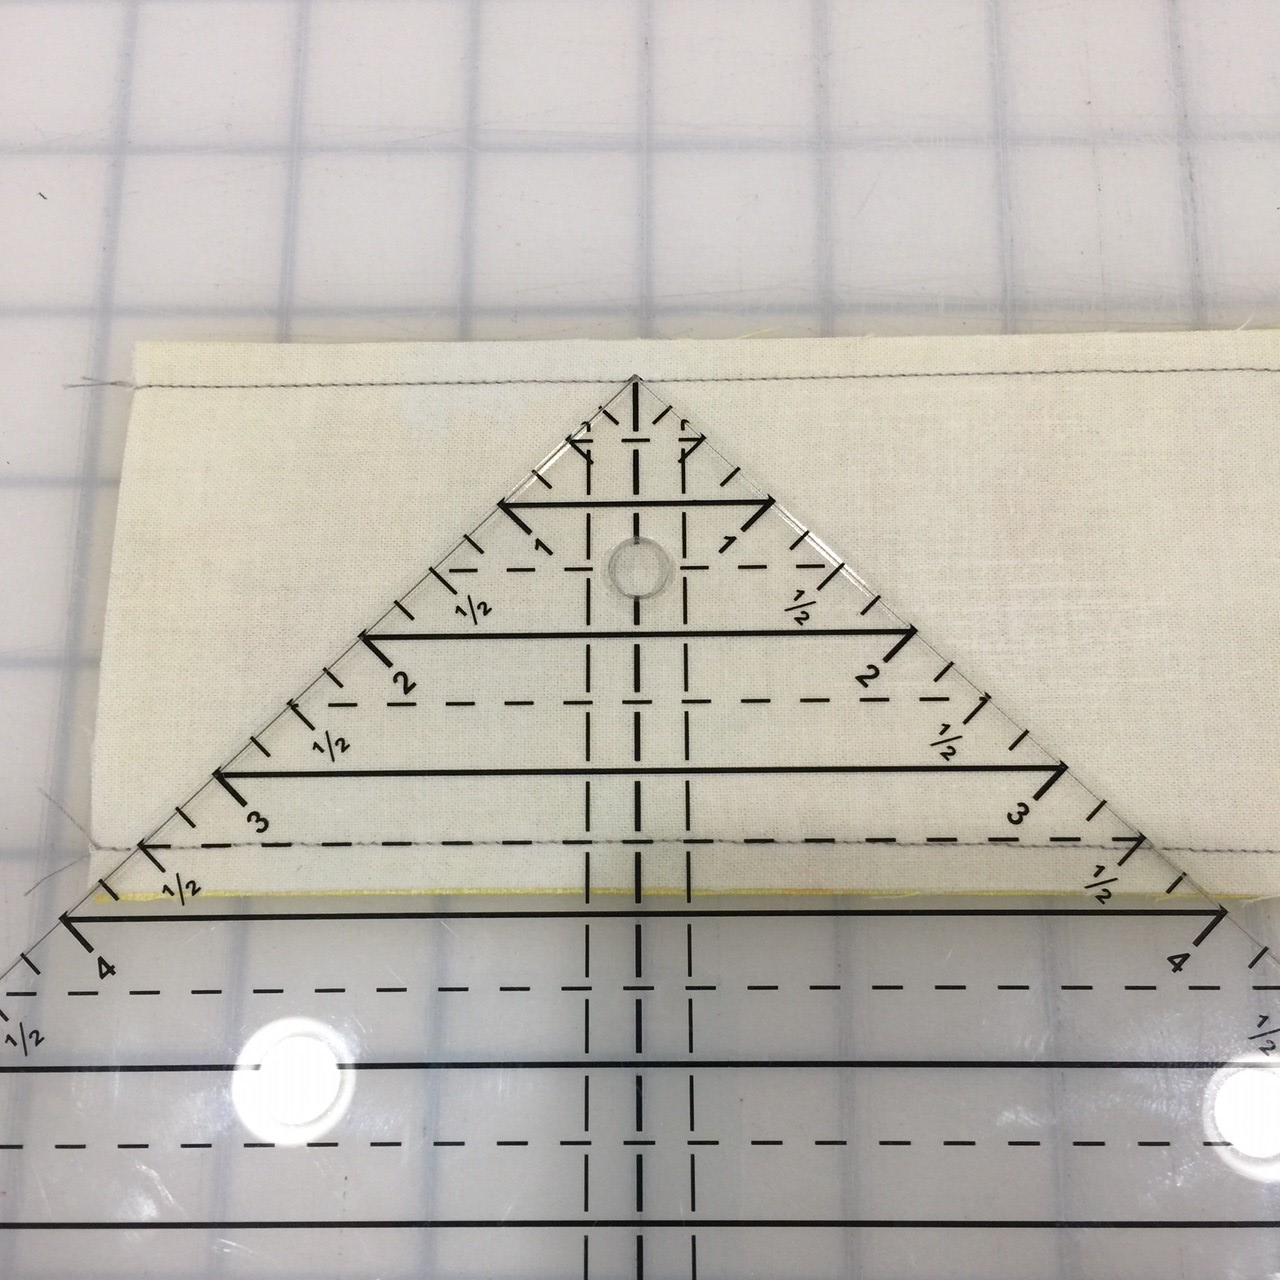
Turn the ruler over, and align the 3 1/2 inch line with the seam on the opposite side of the tube.
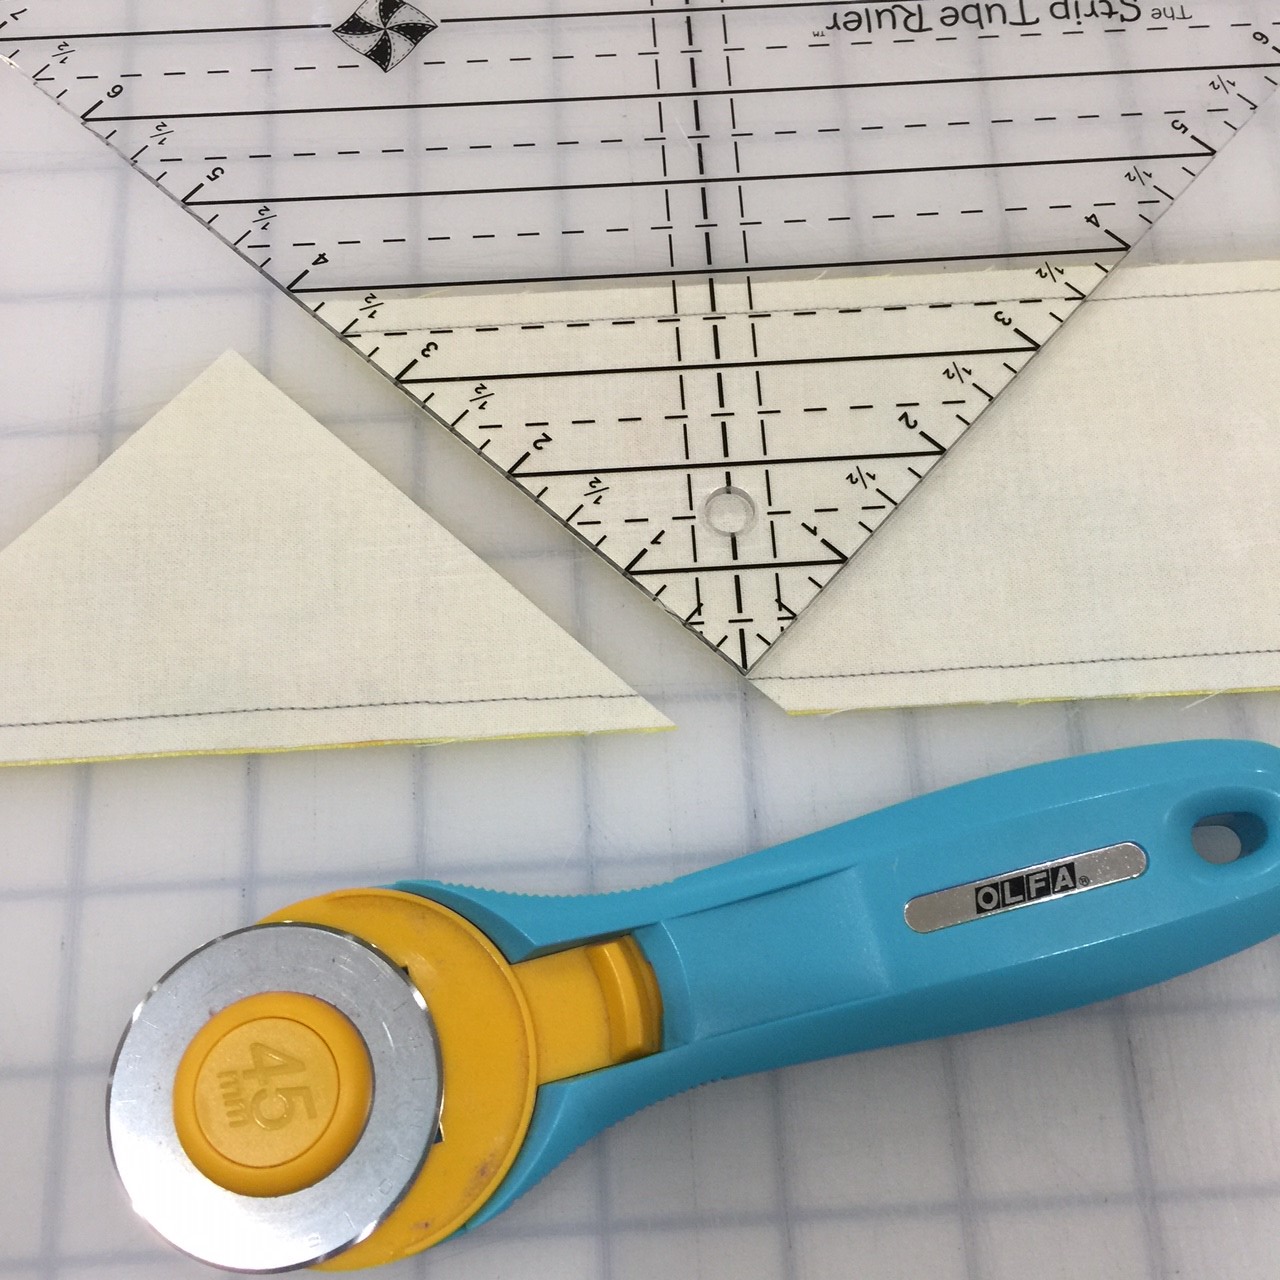
Save the end pieces; some can be used again.
You should get six HST's from each tube. Some will be used in the sashing, and either save the remainder for another project, or use in a pieced back.
Repeat with each color in your square. Arrange into your block.
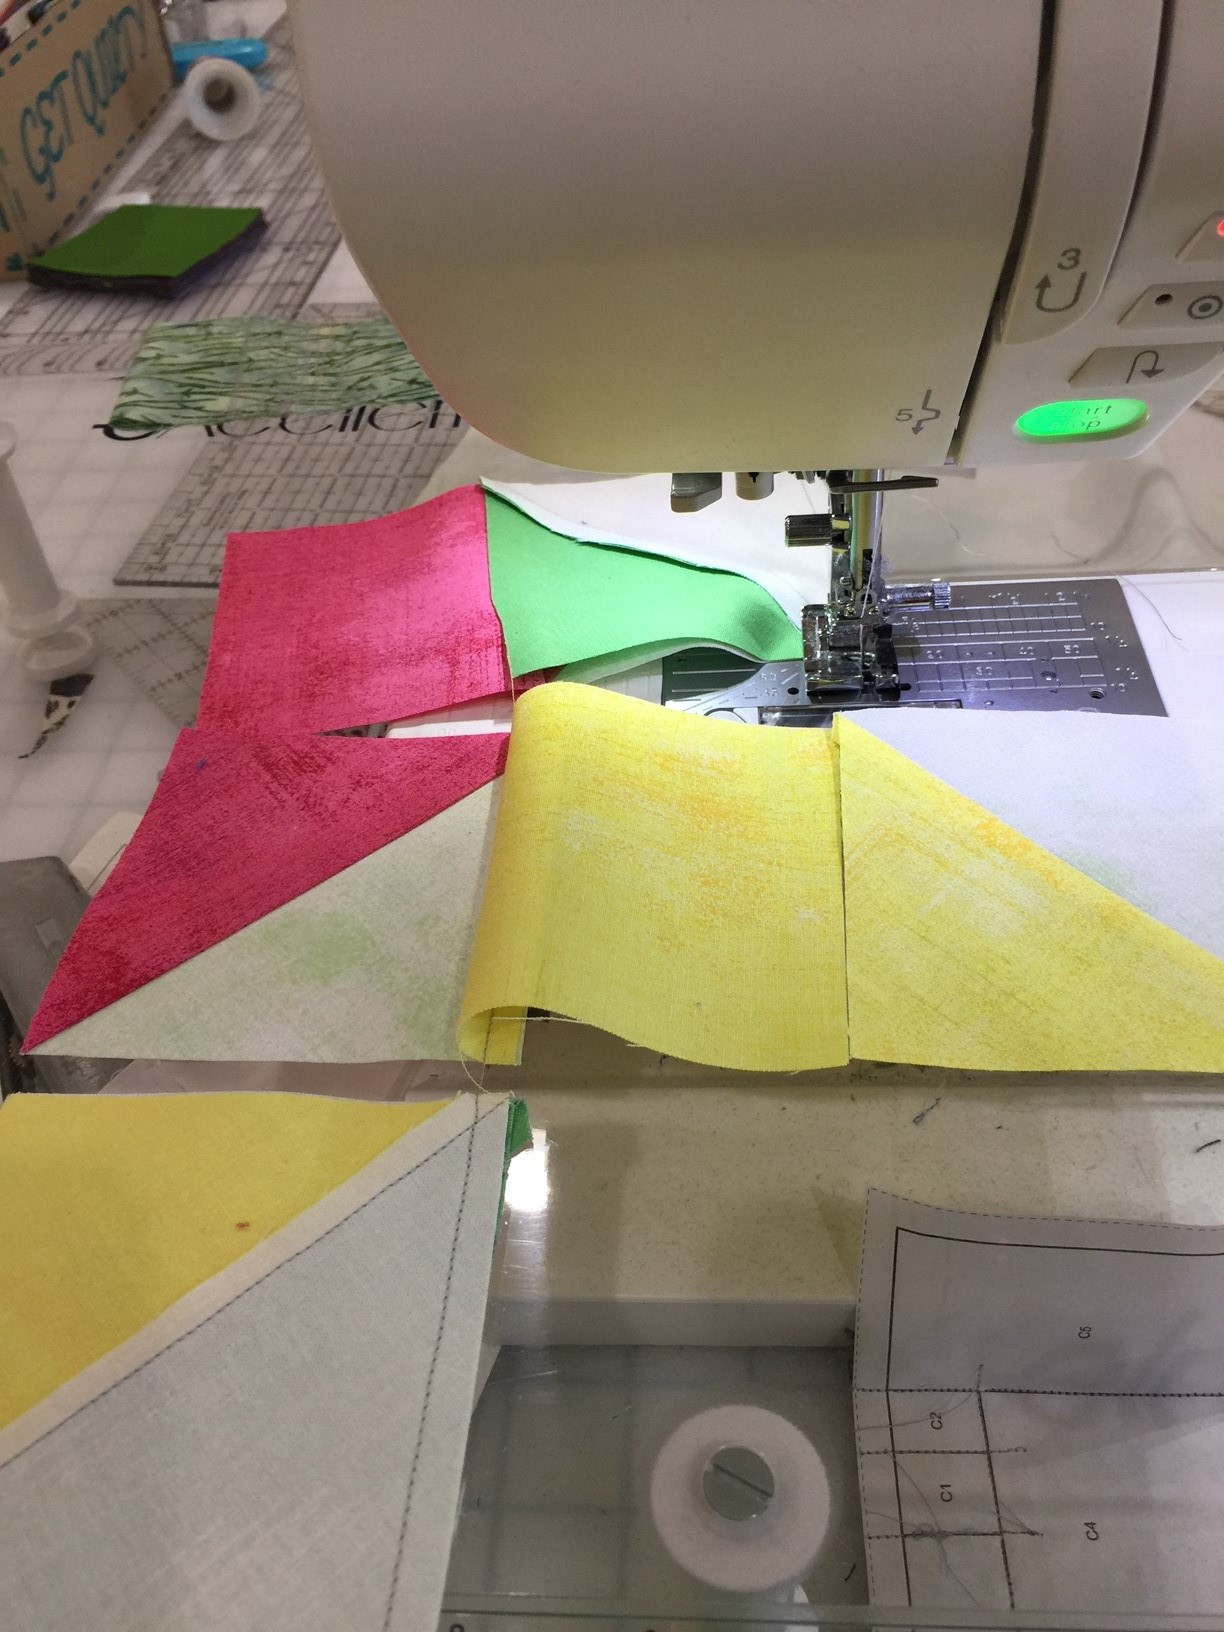
I assembled these blocks using the "web" method. Take the two left blocks from the top row, and stitch together. DO NOT cut the string; insert the two left pieces from the 2nd row into the machine, and continue chain piecing until you've sewn together the two left pieces from all seven rows. Without cutting any of these apart, start back at the first row, and sew on the pieces in the third column, chain piecing the way down.
You'll end up with the block held together in rows.

Press the seam allowances in opposite directions.
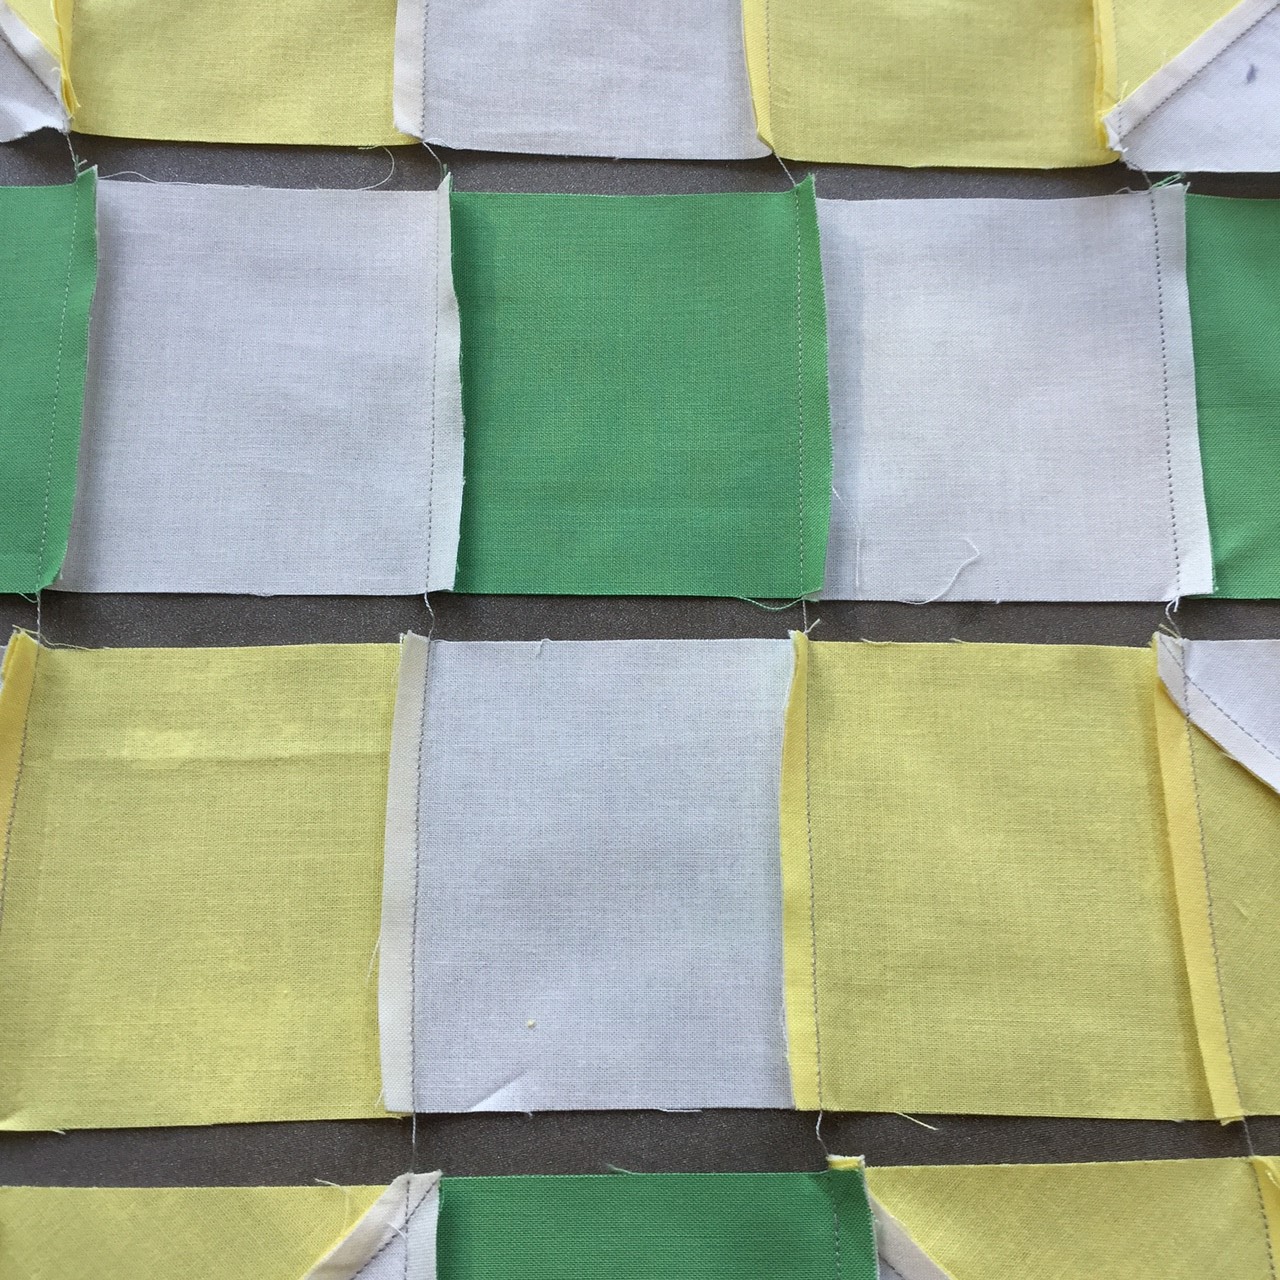
Nesting the seams, sew together the rows into a completed block.
Repeat until you have nine blocks. Each block should measure 21.5 inches square.
Arrange your quilt blocks in a 3x3 pattern, distributing colors until you've got a look you like.
Cut 14 more 3.5 inch x WOF strips and 12 3.5 inch squares from your background fabric.
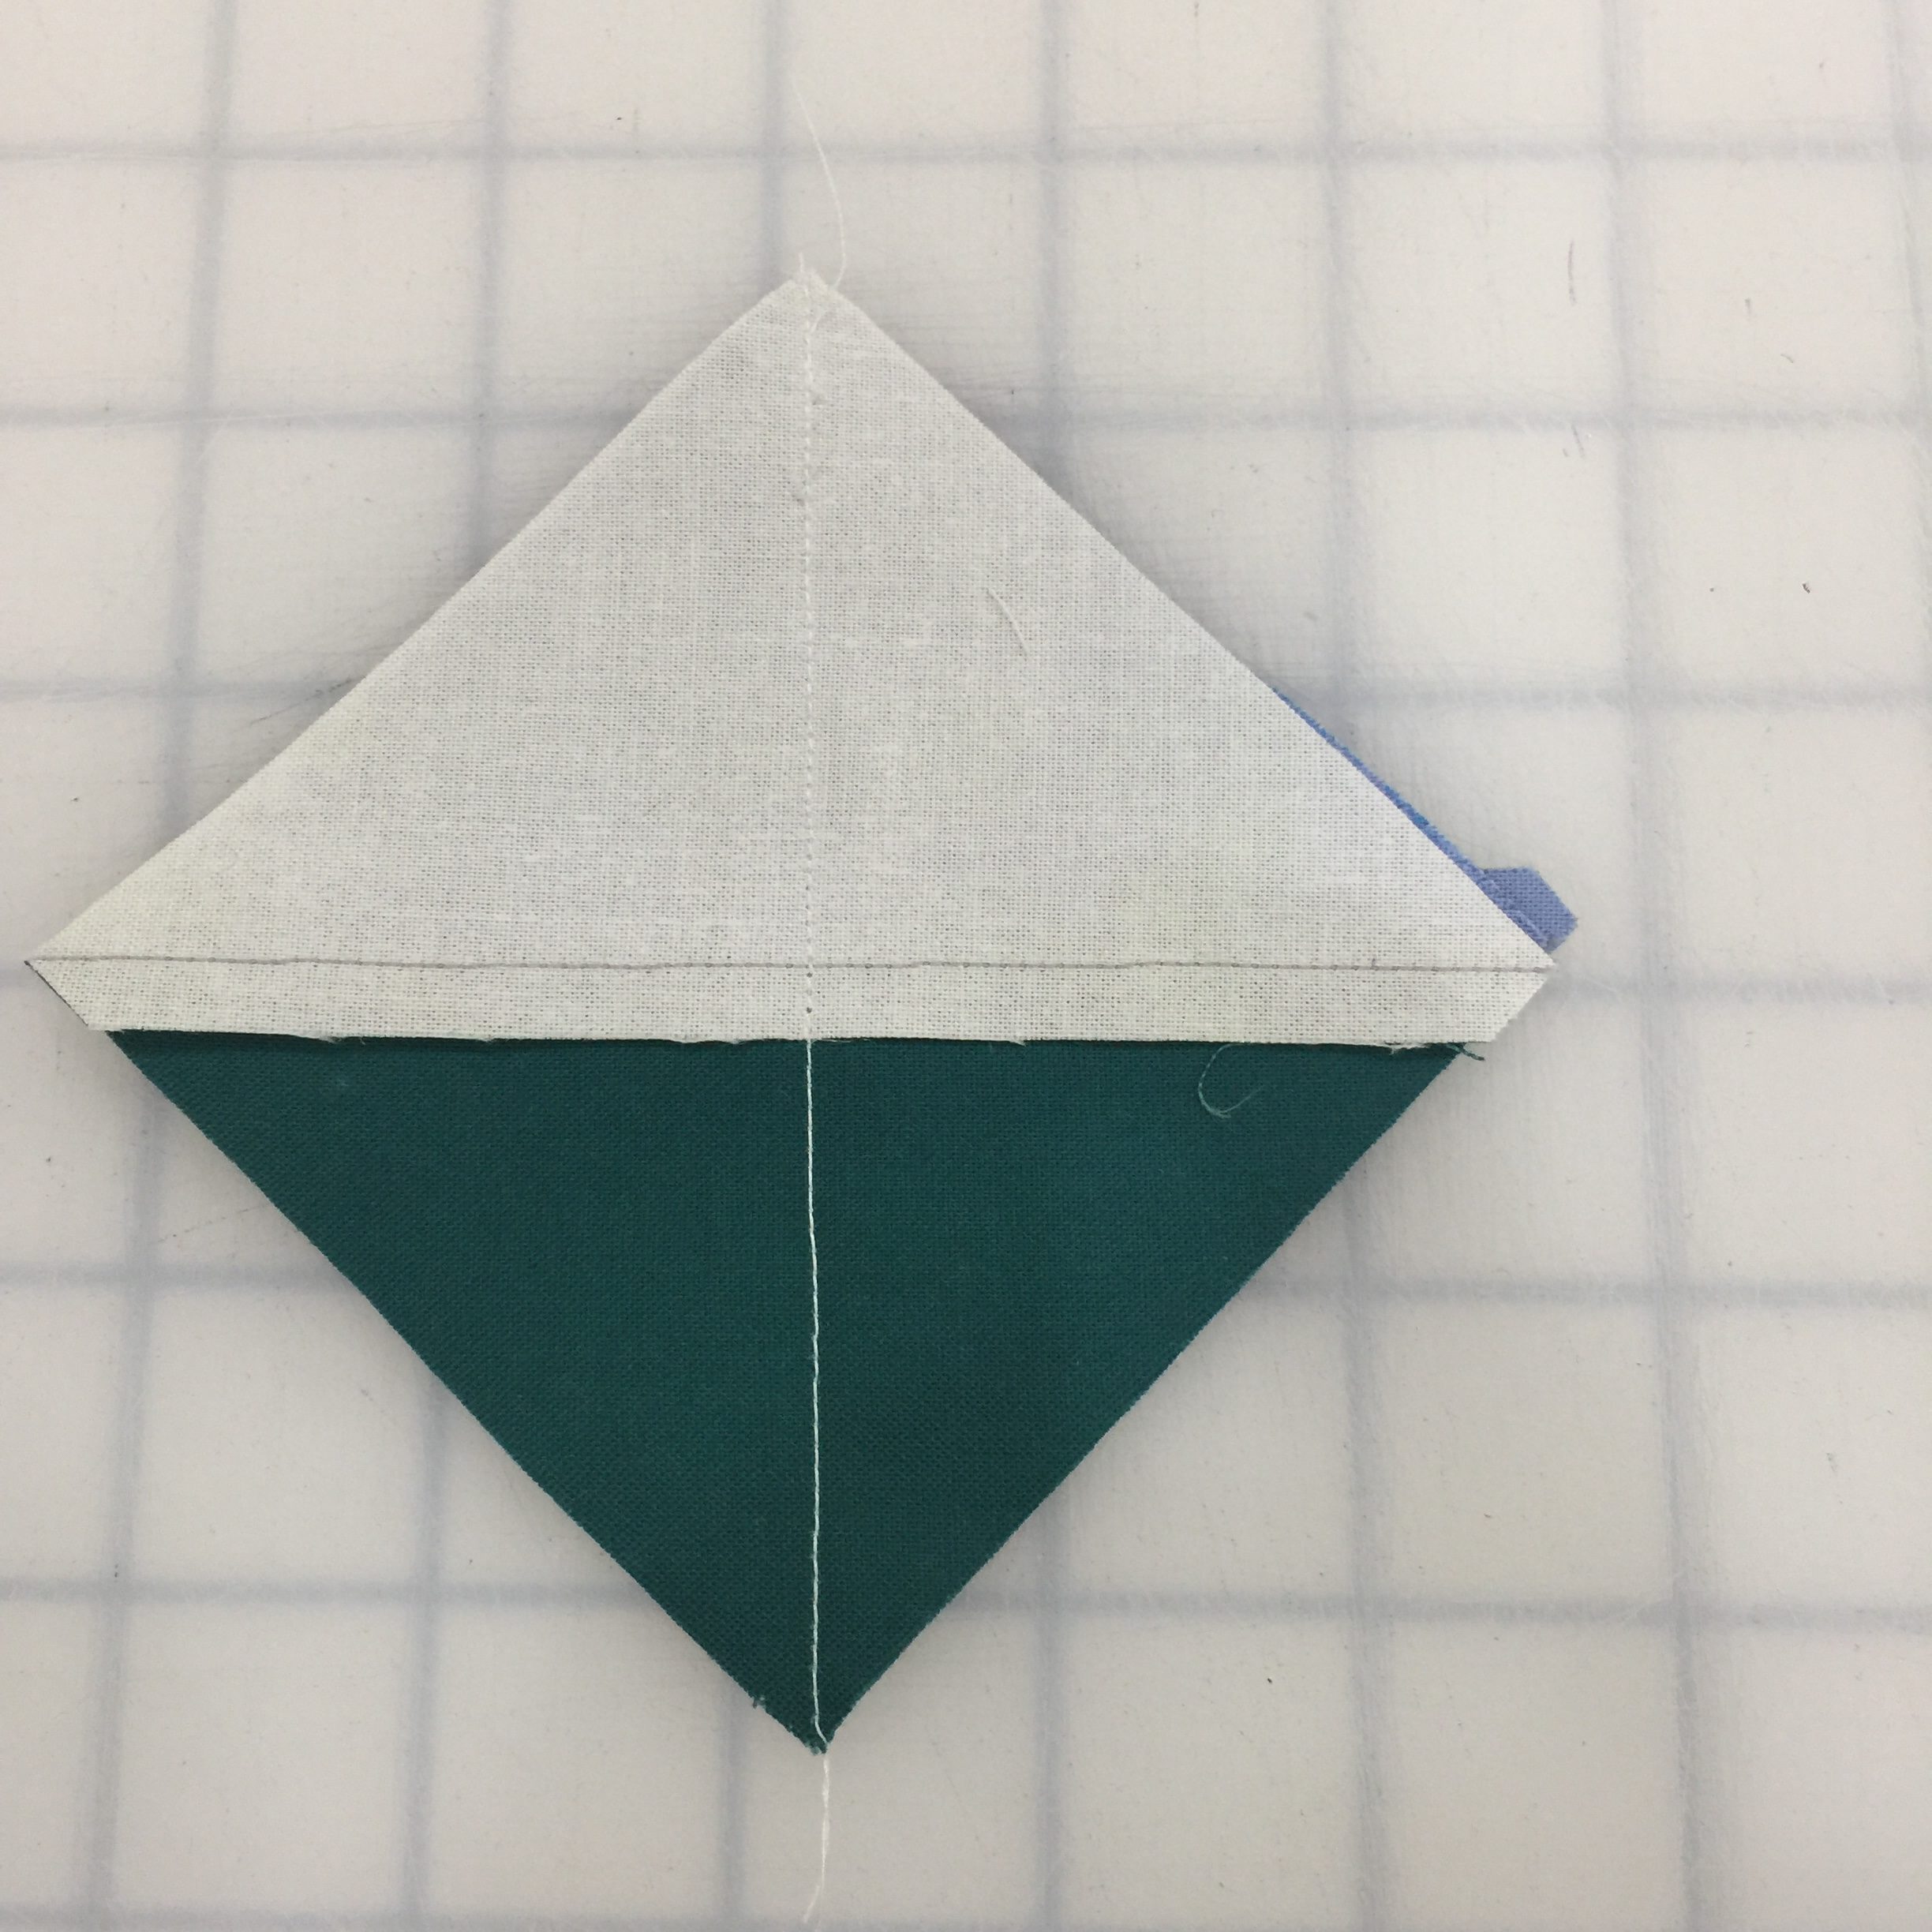
For the sashing between each block; take an extra of the HST for each of the two arrow colors in the blocks you're connecting. Lay them right sides together, with the seams nested and a background against a color on each half.
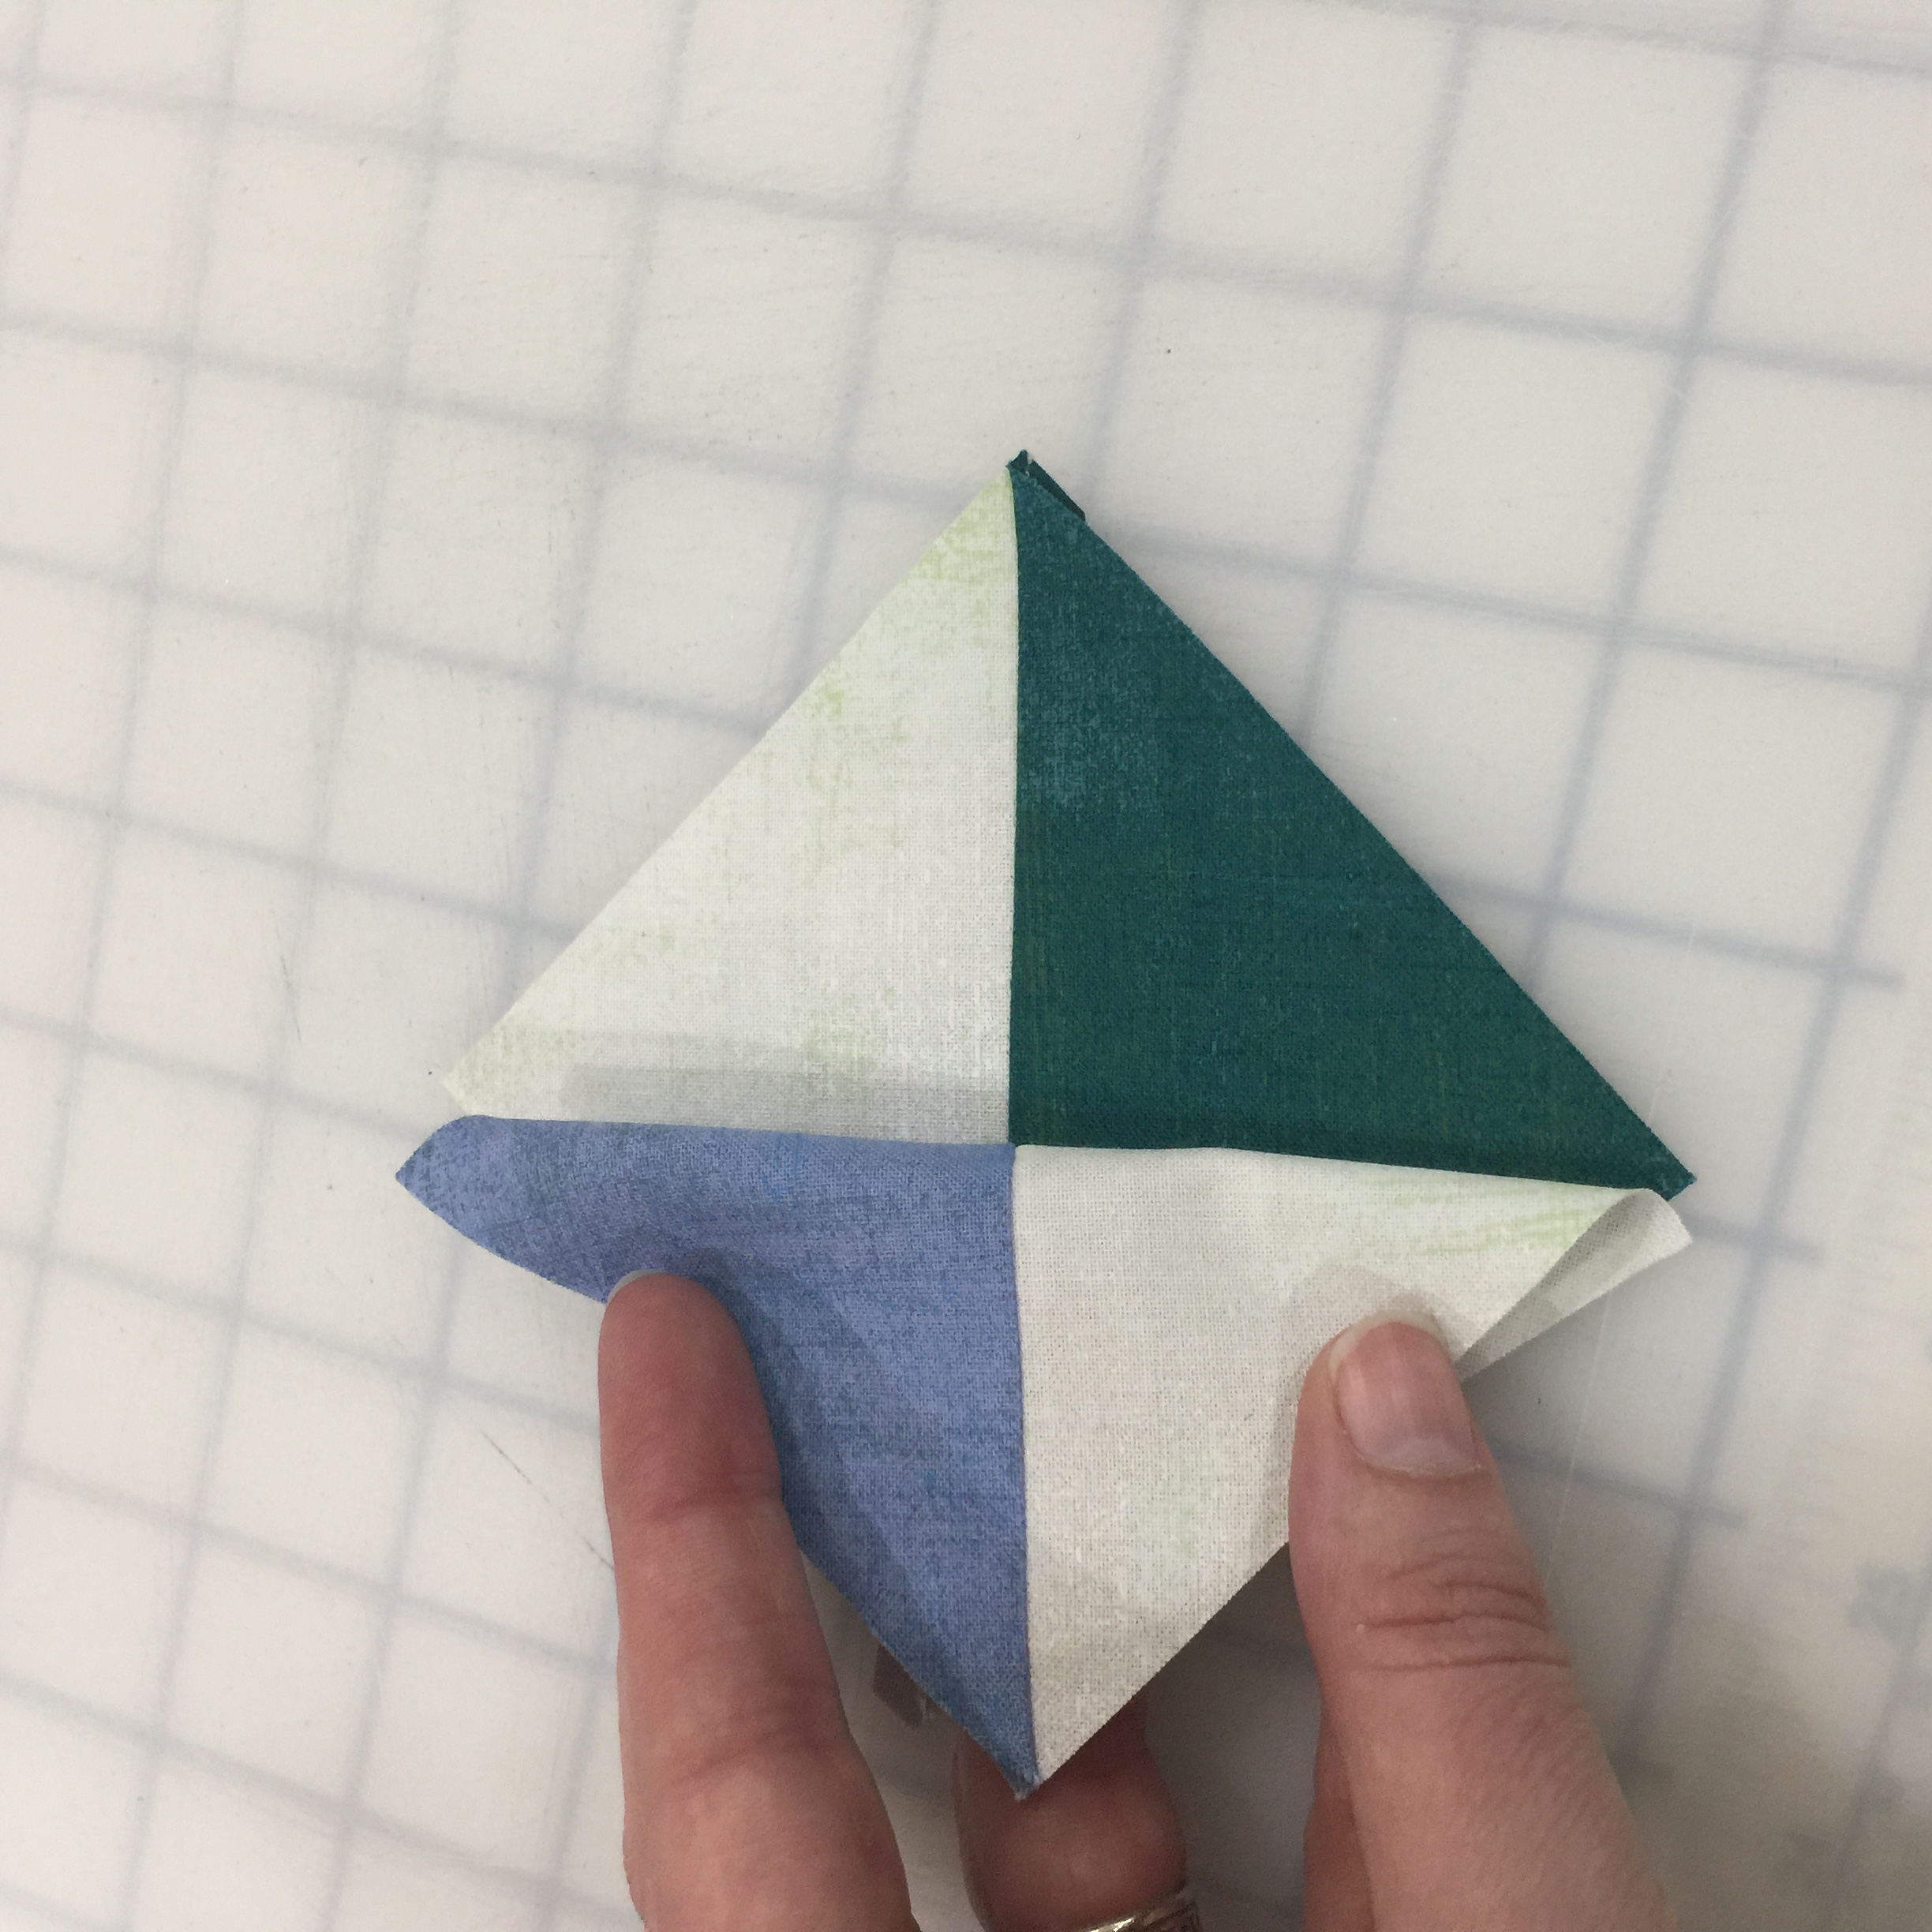
Draw a line from corner to corner, at a right angle to the seam on the HST. Trim the seam allowance to 1/4 inch and press open.
Cut two pieces of background fabric to 9.5 inches by 3.5 inches. Attach one to either side of the hourglass block you just made, with the background portions of the hourglass block sewn to the background strips.

Make an hourglass block/sashing strip between the three blocks in each of the three rows, and assemble the rows.
To attach the three rows together, make hourglass blocks to connect the arrow pieces. Cut two sashing strips at 3.5x9.5 inches, and two sashing strips at 3.5X2.15 inches. Sew together:
9.5 inch strip + hourglass block + 21.5 inch strip + hourglass block + 21.5 inch strip + hourglass block + 9.5 inch strip

Repeat to add the bottom row on, once again matching the colors of the adjacent arrows.
To make the border strip, we'll start with the top border.
To make the quarter square triangle block that is the point of the arrow: take the end piece of your strip tubes and match to a 3.5 inch background square.
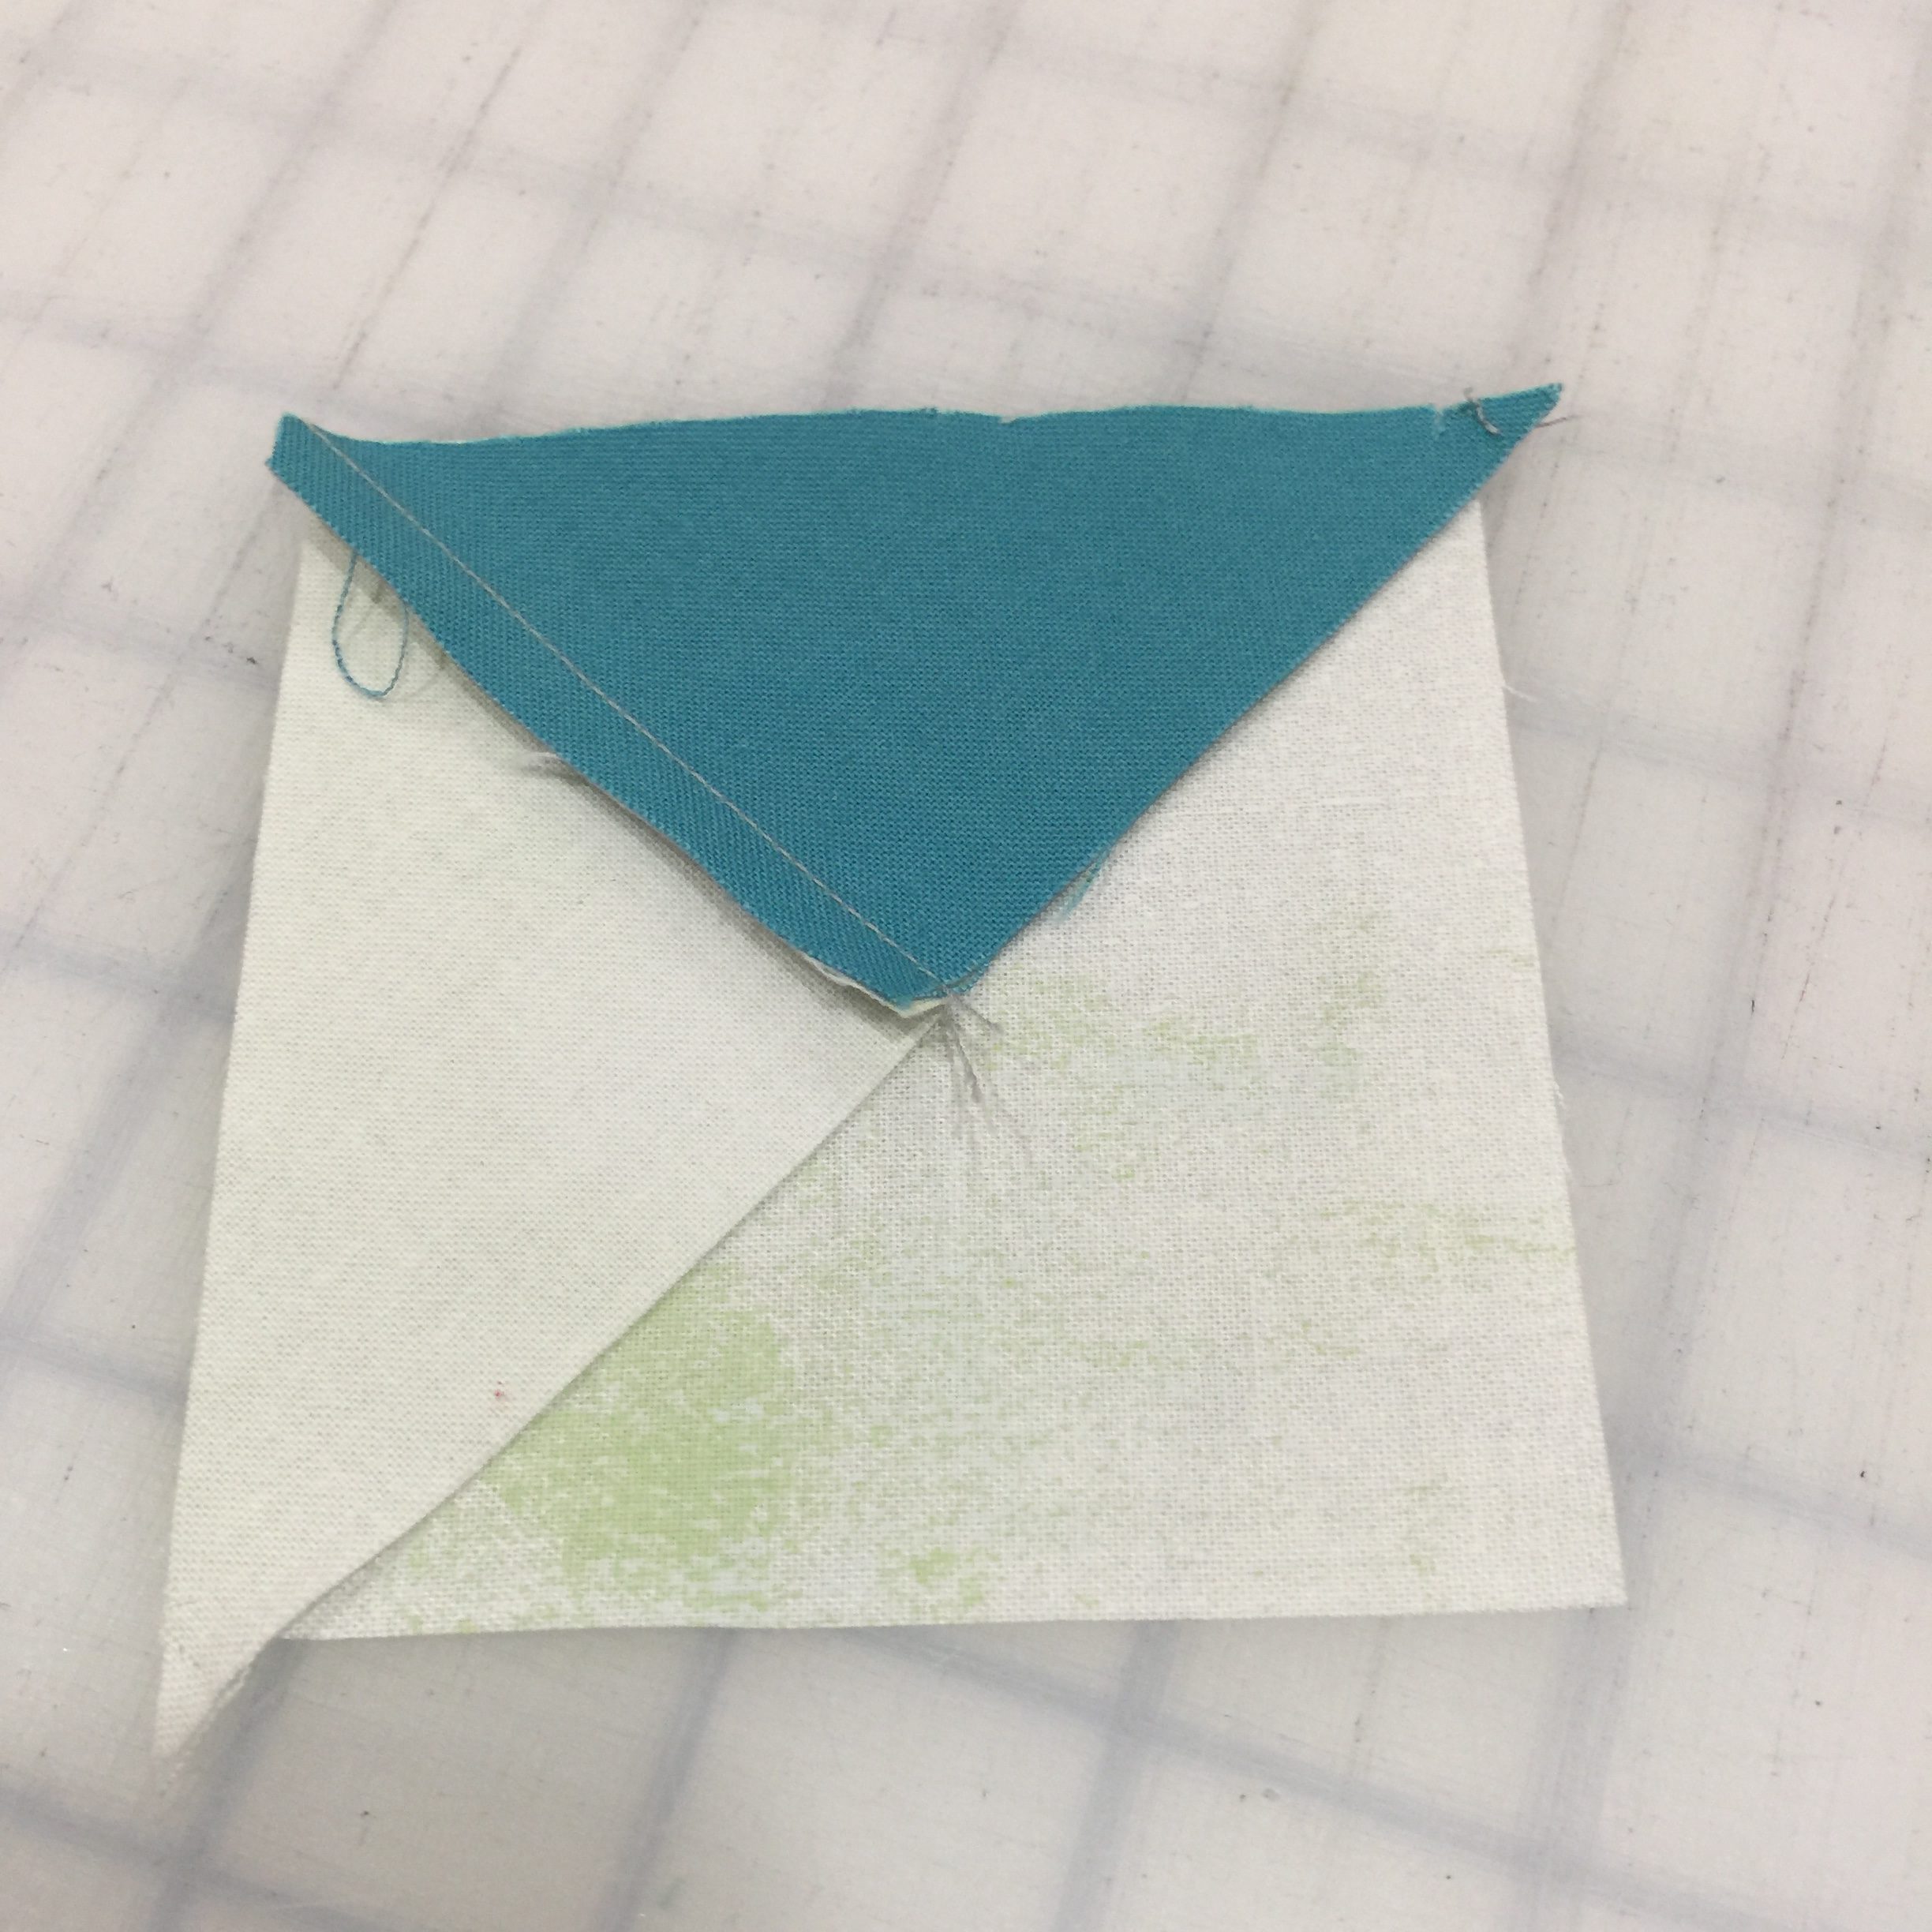
Line up the edges, and sew 1/4 inch from the edge of the triangle.
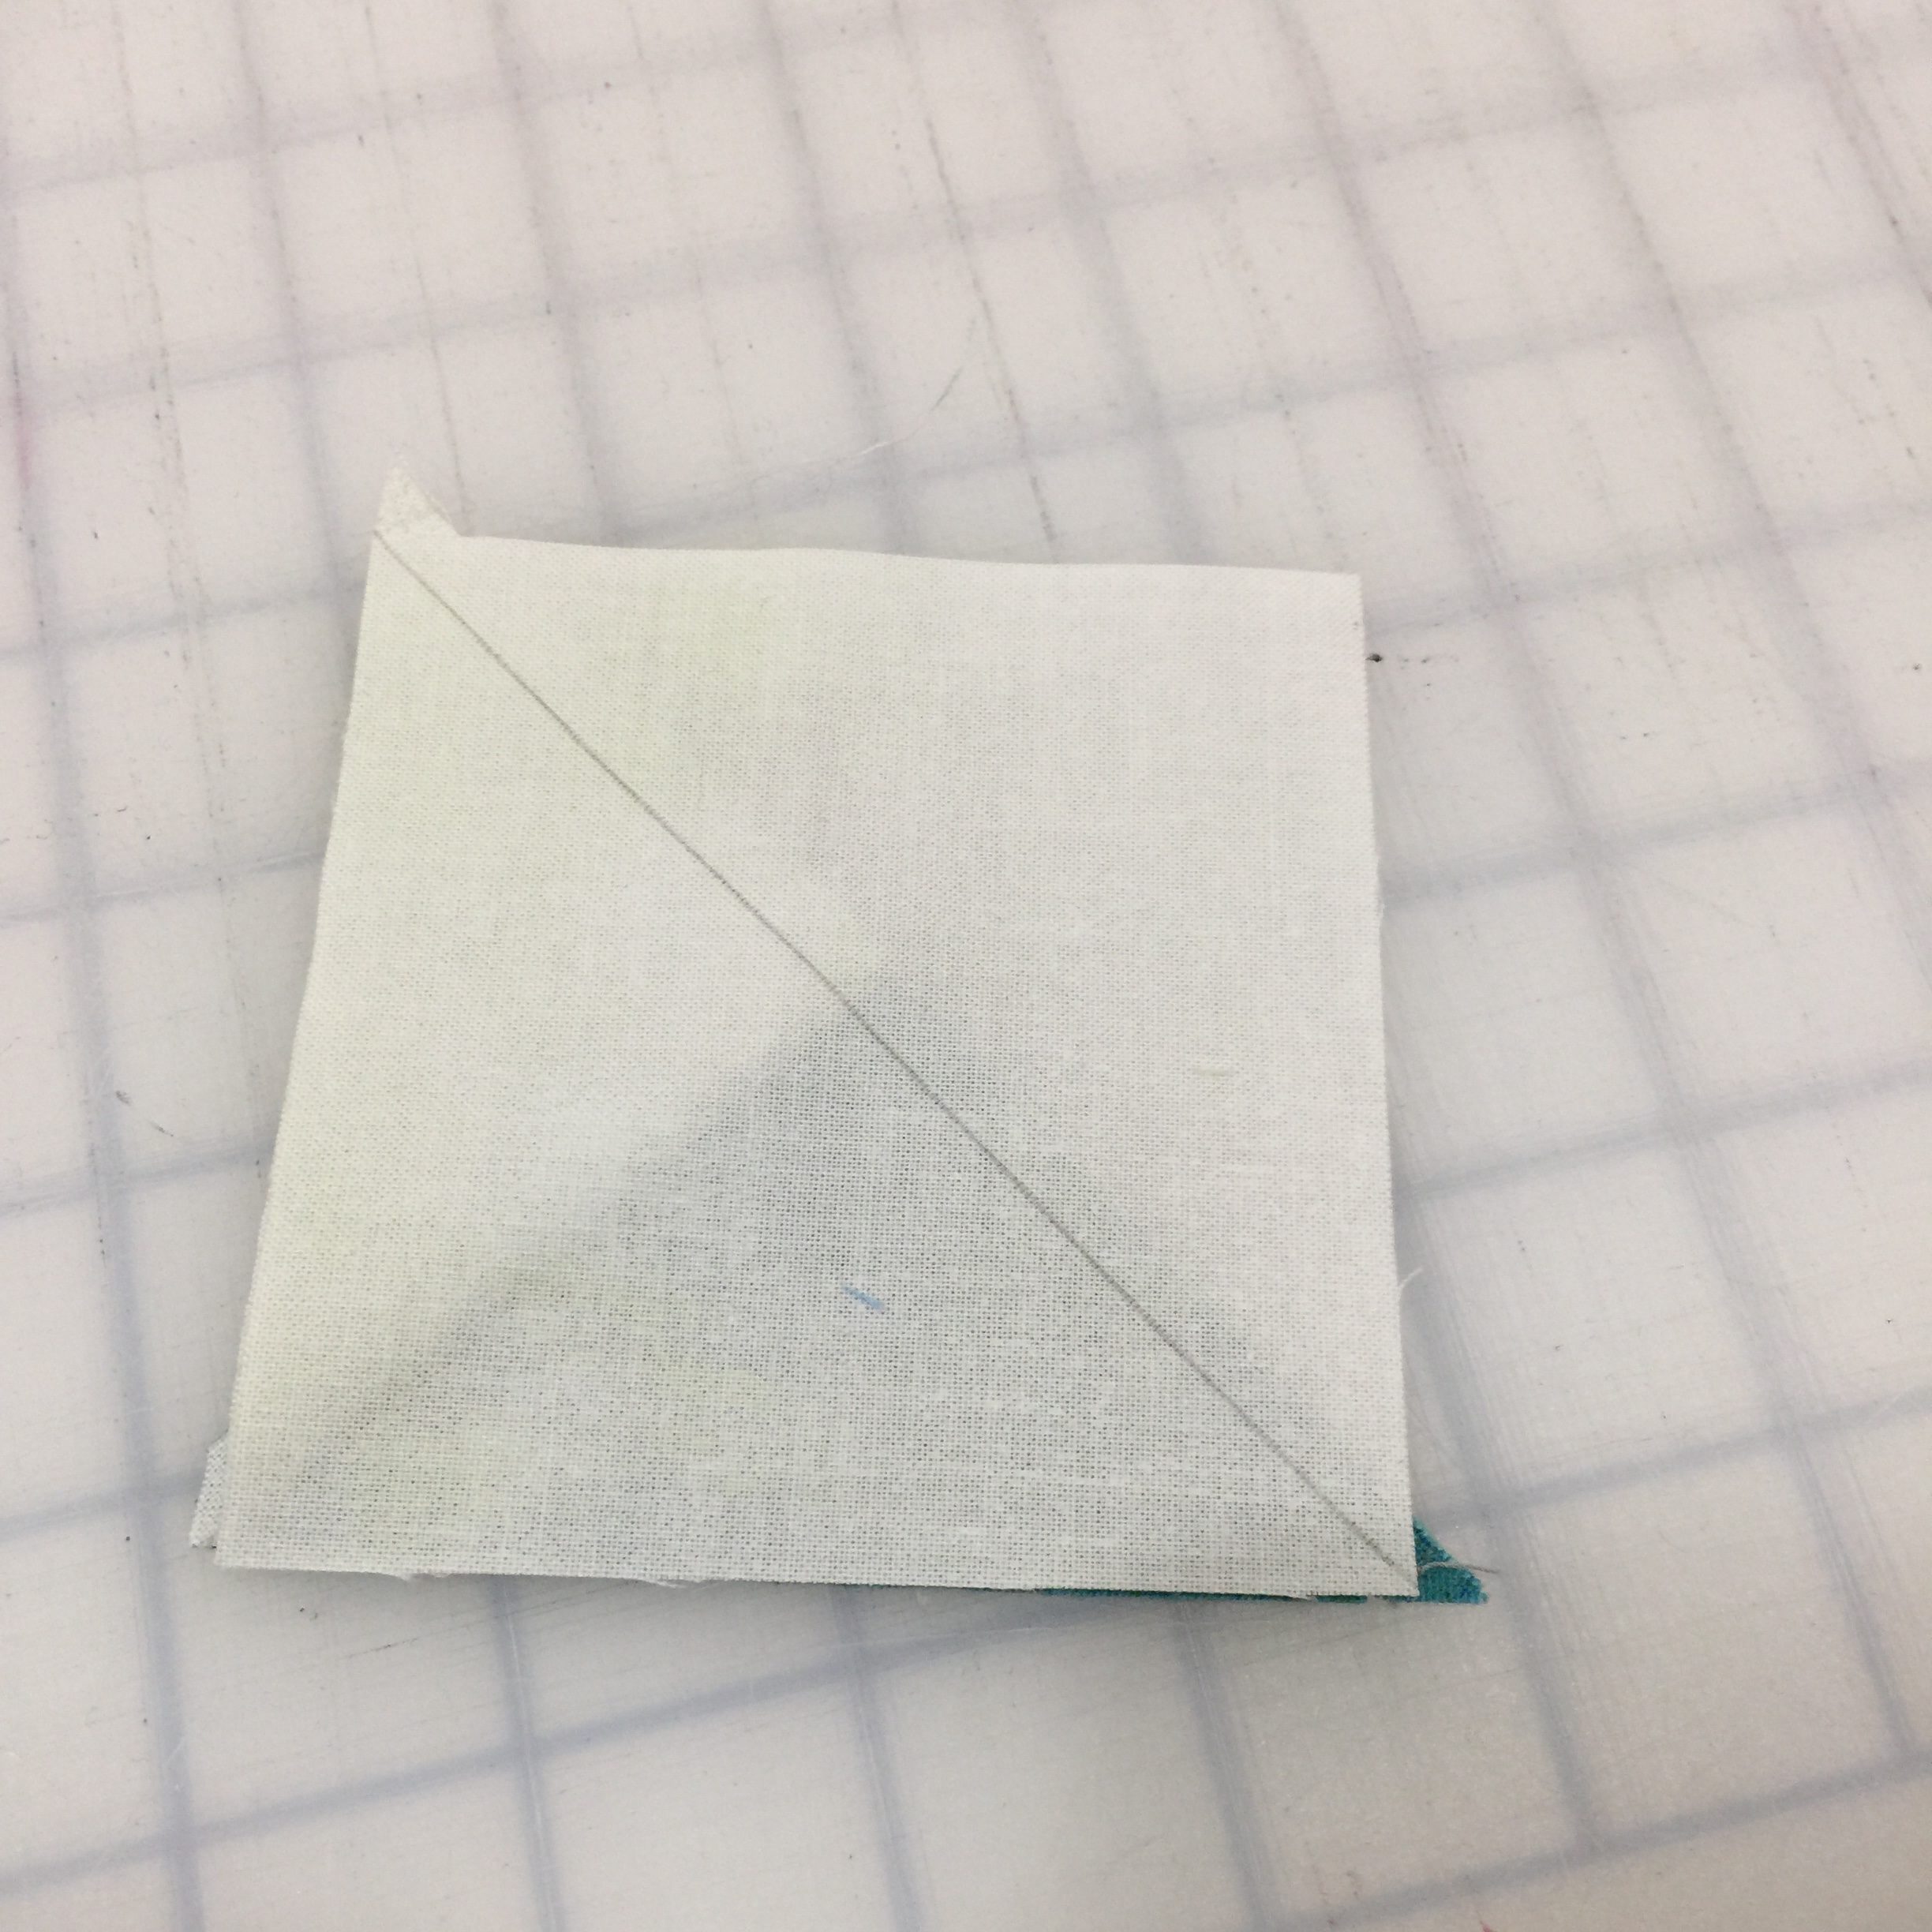
Trim seam allowance to 1/4 inch and press.
Repeat for all of the arrow points on the outside edge of the quilt.
To make the top border, cut two strips 3.5 x 9.5 inches and two strips 3.5 x 21.5 inches.
Sew together
9.5 inch strip + arrow point (watch orientation!) + 21.5 inch strip + arrow point + 21.5 inch strip + arrow point + 9.5 inch strip

Sew onto the top edge of the quilt.
Repeat for the the bottom edge.
For the side border, cut two strips 12.5 X3.5 inches and two strips 3.5 X 21.5 inches.
Sew together
12.5 inch strip + arrow point (watching orientation again) + 21.5 inch strip + arrow point + 21.5 inch strip + arrow point + 12.5 inch strips.
Repeat for the other side, and sew onto main quilt.
Baste, quilt and bind using your preferred binding technique.
![]()
This quilt finishes at 75" x 75".
I hope you've enjoyed this project. it goes together quickly, and you can go as coordinated or as scrappy as you like. Feel free to stop by my blog for more photos!
Brenna Goode
Quilting in the Heartland
quiltingintheheartland.blogspot.com
![]()
Posted in:
Comments