Welcome to Moda Fabrics!
Timehop: Leaves a'Flutter Quilt
Timehop: Leaves a'Flutter Quilt
Published:
Dec 20 2016 - 23:00
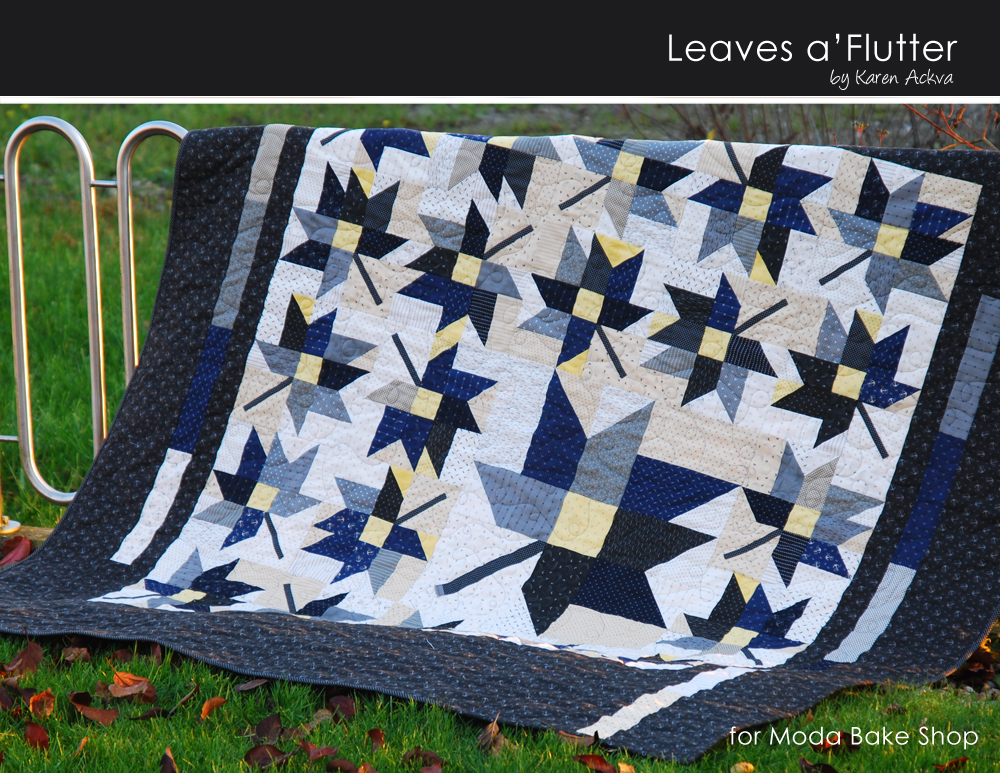

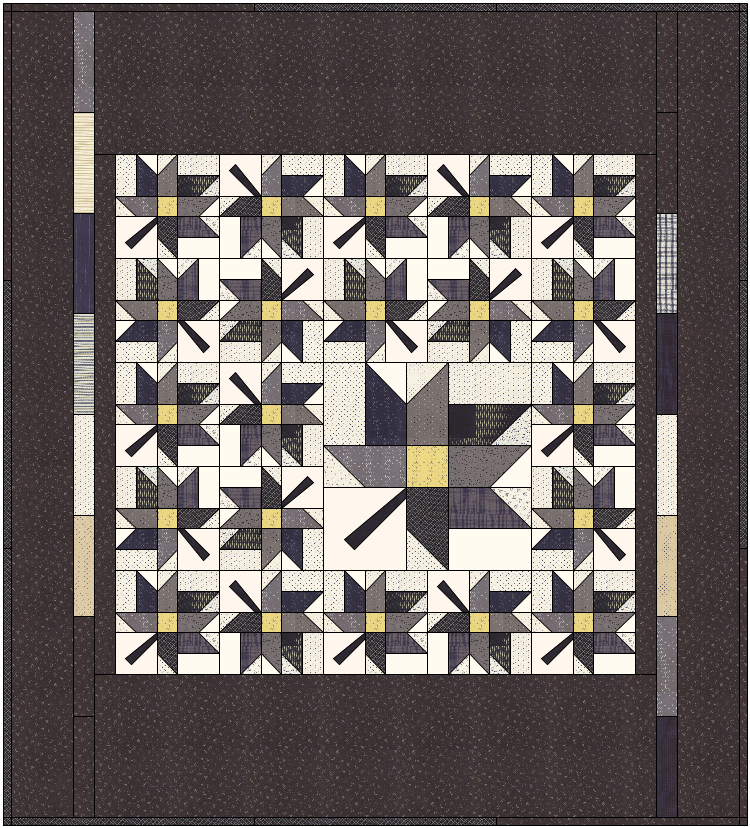
Leaves a'Flutter is a very masculine, fall quilt made from 21 - 10" Autumn Blaze blocks and one - 20" block with all of the leaves fluttering in different directions. The offset borders make the roomy 71 x 79 inch quilt modern with a balanced feeling of tradition. One jelly roll, one layer cake and a little yardage are all you need to make this totally beautiful, quickly sewn, scrappy quilt.
The new collection, Lakeside Gatherings from Primitive Gatherings is the perfect choice to make this manly quilt. There are lots of blues/grays/beiges and a hint of contrasting yellow to make the quilt interesting. The very soft, complementary wovens in this extended collection can be mixed throughout or use as yardage for the backing.
![]()
1 Jelly Roll - Lakeside Gatherings
1 10" Layer Cake - Lakeside Gatherings
3/4 Yards Gray Checks (1124-18)
2 1/4 Yards Gray Anchor (1120-36)
4 1/4 Yards Creme Woven (12708-2) not pictured
75 x 83" Cotton Batting

![]()
There is a little bit of strategy involved in the cutting. Please read through the directions thoroughly. Always cut your largest pieces first followed by the smaller ones. (This will make the most use of your fabrics as well as for use in other projects.) Label your pieces as you go. We are going to make 21 - 10" blocks and one - 20" block all scrappy-style.

CUTTING INSTRUCTIONS:
Separate your lights from dark fabrics. There are 19 lights, 2 mediums, and 21 darks. I tried not to use the medium shades.
From the Jelly Rolls for 10" Blocks
- Light - Background – (63) 2½ x 4½“ rectangles [A] cut at least 4 from each 16 (non-yellow) strips
- Dark - Fabric Leaf – (147) 2½ x 4½“ rectangles [B] from 19 strips (exclude the anchor border fabric)
- Light - Background – (147) 2½ x 2½“ squares [C] from remaining light and yellow strips and 10" squares if needed
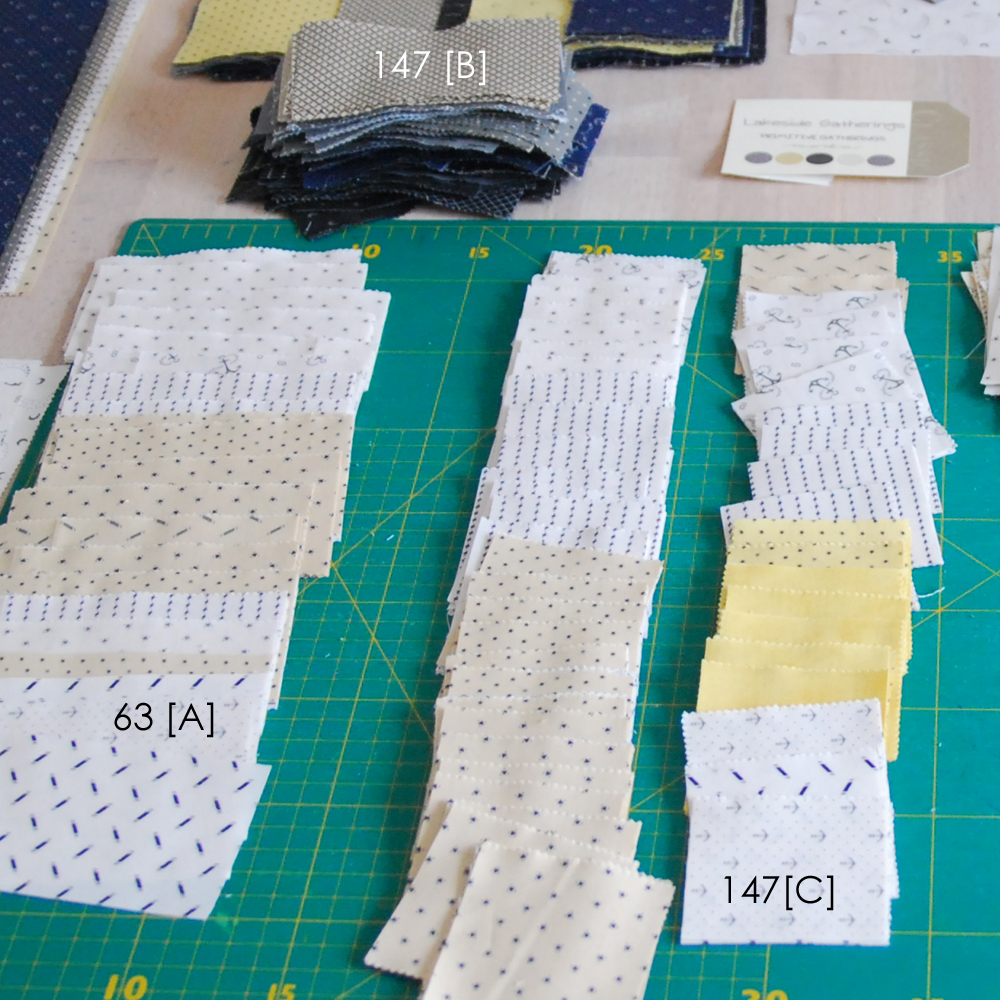 NOTE: You can get 8 [A] or [B] rectangles per strip. You can get 16 [C] squares per strip. Mix and match.
From 10" Layer Cake for 10" and 20" Blocks
- Light - Stem Background – (21) 4½ x 4½“ squares [E] from 6
- Light Background – (3) 4½ x 8½“ rectangles [A1] from 3 squares
- Dark Leaf Fabric – (7) 4½ x 8½“ rectangles [B1] from 7
- Light Background – (7) 4½ x 4½“ square [C1] from leftovers
- Yellow – Inner Leaf – (21) 2½ x 2½“ squares [D] from 2
- Yellow Inner Leaf – (1) 4½ x 4½“ square [D1] from 1
- Light Stem Background – (1) 8½ x 8½“ squares [E1] from 1
- All Fabrics Inner Border – (12) 2½ x 10“ rectangles [F] from 12 different
Remember, always cut your largest pieces first. Make freezer paper labels and attach to layer cake squares before cutting.
 Keep your cut pieces together with the existing labels pinned or ironed in place.


From Gray Anchor Yardage for Borders
- Outer Left and Right Border – (2) 6 x 79“ strips [K]
- Outer Top and Bottom Border – (2) 14½ x 55“ rectangles [J]

- Inner Border – (2) 2½ x 51" strips [G]
- Inner Extension border – (2) 2½ x 20“ strips [H] or use the jelly roll strip
- Binding - (2) 2½ x WOF
** This is the hardest step in the entire tutorial. Once we get past this point, I promise you it will get easier!**
From Gray Check Yardage for Leaf Stems
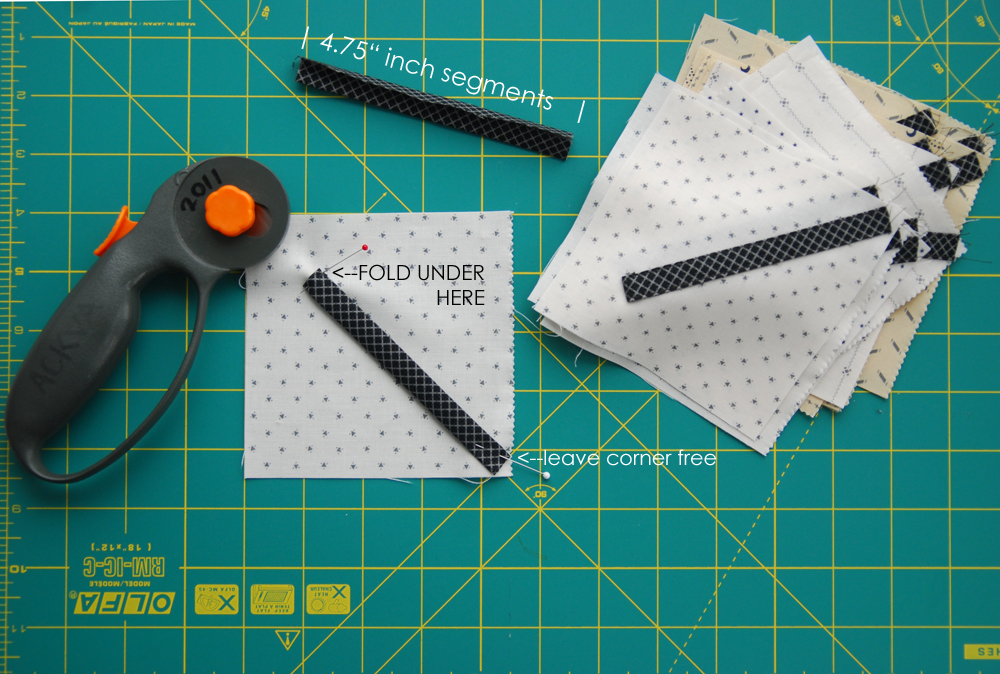
- Dark Stem for 10“ Block – (2) – 1¼ x WOF strips. [L] Fold in thirds and cut (21) 4¾“ segments
- Dark Stem for 20“ Block – (1) 2½ x 9“ segment folded into thirds and pressed. [L1]
- Binding - (6) 2½ x WOF
After all pieces are cut and labeled, start to sew. First take a look at the block. It is separated it into six sections. We will start on Section VI first.
 1. APPLIQUE STEMS - Segment VI
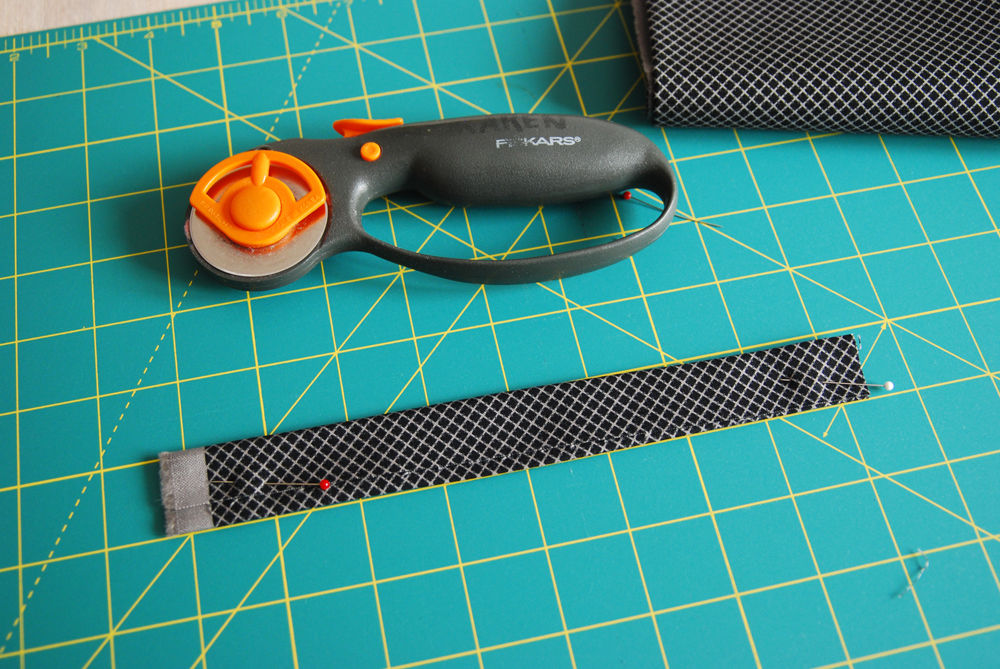
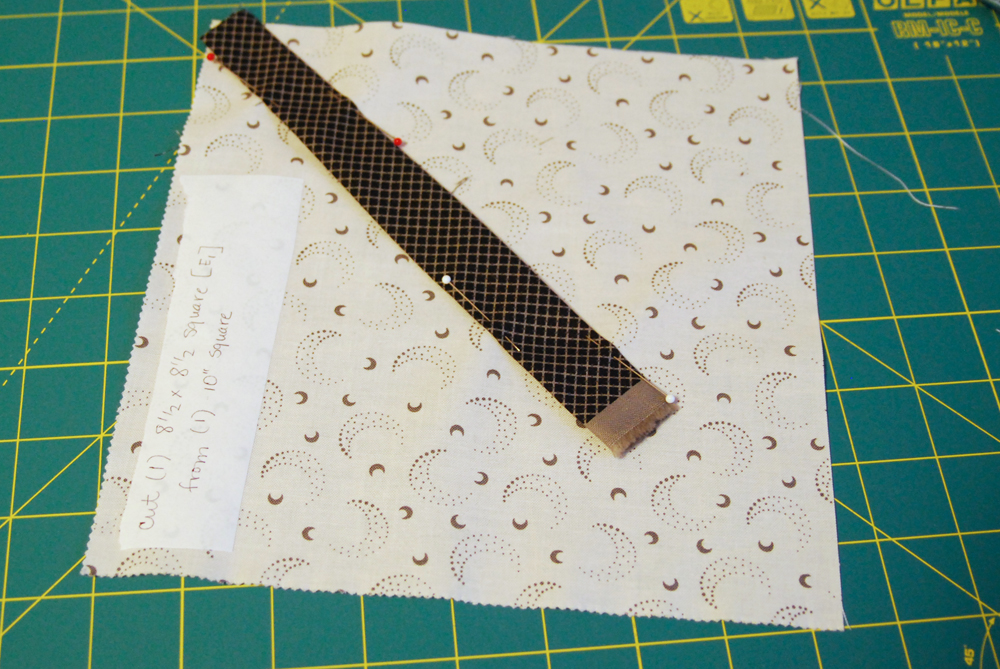
Make the stems for the 10" blocks by folding one strip [L] into thirds. Press with hot iron. Cut (21) 4¾“ segments. Fold under ¼" at one end. Using your diagonal lines on your rotary mat, center on one [E] square as pictured. Pin in place. (The open end will be covered by the two seams that intersect in the lower corner.) Applique in place using your favorite method. Make (21) 4½ x 4½" stem blocks [I]. Set aside for now.

 Make the stems for the 20" blocks in the same manner using the [L1] segment. Press the 2½ x 9“ rectangle into thirds making a slight wedge form. Fold under ¼" at the unfrayed, thinner end. Pin in place on one [E1] square. Applique in place. Make one 8½ x 8½" stem block [I1]. Set aside.
 2. MAKE LEAF SECTIONS - I and II
Now lets get started on sewing the leaf segments. Take a look at the block again. The dark leaves have a "flying geese" either pointing to the left or the right. There are (63) Section I's and (84) Section II's. Sort your 147 [B] rectangles into two piles 84/63.
Draw a diagonal line across the back of all of the 147 [C] squares. Separate the light squares into the 84/63 piles above the [B] rectangles in the direction shown.
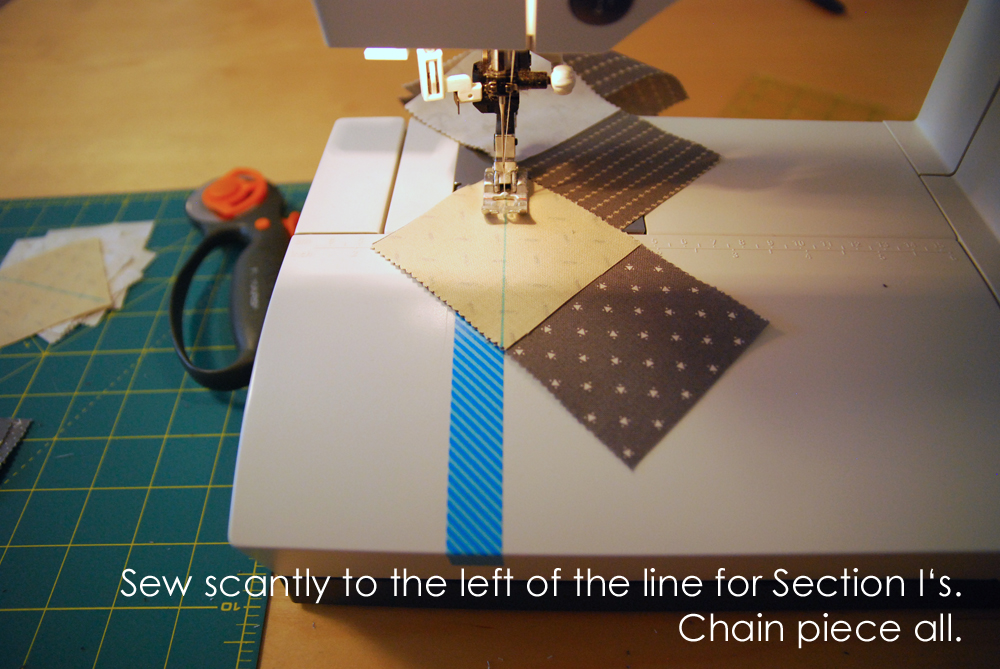
 Sew using a scant ¼" seam allowance to the right of the line for Section II's and scant to the left of the line for Section I's.
 Trim ¼" off using your sewing line as your reference point. (I intend to use the corner scraps for another project and sewed them together before I cut them.)
 Press towards the light fabric.
 Make the leaf segments for your 20" finished block in the same manner. Here you will need (3) Section I's and (4) Section II's. (NOTE: Use the triangle corners in another project later by sewing an additional seam ¼" beyond your cutting line.)
 3. SEW AUTUMN BLAZE BLOCKS TOGETHER
Lay out your blocks one at a time to achieve the look you want.
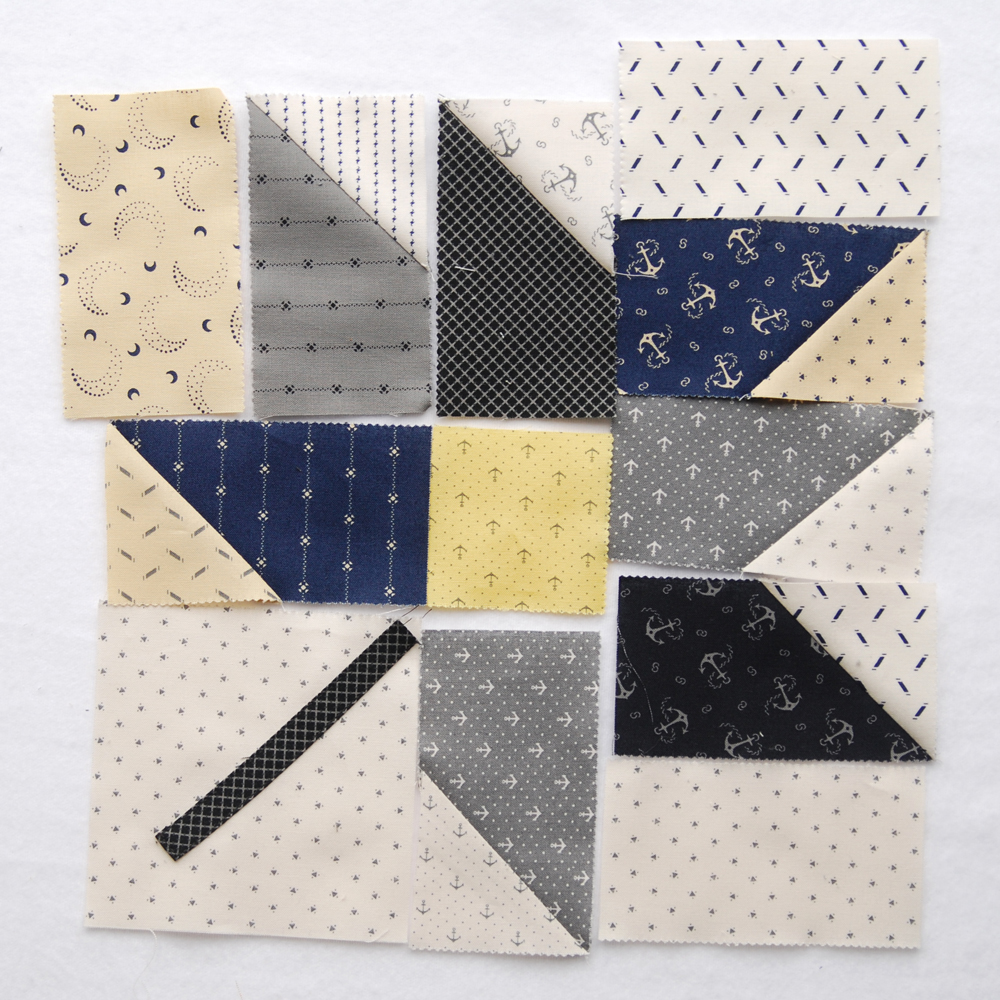 Sew together as pictured. FINGER (nail) press each segment in the direction shown.
 Press the block from the backside when finished sewing all seams. Start from the stem and work toward the tip. Flip over and press from the front.
 Make (21) 10½ blocks. Make your 20½" block in the same manner.
4. SEW YOUR QUILT TOGETHER
Lay out your blocks. Sew together in rows. Sew Row Three together in sections first. Press rows in opposite directions.
 Measure the quilt lengthwise through the center. It should measure 50½". Cut your strips[G] to the length you need. Add your side border strips [G] to each side. Measure your quilt through the width. Cut your top and bottom border strips [J] to that length and add to top and bottom.
 Sew six [F] rectangles followed by one [H] strip for your inner outer border. Press in any direction. Sew to the outer border strips [K]. Press toward the outer border. Measure your quilt through the length. Cut your outer border strips to that length and sew to the main quilt.
 5. QUILTING
Square up your quilt! Make your backing by cutting the 4¼ yards in half. Sew together using 3/8" along the selveage. Press seam open. Baste quilt or hand over to your favorite long arm quilter for that personal touch. I asked Sabine Feldmann at Quilt Oase here in Germany to quilt mine. She did a really awesome job with her very own little swirling wind pattern (or Quilt it yourself).
6. FINISHING the Binding - make scrappy 2½" double folded, cross grain binding by joining all eight strips on the bias. Start with one anchor WOF strip follwed by three check strips, then one anchor strip followed by the last three check strips. Start in the lower right corner leaving about five inches free for connecting the ends. Sew to the front of the quilt using a 3/8th inch seam allowance. Pivot the corners. Connect the ends. Flip to the back. Pin place. Close with hand stitches or with the sewing machine on the front.

![]()
One very handsome ~ 71 x 79 inch quilt. It makes an updated, traditional-block, sofa quilt for that special man in your life. Doesn't he need to be spoiled too? You can learn more about me and my German adventures (from an American point-of-view) at easypatchwork. If you sew this quilt, I would be totally pleased if you share it with us! You can upload your photos to the Mad for Moda flickr group.
Thank you all the members at the Moda Bake Shop for allowing me to share this pattern with you! And thank YOU readers for reading my pattern!
Karen Ackva
{easypatchwork.blogspot.com}
Have a Happy and Safe New Year!
![]()
This project was first published on December 27, 2014.
Posted in: