Welcome to Moda Fabrics!
Bunny Quartet Mini Quilt
Bunny Quartet Mini Quilt
Published:
Apr 4 2017 - 23:00


Hello! My name is Kristina Brinkerhoff from @centerstreetquilts and I am thrilled to be sharing my first Moda Bake Shop Recipe with you! My favorite thing about this Bunny Quartet mini quilt (besides the cute little bunnies, of course!) is that the top only uses a bit of background fabric and 4 Layer Cake squares. And we all have a few extra 10” x 10” Layer Cake squares in our stash, right?
Before we get started on the recipe, you might want to make sure you read to the very end. There's info on how to enter a giveaway for a fun prize over at my Instagram account to celebrate my first Moda Bake Shop post! OK, now let's get hoppin' on this recipe!
This mini quilt finishes at 13.5" x 28.5".
![]()
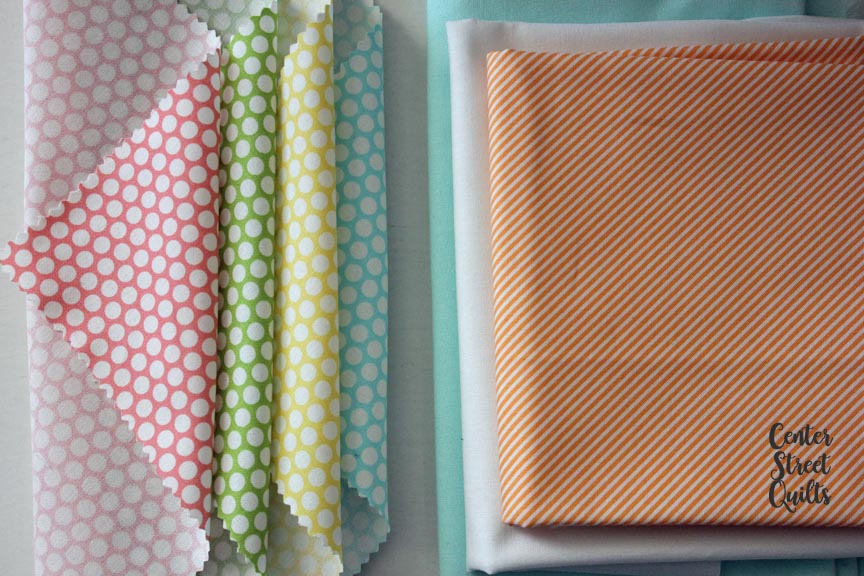
4 Layer Cake squares (Bonnie and Camille Basics)
1/3 yard background fabric
1/2 yard backing fabric
1/4 yard binding fabric
![]()
We'll start off by cutting from our background yardage.
(2) 2.5” x 30” pieces (top and bottom sashing)
(5) 2.5” x 9.5” pieces (sashing)
(4) 1” x 5” pieces (the white strip between the bunnies' ears)
(40) 1.25” x 1.25” squares
You can go ahead and get those cut as desired or use the following detailed instructions for cutting these from 1/3 yard efficiently. Cut three strips that are 2.5” wide and as long as the width of fabric (should be around 42-44” long). Subcut two of those 2.5” x WOF strips so you have two 2.5” x 30” pieces and two 2.5” x 9.5” pieces. Take the last 2.5” x WOF strip and subcut it into three 9.5” long strips. Now you should have (2) 2.5” x 30” pieces and (5) 2.5” x 9.5” pieces. Use the remainder of the fabric to cut the (4) 1” x 5” strips and the (40) 1.25” x 1.25” squares.

Now, let's pull out those four Layer Cake squares. Take the first one and cut it in half, leaving two 5” x 10” rectangles. Subcut one of those rectangles in half again, creating two 5” x 5” squares.
Finally, cut one of your 5” x 5” squares in half to yield two 2.5” x 5” rectangles. You can set the large 5” x 10” rectangle to the side and save for another project (or use it to make more bunnies!). The 5” x 5” square will be the bunny's head and the 2.5” x 5” rectangles will be the bunny's ears.
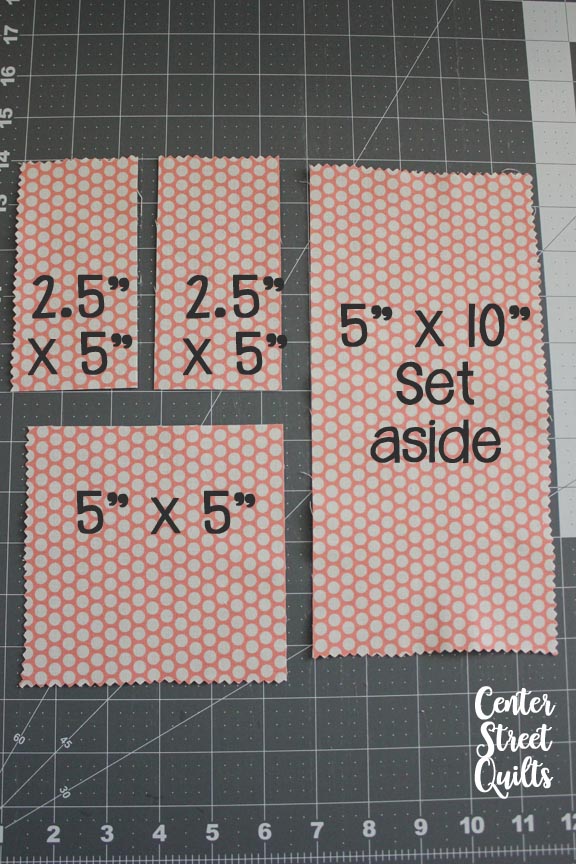
Repeat with the other three Layer Cake squares and we are already finished with our cutting!
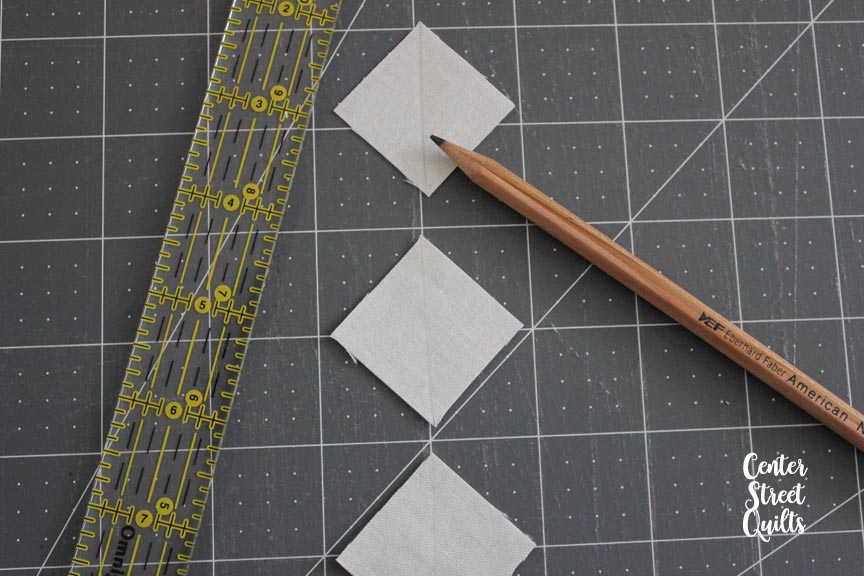
Now, grab your stack of 40 1.25” squares. We'll be using these for the bunnies' heads and ears, but first we need to mark our sewing lines. Take a ruler and mark a line from one corner to the opposite corner on each square. I like to line up several at a time to make the process a little faster.
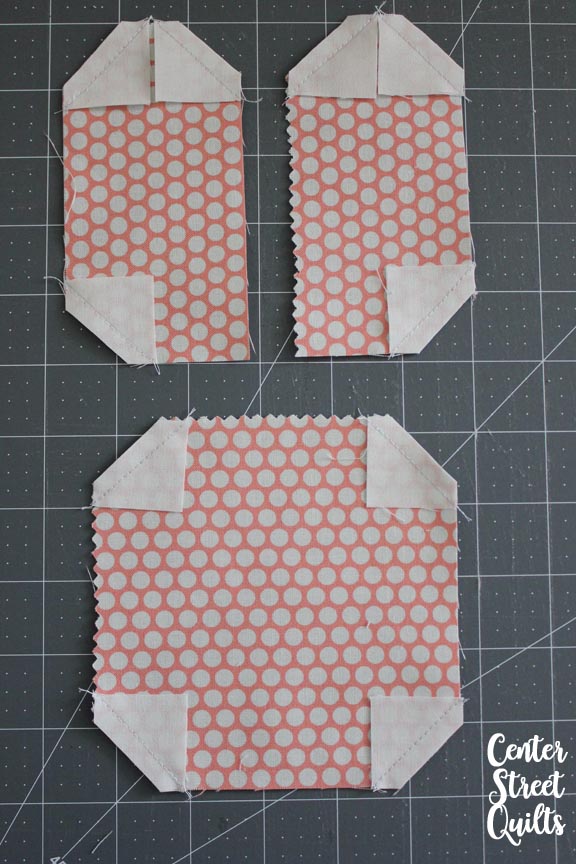
Lay out one bunny like the photo below: with squares on all four corners of the head, and three corners of each ear. We'll be sewing along the lines we just marked to round those corners off a bit. Since the pencil marks are faint, I've added some lines in the photo below so you can see how each square should be oriented and where to sew.

Using the marks we made on the squares, we are ready to sew them on! Just line up the two pieces of fabric with the needle and stitch right on the line we made.
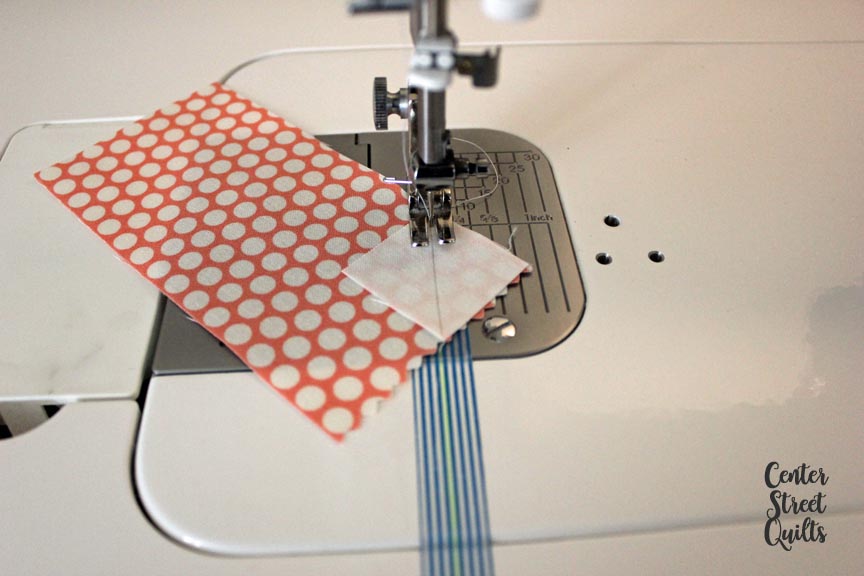
You can do one right after the other to chain piece them and you'll be surprised at how quickly those squares will be sewn on! Just make sure you're paying special attention to the ears. Remember how we only need a square for 3 corners of each ear? You want to make sure that the bottom inside corner of each ear is left without a square.
After getting the squares sewn on, we're going to trim the unnecessary pieces off of the corners to reduce some bulk. Take a ruler and rotary cutter and trim each corner at 1/4” away from your stitched line.

Now your bunny should look like this:
Take your pieces to the iron and press each seam. Personally, I like to press these seams open. I feel like it helps with accuracy, but you are welcome to press the seams however you feel comfortable.

Go back to your stack of background fabric and grab one of the 1” x 5” strips. We'll be sewing this in between the ears. Use a 1/4” seam for this and the remainder of the sewing.
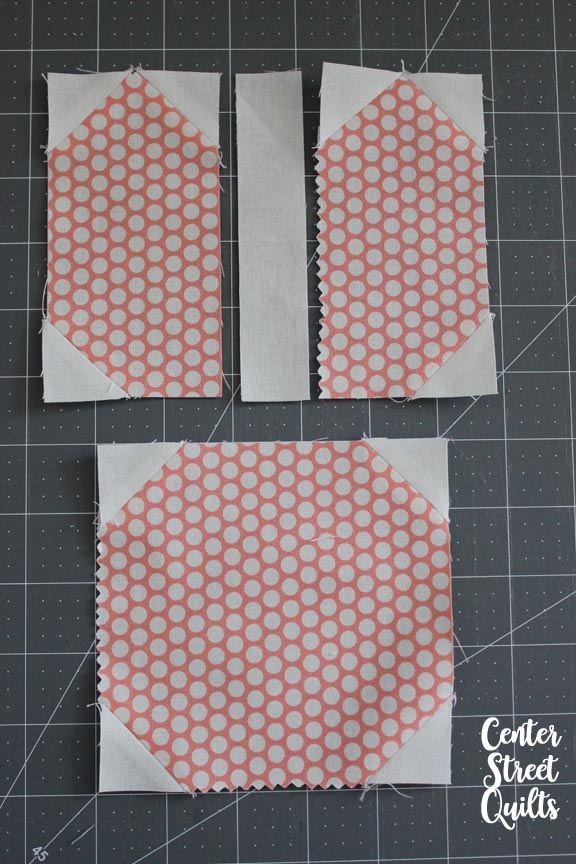
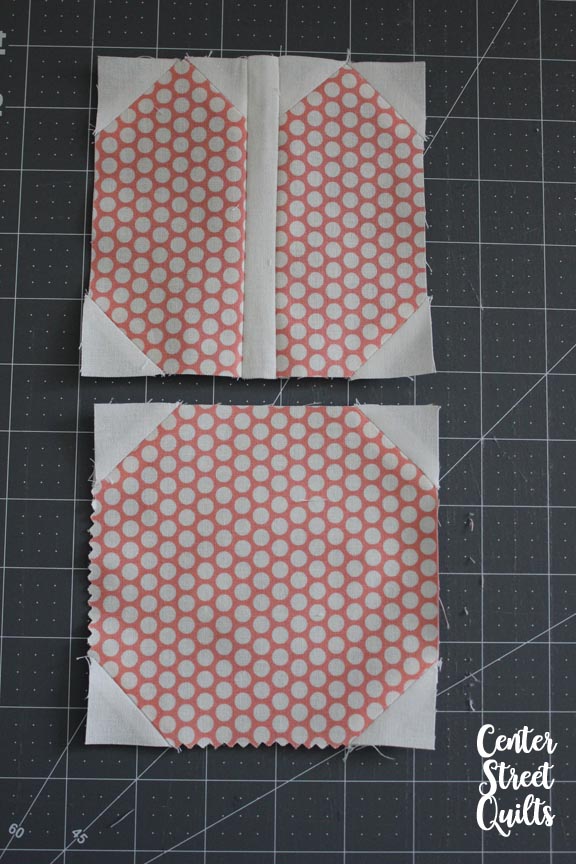
Press the seam as desired. At this point, the bottom head section and the ear section should each measure 5” x 5.” If you used a scant 1/4” seam for the ears, it might be measuring a little wide. If that's the case, trim a sliver off each side until it's back at 5” x 5.” Then you're ready to sew the ears to the head.

We now have one bunny complete! Yay! Repeat with the other three bunnies. Check that each bunny is measuring at 5” x 9.5” and we are ready for sashing.

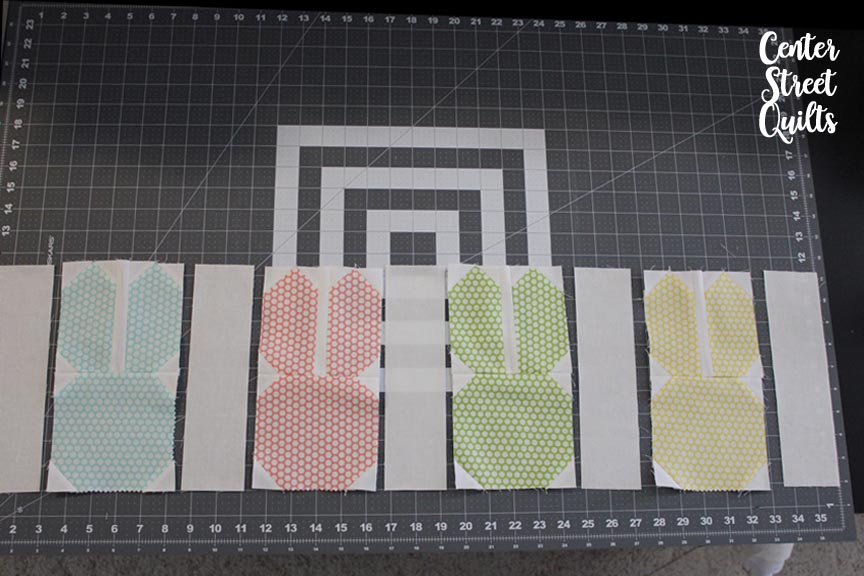
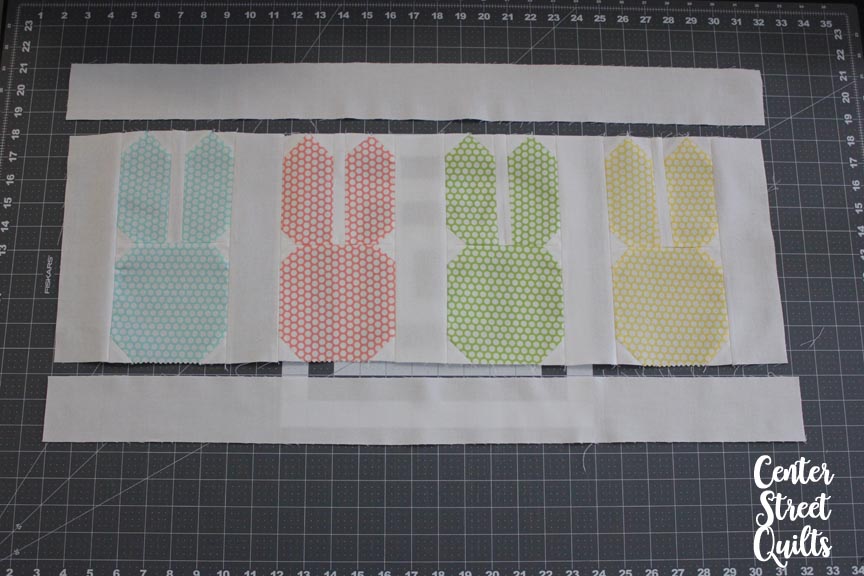
Sew short sashing strips (2.5” x 9.5”) on as shown. Press.

Now, we'll sew the long sashing strips to the top and bottom of the bunny row. You might notice that the top and bottom sashing strips are slightly longer than they need to be. I like to cut them a bit longer to give me some wiggle room in case my rows are running larger than they should be. I just center the sashing on the row, sew it with a 1/4" seam, press, then trim off any extra sashing overhang.
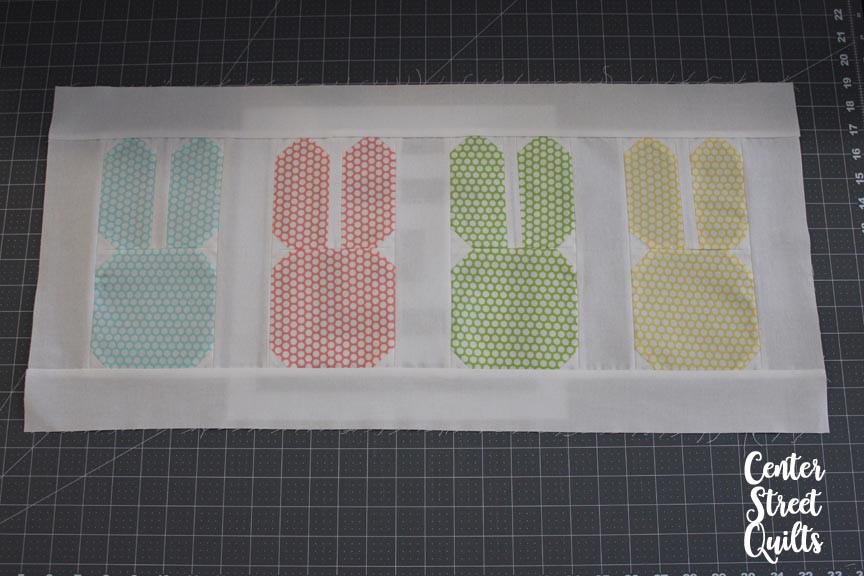
Our Bunny Quartet top is now complete!
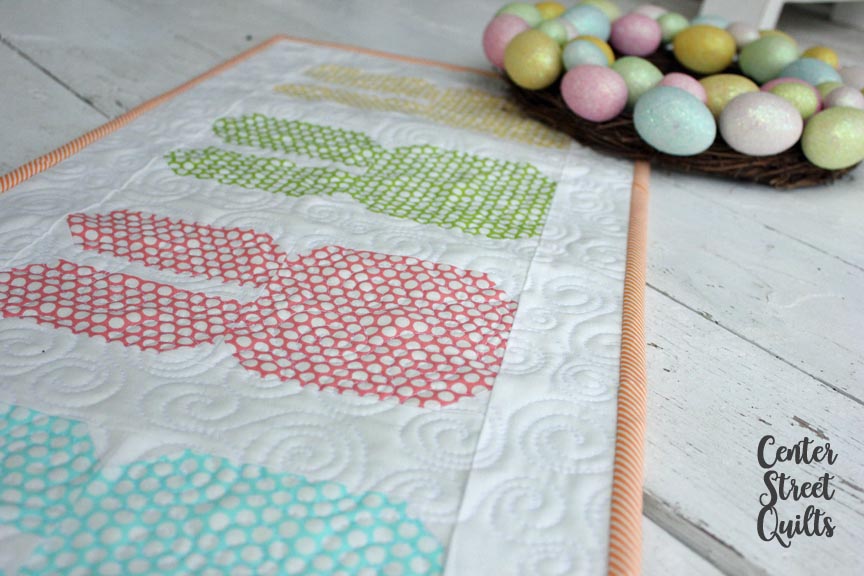
You can now quilt and bind as desired.

This mini quilt can easily be modified to fit your preferences:
- Do you like scrappier bunnies? Substitute each Layer Cake square with two charm squares.
- Want more uniform bunnies? Use two of the same Layer Cake square (each 10” x 10” square can make two bunnies) or use yardage for the bunnies.
- Not quite the right size for where you want to display it? Add or subtract bunnies to make it the perfect size for your needs. I made an extra single bunny for an even smaller mini quilt and love how it turned out.

![]()
This quilt finishes at 13.5" x 28.5".
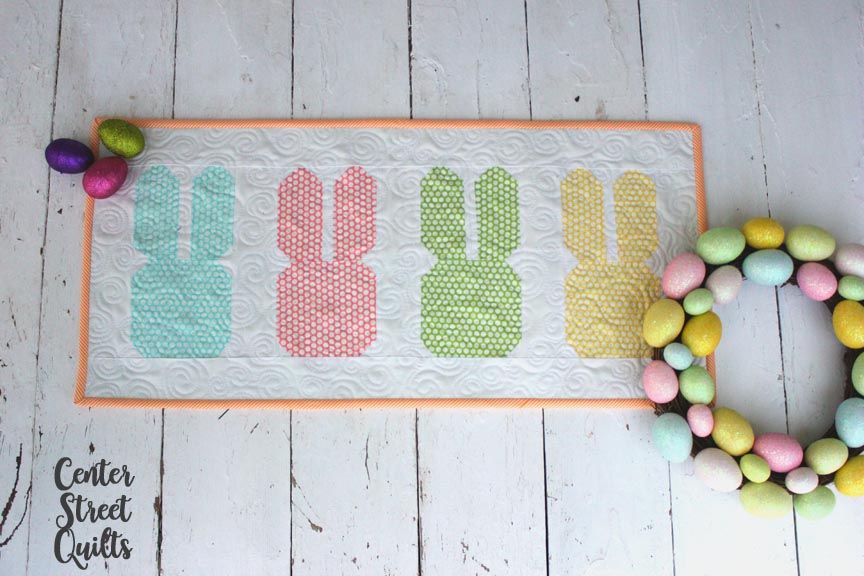
I had a lot of fun making this Bunny Quartet mini quilt and hope you'll give it a try! If you head on over to my instagram account (@centerstreetquilts) I'm doing a giveaway and you can enter to have a chance of winning the blue single bunny mini quilt I posted above! Thanks for reading along with me today, and please tag me on instagram with your Bunny Quartet mini quilts, as I'd love to see them!
Kristina Brinkerhoff
{Center Street Quilts}
![]()
Posted in:
Comments