Welcome to Moda Fabrics!
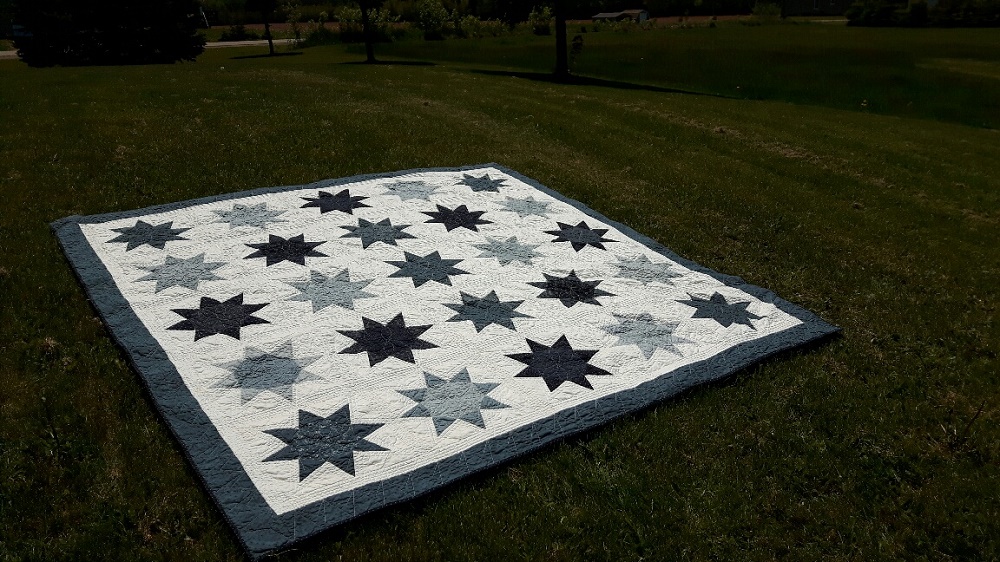
Stars All Agleam Quilt
Stars All Agleam Quilt
Published:
Jun 18 2017 - 23:00


Hi, It's Cathy from meandmymumquilting.blogspot.ca/. I love star blocks, but I hate the y-seam construction that some patterns call for. I would like to share with you an easy way to make this beautiful star quilt, using Fat Eighths or Fat Quarters without Y-seams. I hope you give this method a try....
This quilt/project finishes at 92" x 92"( without the outer border). And 100" x 100" with the outer border.
![]()
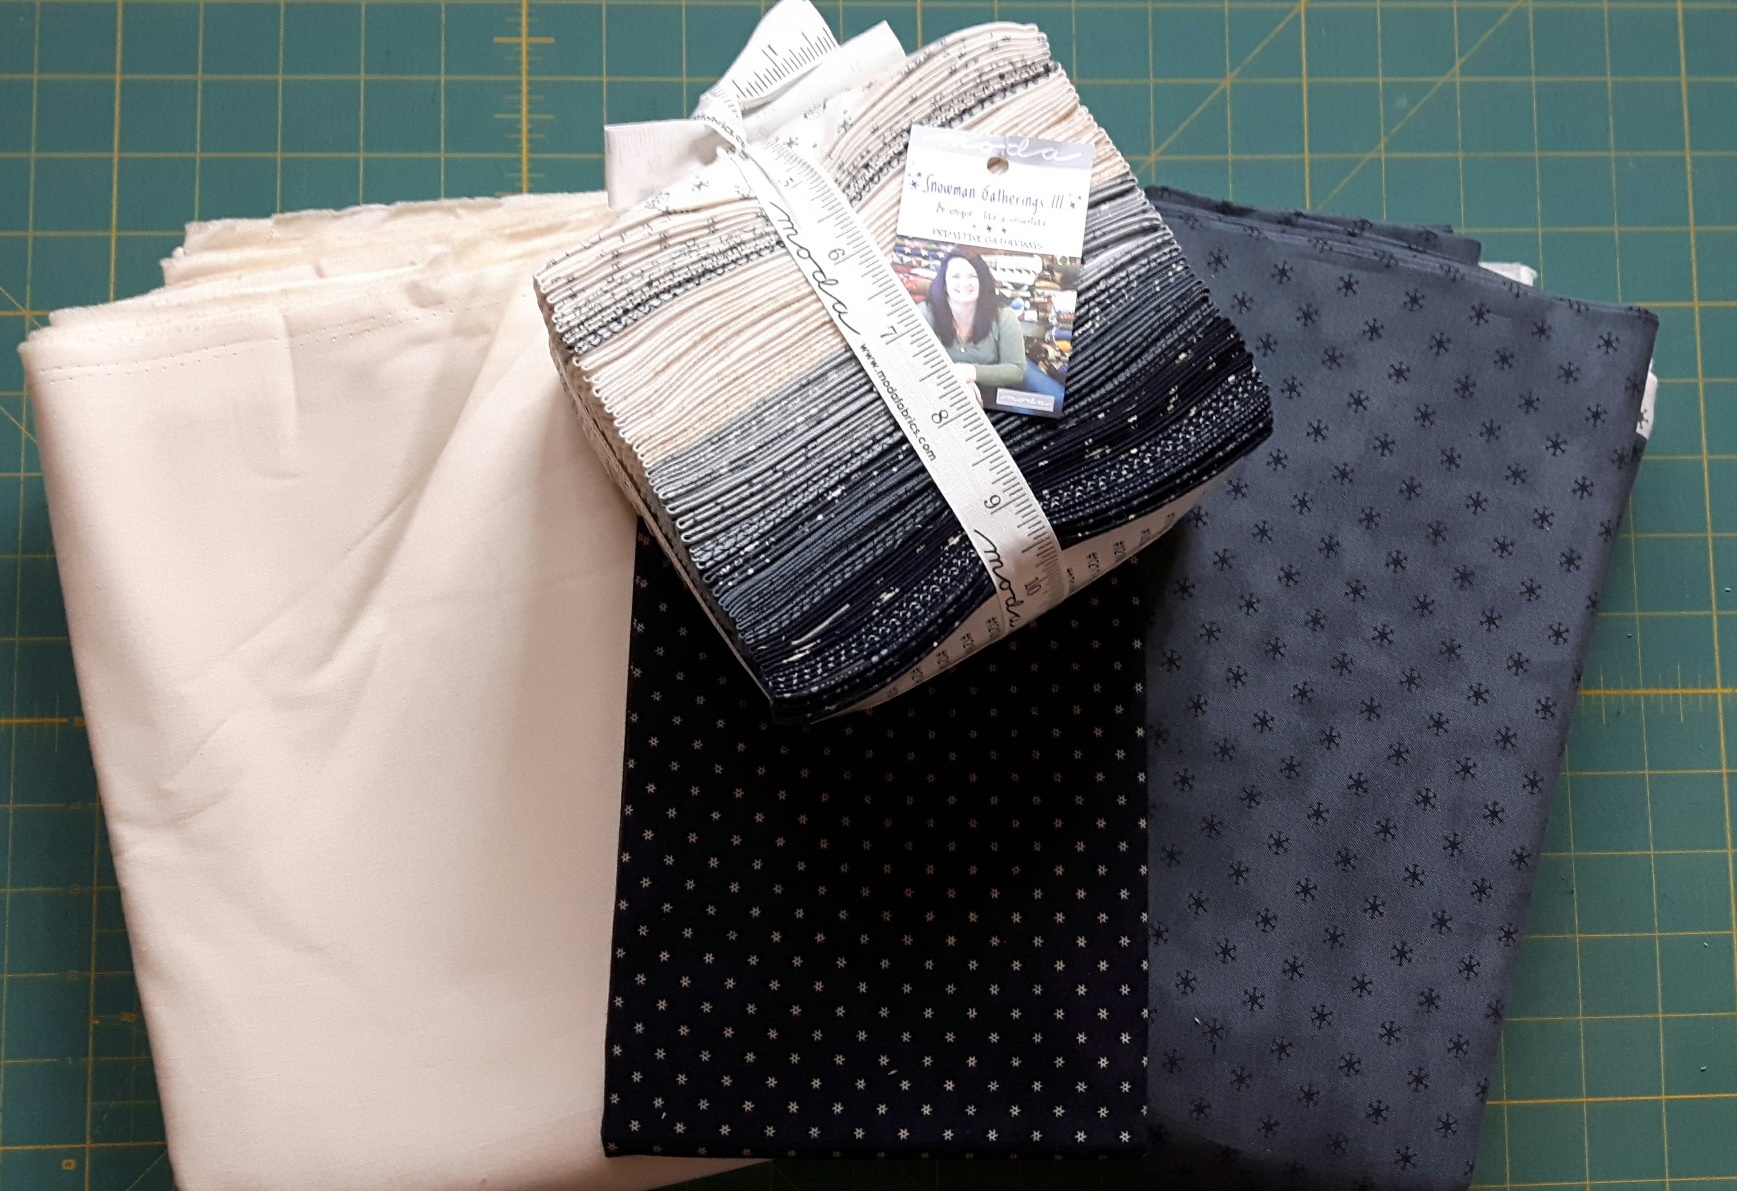
1 x Fat Eighth Bundle, {Snowman Gatherings III by Primitive Gatherings - 1210 f8}
6.5 yards background fabric {Bella solids snow - 9900 11}
1.5 yards outer border fabric {Snowman Gatherings III - 1216 22} ( If desired.)
3/4 yard binding fabric {Snowman Gatherings III - 1212 17}

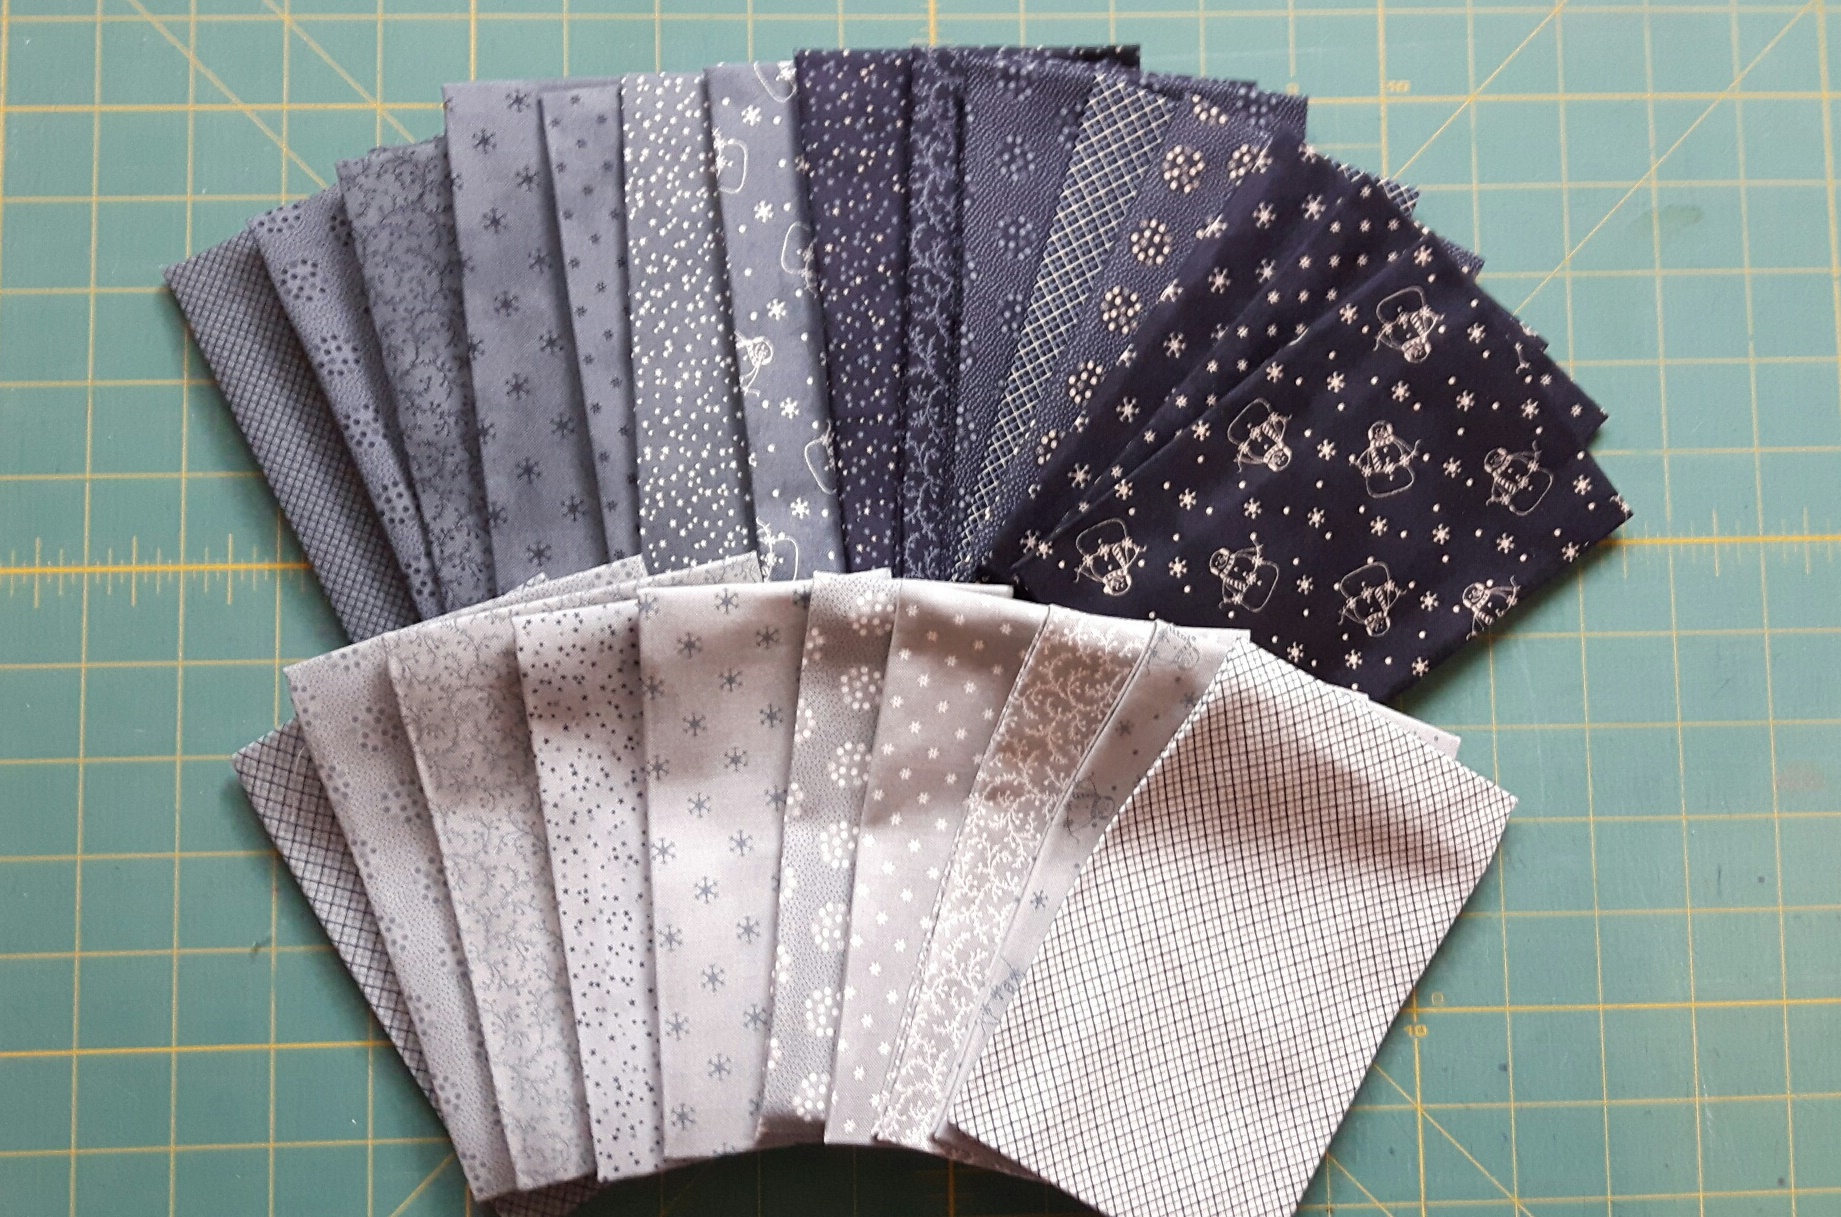
Select 25 Fat Eighths from your bundle for the star points. Make sure they contrast with your background fabric.
Make sure to press all the Fat Eighths, so they lay flat with no creases. Before you begin cutting the fabric into strips, Measure the fabric to make sure it is at least 9" in width and 21" in length. You will be cutting two 4 1/2" x 21" strips from each of the 25 fat eighths.
This quilt block is constructed using 45 degree triangles. If you already have a 45 degree triangle ruler you are ready to go and can skip down a few steps. BUT if you don't have a 45 degree triangle ruler, that's okay. I will show you a fast and accurate way to cut the triangles needed for this block.

Firstly grab a regular piece of paper ( 8.5 x 11). You will measure and cut a piece that is 3 3/4" x 11".

Using a square ruler, Align the 45 degree diagonal line along the bottom long edge of the paper and slice the excess away and discard.

Next, Align the edge you just cut with the 3 3/4" line of your ruler and cut. Discard the excess.

You are left with a sharp diamond shape. Fold in half sharp point to point to create a crease line. You will then cut the diamond in half to yield two triangles.

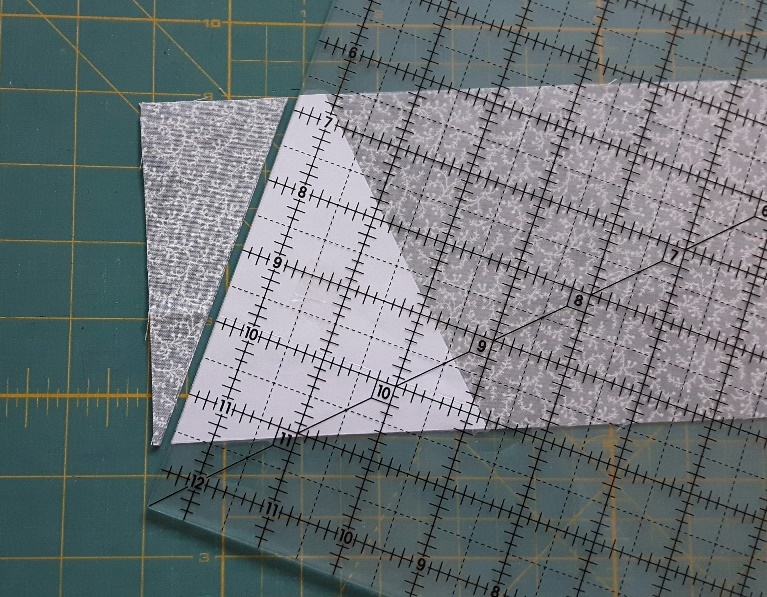
Align the bottom of the triangle with the 4 1/2" line so the tip of the triangle extends past the ruler and cut the tip off. This is necessary so the triangles can be cut from 4 1/2" strips. It also makes it easier to match up the points when sewing the triangles together.
You now have two 45 degree triangles to use as templates for cutting your fabric.

I taped the templates to opposite sides of my square ruler, making sure that they are angled like in the photo. Be very sure that the outer edge of the paper template is perfectly aligned and taped to the outer edge of the ruler.
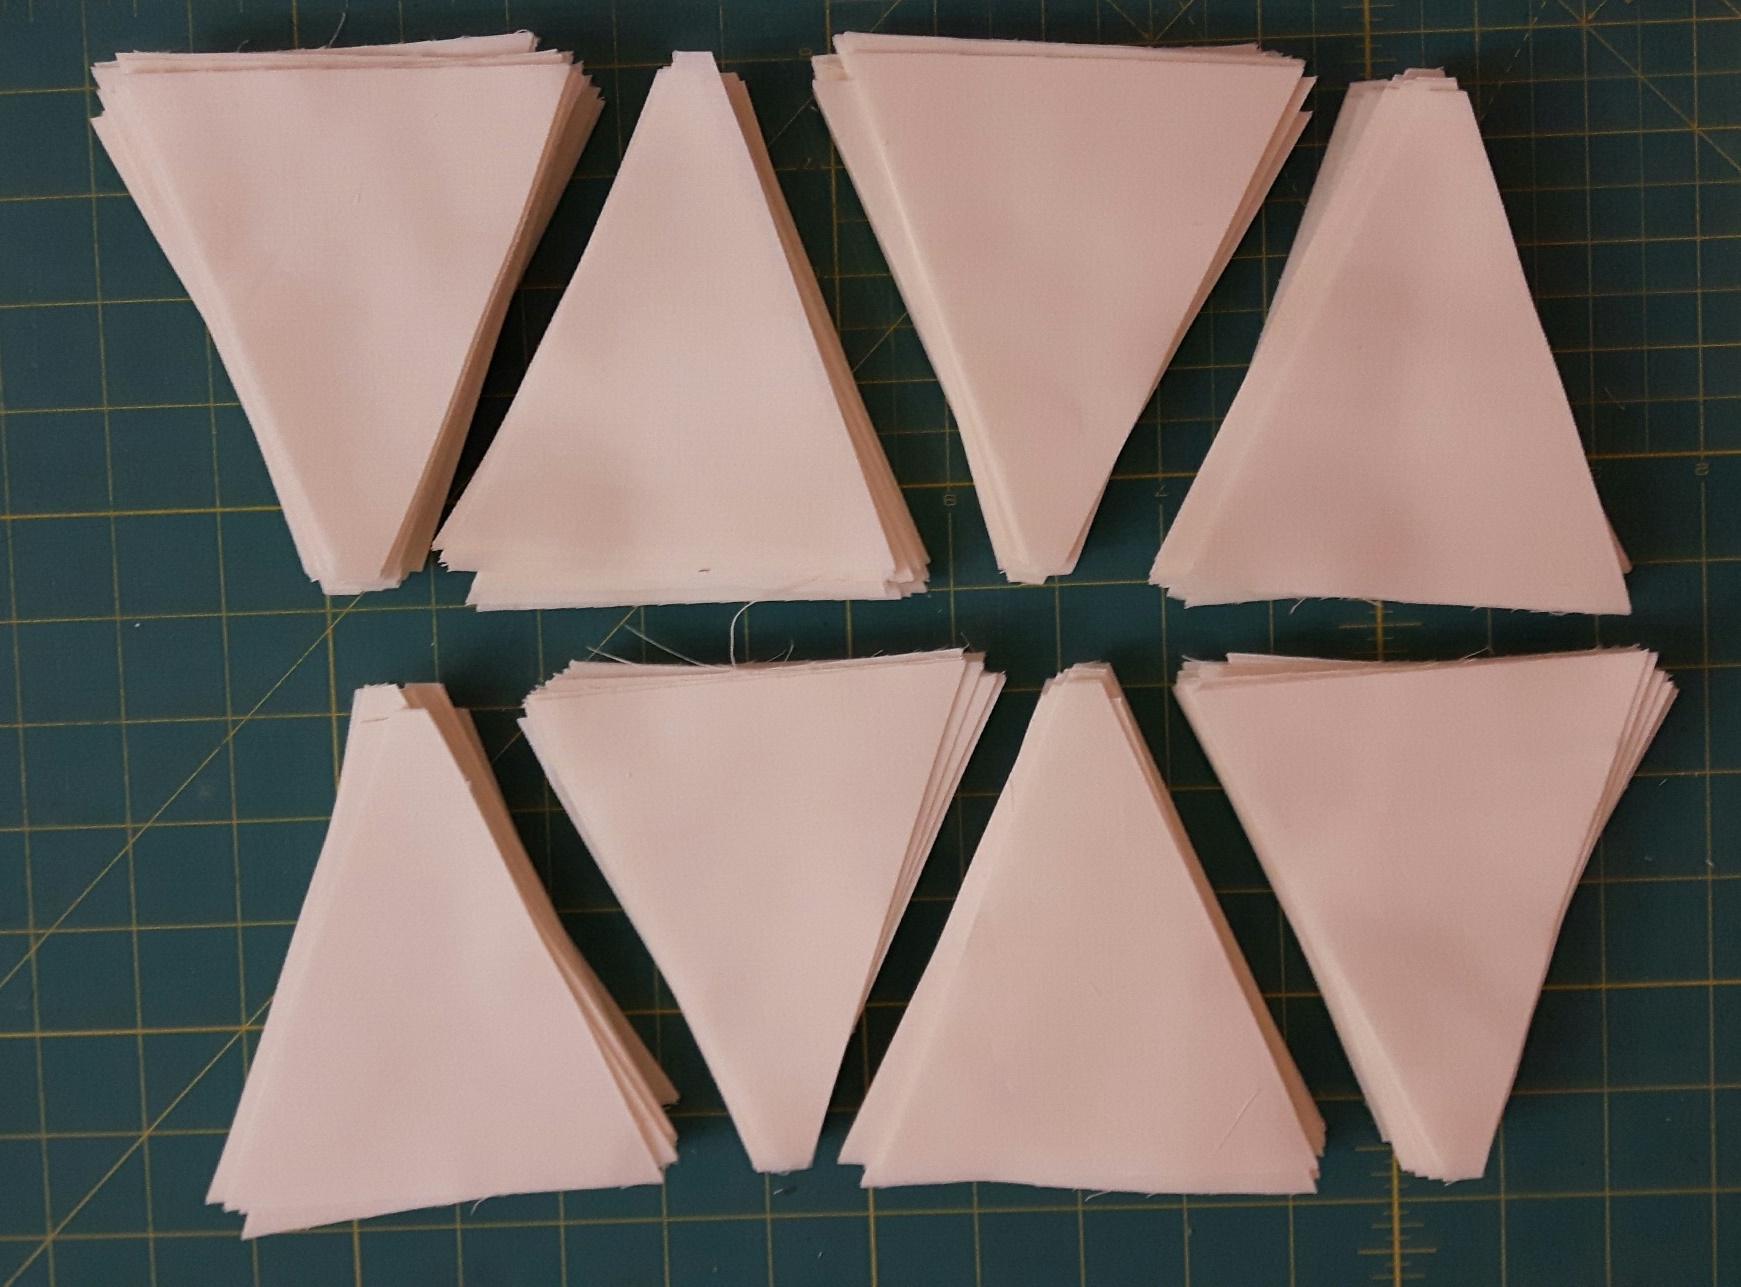
Now it's time to cut out your colored triangles!! ( just a recap you have selected 25 F8's that contrast with your background fabric and have cut them all into 4 1/2" x 21" strips).
Place the ruler with your template on the fabric so the base of the triangle is aligned with the bottom edge of the fabric. Cut off the small skinny triangle that is not covered by the ruler and discard.
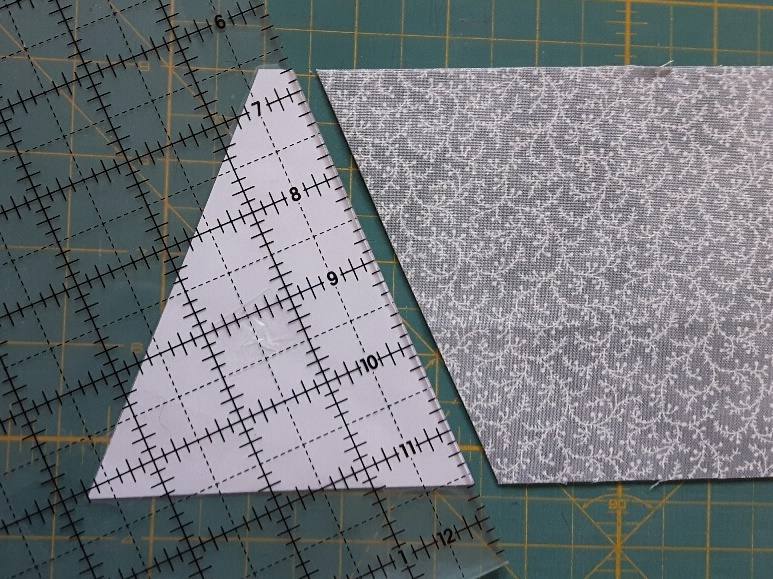
Switch to the opposite side of the ruler and align the bottom edge of the template with the bottom of the fabric. The triangle template should now cover the fabric perfectly.Cut along the ruler edge to separate the first triangle.

Rotate the ruler so the bottom of the triangle is aligned with the top of the fabric and the cut edge matches the angle of the template. Cut to separate the next triangle. Continue rotating the ruler so the templates align with the fabric strip until you reach the end. You should yield 8 triangles from each 4 1/2" strip. ( although if you are lucky you might get 9).

Continue with this method until all the colored strips have been cut into 45 degree triangles.
Background Fabric: Cut 22 strips of background fabric 4 1/2" wide x WOF (42"). Sub cut into 400 - 45 degree triangles using the method described above. ( You should yield 17/18 triangles per strip).
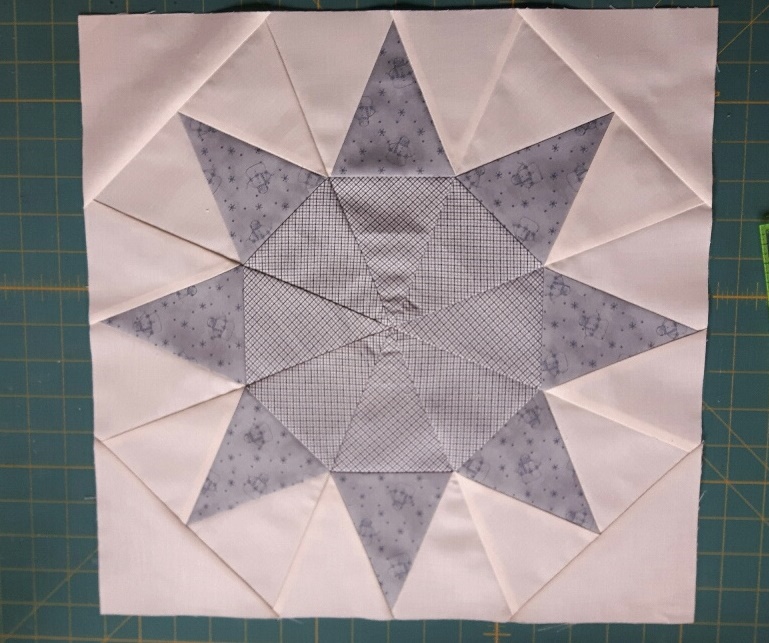
You are now ready to begin sewing your stars together.You will need 16 background triangles and 8 each of two different colored triangles. (inner star and star points).

Layout your first star block in the fabric combination you like. For my blocks, I chose to have my centers be one fabric and my star points be a second fabric. Once you have your fabrics in the position you like, gather the star points and the background triangles.
All seams are sewn with a 1/4" seam allowance.

With fabrics, right sides together (RST) align the fabrics so that they resemble the photo. The blunt tip of the background square has a bit of the colored triangle extending past. The bottom of the pieces has a very small bit poking out (but this picture doesn't show that very well.)
These long edges are bias ( meaning stretchy) so be very careful not to stretch them as you are handling or sewing them. Pins are definitely suggested for this block. Sew using a 1/4" seam.
For the first seam I pressed towards the colored fabric.

Add the other background fabric to the opposite side of the colored triangle (RST) like it shows in the photo. Pin , sew and press towards the background this time.

The seams should both be going the same direction.
Repeat with the remaining star points for this block. Trim the dog ears.
Once all 8 sections are complete, it's time to add the remaining triangles to each segment. I like to think of it like adding the top to the pyramid.
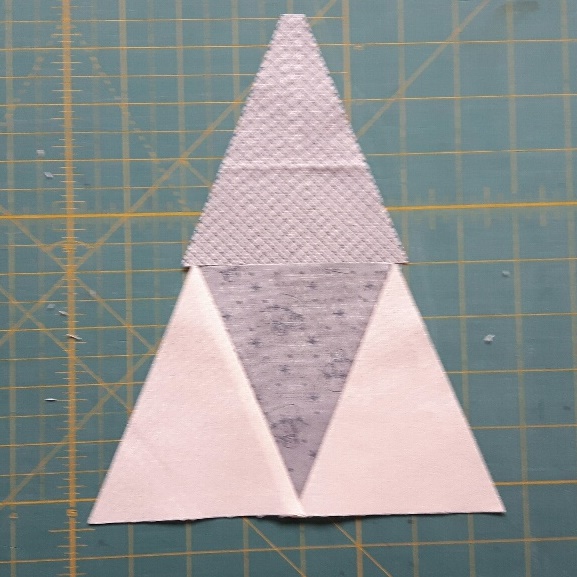
Place the triangle onto the already pieced triangles so that the widest part of the colored triangles are aligned. There should be equal amount of fabric extending past the background on both sides. Pin in place and sew.
Repeat with all 8 segments.

As per the photo:
Press 4 segments towards the point.
Press the remaining 4 segments towards the base.
Keep them in separate piles.

Take 1 segment from each pile and align them RST , taking special care with the center seam where the points meet. They will nest together perfectly if you have followed the pressing instructions I have given.
Pin and sew into 4 pairs .
Press in the same direction as the photo shows.

Take 2 segments from the previous step and align them RST, taking special care with the seam where the points meet. Repeat
Pin and sew into 2 halves.
Press so all the seams are going in the same direction.
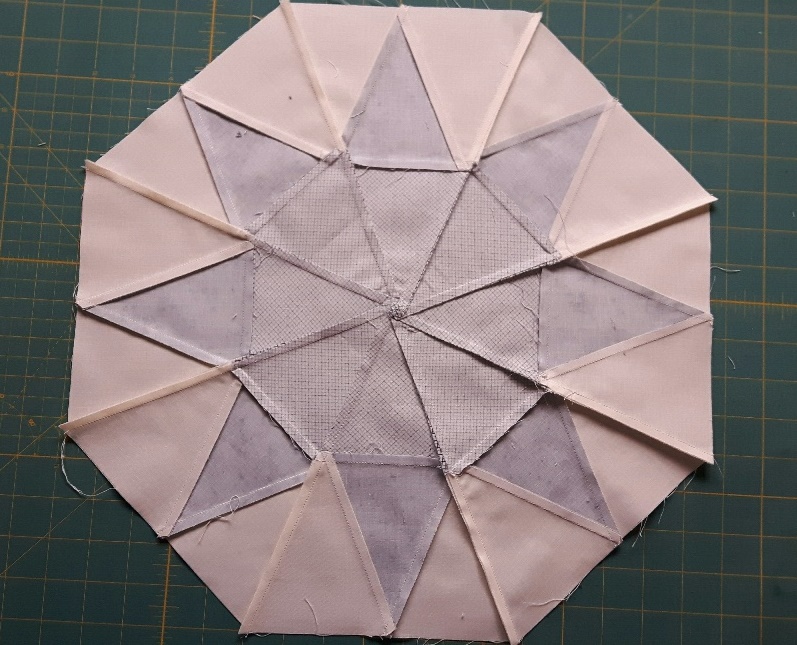
Take the 2 halves from the previous step and align them RST, Taking special care with the 3 places the points meet.
Pin and Sew into a star. ( don't worry we'll add the corners later.)
Press so that all the seams go around the block in the same direction. (Clockwise in this photo). By grabbing the last 2 seams close to the center in their proper direction and gently twisting, you can "Spin" the seam so it will lay flat. Steam or starch can help with this step as well.
Now do the same thing with the remaining 24 stars. When all 25 stars are complete you can add the corners to complete the block.
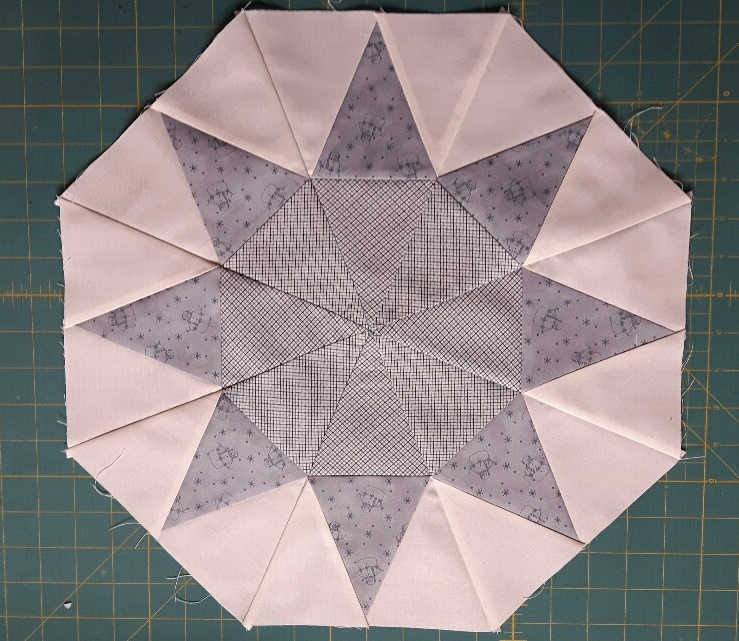
Background: Cut out eight 6" strips. Sub-cut into 50 - 6" x 6" squares. Cut these squares Once on the diagonal.

Pin and sew the corners onto the block, to make the block a square.

Trim off the excess corners so the block measures 16.5" x 16.5".
Background: To save some fabric from waste, we will be cutting the sashing strips from the yardage using the largest measurement first. Cut out 2 strips that measure at least 16.5". Sub-cut these into 2.5" widths. You need 28.

20 will be used vertically between the blocks and the remaining 8 will be added to the long horizontal sashing strips, in the next step.
Cut 16 - 2.5" strips from the remaining background fabric for the horizontal sashing and borders. Sew together, (end to end) 2 full strips and a 16.5" to achieve the length needed. Make 8 long strips.
Reference the diagram for placement of the vertical sashing (black) and the long horizontal sashing (grey). Then the outer borders go on last (red).

Cut out 10 - 5" strips of your final border fabric. Sew together 2 and 1/2 strips to make a border piece that is approx 100" long. Attach to all 4 sides. quilt as desired.
Cut 10 binding strips to the desired width (2"-2.5") Whichever width you prefer for your bindings.
Quilt as desired. I used my built- in walking foot and did some straight line quilting with my domestic machine.
![]()
This quilt finishes at 92" x 92"( without the outer border). The quilt finishes at 100" x 100" with the outer border.
I hope you like my "Stars all Agleam" quilt, and that you try this method for no Y-seam stars. Please drop by my blog and see the version my Mum made ( it will be posted once this gets published). Her quilt reminds me of fireworks with its bright colors and fun patterns. If you decide to make this quilt I would love to see your version too.
Cathy Victor
{meandmymumquilting.blogspot.ca}
![]()
Save
Save
Save
Save
Posted in:
Comments