Welcome to Moda Fabrics!
Woodruff Quilt
Woodruff Quilt
Published:
Jul 24 2017 - 23:00


Hello Moda Bakers, I'm Nicola Dodd from CakeStand Quilts, and it's so lovely to be here again to share a new recipe with you.
My design was inspired - as they so often are - by an antique quilt I found on Pinterest, which combined simple nine-patch blocks with squares of gingham. I'm always fascinated by the way fabric placement can completely change a design and the neutral fabric placement in that vintage quilt reminded me of white blossom. I repeated the blossomy theme in my hand quilting and I've written a blog post to accompany this tutorial to pass on all my favourite tips!
I also wanted to use gingham in my quilt. Luckily, it features in lots of fresh colours in of one of Moda's lovely new blender ranges, 'Essentially Yours'. I chose a crisp silver grey to pair with Bonnie & Camille's gorgeous new group, 'The Good Life'. I chose to use two matching charm packs, but they really don't have to match. Camille often mixes two different groups together in her quilts, which I find so inspiring!
As well as having lots of delicious retro prints, 'The Good Life' has a fun ticking stripe. Directional prints are always so striking, but they can be difficult to use successfully in a quilt. I really wanted to keep my stripes running in the same direction and this is how I did it...
This quilt finishes at 59.5" x 76.5"
![]()
(2) Charm Packs {'The Good Life' by Bonnie & Camille}
1** x yard neutral fabric {'Bella Solid' in Porcelain} Please read the note, below
2 x yards background fabric {'Essentially Yours' silver check}
3.75 x yards backing fabric {'The God Life June in red}
0.5 x yard binding fabric {'Bonnie & Camille Basics' in red/pink bias stripe}
**A lovely Bakeshop reader has pointed out that if you are not planning to use any of the cream squares from your charm packs in the quilt, you will in fact need 1.25 yards of neutral fabric. Please accept my grovelling apologies if this has caused you any inconvenience. And thank you Terri!
![]()
Please read through the pattern before you begin, assuming a 1⁄4” seam allowance and a fabric width (WOF) of 42”. I would always recommend making a test block.
CUTTING:
1. From the neutral fabric, cut (8) 5” x WOF strips, then subcut into (64) 5” squares.
NOTE: I replaced a few of my 5” squares with the neutral prints from my charm pack to give my quilt a scrappy, vintage look.

2. From the background fabric, cut (8) 9” x WOF strips, then subcut (31) 9” squares.
3. From the binding fabric, cut (7) 2.5” x WOF strips.
PIECING THE BLOCKS:
4. Place a print 5” square and a neutral 5” square right sides together and sew along one side. Press towards the print. MAKE 64 units.

5. Choose two contrasting units and sew together to make a four-patch, as shown below, nesting your seams. Press towards the print you would like at the centre of your block (shown aqua), or open if preferred. MAKE 32 (your four-patches should measure 9.5” square).

6. Make a cut 2.5” away from one side of the four-patch, then re-join to the opposite side of the block, as shown below, pressing as directed (<).
7. Make another cut 2.5” away from the bottom of your block and re-join to the top, turning through 180° so that the seams ‘nest’. MAKE 32 (your blocks should measure 9” square).

NOTE: As the orientation of the squares never change, this is a great technique to use with directional prints!
ASSEMBLING THE QUILT:
8. Lay out the quilt in rows, alternating the pieced blocks with 9” background squares, as shown below.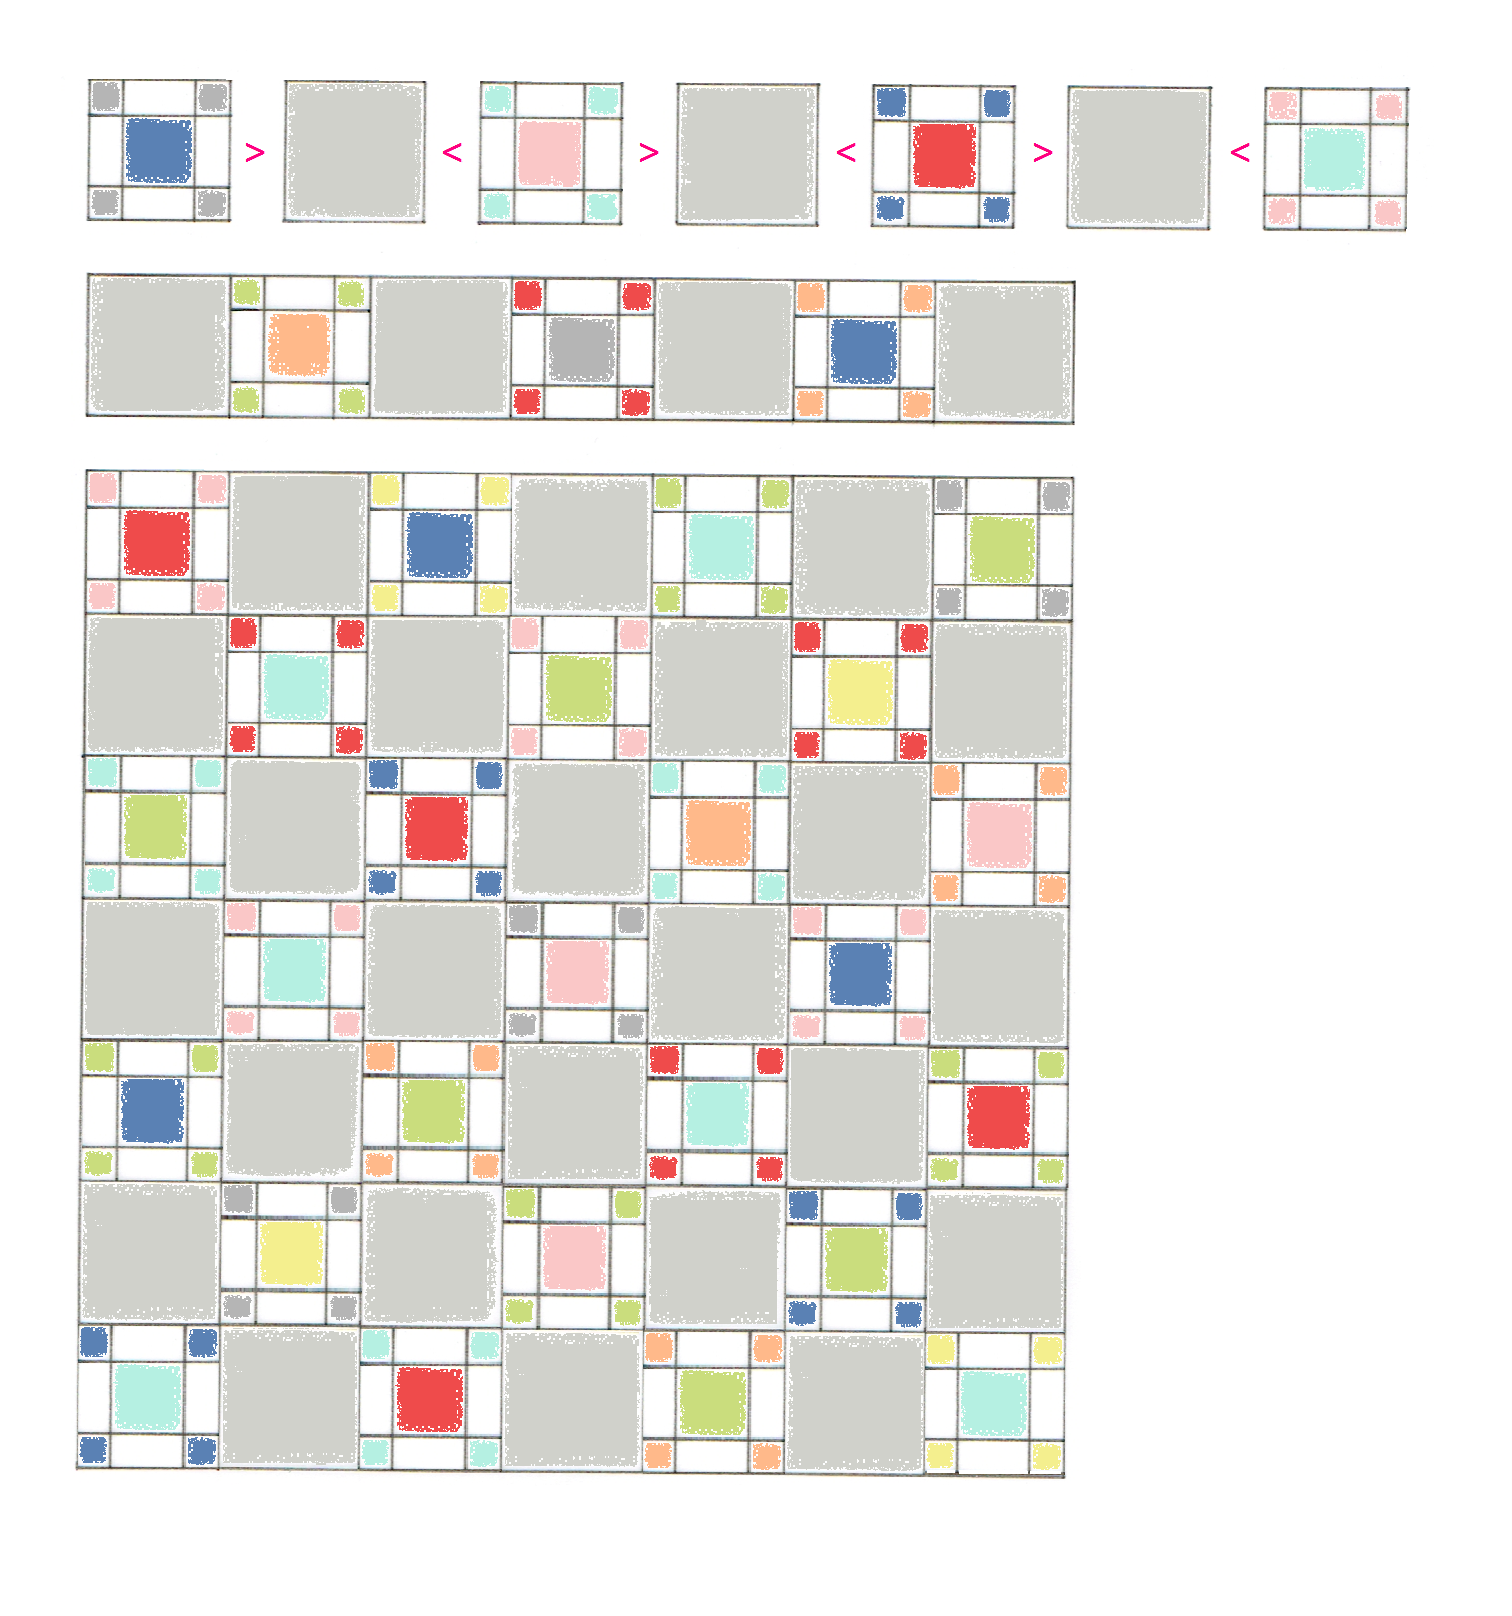
9. Assemble the quilt top, a row at a time, pressing the seams towards the background blocks, so that the seams ‘nest’ nicely when you join the rows together.
10. Cut your backing into two WOF x 67.5” pieces, trim off the selvages and join together using a 1⁄2” seam, pressed open, then trim to 67.5” x 84”.
11. Sandwich the batting between the backing and the quilt top, baste, then machine or hand quilt.
I decided to hand quilt mine and you can find my favourite tips and ideas listed under Tutorials on my blog at cakestandquilts.com including how I created my blossom motif (enormous hint in the photo, below!)

12. Join your binding strips to make one, long strip and press it in half, wrong sides together, along its length. Trim away excess batting and background - taking the opportunity to ensure your corners are square - and bind the raw edge using your preferred method.
![]()
The 'Woodruff' quilt finishes at 59.5" x 76.5".

I really hope you'll give hand quilting a try on your next project. I find it so relaxing. I'm showcasing a few of my favourite hand quilted projects at the UK's Festival of Quilts next month and I'll be taking all my Moda Bakeshop quilts with me!! Do come and say hello if you're visiting. Or catch up with my Festival photos on Instagram!
Nicola Dodd
{cakestandquilts.com}
![]()
Save
Posted in:
Comments