Welcome to Moda Fabrics!
Layer Cakes On Point Quilt
Layer Cakes On Point Quilt
Published:
Jul 31 2017 - 23:00


I am fairly new to sewing and quilting. Cutting fabric for a project can be somewhat intimidating. I’m afraid I’m going to cut something incorrectly, not be able to read the pattern correctly, or run out of fabric. Because of this, I prefer patterns that require as little cutting as possible - and with little or no piecing. Please check out my instagram page (@mona.phelps) for the most recent updates on what I'm working on.
This quilt/project finishes at 60" x 73".
![]()

2 Layer Cakes® - Eat, Drink, & Be Ugly by Sandy Gervais
1-2 yards border fabric - Bella Solids Natural 9900 12 Moda #1
2 yards background fabric - 108" Grunge Cherry 11108 265 Moda Basics #1
1 yard binding fabric - Eat Drink Be Ugly Night Sky 17926 15 Moda
![]()
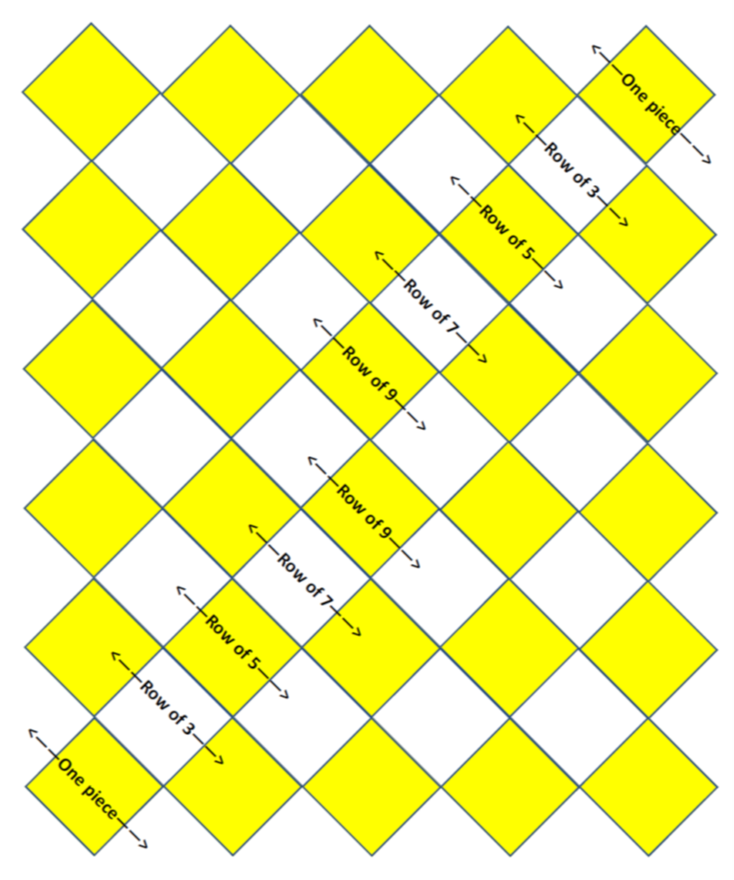
For this quilt, “Layer Cakes on Point,” you will sew together pieces from layer cakes in strips (2 sets each of 3, 5, 7, and 9). You then sew the strips together, lining up the pieces from layer cake 1 to layer cake 2, starting with the 9-piece strips. After all the strips are sewn together, you cut down the sides, making it into a rectangle. Sew on the border and you're ready to quilt and bind!
You will need two layer cakes, a small amount of fabric for a border, backing fabric, and binding fabric (see the "Ingredients" above). One option for the layer cakes would be to use a patterned set and then also a solid set. For my quilt, I used two of the “Eat, Drink, and Be Ugly” layer cakes by Sandy Gervais for Moda. I sorted the layer cakes in to low volume prints and brighter prints.
After you have your stacks of low volume and brighter prints, you will sew together rows. You want to alternate a brighter print and low volume prints. I started and ended each row with one of the brighter prints.
After I sewed all the individual rows, I tried a couple of different layouts to see which one I liked best.

Once you decide which layout you want to use, sew the rows together. You will sew both 9-piece rows together for the center of the quilt. You want to make sure that the rows are off-set - one of the bright prints aligns with one of the low volume prints.
Continue sewing rows together, attaching each shorter row until you sew on a single block.
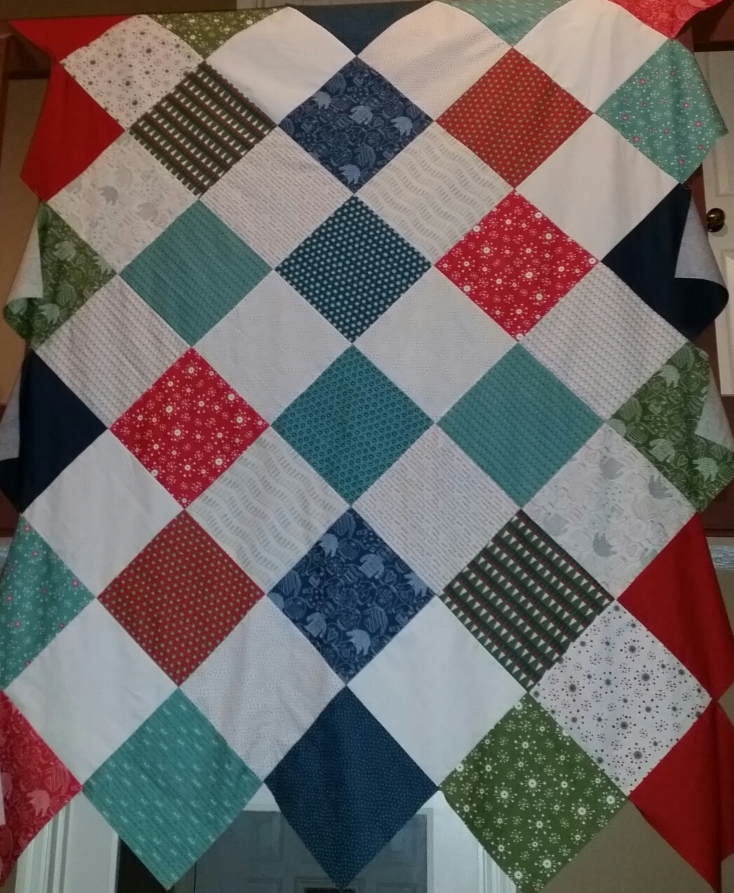
Once all rows are sewn together, it will look like you have triangles hanging on the sides (see above). You are going to cut those off. Using a long ruler, cut along the edge so that the “triangle” shapes are gone and you have a straight edge.


At this point, you will have a rectangle and it's time to attach the border. I cut my border fabric 2 ½ inches wide by the length of each side (you can cut yours wider if you’d prefer). For the top and bottom border, I cut the fabric 2 ½ inches wide by the length of fabric PLUS 3 inches per piece (this will ensure that you have enough to cover the length of the side plus the length of the border fabric).

Sew on the border fabric. Now all you need to do is quilt and bind!

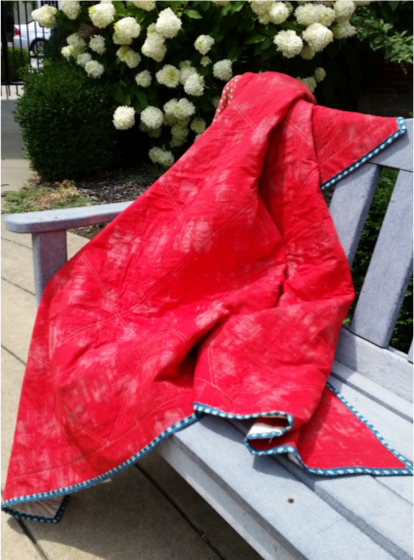
I LOVE the Moda Grunge for the backing, too!
Note – you can add two rows of 11 strips to make a larger quilt.
Note – all seams are ¼” unless stated otherwise.
![]()
This quilt finishes at 60" x 73".
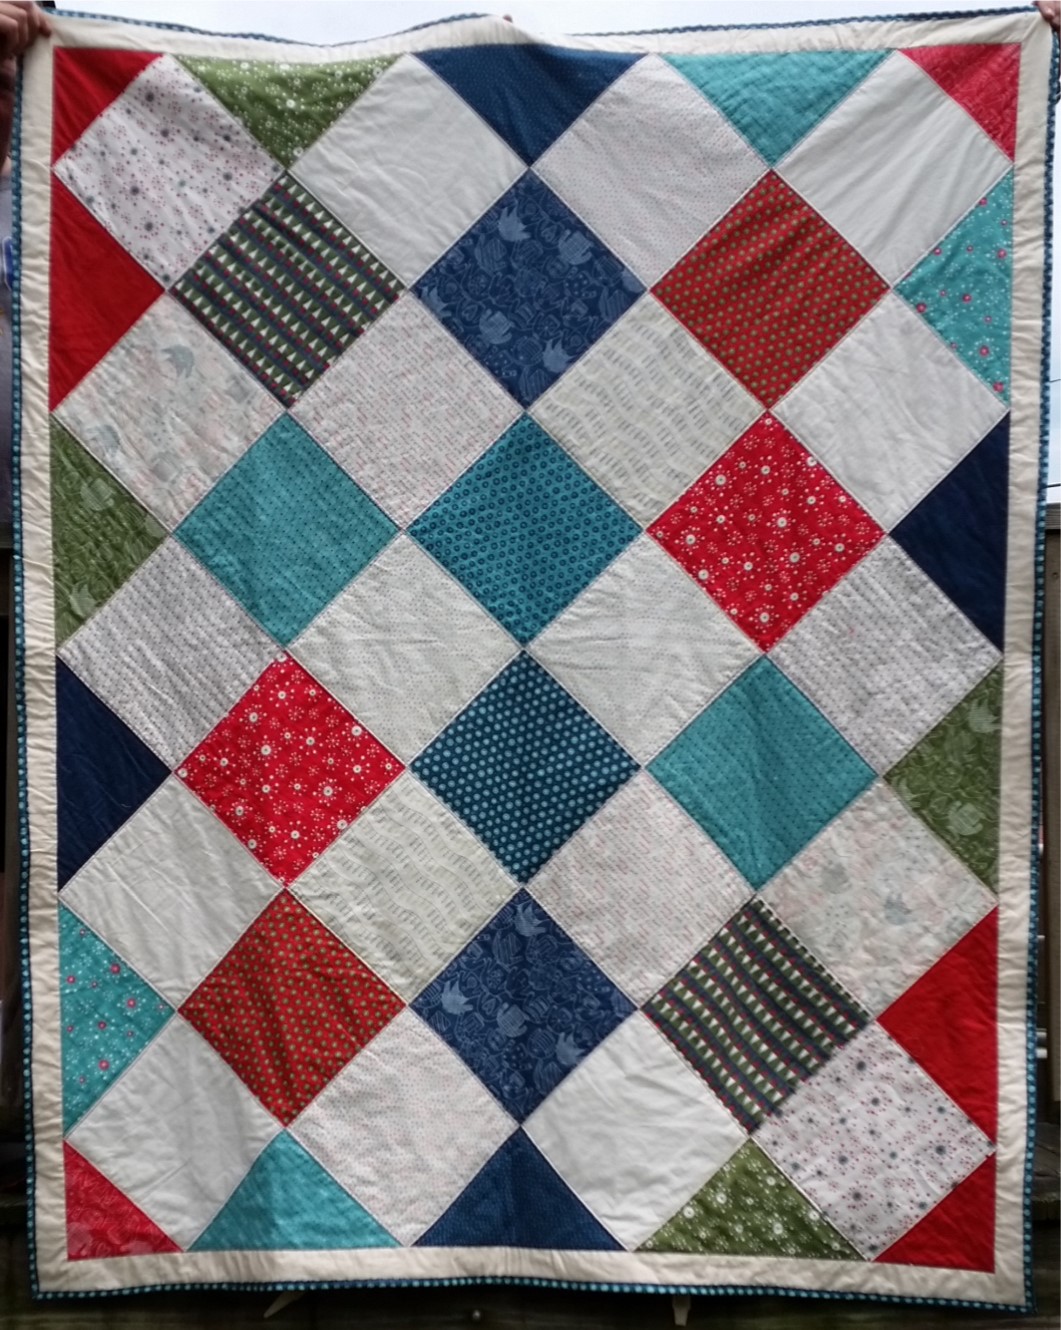
This is a fun and easy quilt - perfect for a beginner or someone who doesn't like to do a lot of cutting.
Enjoy - and happy baking!
Mona Phelps
Instagram
Facebook
Kentucky Whittaker Creations
![]()
Posted in:
Comments