Welcome to Moda Fabrics!
Racing Rails Quilt
Racing Rails Quilt
Published:
Aug 10 2017 - 23:00


Hello! I'm Alison from Little Bunny Quilts/Honey, Bunny, and Doll Designs and I'm back today to share a fun twist on a traditional "jelly roll race" style quilt. I love the idea of how fast and simple a jelly roll race can be, but what if you use the technique to make strip sets for blocks instead? So, let's combine the jelly roll race technique with a traditional rail fence block, and come up with something quick and spectacular!
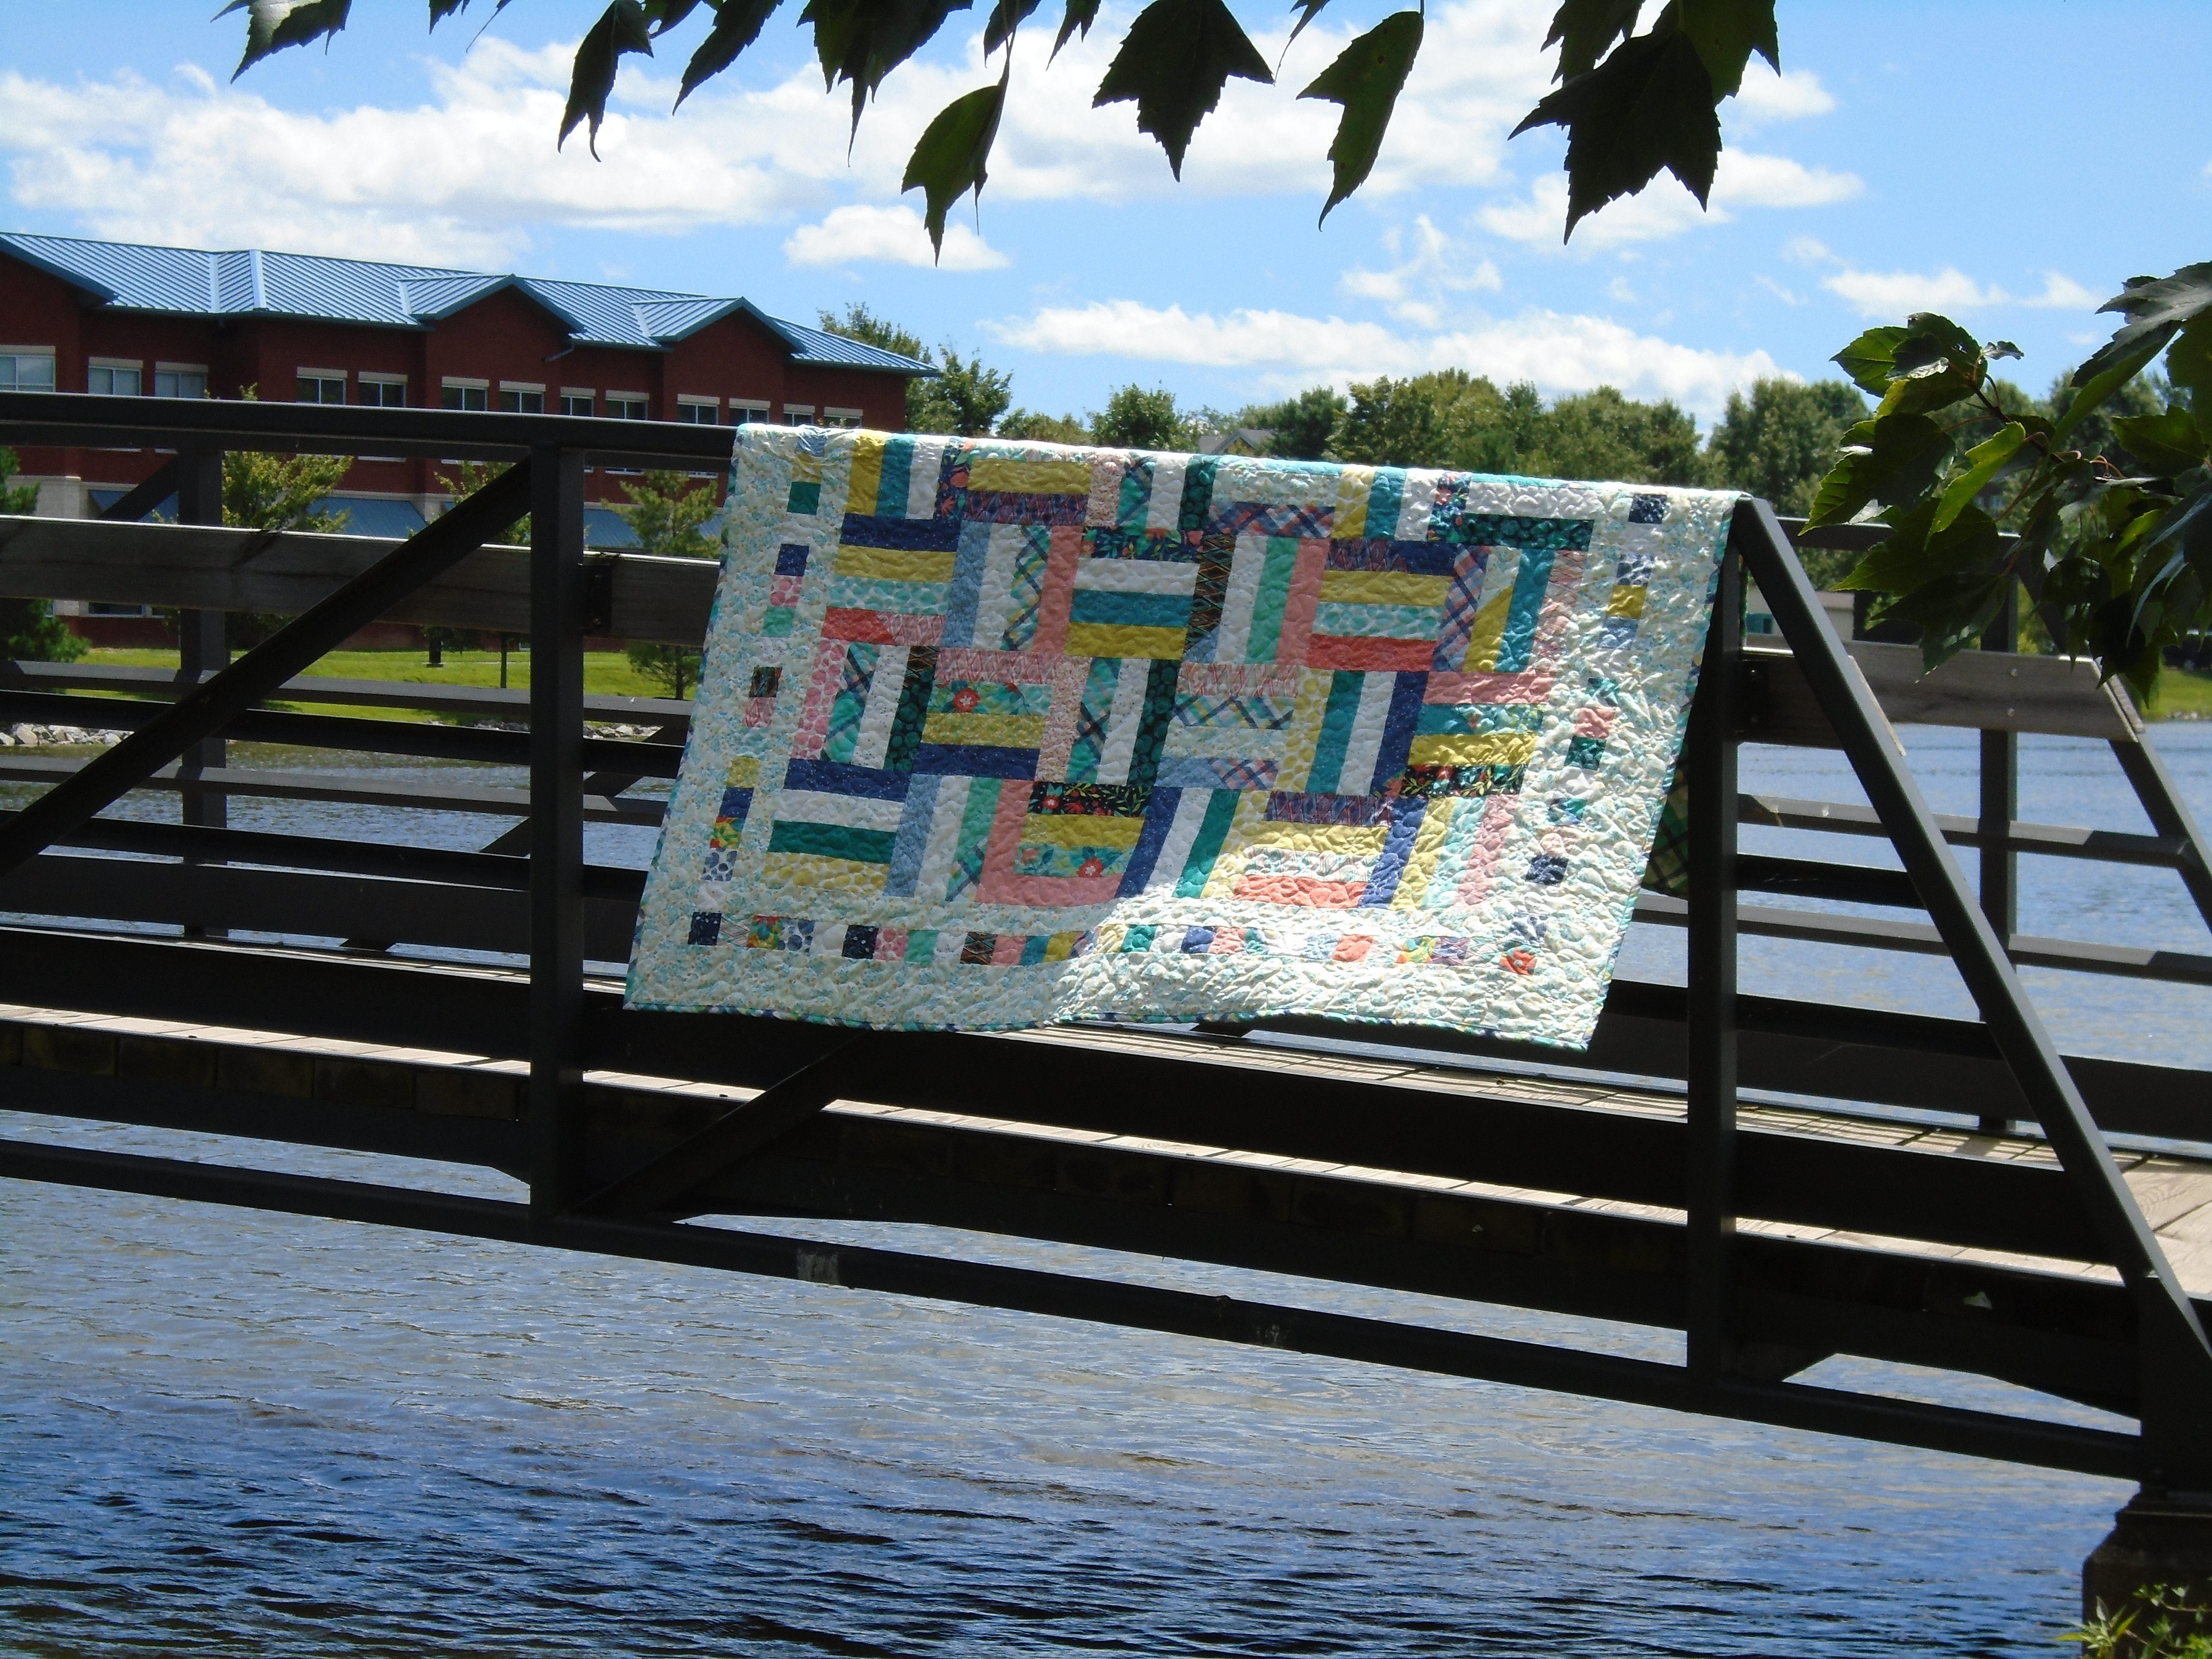
This quilt finishes at 64" square!
![]()
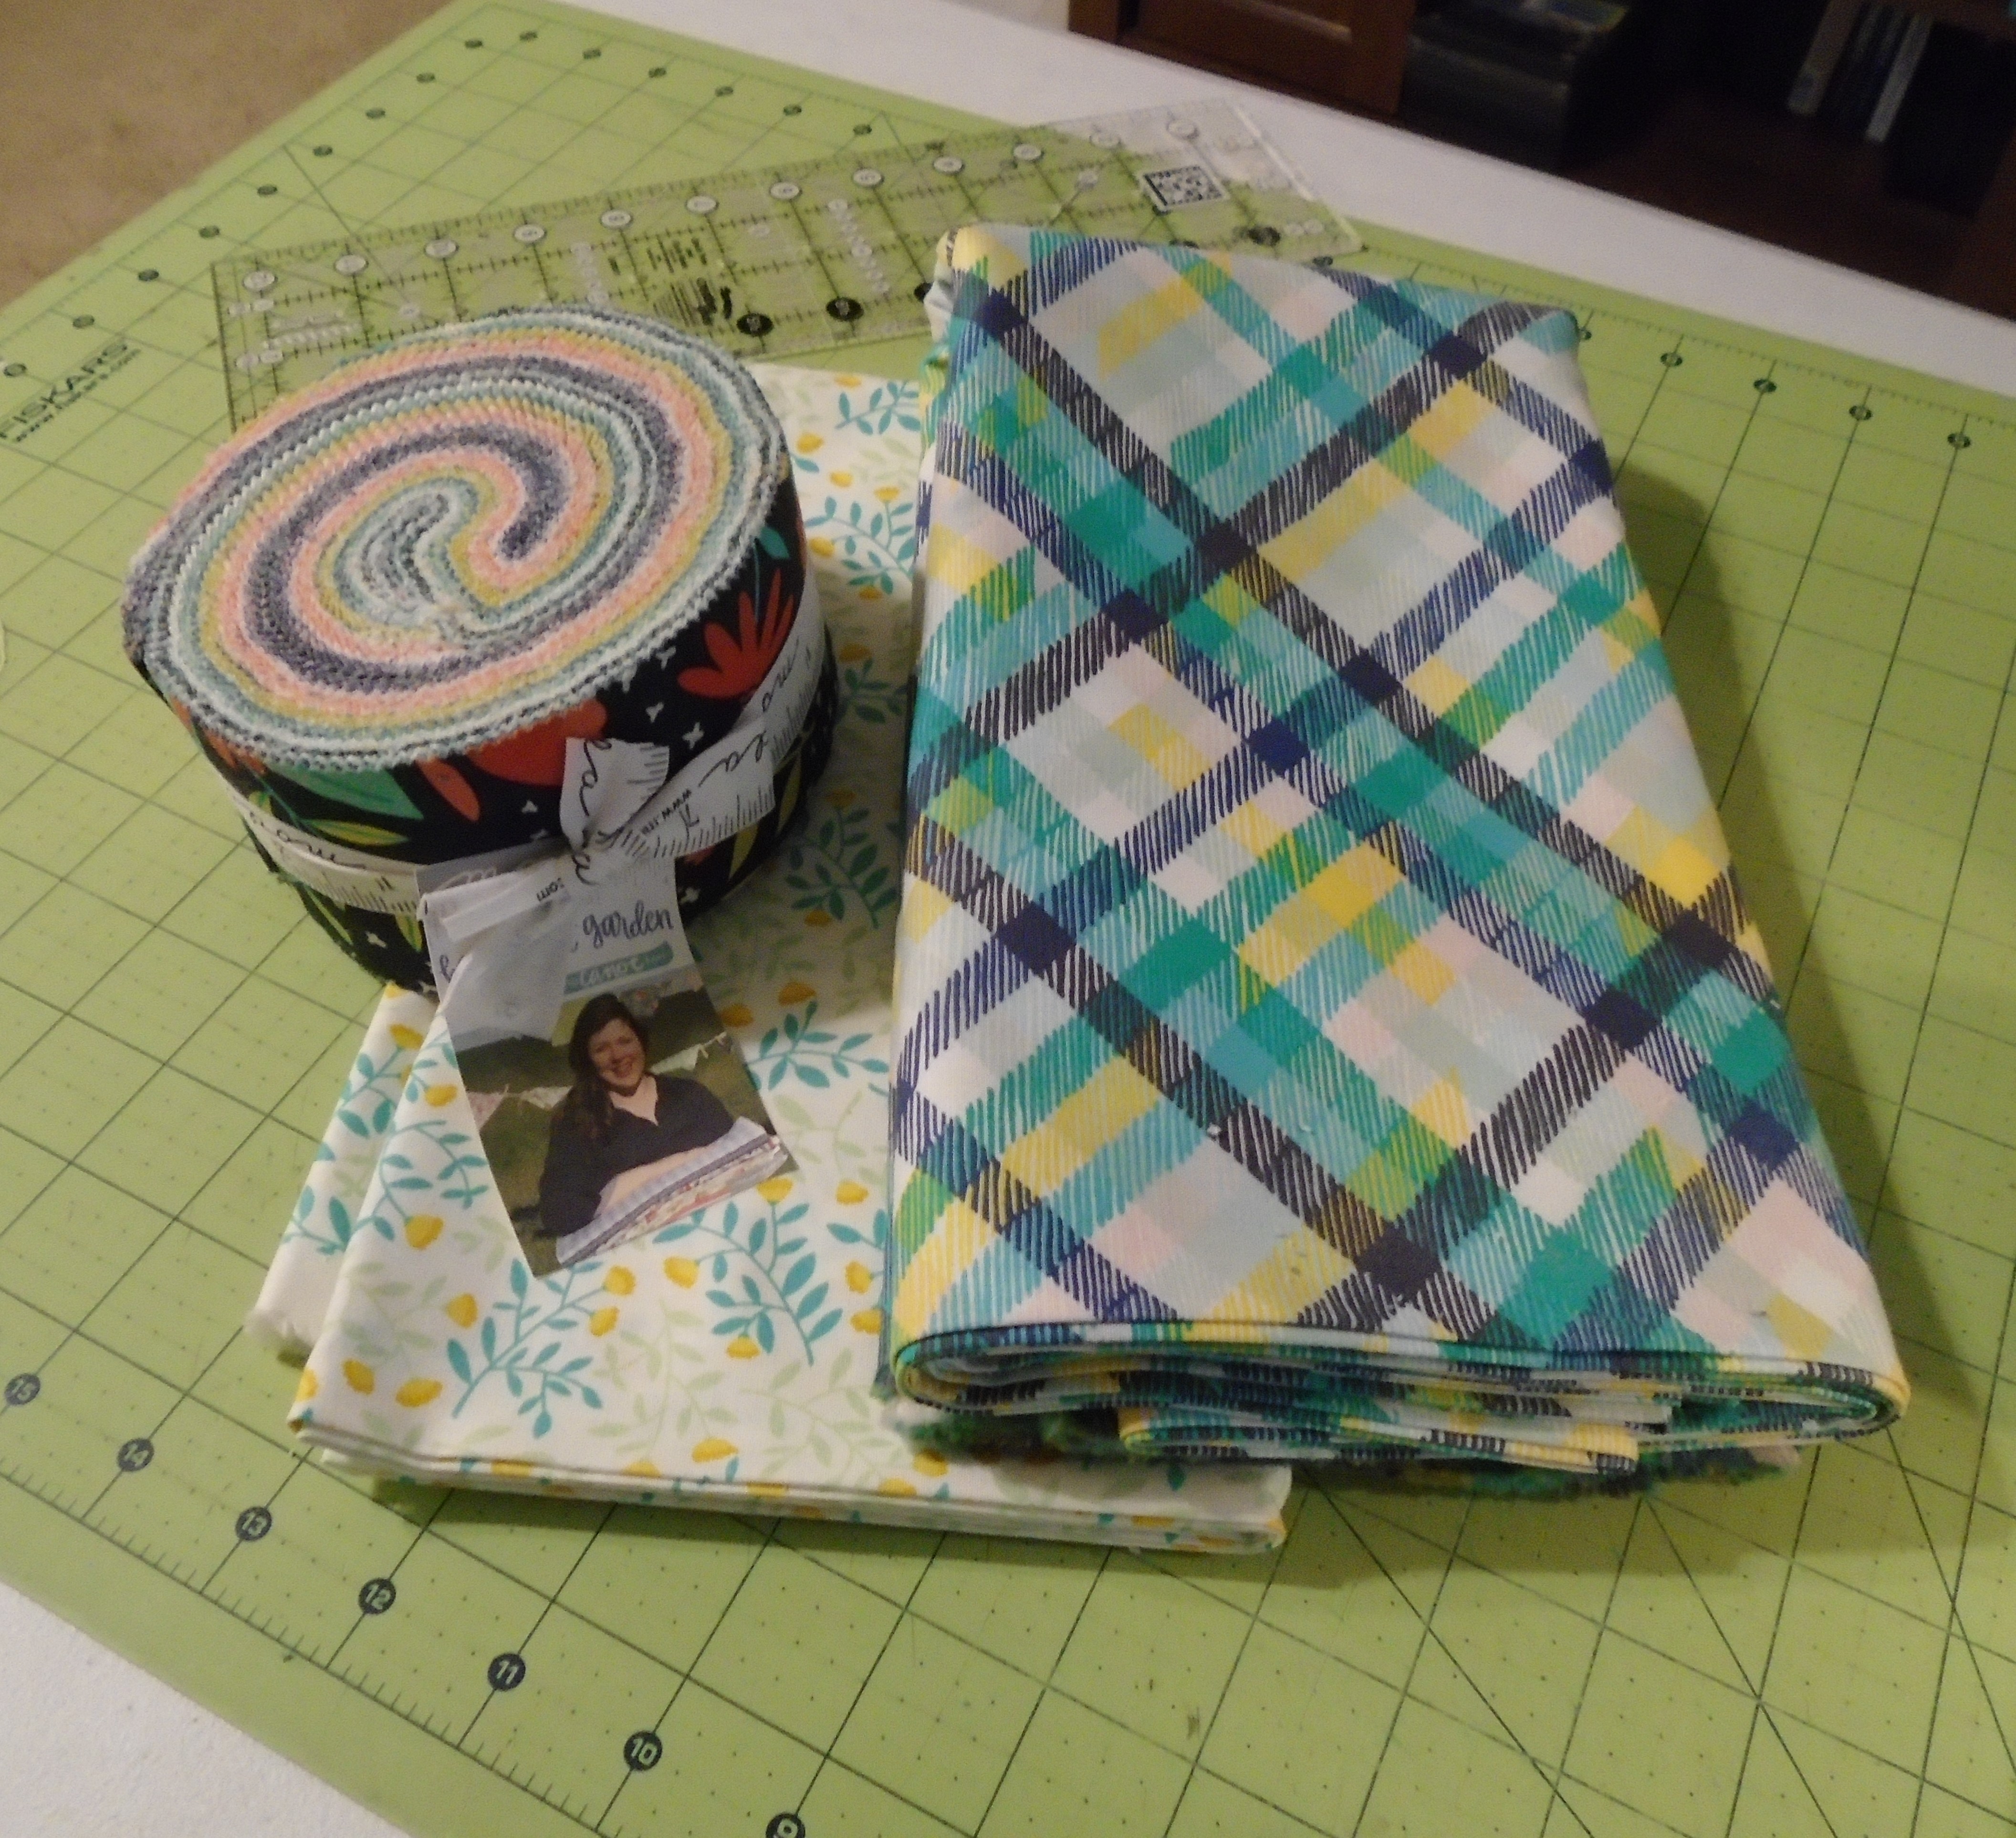
1 Jelly Roll - Midnight Garden by One Canoe Two
1.25 yards 36021 11* floral print for borders
3.75 yards 36023 11 plaid print for backing and binding
![]()
The first step is to take stock of your jelly roll. This jelly roll has five main colors -- dark blue, teal, orange, yellow, and white. There are 20 strips that are blue or teal, and 20 strips that are orange, yellow, or white.
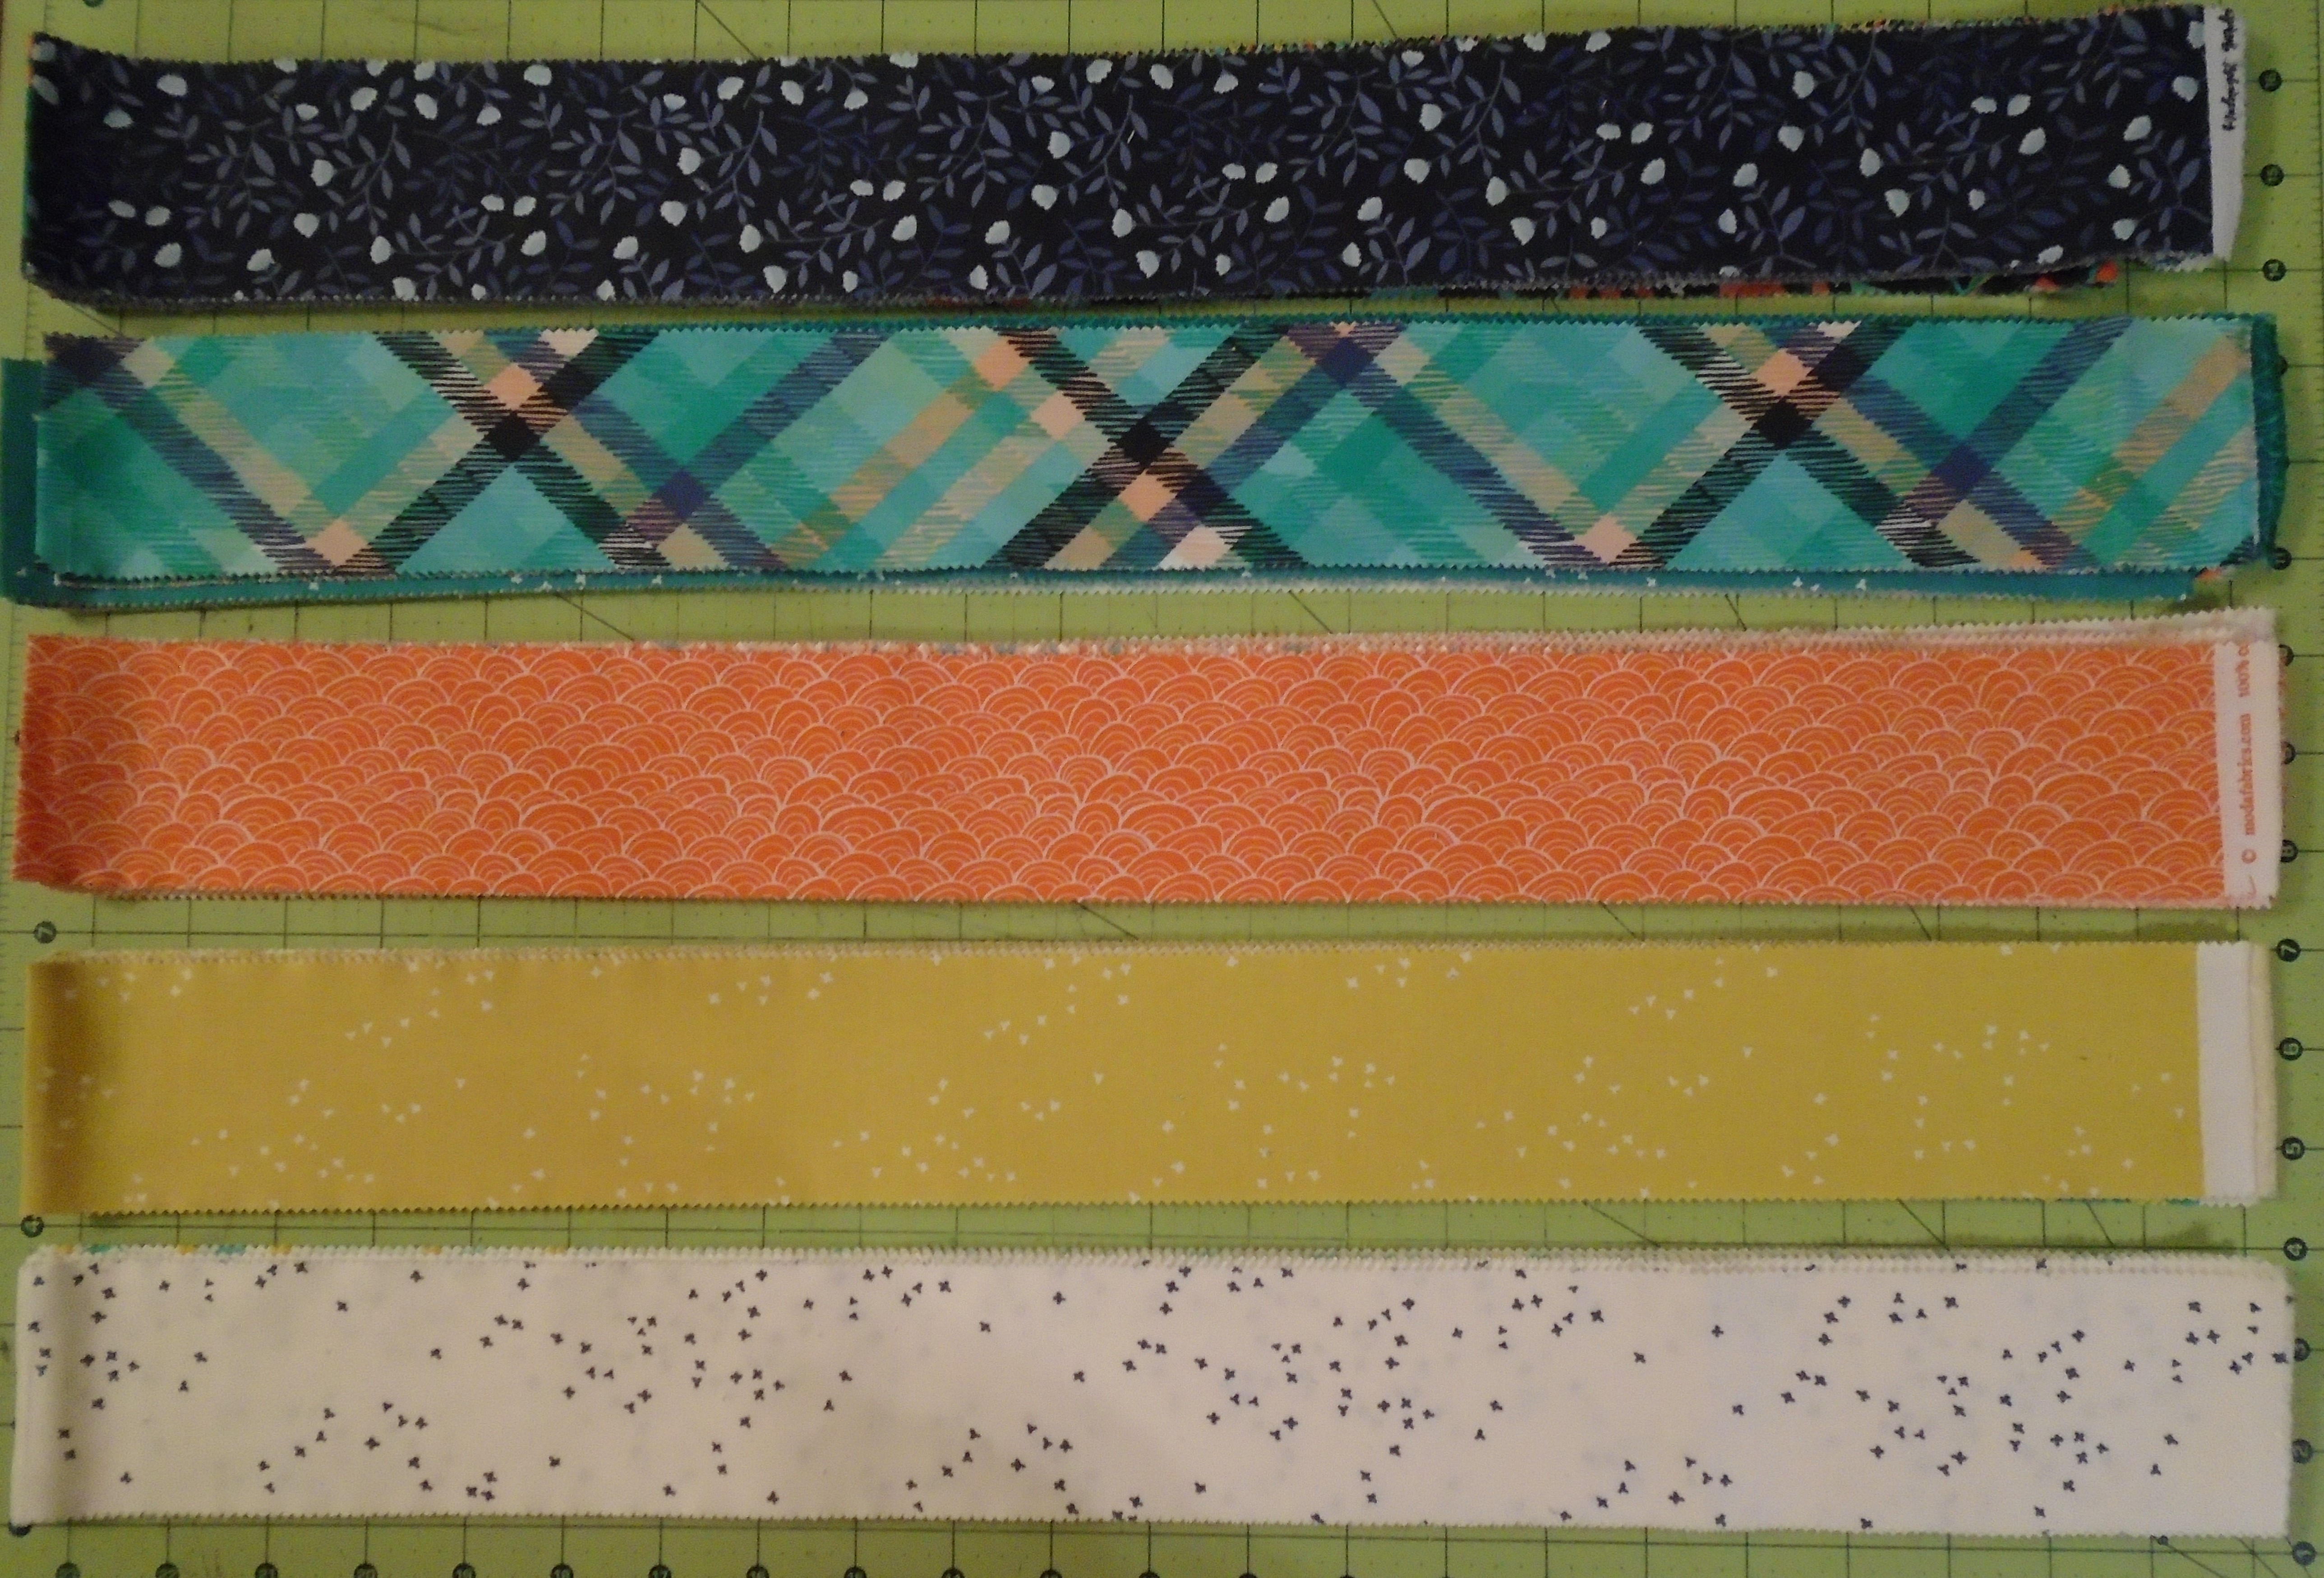
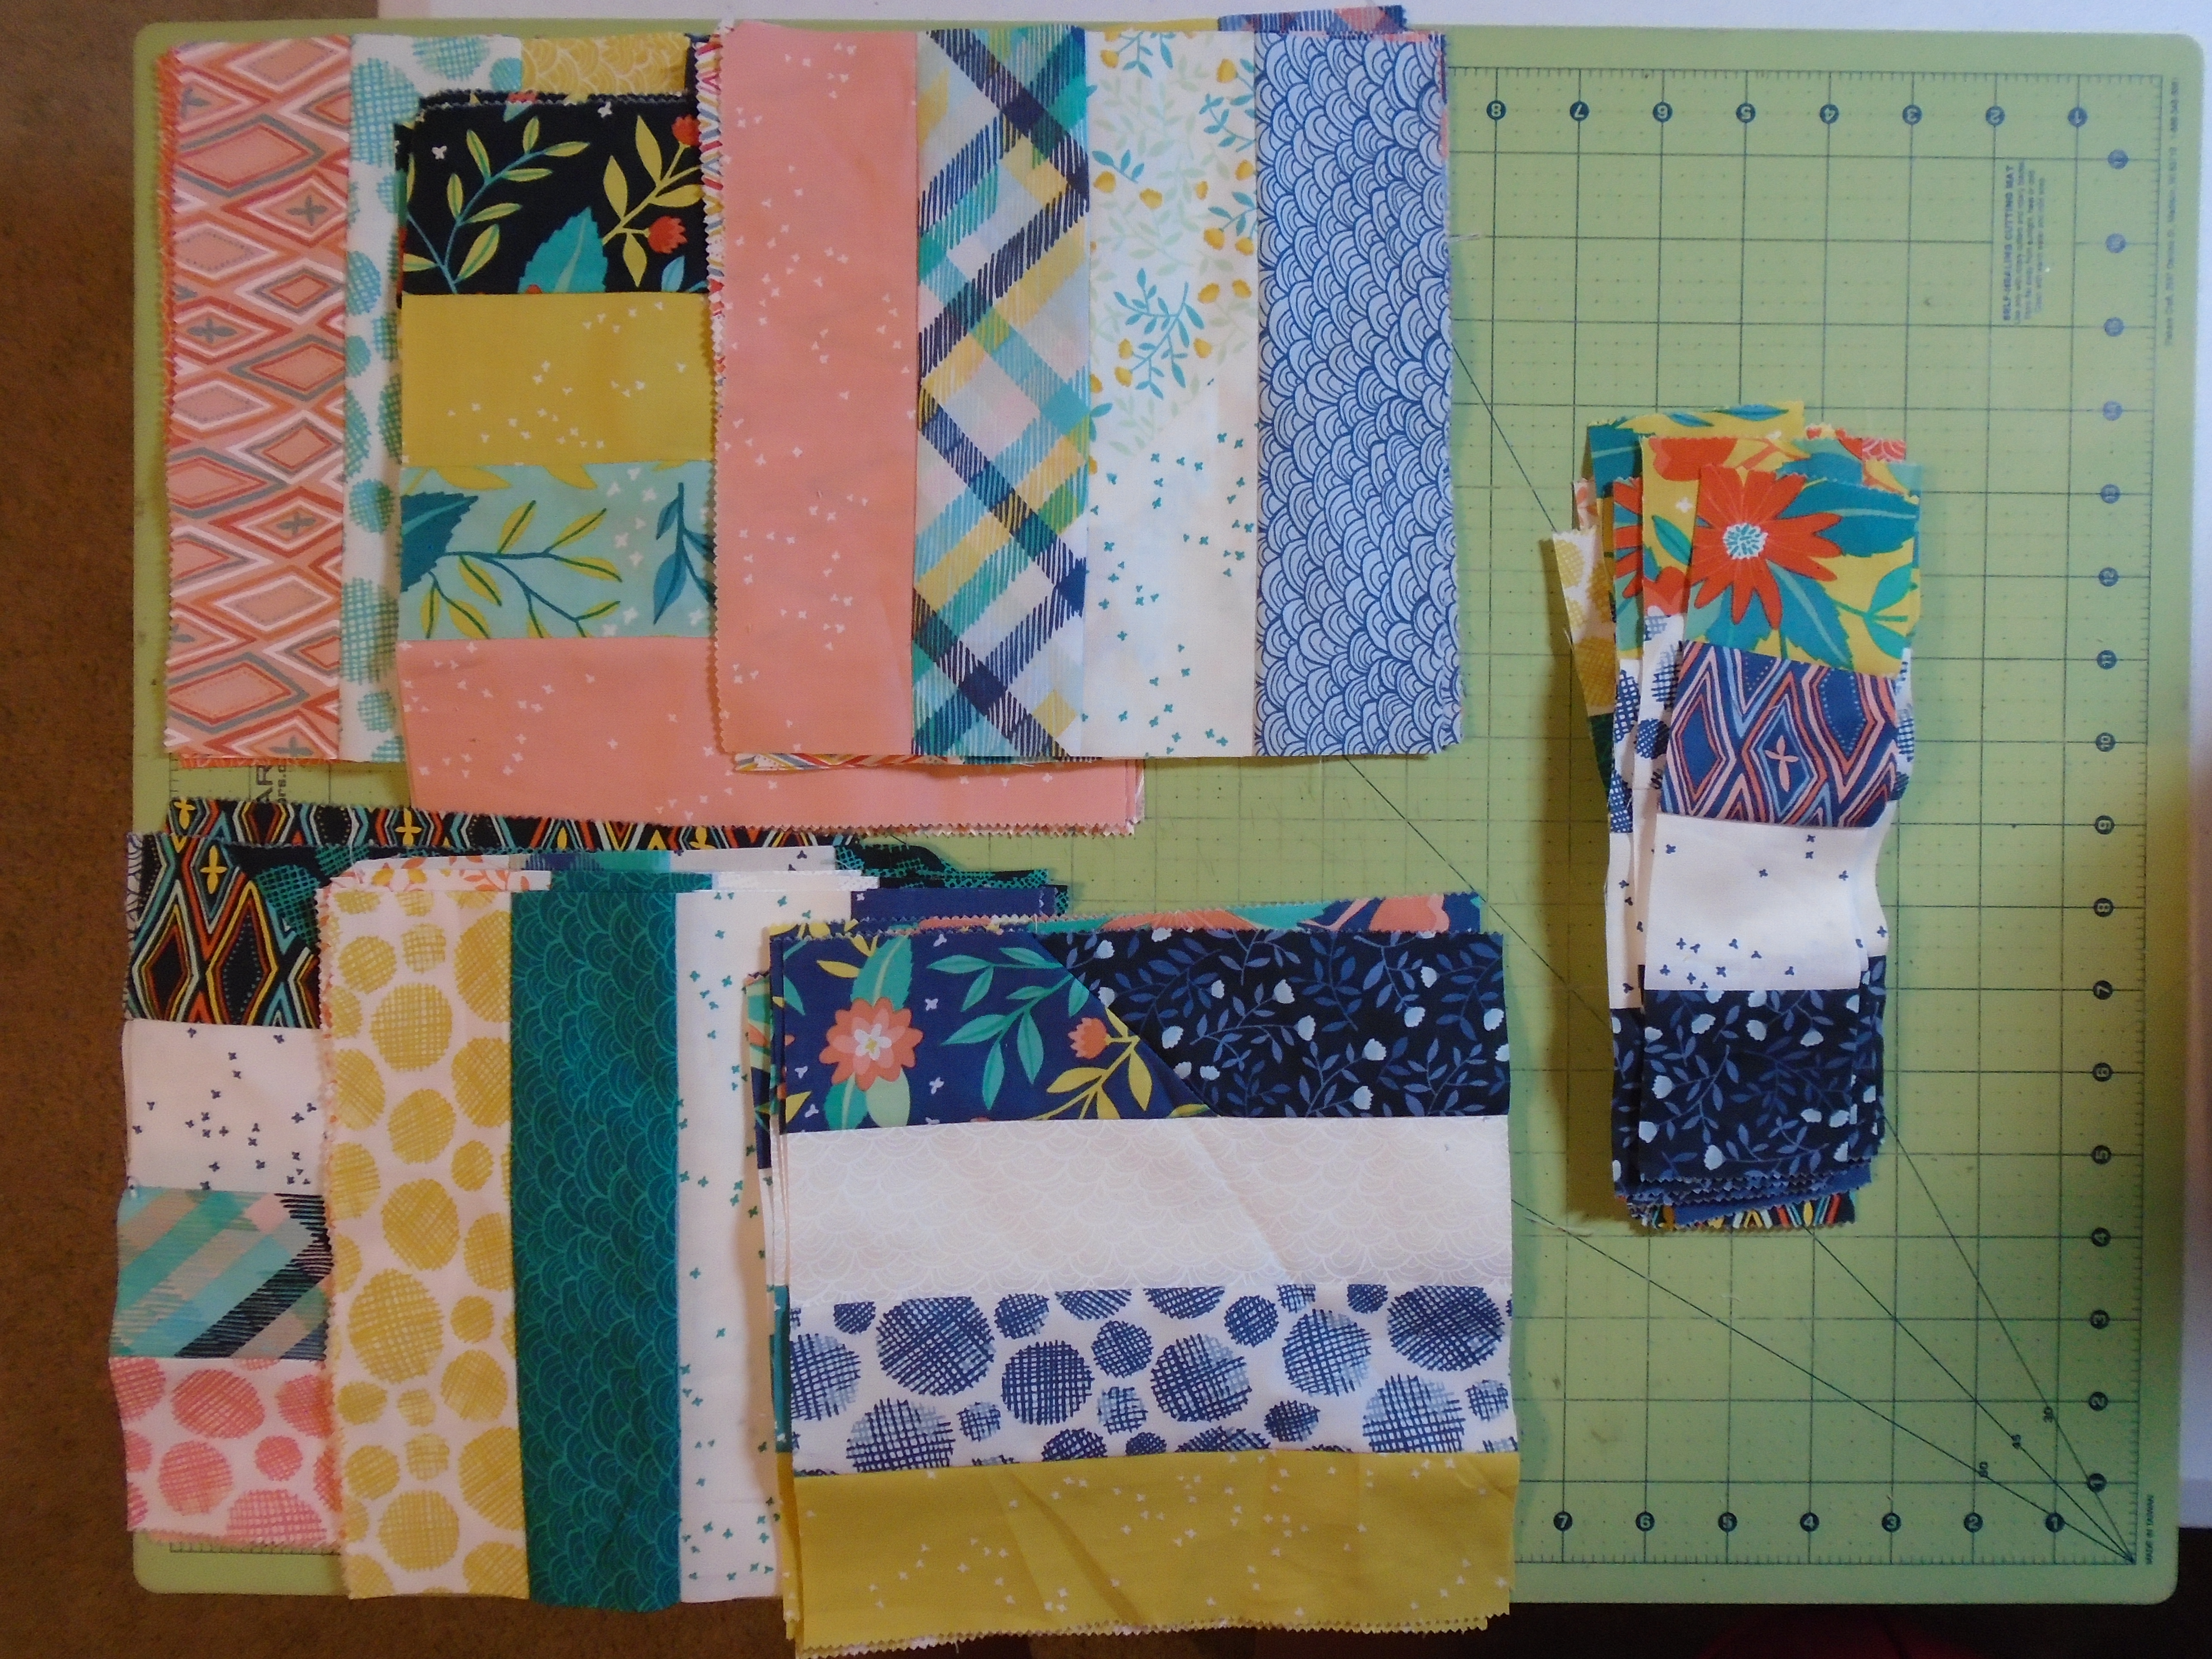
Since we do want a little bit of control over the contrast in the blocks, we won't sew all forty strips into one long continuous strip. I sewed all of the blue and teal fabrics into one long strip and all of the orange, yellow, and white strips into another strip. Sew the strips together as if you were making binding for a gigantic quilt -- sew your strips at a 90 degree angle and press your seams open. I made sure that each strip "blended" with the next strip I added -- for example, the blue strips are from darkest to lightest, with prints that have both blue and teal in the middle, then the teal prints from darkest to lightest. The other strip has the oranges, then yellows, and finally whites sewn in a similar manner.

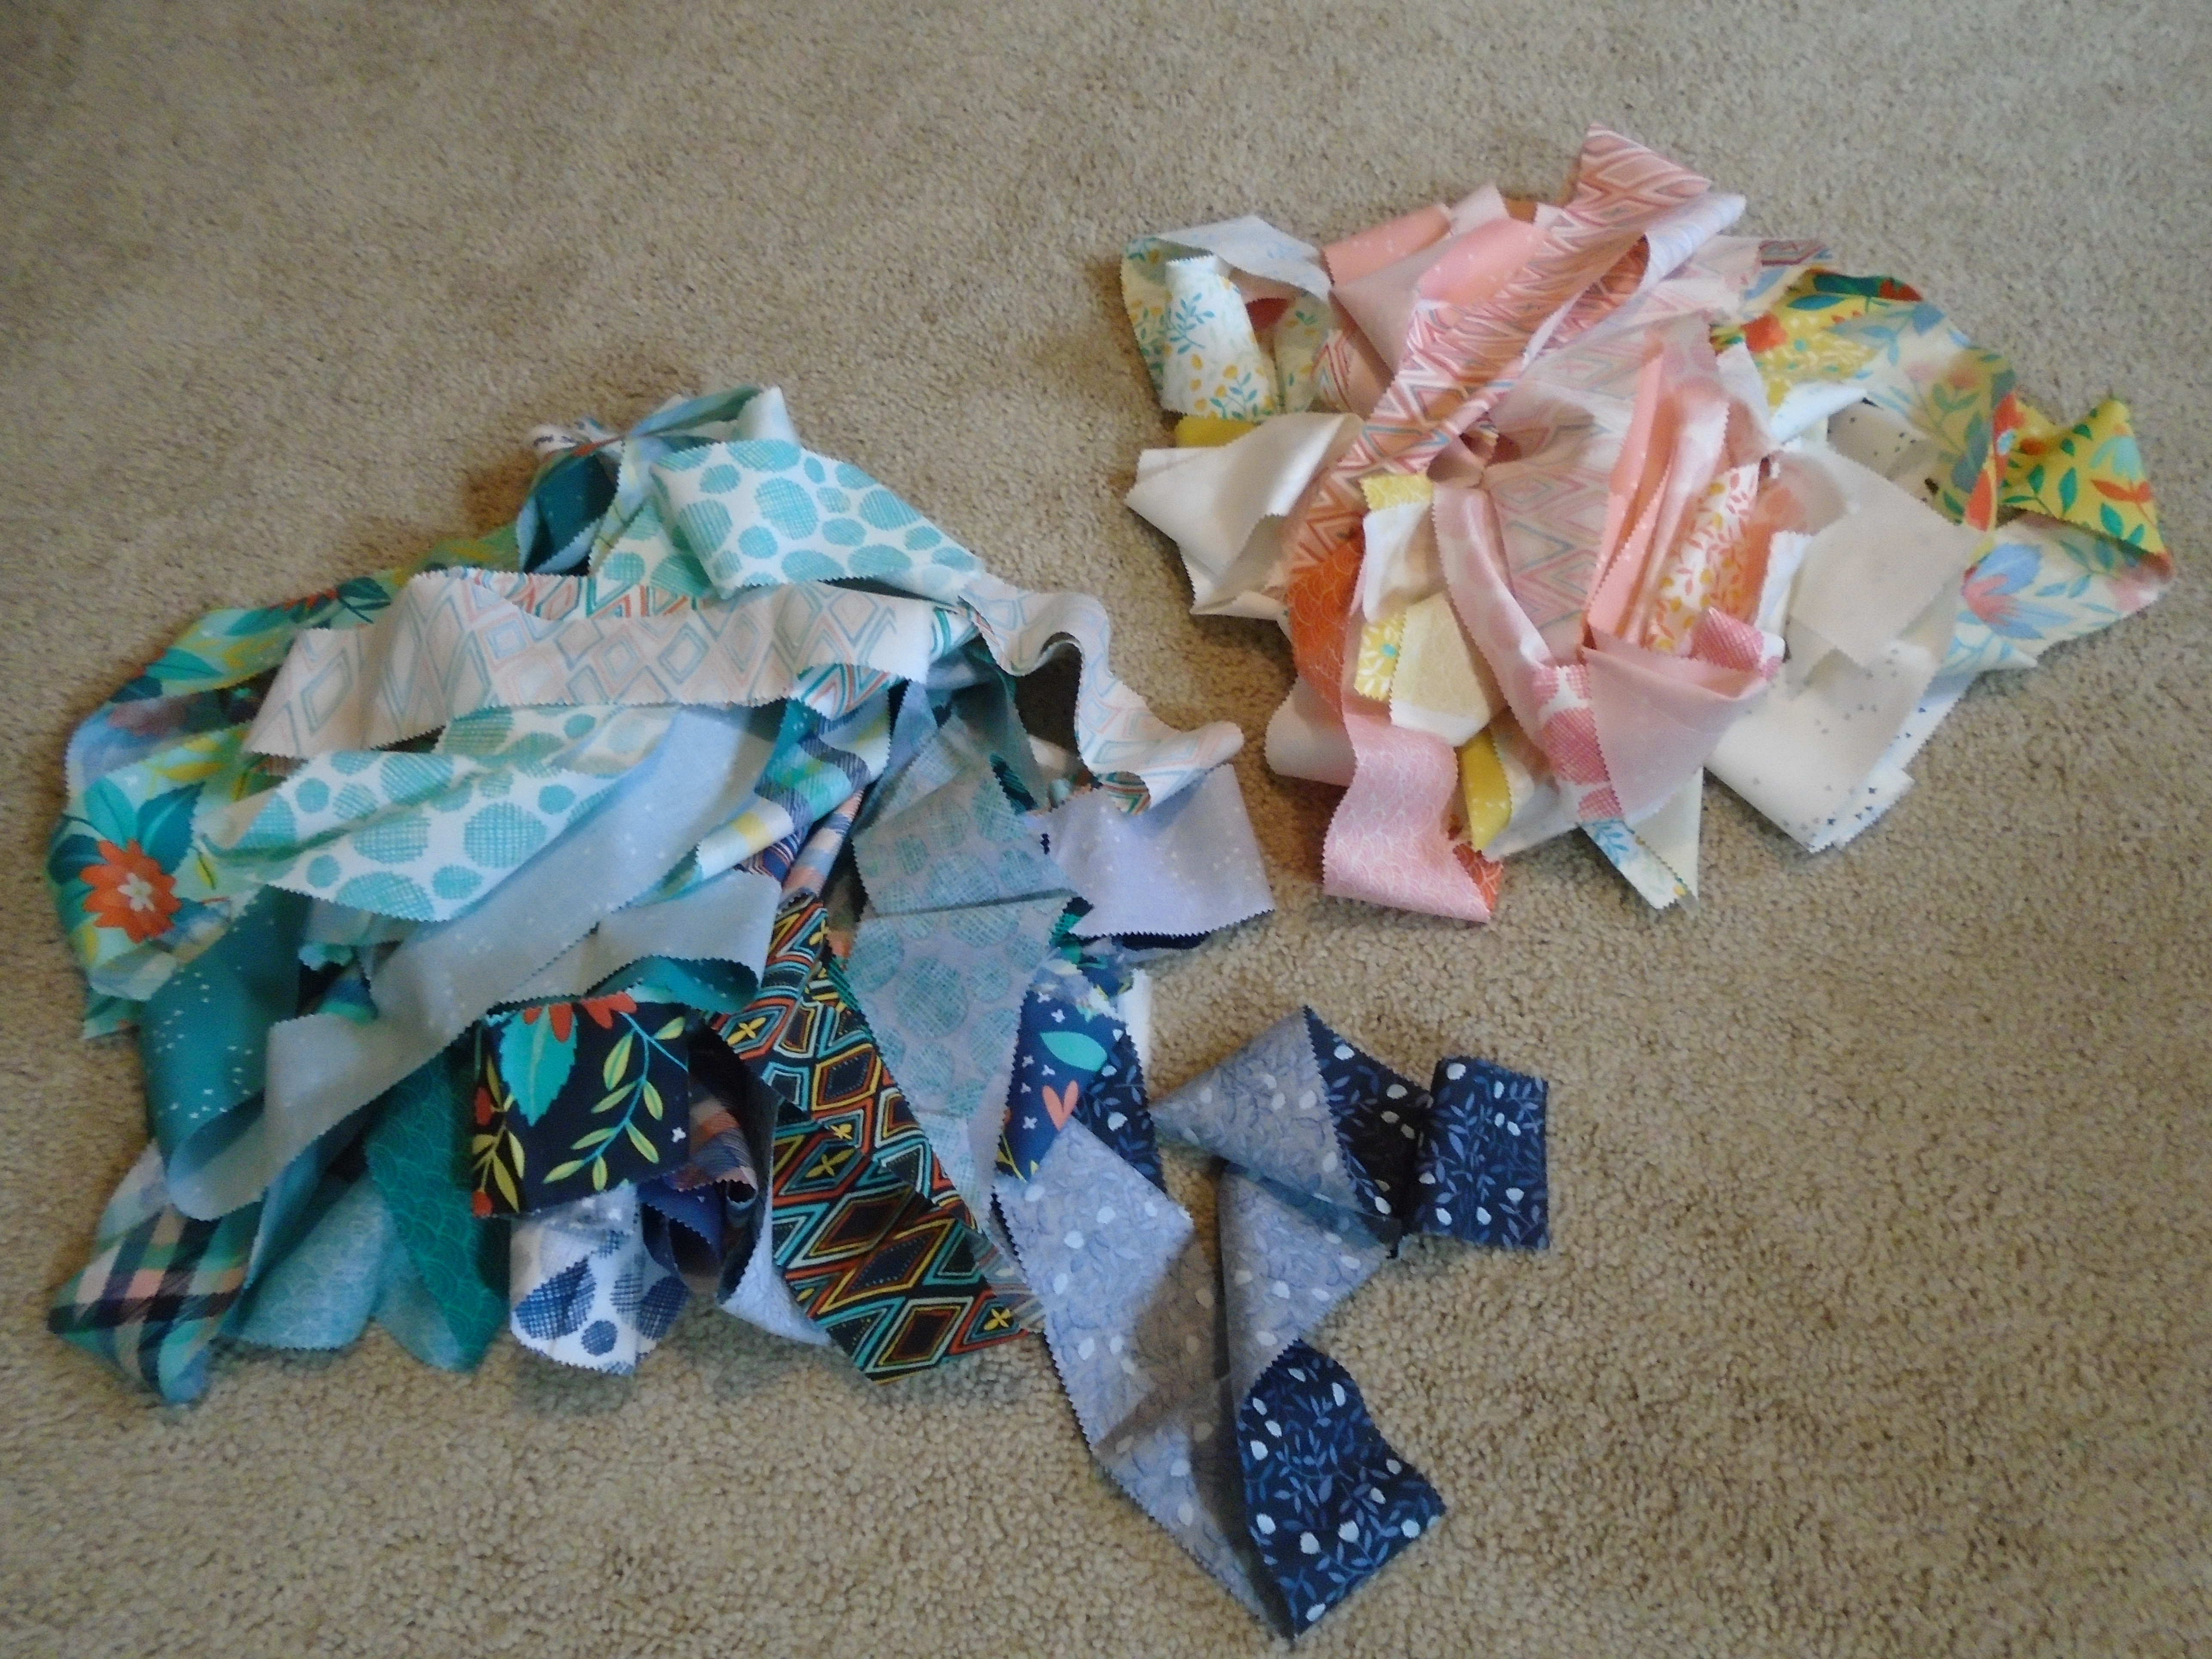
Once you've pressed your two long strips, trim about 10-15 inches off of one of your strips. Sew your strips together in a pair along the long sides and press. The two ends of the paired strip are in the lower left corner of the second picture.


Find the approximate center of your paired strip set and cut in half. Sew your new halves together, maximizing the contrast between the strips you sew together. Your strip set will now be four strips wide (8.5 inches wide) and approximately 32 feet long! Press well, because we are ready to start cutting blocks!
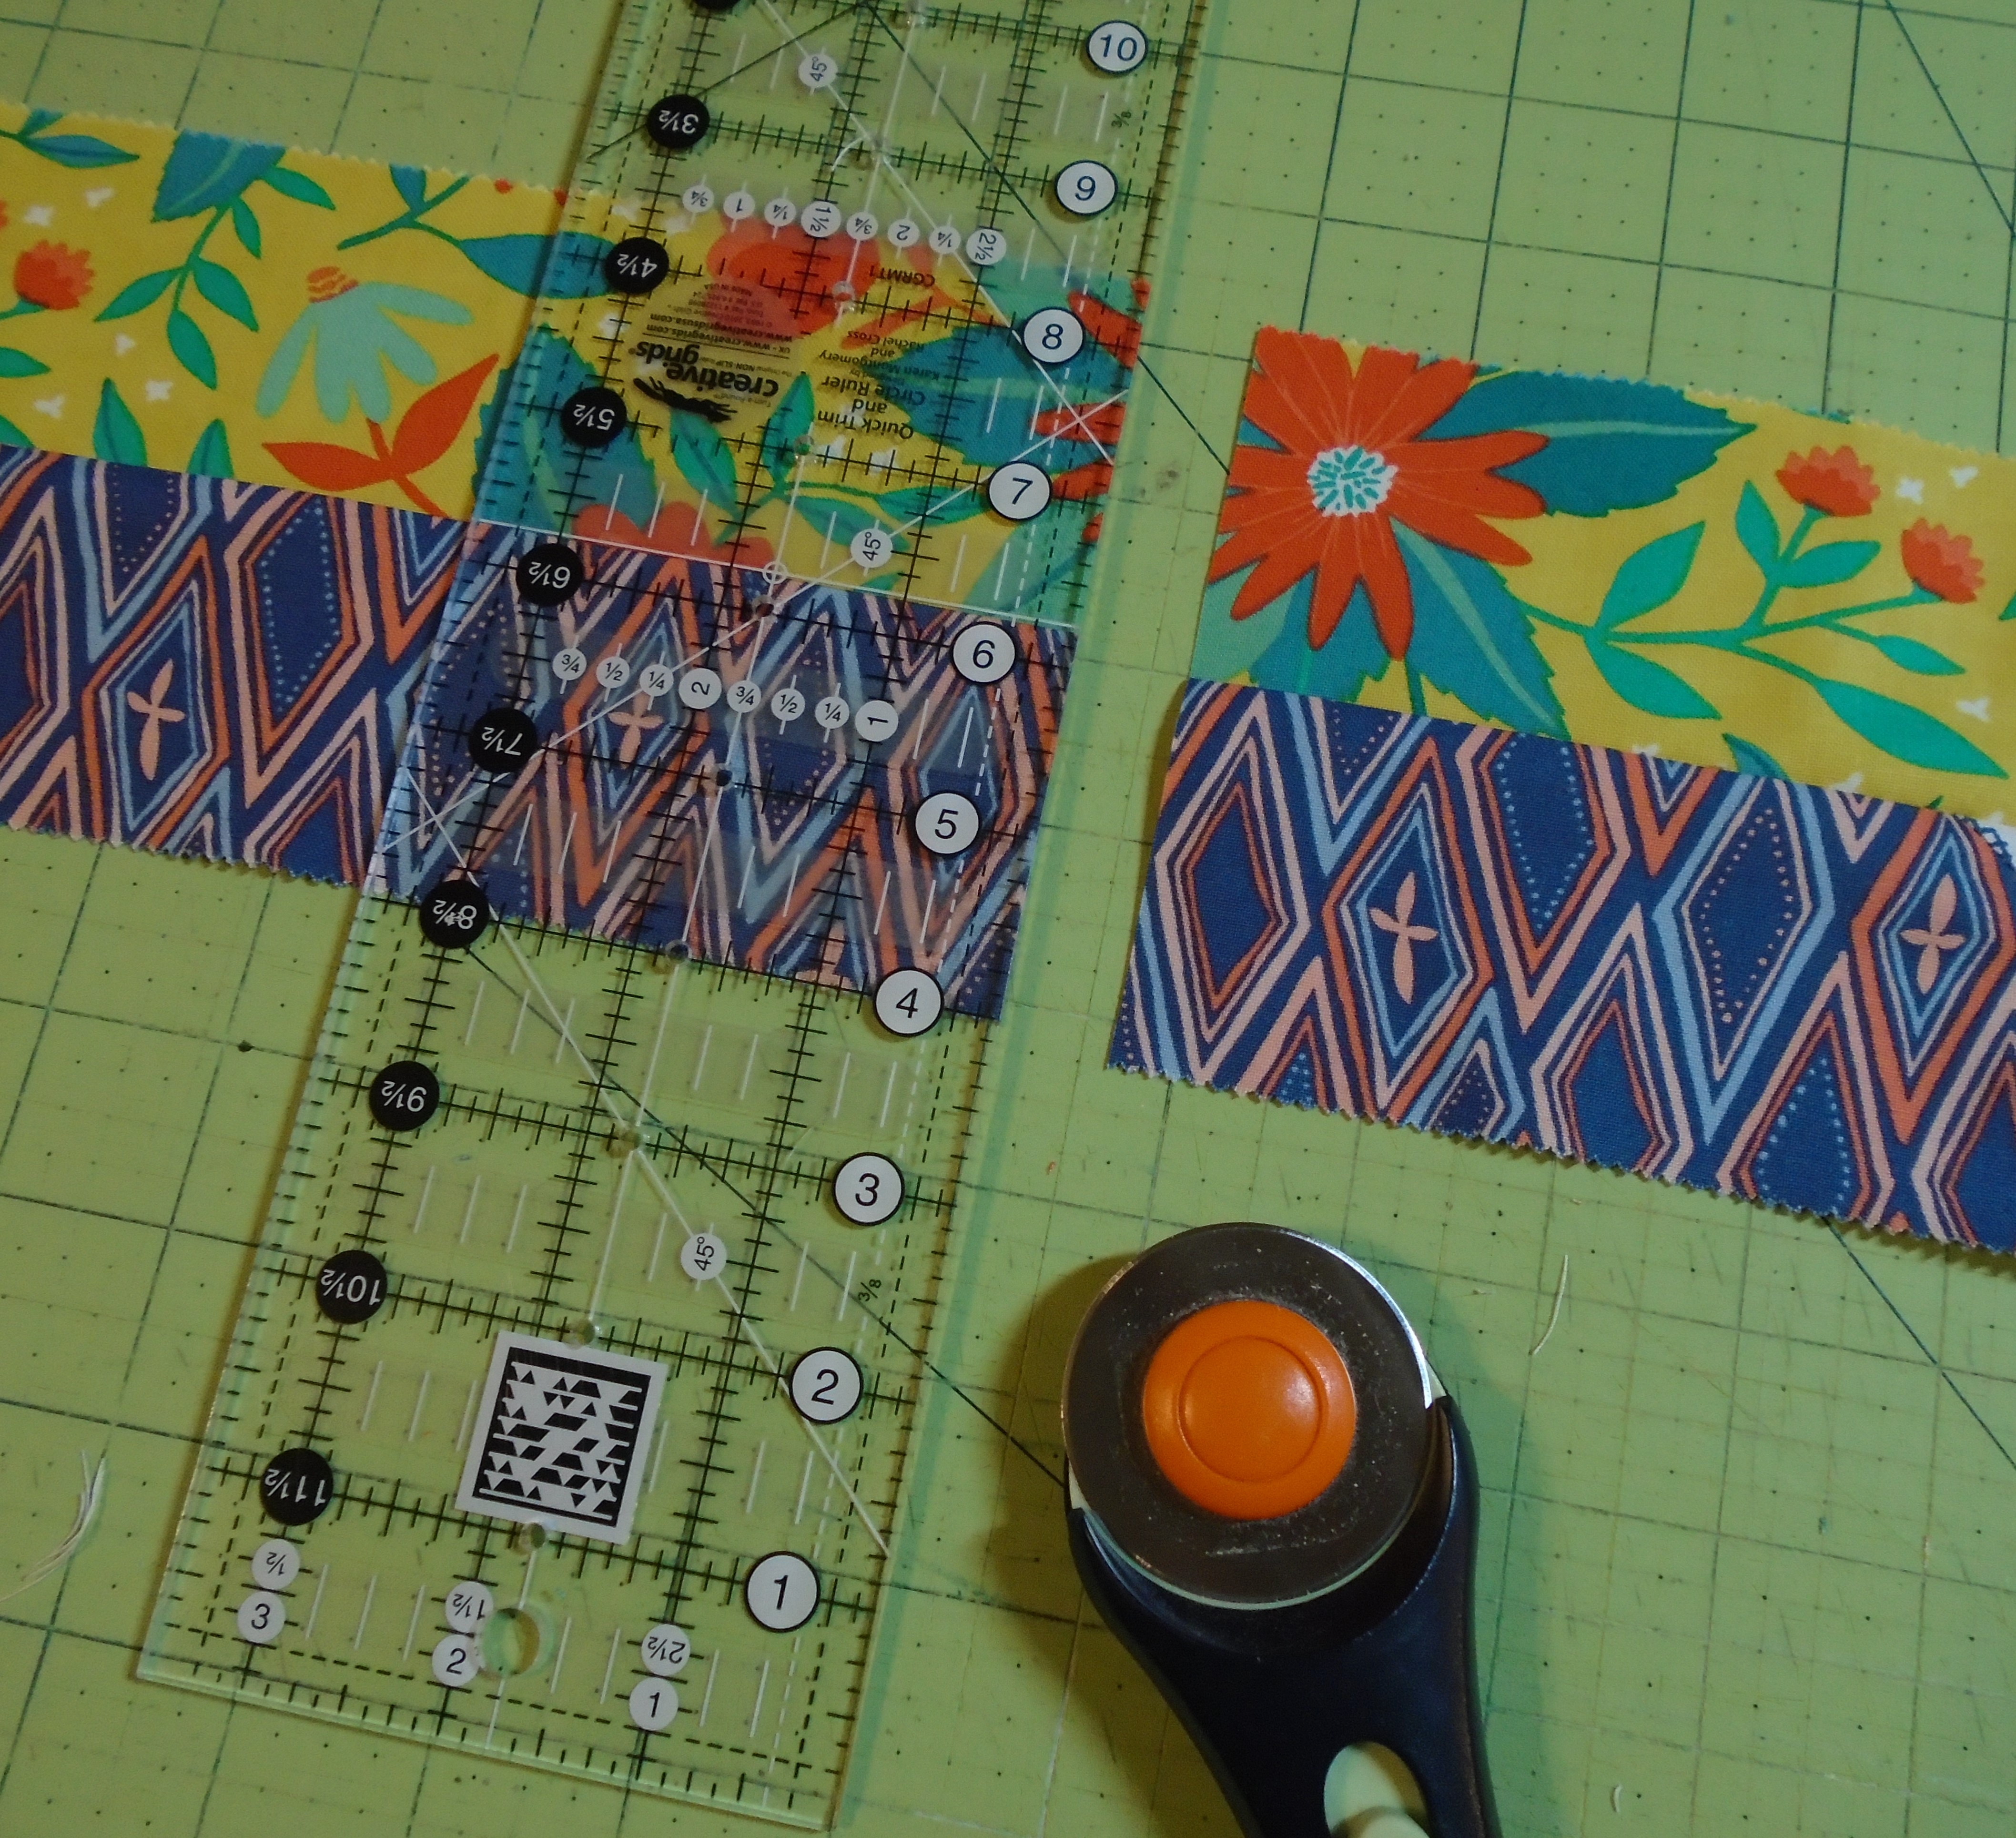


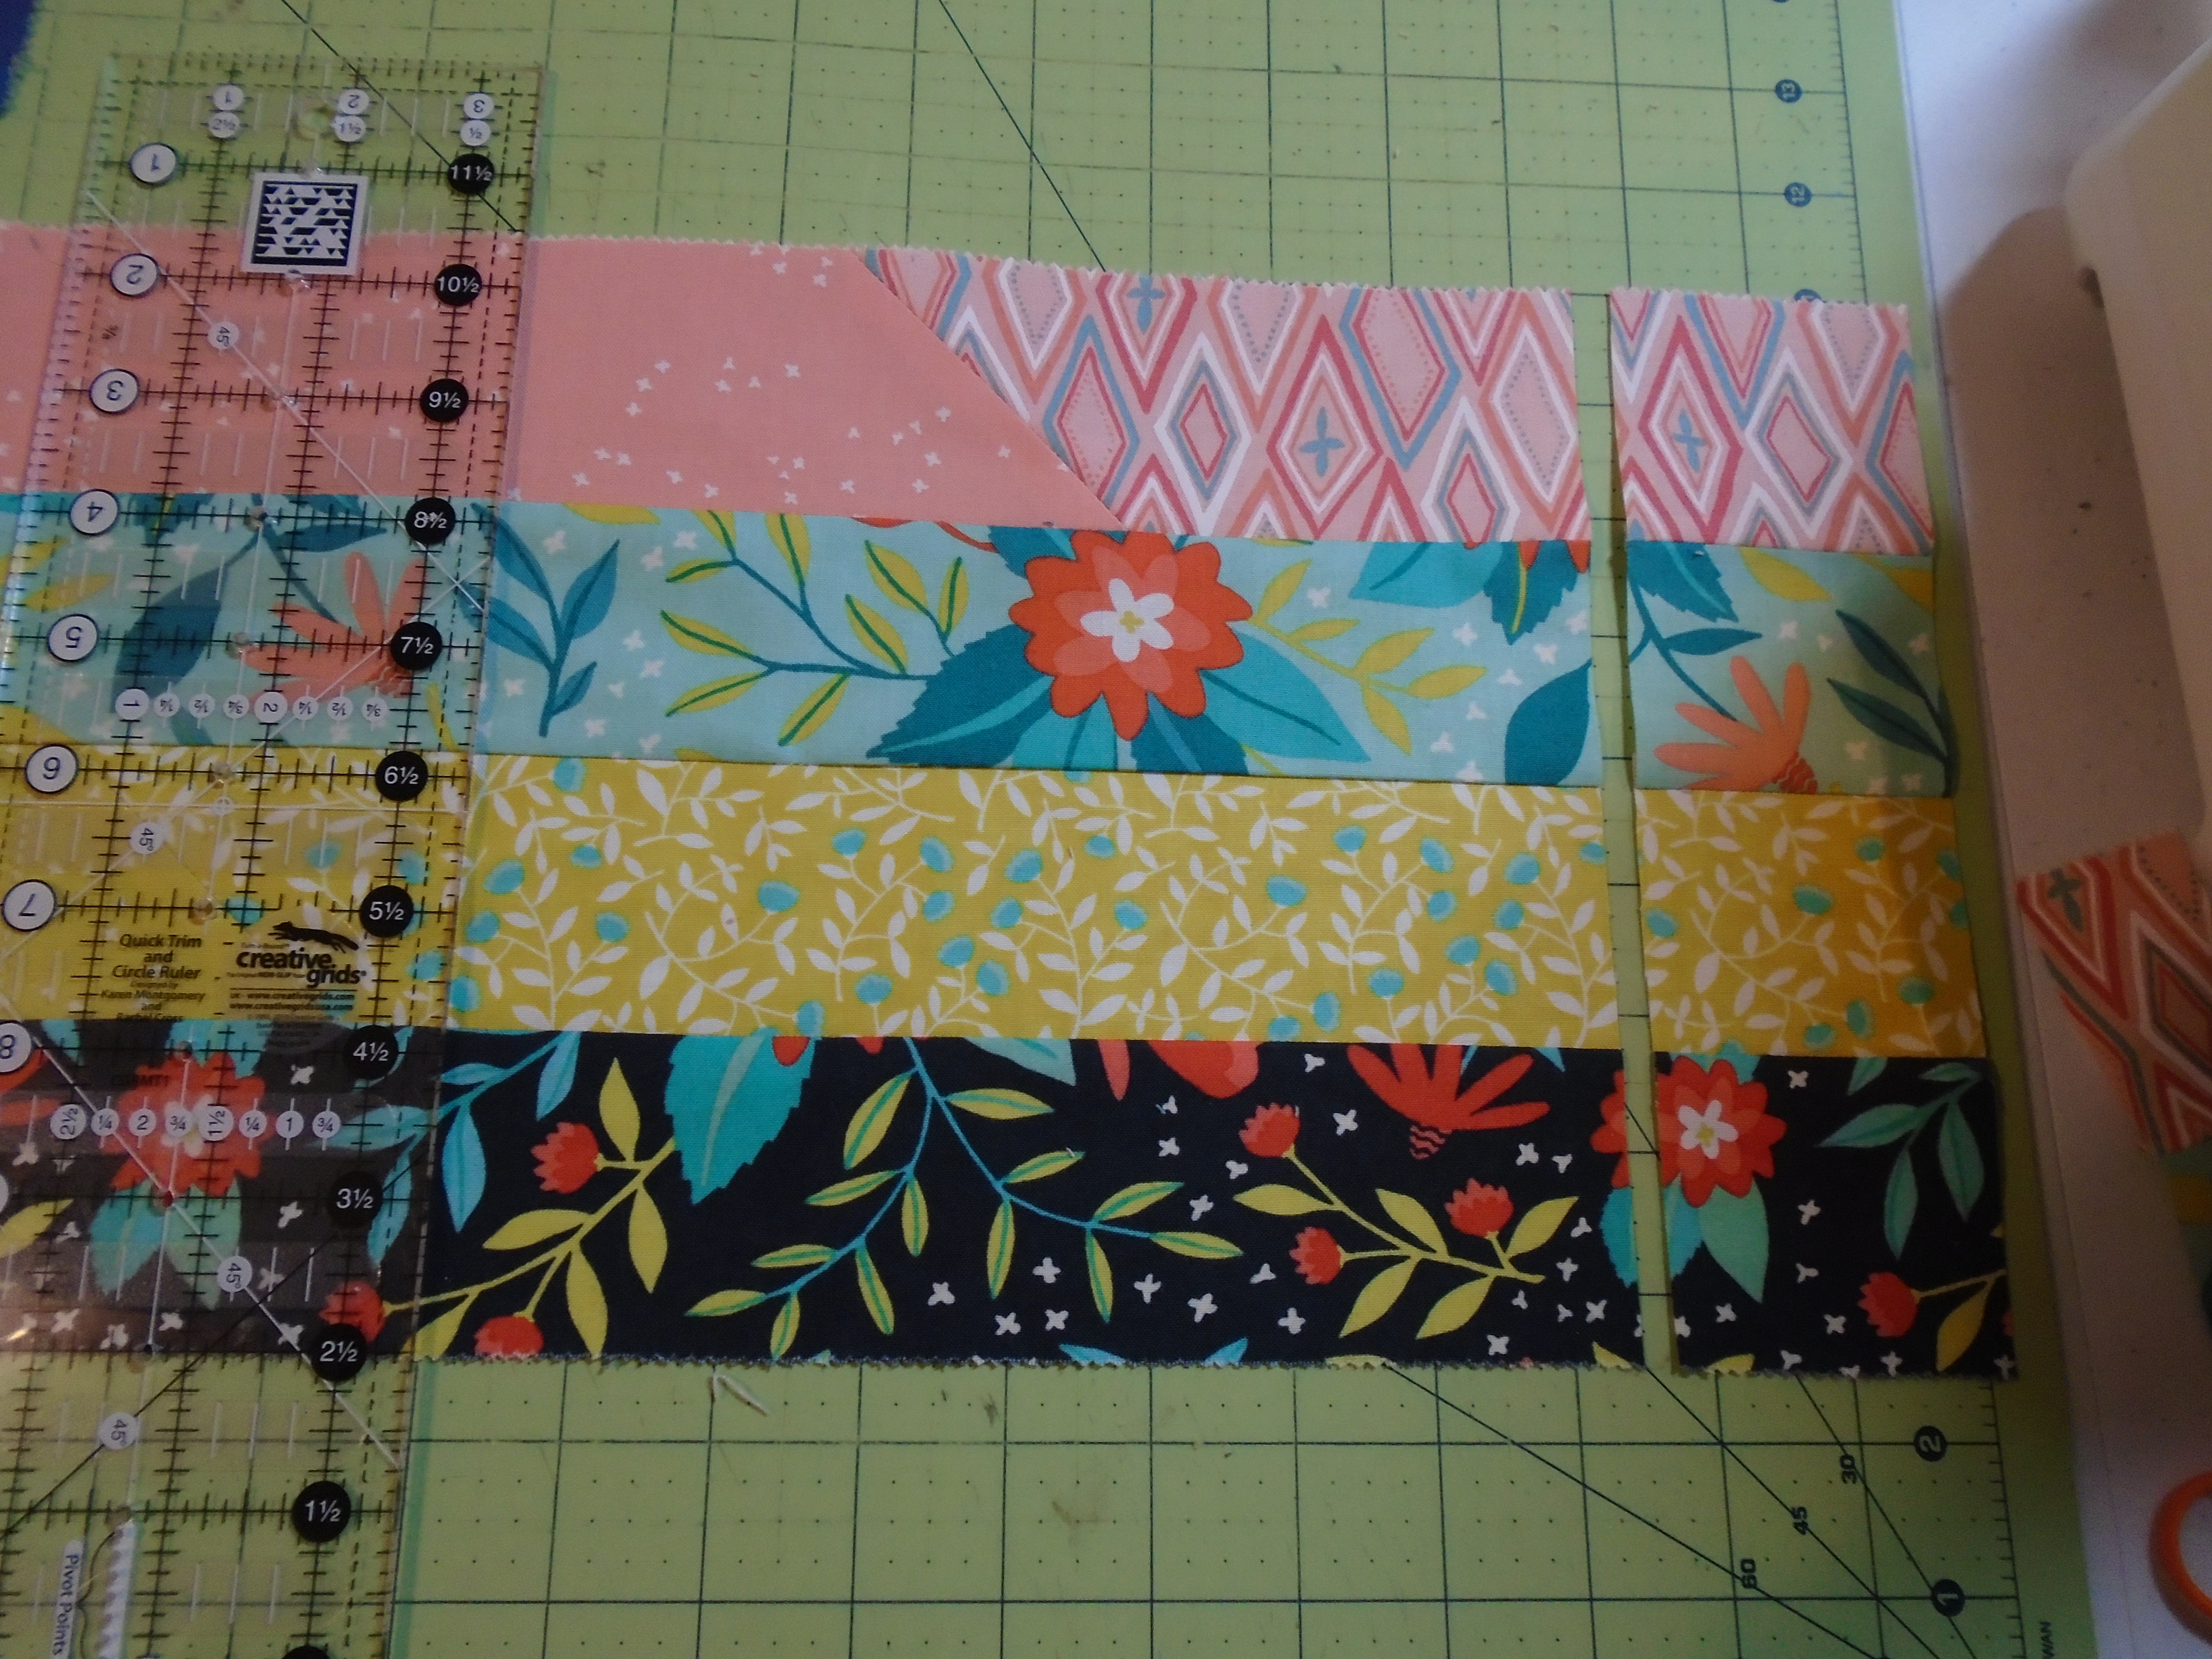
Pick one end of your extra long strip set to start cutting blocks. Trim a straight edge. You will need to cut a total of thirty six (36) 8.5 inch square blocks as well as twenty seven (27) 2.5 inch by 8.5 inch strips from your strip set. You want to make sure that your diagonal seams -- where you connected your strips -- are contained within the 8.5 inch blocks rather than cut through or in the 2.5 inch by 8.5 inch strips.

The following picture is a good example of cutting a 2.5 inch strip to make sure the diagonal seam is contained in the 8.5 inch block. For the most part, you should try to alternate between cutting strips and squares, but cut however works best for your blocks so that you end up with the correct number of blocks and strips. You should also have plenty of wiggle room to trim the "starting edge" of your strip set so that it is always perpendicular to the seams of the strip set.
For now, set your 2.5 inch by 8.5 inch strips aside until you are ready to assemble your border.
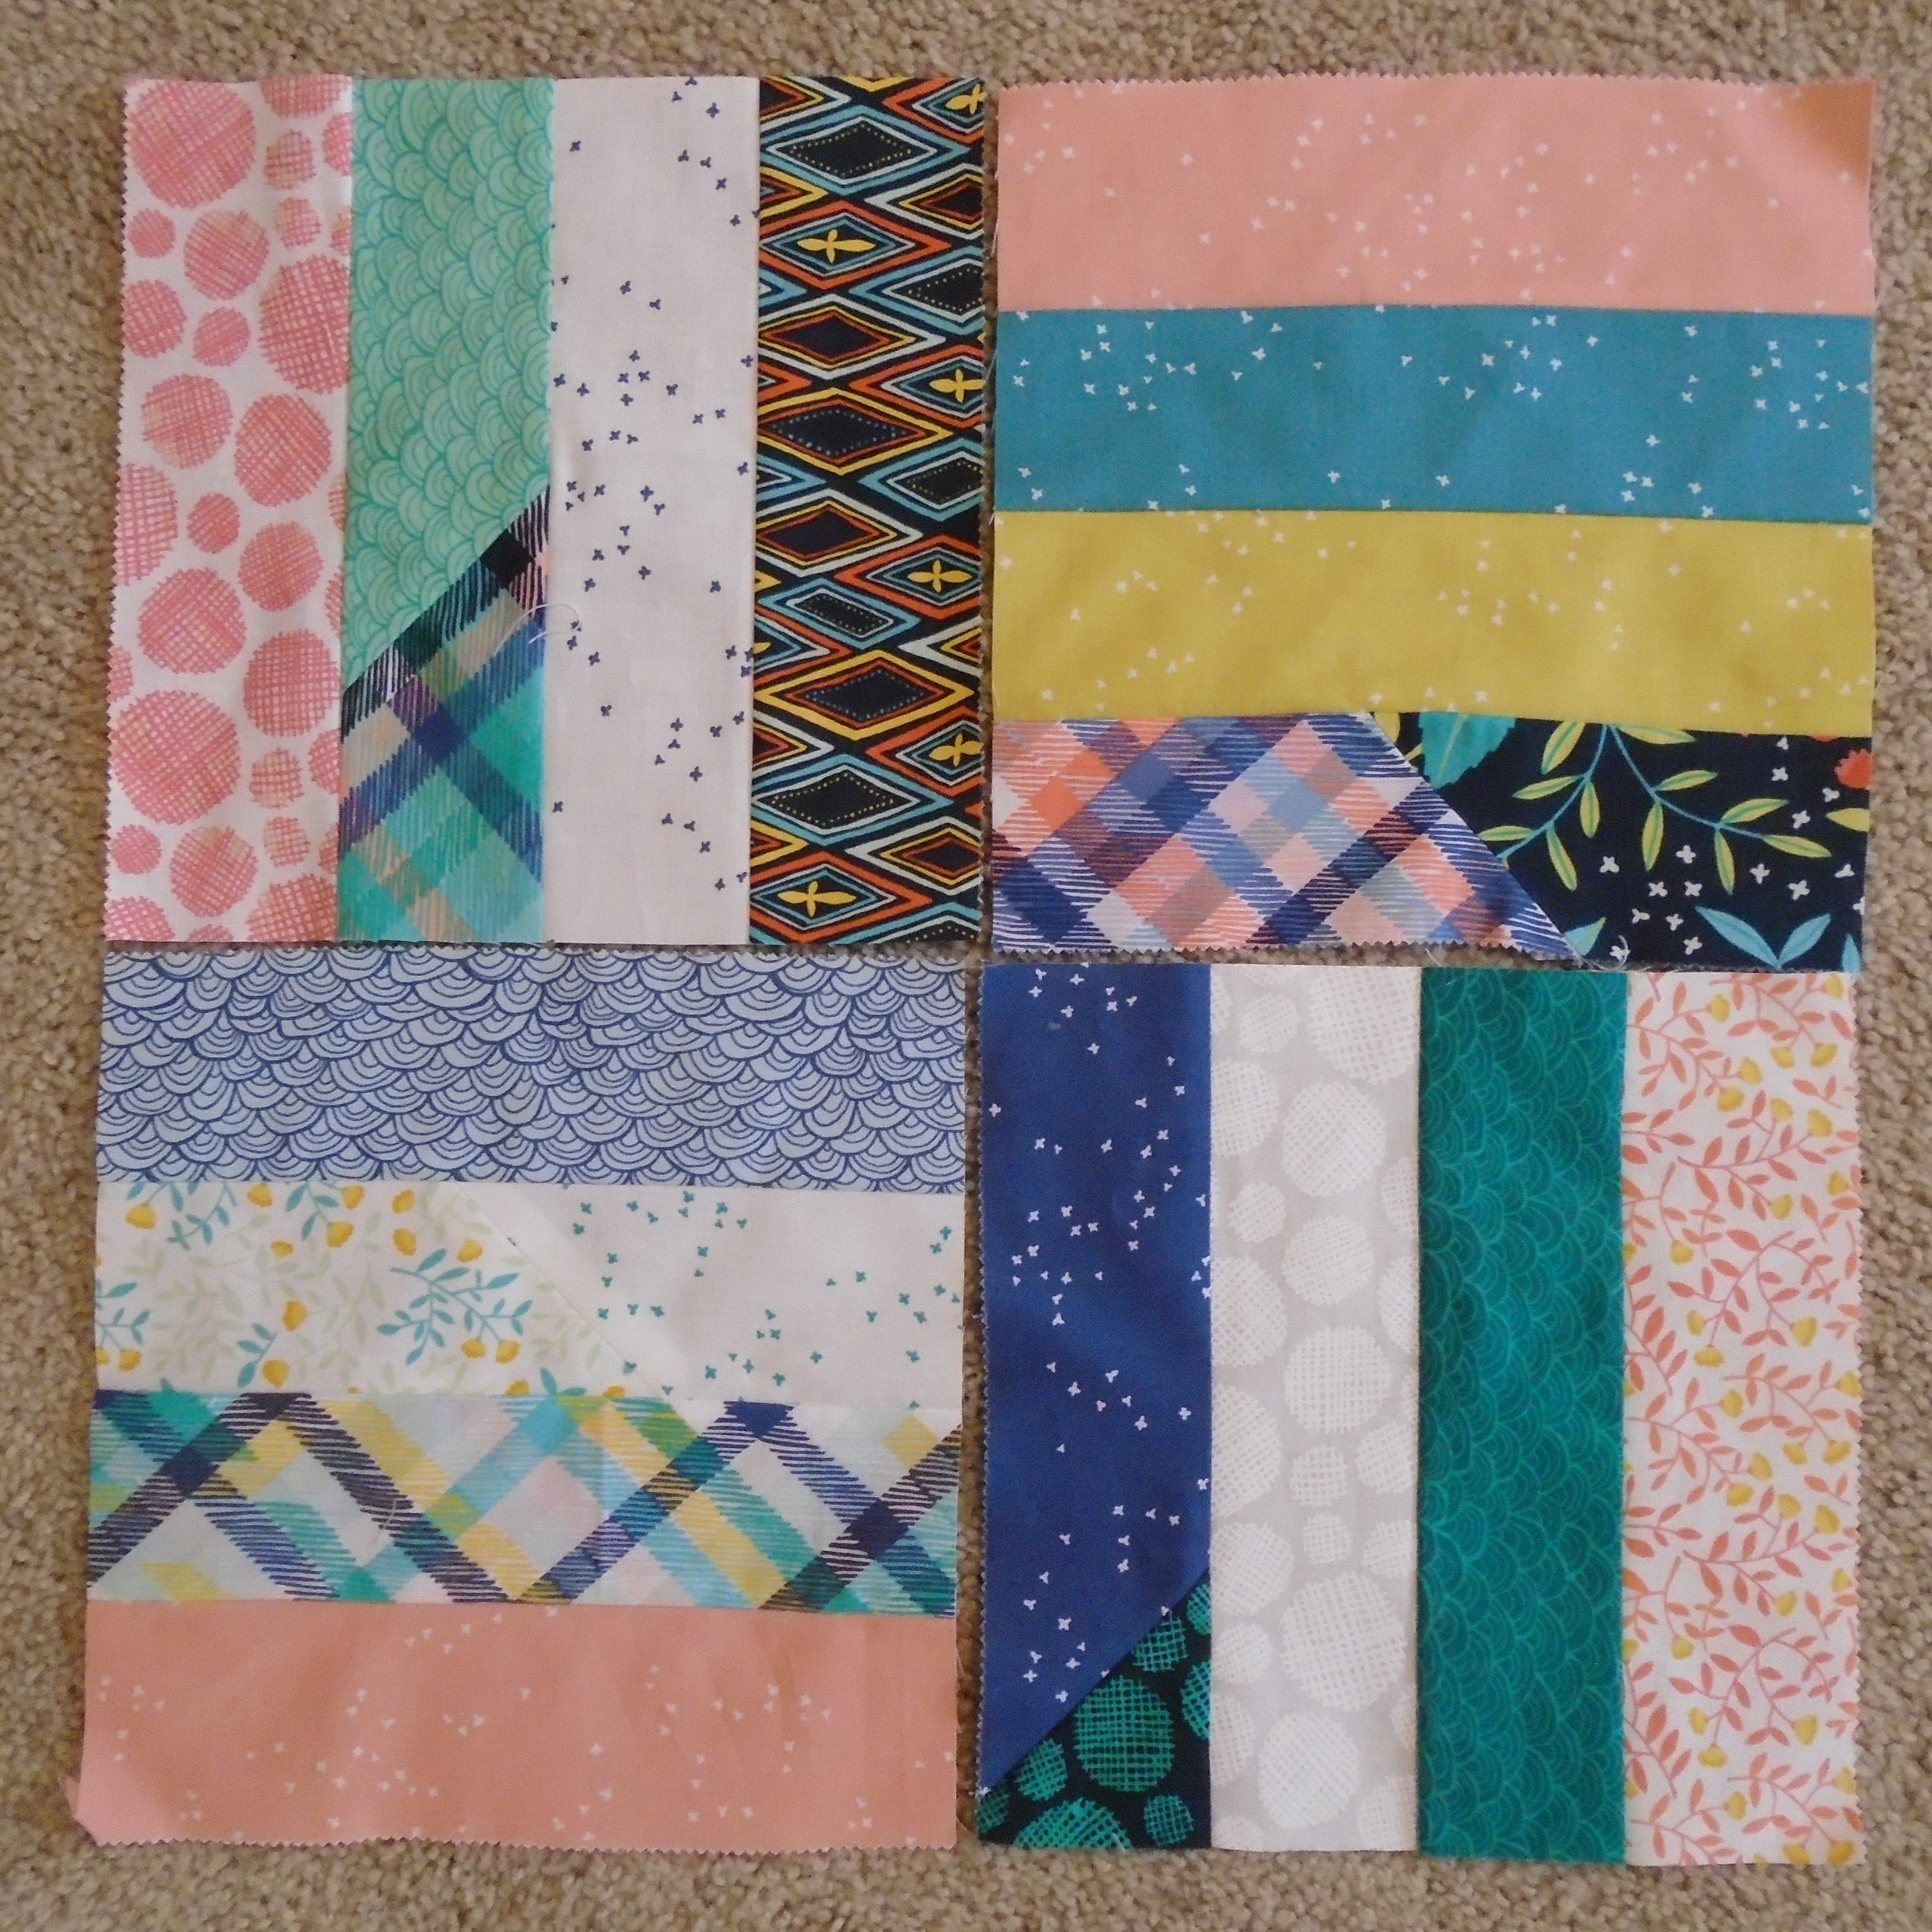
Sew together your rail fence blocks in groups of four - nine sets total - to get the "pinwheel" effect, each block has a dark blue strip facing the center of the block.
Lay out your rail fence units in a three by three arrangement for the center of your quilt top. The center of your quilt top should measure 48.5 inches square.

Now we need to pull out our border fabric and cut it into strips. Cut six (6) 2.5 inch x WOF strips and cut seven (7) 4.5 inch x WOF strips. You will need to piece each border by joining strips. The first border is the 2.5 inch border from the border fabric -- you will need two strips 48.5 inches long for the "sides" and two strips 52.5 inches long for the "top and bottom". Next we will add our pieced scrappy border. For the sides, join 6 of your 2.5 inch x 8.5 inch strips end to end and add two extra 2.5 inch squares (each side strip should have 26 square pieces total). For the top and bottom, join 7 of your 2.5 inch x 8.5 inch strips end to end (each top/bottom strip should have 28 square pieces total). Your quilt top should now measure 56.5 inches square.

Now add your 4.5 inch border strips. Your side strips will measure 56.5 inches long, and your top and bottom strips will measure 64.5 inches long.
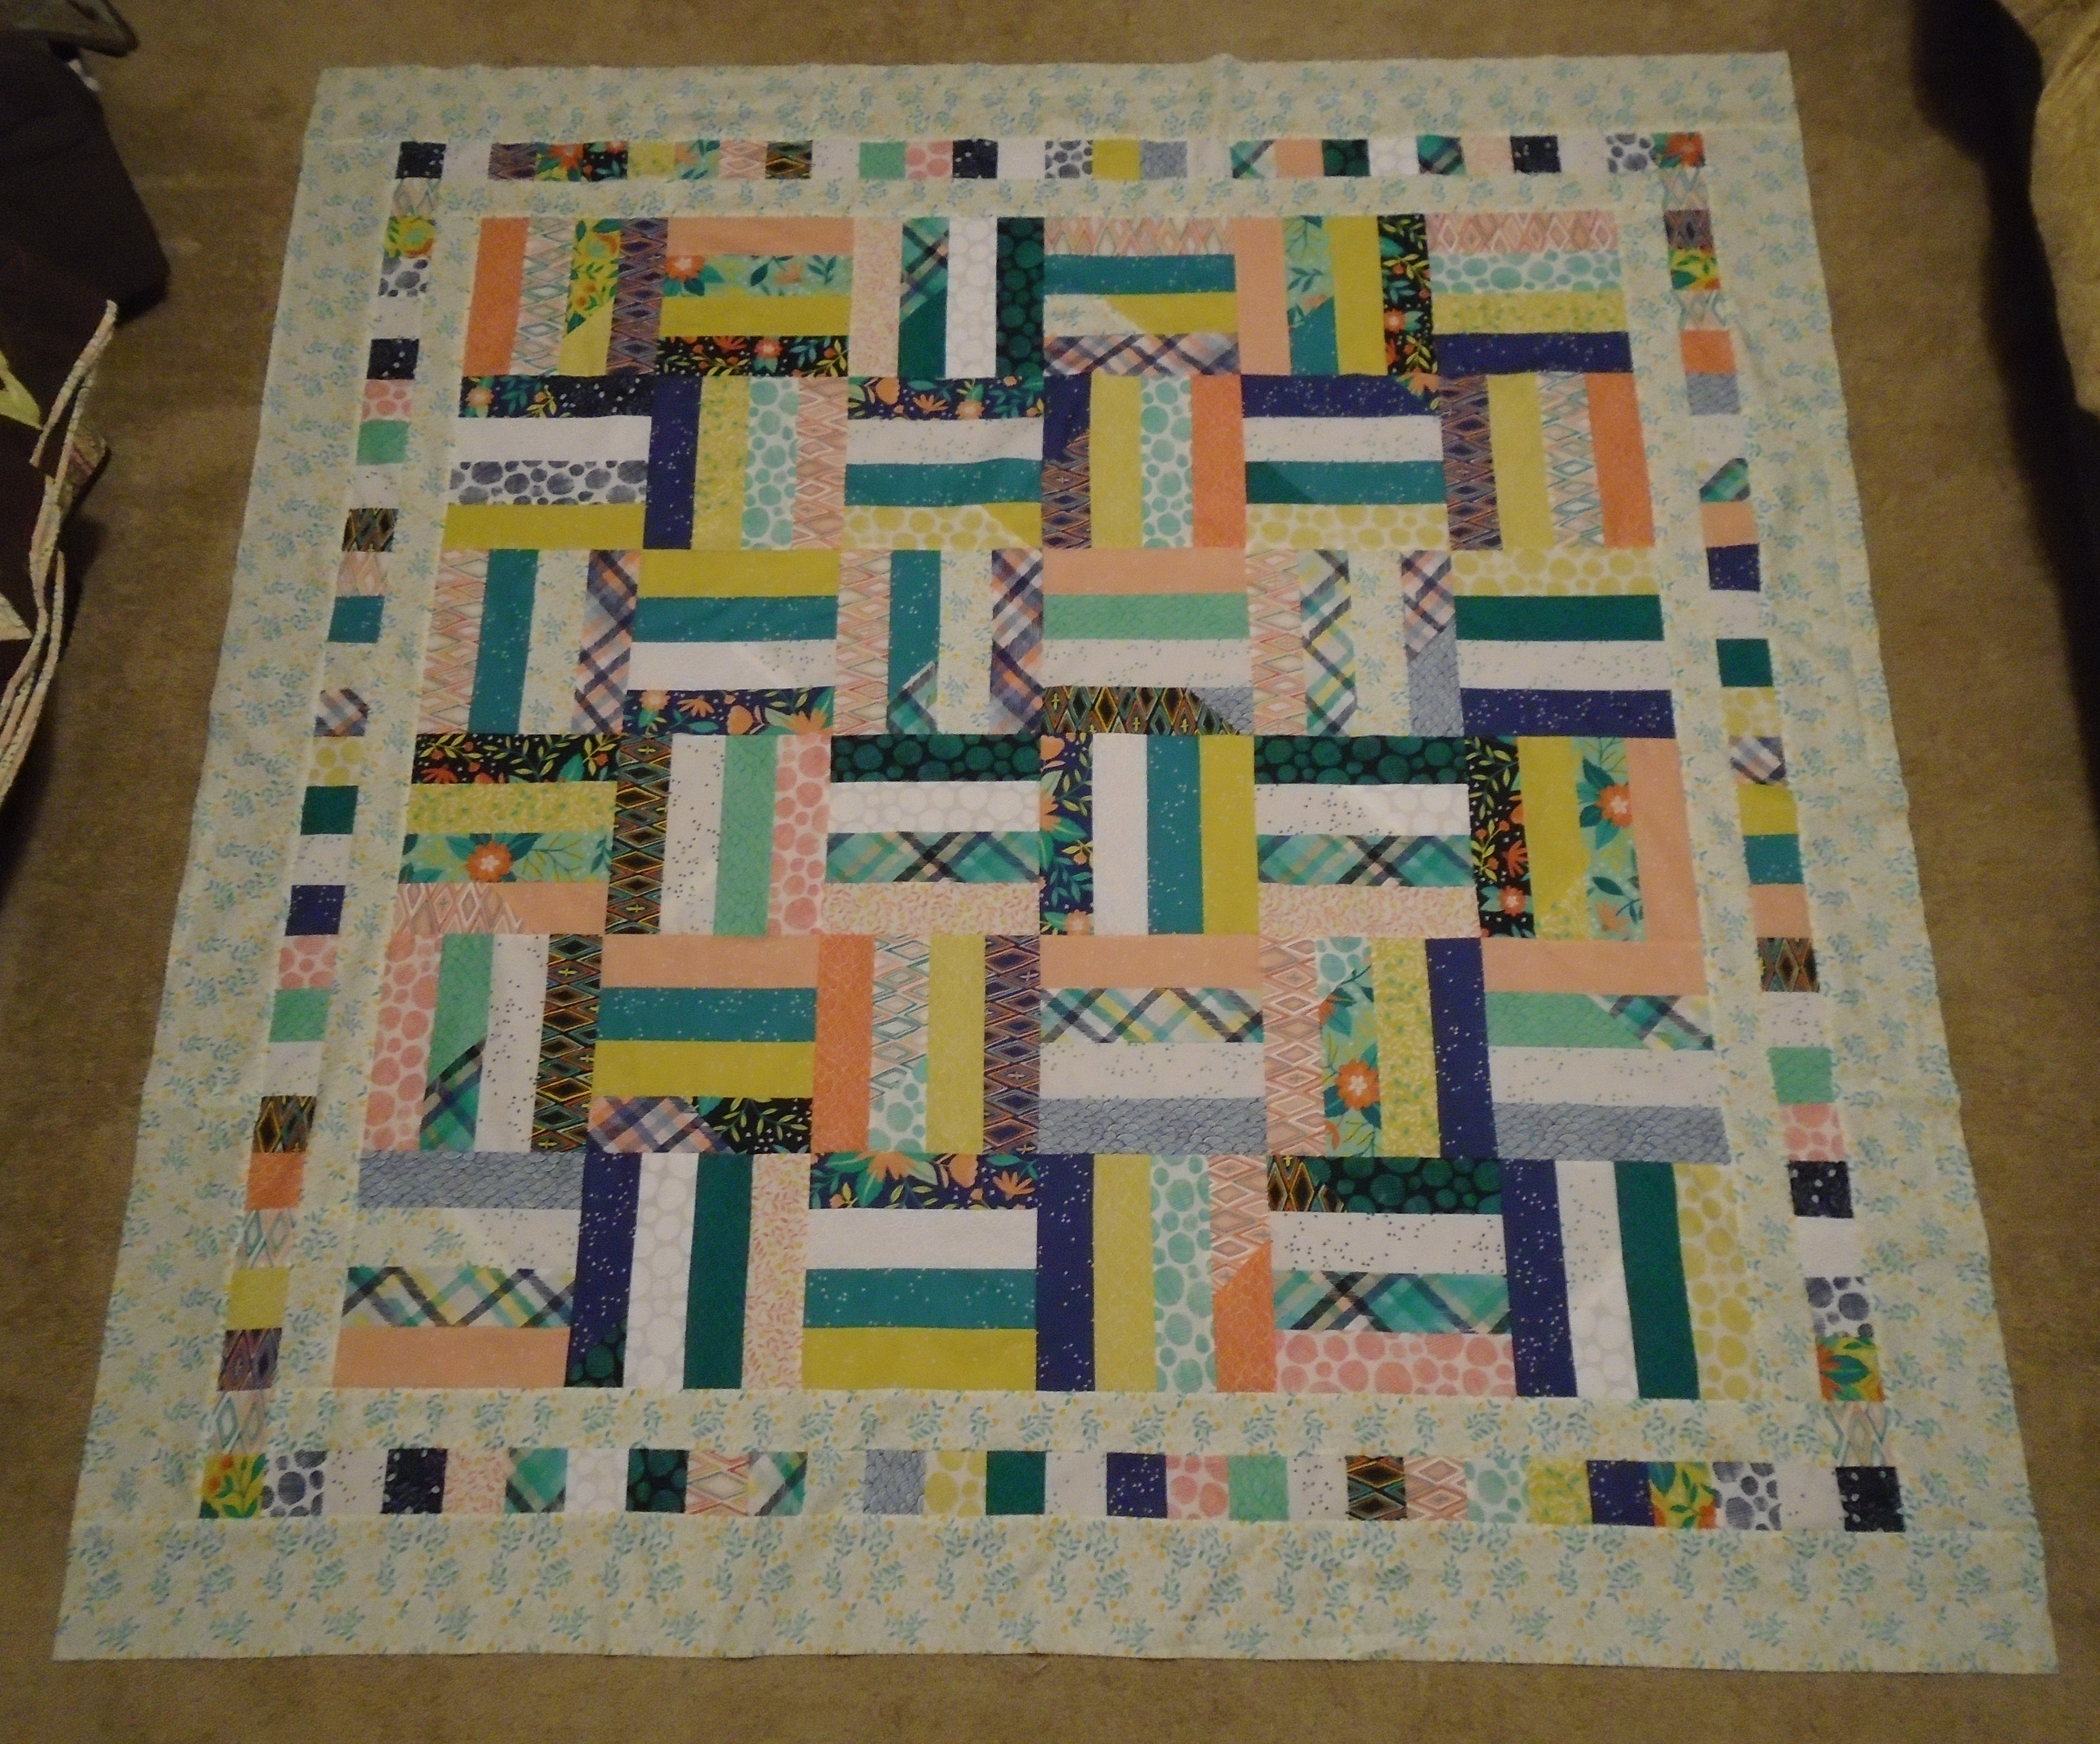
Your quilt top is now ready to quilt and bind! I used the navy plaid print for both my backing and my binding.

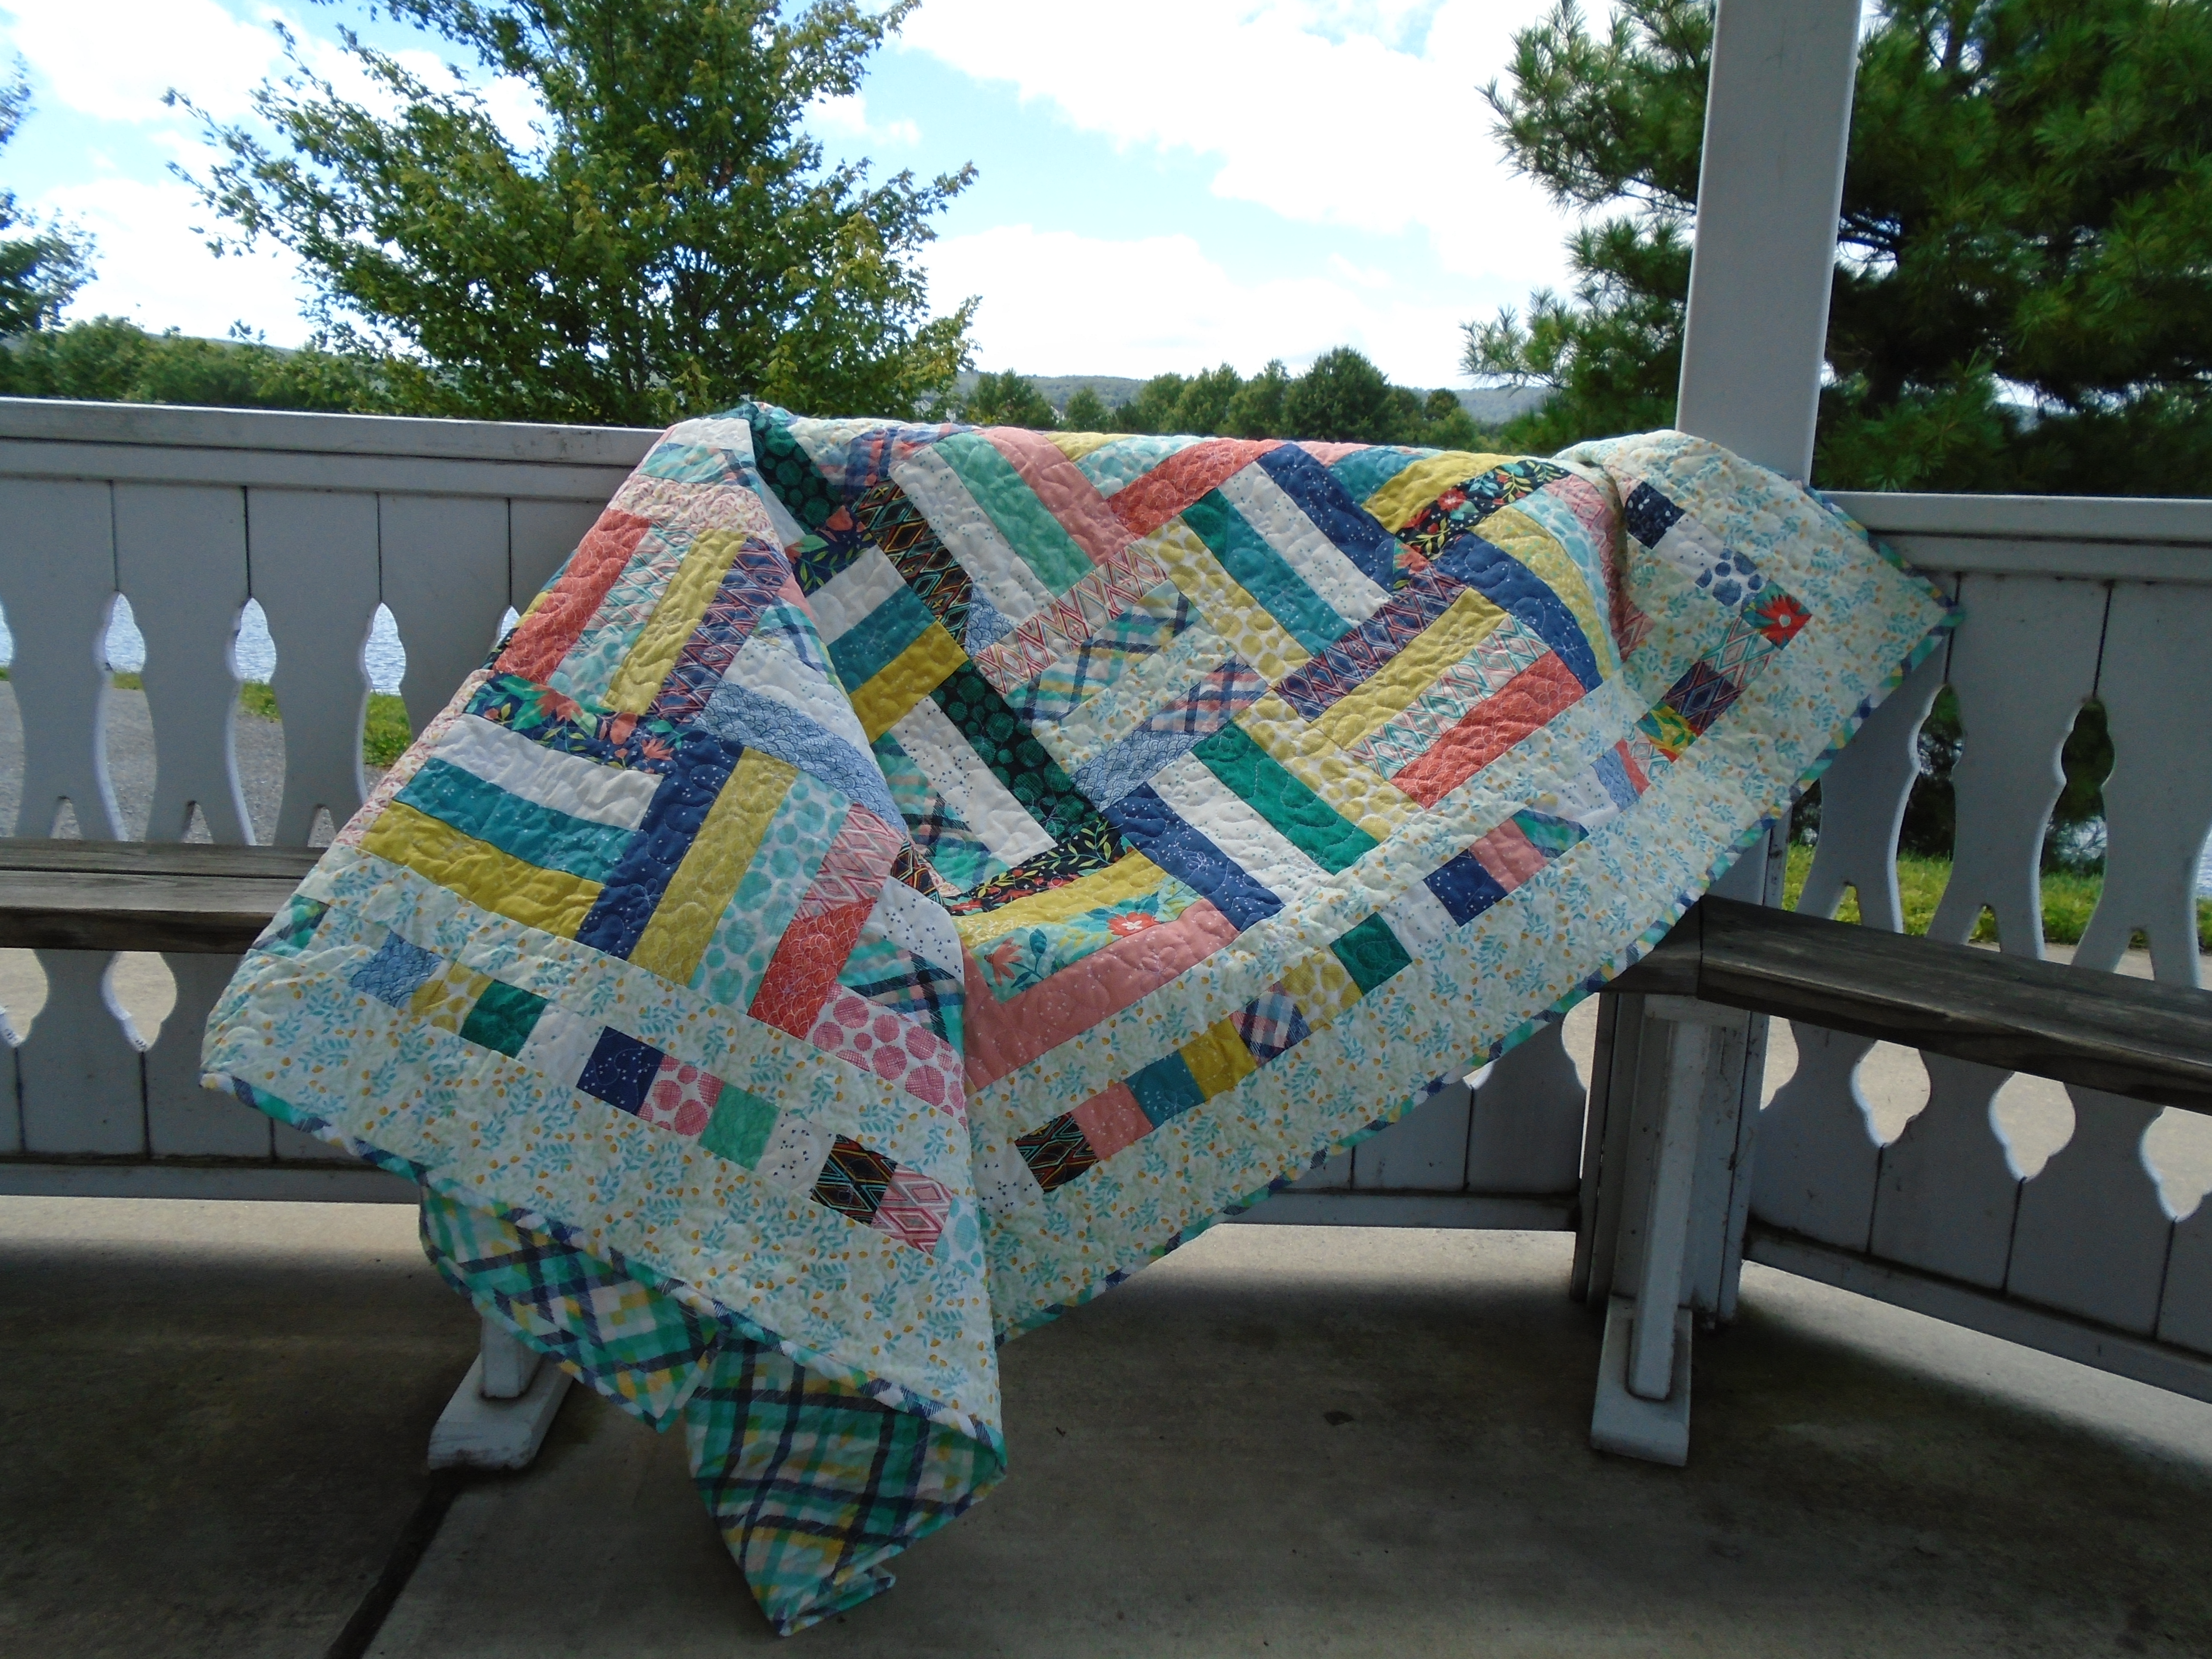
![]()
This quilt finishes at 64" inches square.
Hopefully you've been inspired to make a Racing Rails quilt of your own! I wrote this pattern to really maximize what you could use from a single jelly roll and ended up with very, very little left over! Alternatively, if you wanted to use this technique to make only blocks and eliminate the pieced border from the design, you could cut approximately 42 8.5" blocks (8" finished) from the strip set that we made above, for a 48" x 56" quilt without borders. Do you have other blocks you'd like to see made into quilts using this technique? Leave me a comment below or send me an email {[email protected]} and you might see your idea made into a future pre-cut project! As always, I love to see pictures of the quilts you make from my patterns, so please share them with me via email or on social media!
Alison Vermilya
{Little Bunny Quilts & Honey, Bunny, and Doll Designs}
![]()
Posted in:
Comments