Warehouses Closed June 6-13 For Exclusive Event
Dresden Irish Chain Quilt
Dresden Irish Chain Quilt
Published:
Sep 27 2017 - 23:00

![]()
Hello! This is Jessica from Saw it. Loved it. Made it. and this is my first Moda tutorial. This post was a long time coming and I am so excited to finally share it with you all. I have always loved dresden quilts since I was a little girl but I could never settle on a design. I finally decided to hit the drawing board and lay the quilt out exactly how I wanted it. I hope you all love it as much as I do. For those of you on Instagram, I would love to see your quilts that you make. Tag me @sawitloveditmadeit or use #dresdenirishchainquilt so I see your beautiful quilts that you make. Happy sewing!
This quilt/project finishes at 84" x 84".
![]()
1 Layer Cake®
5 2/3 yards background fabric
1/3 yard fabric or 13 - 5"x5" Charm squares for the Dresden Centers
1/4 yard for the Irish Chain Centers
7 2/3 yards backing fabric
2/3 yards binding fabric
EZ Dresden Ruler
Cardstock or backing of the layer cake pack to make a template
![]()
The first step that we are going to do is cut out the background fabric.

Now that the background fabric is all cut, it is time to start cutting into the layer cake squares. You want to select 22 layer cake squares that will make up the dresden plate blades.

Begin by sub-cutting each of the 22 layer cake squares for the dresden plate blades into 2 - 4" x 10" pieces and 1 - 2" x 10". Set aside the 2" x 10" strips and the remaining layer cake squares for the irish chain blocks.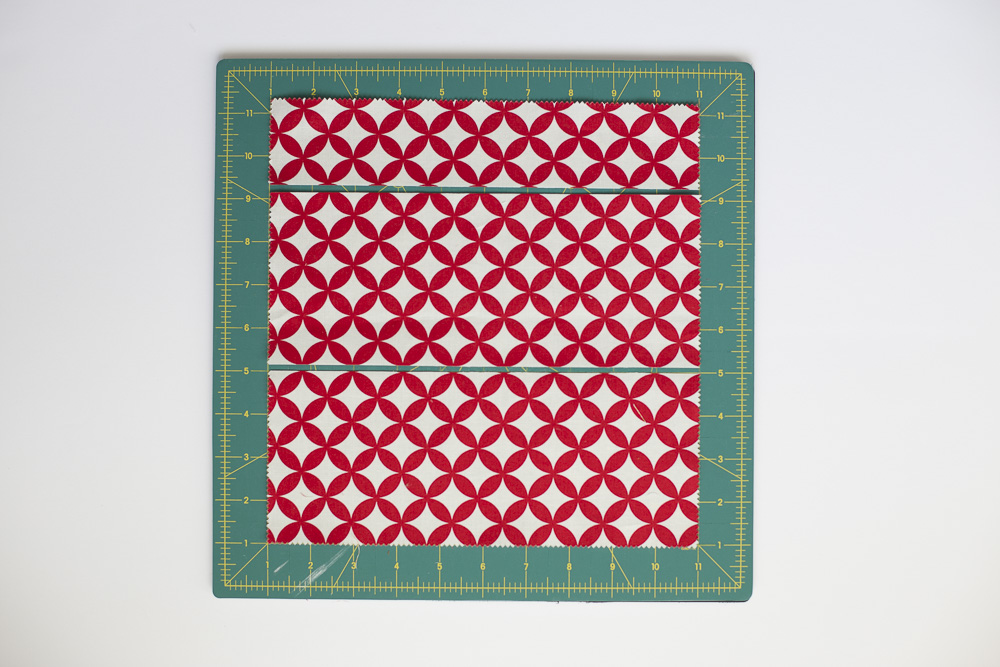
Now take the EZ Dresden Ruler and line it up with the 4" line and cut out your blades, rotating the ruler as you go. ***Make sure to cut very carefully. You should yield 6 blades for every 4" x 10" piece. Sometimes I did not cut as carefully as I should of and by the 6th blade, the ruler was over the edge just a bit. This is okay. The widest part of the blade will be turned under to make the point.*** You will need 260 blades.

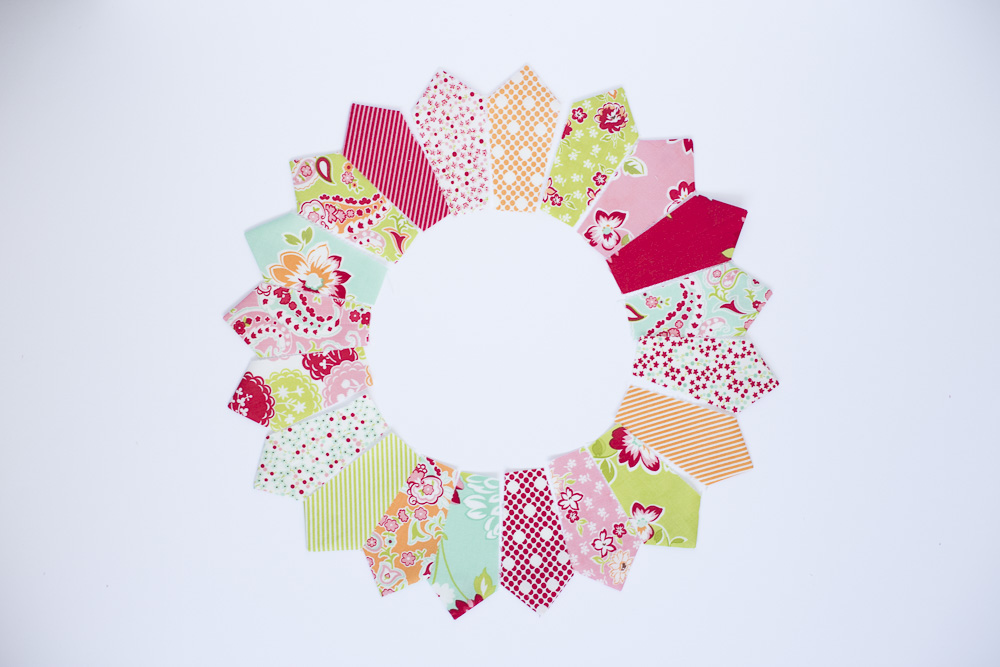
I wanted to make sure that my dresden plates had scrappy blades so after I cut out all of my blades, I went through and selected 20 dresden blades to make up one plate and clipped then together into 13 different sets of 20 blades.

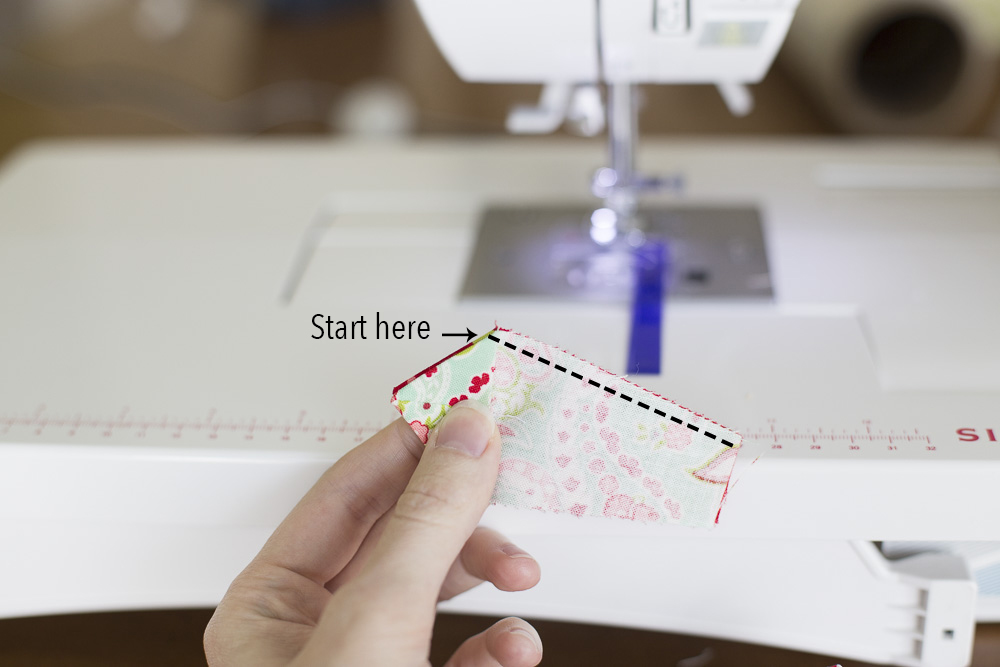
Now it is time to start chain piecing all of those blades together. Begin by folding the blade right sides together and start sewing at the raw edge with a 1/4" seam allowance and sew towards the folded edge.

Chain piece each of the 20 blades together and then break the thread before you start chain piecing the next set of 20 blades. This helped me keep track of the plates and not get things mixed up.

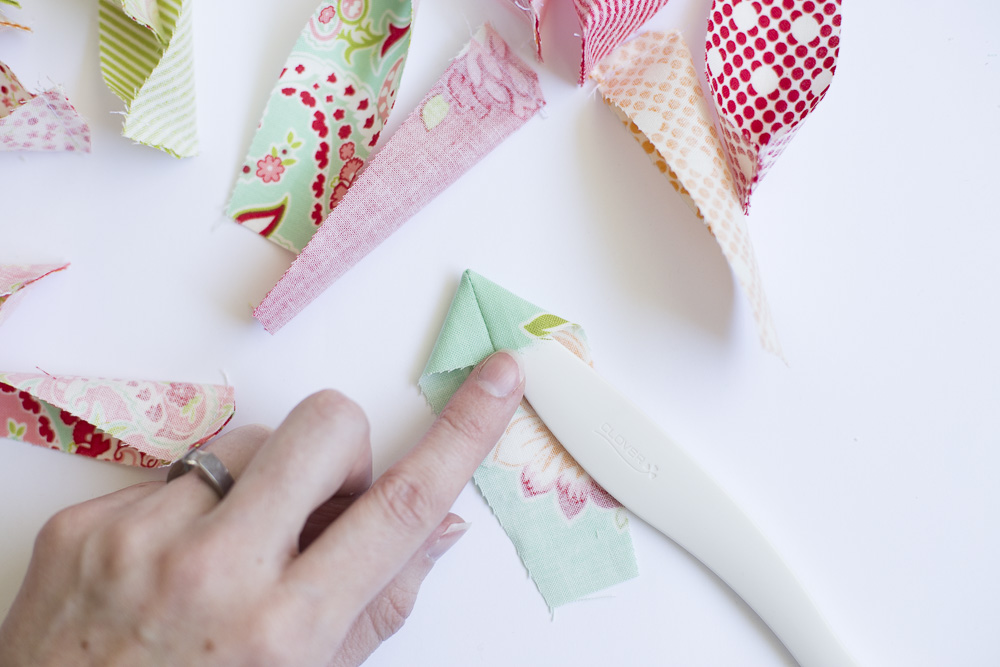
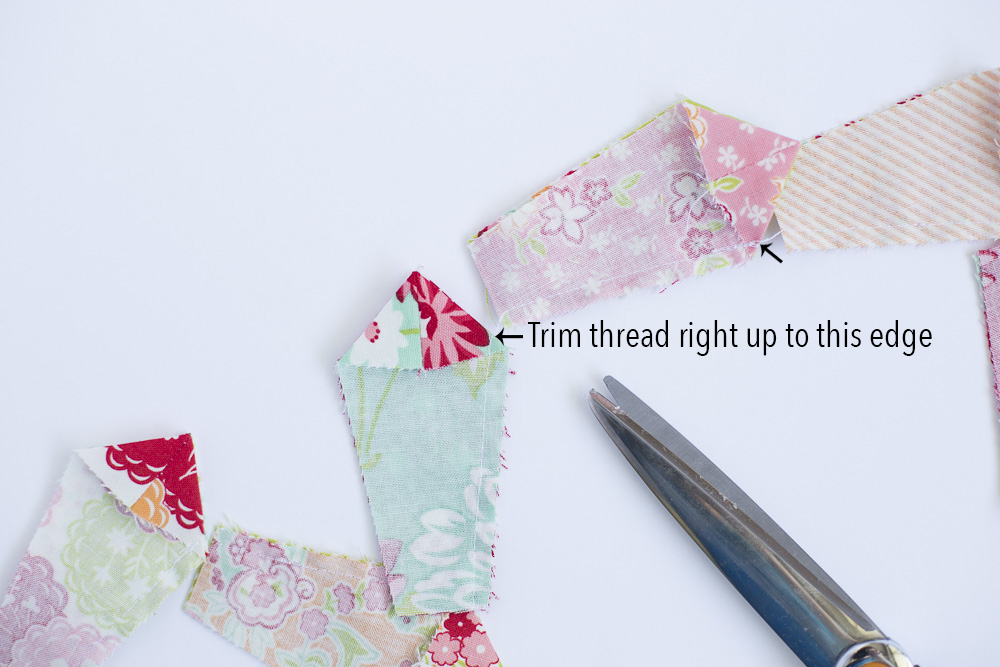
Now it is time to turn the point out. You can leave the seam allowance in the point or trim it to reduce the bulk in the corner. I chose to trim the point and will show you that in this tutorial.
Begin by trimming the point but make sure to not trim too close to the sewn line. Trim at least 1/8" away from the sewn line and at an angle.

Once those are all trimmed you will want to finger press the seam allowance open and turn it under. You can use a Clover Hena Marker to make the point sharp but make sure to not push too hard or it will be too pointy or push the seam allowance through. I also have another trick on how to turn and press dresden blades on my blog.

Making sure to line up the seam with the center of the blade and press with a hot iron.
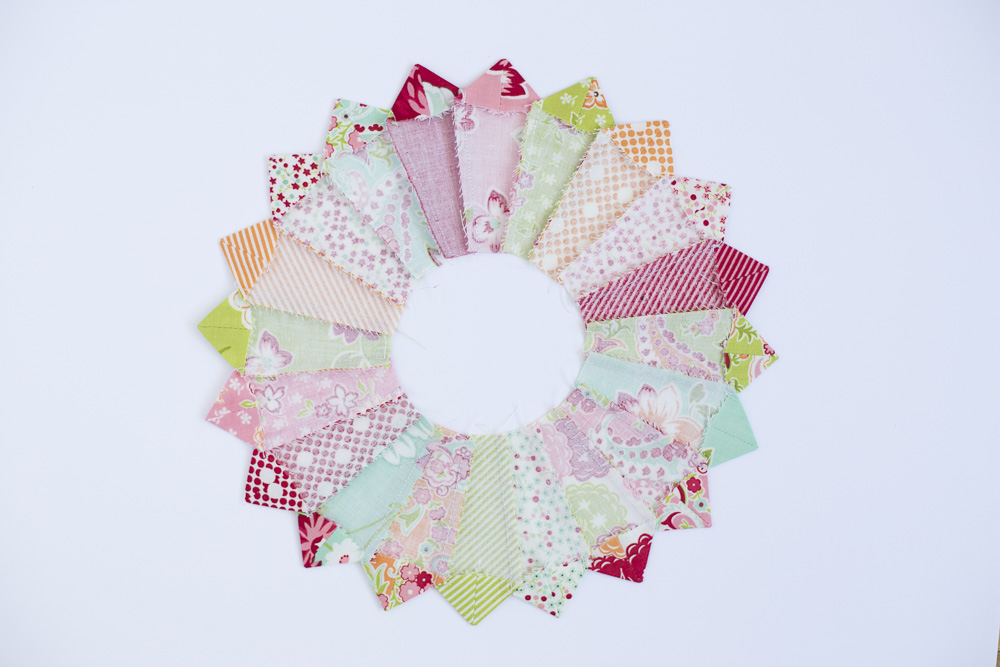
To make the plates, take the blades and line them up right sides together. Sew a 1/4" seam allowance starting at the pointed end and sewing down towards the narrower end. Make sure to backstitch at the beginning and end of the blades.
When trimming the chain pieced blades make sure trim right up to the edge of the blade so that there are no thread tails coming off at the seams near the points.
Continue sewing the blades until all 20 blades are sew together. Press the seams in one direction.

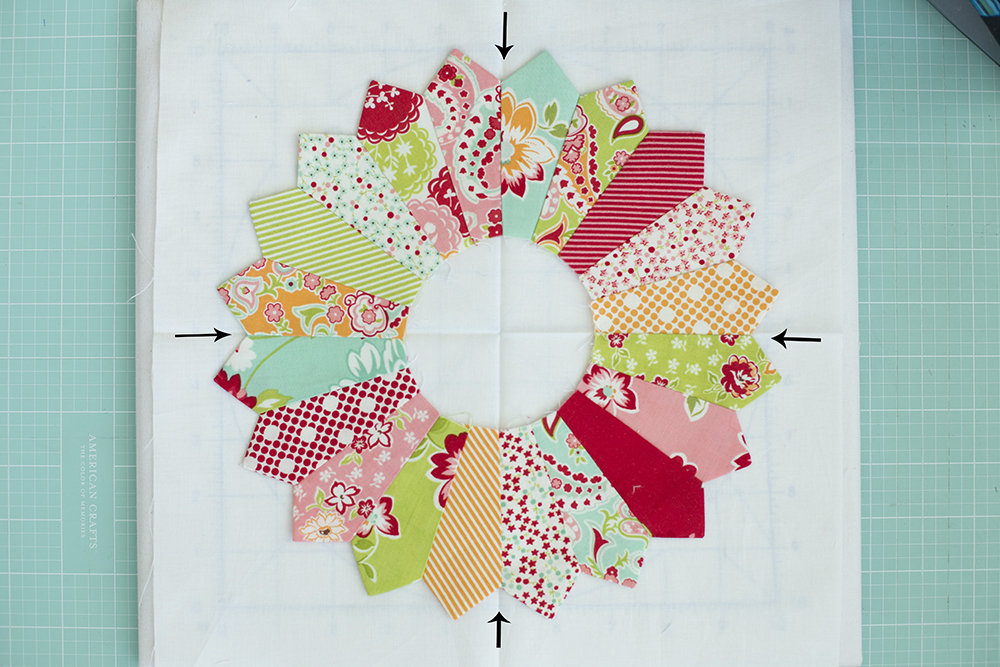
The plate is ready to be attached to the 12.5" x 12.5" background square. Start off my taking the 12.5" x 12.5" background fabric folded in half and in half again and lightly press it. This will help guide you to center the dresden plate in the background fabric.

Making sure to line up the center of the seams with the pressed background lines.
The dresden plates can be stitched down with your sewing machine using a straight stitch, zig-zag or embroidery stitch or you can stitch it down by hand. I chose to do it by hand because I wanted a cleaner look because I knew I was going to get this custom quilted and I did not want my machine stitching to distract from the custom quilting. Below is an example of how I stitched down this dresden plate for a pillow that I made last year.

To help keep the dresden plate in place I used a bit of washable Elmer's glue and heat set it in place. Or it can also be pinned in place while it is being stitched down.

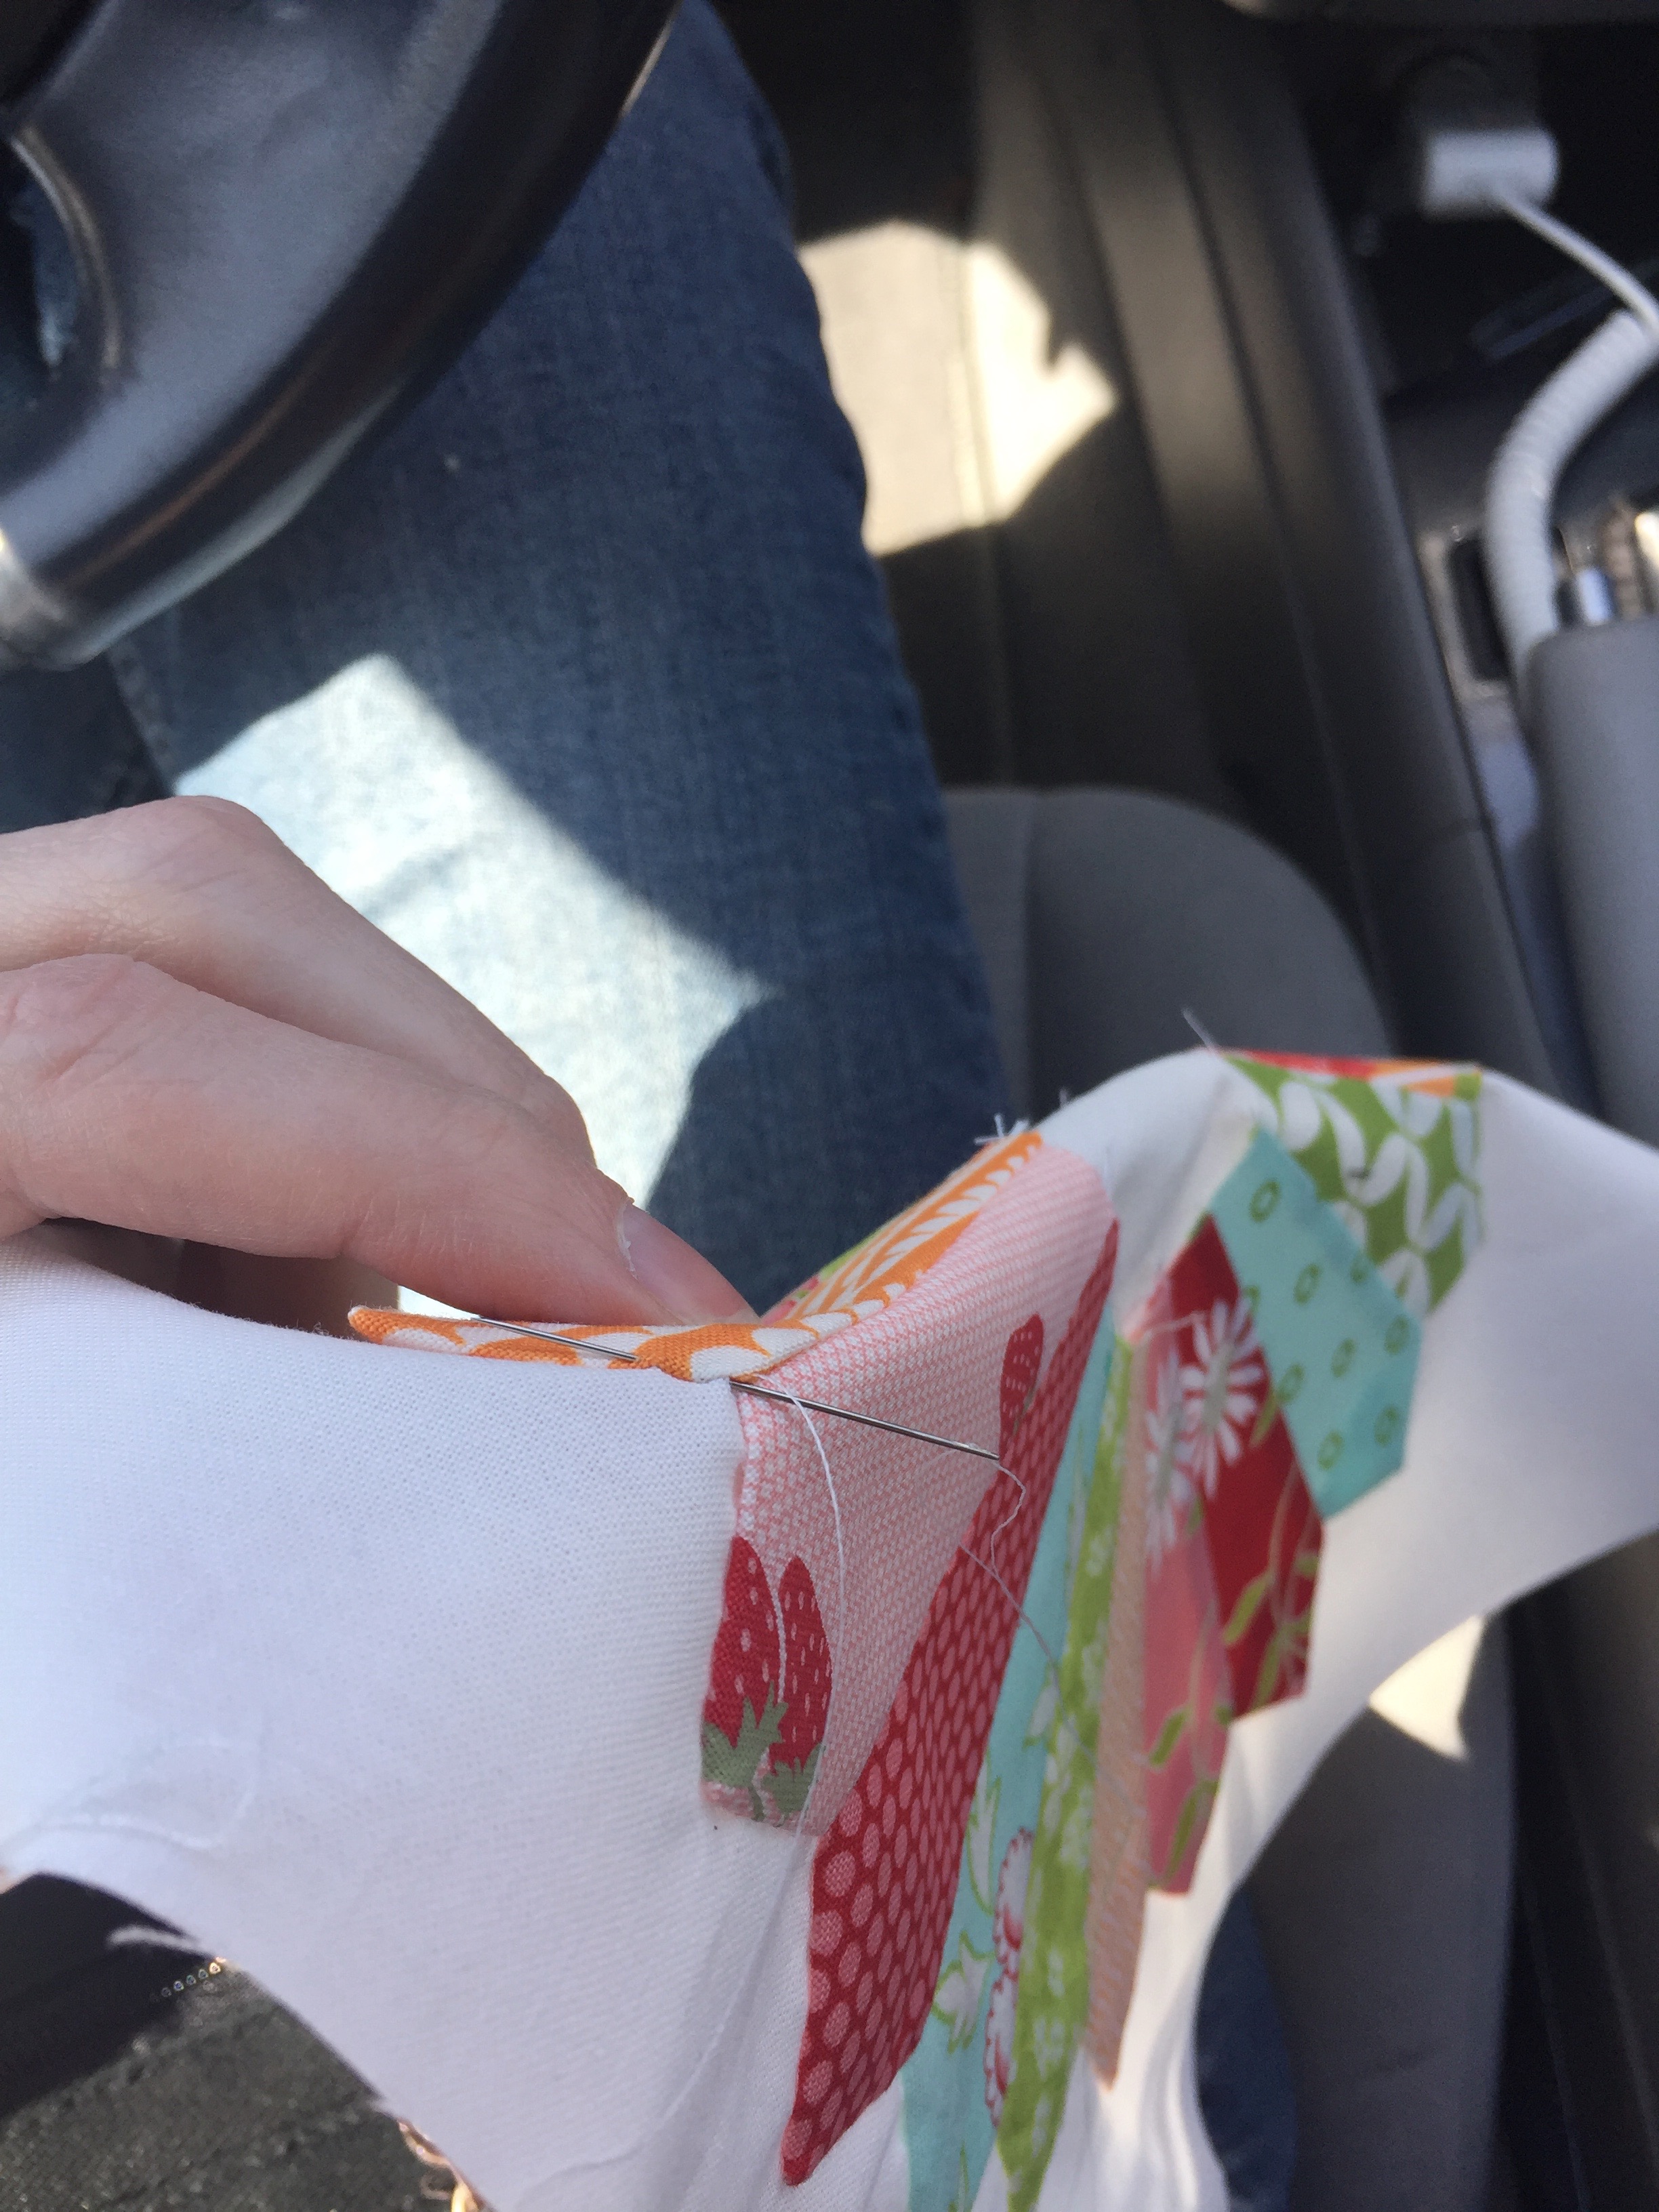
I love how clean it looked stitching it down by hand! Yes it took time to do but I finished all 13 in less than a week while in the school carpool lane and watching Netflix. You can do it!

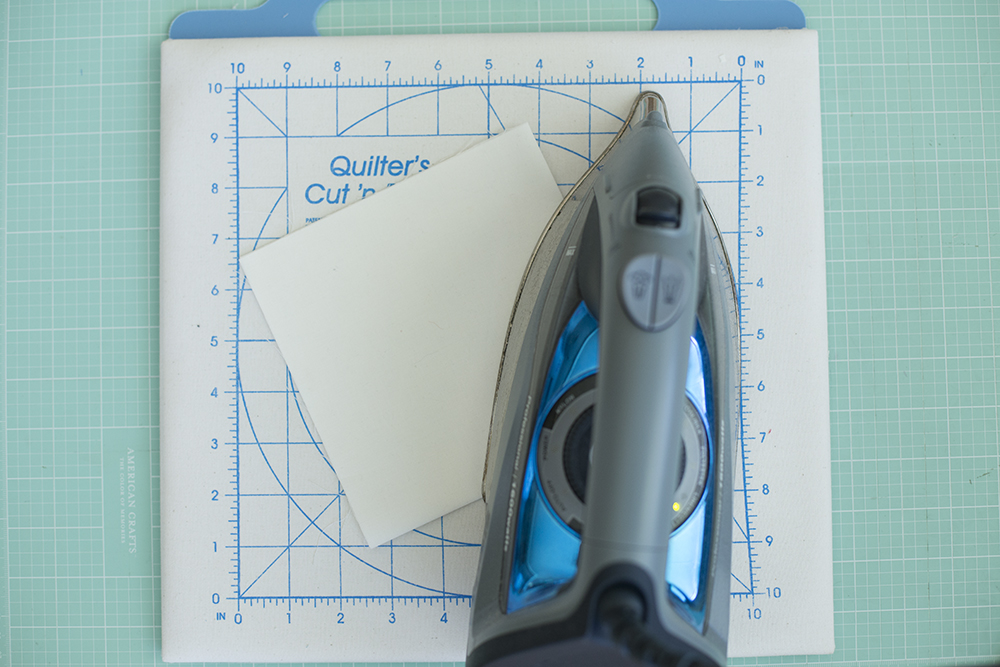
After all of the plates are stitched down, you will need to make the centers for the plates. There are a lot of different ways to make circles. Please use whatever method you are comfortable with and what works for you. I took the cardboard piece from the bottom of the layer cake pack and traced the opening of a jar that had about a 4" diameter opening. I used that as my template for the circles.
Cut out 13 - 5" x 5" or use the scrap Charm squares for the plate centers. Place the square right side down on your ironing board and place the 4" diameter circle in the center of the square. I lightly spritzed the edge of the fabric poking out around the edges of the template with starch and slowly start to iron the edges of the fabric over the template. Once all the way around the template, give it a good press before removing the cardboard template. After the template is removed, press it again and trim the corners of the fabric down. I really didn't worry about making it perfect.

Follow the same process of sewing down the circles as you did for the dresden plates. Set these aside and lets begin sewing the irish chain blocks.
You will now need 44 - 2" x 10" print fabric strips. There should already be 22 - 2" x 10" strips from the layer cake squares that you have already cut out. Select 11 more layer cake square and cut out 2 - 2" x 10" strips from each layer cake square to give you a total of 44 strips. ***You can cut the entire layer cake square into strips but I wanted to make my blocks as scrappy as possible and decides to cut out only 1-2 strips per layer cake square until I had a total of 44 - 2" x 10" strips.
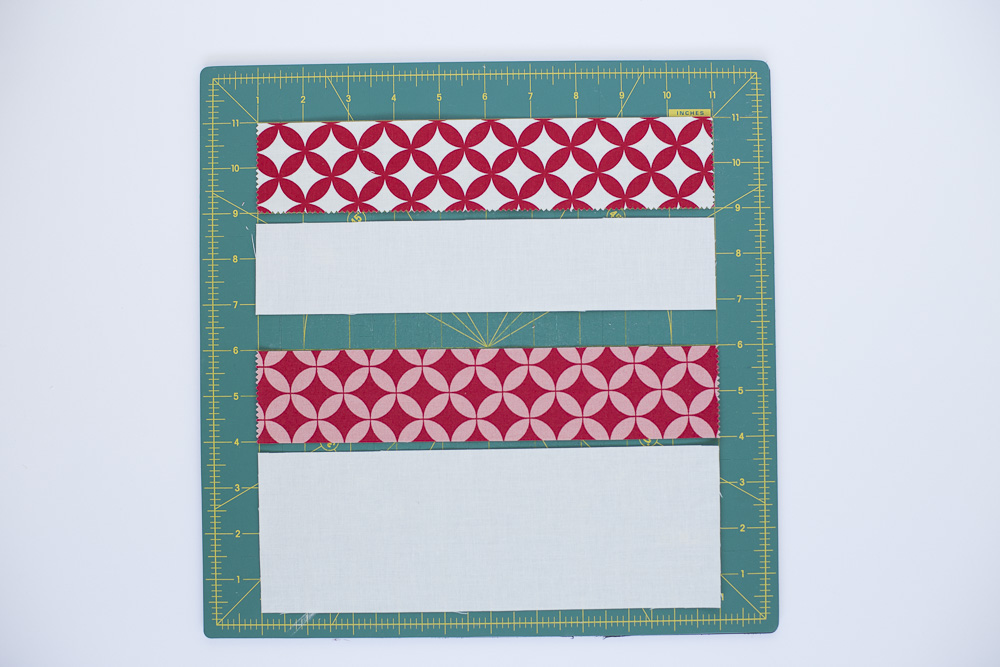

Select 29 of the strips and strip piece them with the 2"x 10" background pieces and then take the remaining 15 strips and strip piece them with the 3.5" x 10" background pieces.

Press the seam allowance and sub-cut the strips into 2" pieces.
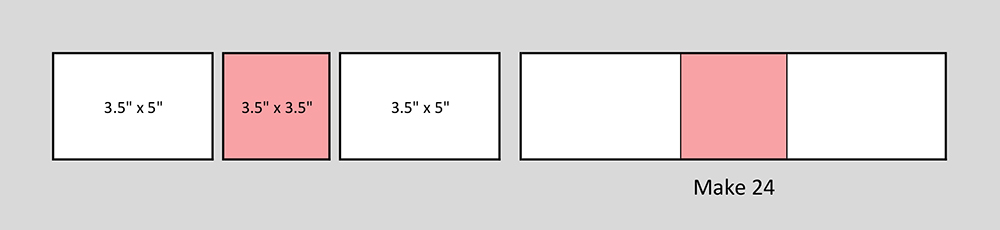
See the diagrams below and assemble the irish chain blocks as shown.

Now that the Irish chain squares are made, it is time to make the center section of the Irish chain block. Take the 1/4 yard fabric selected for the Irish chain centers and cut out 24 - 3.5" x 3.5" squares. Take the remaining 3.5" x 5" background fabric and sew them as shown in the diagram below.
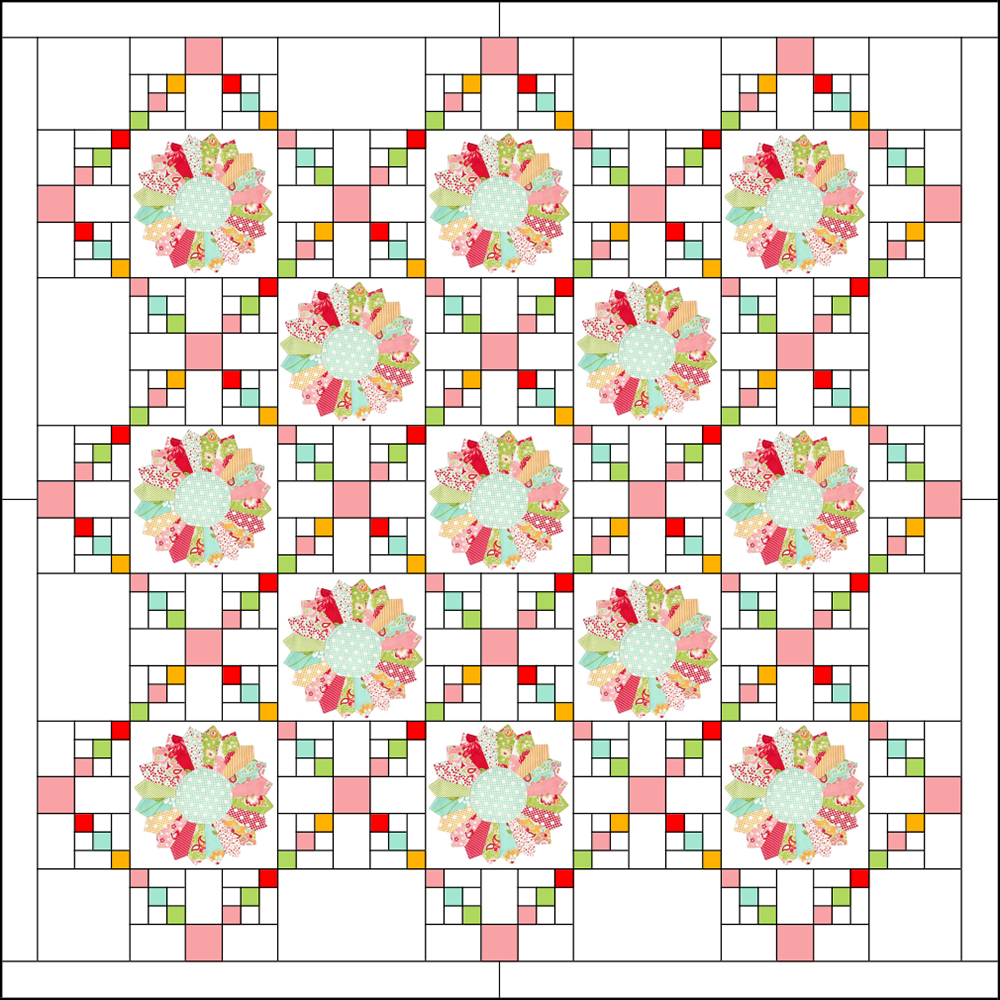
Assemble the blocks into 12 full size blocks and 12 - 2/3 size blocks like in the diagram below.

After the irish chain blocks are assembled they are ready to be sewn together with the dresden plate blocks. Assemble the quilt as shown with the remaining 8" x 8" blocks, 8" x 12.5" blocks, and borders.
Since this quilt was a big time bucket list quilt for me, I wanted to make sure that I have it custom quilted. I was so lucky to have Molly @mollylovelythreads quilt it for me. She was amazing to work with and so talented. Look at her amazing quilting she did!

![]()
This quilt finishes at 84" x 84".
Jessica Richards
{sawitloveditmadeit.blogspot.com}
![]()
Posted in:
Comments