Welcome to Moda Fabrics!
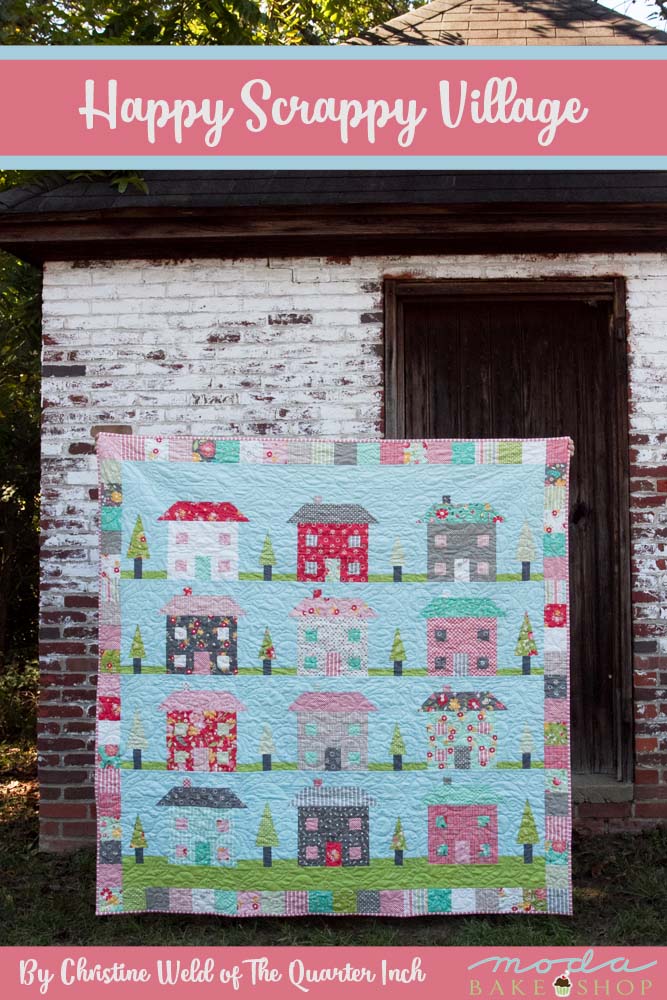
Happy Scrappy Village Quilt
Happy Scrappy Village Quilt
Published:
Oct 21 2017 - 23:00
![]()
House quilts are so much fun! This one is perfect for that layer cake that you've been saving for a special project. Break it out, and start construction on your own Happy Scrappy Village!
This quilt finishes at 60" x 60".

![]()
1 Layer Cake® {Flower Mill by Corey Yoder}
1 ¾ yard blue background fabric
½ yard green background fabric
1/8 yard neutral brown/gray fabric for tree trunks
½ yard binding fabric
4 yards backing fabric
30-degree ruler (optional)
Templates (found in PDF at end of pattern)

![]()
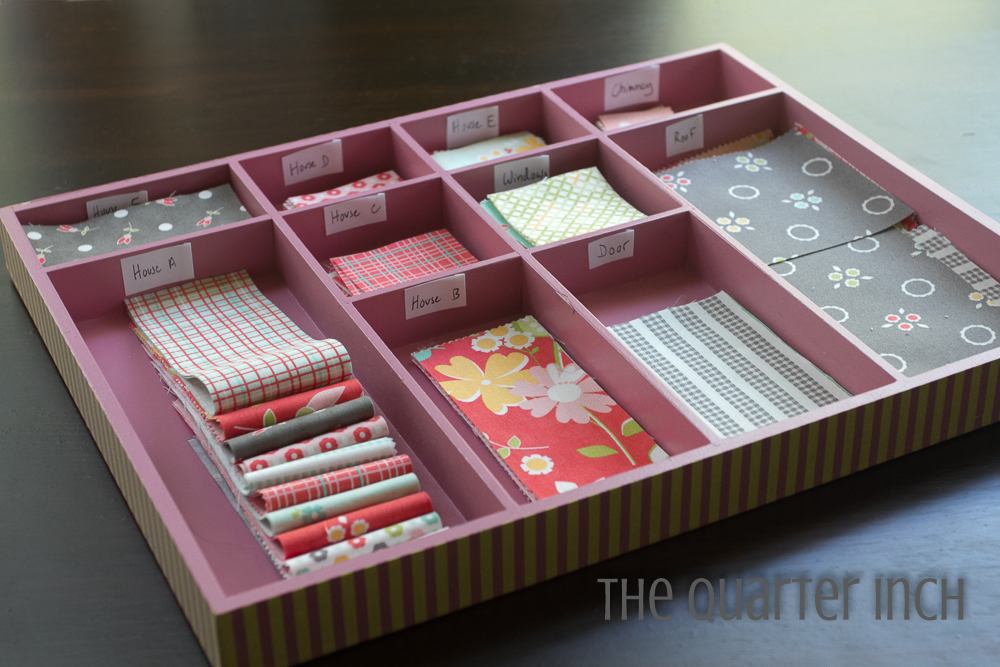
Organization is key for this project! Spend a little time planning a system to keep your pieces labeled and in order before you begin cutting. Plastic baggies work well. I repurposed a tray from my daughter’s play area and the labeled the different sections. It’s pretty perfect for this project, huh?
There is little waste in this project, which means little room for error. Most of the width and length of the layer cake squares are used. Make sure your cuts are precise and that you’re not being too generous or you may run short of fabric.
Layer Cake Cutting Instructions
Separate your layer cake into four groups:
Group 1: 12 layer cake squares for the main part of the house and chimney.
Group 2: 12 layer cake squares for the roof, windows, door, and border square pieces.
Group 3: 6 layer cake squares for the tree blocks and border squares. (I chose to use the green squares in my layer cake for the trees, but the tree blocks would look delightfully scrappy in a variety of colors!)
Group 4: 12 layer cake squares for border squares.

Each group has its own cutting diagram below. Using these diagrams as a reference, cut each group. Be sure to label the groups and the pieces from each group. Trust me, careful labeling is your friend in this project!
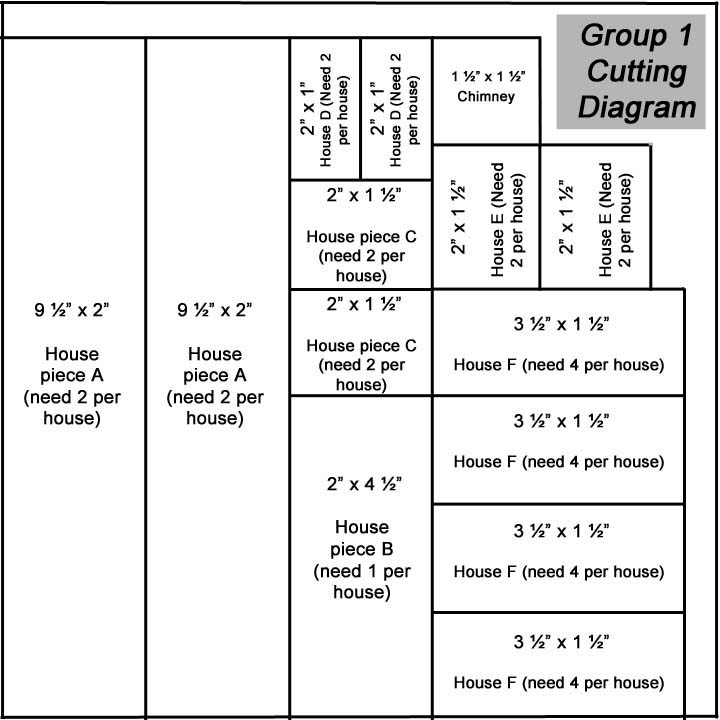
Note: House pieces C and E are the same size piece, but are oriented differently in case you are using a directional fabric.


Background Fabric Cutting Instructions
Blue Fabric:
Cut [4] 2 ½” strips. Sub cut into [12] 4” by 2 ½” pieces (label “Sky A”) and [12] 8” by 2 ½” pieces (label “Sky B”).
Cut [1] 1 ½” strip. Subcut into [12] 1 ½” by 1 ½” squares. Label “Sky C.”
Cut [1] 3 ½” strip. Subcut into [12] 3 ½” by 3 ½” squares. Label “HSTs with roof squares.”
Cut [4] 2” strips. Subcut into [24] 7” by 2” pieces. Label “Sky D.”
Cut [2] 5” strips. Subcut into [6] 4” by 5” pieces (label “Top of large trees”) and [10] 6” by 5” pieces (label “Top of small trees”).
Cut [2] 2 ¼” strips. Subcut into [20] 1 ½” by 2 ¼” pieces (label “Bottom small trees”) and [12] 2” by 2 ¼” pieces (label “Bottom of large trees”).
Cut [1] 6 ½” strip. Do not subcut yet. Label “Background of large trees.”
Cut [1] 5” strip. Do not subcut yet. Label “Background of small trees."
Cut [2] 3 ½” strips WOF. Label “Top border piece.”
Green Fabric:
Cut [4] 1 ½” strips. Subcut into [24] 2” by 1 ½” pieces. Label “Grass A.” Subcut the remainder of the strips into [32] 1 ½” by 2 ¼” pieces. Label “Large and small tree blocks.”
Cut two 3 ½” strips. Label “Bottom border piece.” Set aside.
Neutral Fabric for Tree Trunks:
Cut [2] 1 ½” strips. Subcut into [6] 3” by 1 ½ pieces.” Label “Large tree trunks." Subcut the remainder of the strips into [10] 2 ½” by 1 ½”. Label “Small tree trunks.”
Constructing the Blocks
This quilt consists of two different blocks: house blocks and tree blocks. House blocks finish at 12” by 12” and tree blocks finish at 4 ½” by 12”. There are two versions of the tree block, one with a large tree and one with a small tree. The quilt has 12 house blocks and 16 tree blocks.
House Blocks
Begin by playing around with fabric combinations and deciding which fabrics you would like to pair together in blocks.
If you are not pleased with any of the fabric combinations and you would like to swap out any parts of your houses, you will have ample scraps leftover from Group 3 and Group 4 to cut additional windows, doors, or chimneys. I tend to fiddle a lot with the combinations until I get them just right. A nice aspect of this pattern is that you have just enough left in your scrap pile to mix things up a little. The scrappier the better!
Once you have your fabrics cut and organized, begin constructing the house blocks one at a time in sections. Begin with the main section and lay out the pieces.

Sew the house pieces to the windows and door.

Most seams do not nestle in this quilt, so the pressing direction is up to you!
When sewing small pieces, accurate quarter inch seam allowances are key for successful piecing. Check your measurements periodically and make sure the pieces are finishing at the correct size.

Re-sew seams if necessary to ensure an accurate quarter inch seam. It’s easier to remove a small seam when you are putting the block together than struggle with a finished block that doesn’t square up!
Continue piecing until the main section of the house is assembled.

Sew Grass A to Sky D. Press the seams towards the grass (these will need to nestle with the bit of grass in the tree blocks). Sew units to the sides of the house.

Draw a line diagonally on the back of the 3 ½” piece of sky fabric. Place the piece of sky fabric with the 3 ½” square of roof fabric, right sides together. Sew a scant quarter inch seam on each side of the line. Cut apart and press open. Square up both HSTs to 3” (there will not be much to trim off, you are just making sure the block is square).
Note: if you are using a directional fabric for the roof, you may want to take one of the border squares cut from the same fabric and make an additional HST so that the fabric in both HSTs are oriented the same. The directions cut two more border squares than are needed and you can also cut extra border squares from the leftover tree fabric to make up the difference.
Sew the HSTs to the sides of the roof pieces.

Construct the sky and chimney unit using Sky A, Sky B, Sky C, and chimney pieces.
Attach roof unit to sky unit.
Sew the roof/sky unit to the house unit.
Square block up to 12 ½”.
Make a total of 12 house blocks.
Tree Blocks
You will need a total of 16 tree blocks: six large tree blocks and 10 small tree blocks.
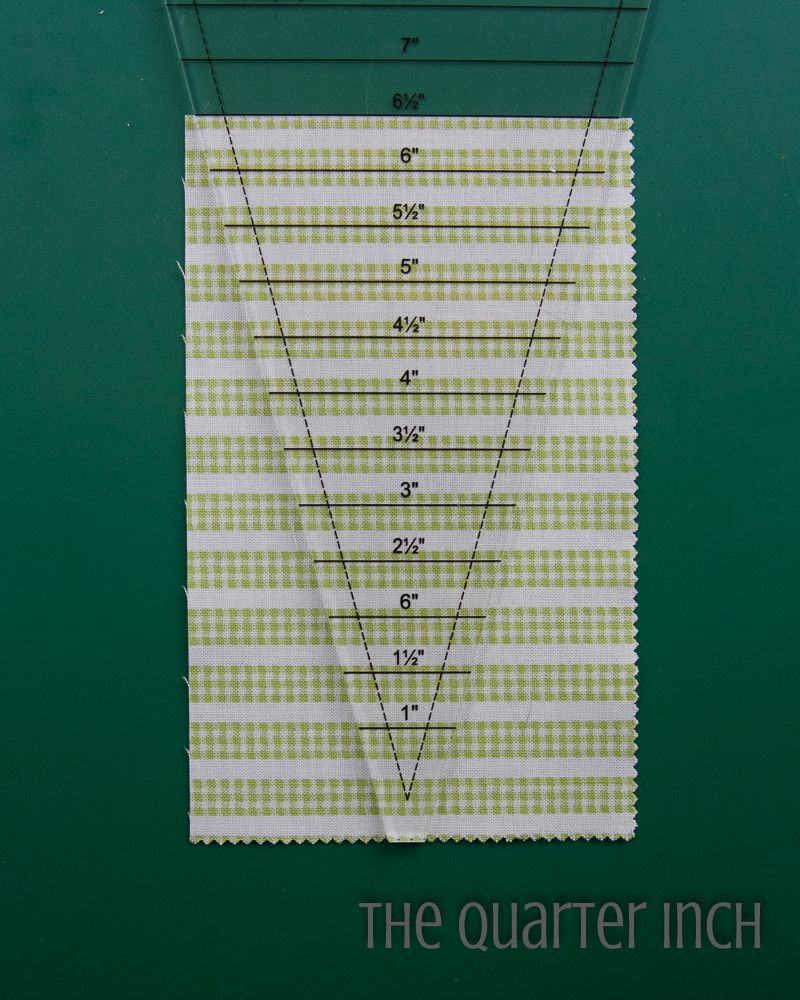
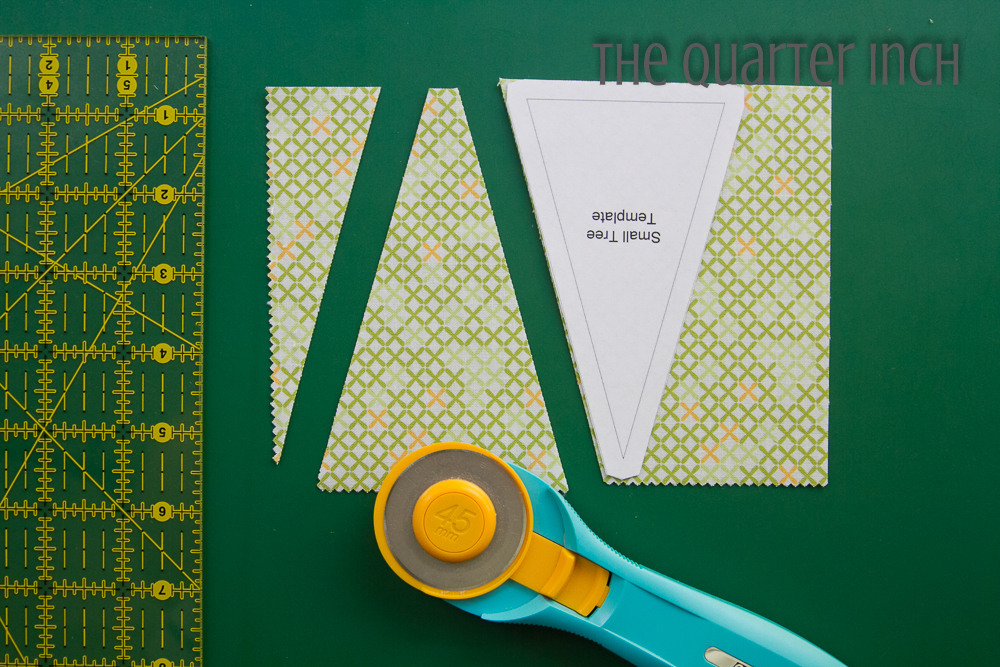
There are templates in the PDF (available at the end of this tutorial) that can be used to make the tree blocks, or you can use a 30-degree ruler to cut the triangles for the trees.
Tip: When cutting with templates, place a ruler over the template for safety and accuracy.
Large Tree Blocks
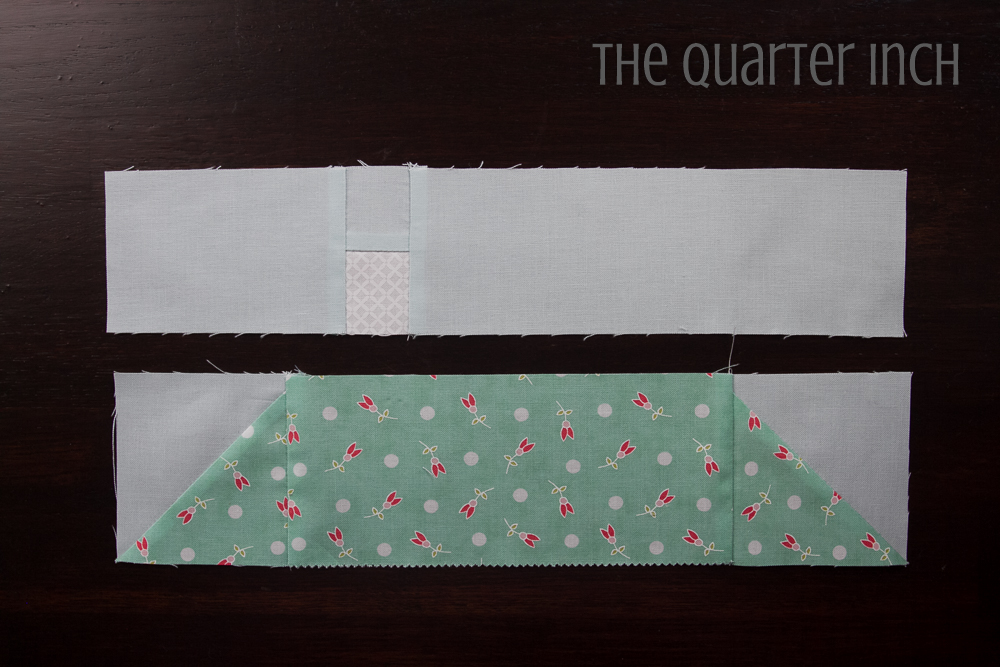
Using the large tree template or a 30-degree ruler, cut a 6 ½” tall triangle from the 6 ½” by 4” rectangle labeled Tree A (cut from Group 3).
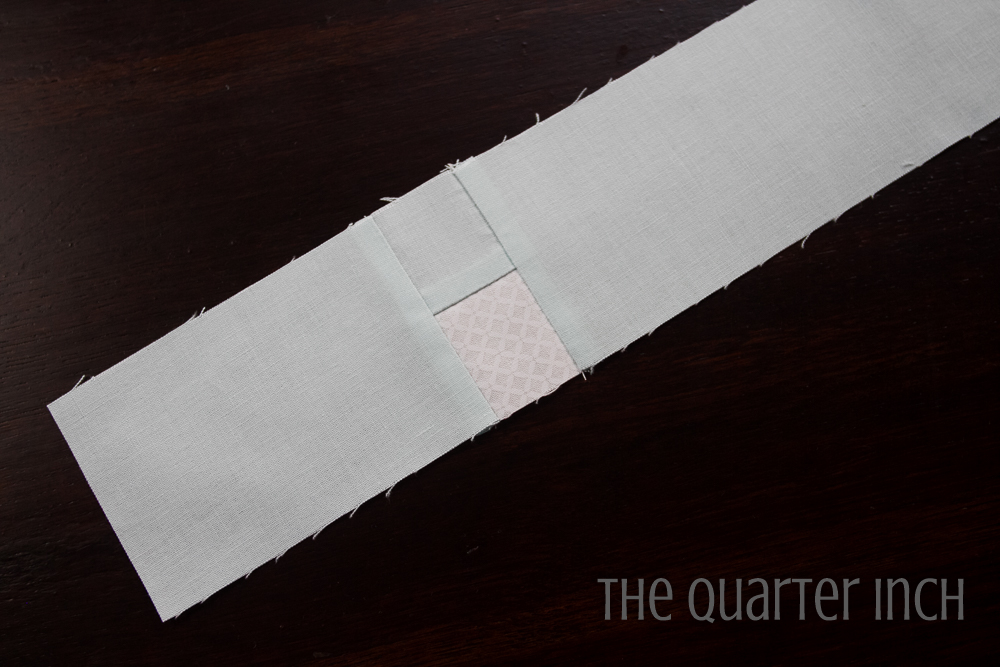
Trim the selvage from the 6 ½” strip of blue background fabric and fold in half. Using the “Large Tree Background Template,” cut two shapes at once from the fabric. This will ensure you cut mirror image pieces. It's a bit difficult to see in the photo since the fabric is a solid, but the fabric is positioned with wrong sides together.

Take your large tree triangle and your background pieces and layout your tree block.

Offsetting the two pieces just enough so that the seam line passes right where the two pieces intersect, sew the triangle of tree fabric to the piece of background fabric. Repeat on the opposite side.

Square the unit up to 5" by 6 ½". Sew the top piece of sky fabric (the 4” by 5” pieces labeled “Top of large trees”) to the tree unit.
Take two of the 2” by 2 ¼” pieces of blue background fabric labeled “Bottom of large trees,” two of the 1 ½” by 2 ½” pieces of green background fabric labeled “Large and small tree blocks,” and one 3” by 1 ½” piece of neutral background fabric labeled “Large tree trunks." Assemble these into the bottom unit.

When sewing the grass to the sky for the trunk units, press towards the piece of sky fabric (these will need to nestle with the bit of grass in the house blocks).
Sew bottom unit to the base of the tree.
Make a total of six large tree blocks.
Small Tree Blocks
Using the template provided or a 30-degree ruler, cut two small trees, 5” tall, from the 5” by 6” rectangle. Both trees can be cut from the square comfortable, with the bases of the tree at opposite ends of the square.

With the same technique used for the large trees, cut the background pieces for the small trees from the 5" strip of blue fabric and from the fabric remaining from the 6 ½” strip used to cut the background of the large tree blocks.
Following the instructions for the large tree blocks, but using the pieces cut for the small tree blocks, assemble a total of 10 small tree blocks.
Assembling the Quilt Top
Lay out your house blocks and tree blocks, with three house blocks and four tree blocks per row. Vary the placement of the large and small tree blocks. Make a total of four rows.
Working in rows, assemble the top. Press the seams in the first row to the left, in the second row to the right, etc.
Borders
Take the 3 ½” strips of blue and green fabric labeled “Top border piece” and “Bottom border piece.” Trim selvedges and join the strips of the same color together. Trim each to 54 ½”. Sew the blue to the top of the quilt top and the green to the bottom.
Attach Border Squares
You will need a total of 76 border squares. You will have two leftover from the ones cut from the layer cake squares.
Sew two sets of [18] border squares together in two columns. Sew to the sides of the quilt. When attaching side borders, make sure the seams of the border squares are lining up with the seams of the tree blocks. Four border squares should line up with each tree block. The top and bottom border square will align with the blue and green border strip.
Sew two sets of [20] border squares together in two rows. Sew on the top and bottom of the quilt.
Finishing
Layer the quilt top, batting, and backing. Baste and quilt as desired. I quilted the quilt on a longarm using the Dancing Vines pattern. Bind.

![]()
This quilt was a delight to design and construct and finishes at 60" x 60". I hope you enjoy building your own happy, scrappy village!
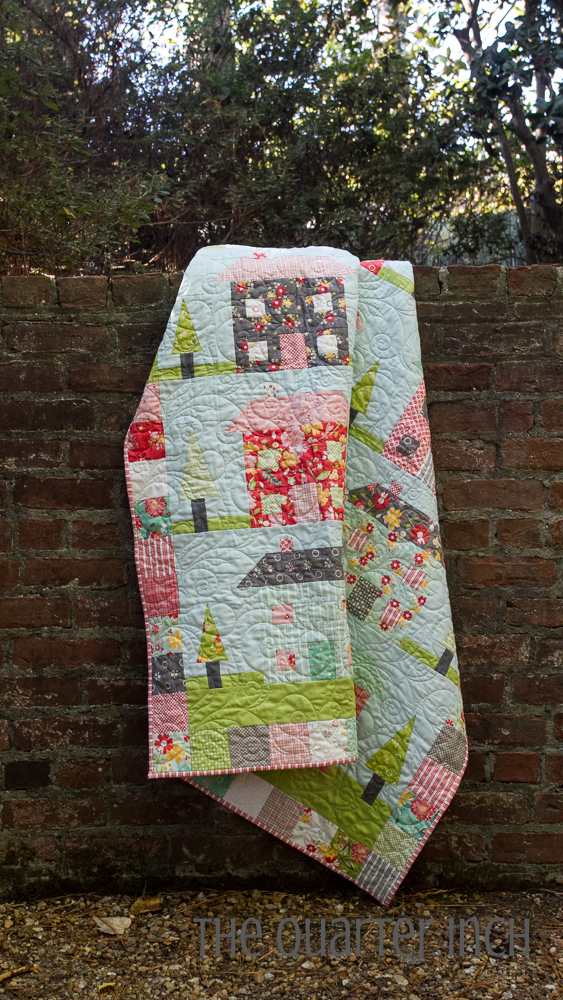


Happy sewing, everyone!
Christine Weld
The Quarter Inch
![]()
Posted in:
Comments