Warehouse Closed On July 4th
Windows on My Heart
Windows on My Heart
Published:
Feb 6 2018 - 23:00
 Easy piecing with fabric manipulation.
![]()
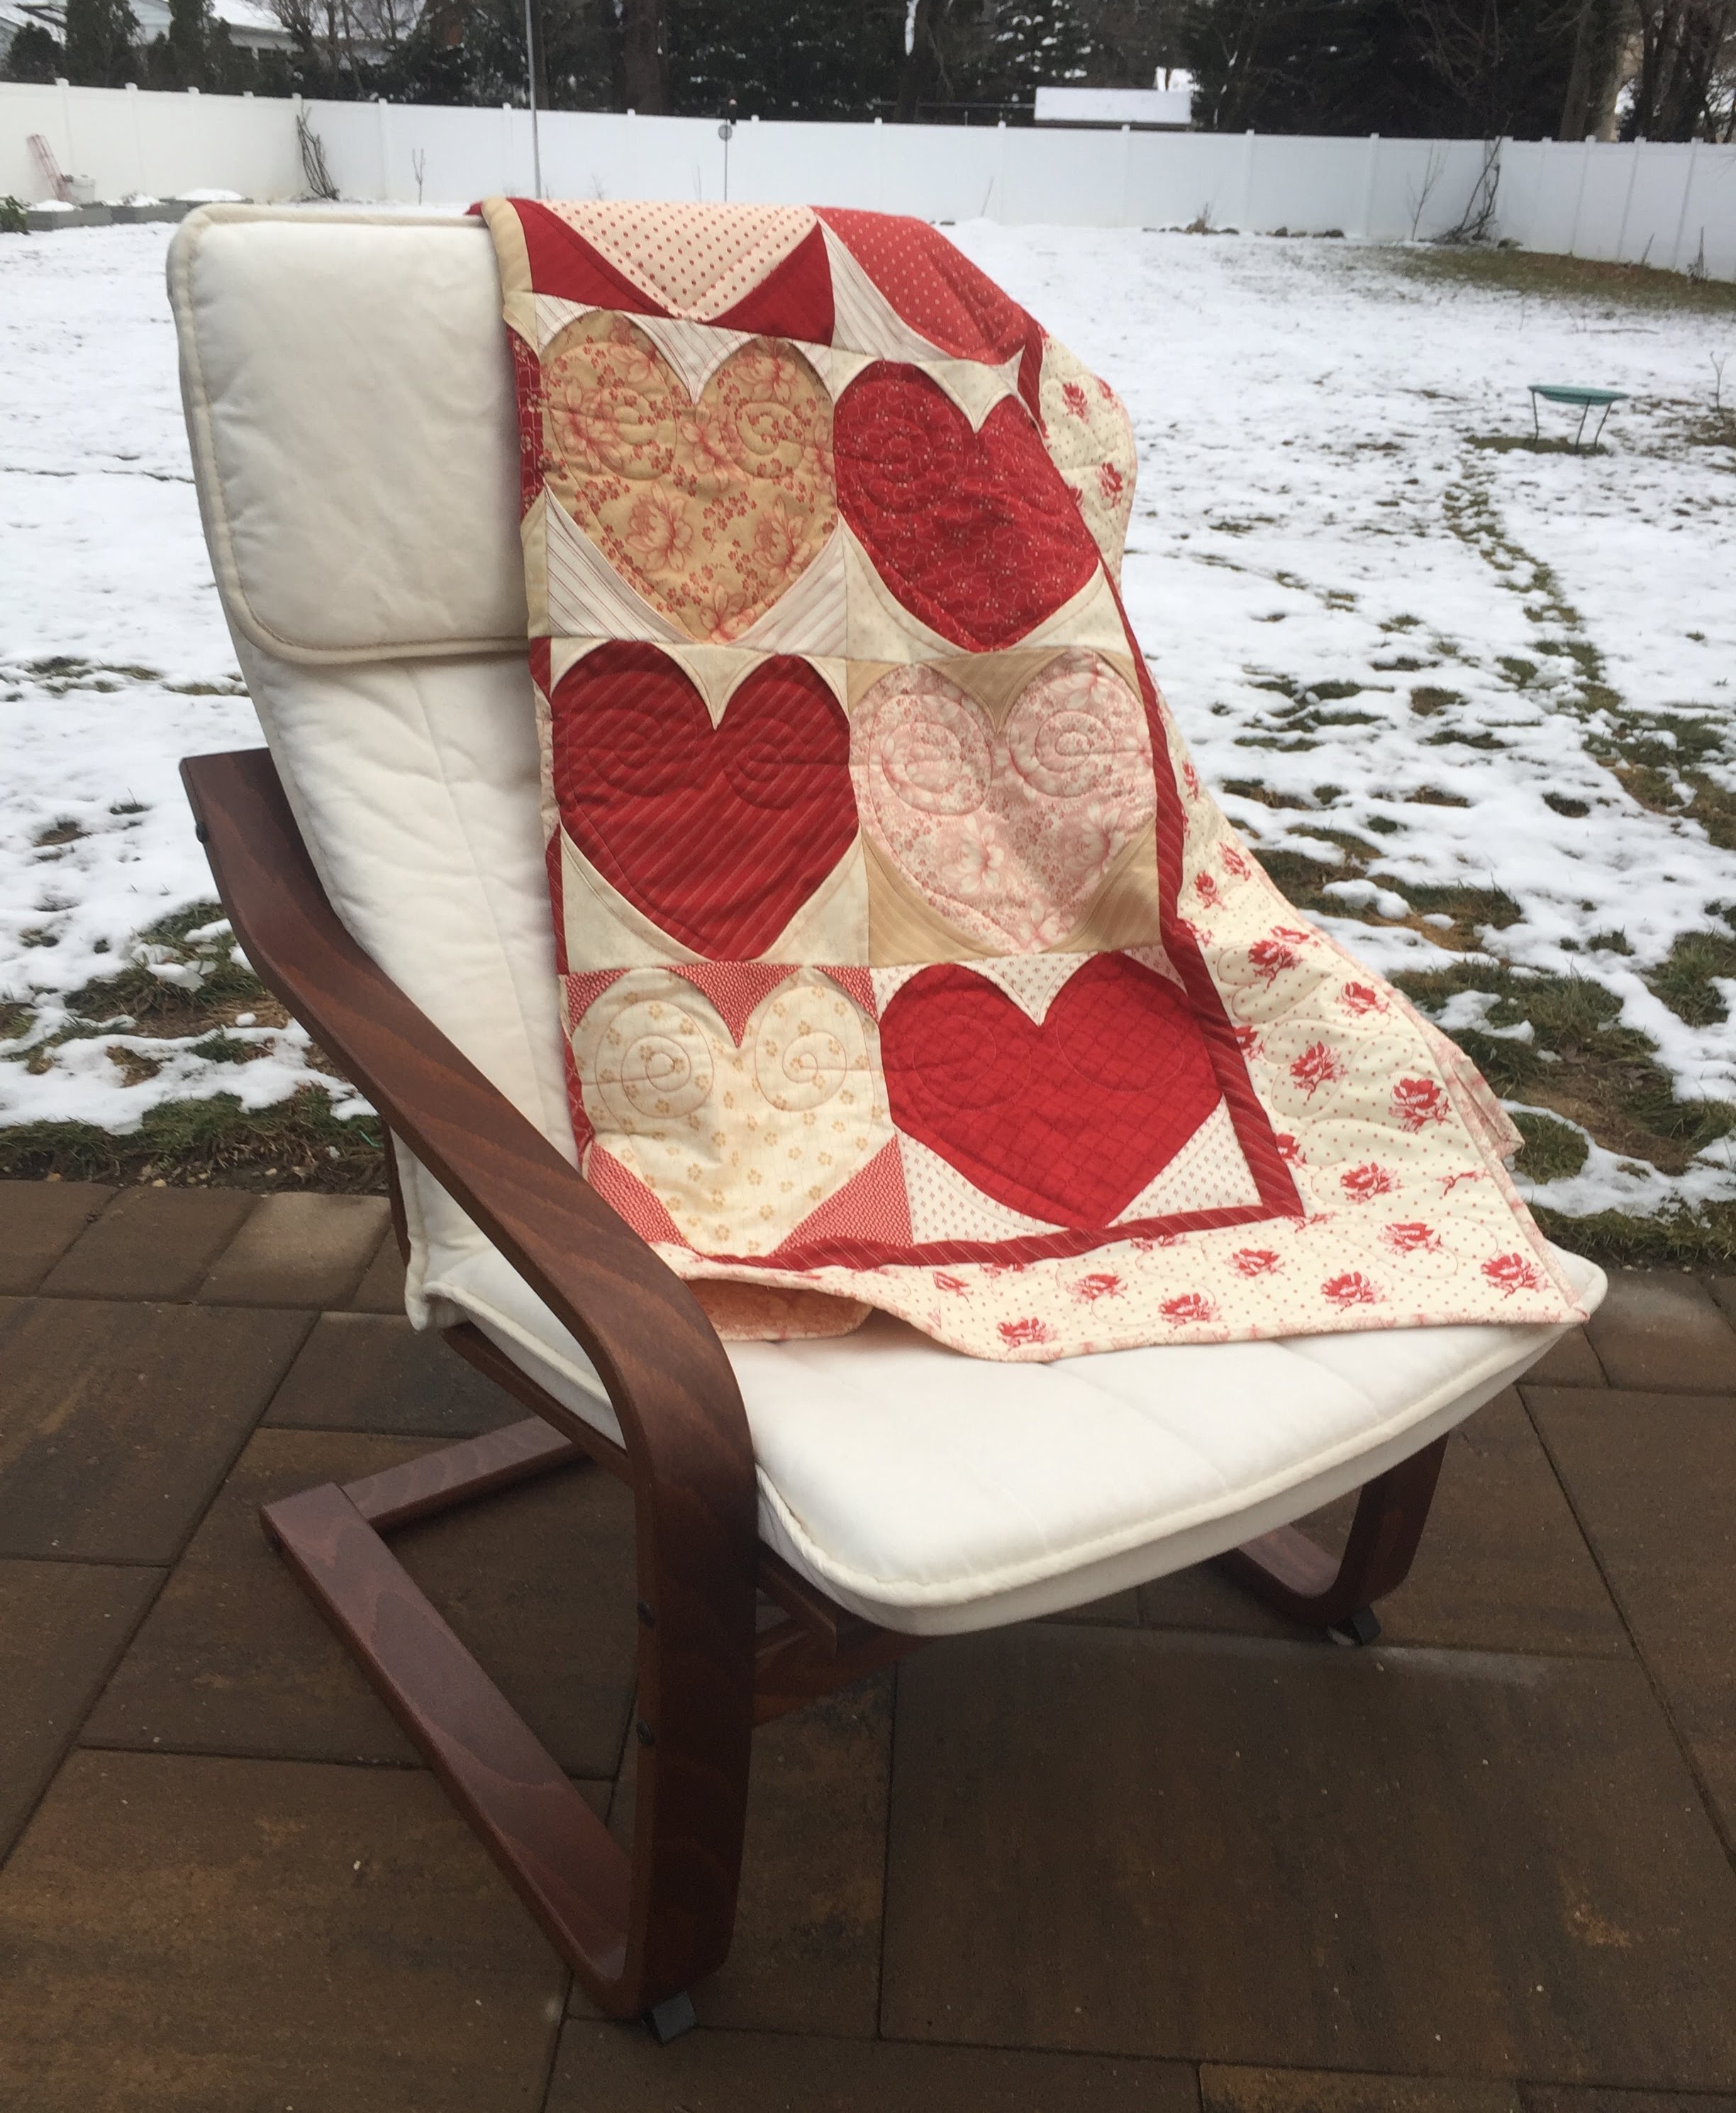
Valentine’s Day is one of my favorite holidays, but one I rarely plan for in advance. This year I’ve come up with a fresh new spin on a heart block. I use fabric manipulation to get curved lines and a 3-d effect without the challenge of piecing curved seams. Using a Farmhouse Reds Layer Cake and some coordinating yardage you can put this together easily and have a lovely romantic throw in no time. You can see my other version of this project on my Instagram feed - @jenstrauser
This quilt/project finishes at 50" x 58".
![]()
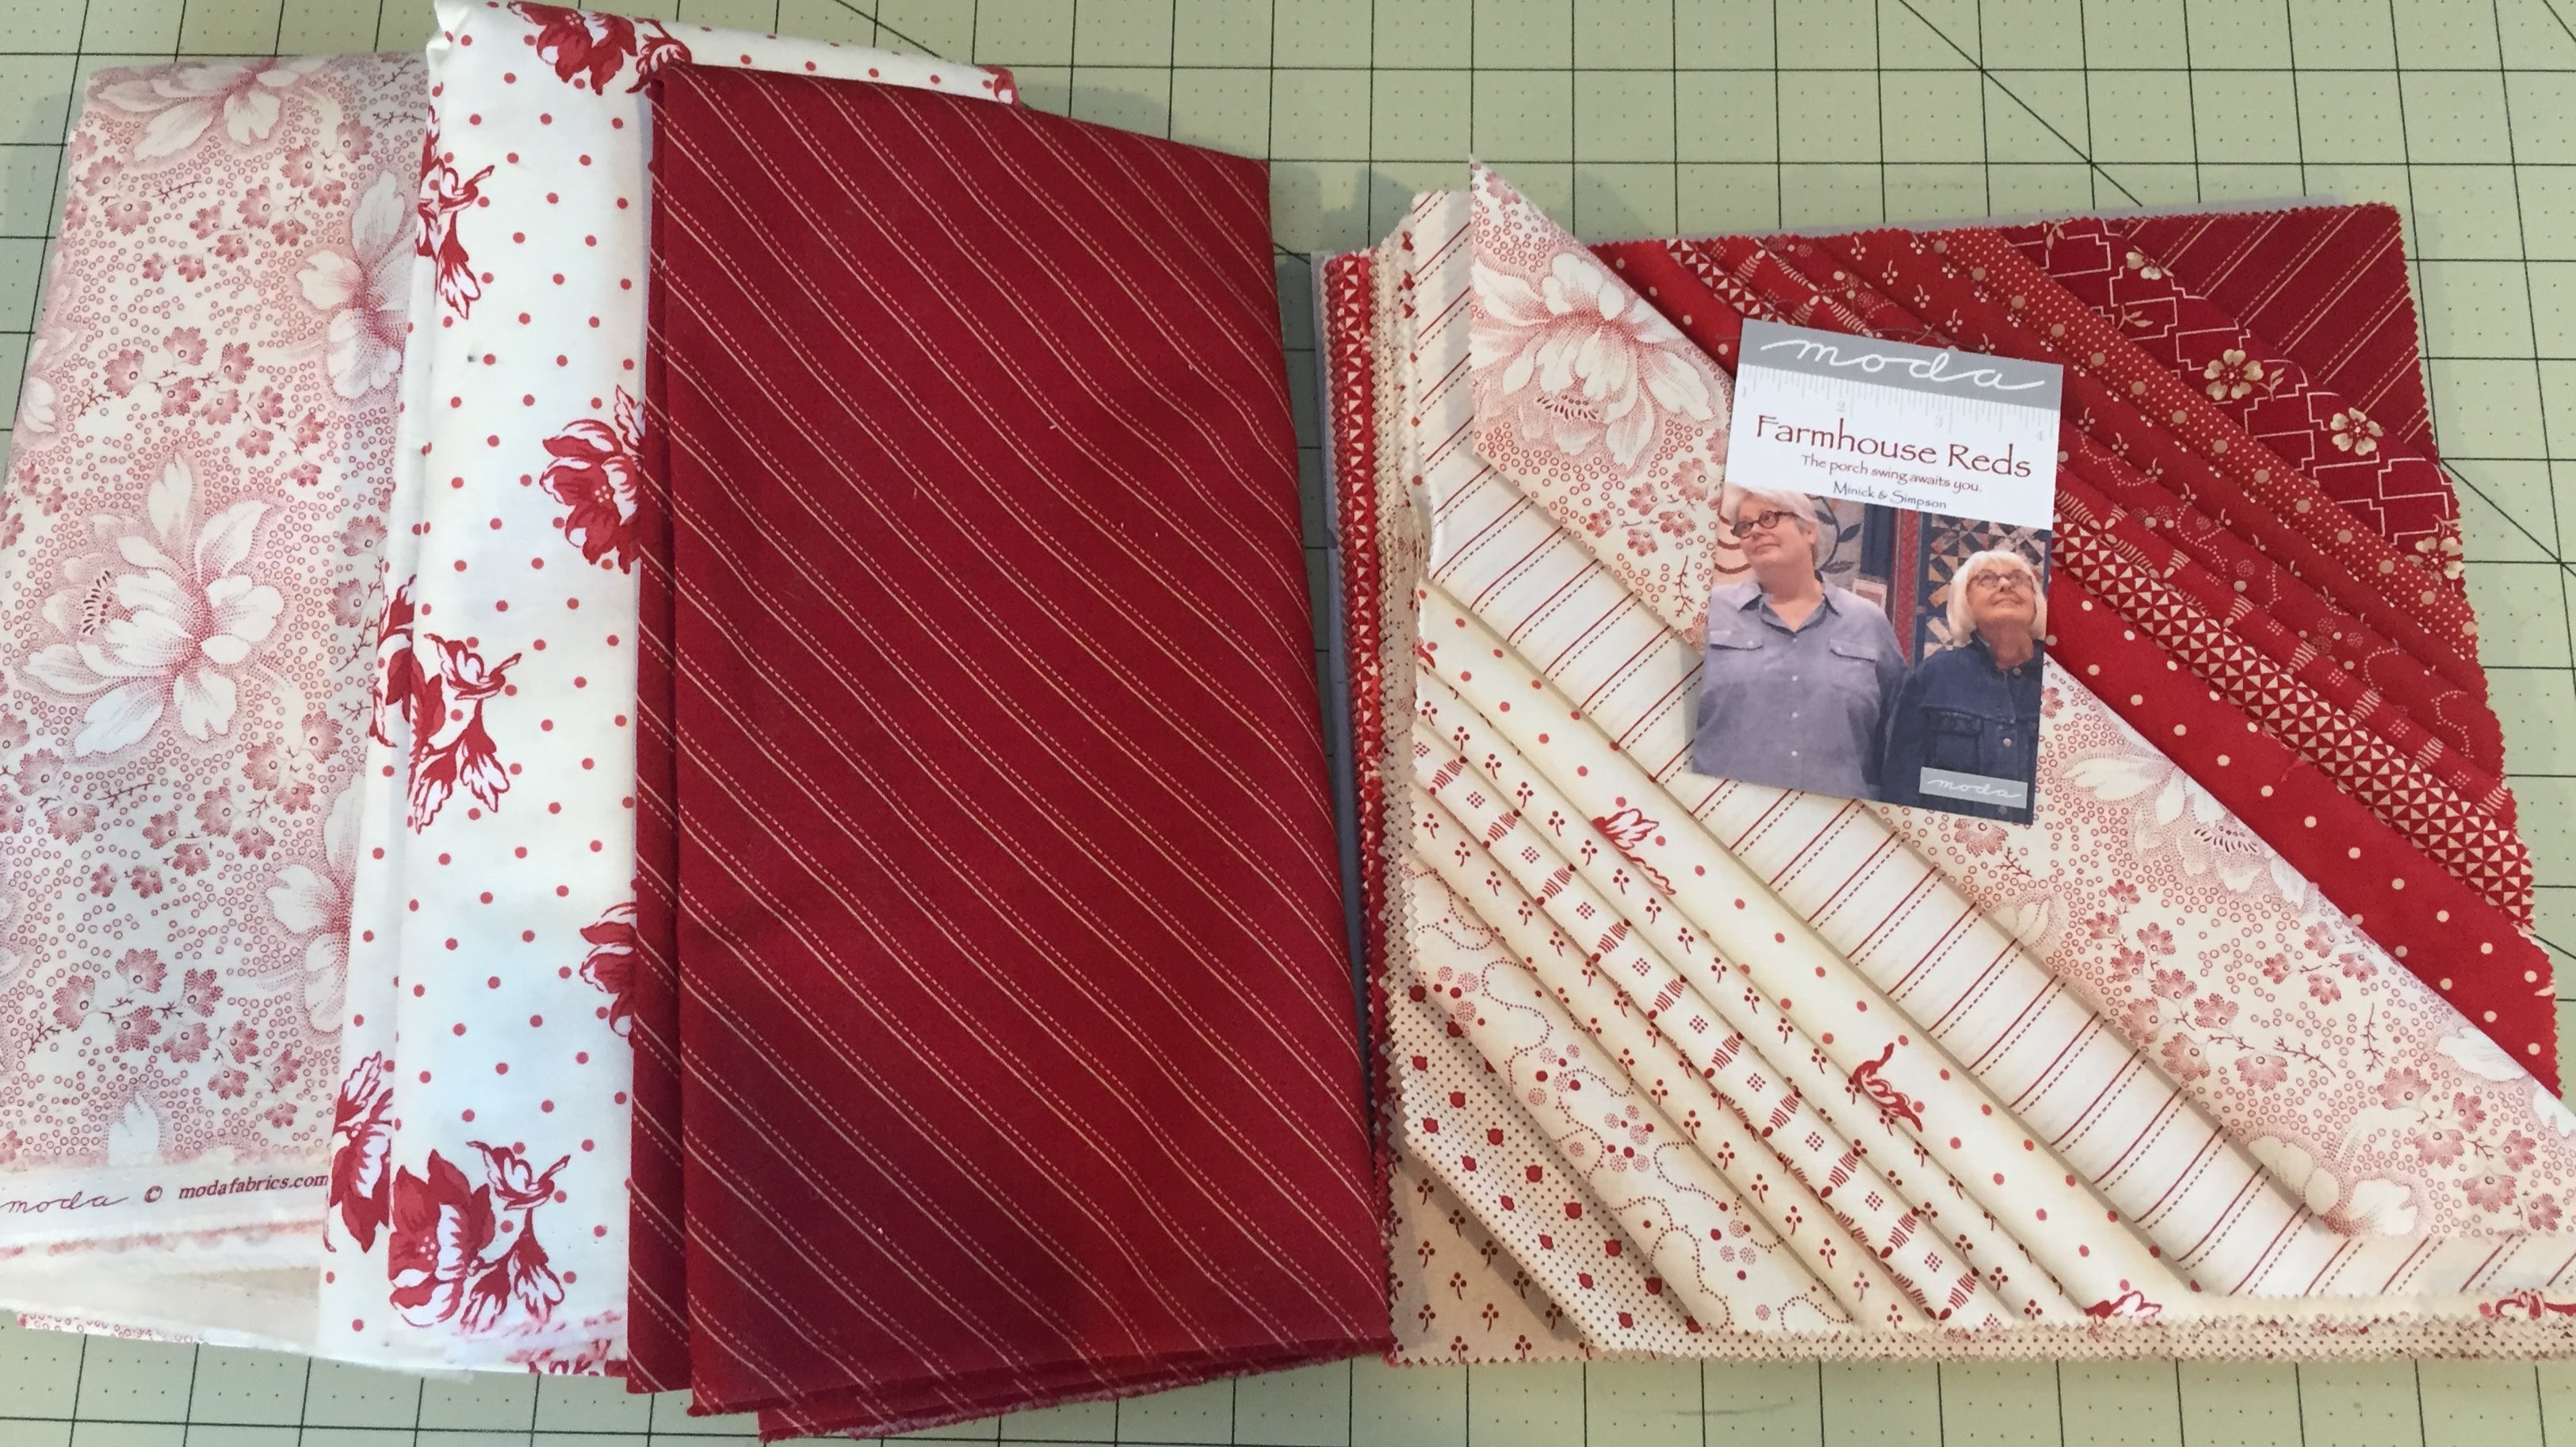
1 Layer Cake® Farmhouse Reds by Minick and Simpson
1/2 yard inner border fabric 48615 16
1 1/2 yards outer border fabric 48610 11
4 yards backing and binding fabric 48613 11
![]()
Twin sized batting
Variegated tread for quilting (optional)
![]()
All seams are ¼”, unless noted
Press all seams open
Plan the quilt
- I like to sort through my layer cake, dividing it into two piles of 20 squares each. One stack will be the hearts, and the other stack will be the background. Set your hearts aside for now. These are Piece A.
Cutting fabric
- From your background fabric cut
B: 1 - 3” x 5 ½” rectangle
C: 2 - 2 ½” squares
D: 2 - 5” squares
Prepare block units
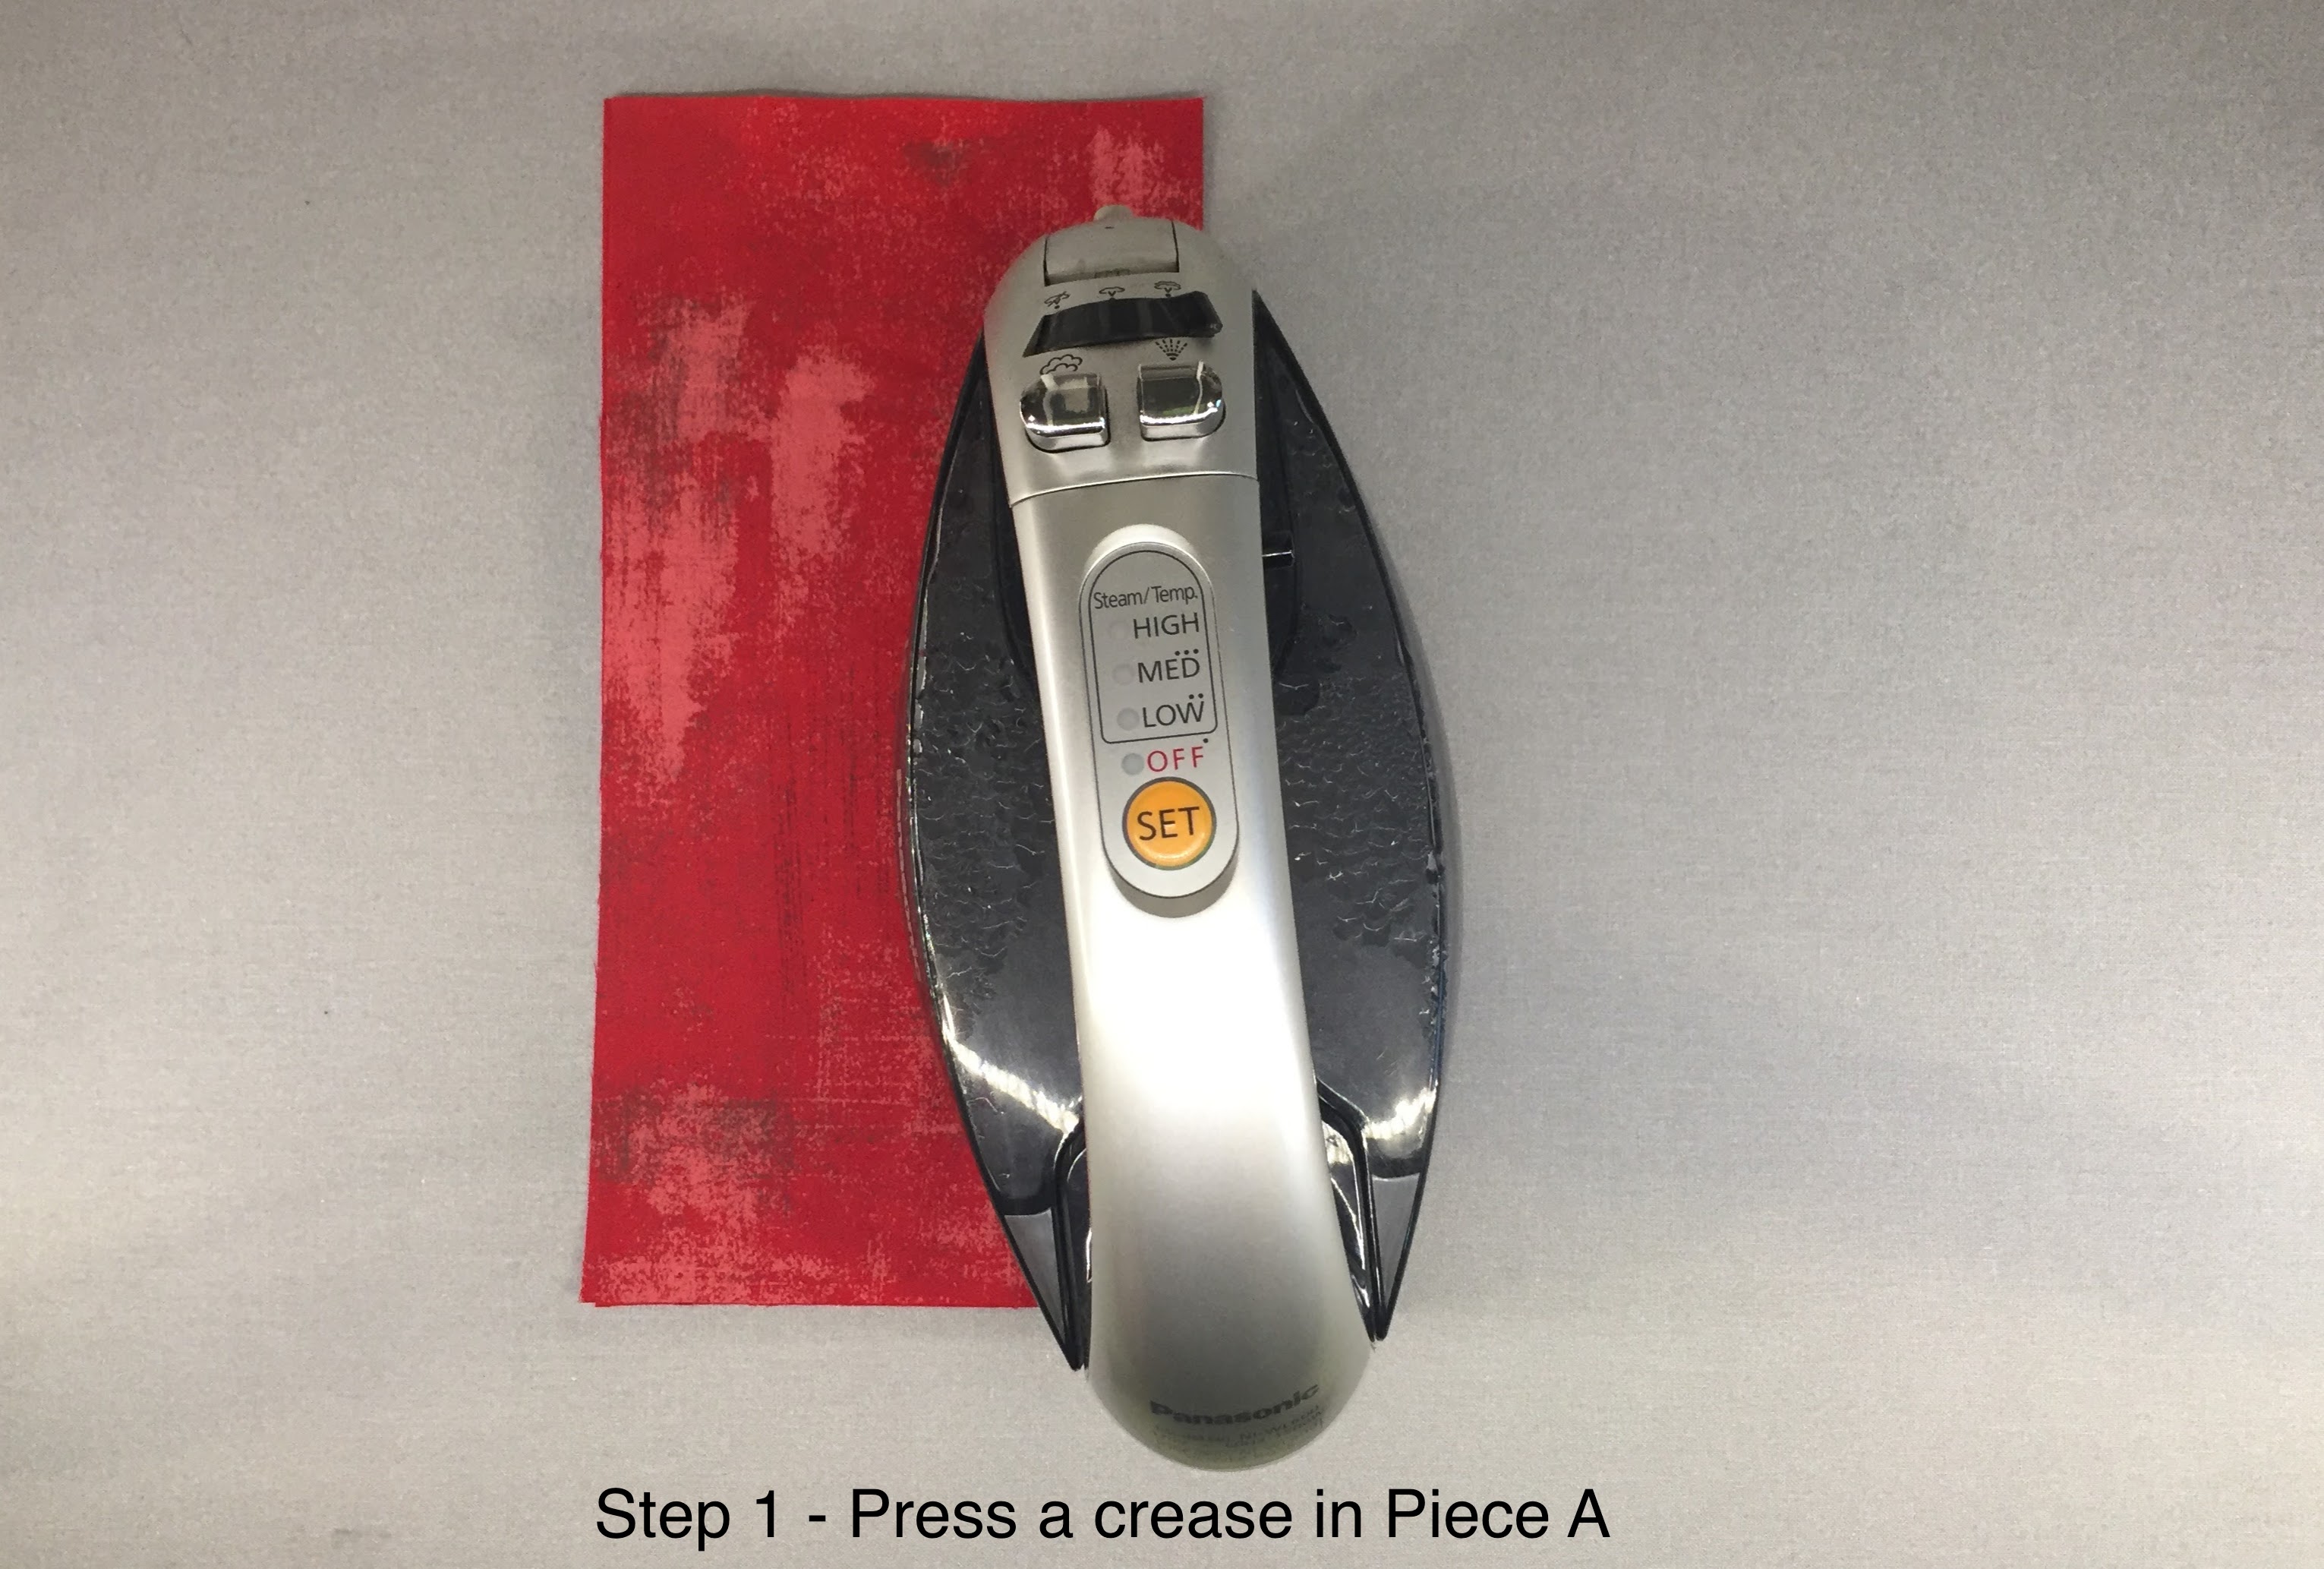
- Fold piece A in half, right sides together and press lightly. You will have a crease from top to bottom along the center of the block. This crease will be your placement guide for piece B.

- Place piece B wrong side up on your ironing board. Turn up ¼” along the long side and press. Fold the two short raw edges in and up, forming a triangle with the folded edge at the center point. Press to set the shape.

- Press pieces C and D in half along the diagonal, wrong sides together


Stitch your block

- Following the block diagram, line up pieces B, C and D on top of piece A with raw edges to the outside, and folded edges to the inside. This will generate your heart shape.

- Pin your pieces in place.

- Stay stitch around the outside of your square, keeping your stitch line to less than a ¼”. I aim for ⅛”, but it does not have to be precise. This will keep your pieces from shifting. I also put a pin at the point of piece B, to steady it during the next step.

- Slide your finger under the open flap of piece D. Fold the bias edge you created over and away from the center of the heart. It will fold flat, leaving you with a gentle curve. At it's widest point, the fold will be about 3/8" of an inch wide. Pin this flap down all the way around the inside of your block.
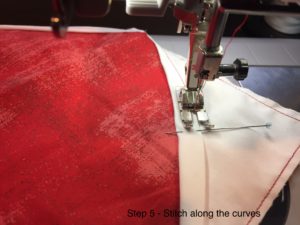
- Your stitching will show on your finished piece, so use a thread color you like. I like to sew very close to the edge of the curve, but consistency is the most important factor. Sew slowly, rotating the piece as necessary.

- When you get to piece B stitch it like the other triangles. When you get to the very tip, drop your needle, rotate the piece, and continue along the next side.

- Continue all the way around the heart.
- Sit back, admire your heart. Isn’t it cute? Pet it. Now make 19 more.


Assemble your top
- Using a design wall if you have one, a handy floor if you don't, arrange your hearts into a pleasing composition, with 4 hearts across, 5 down. I went with a mostly random layout, but tried to distribute lights and darks across the quilt.
- Starting at the upper left side, join the blocks in pairs. Press your seams open.
- Join the pairs together, completing each row. Press your seams open.
- Join the rows together, pinning intersections carefully. Again, press your seams open. It is a little bit more work, but it makes for a flatter quilt, particularly with these bulky seams.
Prepare borders
- Measure your quilt top across the center. I like to add to the vertical sides first, so I measure from top to bottom. Your quilt should measure 38.5” x 48”. Cut two strips from your border fabric, 1.5” x 48”, or whatever your quilt top measures.
- Fold border pieces in half lengthwise, then in half again, pressing at each section to make registration marks. Do the same for your quilt top, then pin the border to the sides, matching up your registration marks. This will prevent the dreaded wavy border.
- Repeat this process for the top and bottom borders. Measure across the center of the quilt, including borders. It should measure 40.5”. Cut your border pieces 1.5” x 40.5”, or whatever your quilt top measures. Repeat the pressing and pinning.
- To add your wide outer border, repeat the process. Side borders should measure 5.5" x 48.5". Top and bottom borders should measure 5.5" x 49.5".
- Et voilà, you have a finished quilt top.

Layer and prepare for quilting
- Press your top carefully. A nice flat top is easier to work with.
- Prepare backing. Remove the selvage edges, cutting a straight line as you remove them. Cut the remaining yardage in half, two have two pieces 72" x WOF. Stitch pieces together along the 72" sides, giving you a backing that is 72" x 80".
- Lay out your backing on a flat surface, right side down. Layer batting on top of it, keeping everything smooth. Lay quilt top on top, right side up.
- Pin or thread baste, as you prefer. I do not leave a space wider than my hand un-basted.
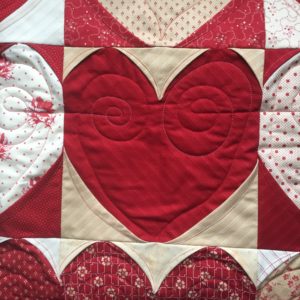
- This is where I tell you to quilt as desired, the most despised phrase in quilting. Quilting will vary greatly depending on the tools at your disposal. In this piece I opted to free motion patterns inside of each heart, and a swirly heart border. I used a variegated red, pink and white thread from Gutermann. I am lucky enough to have a longarm quilting machine. With a domestic machine I would use a free motion foot and echo within each heart, to enhance the texture. If you aren’t comfortable with a free motion foot, a walking foot with straight lines or a cross hatch would look great. Be careful going over the folded bits - they are very bulky, and hitting them while doing free motion and can cause broken needles. I avoided stitching over them.
- I used leftover strips from the backing to prepare my binding strips. I cut my binding strips at 2 1/2". Bind your quilt, and get snuggly with someone you love.

![]()
This quilt finishes at 50" x 58".
I hope you enjoyed this project. I have put together a video tutorial that you can find on Youtube.com to help if you are confused. If you use my pattern, let me know! I love seeing other maker's interpretations of my designs. Share your photos on social media, and tag me on Instagram @jenstrauser or on Facebook @Dizzy Quilter.
Jennifer Strauser
![]()
Posted in:
Comments