Welcome to Moda Fabrics!
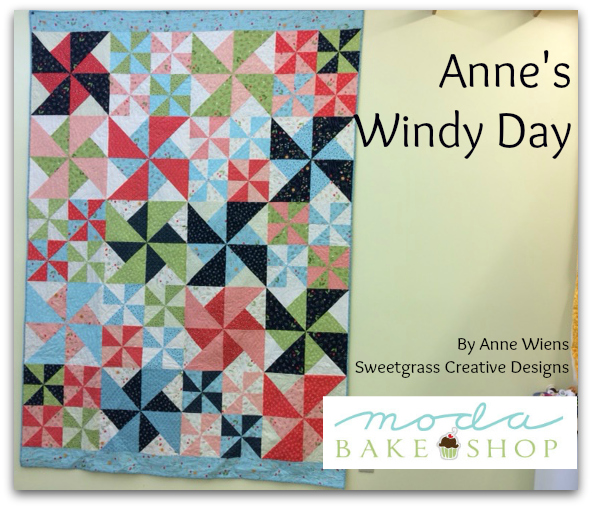
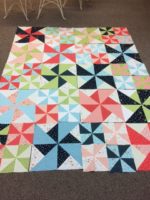
Windy Day Quilt
Windy Day Quilt
Published:
Feb 4 2018 - 23:00
![]()
We are no stranger to wind here on the northern Montana plains. It's a rare day when the wind isn't blowing. Winter storms blow in on howling north winds. About the time you think you can't stand the sub-zero cold and bitter wind chill any longer, the wind shifts to the southwest and comes sweeping off the eastern front of the Rockies as a warm Chinook. The first Chinook I experienced raised the outdoor temperature from -7°f to +40°f in about 12 minutes.
This 64" x 88" twin-size quilt, however, brings to mind more gentle summer breezes, and the fabric collection I used reminds me that spring is just weeks away...on the calendar, anyway. Around these parts, we know that the first day of spring and the first spring day are entirely different things.
![]()
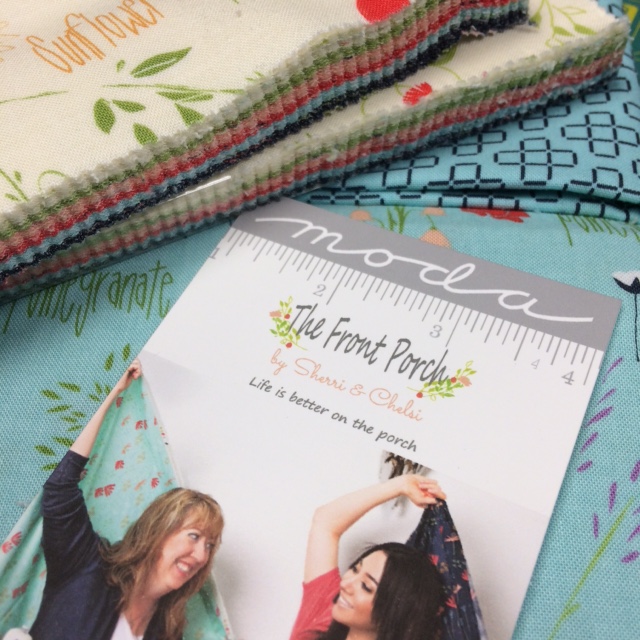 Two Moda Layer Cakes®. I chose the "Front Porch" collection by Sherri & Chelsea.
5/8 yard of a coordinate for the optional top and bottom borders. I used one of the floral prints, #37540-18 Blue.
5/8 yard of a coordinate for binding. I used #37545-17 Blue.
![]()
In addition to your normal rotary cutting tools, you will need a Tucker Trimmer III® or a square ruler that is at least 8.5" x 8.5", and has a diagonal line from corner to corner.
A 12" (or larger) rotating mat or a 12" x 18" flat mat would be handy. You will be making several cuts at one time, and being able to rotate the mat is preferable to moving and realigning pieces between cuts.
Twenty safety pins and twenty small slips of paper to label your blocks. This is optional, as well, but also highly recommended.
![]()
Step 1 is to unwrap your Layer Cakes. Spend a little time fondling the fabric, sorting them into color groups. and match up your 10" squares.
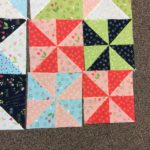
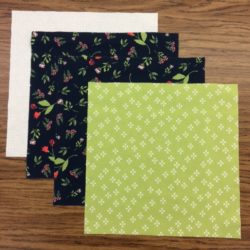 1a - Squares for the Double Pinwheel block
1a: Choose twelve sets of four squares for the Double Pinwheel blocks. You will need one light square for the background. You will need two matching squares for the large pinwheel and one contrasting square for the small pinwheel.
Note: You can use two darks and one medium, or two mediums and one dark for the double pinwheel blocks, but I suggest you always use the lightest square for the background.
1b: Once you have your sets for the twelve Double Pinwheel blocks, pair up the remaining squares, one darker square and one lighter square per pair. Set these pairs aside while we make the Double Pinwheels.
Step 2 is to make the Double Pinwheel blocks.
 2a
2a
2a: Stack the two matching squares and cut diagonally ONCE. Set these triangles aside.
 2b
2b
2b: Stack the background and contrasting squares, right-sides together, and cut diagonally TWICE.
Cut one diagonal line, rotate the mat without moving the fabric, and make the second diagonal cut. NEVER EVER cut toward your body with a rotary cutter!
 2c
2c
2c: Sew the triangles together. It is imperative that the triangles are sewn together correctly, or you will have pinwheels that spin in opposite directions.
Feed the triangle pairs under the presser foot, with the background (lighter) fabric on top, and leading with the right (90°) angle. Be sure all of the pairs feed through this way, you'll save yourself a lot of unsewing.
Personally, I prefer to press my seams open. If you want to press to one side, press toward the darker triangle.
 2d
2d
2d: Sew the pairs of small triangles to the larger triangles. You will notice that the large (green) triangle is quite a bit bigger than the pair of small triangles. That's okay. Press the seam open, or toward the larger triangle as you prefer.
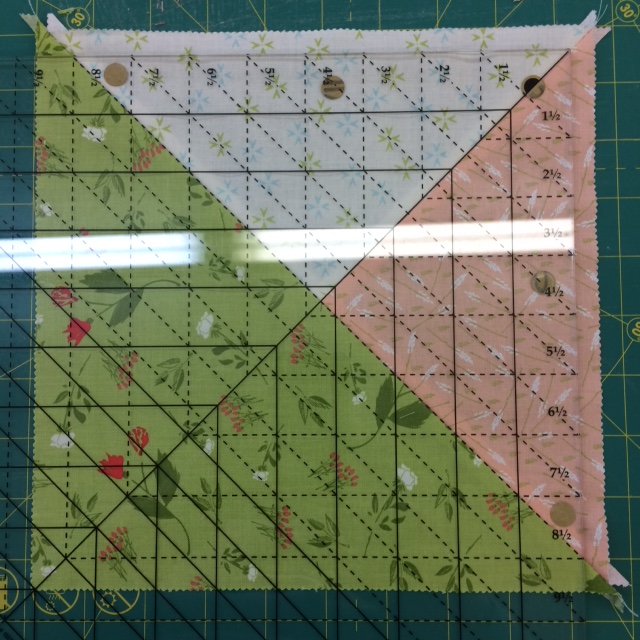
2e: Now we want to trim these triangle units. For this step, I'm going to use the Tucker Trimmer III. If you don't have one, use painters tape or Glo Tape to mark a diagonal line at the 8.5" points on a square ruler.
 2e-1
2e-1
Lay the ruler on your triangle unit so that one the center diagonal line runs along one seam and the 8.5" diagonal line runs along the other seam. Trim the right and top edges.
 2e-2
2e-2
Rotate your mat 180° and line up your ruler's diagonal lines with your seam lines again. trim the right and top edges.
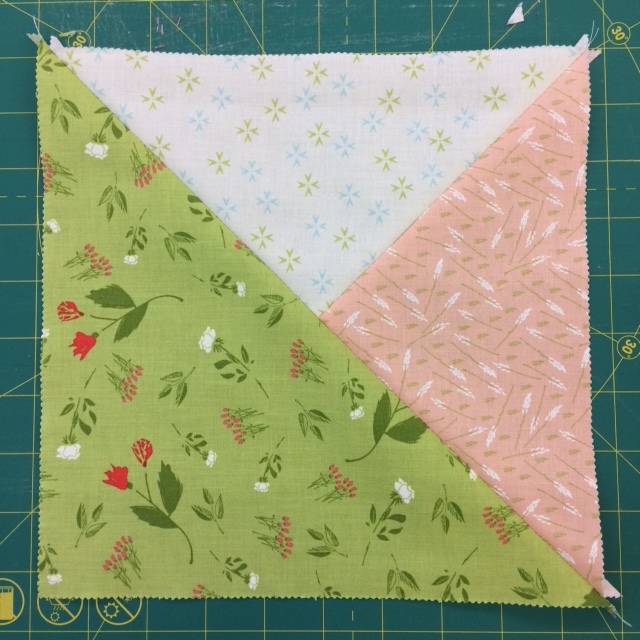
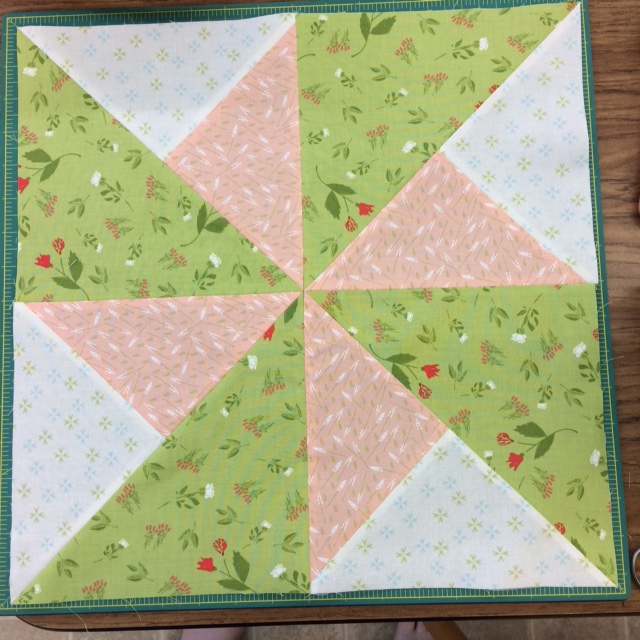
2f: Layout the four triangle units as shown and sew together to
 2f
2f
make the Double Pinwheel blocks.
Make twelve of these double pinwheel blocks. Set them aside while we make the smaller pinwheels.
Step 3 is to make 32 single pinwheels.
 3a
3a
3a: Place one pair of 10" squares on your mat, right-sides-together, edges aligned.
Cut in half vertically, horizontally, and then cut on both diagonals, yielding eight triangle pieces.
 3b
3b
3b: Sew the triangle pairs along the bias edge.
Press seam open or toward the darker triangle, as you like.
Trim each half-square triangle to 4.5" square.
 3c
3c
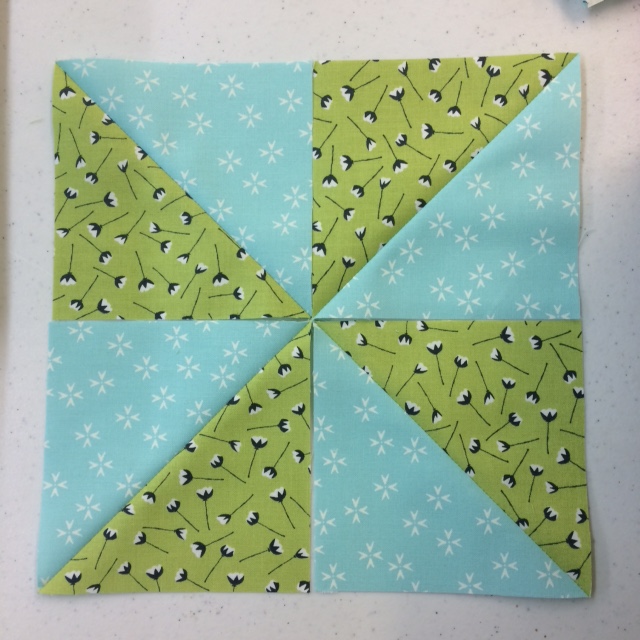
3c: Lay out four matching half-square triangles in a pinwheel formation. Be sure your small pinwheels "spin" the same direction as your Double Pinwheel blocks. Sew pinwheels together.
Eventually, we will sew these 8.5" pinwheels into blocks of four, to match the size of the Double Pinwheel blocks.
 4a
4a
Step 4 is to lay out the quilt. The easiest way to do this is to make a placement chart, four squares across and five squares down.
4a: Pencil in where you want your Double Pinwheel blocks to go.
This is just a starting point. You can move things around once you have them laid out.
 4b
4b
4b: Lay out your Double Pinwheel blocks according to your chart, leaving spaces where indicated. If you use a reducing glass, (or your cellphone's camera), you may notice one or two colors really command attention.
I thought the navy blue and dark orange blocks were the "showoffs" in this quilt.
Move blocks around to spread these blocks out.
 4c
4c
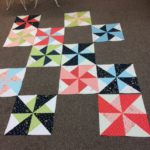
4c: Once you're happy with the layout of the Double Pinwheels, you can fill in with the single pinwheels.
The reason we didn't go ahead and sew the small pinwheels into blocks is because we want to be able to keep same colors from butting up against each other. This would have been much harder to do had we already sewn the small pinwheels together.
Note: If you sewed all of your 10" squares into pinwheels, you'll have 4 pinwheels left over...just right for a doll quilt or throw pillow cover!
 4d
4d
4d: Now we can sew the small pinwheels into blocks.
I found it best to pick up and sew one set of 4 pinwheels at a time. I snapped a photo of each block before picking up the pinwheels, so I didn't get them out of order when sewing them together.
Step 5 is to sew the rows together.
At this point I pin a slip of paper to the upper left corner of each block, noting the row number and the position of the block within that row...1a, 1b, 1c, 2a, 2b, etc. That way, if I have to pick up the blocks. I can lay them back out again in the same order, and since the tag is always in the upper left corner, I can keep the orientation straight, as well. When I sew block A to block B, I remove the tag from block B. When I sew block B to block C, C loses its tag, and so on. The tag stays on Block A of each row until the rows are sewn together.
Step 6 to add the optional top and bottom borders, which will make this quilt long enough to use on a twin bed.
Measure your quilt top width across the center row. Ideally, it will be 64.5" If it isn't, don't worry. Just jot down the number you got. (Mine was 64".)
Cut four 4.5" width-of-fabric strips from your coordinate print. Trim two strips to 40" long, and cut four 14" strips from the other two. Sew the 14" strips to both ends of the 40" strips. Trim the strips to the width of your quilt top, and sew to the top and bottom edges.
Your quilt top is now complete, ready to quilt, bind, and snuggle up under on the next cold, windy day!
![]()
This quilt finishes at approximately 64" x 88".
Anne Wiens
Blog: Seams Like a Plan
![]()
Posted in:
Comments