Welcome to Moda Fabrics!
Modern Cogs Quilt
Modern Cogs Quilt
Published:
Mar 6 2018 - 23:00

![]()
Hello friends! I am Jen Van Orman from Heritage Threads and I am excited to share with you all today a BIG quilt with BIG blocks! If you know me well, you know that tiny pieces and tiny blocks will always have my heart, but one cannot resist a big block that packs a big punch. I wanted to showcase the beautiful variation in the new Ombre Confetti Metallic by Vanessa Christensen and these 16" blocks did a great job of doing just that!
This quilt finishes at 96" x 96".
![]()

1 Fat Quarter Bundle {Ombre Confetti Metallic by V and Co.}
7 yards background fabric {Bella Solid Fog SKU# 9900-282}
3 yards Essentially Yours 108" wide backing fabric, or 9 yards 44" width fabric
3/4 yards binding fabric
![]()
CUTTING:
From your background fabric cut:
6 strips 5" x WOF.
---Subcut into (46) 5" x 5" squares.
21 strips 4.5" x WOF.
---Subcut into (184) 4.5" x 4.5" squares
1 strip 16.5" x WOF
--- Subcut into (4) 9.75" x 16.5" setting rectangles. These will be used in the final setting.
20 strips 3" x WOF.
---Set aside 11 strips that will be used as vertical sashing
--- From remaining 9 strips, cut (18) 3" x 16.5" pieces which will be used as sashing between the blocks.
12 strips 3.5" x WOF.
--- These will be used for your final border.
From your FQs cut:
I chose to omit the 2 browns and the black FQ. You will need to cut 8 FQs following this diagram (This will yield (64) 4.5" x 8.5" pieces.):
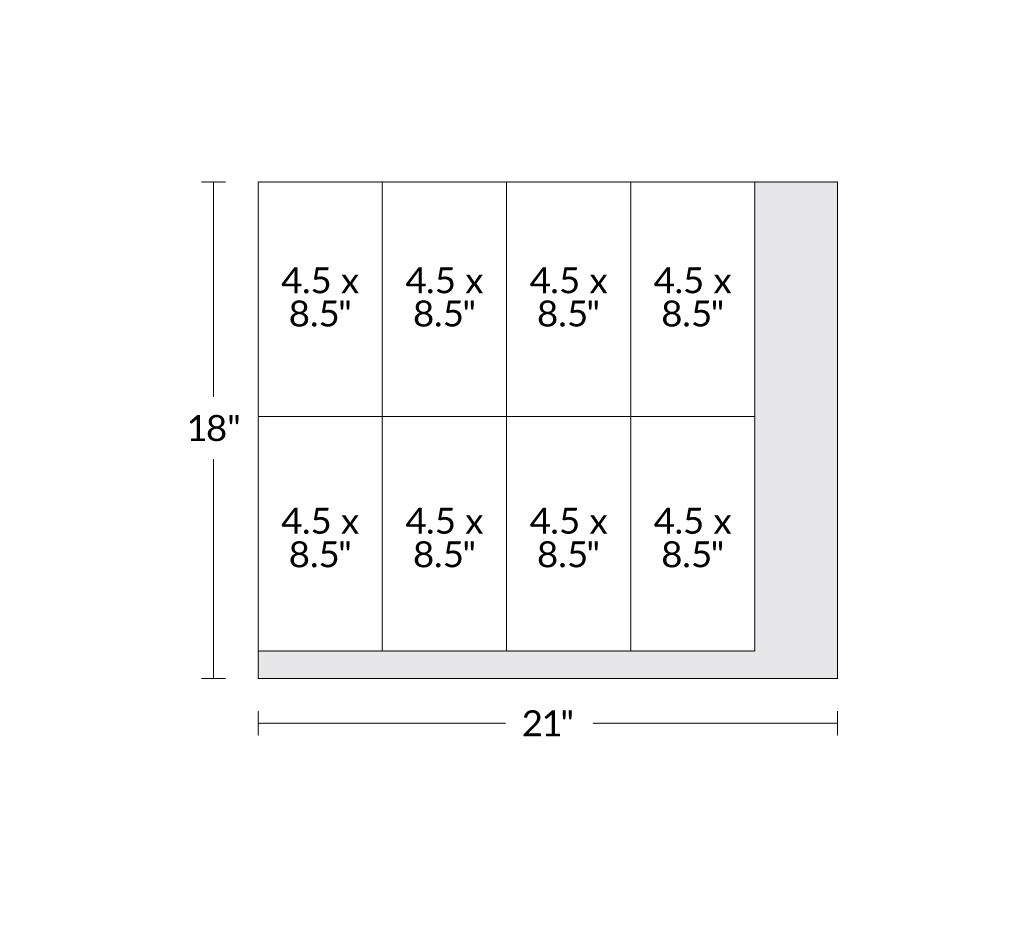
You will need to cut 9 FQs following this diagram:

This will yield (54) 5" x 5" squares and (36) 4.5" x 8.5" pieces, which you can put with the other ombre pieces that are the same size. You will only need (46) 5" x 5" squares, so you may omit some colors you don't like or ones that ended up being too light. Keep in mind you will need to omit them in pairs of 2 matching colors.
From your binding fabric cut:
(10) 2.25-2.5" x WOF strips (use whichever width you prefer). You can either choose to sew this together and make your binding now, or after you are all done making your quilt.
BLOCK CONSTRUCTION:
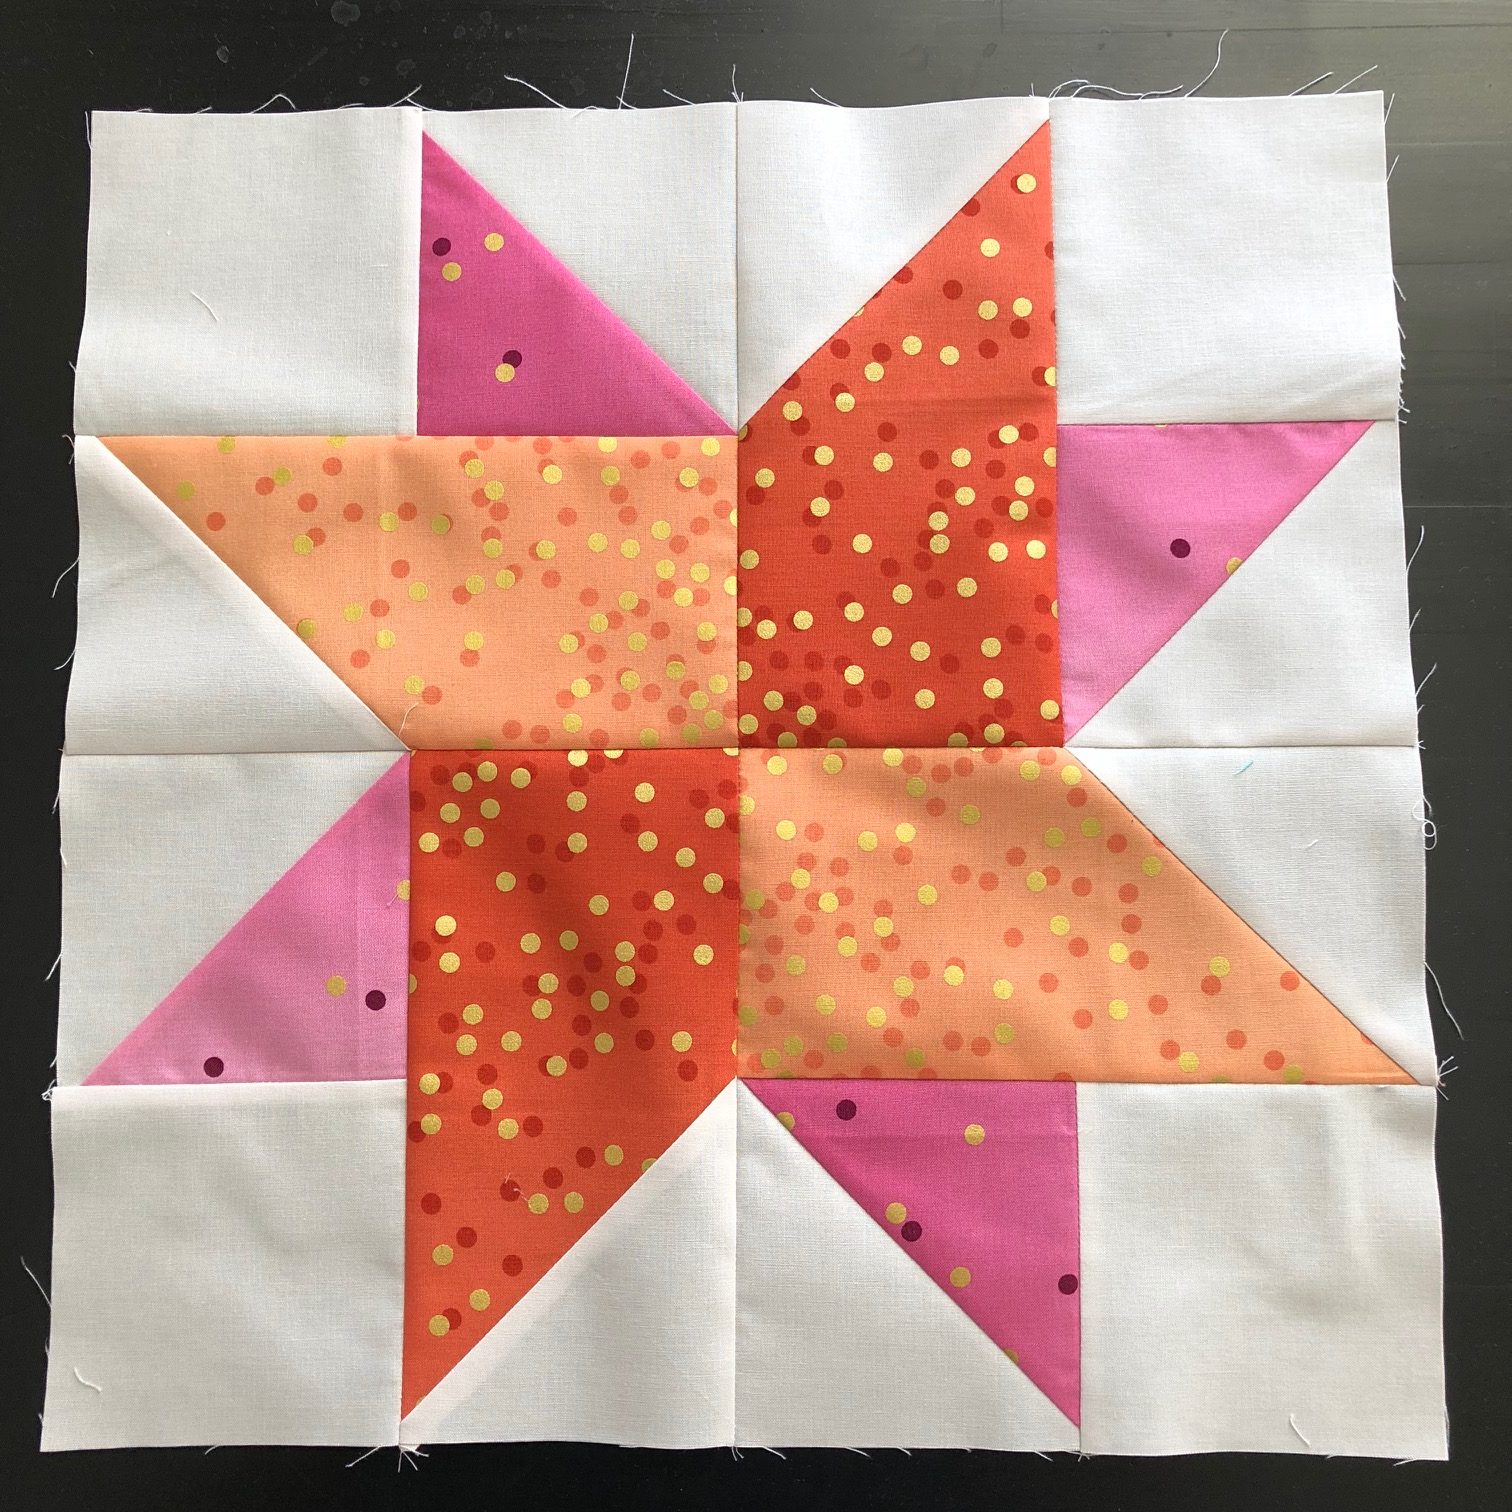
Here is what each block will look like after you finish:
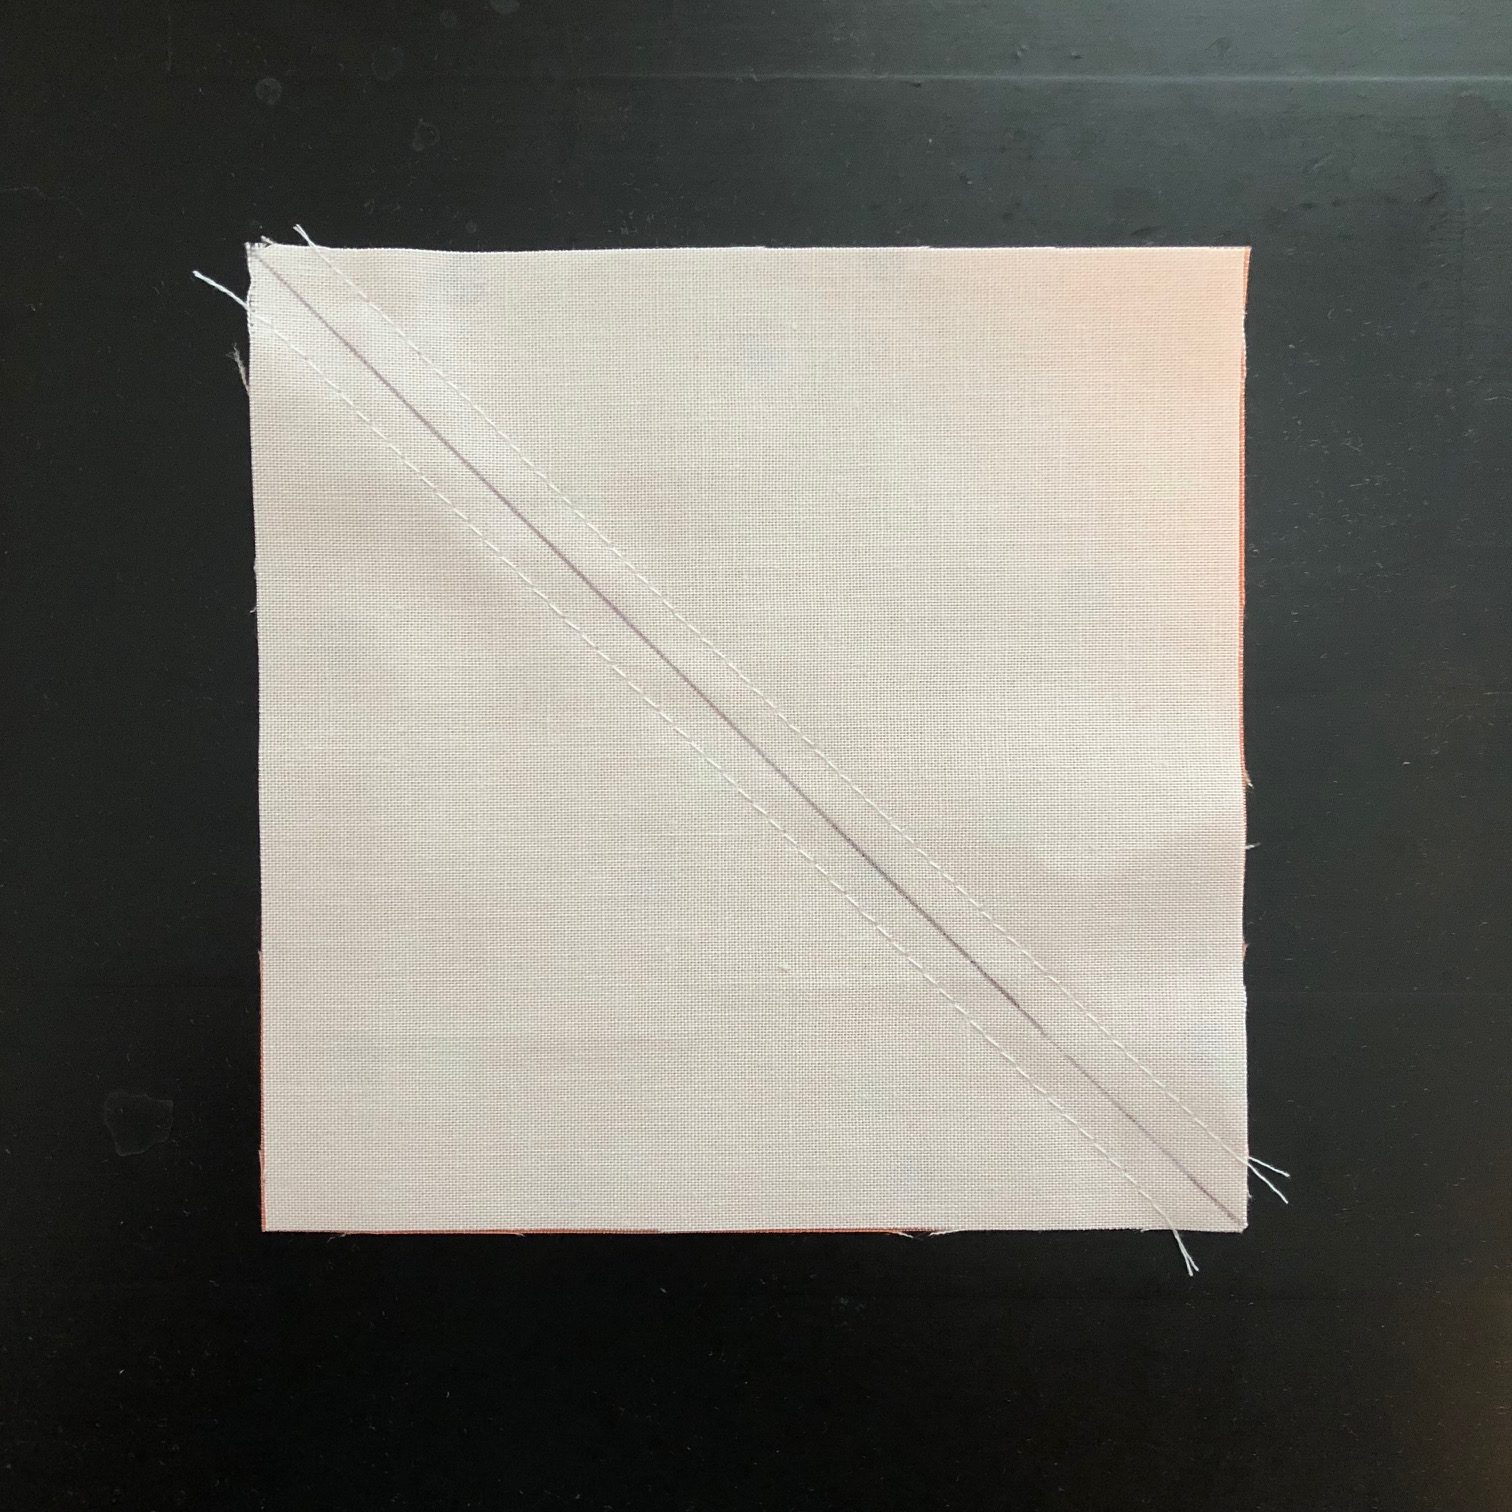
Begin by turning your (46) 5" x 5" background squares and the (46) 5" x 5" ombre squares you chose into 92 half square triangles (HSTs). You may draw a line down the center diagonally on the background squares, or line the corners up with tape on your machine. Whatever your preferred method is, go for it!
Sew 1/4" away from the center line on both sides.
Cut down the center line, press toward the print, and then trim to 4.5" square.

Take (92) 4.5" x 4.5" background squares and sew them like so to each of the HSTs. Set these aside until it's time to sew together each segment of the block.

For the remaining piece that will make up each segment, sew (1) 4.5" x 4.5" square onto each 4.5" x 8.5" ombre piece like this. You can mark diagonally or use tape on your machine to keep your sewing straight.

Cut off the excess 1/4" from your sewing line and press in either direction.

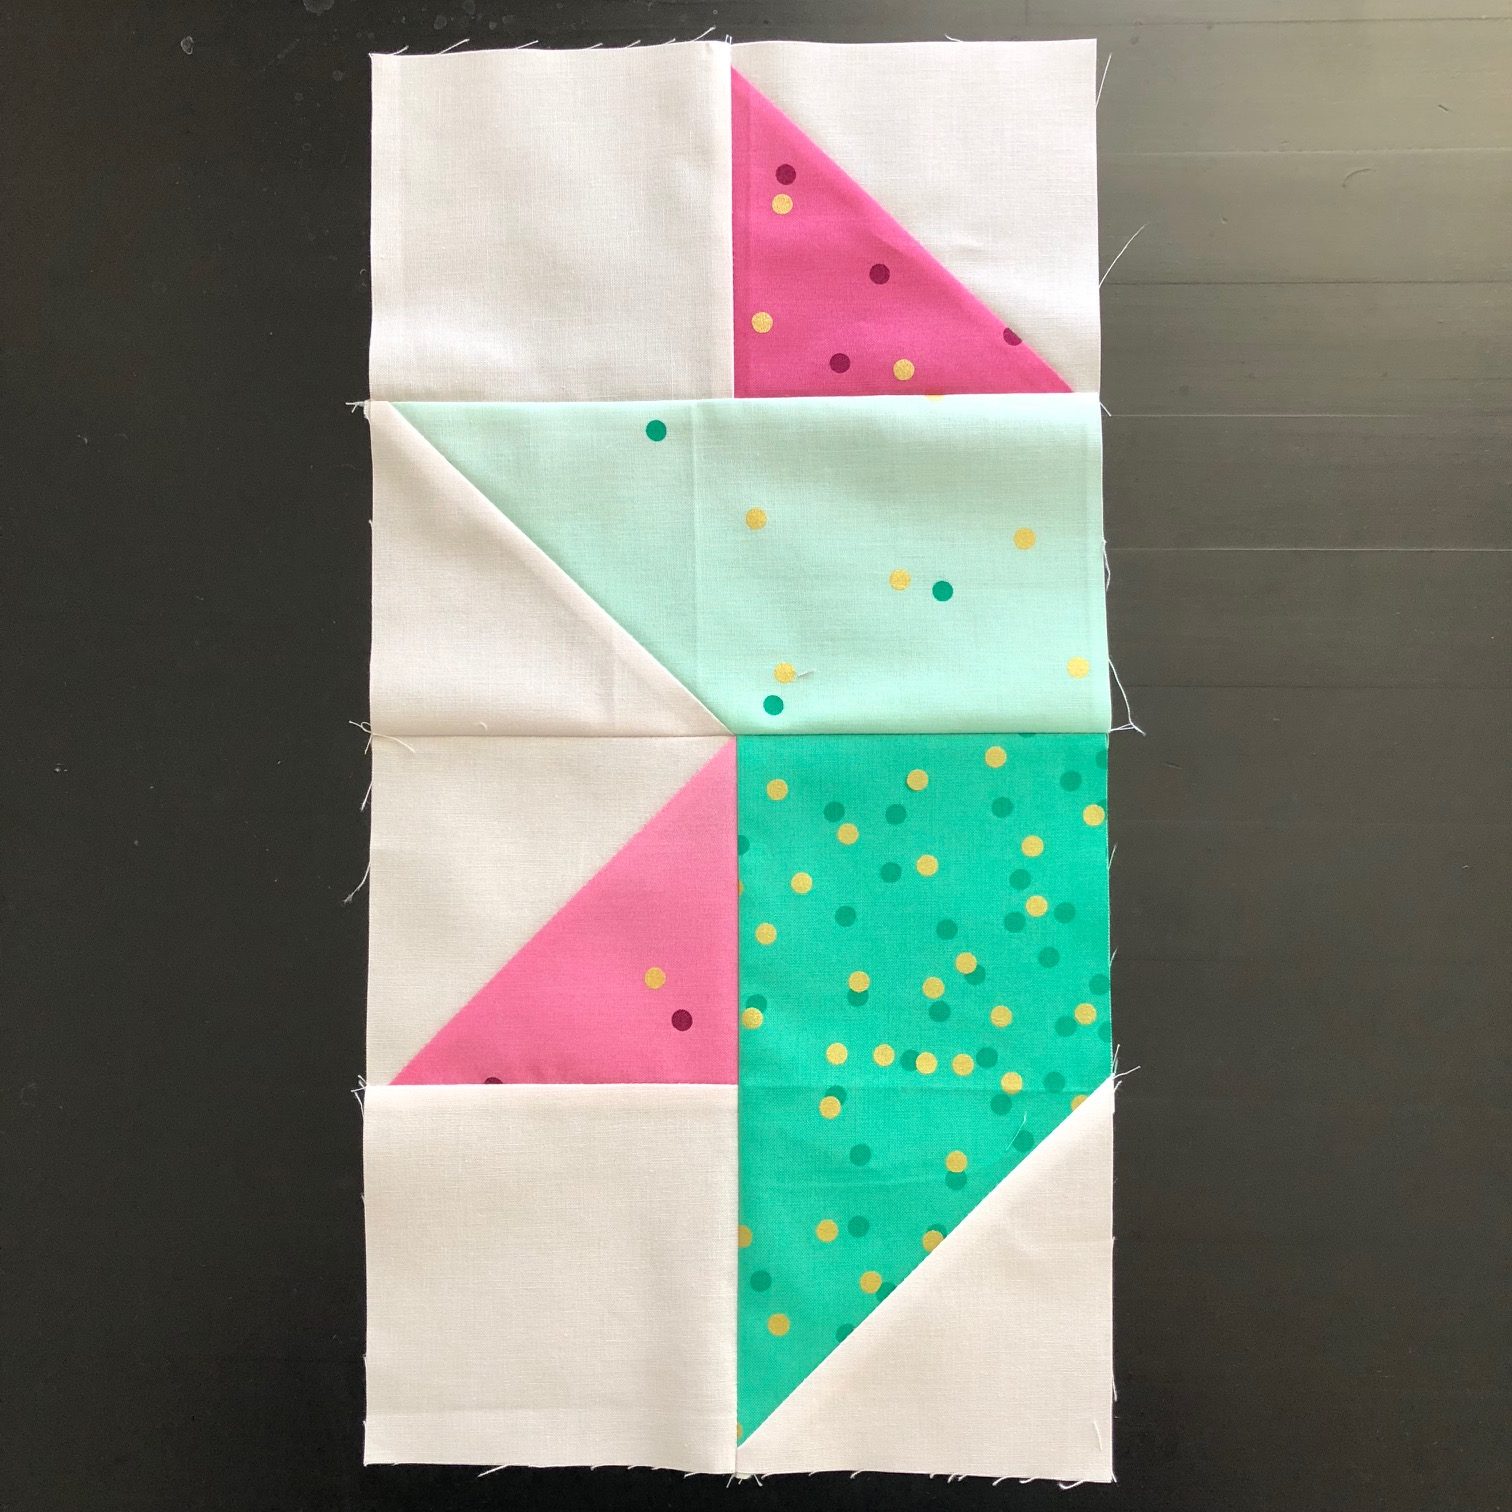
At this point in time, I decided I wanted to pair up my HST unit with the 4.5" x 8.5" piece we just made. You will need (4) 4.5" x 8.5" ombre pieces plus (1) HST unit per segment of the block. Each segment will be constructed exactly the same. I decided to keep like colors together as much as possible, but this quilt is very forgiving and all 4 segments could be different if you felt like it! Now you will sew the HST unit to the 4.5" x 8.5" ombre piece to make one segment.

Then sew 2 segments together to form half of the block.
Then two halves together and your block is complete!
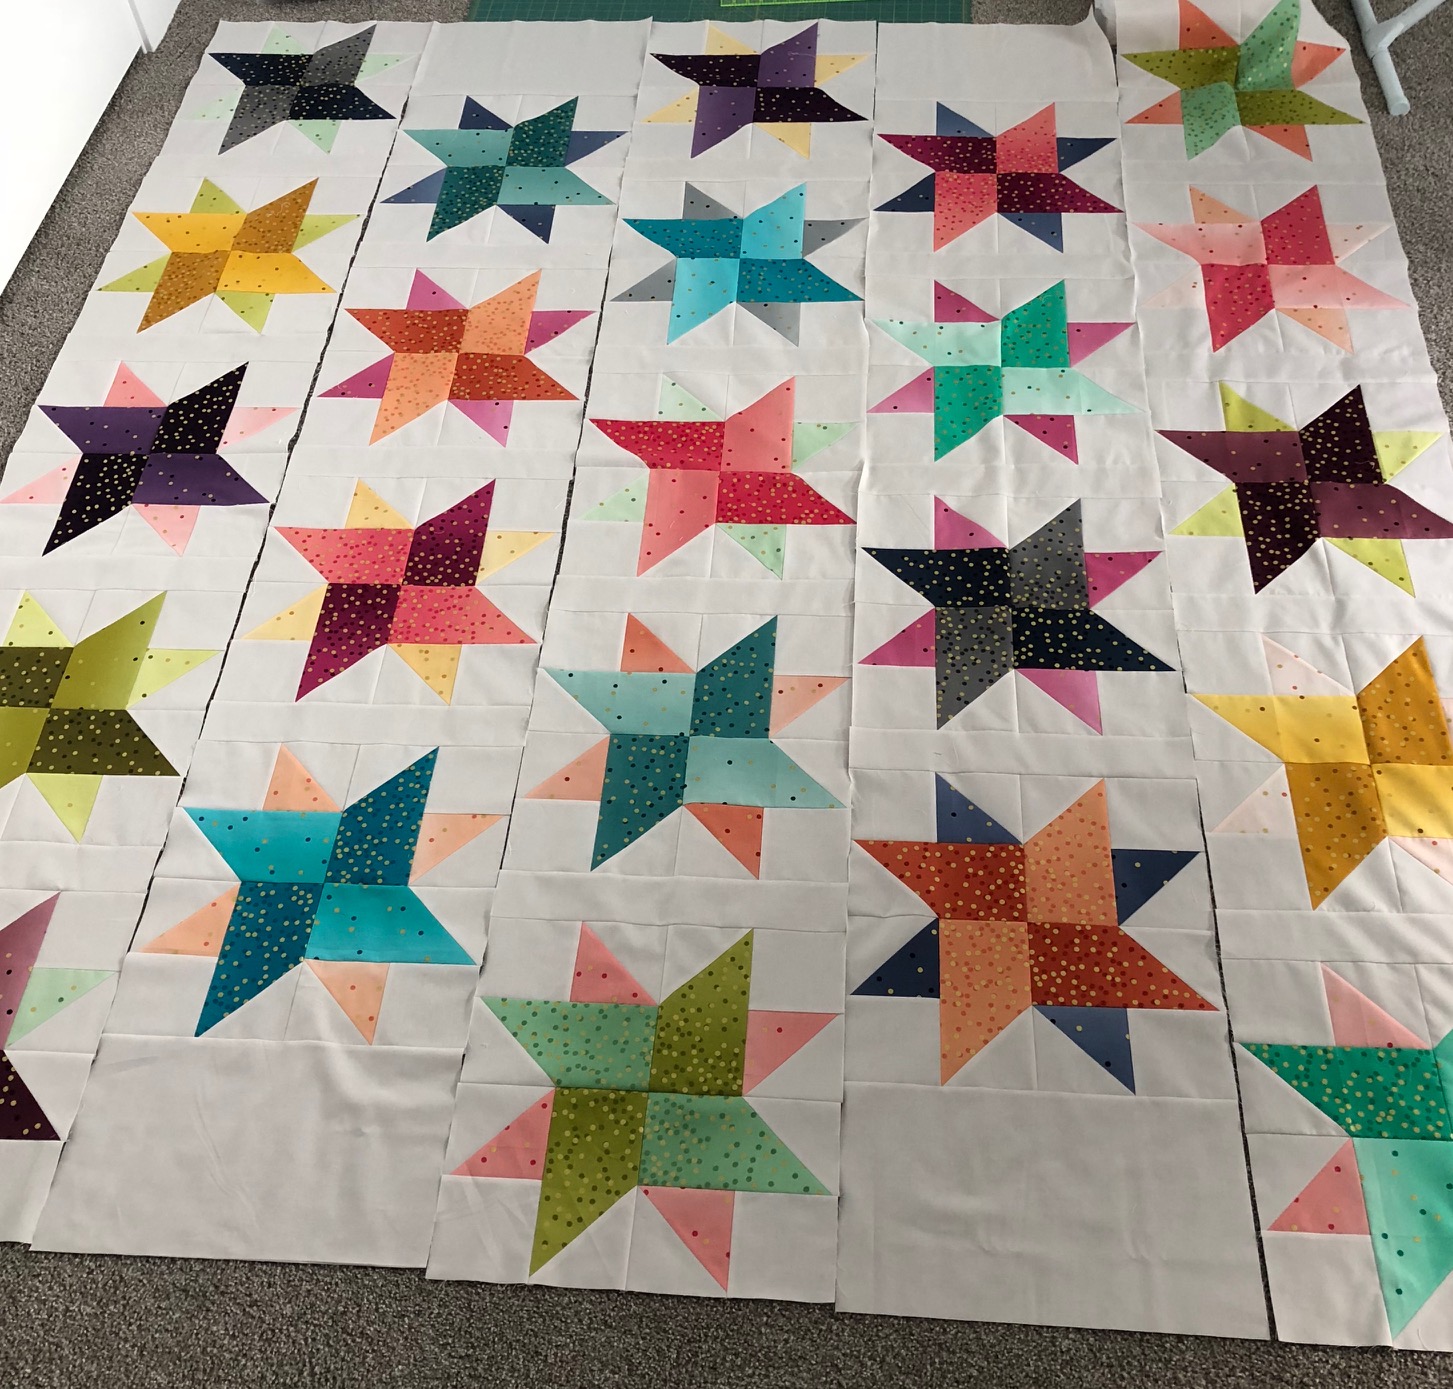
Using your fancy design floor (or design wall if you have one!!), lay out your blocks to get a general sense of color disbursement.

I think it's easiest for a quilt like this to sash each row one at a time. The 3 rows with 5 blocks will use (4) 3" x 16.5" sashing pieces and the 2 rows with 4 blocks will use (2) 9.75" x 16.5" setting pieces as well as (2) 3" x 16.5" sashing pieces.
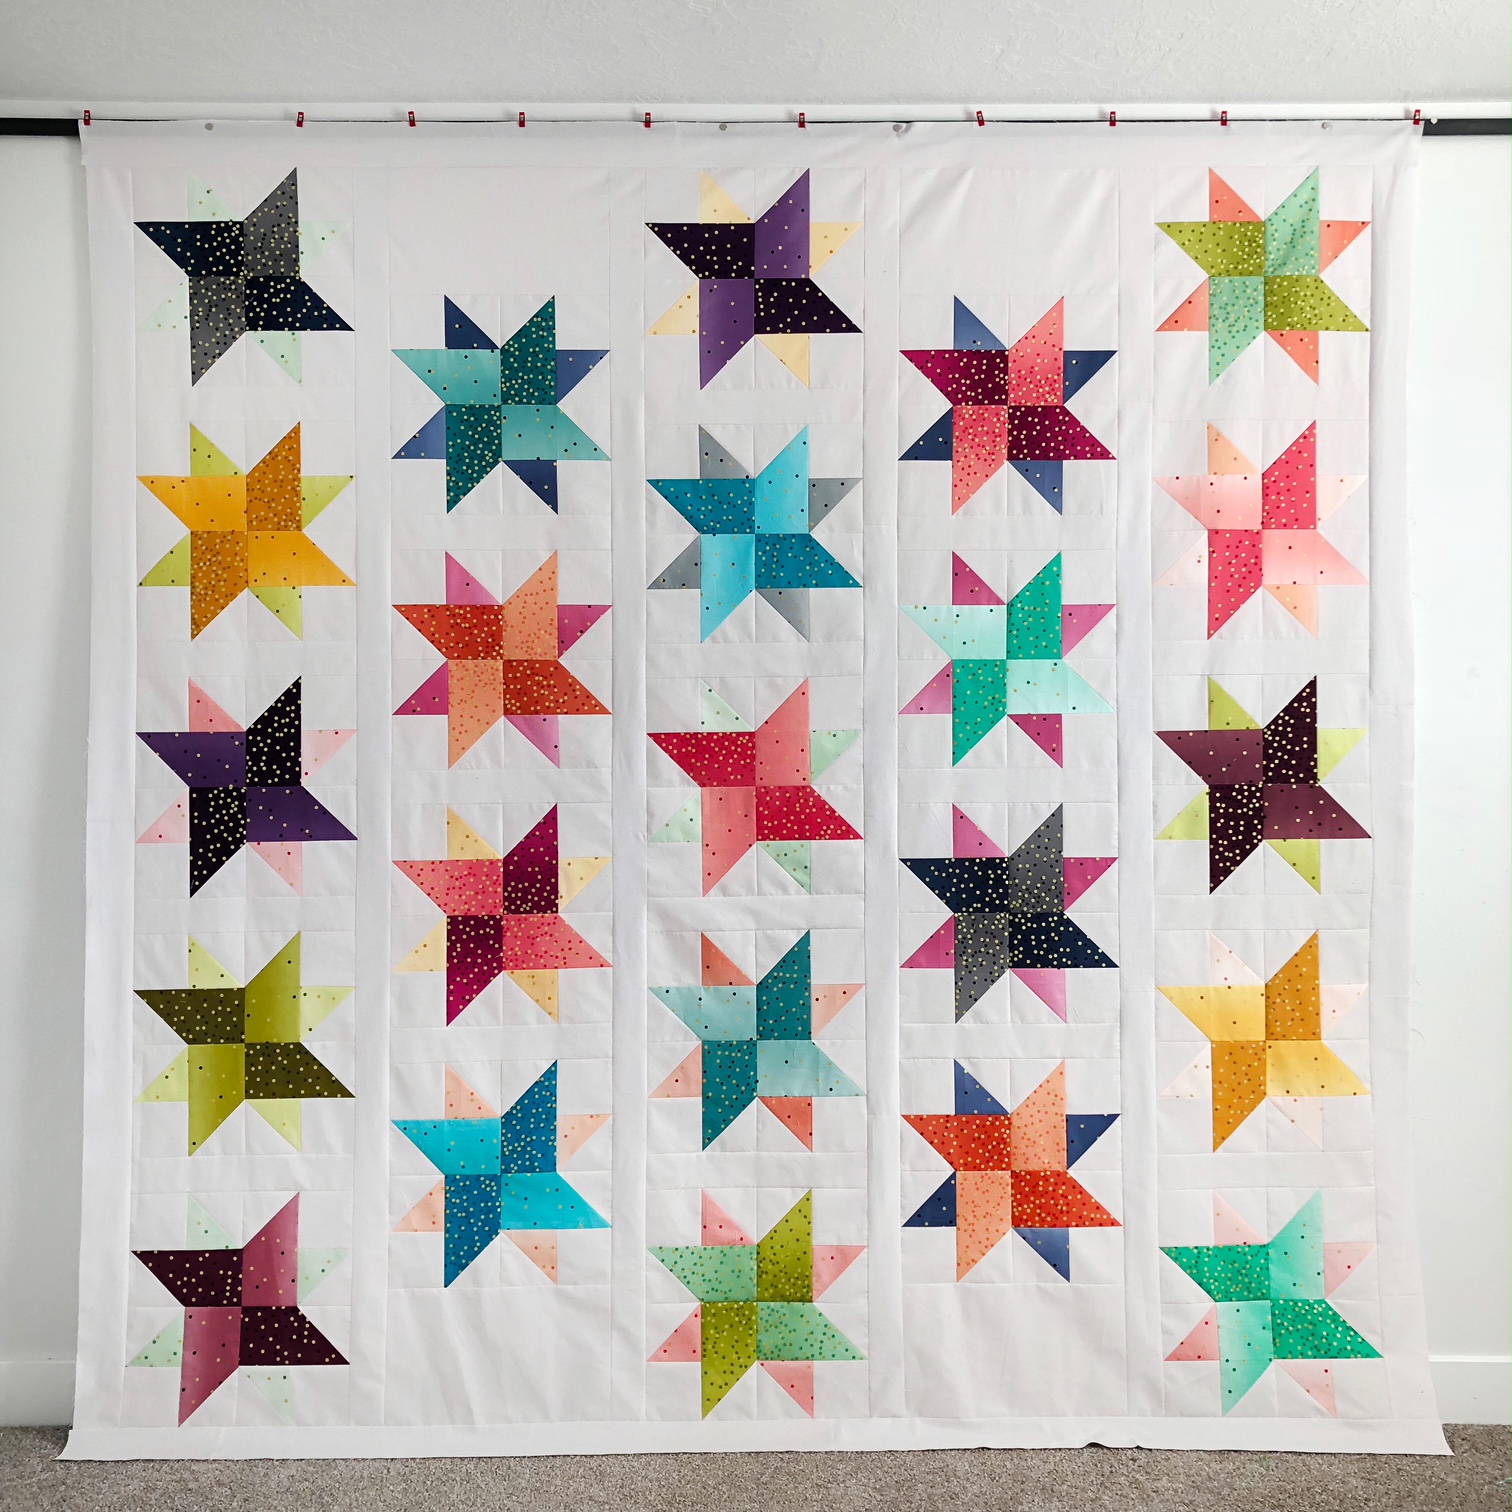
Next, sew together the 3" strips set aside for vertical sashing. Sash each in between each row. Then, sew together your 3.5" strips set aside for the final border, attach those and you are done! This is a BIG quilt that can feel a little unwieldy as you are sewing those final borders on. Go slowly, be patient, and try to keep the weight of the top on your table for easier sewing.

![]()
This quilt finishes at 96" x 96".
I cannot wait to see what fabric combinations you all come up with! Be sure to tag me @heritage.threads on instagram so I can see your gorgeous quilts!
Jen Van Orman
{www.Heritage-threads.com}
![]()
Posted in:
Comments