Warehouses Closed June 6-13 For Exclusive Event
Waves Jelly Roll Quilt
Waves Jelly Roll Quilt
Published:
Apr 5 2018 - 23:00

![]()
I LOVE Jelly Roll Race quilts! #Swoon I tinker around to see how much I can change the design and still be true to the wonderful combination of speed and beauty.
If you are new to the basic Jelly Roll Race quilt, I just posted a quick tutorial on my blog, jennykaequilts.com. Go check it out now so you don't get confused. Don't worry, I'll wait.
This quilt/project finishes at 56" x 89".
![]()
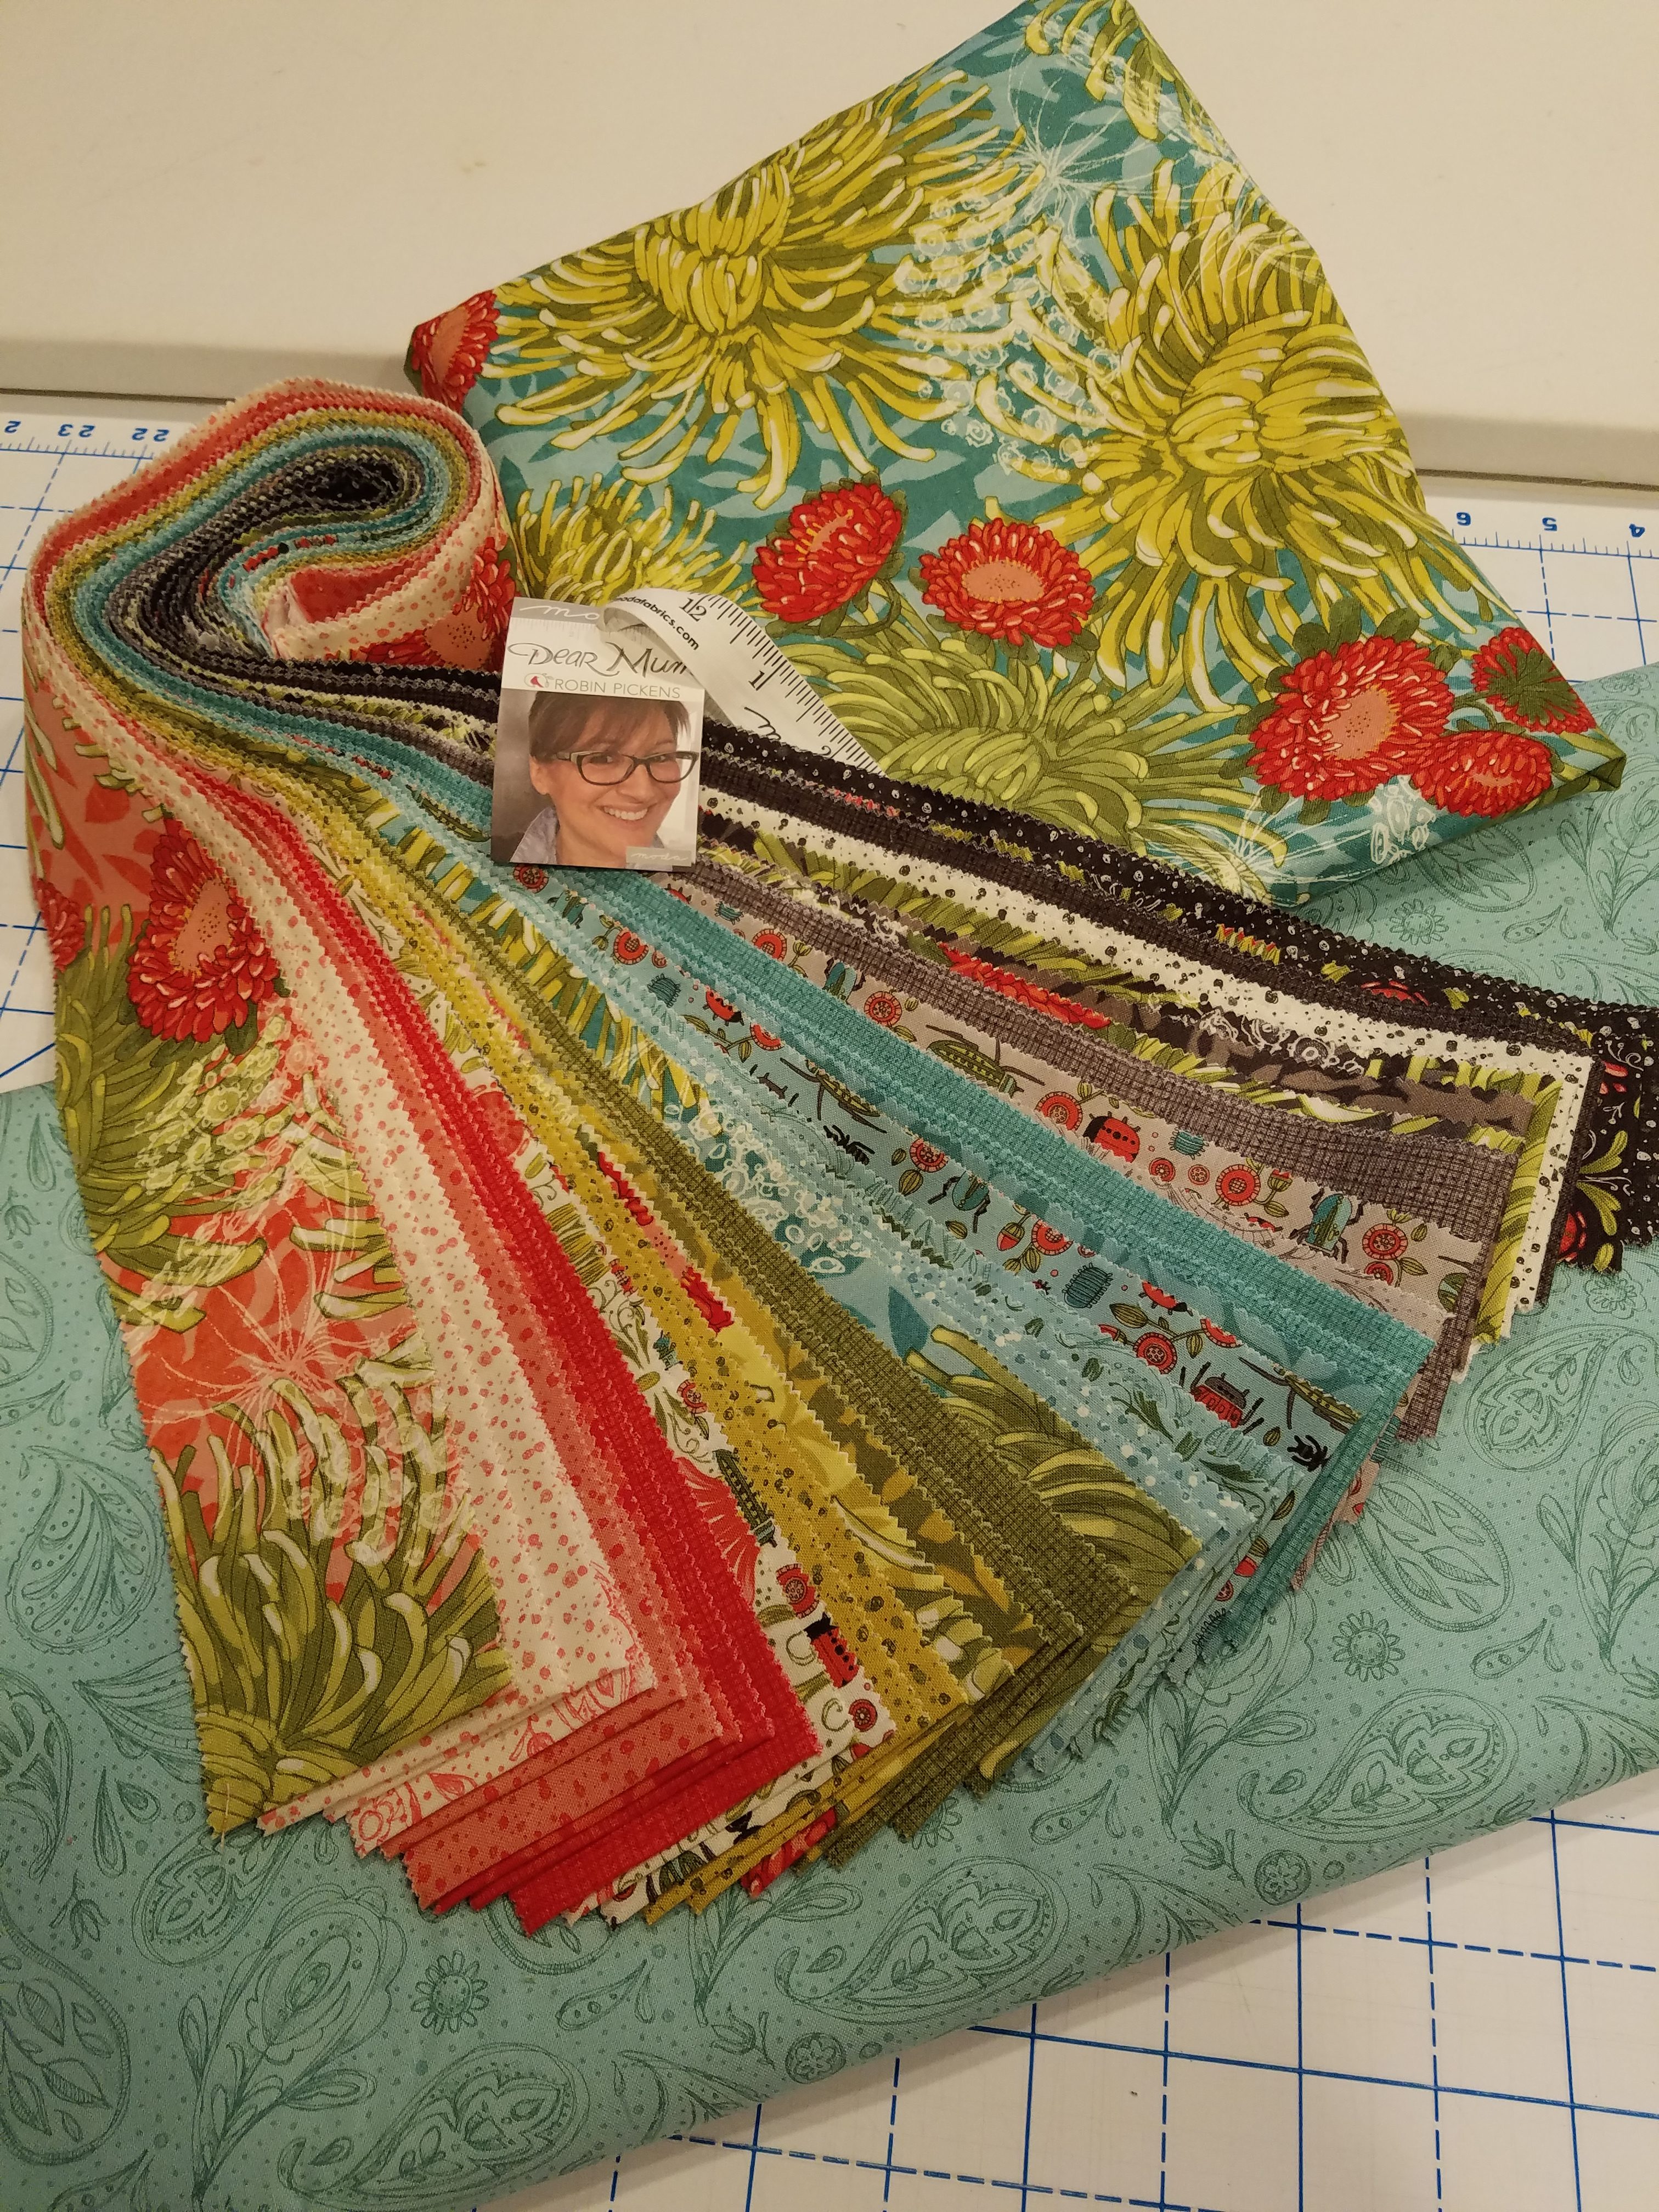
1 Jelly Roll® {Dear Mun collection by Robin Pickens}
2 yards applique, outer borders and binding fabric {48620-19}
4 7/8 yards inner border and backing {48622-19}
3" Wave ruler
Decorative Thread
Roll of iron-on adhesive, tape 7/8" wide
![]()
Now, when I think of speed, “applique” is not the term which springs to mind. But what if there was a FAST way to applique? “And have it look nice?” Yep. “And be usable as a quilt?” Yep. “Prove it.” Here, hold my thimble.
Start with a completed Jelly Roll Race top. Once you have pressed it well and squared it up, count the number of strips in your top.
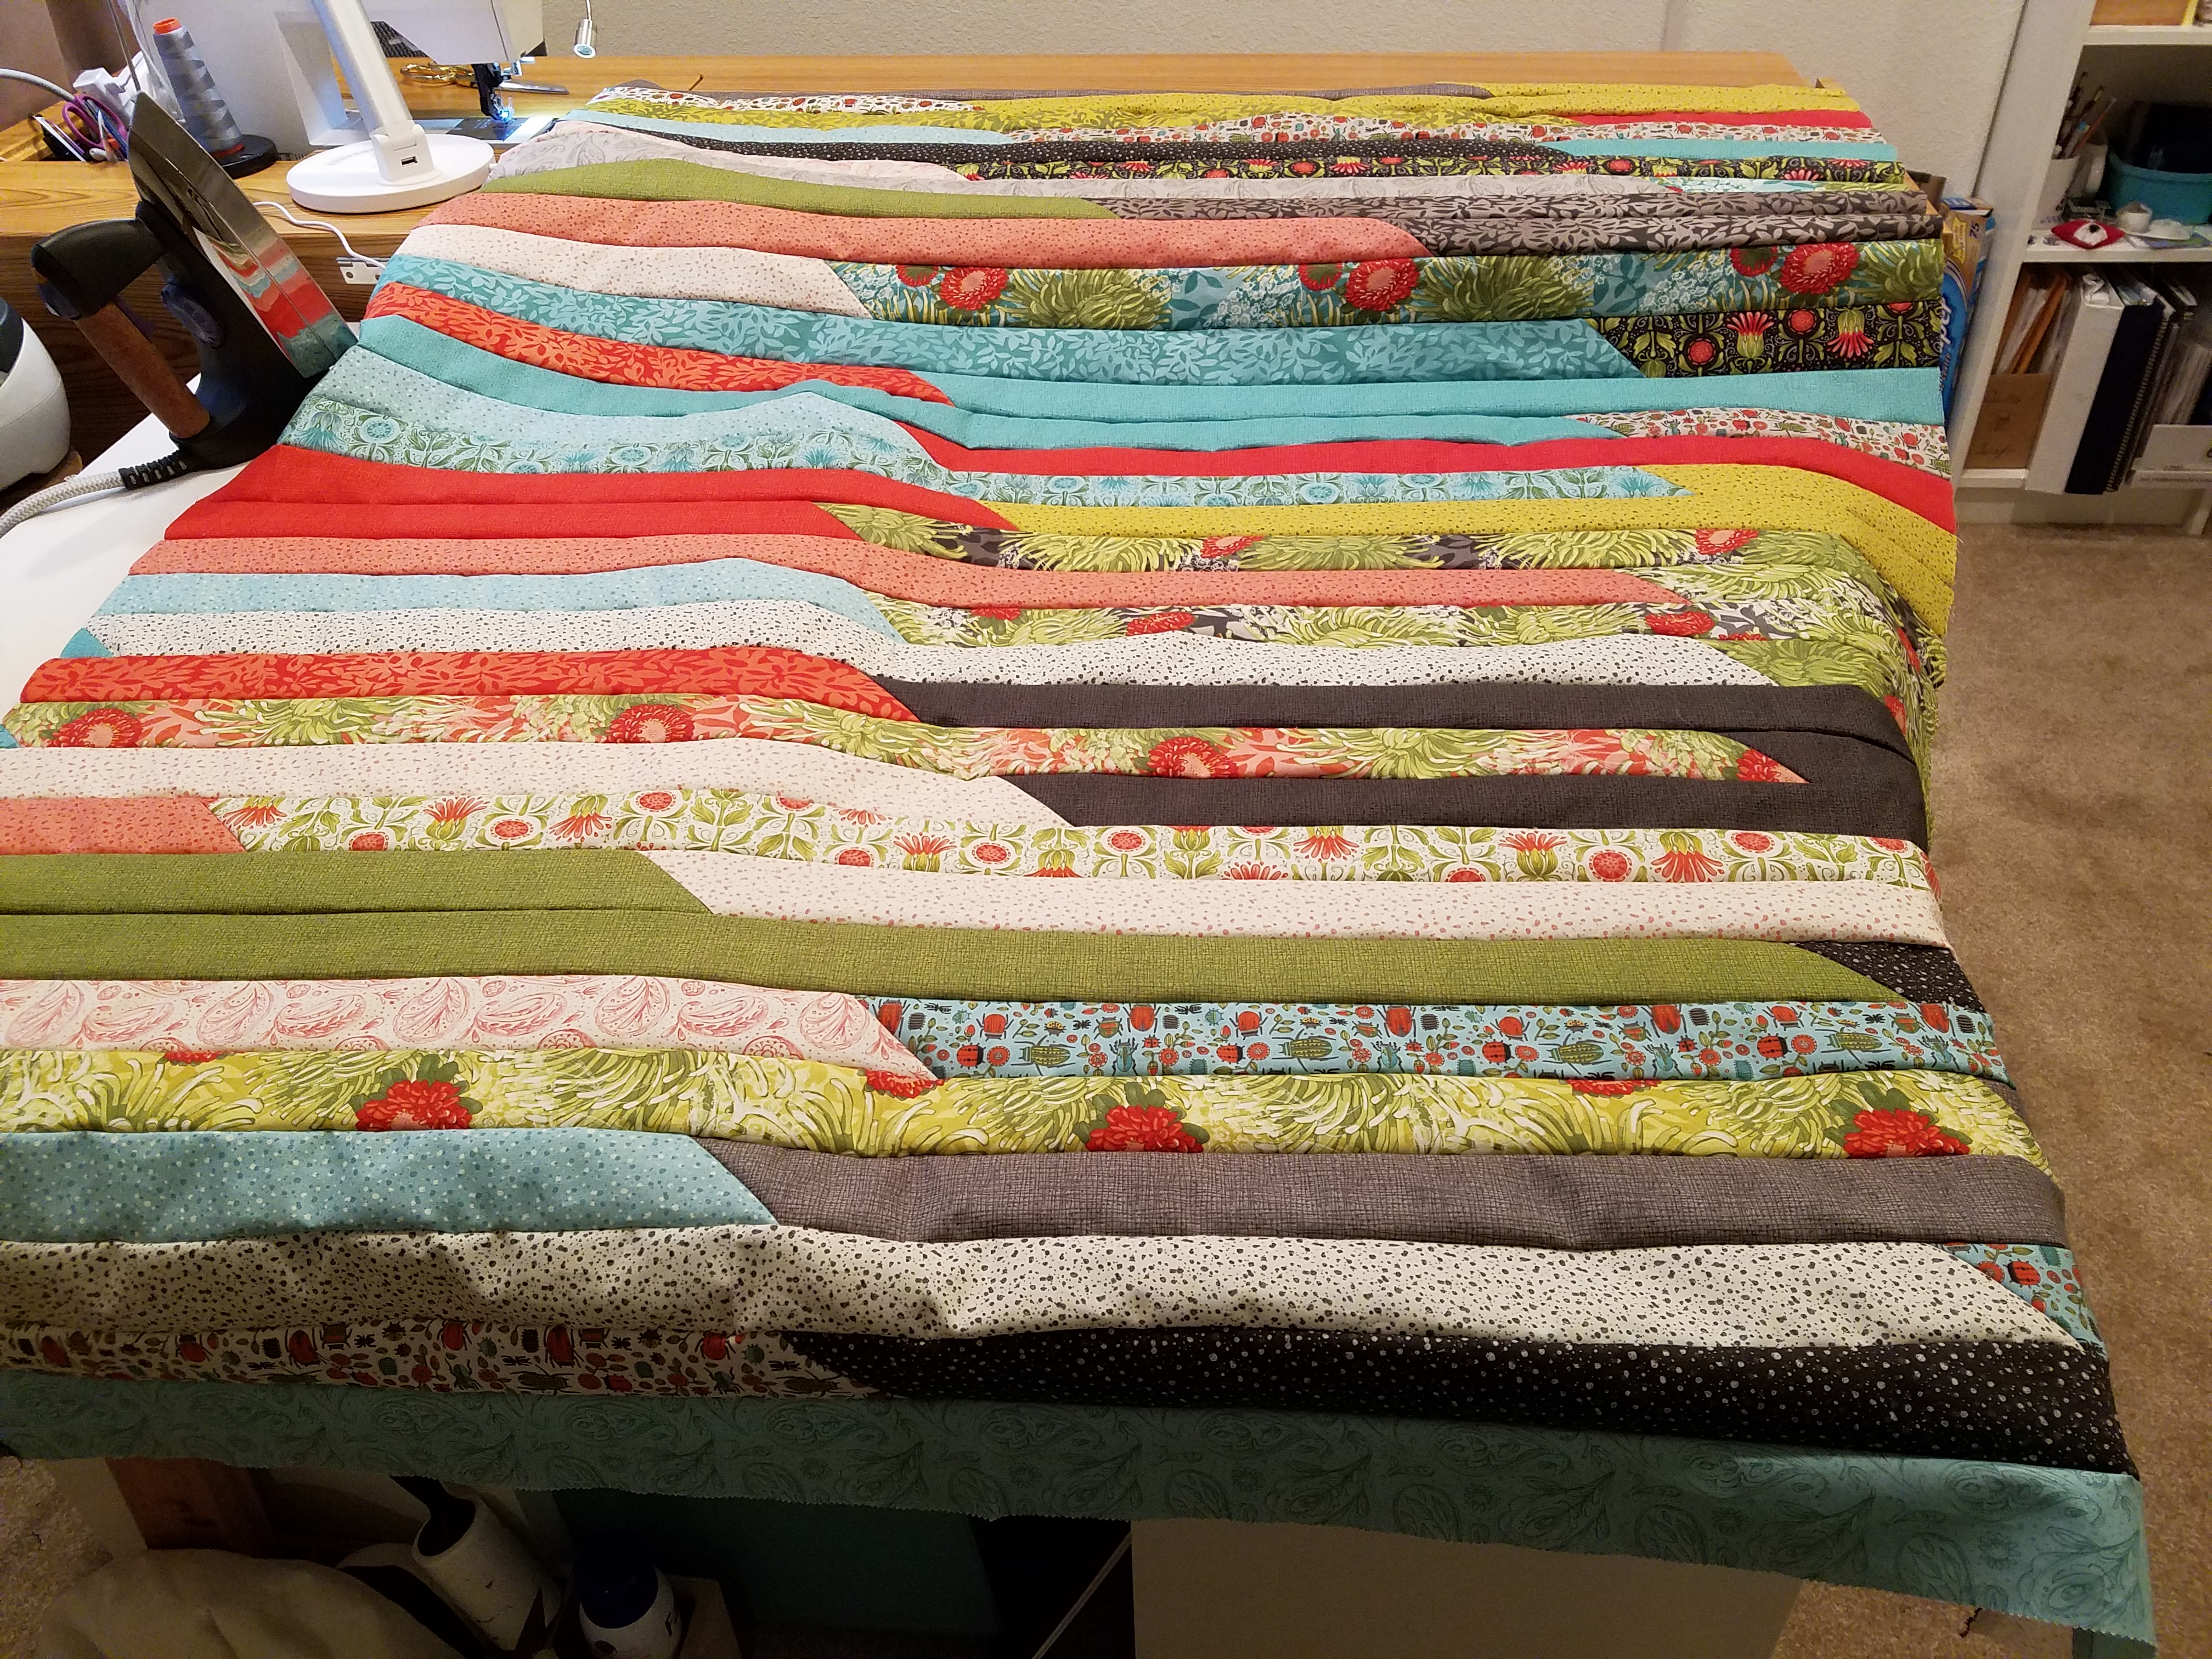 Ain't it pretty?
Divide that number by three. (I realize I have now introduced math and for that I am sorry.) For example, if you have 33 strips, divide by 3 and you have the number 11. From the top (and I know someone will ask the question, “which is the top?” It is whichever end you want it to be because YOU are the designer. Isn’t that awesome?) count down 11 strips.
 Count down one third of strips
Take your seam ripper and separate one third from the remaining two thirds (11 strips from the remaining 22 strips).
 Rip it up
Next, prepare the wave applique fabric. Measure the width of the top. Add 8 inches for wiggle room and cut your applique fabric to that length. (Usually about 1 1/3 yard, give or take.) Cut it in half LONG-ways. (I like to rip it but that is another blog for another time.)
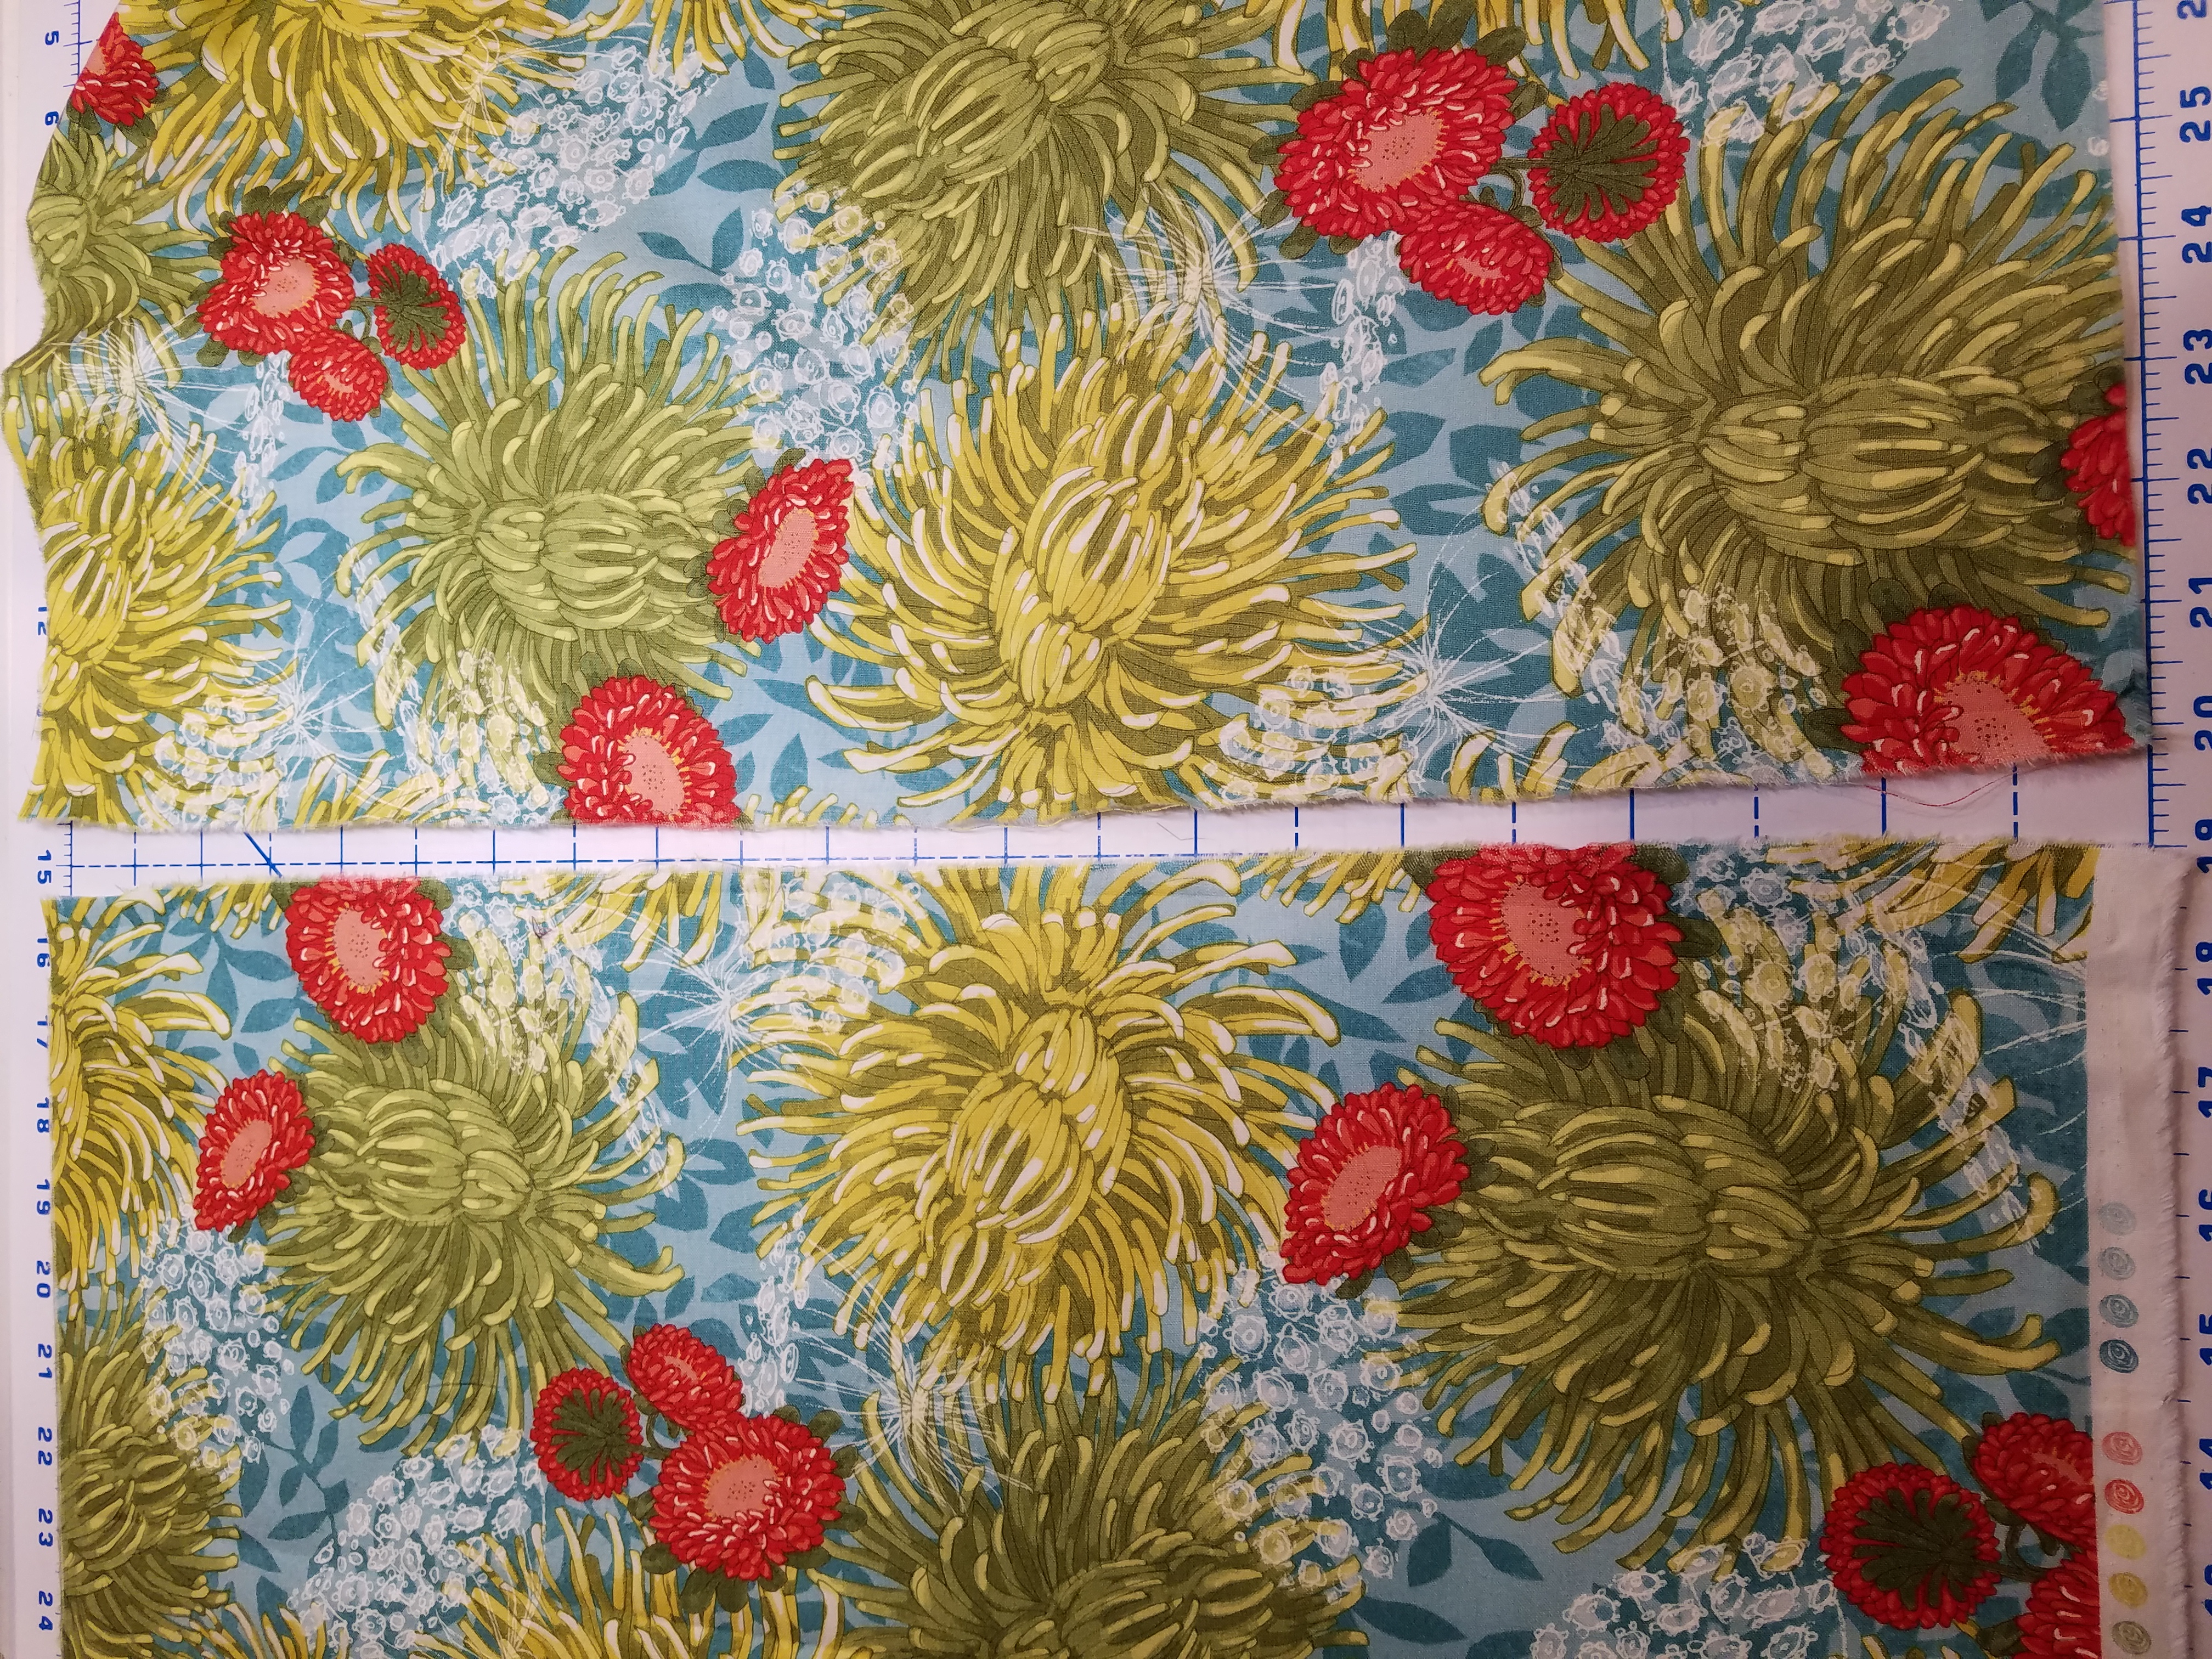 Cut in half LONG-ways
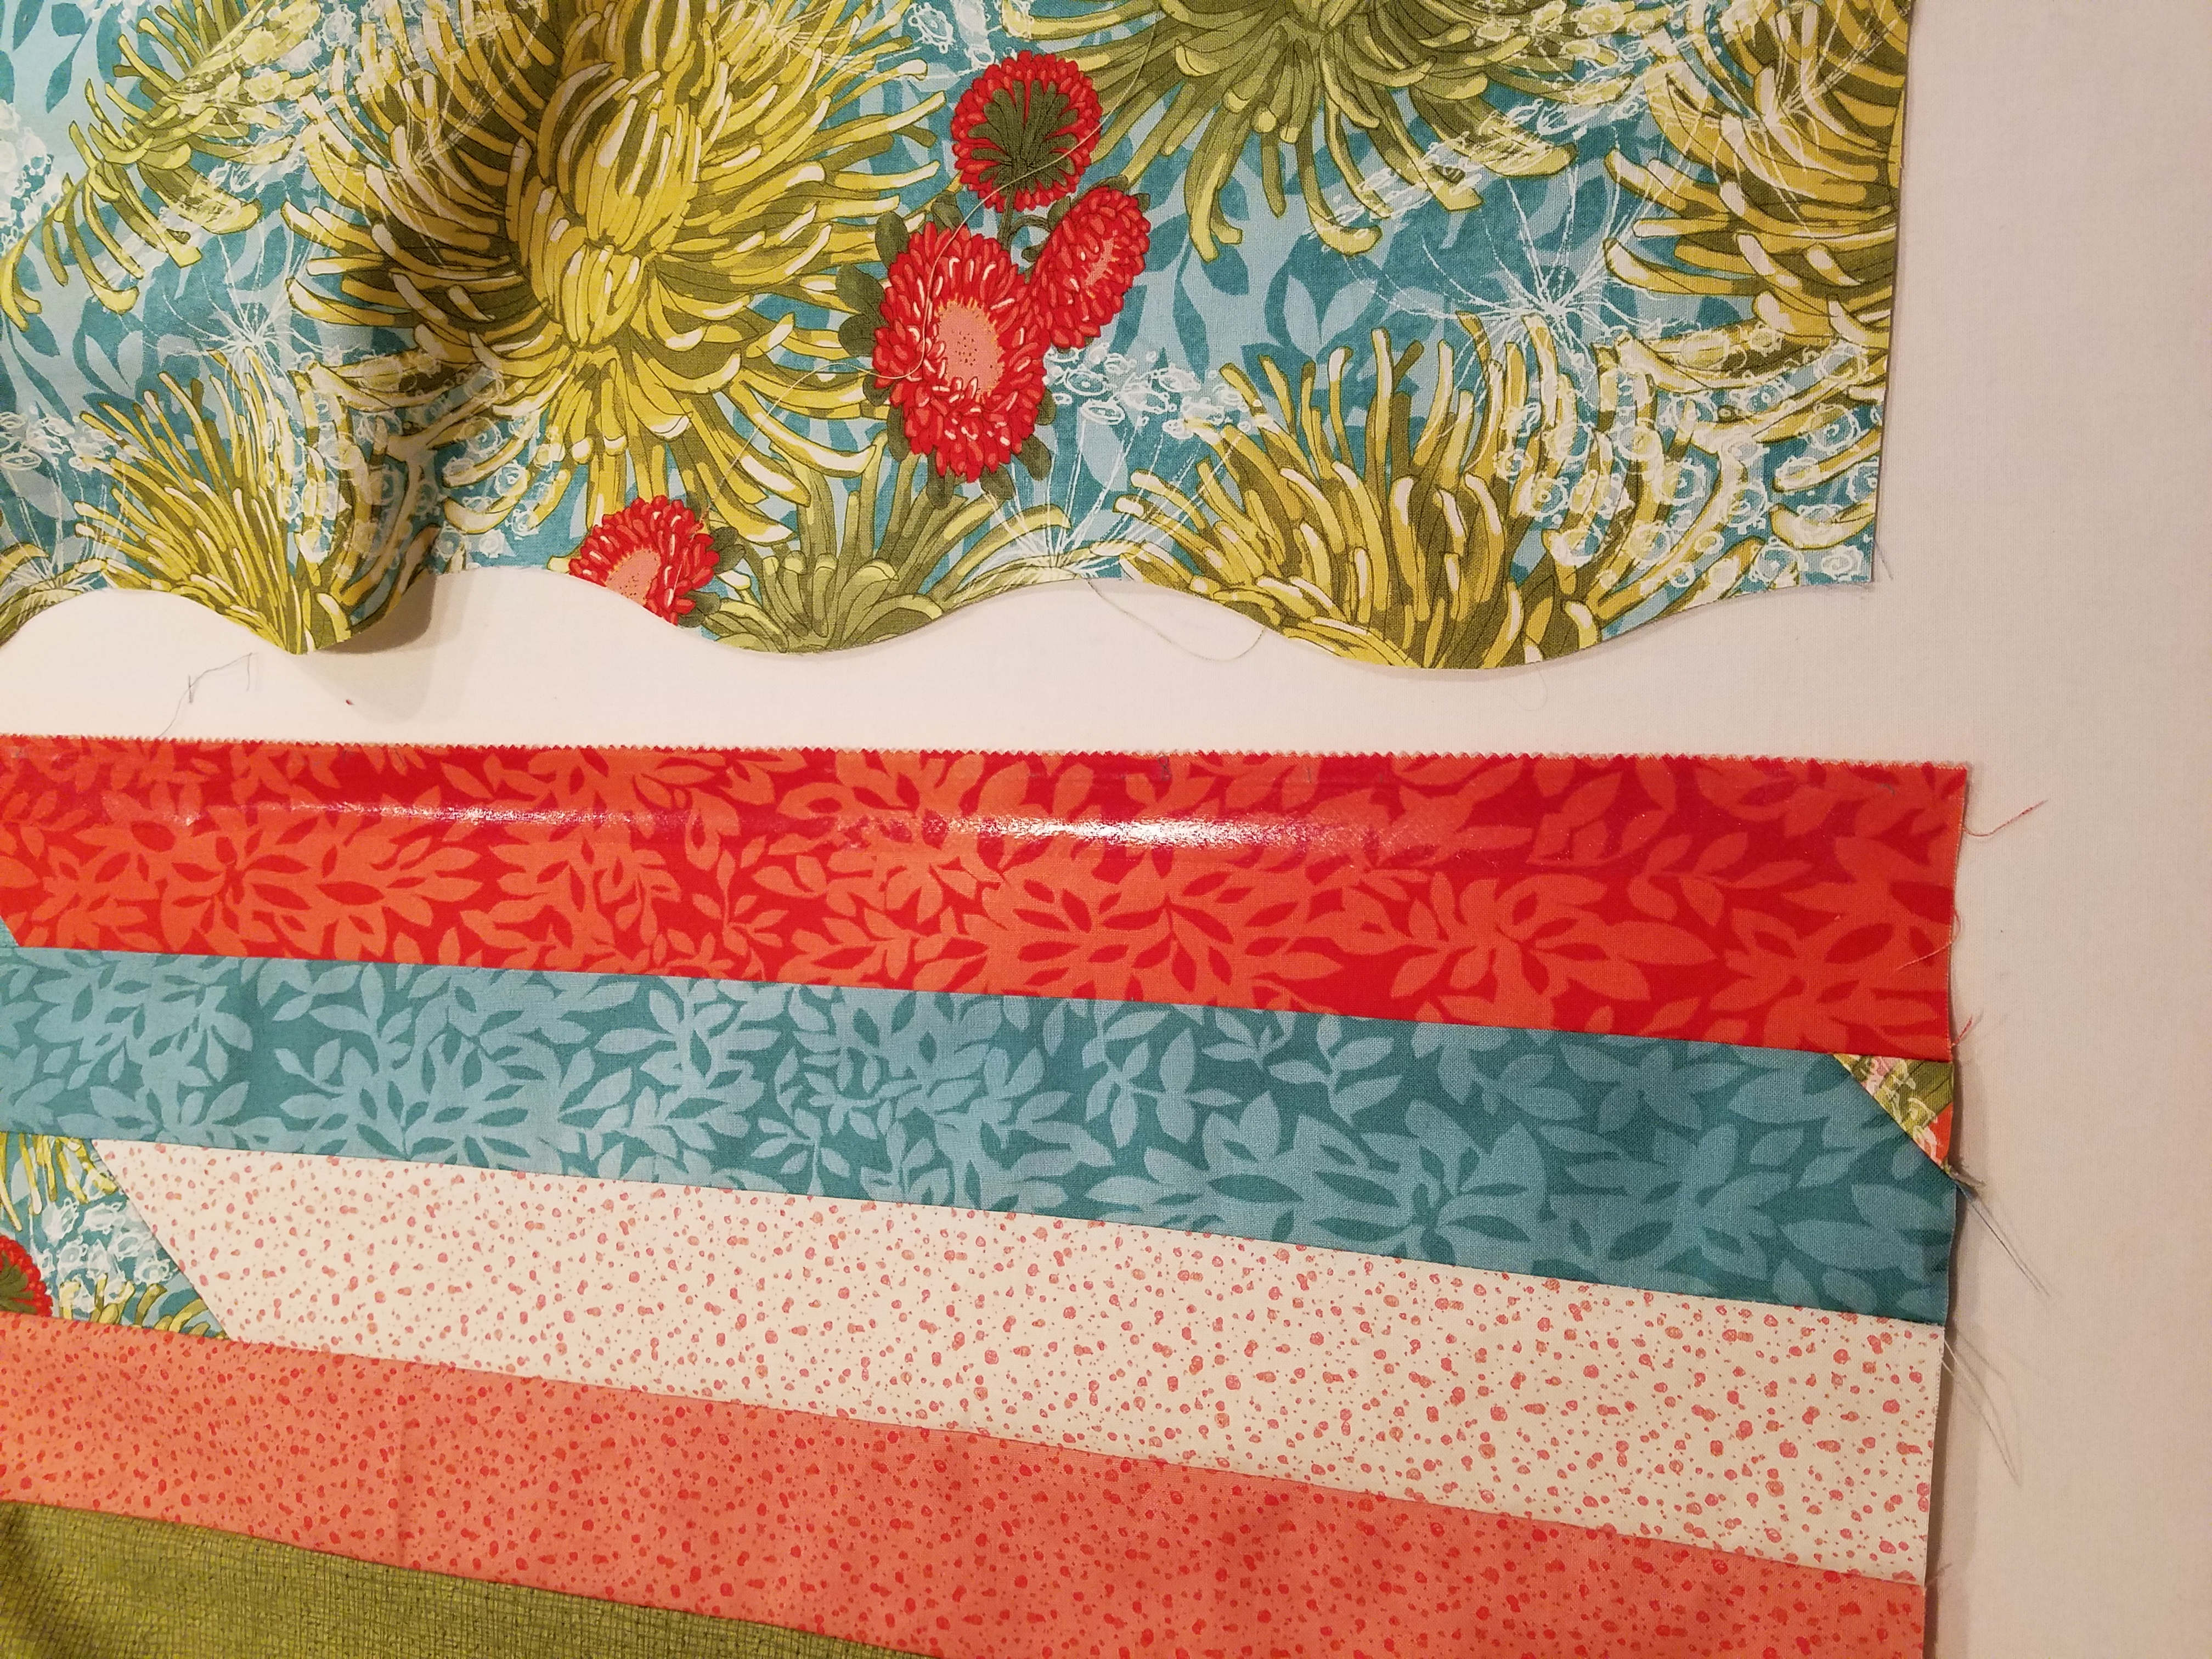
Use the 3” Wave Ruler to cut waves on both long sides of the applique fabric. This can be a bit tricky so don’t rush this part. ( I have NO idea why there are scissors in the picture. Don't use scissors, use a rotary cutter. ) Check that both short ends of your wave applique are even, and trim if necessary.

Now, get that roll of iron-on adhesive. (Bet ya never used that before!) Read and follow manufacture's instructions. Iron it onto the right side of the fabric on the inside of the one-third section and the two-thirds section. Stay straight and super close to the edge but don’t go over it! Repeat, DO NOT go over it!
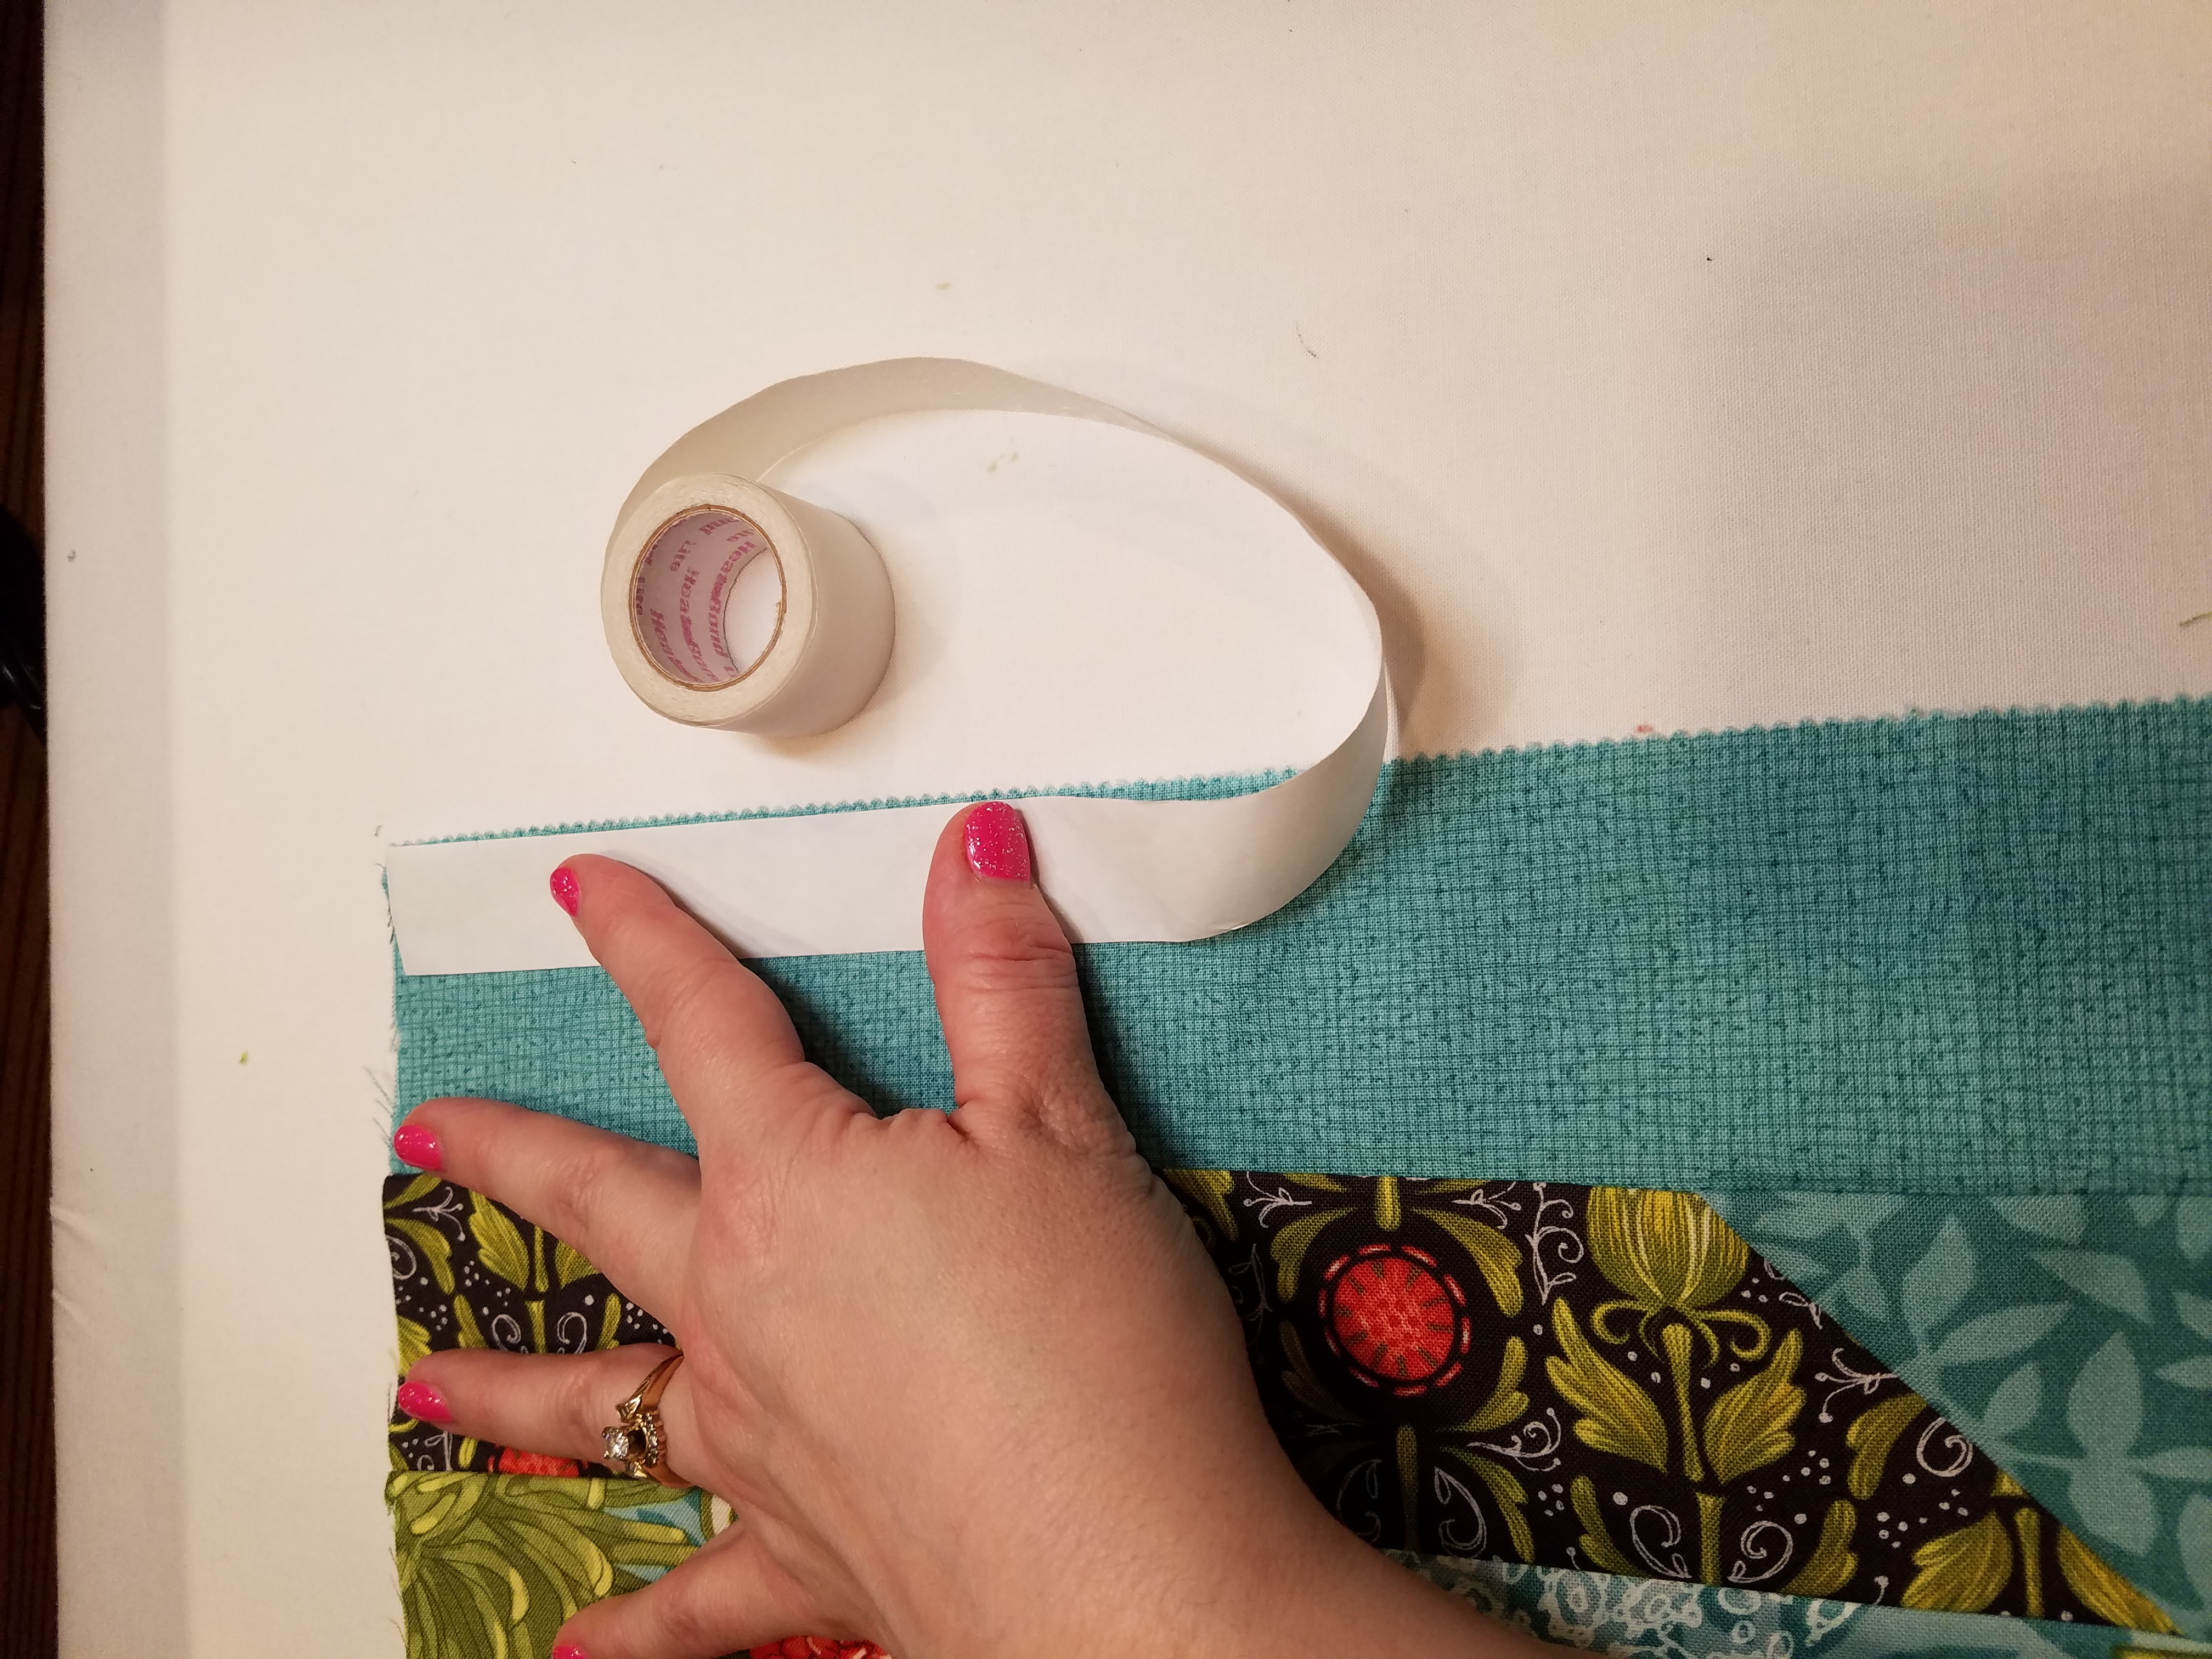 Be sure to follow manufacture's instructions
Iron it onto the right side of the fabric on the inside of the one-third section and the two-thirds section. Stay straight and super close to the edge but don’t go over it! Repeat, DO NOT go over it!
 Press carefully
Peel off the paper backing and fuse the Waves applique to one third and then the two thirds. Pro tip here – be sure the Waves cover the adhesive, otherwise you will have to stop to clean your iron…just saying.
 Make sure the Waves covers the fusible tape
With the decorative thread in your machine, stitch the applique along the wavy edges. (This is a great chance to use one of those crazy stitches on your machine so when someone says, “You don’t need all those stitches, you never use them,” you can show them this quilt.)
 Love the button-hole stitch
I will be honest, adding borders takes longer, but I was very pleased how it dressed up this version. They really up the game. For the inner borders I used the backing fabric. I cut 7 strips 1 1/2” wide by WOF, joining them for 2 strips 1 1/2" by 51 1/2” and 2 strips 1 1/2” by 80 1/2". For the outer borders, I used the applique/binding fabric. I cut 7 strips 3 1/2” wide by WOF, joining them for 2 strips 3 1/2" by 58 1/2" and 2 strips 3 1/2” by 82 1/2". For binding, I cut 8 2 1/2" strips from the applique fabric. (But you can finish however makes you happy!)
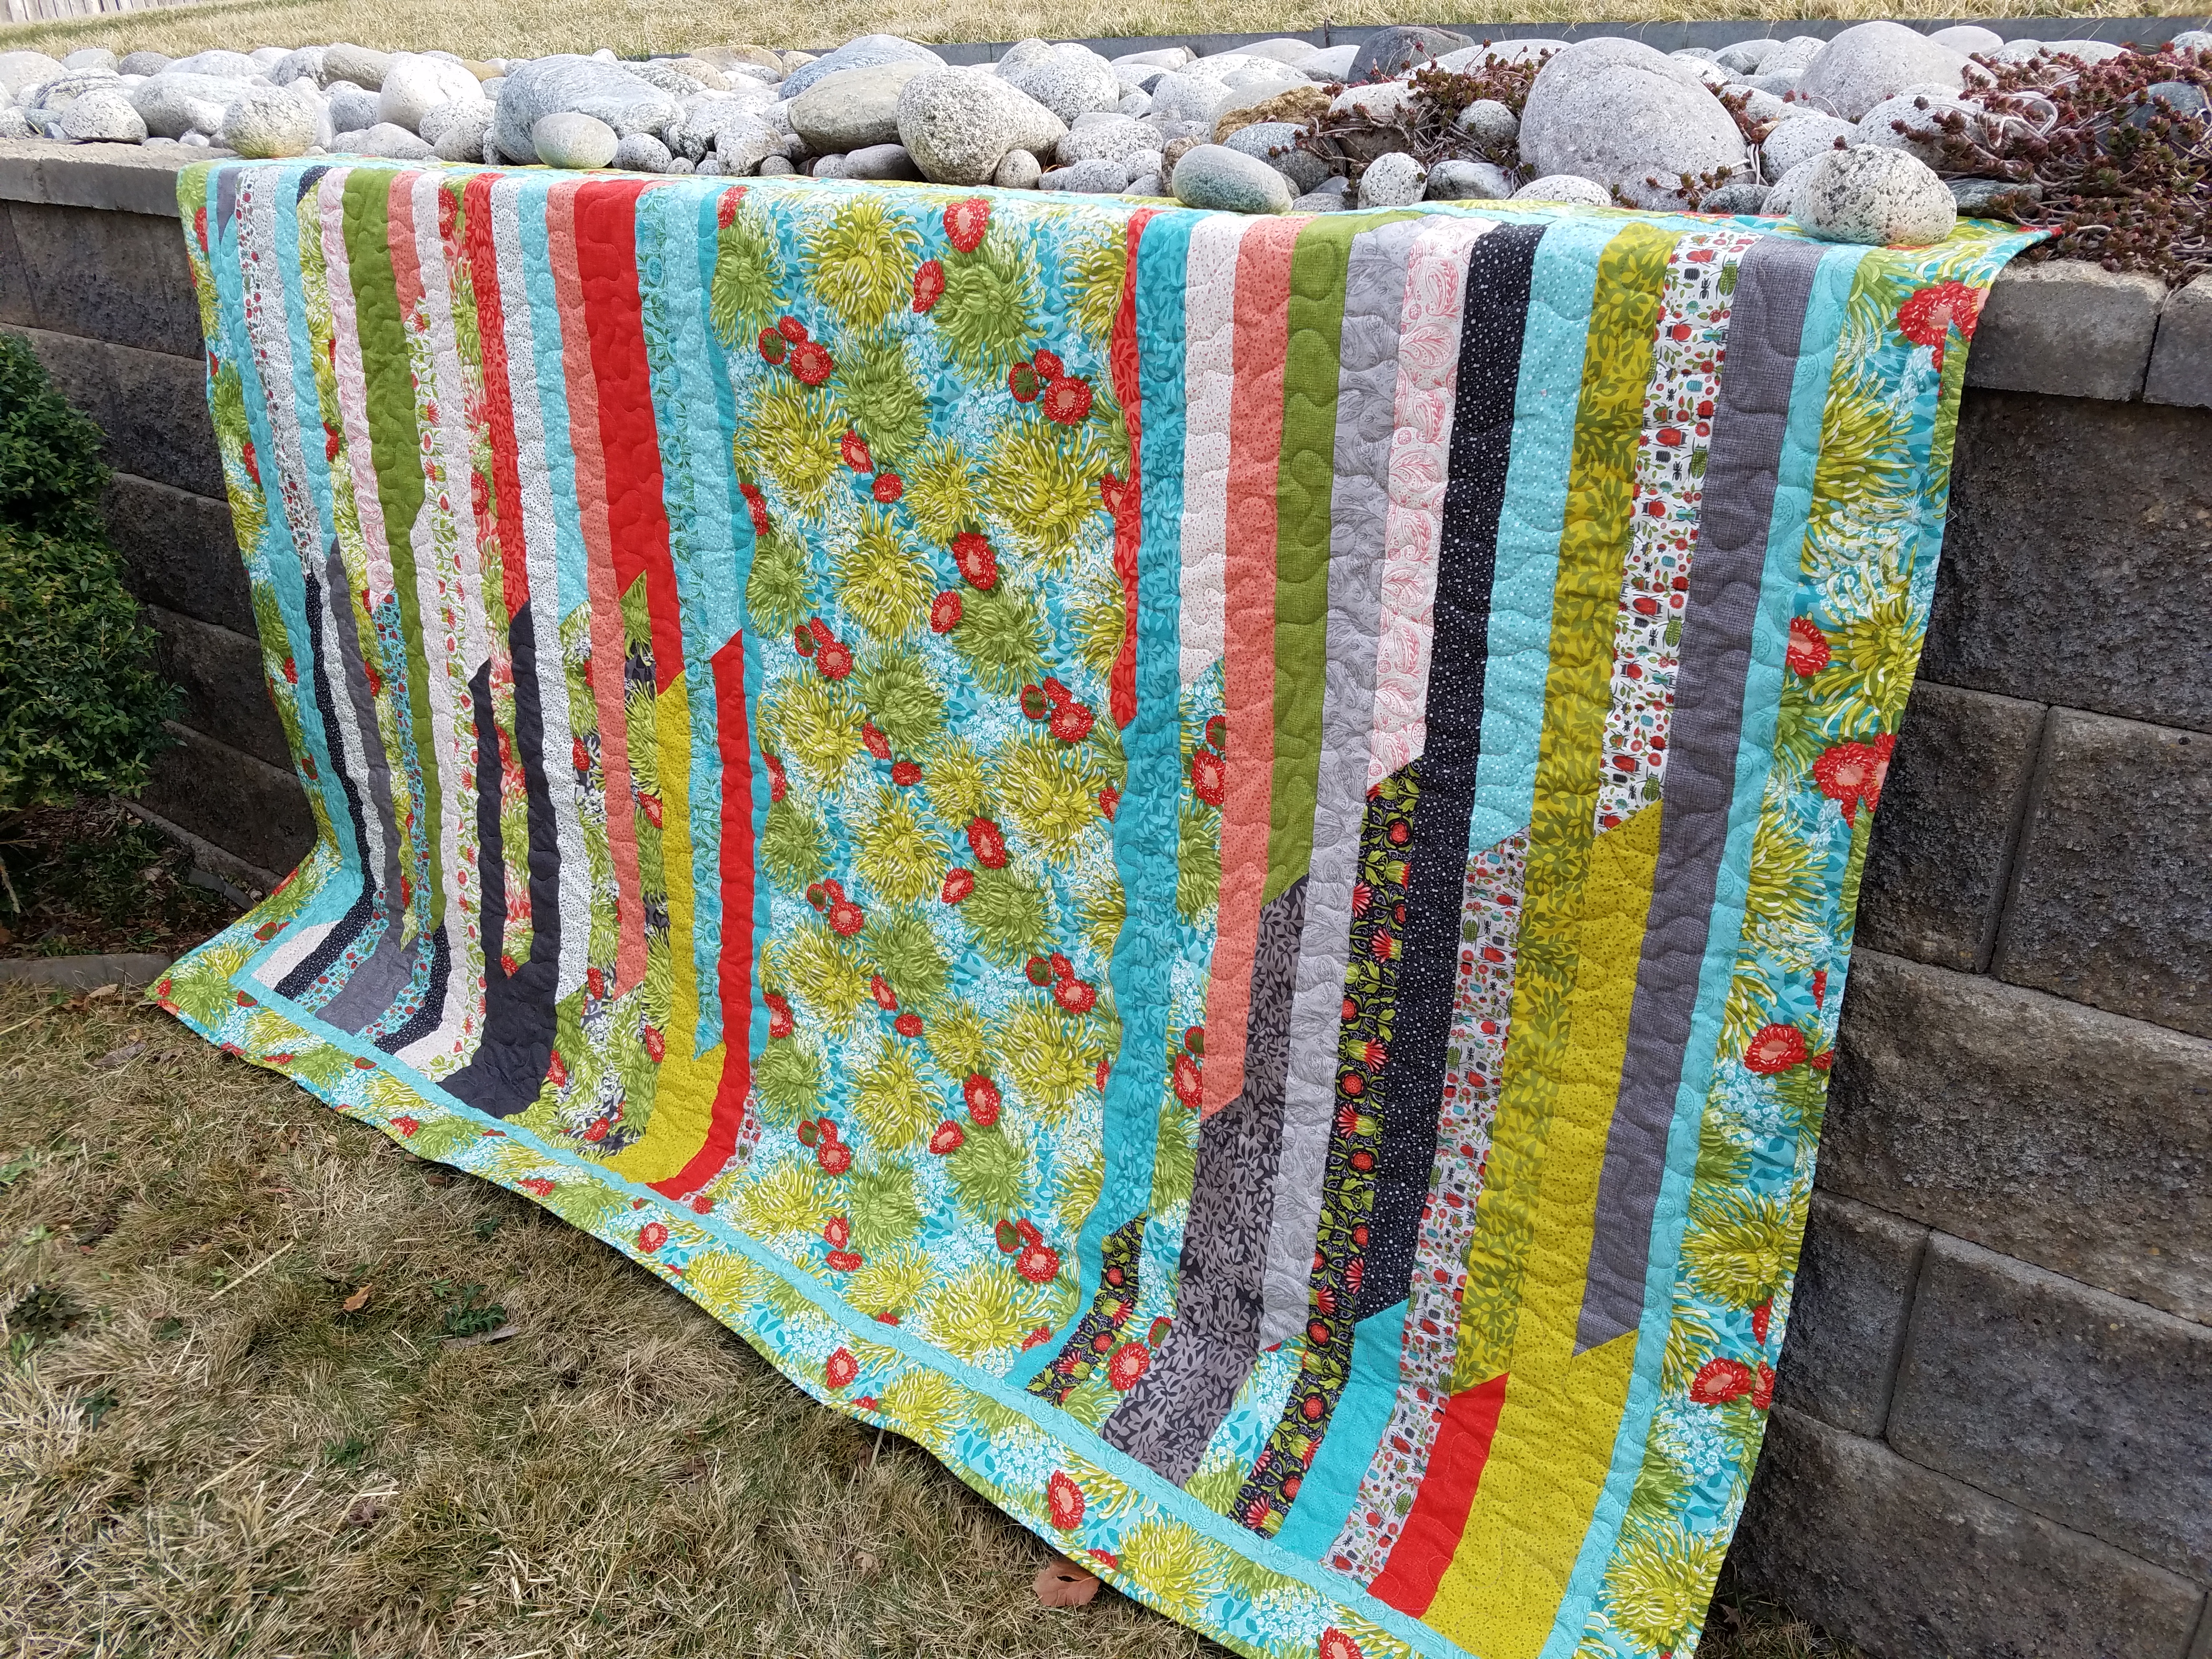 Going big with borders, great for Mother's Day
![]()
This quilt finishes at 56" x 89".
If you love the fabric in this project, it is your lucky day. This adorable Jelly Roll needs a new home. To enter do three things. 1. Subscribe to my YouTube channel. 2. Watch 1 video. (I have some great interviews. Ooo the live stuff is good, too!) 3. Leave a comment below. (Comment on the videos or tutorials or ask questions, whatever!)
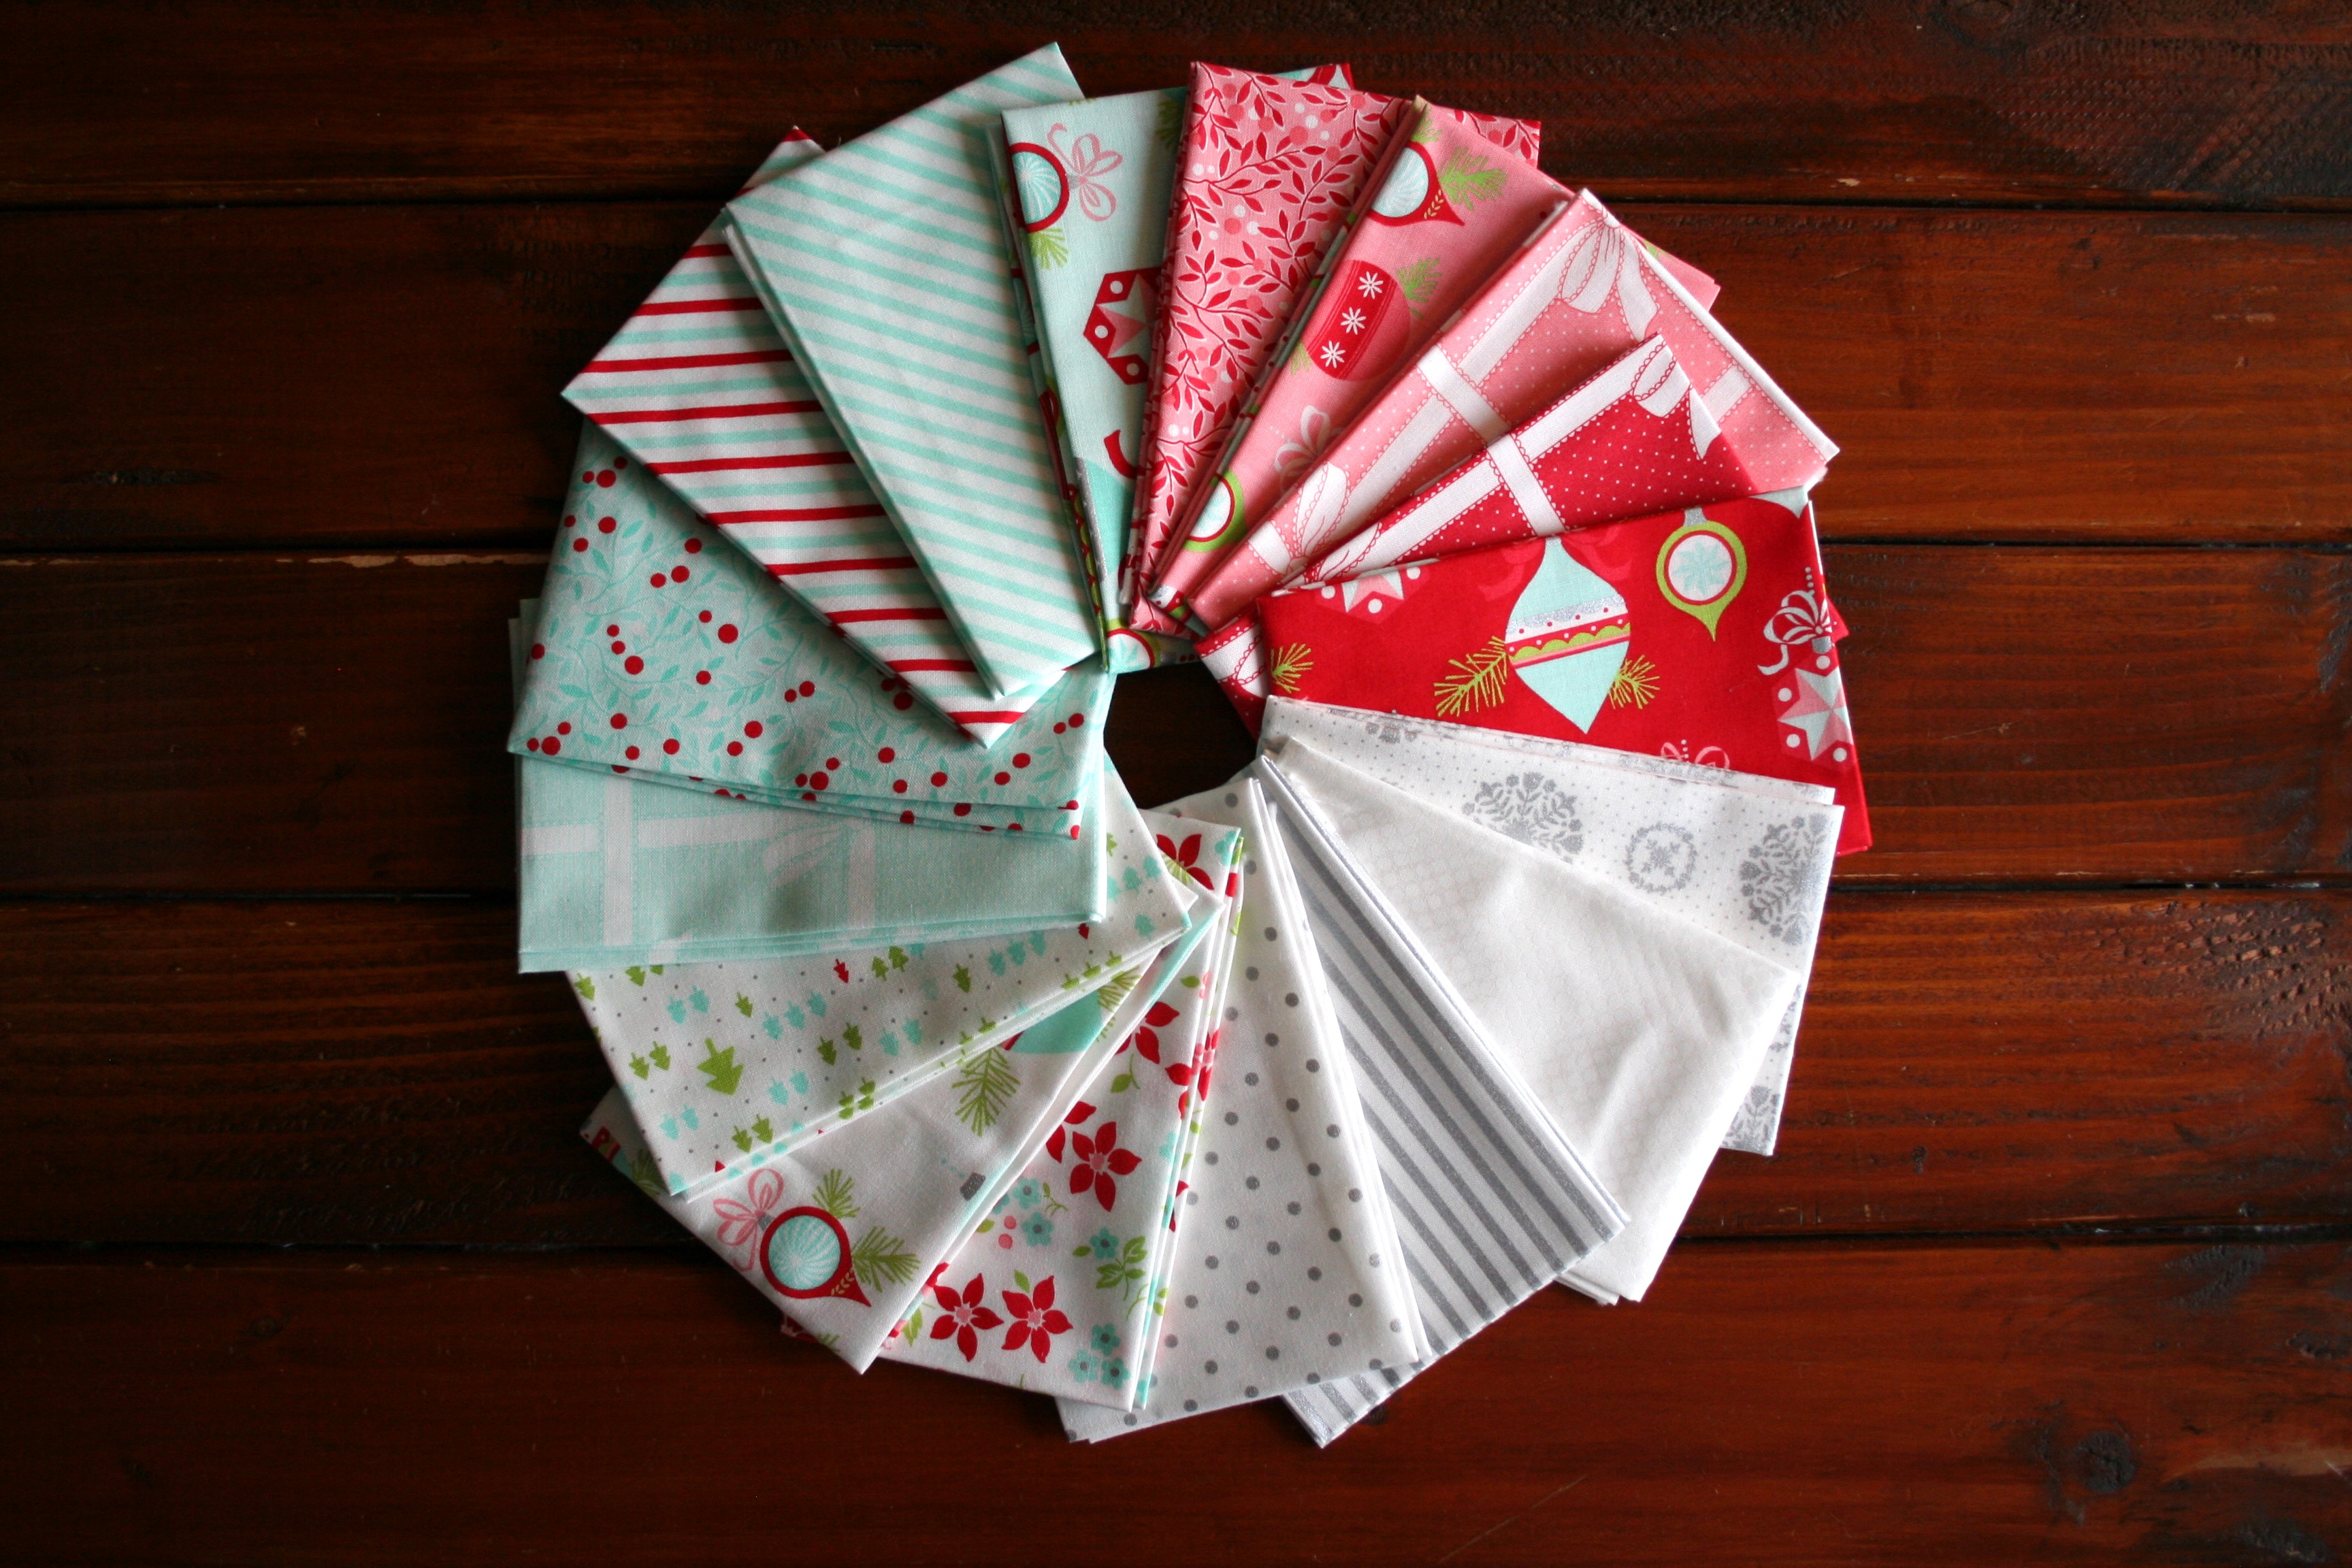 Enter to win me
I hope you learned something new and are ready to give it a go! If you haven't had enough of me yet, check out my website.
See you next time.
Jenny Kae Parks
{jennykaequilts.com}
![]()
Posted in:
Comments