Warehouses Closed June 6-13 For Exclusive Event
Classic Christmas Quilt
Classic Christmas Quilt
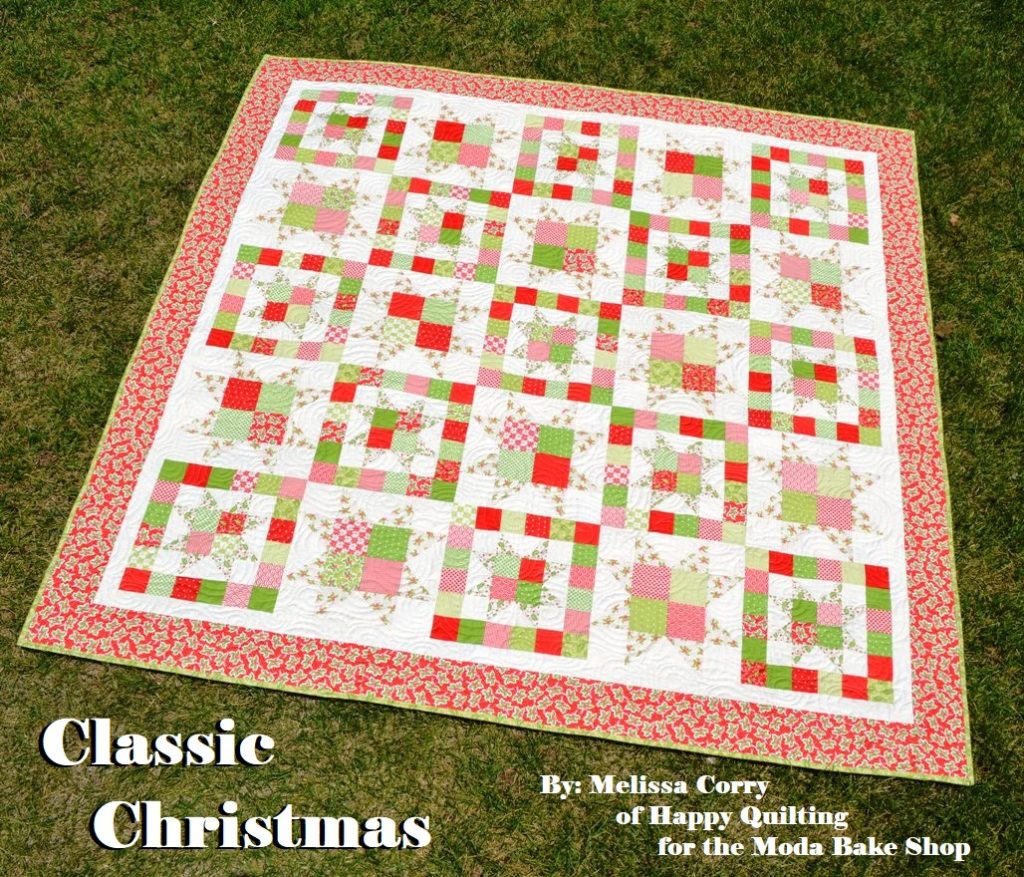
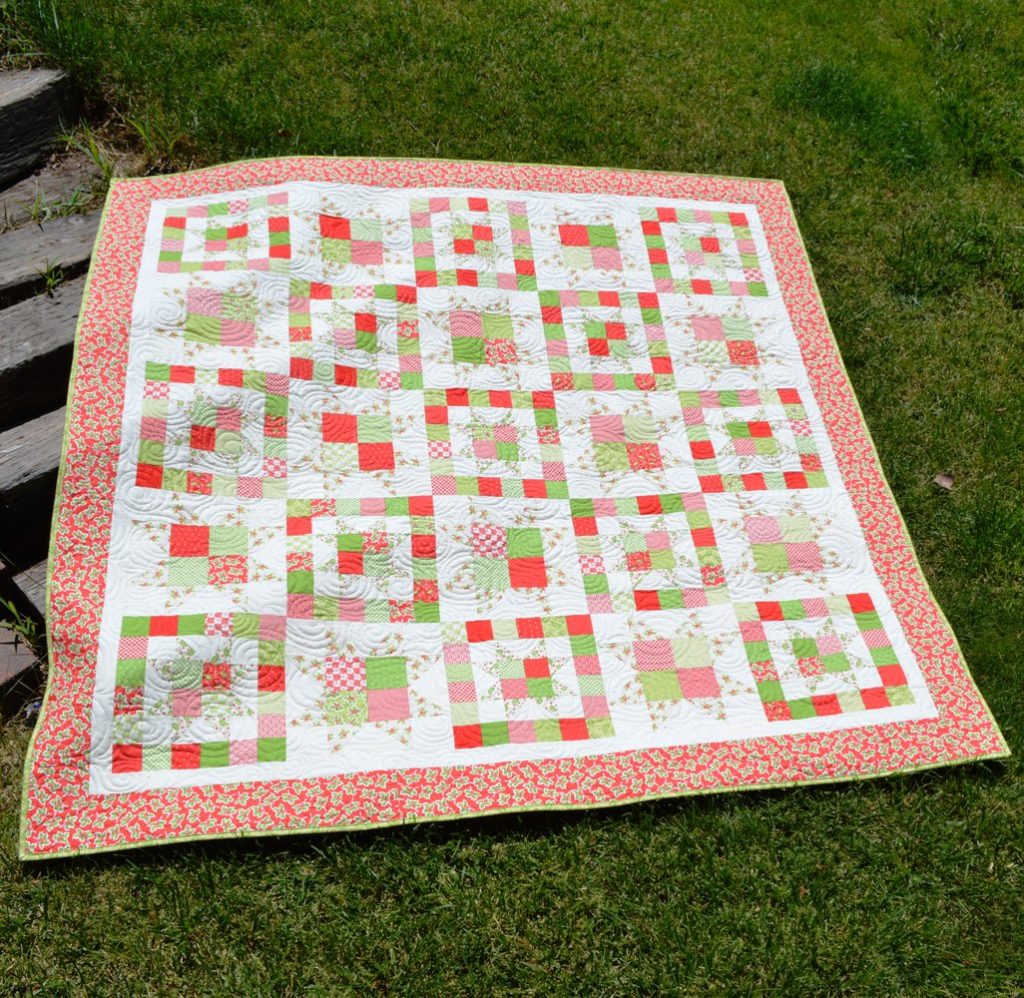
Hi Moda Bake Shoppers!!! It's me, Melissa Corry from Happy Quilting and I am thrilled to be bringing you a Christmas in July tutorial today ;) I absolutely love everything Joanna at Fig Tree & Co designs and when I saw she was doing a Christmas line, I knew I had to make something classic with it!!! And what is more Classic Christmas than patchwork stars in Red and Green. I just love it and hope you do to!!!
This quilt/project finishes at 71" x 71".
So let's get right to what you need to do to make your own ;)
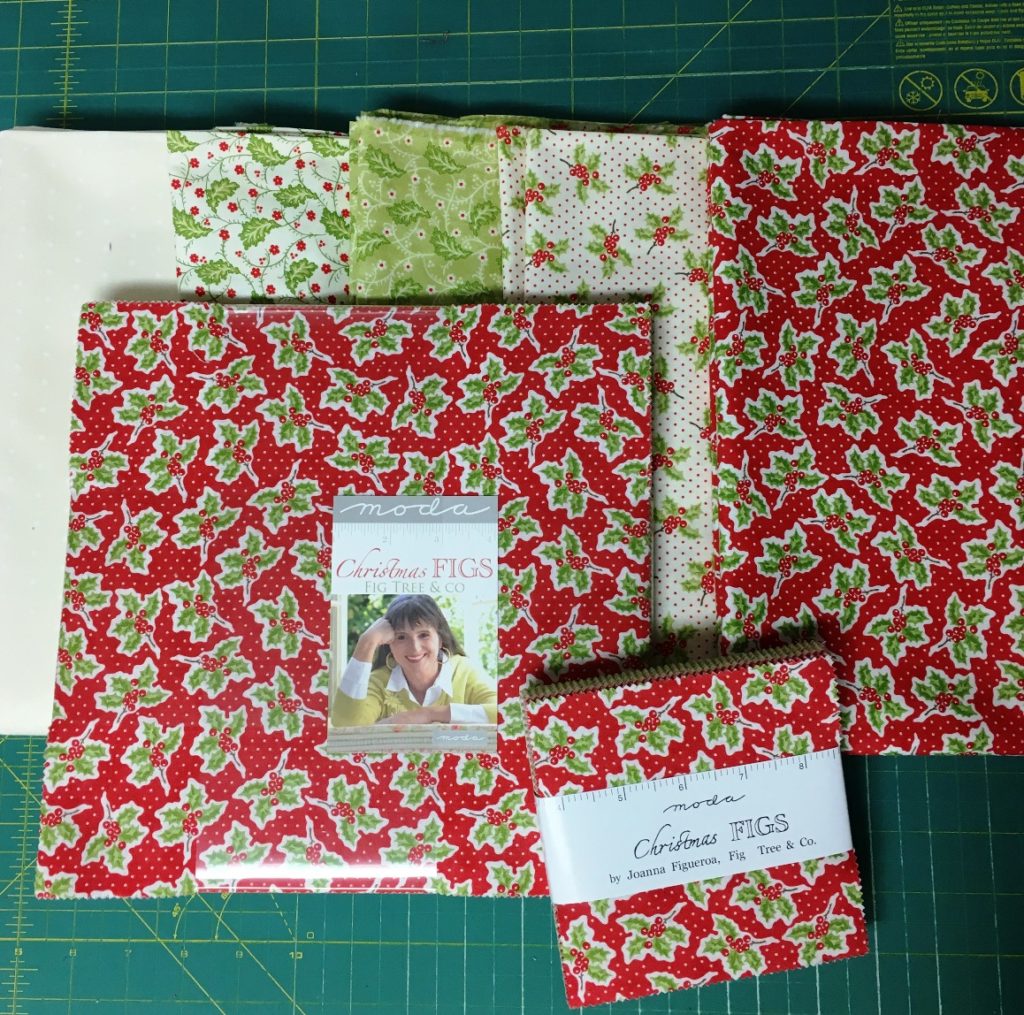
1 Christmas Figs Layer Cake and Charm Pack by Joanna Figueroa, Fig Tree & Co.
2 1/3 yards background fabric {20312 14}
1 yard border fabric {20310 11}
2/3 yard Large Star point fabric {20310 14}
1 yard Small Star point fabric {20317 14}
4 1/2 yards backing fabric {20317 11}
2/3 yard binding fabric {20317 13}
STEP 1 - CUTTING
From the Border Fabric, cut(8) 4 1/2"x Width of Fabric Strips and trim the selvedges
From the Binding Fabric, cut (8) 2 1/2" x Width of Fabric strips and trim the selvedges
From the Background Fabric, cut:
- (12) 7 1/4" x 7 1/4" squares
- (13) 5 1/4" x 5 1/4" squares
- (48) 3 1/2" x 3 1/2" squares
- (52) 2 1/2" x 2 1/2" squares
- (8) 2" x Width of Fabric strips and trim the selvages.
From the Large Star Point Fabric, cut (48) 3 7/8" x 3 7/8" squares
From the Small Star Point Fabric cut: (52) 2 7/8" x 2 7/8" squares
From the Christmas Figs Layer Cake and Charm Squares - divide the fabrics into 2 piles of Green and Red Fabrics.
- From the Green Fabrics cut - (24) 3 1/2" x 3 1/2" squares and (156) 2 1/2" x 2 1/2" squares
- From the Red Fabrics cut - (24) 3 1/2" x 3 1/2" squares and (156) 2 1/2" x 2 1/2" squares
STEP 2 - FLYING GEESE UNITS
And now with all of that cutting done, we are ready to start stitching!!! We will start with the Flying Geese Units. We will make the Large and Small Flying Geese Units at the same time with chain stitching to save time and thread. Gather your Large Star Point (3 7/8") and Small Star Point (2 7/8") Fabric squares. On the wrong side of all of the squares, draw a diagonal line.
Then gather the Large 7 1/4" x 7 1/4" Background fabric squares and the Small 5 1/4" x 5 1/4" Background fabric squares. Place two Large Star Point Squares onto a Large Bakground square and two Small Star Point Squares onto a Small Background square with right sides together as shown below. Pin the squares in place. I like to pin all 12 Large and 13 Small sets. (you will have more squares, we will get to them in the next step). Now we are going to sew a 1/4" seam on either side of the drawn line.
I like to chain stitch here to save a lot of time and thread. So start by sewing a 1/4" seam on the right side of the drawn line on your first pinned set. When you get to the end, don't clip your threads, just start feeding the next set through. Continue like this until you have stitched a 1/4" seam on the right side of the drawn line on all 12 Large Sets and 13 Small sets.
Then clip your threads and stack up your units. Then you can repeat the process on the left hand side of the drawn line, chain stitching the second seam on all 12 Large Sets and all 13 Small Sets. Then once again, clip the threads between the chain stitching and stack up your units.
Now move to your cutting mat and cut each unit in half on the drawn line. Just line your quilting ruler up with the drawn line and cut along the edge. Be sure to keep your small and large units in seperate piles.
Then move to your iron and press each of the units upwards, towards the marked squares as shown below.
Now Place a Large marked Square on the Large Unit and a Samll marked Square on the Small unit with right sides together as shown below. Pin them in place. Once again, chain stitch a 1/4" seam on each unit on the right hand side of the drawn line. Clip your threads and then chain stitch a 1/4" seam on each unit on the left hand side of the drawn line. Then again, clip your threads.
Almost there, now just again, cut each unit on the drawn line. Then Press the seam allowance up towards the marked squares (now triangles). And finally, trim the dog ears from the 2 sides and top of each Flying Geese unit.
Each Set makes 4 Flying Geese so now you should have a total of 48 Large Flying Geese measuring 3 1/2" x 6 1/2" and 52 Small Flying Geese measuring 2 1/2" x 4 1/2".
STEP 3 - PATCHWORK UNITS
And now, we are moving onto some simple patchwork. Again, we will be working on both Large and Small units to save time and time. Start by matching a Small 2 1/2" x 2 1/2" Red square with a Small 2 1/2" x 2 1/2" Green square with right sides together and stitch a 1/4" seam along the edge. Chain Stitch all your squares. Then contine with your Large 3 1/2" x 3 1/2" squars, matching a Red and Green square with right sides together and chain stitching a 1/4" seam along the edge.
Once you are finished Chain Stitching clip your threads between your units and press the seam allowances towards the Red Squares. You will have 156 Small 2 Patch Units measuring 2 1/2" x 4 1/2" and 24 Large 2 Patch Units measuring 3 1/2" x 6 1/2".
And from all of our Large 2 Patches units and some of our Small 2 Patch units we are now going to make 4 Patch Units. Place a Small 2 Patch Unit on a second Small 2 Patch Unit with right sides together, aligning and pinning the center seam, and making the red and green in opposite layout as shown below. Align and pin 13 Small Sets. Then repeat the same for the Large 2 Patch Units Aligning and pinning all 12 Large Sets. Chain Stitch a 1/4" seam along the pinned edge of all the Large and Small Sets. Clip your threads and then press the seam allowance open.
You will now have 13 Small 4 Patch Units measuring 4 1/2" x 4 1/2" and 13 Large 4 Patch Units measuring 6 1/2" x 6 1/2". And you will have a whole bunch of small 2 Patch Units that we are now going to use ;)
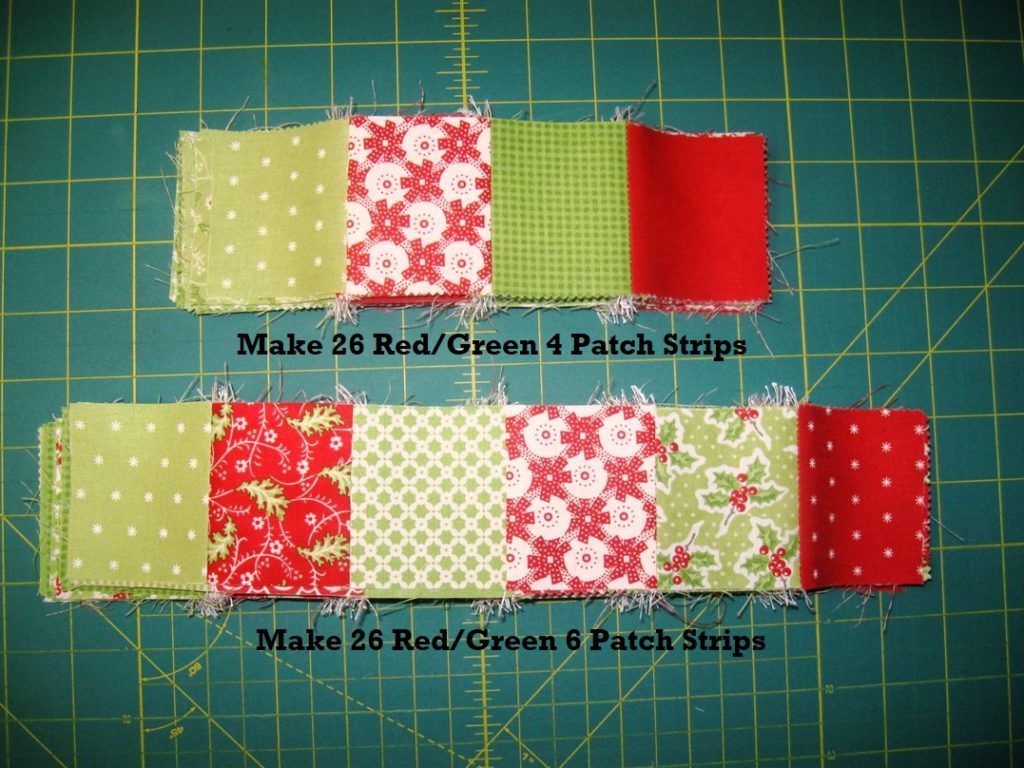
We will be making some Patchwork Strips now. We will start with 4 Patch Strips. Place a Small 2 Patch Unit onto a second Small 2 Patch Unit with right sides together and in opposite layout as shown below. Chain Stitch 26 Sets of 4 Patch Strips. Clip your threads and press the seam allowances towards the Red square.
And now all that is left is some 6 Patch Strips. Place a Small 2 Patch Unit onto a second Small 2 Patch Unit with right sides together and in opposite layout as shown below. Chain Stitch 26 Sets. Then place a thrid 2 Patch Unit onto the now 4 Patch Unit with right sides together and in opposite layout. Chain stitch all 26 Sets. Clip your threads and press the seam allowances towards the Red squares.
And you will now have 26 4 Patch Strip Units measuring 2 1/2" x 8 1/2" and 26 6 Patch Strip Units measuring 2 1/2" x 12 1/2". And now all your units are finished and you are ready to start making blocks!!!
STEP 4 - STAR BLOCKS
Once again, we are going to work on the Large Block and the Small Block at the same time so we can chain stitch to save time and thread. I like to stack up all of my blocks ie the Large Block pile has 12 units in each place and the Small Block pile has 13 units in each place, this just makes it easier for me to chain stitch. If you prefer, you can just make 1 block at a time, doing all the Large Blocks and then all the Small Blocks. Whatever works best for you ;)
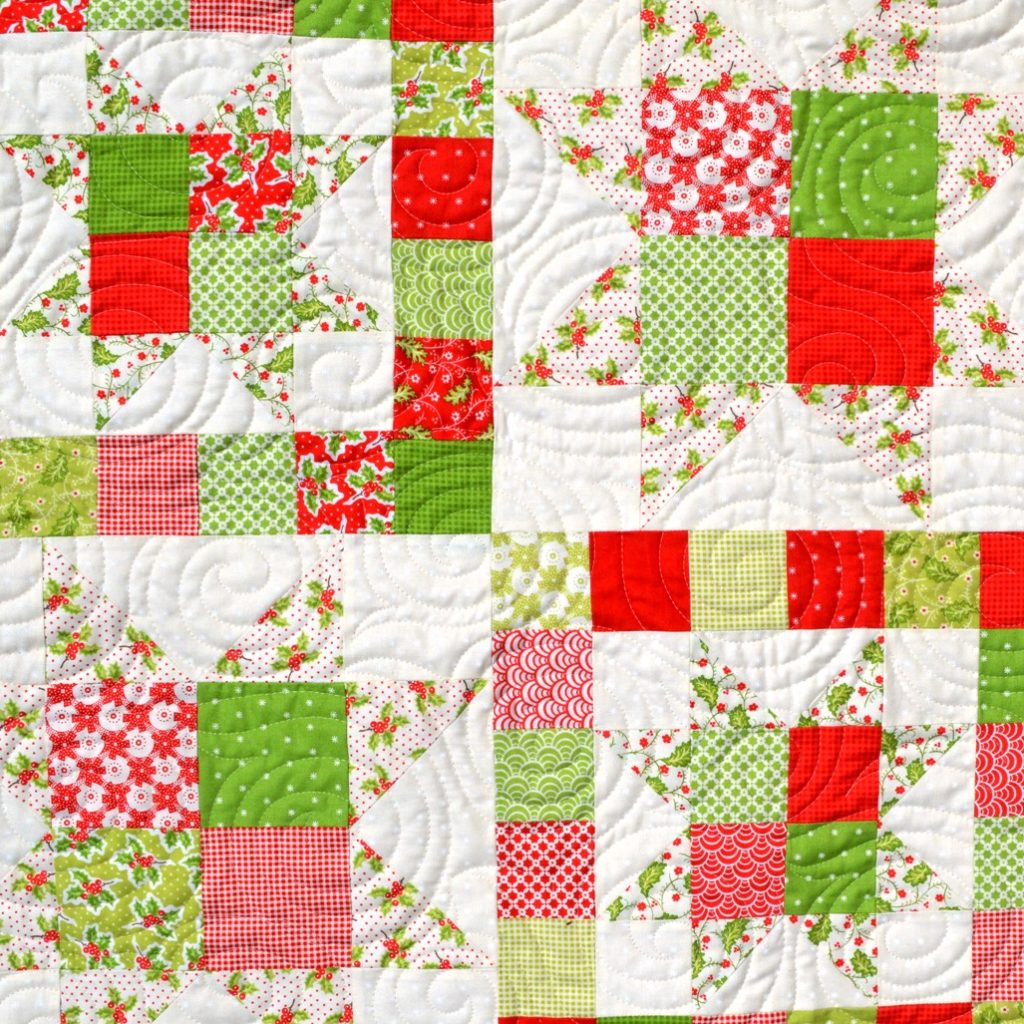
Layout a Large 4 Patch Unit, 4 Large Flying Geese, and 4 Background 3 1/2" x 3 1/2" squares to make a Large star block as shown below. Do the same for the Small Block uning 1 Small 4 Patch Unit, 4 Small Flying Geese, and 4 Backgrond 2 1/2" x 2 1/2" squares.
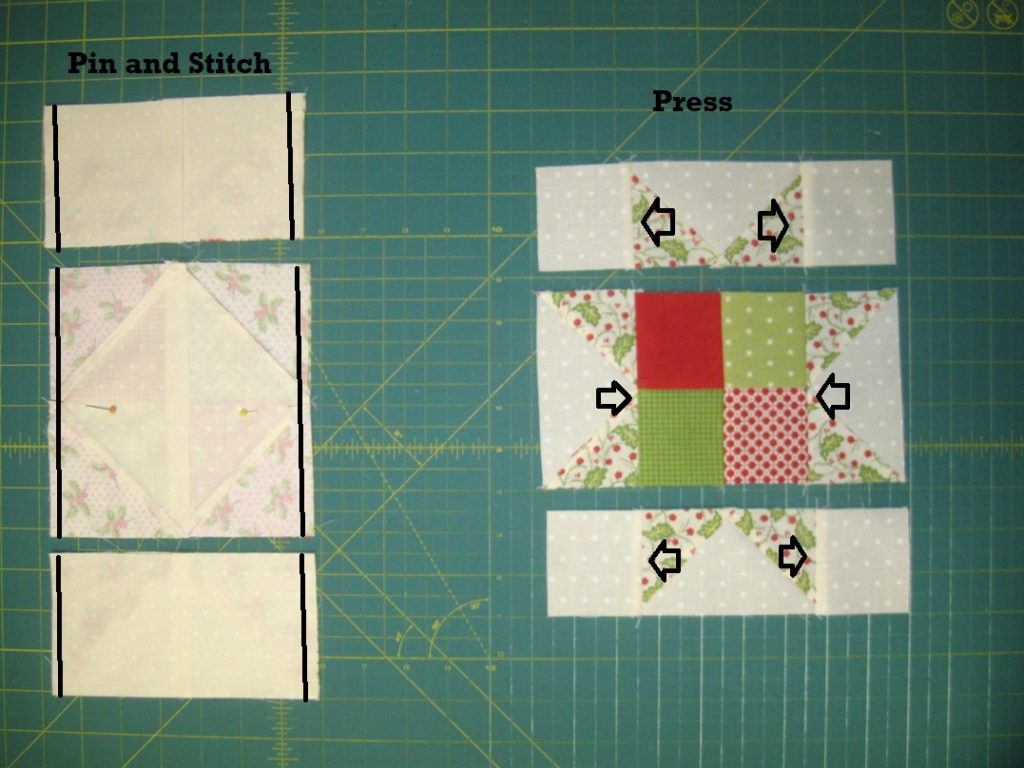
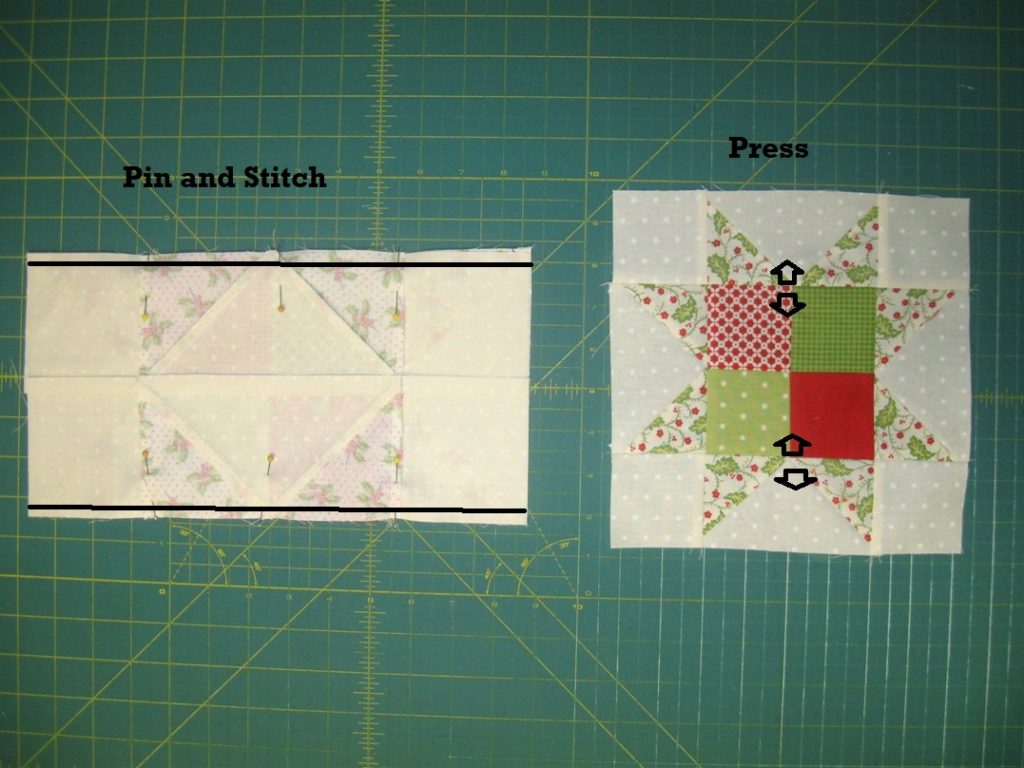
Place the units in the two outside columns onto the units in the center column with right sides together as shown below. Align and pin all the seams. Chain stitch a 1/4" seam along the pinned edge. Press the Seam Allowances in the first and thrid row outward. Press the Seam Allowances in the center row inward. This will allow them to nest in the next step.
Now place the First and Second Row onto the Center row with right sides together as shown below. Align and Pin the seams. Stitch a 1/4" seam along the pinned edges. Then just press the seam allowances open. If you choose to make 1 block at a time repeat for all your block sets.
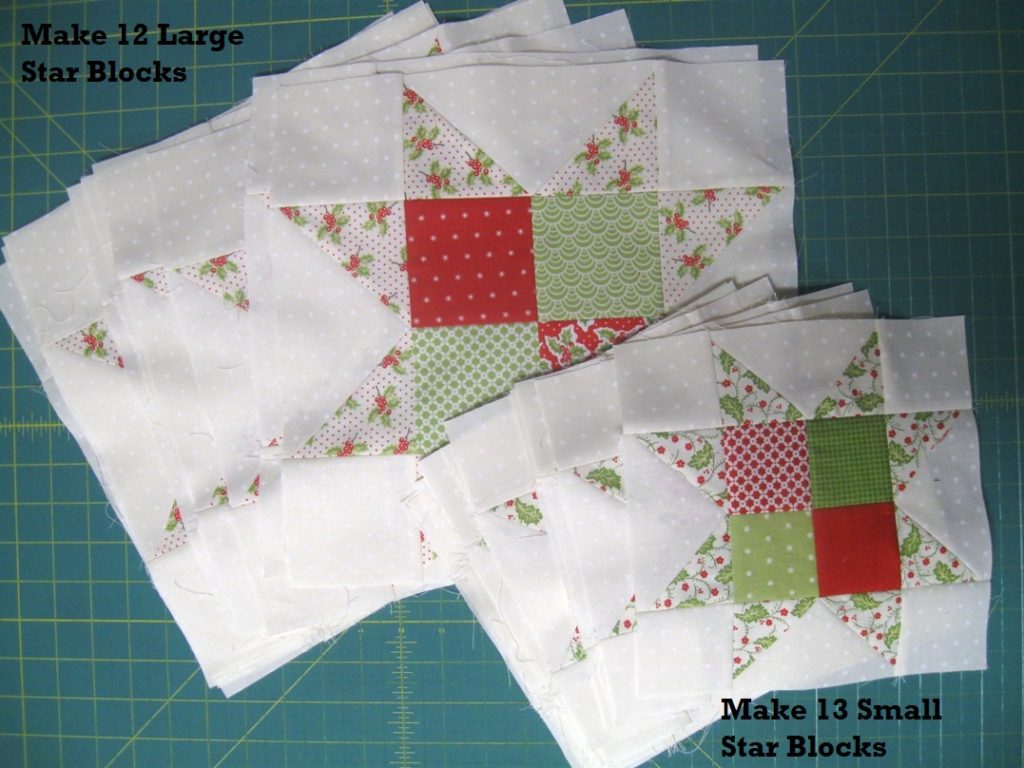
And just like that, you will have 12 Large Star Blocks measuring 12 1/2" x 12 1/2" and 13 Small Star Blocks measuring 8 1/2" x 8 1/2". The Large Star Blocks are now done, and you can set those aside. The Small Star Blocks are now going to get some patchwork frames ;)
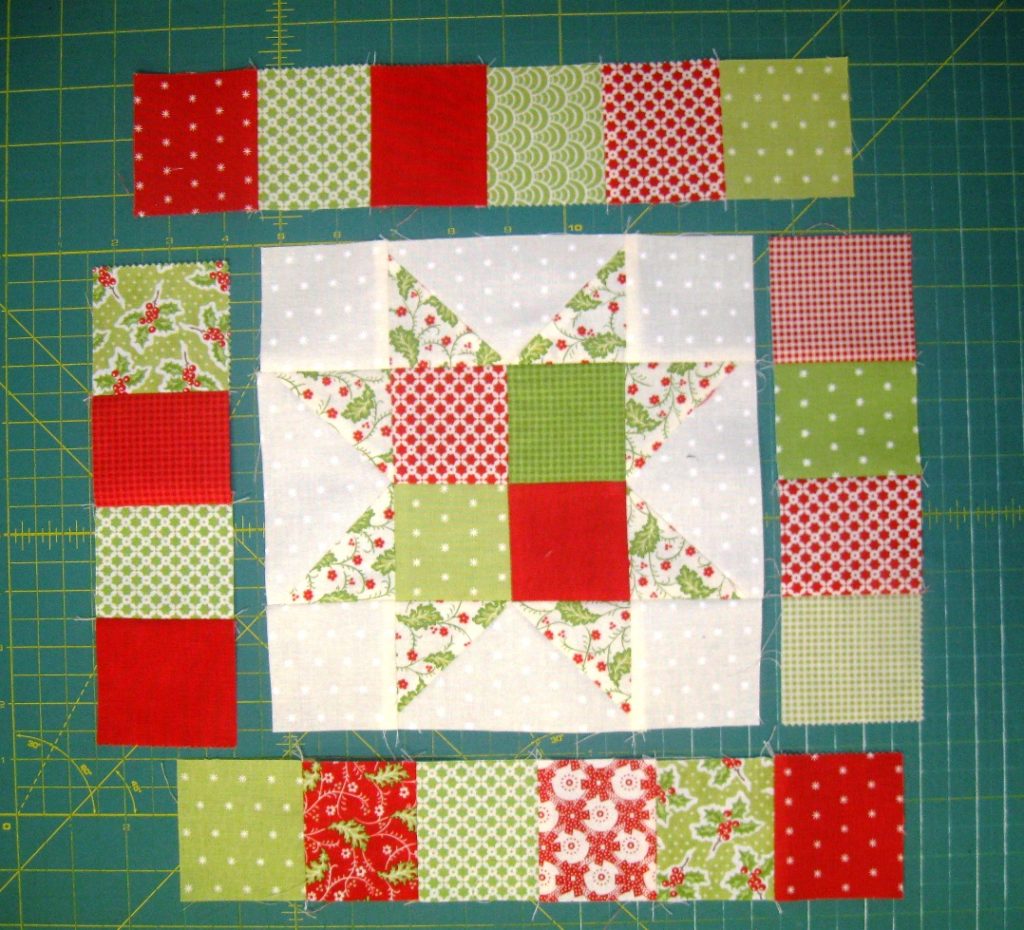
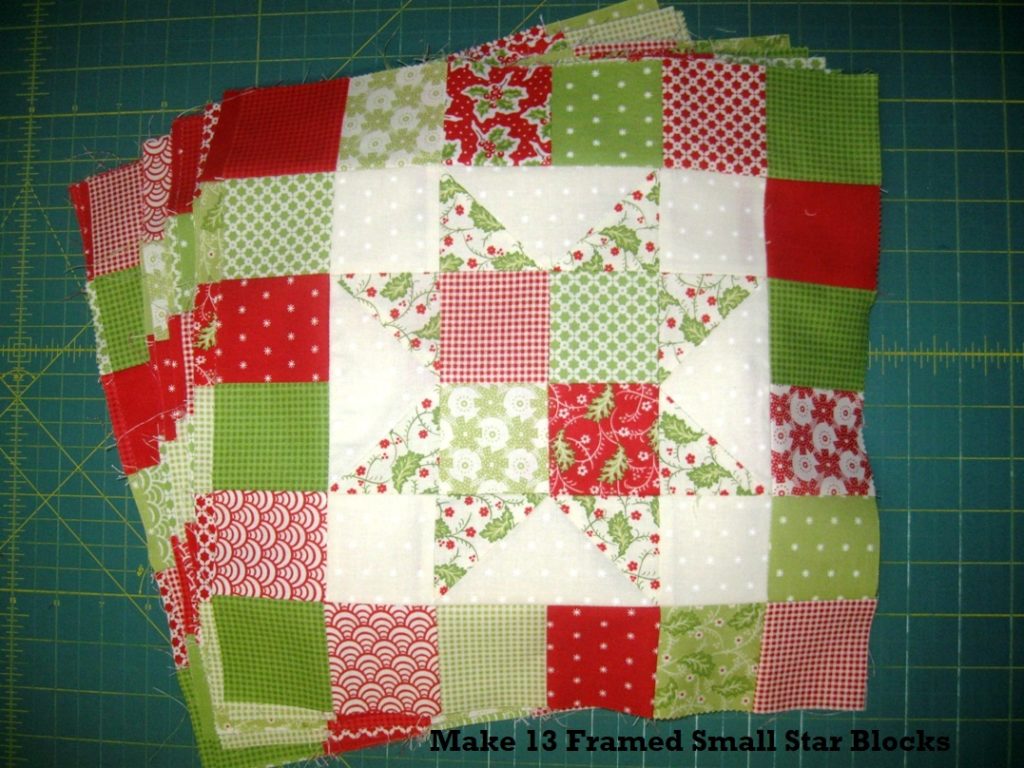
Layout a 4 Patch Strip Unit on either side of the Small Star Block and a 6 Patch Strip Unit on the top and bottom os the Small Star Block as shown below. Again, you can chain stitch all 13 sets of the next few instructions to save time and thread. Take care with the red and green placement to make sure it stays Red/Green all the way around the block.
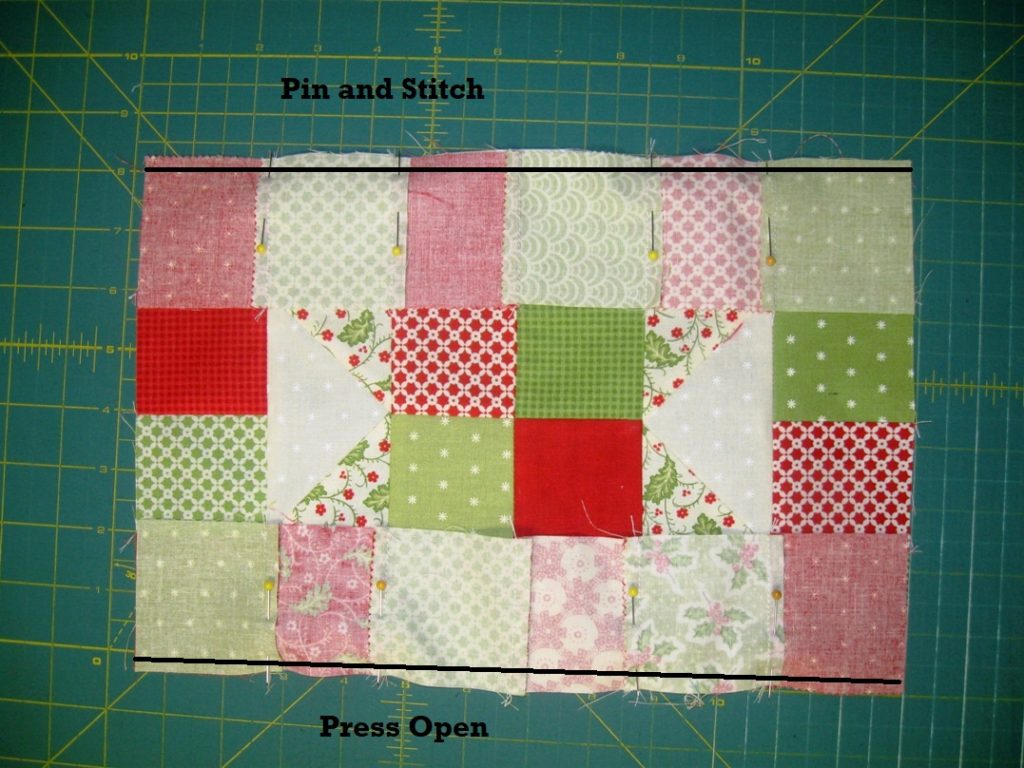
Place the two 4 Patch Strip Units on the sides of the Small Star block with right sides together as shown below. Align and pin the seams. Stitch a 1/4" seam along the pinned edge. Press the seam allowances open.
Then place the two 6 Patch Strip Units on the top and bottom of the Small Star block with right sides together as shown below. Align and pin the seams. Stitch a 1/4" seam along the pinned edge. Press the seam allowances open.
And now you have 13 Framed Small Star Blocks measurinng 12 1/2" x 12 1/2". And now it's time to put the quilt top together!!! So fun!!
STEP 5 - QUILT TOP
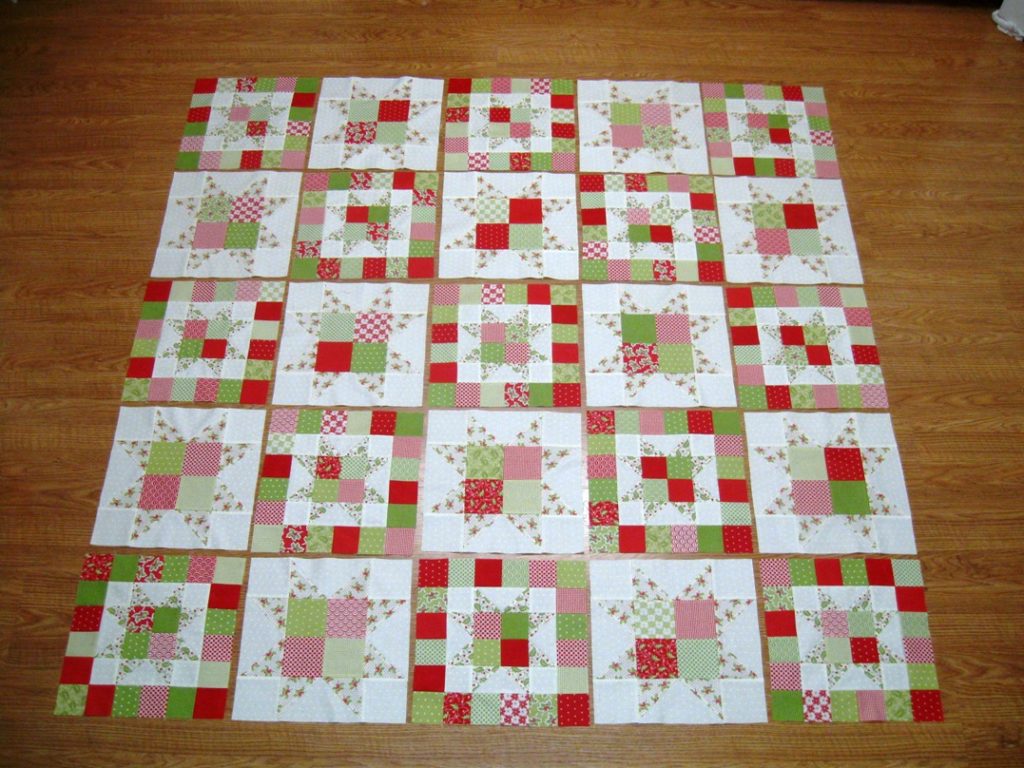
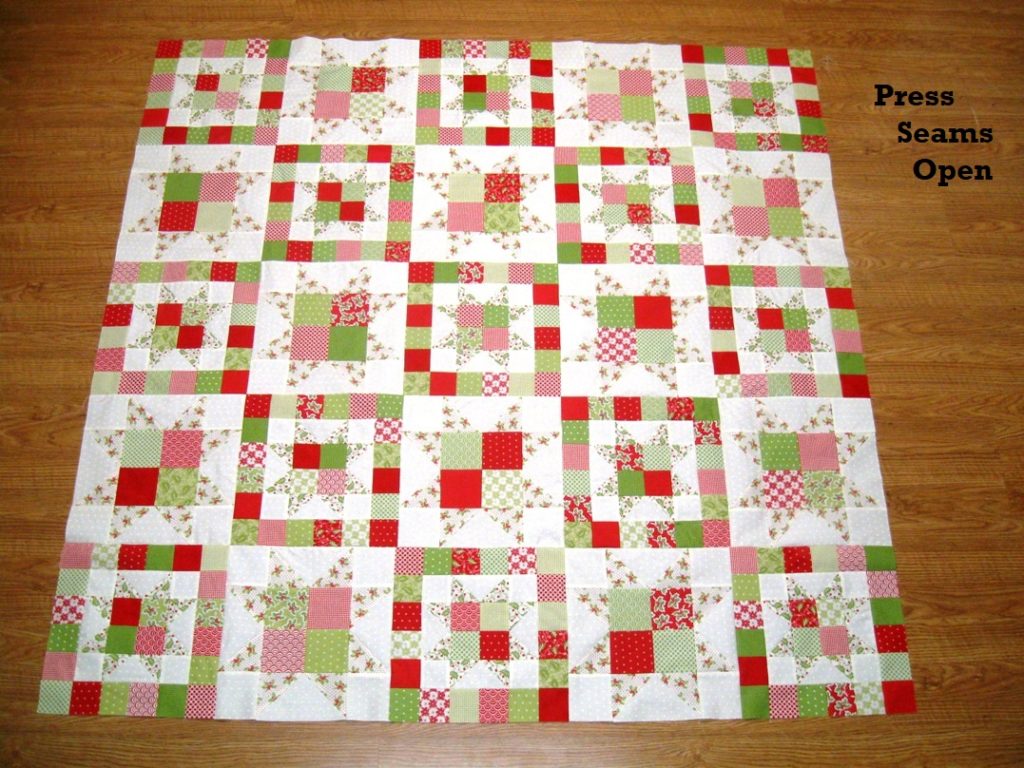
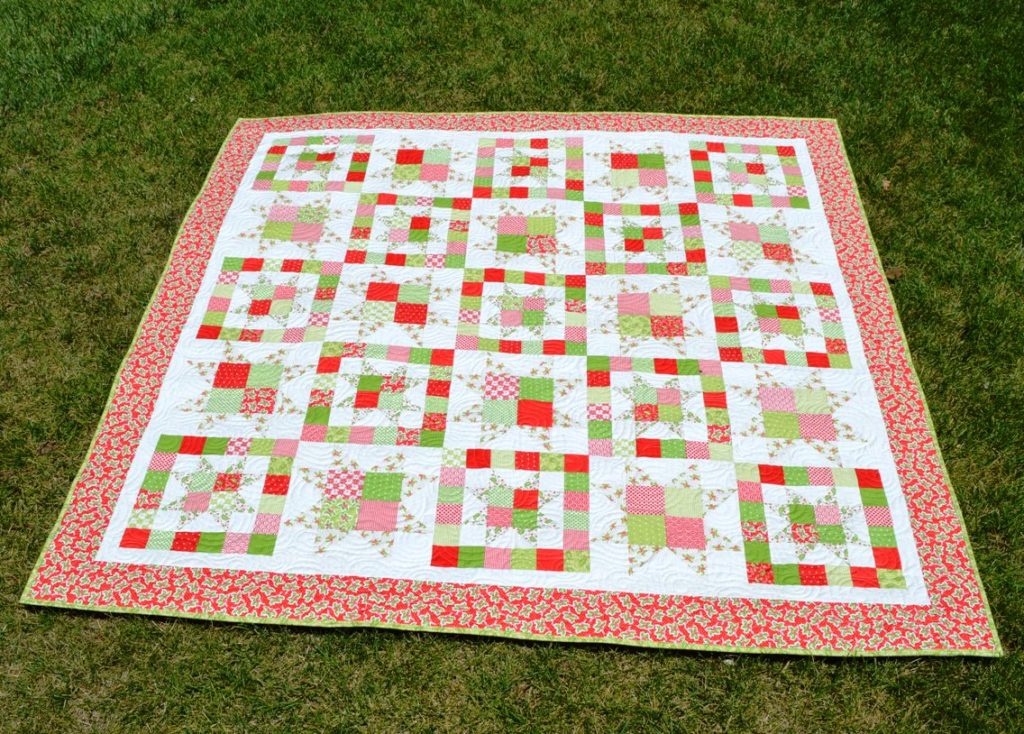
Layout your 13 Framed Small Star Blocks and 12 Large Star Blocks as shown below. You can change the Red/Green placement if you like or follow the same layout I did ;) Rearrange the blocks until you get a look that is pleasing to the eye and well balanced.
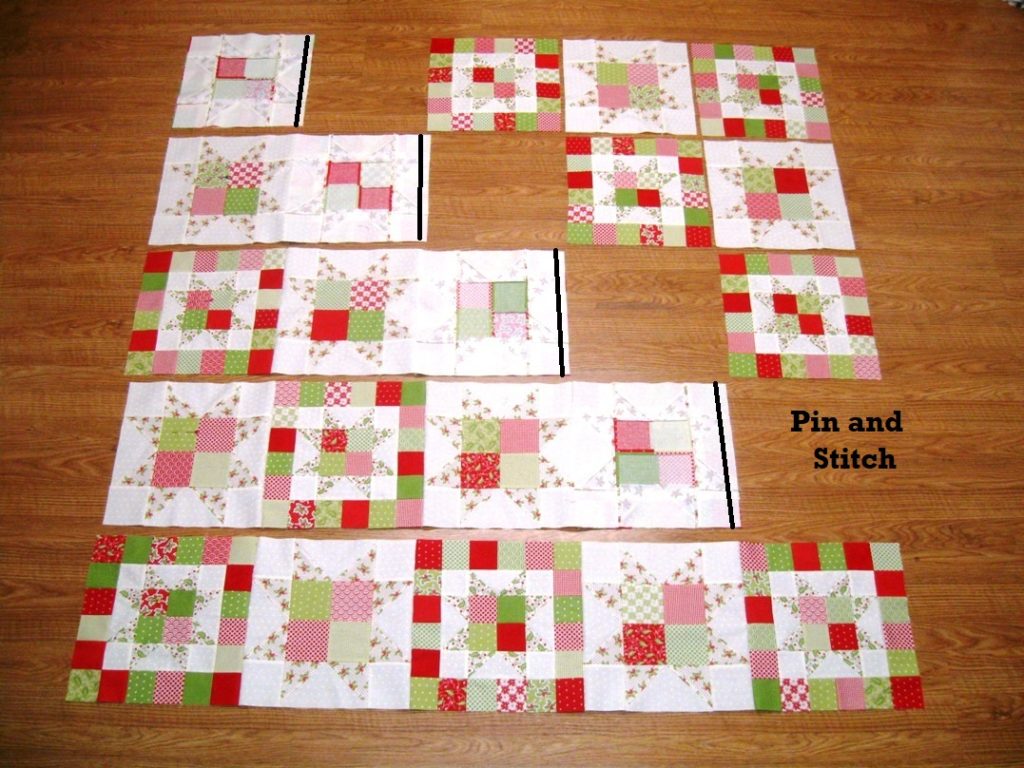
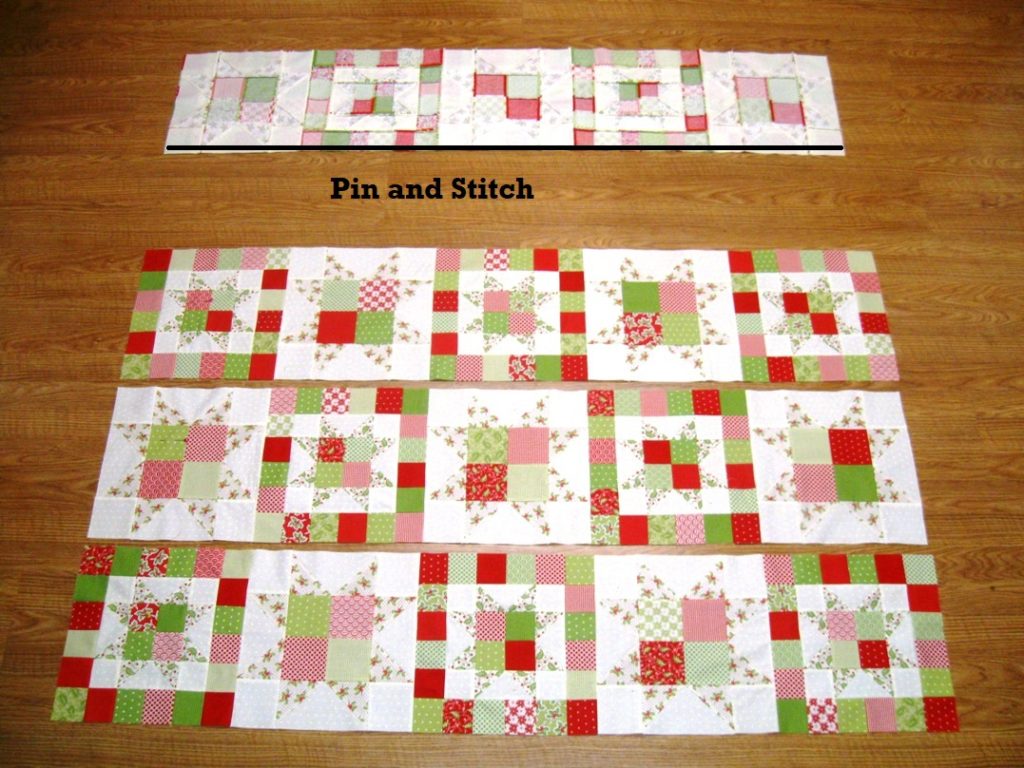
Now it's time to sew the blocks into rows. You can choose to chain stitch all your rows, or work on one row at a time ;) Place the second block onto the first block with right sides together (Shown in Row 1). Align and Pin your seams. Stitch a 1/4" seam along the pinned edge. Lay your blocks back out. Now place the third block in the row onto the now sewn together first and second block with right sides together (Shown in Row 2). Align and Pin your seams. Stitch a 1/4" seam along the pinned edge. And again, lay your blocks back out. Continue in this fashion (Shown in Row 3 and 4) until you have sewn all 5 blocks in the row together. Repeat for all 5 rows if you weren't chain stitching ;)
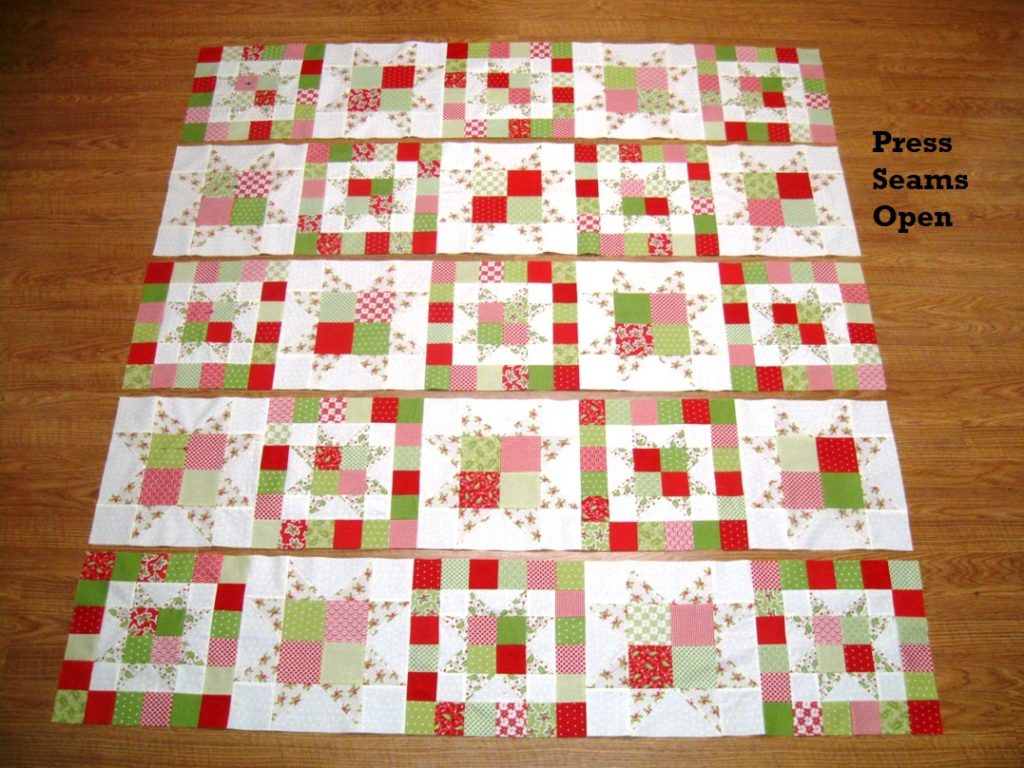
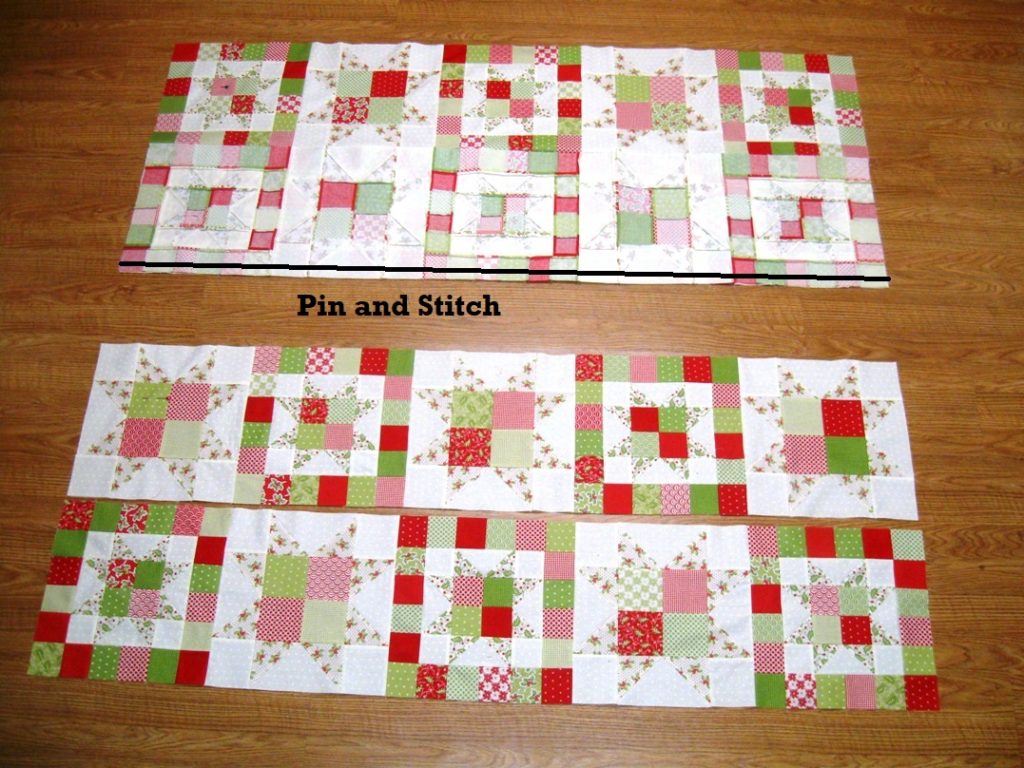
Now press the seam allowances in each row open. And now, we sew the rows into a quilt top. This is just like the last step, only on a larger scale.
Place the second row onto the first row with right sides together. Align and Pin your seams. Stitch a 1/4" seam along the pinned edge. Lay your rows back out.
Now place the third row onto the now sewn together first and second row with right sides together Align and Pin your seams. Stitch a 1/4" seam along the pinned edge. And again, lay your rows back out.
Continue in this fashion until you have sewn all 5 row together. Press the Seam Allowances Open. And now you have a beauitful quilt top center measuring 60 1/2" x 60 1/2".
STEP 6 - BORDERS
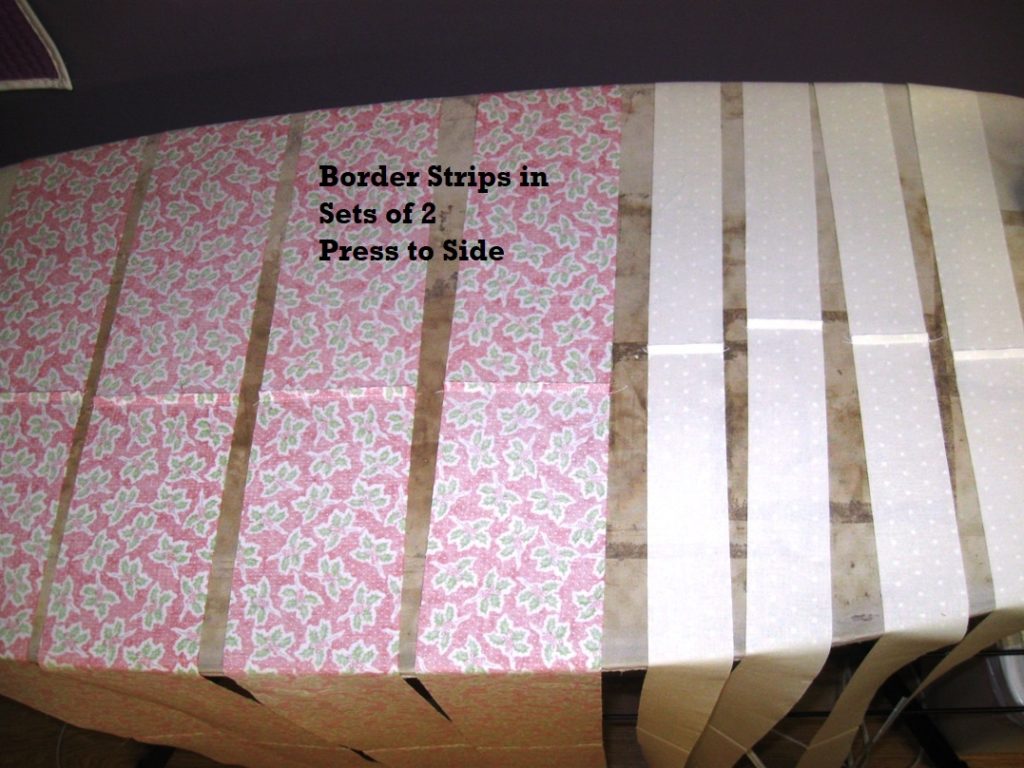
And all that is left, is to add a few borders. I like to make my borders long and then just trim the excess. From your Width of Fabric Background and Border Strips, sew each fabric strips into 4 sets of two, end to end with a 1/4" seam. Press the seam allowance to the side.
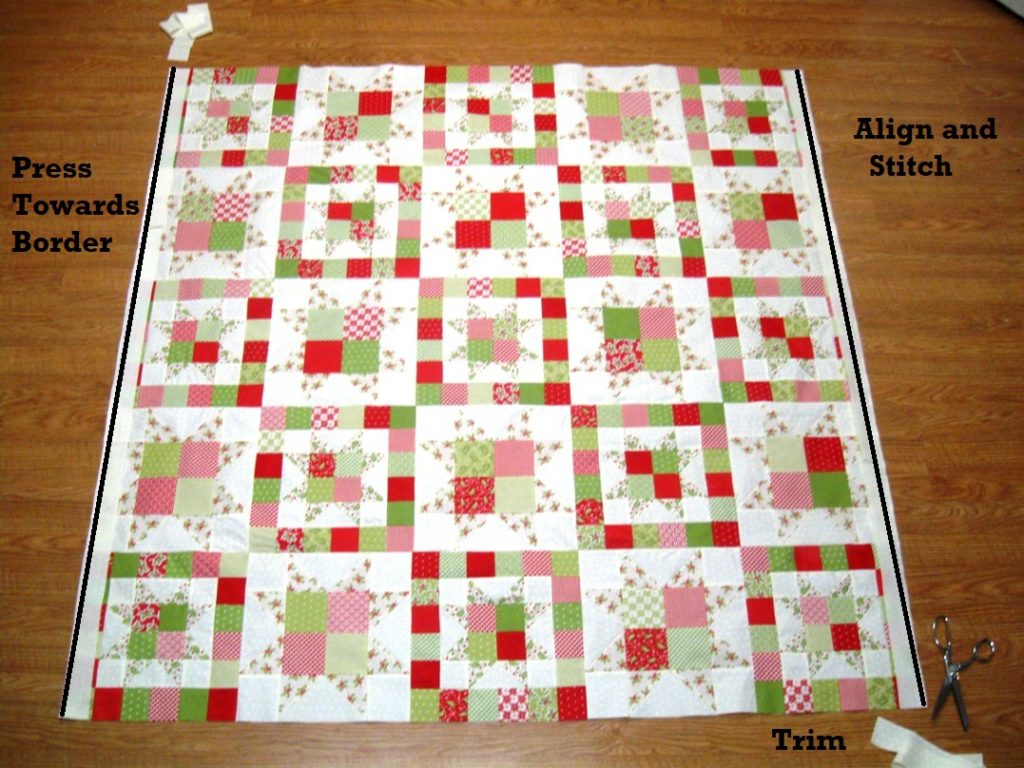
We will start with the small Background Border. Place two Background strips on either side of your quilt top with right sides together. I just align as I am stitching and stitch a 1/4" seam along either side. Trim the excess lenght from the border strip and then press the seam allowances outwards towards the Border fabric.
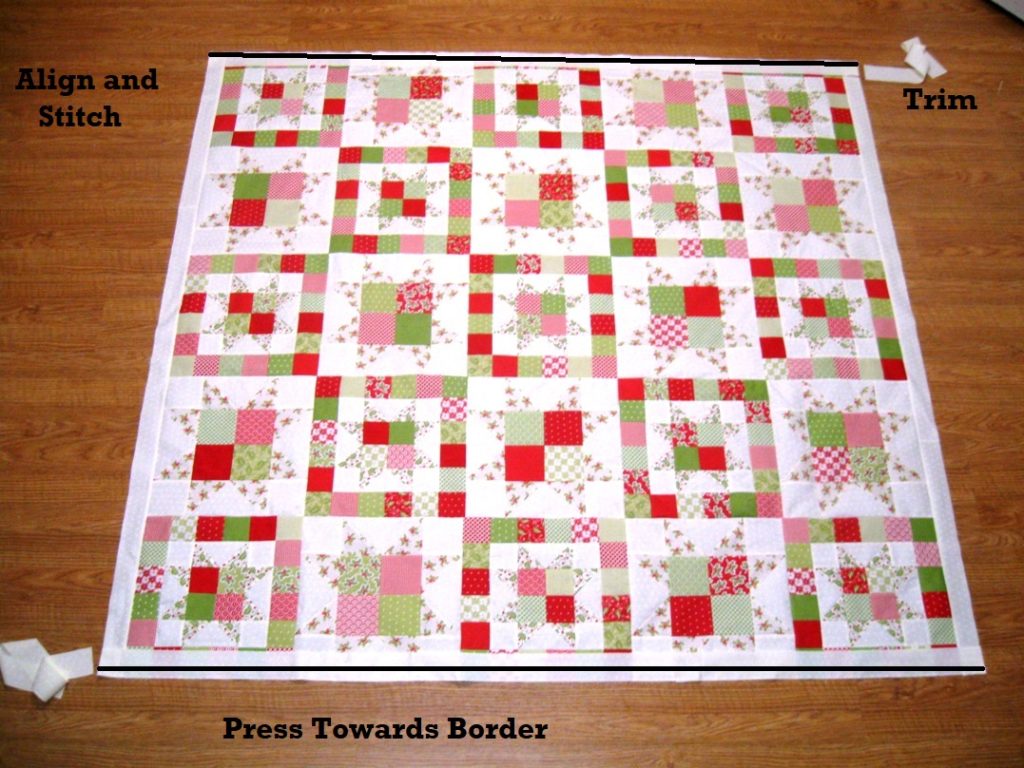
Place two Background strips on the top and bottom of your quilt top with right sides together. Again, align and stitch a 1/4" seam along the top and bttom. Trim the excess lenght from the border strip and then press the seam allowances outwards towards the Border fabric. Your quilt top will now measure 63 1/3" x 63 1/2".
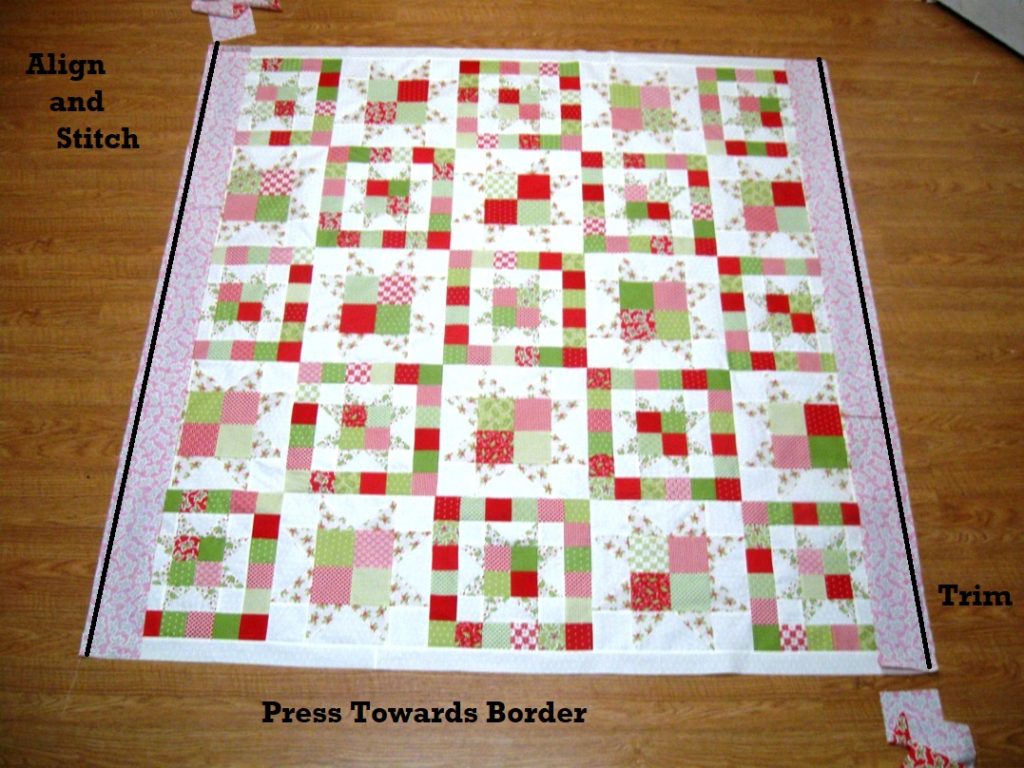
And now, we are going to repeat the same process for the larger Border Fabric Strips. Again, place two Border fabric strips on either side of your quilt top with right sides together. Align and stitch a 1/4" seam along either side. Trim the excess lenght from the border strip and then press the seam allowances outwards towards the Border fabric.
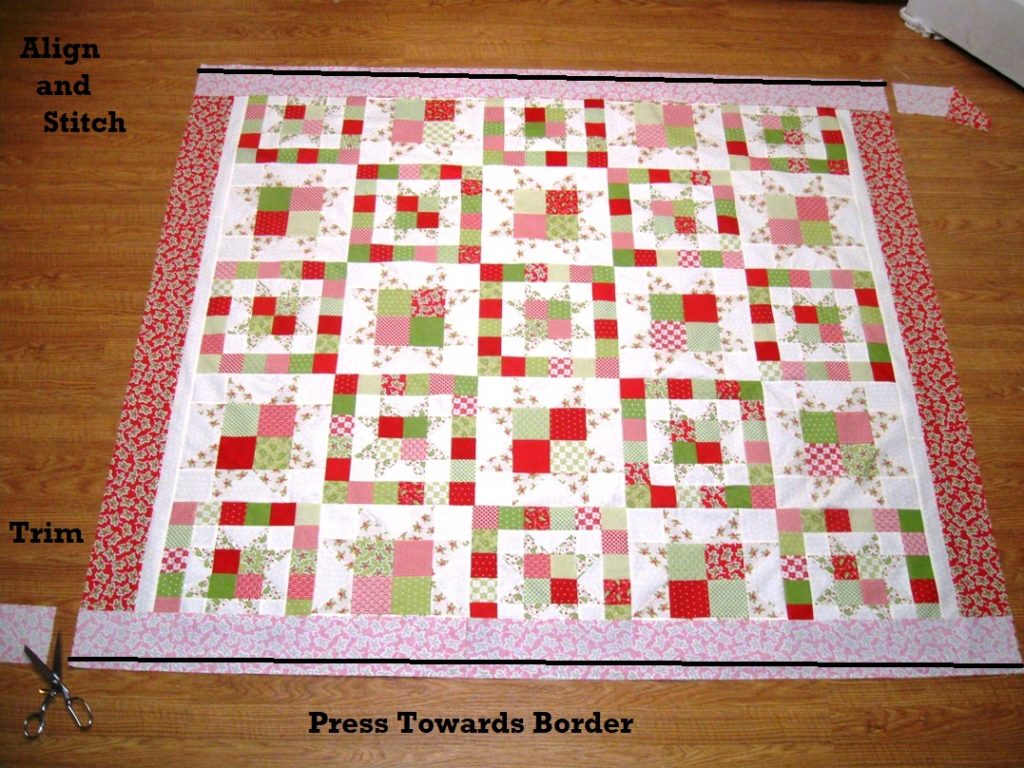
And finally, place the final two Border fabric strips on the top and bottom of your quilt top with right sides together. Align and stitch a 1/4" seam along the top and bttom. Trim the excess lenght from the border strip and then press the seam allowances outwards towards the Border fabric.
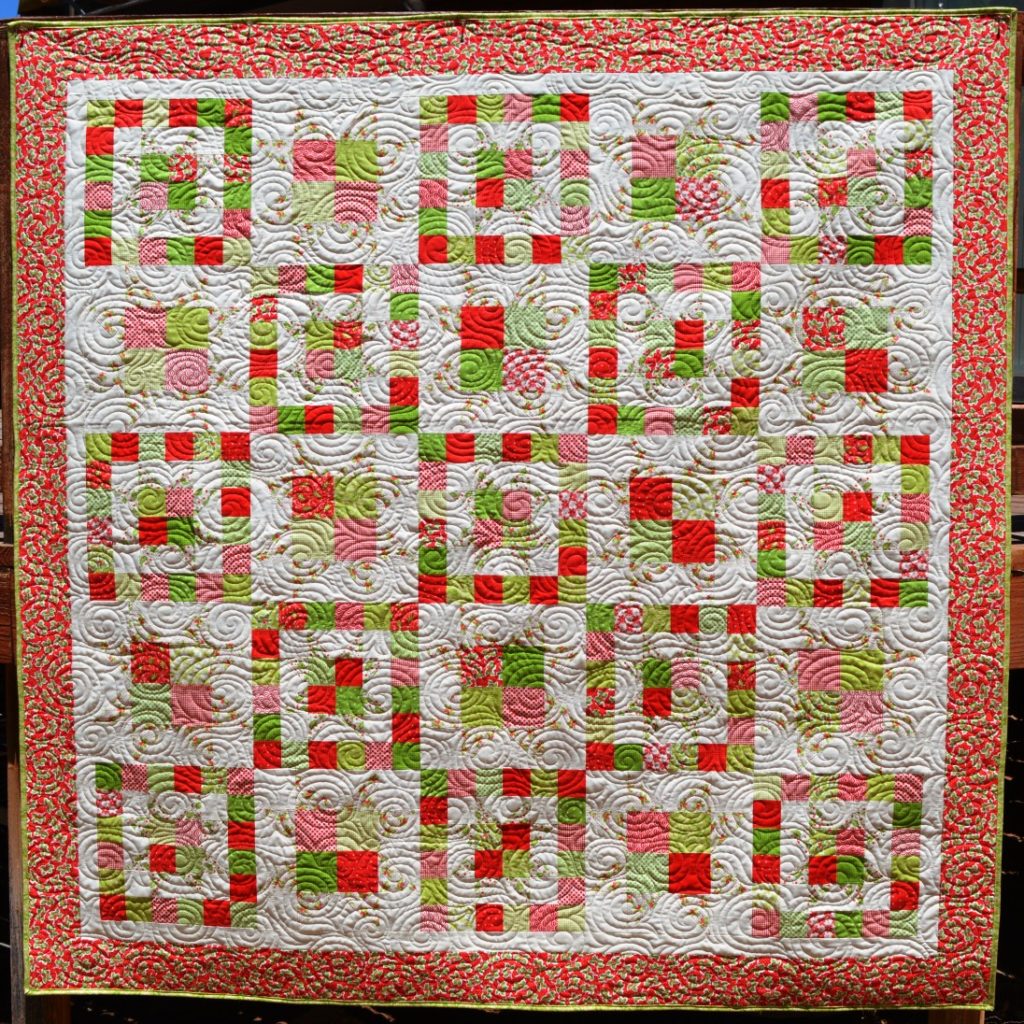
Your quilt top is now done!!! The quilt top will now measure 71 1/2" x 71 1/2". And isn't it just so festive!!!
STEP 7 - FINISHING
So Now . . . Let's finish it up ;) Time to Baste It, Quilt It, and Bind It!!! Which is a whole lot in one little sentence. If you are new to quilting, you can see my Finishing Your Quilt Series of video tutorials that will walk you through Basting, Quilting, and Binding step by step ;)
When it came time to quilt mine, I decided to do a free motion swirl in varying sizes all over the quilt top. I just love the added movement it gives the quilt ;) And it is super fun to quilt and fast!!! I used 402 Pearl So Fine thread which blended perfectly with all of the colors in this quilt ;)
And then you can bind. Remember those (8) 2 1/2" x WOF binding strips. Sew those into your binding strip and then attach it to your quilt for the perfect finish!!
Classic Christmas finishes at 71" x 71" making it the perfect size to snuggle up with in front of a large fire place and a mug of hot chocolate. It really is the perfect quilt for Christmas.
I hope you have enjoyed this tutorial and find it easy to follow. If you make your own Classic Christmas Quilt I would love to see it!! You can email me a picture at [email protected] or add it to my flickr group here or post it to social media with the hashtag #happyquiltingwithmc ;) I can't wait to see your Classic Christmas Quilts!!!
And I would love to have you stop by Happy Quilting sometime for a visit ;) I just love being able to share lots of quilting goodness on a daily basis ;) Wishing you a very Happy Quilting Day!!!
Melissa Corry
www.happyquiltingmelissa.com







Comments