Welcome to Moda Fabrics!
Building Blocks: Half Rectangle Triangles
Building Blocks: Half Rectangle Triangles
Published:
Sep 20 2018 - 09:00

![]()
Welcome to another Building Blocks tutorial! I'm Nicola Dodd from CakeStand Quilts and I'm so happy to be back at the Bake Shop to help you cook up some Half Rectangle Triangles.
I'm a huge fan of the Half Rectangle Triangle (lets call them HRTs or this will be a really long post!) as they add so much movement and excitement to a quilt. They are usually made with templates, but if you don't want to invest in special rulers, or the idea of Foundation Paper Piecing brings a tear to your eye, I have two simple techniques that both use a tool you will already have: your ruler!
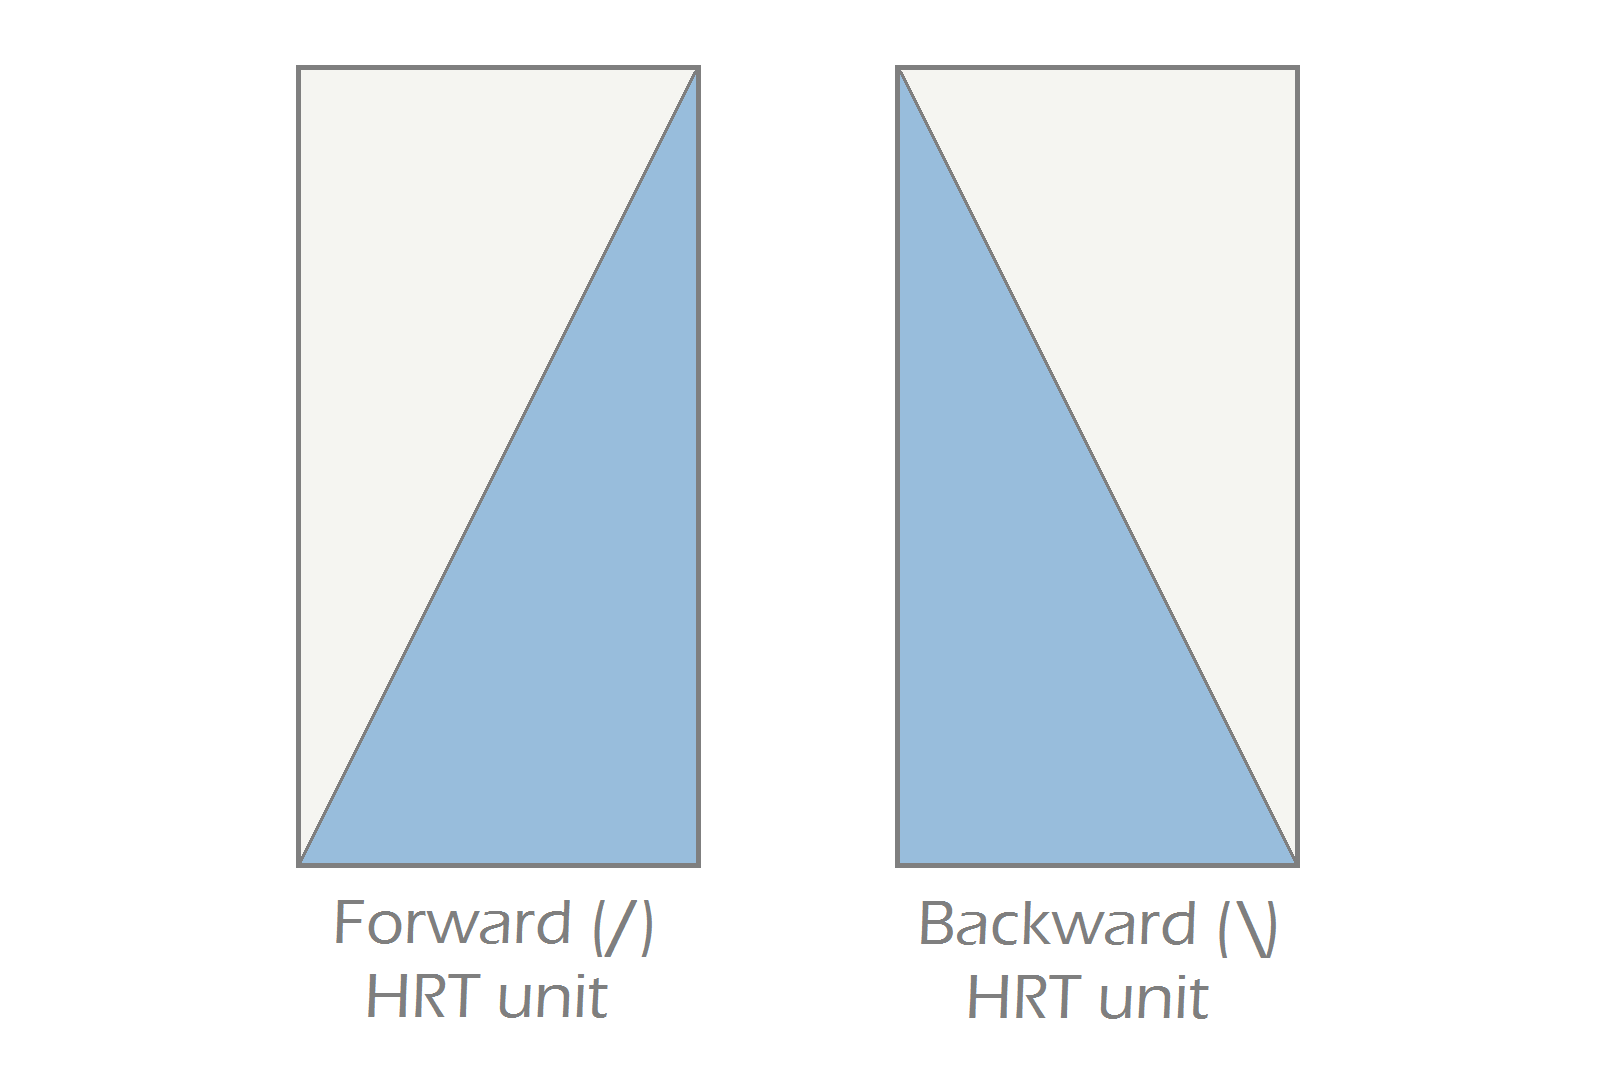
Before we start, one little quirk of the HRT is that it's directional. An easy way to remember which is which is by referring to the symbols on your computer keyboard: the forward slash symbol and the backslash. I'll be referring to our units as Forward HRTs or Backward HRTs.
The first technique I'm sharing is a no-trim method and the second technique makes a slightly oversized unit that you can trim down. Both make a 1:2 rectangular unit - that is, half as wide as it is high - so you can mix and match it with the other Building Block units we'll be making this month.
We will be making 2 2½” x 4½” HRT units
![]()
2 contrasting Charm squares
![]()
Ruler, cutting board and rotary cutter.
Washi (low tack) tape for Method Two
{We will be working with bias cuts, so you may want to starch your Charms before you start}
![]()
METHOD ONE: NO TRIM HRTs
1. From each of the charm squares, cut 2 2½” x 4½” pieces.
2. Decide whether you are making a Forward or Backward HRT. We will be making Forward HRTs. Using your ruler, mark a point ½” from the corner on the short side. Then mark a point 3/8” from the opposite corner on the long side. Trim, discarding the smaller triangle. Repeat with the contrast piece.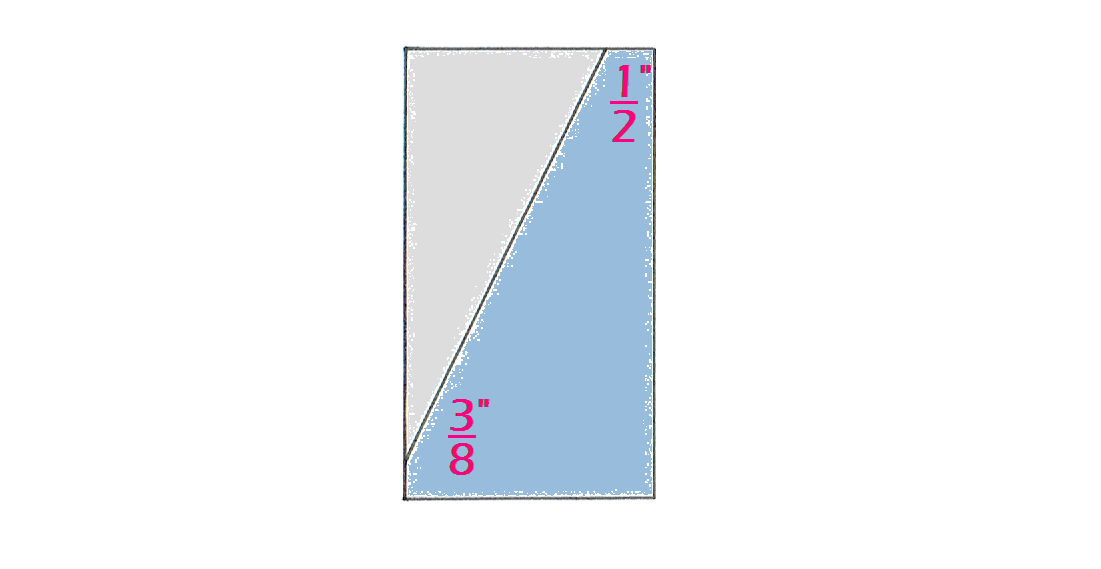 3. Place the contrasting trimmed triangles right sides together, offsetting them so that the ¼” seam allowances intersect. TIP: marking the seam allowance on the first few will help.
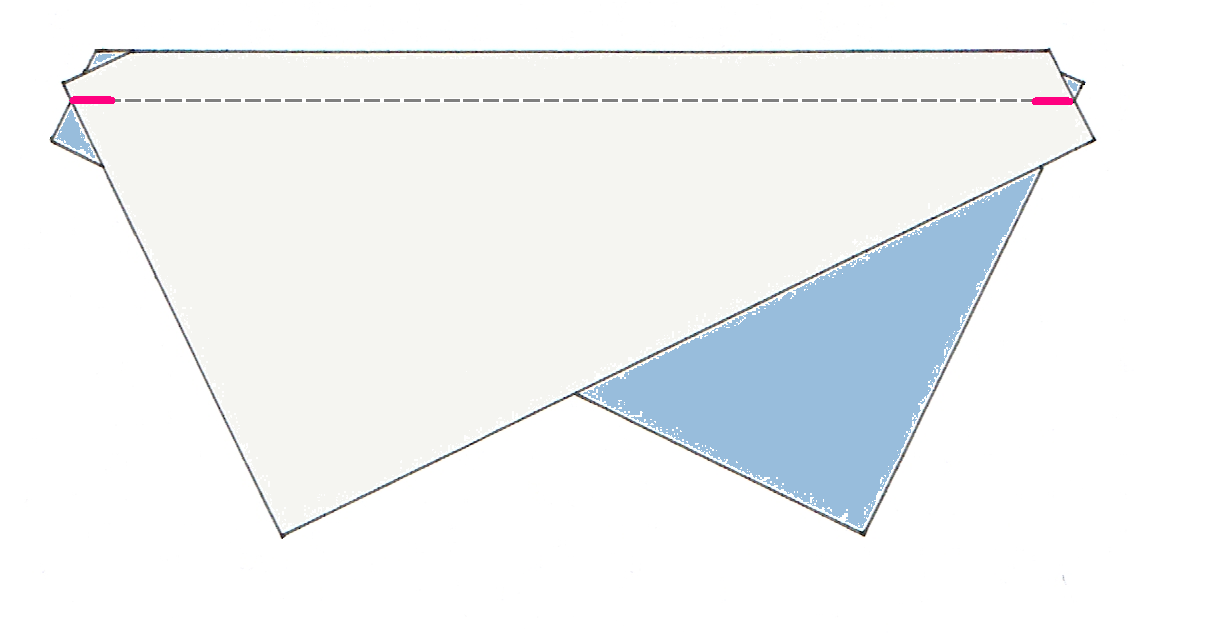 4. Join with a ¼” seam and press the seam towards the darker fabric. NOTE: the seam doesn’t go to the corner of the block but is offset by 1/8”!
As we are always working with a quarter inch seam allowance, this method works for any size triangle...

METHOD TWO: OVERSIZED HRTs
1. From each of the charm squares, cut 1 3½” x 5” piece.
2. Decide whether you are making a Forward or Backward HRT and, using your ruler, mark a point ½” from the corner on the short side. Then mark a point ½” from the opposite corner, again on the short side. Make a diagonal cut (you will have pieces for two blocks). Repeat with the contrast piece.
3. Place the contrasting trimmed triangles right sides together, offsetting them so that the ¼” seam allowances intersect. TIP: again, marking the seam allowance on the first few will help.
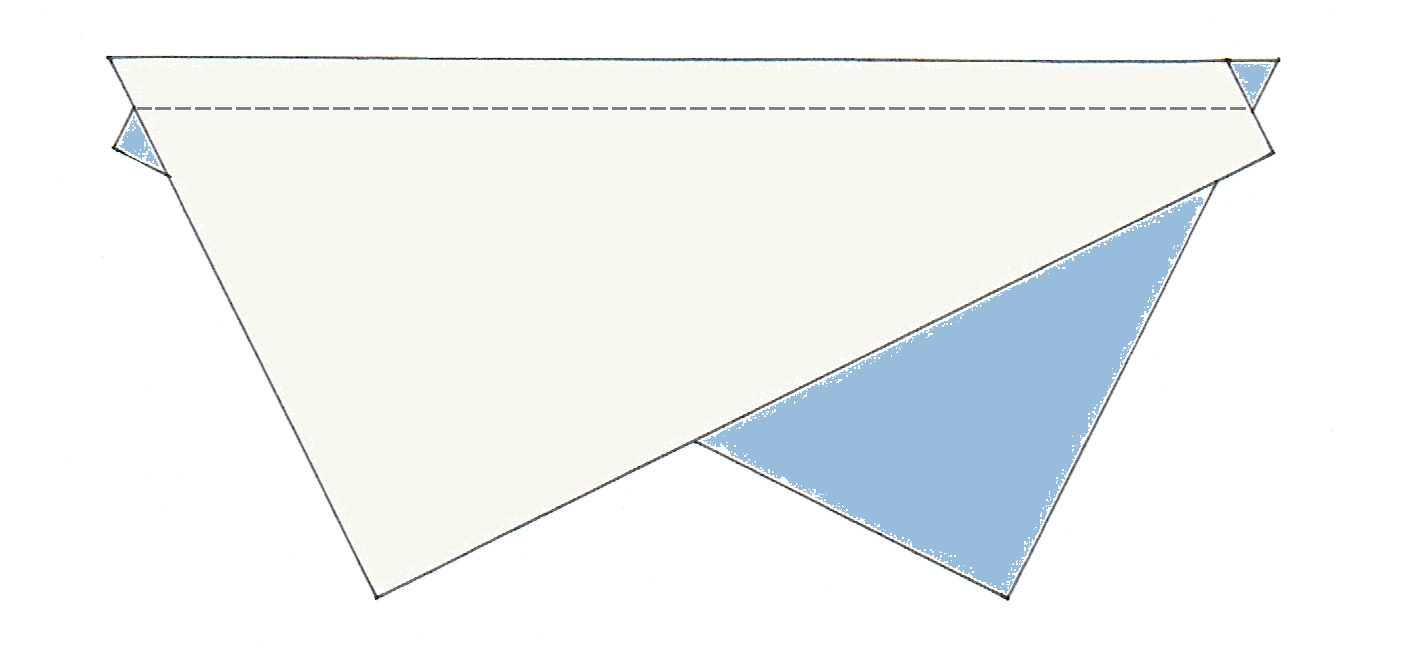 4. Join with a ¼” seam and press the seam towards the darker fabric.
5. Mark a 2½” x 4½” rectangle at the corner of your ruler with washi tape and line up over your unit, making sure that the ¼” seam allowance is aligned on the seam and the seam itself is offset by 1/8” from the corner.
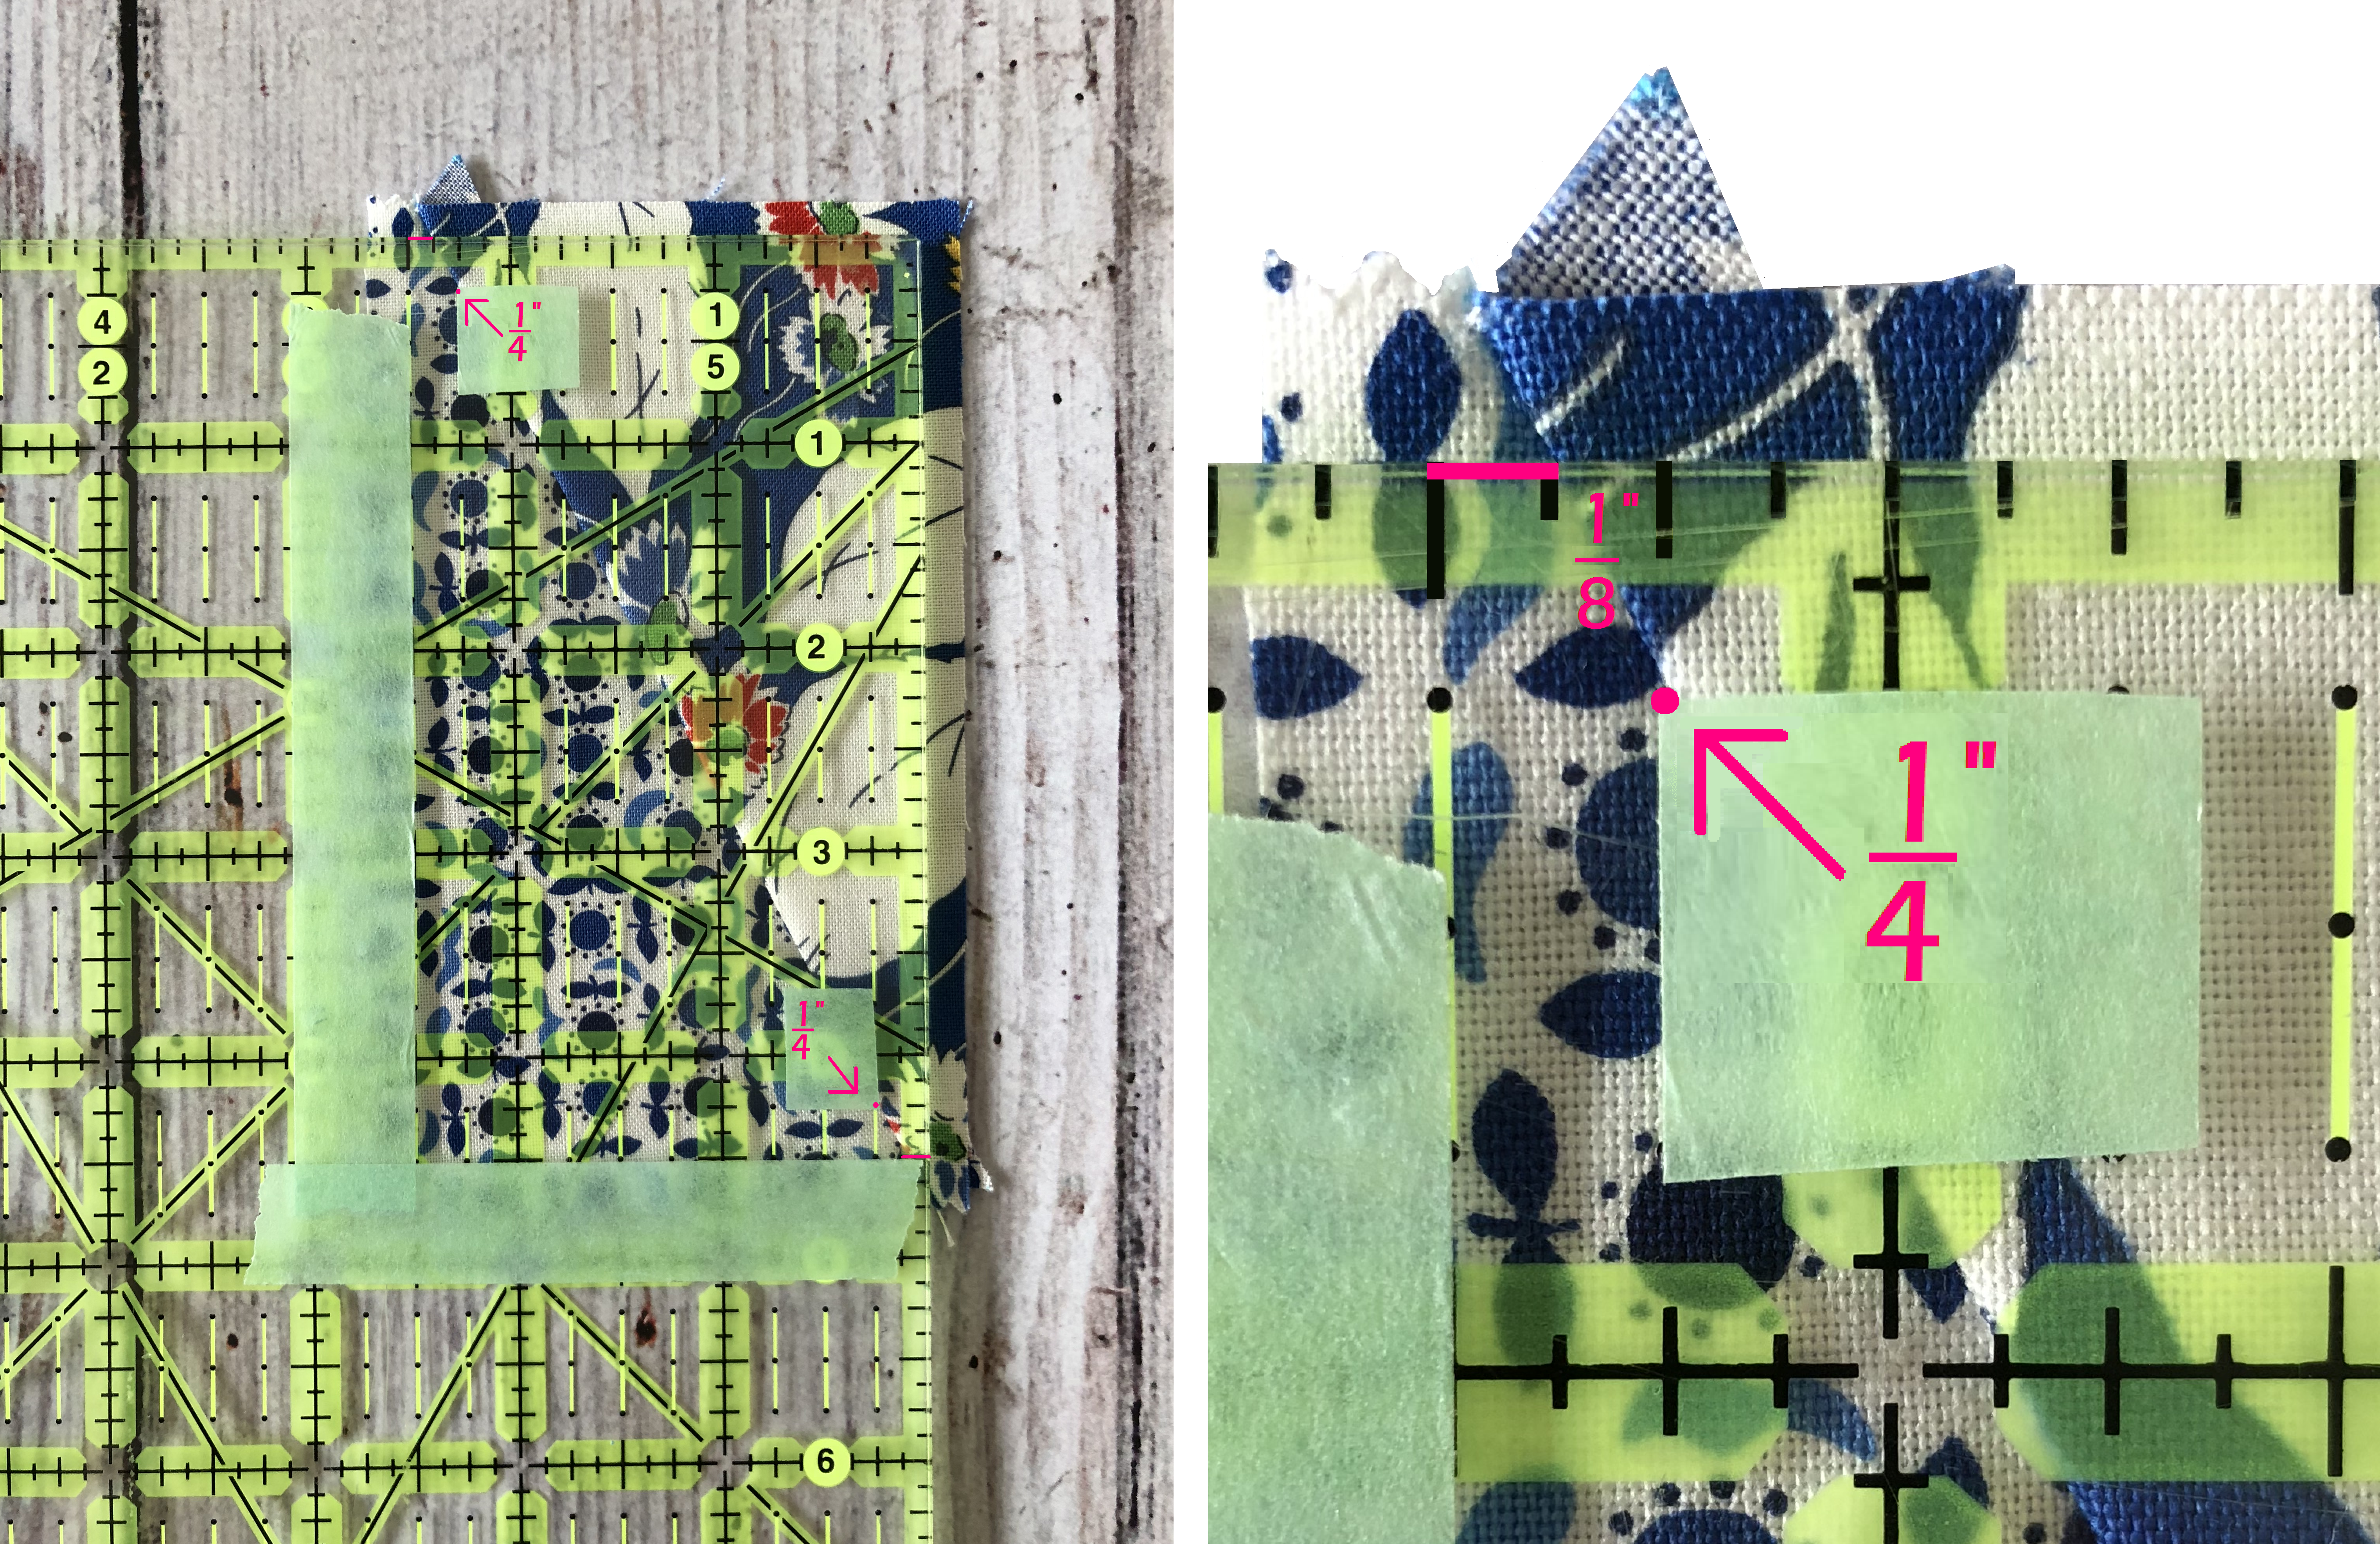
Again this method works for any sized HRT, so you can have lots of fun experimenting with your precuts...
![]()
Two lovely little Half Rectangle Triangle blocks.
And now for the fun part: using them in a project! I chose the utterly delicious Feedsacks: True Blue by Linzee Kull McCray to make the Wavecrest Cushion (or should that be pillow?). The sparkling sea is created with 2" x 4" HRT blocks and individual 4" x 8" and 3" x 6" HRT blocks make the sails of a Yacht dancing on the horizon. Isn't that the most glorious blue sky? You can find the full tutorial on my blog.

Until next time, I'll wish you fair winds and a following sea!
Nicola xx
{blog:Nicola's Sketchbook}
{instagram: @nicolajdodd}
{shop: CakeStand Quilts}
![]()
Posted in:
Comments