Welcome to Moda Fabrics!
Stars and Stripes Flag Quilt
Stars and Stripes Flag Quilt
Published:
Jan 20 2019 - 23:00

![]()
Hi Bakers! I am Lisa Jo Girodat of Neverlandstiches and am so excited to be back on Moda Bakeshop to share this new quilt pattern.
I have a confession to make...I love history! I am such a geek! I love anything to do with history I am addicted to shows such as Vikings, The Last Kingdom, Knight Fall, anything to do with the American Revolution or Civil War. I listen to the soundtrack from Hamilton at least once a week. When I saw the beautiful new collection by the French General, Viva Le France I could not resist creating a quilt, which could represent an American Flag. I just love how this collection provides variations of blues and reds so that I could create almost a gradient/worn effect.
I am rating this quilt as Moderate only because of the quarter square triangles in the Ohio Stars and those used in the top sections of the sashing.
This quilt finishes at 73" x 80".
![]()
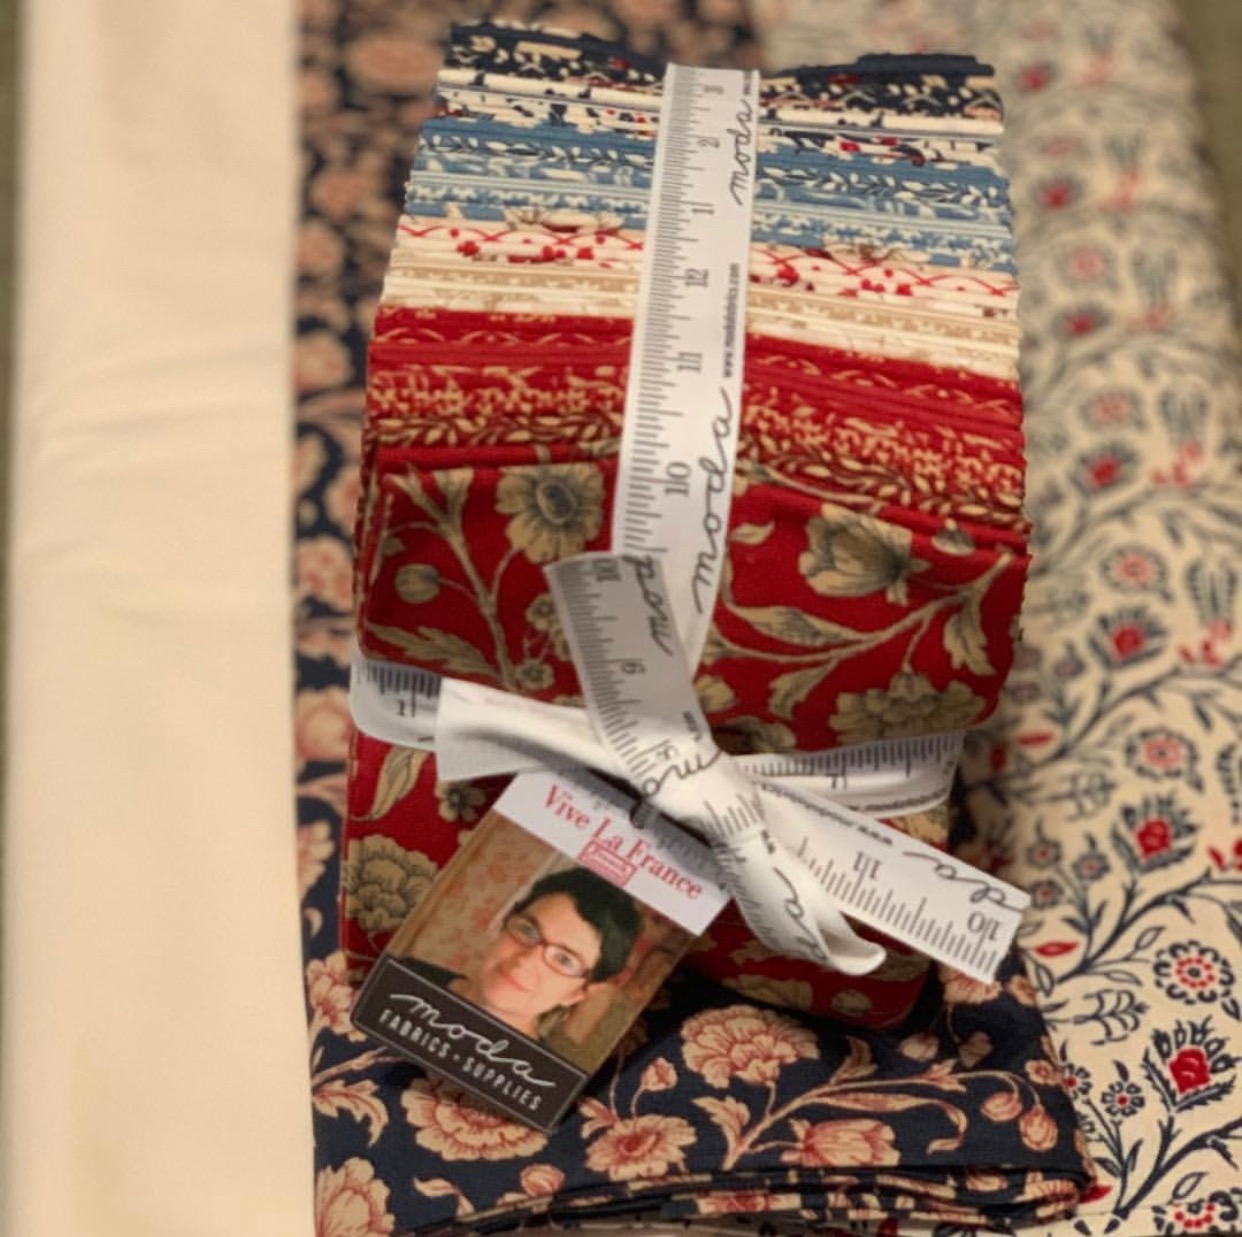
1 -Fat Quarter Bundle, 13830AB - Vive La France by The French General
4 yards of Moda Bella 9900-60 Ivory for background fabric ( This neutral solid as absolutely dreamy and my absolute new favorite!! I you've never tried it, I highly encourage you to snag a few yards)
5 1/2 yards backing fabric {I used 13831-14 from the Vive La France collection}
1 yards binding fabric {I used 13830-16 from the Vive La France collection
![]()
Your favorite neutral piecing thread
A rotatory cutter, mat and ruler
Your favorite 3 1/2 inch and 5 1/2 HST rulers
![]()
Before you begin:
Read through the entire pattern before you begin so that you may plan out which fabrics you want to use in the various sections. (A planning color sheet may be downloaded from my blog):
- All seams are a true quarter inch
- Fabrics were spray starched before cutting
- Seams were all pressed to the darker fabrics
- Personally, I cut and sew one section at a time to keep order in my messy sewing room and for a sense of accomplishment.
There are three basic block used in this quilt:
- Ohio Star
- Churn Dash
- Nine Patch
The blocks should be trimmed to 9 1/2 inches so that they finish at 9".
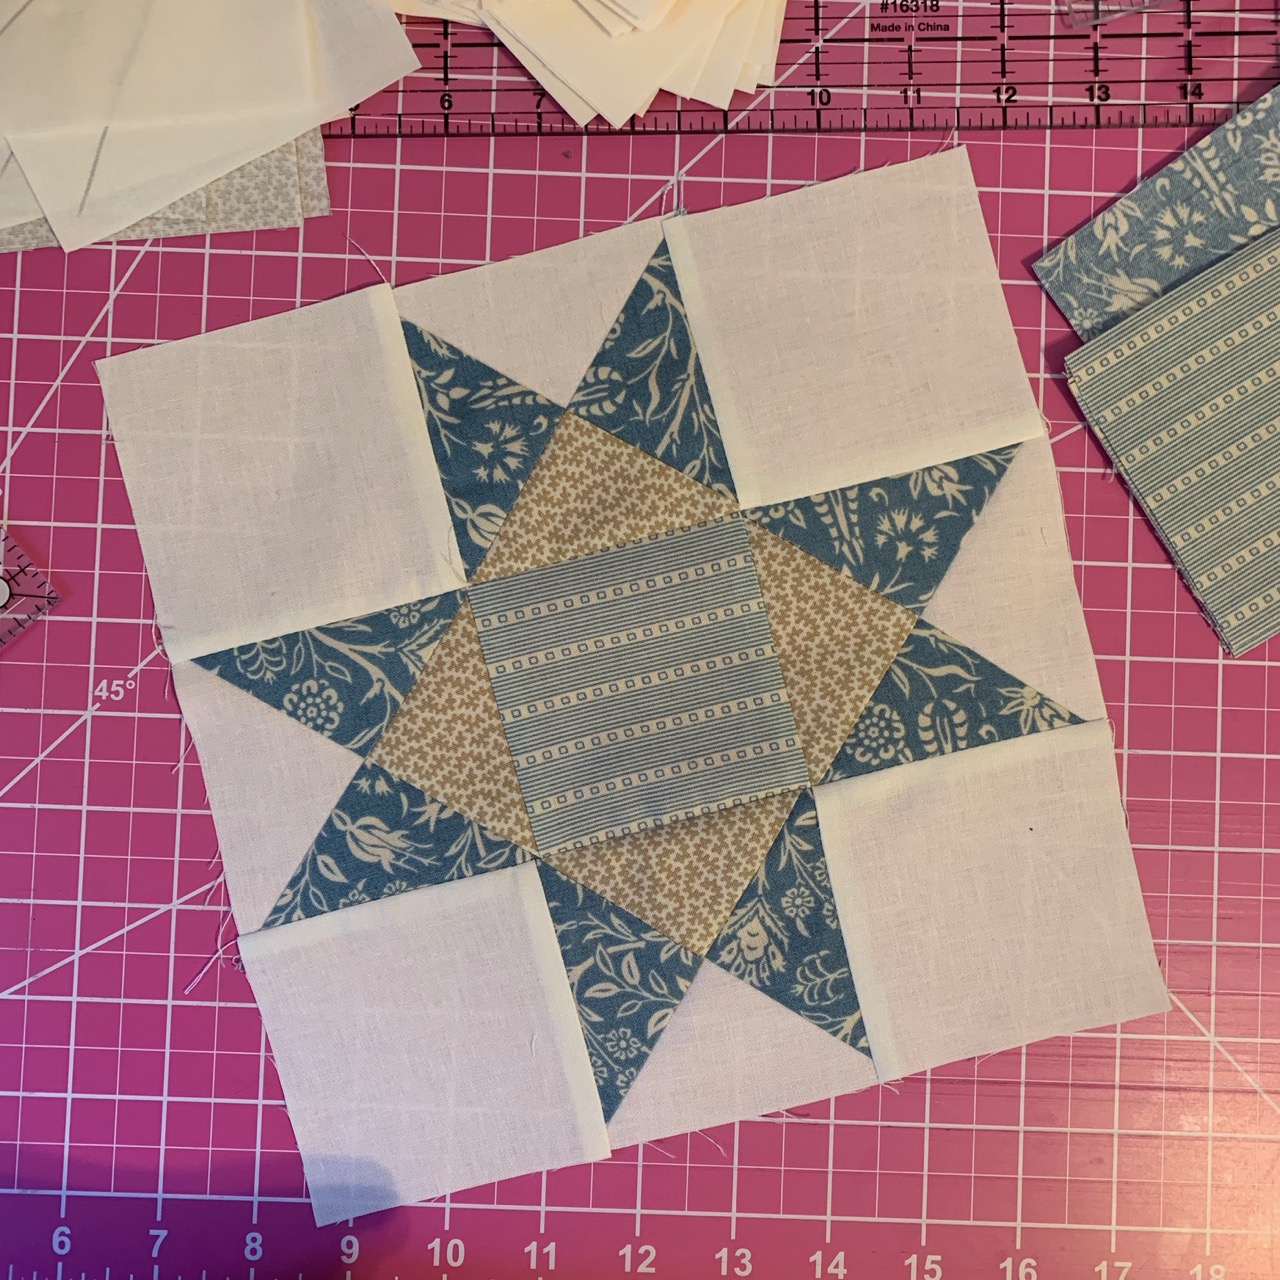
Making 15 Blue Ohio Stars.
For the 15 Ohio Stars, cut the following:
(60) - 3 1/2 inch squares of background fabric for the corners (a)
(15) - 3 1/2 inch squares of light blue prints for the centers (b)
(30) - 4 1/2 inch squares of the dark blue prints for the QSTs (c)
(30) - 4 1/2 inch squares of background fabric for the QST's (d)
To assemble each Ohio Star you will need:
(4) - 3 1/2 inch squares of background fabric
(1) 3/1/2 inch square of a light blue print fabric for the center
(2) - 4 1/2 inch squares of dark blue print fabric for the QSTs
(2) - 4 1/2 inch squares of background fabric for the QST's.
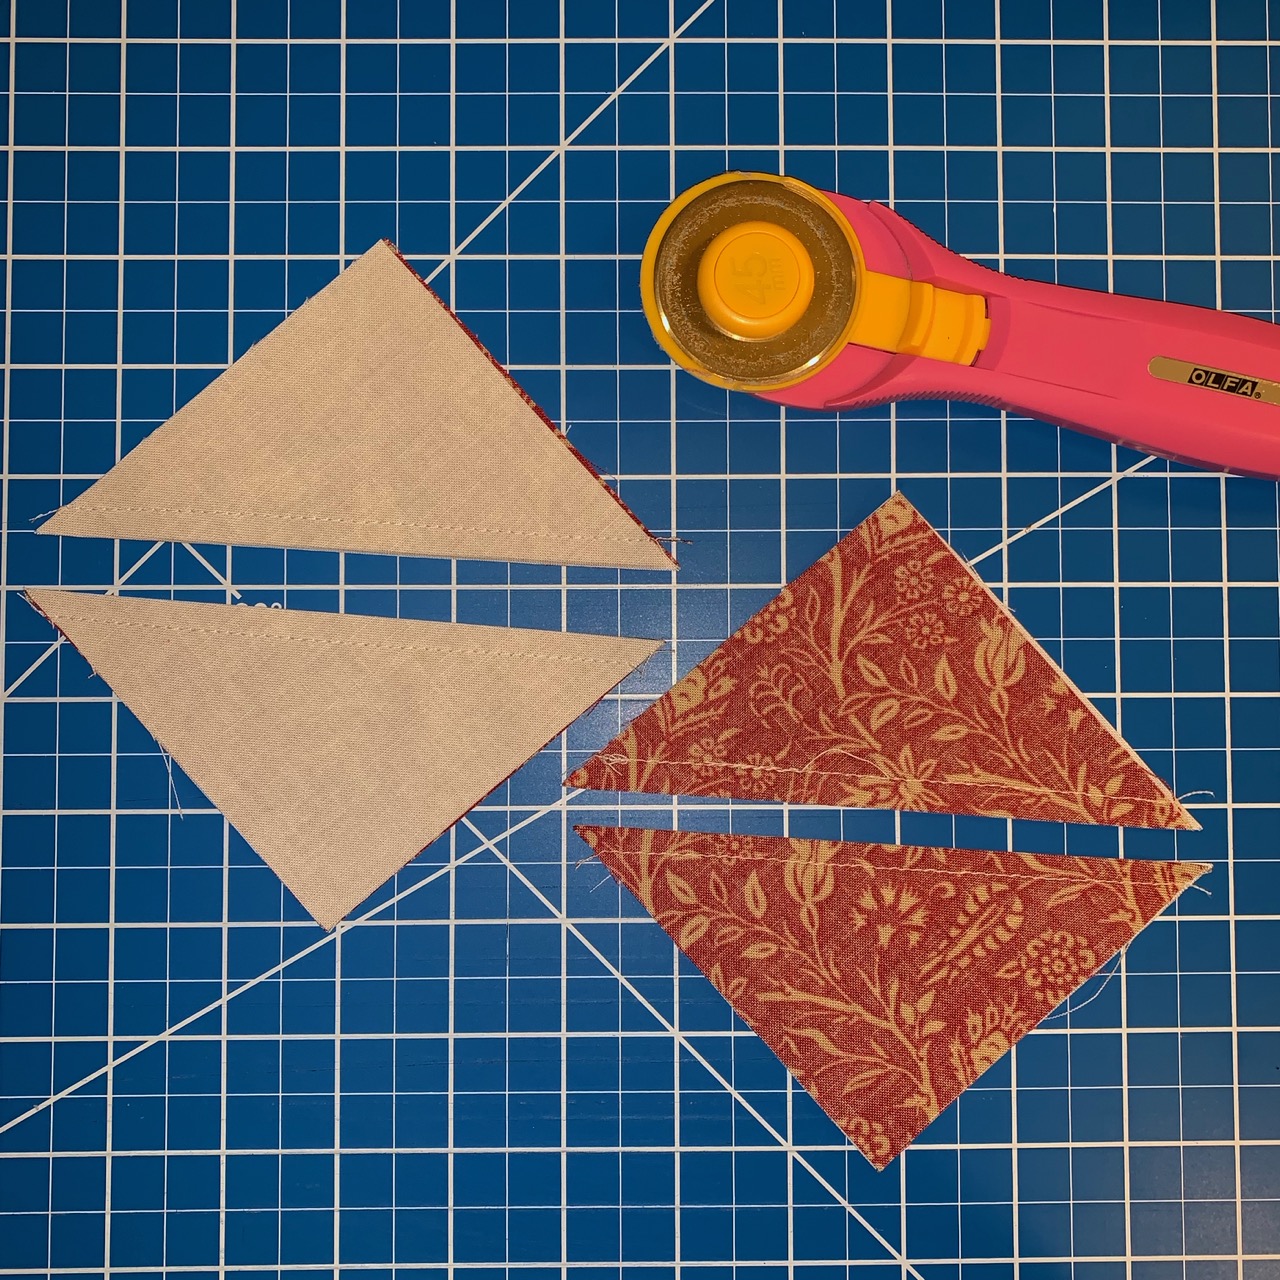
Making the QST's:
Make your QSTs with a 4 1/2 inch square of background and 4 1/2 inch square of dark blue print.
You will need 4 QST’s for each Ohio star, therefore you will need to do this twice for each Ohio Star.
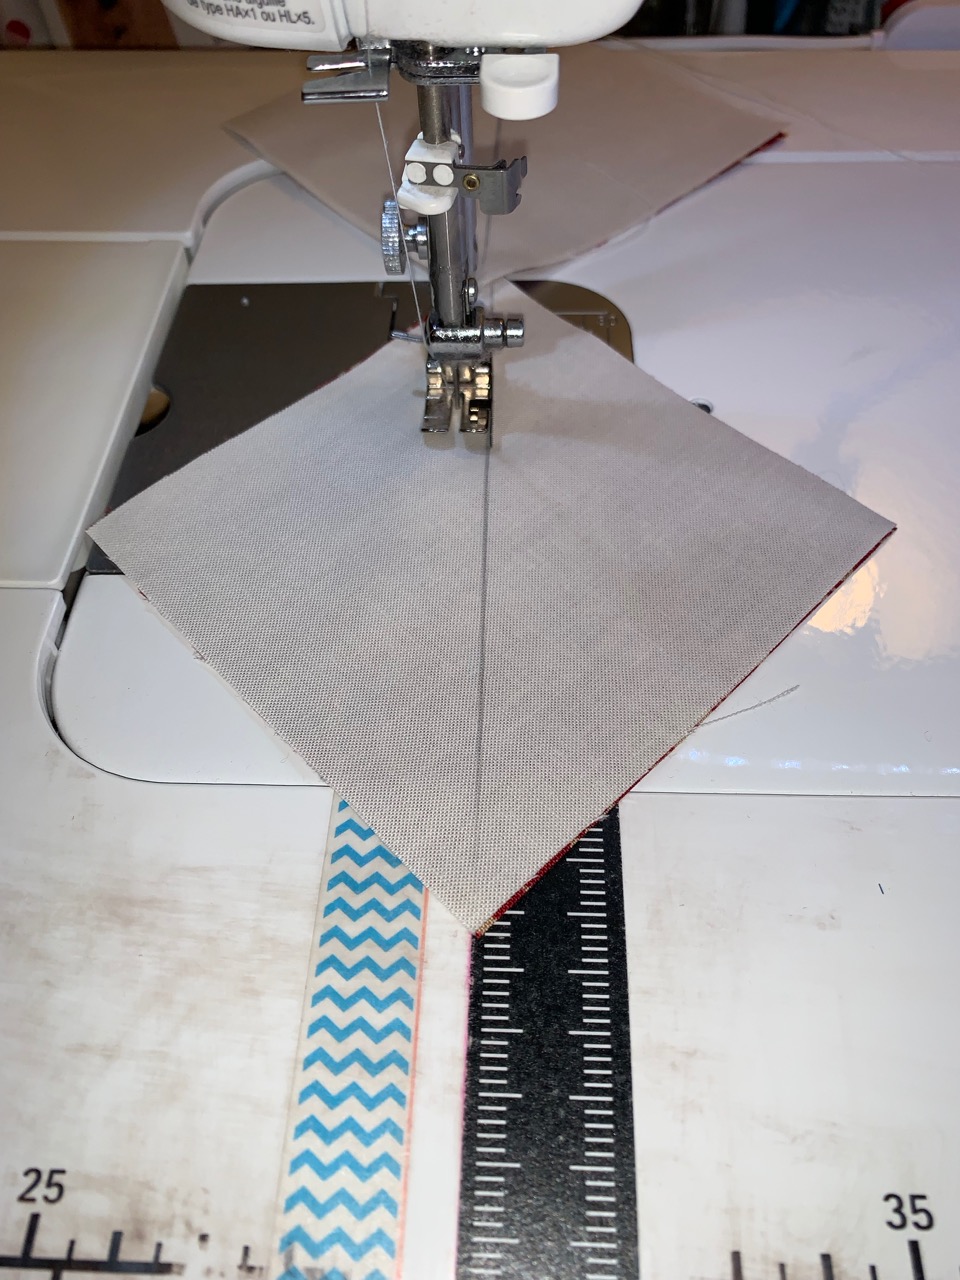
Place your two squares right side together.
Draw a diagonal line on the back of your background fabric.
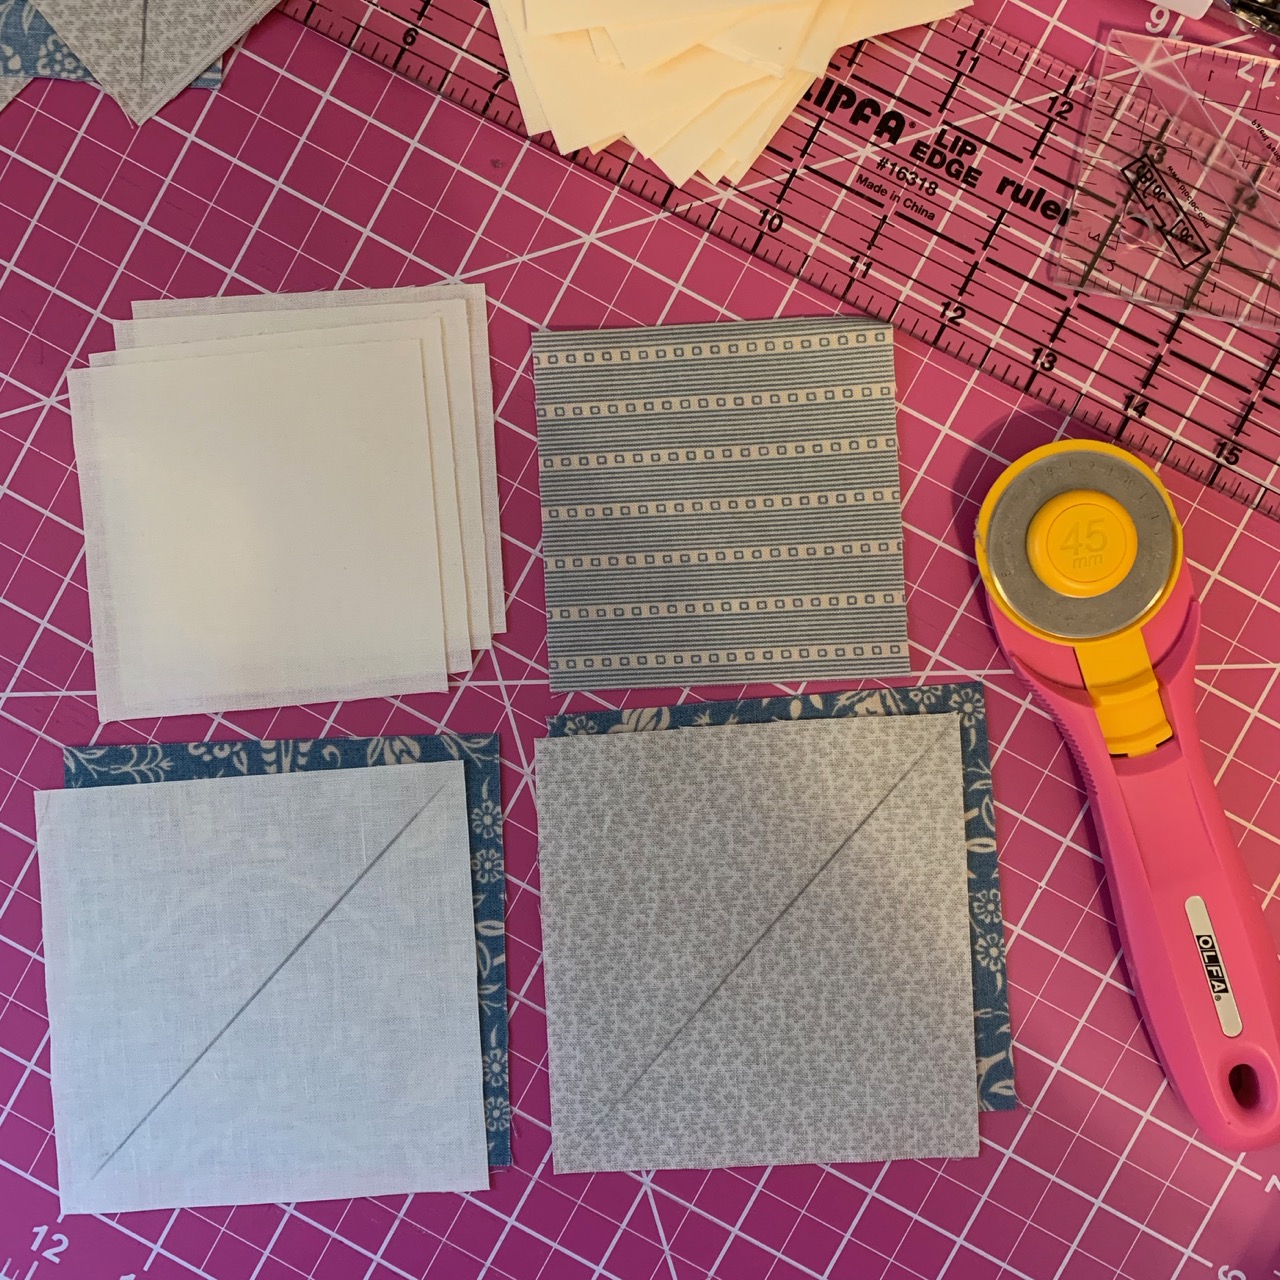
Stitch ¼ inch on each side of the line.
Cut on the drawn line.

Press your two squares open.
Place the two HSTs on top of one another, right sides together with the blue on top of the white.
Draw a diagonal line across the back, opposite of your seam.
Stitch ¼ inch on each side of the line.
Cut on the drawn line.
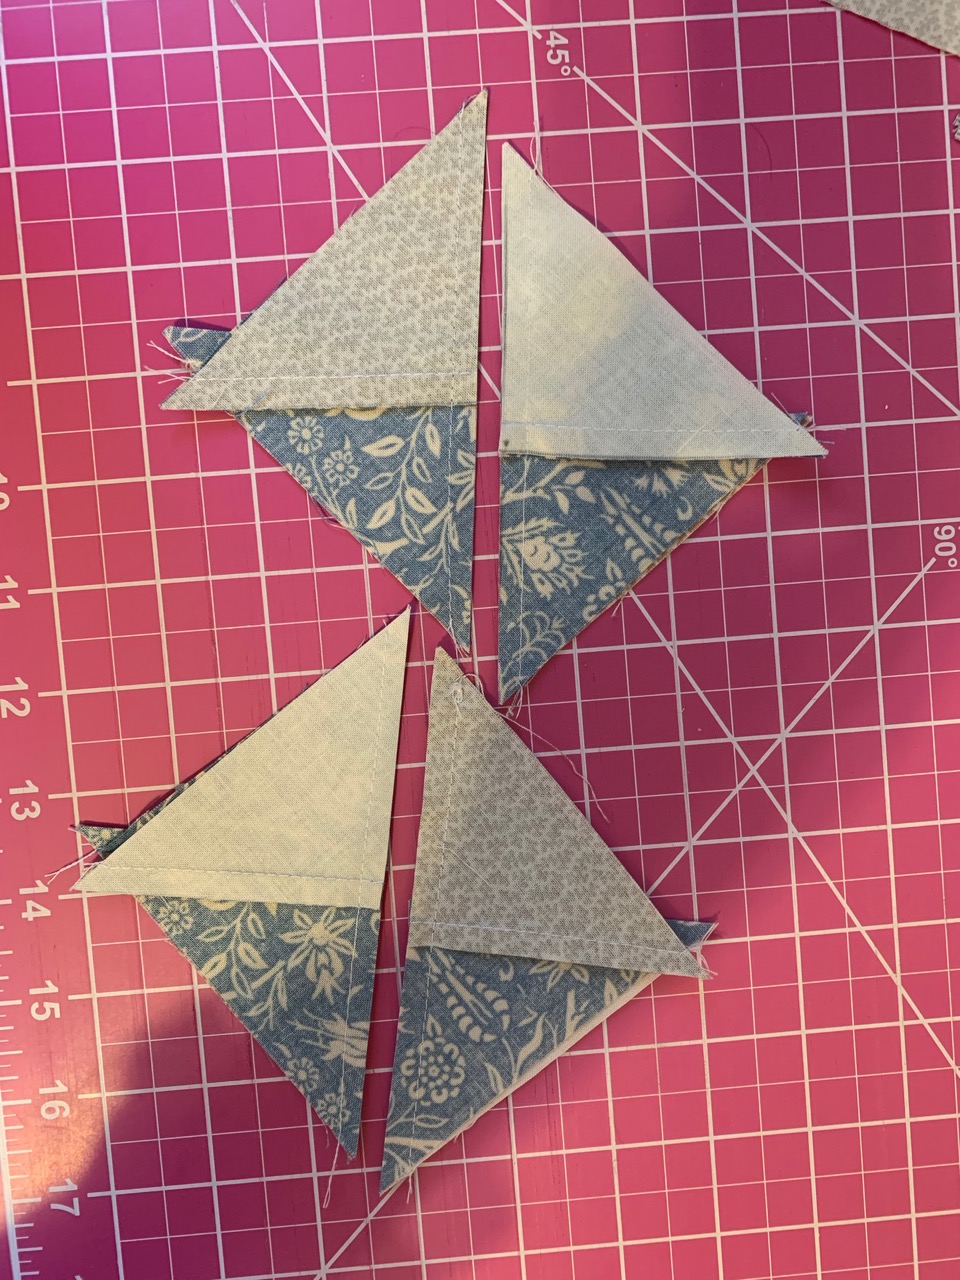
Press your two squares open
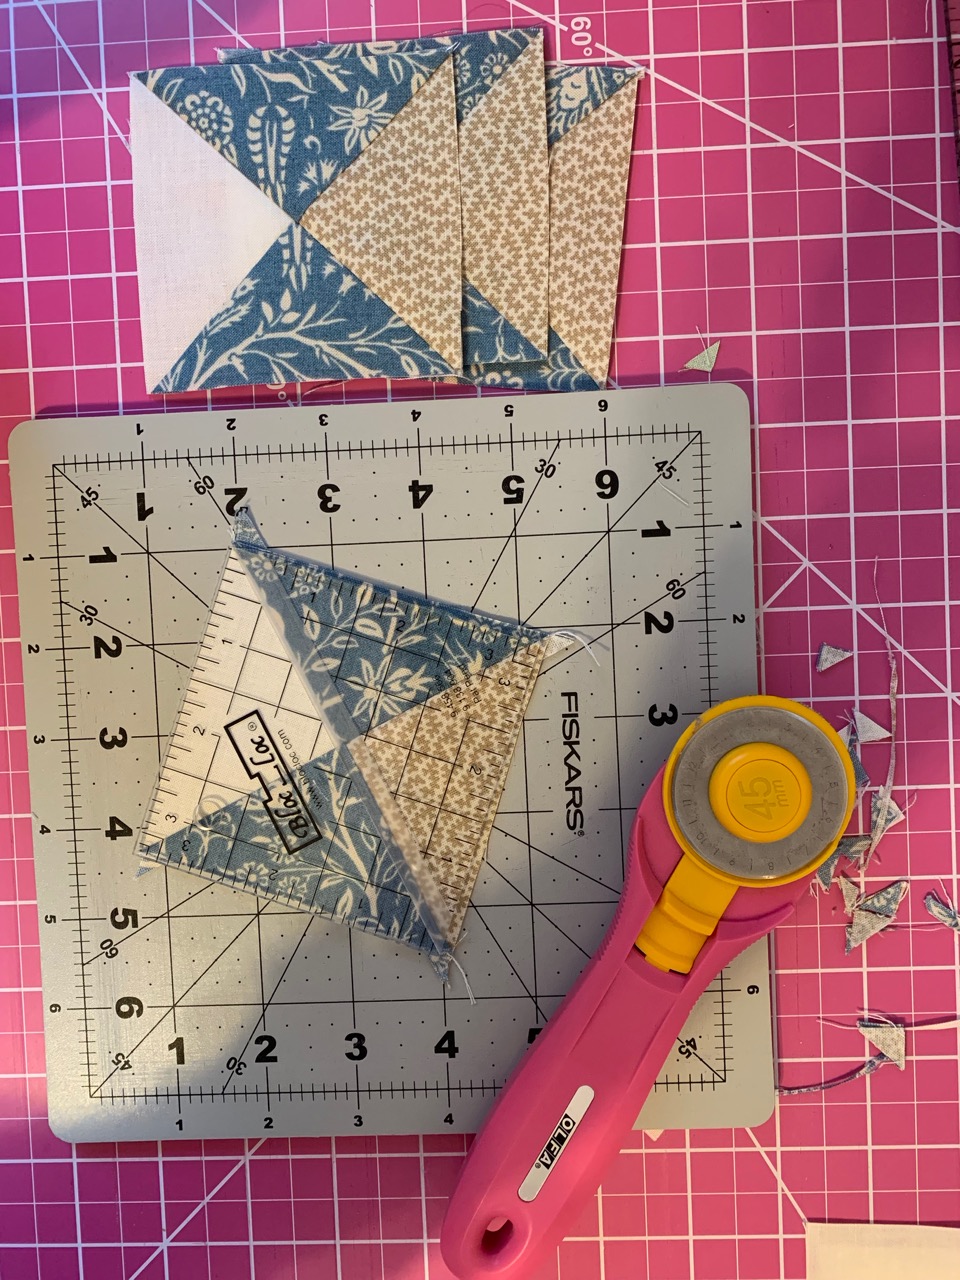
Trim to 3 1/2 inch square
Note: my dear friend and fellow Bakeshop Chef, Christine Weld, has a wonderful building blocks tutorial on making quarter square triangles here.
Assemble you Ohio Star blocks as shown in the diagram:
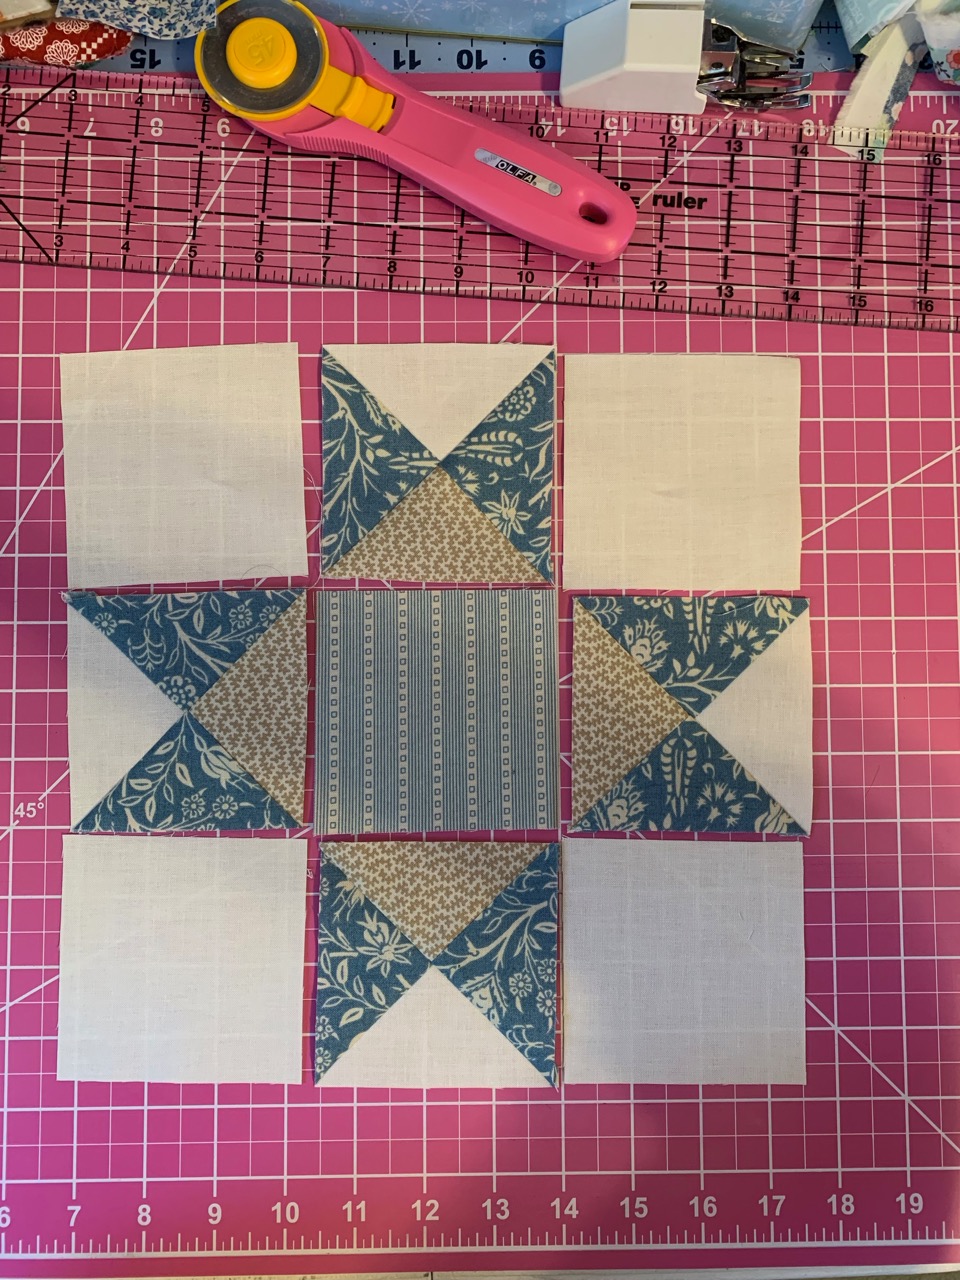
Trim you block to 9 1/2 inches.
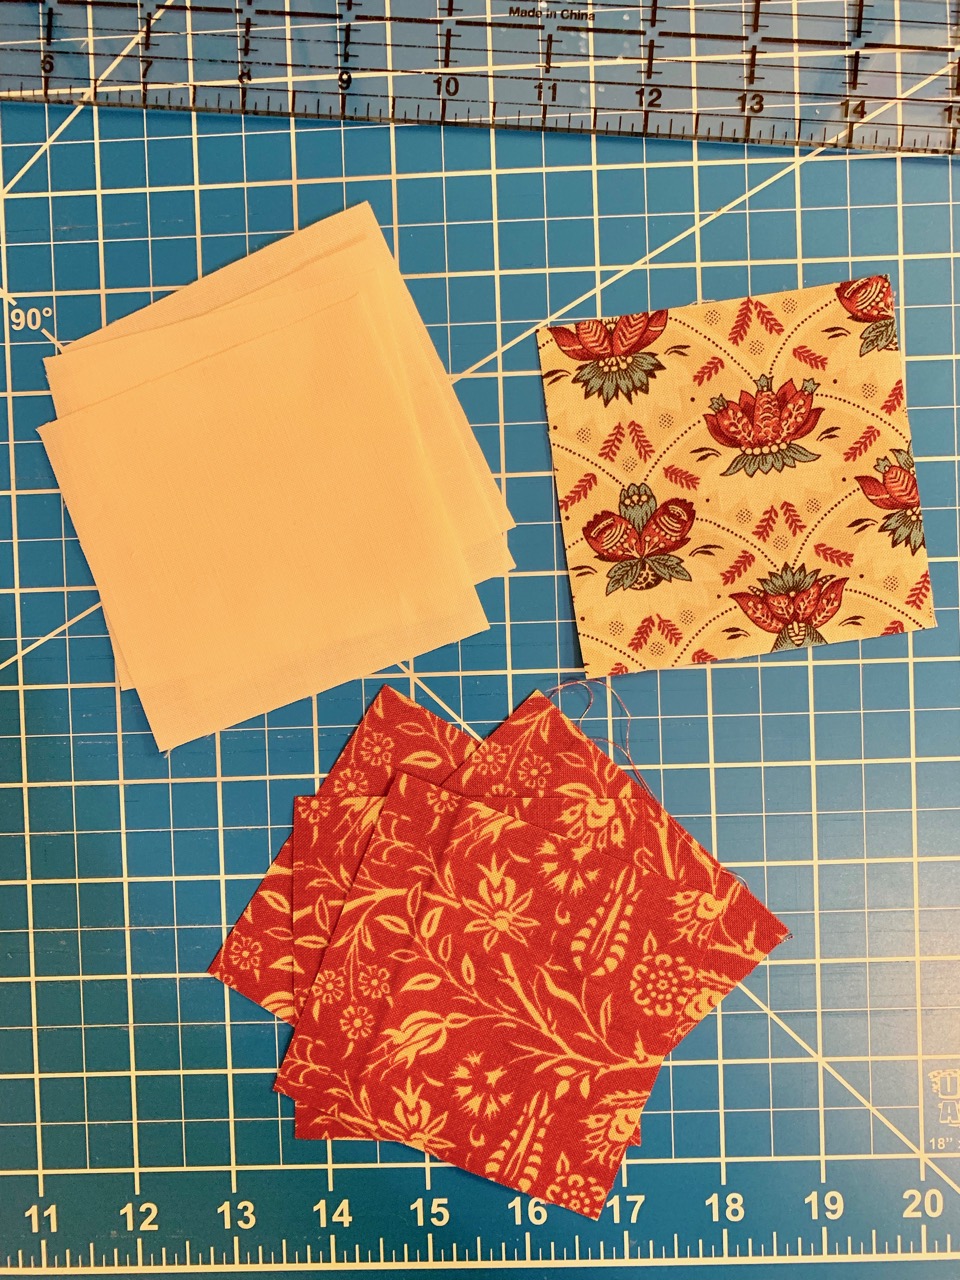
Making 12 Red Nine Patch Blocks:
For the 12 Red Nine Patch blocks, cut the following:
(48) 3 1/2 inch squares of background or low volume prints from the FQB (a)
(48) 3 1/2 inch squares of red prints (b)
(12) 3 1/2 inch squares of various prints with light red from the FQB for the centers of the Nine patch blocks (c)
To make each nine-patch block select and layout:
(4) 3 1/2″ dark red print squares
(1) 3 1/2" square of a center fabric
(4) 3 1/2" squares of background/low volumes.
Arrange in three rows of three.

Sew the squares together to make up the rows. Press the seams towards the darker squares.
Sew the rows together to form a nine-patch.

Trim the block to 9 1/2".
Making 13 Churn Dash Blocks:
For the 13 Churn Dash Blocks, cut the following:
(26) - 4 inch squares of background fabric for HSTs (a)
(26) - 4 inch squares of red print fabrics for HSTs. (e)
(13) 3 1/2 inch squares of various light prints or low volumes from the FQB for the centers (b)
(52) 2 inch x 3 1/2 inch rectangles of background fabric (d)
(52) 2 inch x 3 1/2 inch rectangles of red prints (c)
To assemble each Churn Dash you will need:
(2) - 4 inch squares of background fabric for HSTs (a)
(2) - 4 inch squares of red print fabrics for HSTs. (e)
(1) 3 1/2 inch squares of various light prints or low volumes from the FQB for the centers (b)
(4) 2 inch x 3 1/2 inch rectangles of background fabric (d)
(4) 2 inch x 3 1/2 inch rectangles of red prints (c)

Making the HSTs:
Each Churn Dash needs 4 HSTs.
Draw a diagonal line on the back of the 4 inch squares of background fabric.
Place the 4 inch square of background fabric on top of the red 4 inch square of red print fabric (right sides together).
Stitch 1/4" on each side of the drawn line.
Cut on the drawn line.
Press your two squares open.
Trim to 3 1/2 inches square.

Assemble the 13 Churn Dash blocks as shown:

Making the 12 QST Star Sashing Blocks:
These 5 1/2" x 9 1/2 inch blocks will be used as sashing between the columns of Ohio Stars.
For the 12 QST Star Sashing Blocks, cut the following:
(24) - 5 1/2 inch x 2 1/2 inch rectangles of blue fabrics
(6) - 6 1/4 inch squares of background fabric
(6) - 6 1/4 inch squares of various blue print fabrics
Use one one 6 1/4 inch square of background fabric and one 6 1/4 inch square of blue print fabric to make 2 QSTs are instructed above in the Ohio Star block section. Tese QSTs should be trimmed to 5 1/2 inches.
Once you have (12) 5 1/2 inch QSTs complete, Sew a 5 1/2 inch by 2 1/2 inch rectangle on the top and bottom of QST along the background edges.

Cut 4 stripes of background at 5 1/2 inches x 45 1/2 inches (piece as needed) to be used as sashing in the red stripes section of the quilt.
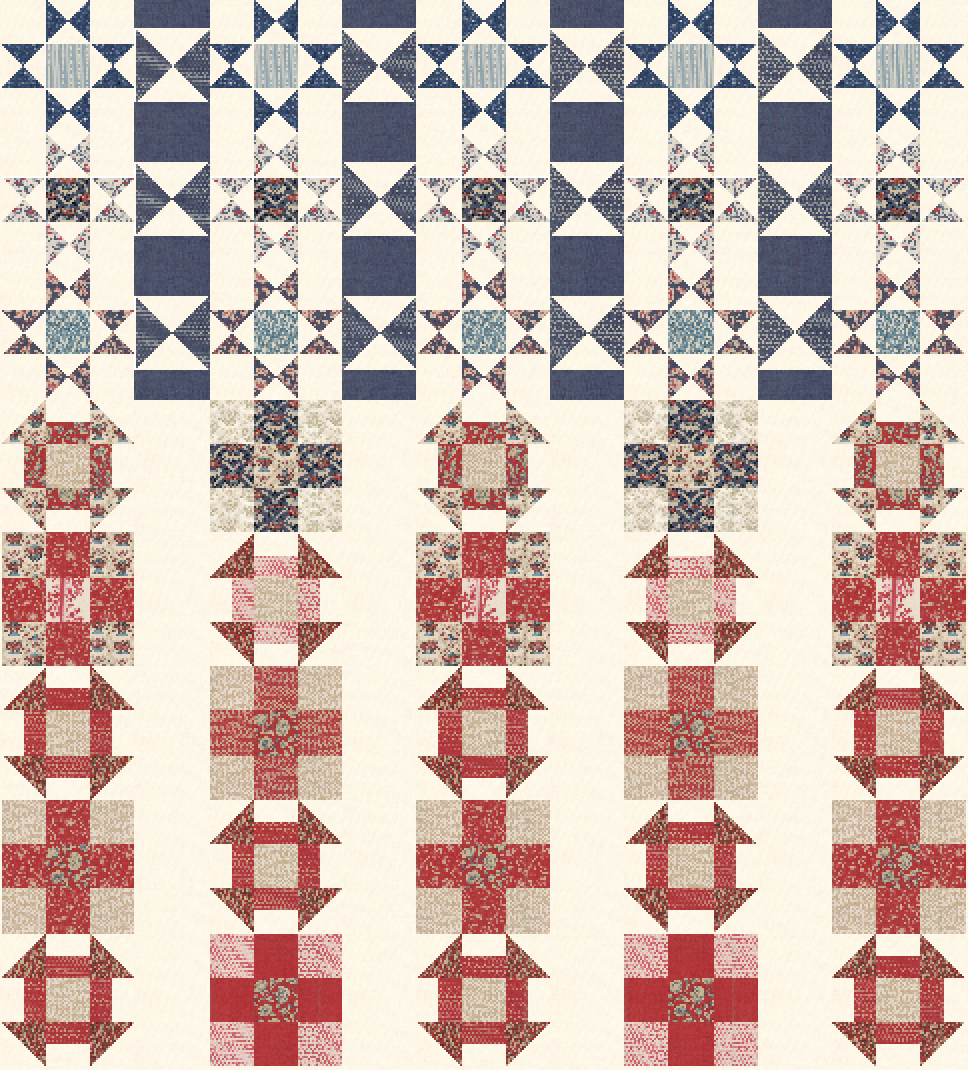
Begin assembling your quilt as shown in the drawing below:
Cut (8) 2 1/2 inch by WOF strips of background fabric and sew on a background boarder around the quilt top.
To create the piano key boarder, use the remainder of the FQB and cut 2 1/2 inch strips of red and blue prints at varying lengths and sew the 2 1/2 inch sides together to boarder the quilt. If you'd like to get fancy try to keep the blue scraps toward the top Ohio Stars and the red scrap near the red stripes.

Quilt with your favorite backing and batting and bind using your favorite method.
![]()
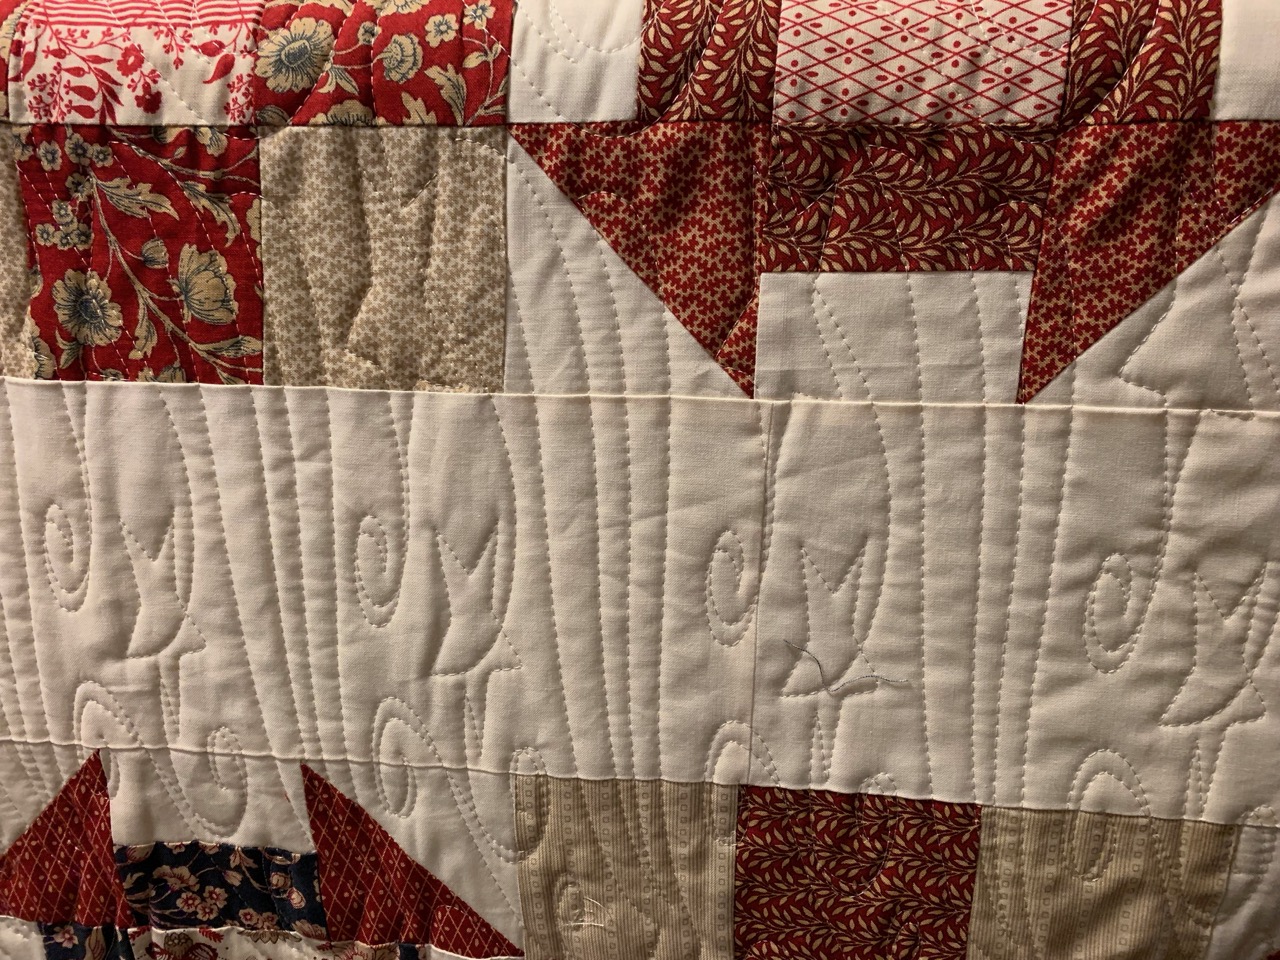
This quilt finishes at 73" x 80".
I quilted my quilt with a fun panto called Star Spangled. I think it is very appropriate for this quilt.
After the quilt has been washed & dried it's ready to snuggle with or my personal favorite, sleep under it.
If you make this quilt please tag me on Instagram or share it on the Moda Bakeshop Facebook group as I would love to see your version.
Lisa Jo Girodat
Neverlandstitches
{blog: Neverlandstiches}
{instagram: Neverlandstitches}
![]()
Posted in:
Comments