Welcome to Moda Fabrics!
At the Seashore - Breezy Beachy Umbrella
At the Seashore - Breezy Beachy Umbrella
Published:
Aug 7 2019 - 23:00

Hi fellow bakers! This is Mona Phelps from Kentucky Whittaker Creations. I'm so excited to be joining in the "At the Seashore" sew-along this summer! I'll be honest... I've never been a huge "beach at the ocean" fan. However, when I was growing up, we spent a lot of time at Lake Cumberland in Kentucky. My family had a small cabin where we spent a few weeks each summer. We would play at the lake, skip rocks, water ski, and more. One thing we often wish we had with us was a big umbrella to give us a little break from the sun. This was the inspiration for my block "Breezy Beachy Umbrella." I hope you enjoy making it!
This post is part of our summer quilt-along series. Find the rest of the posts by clicking {here}.
![]()

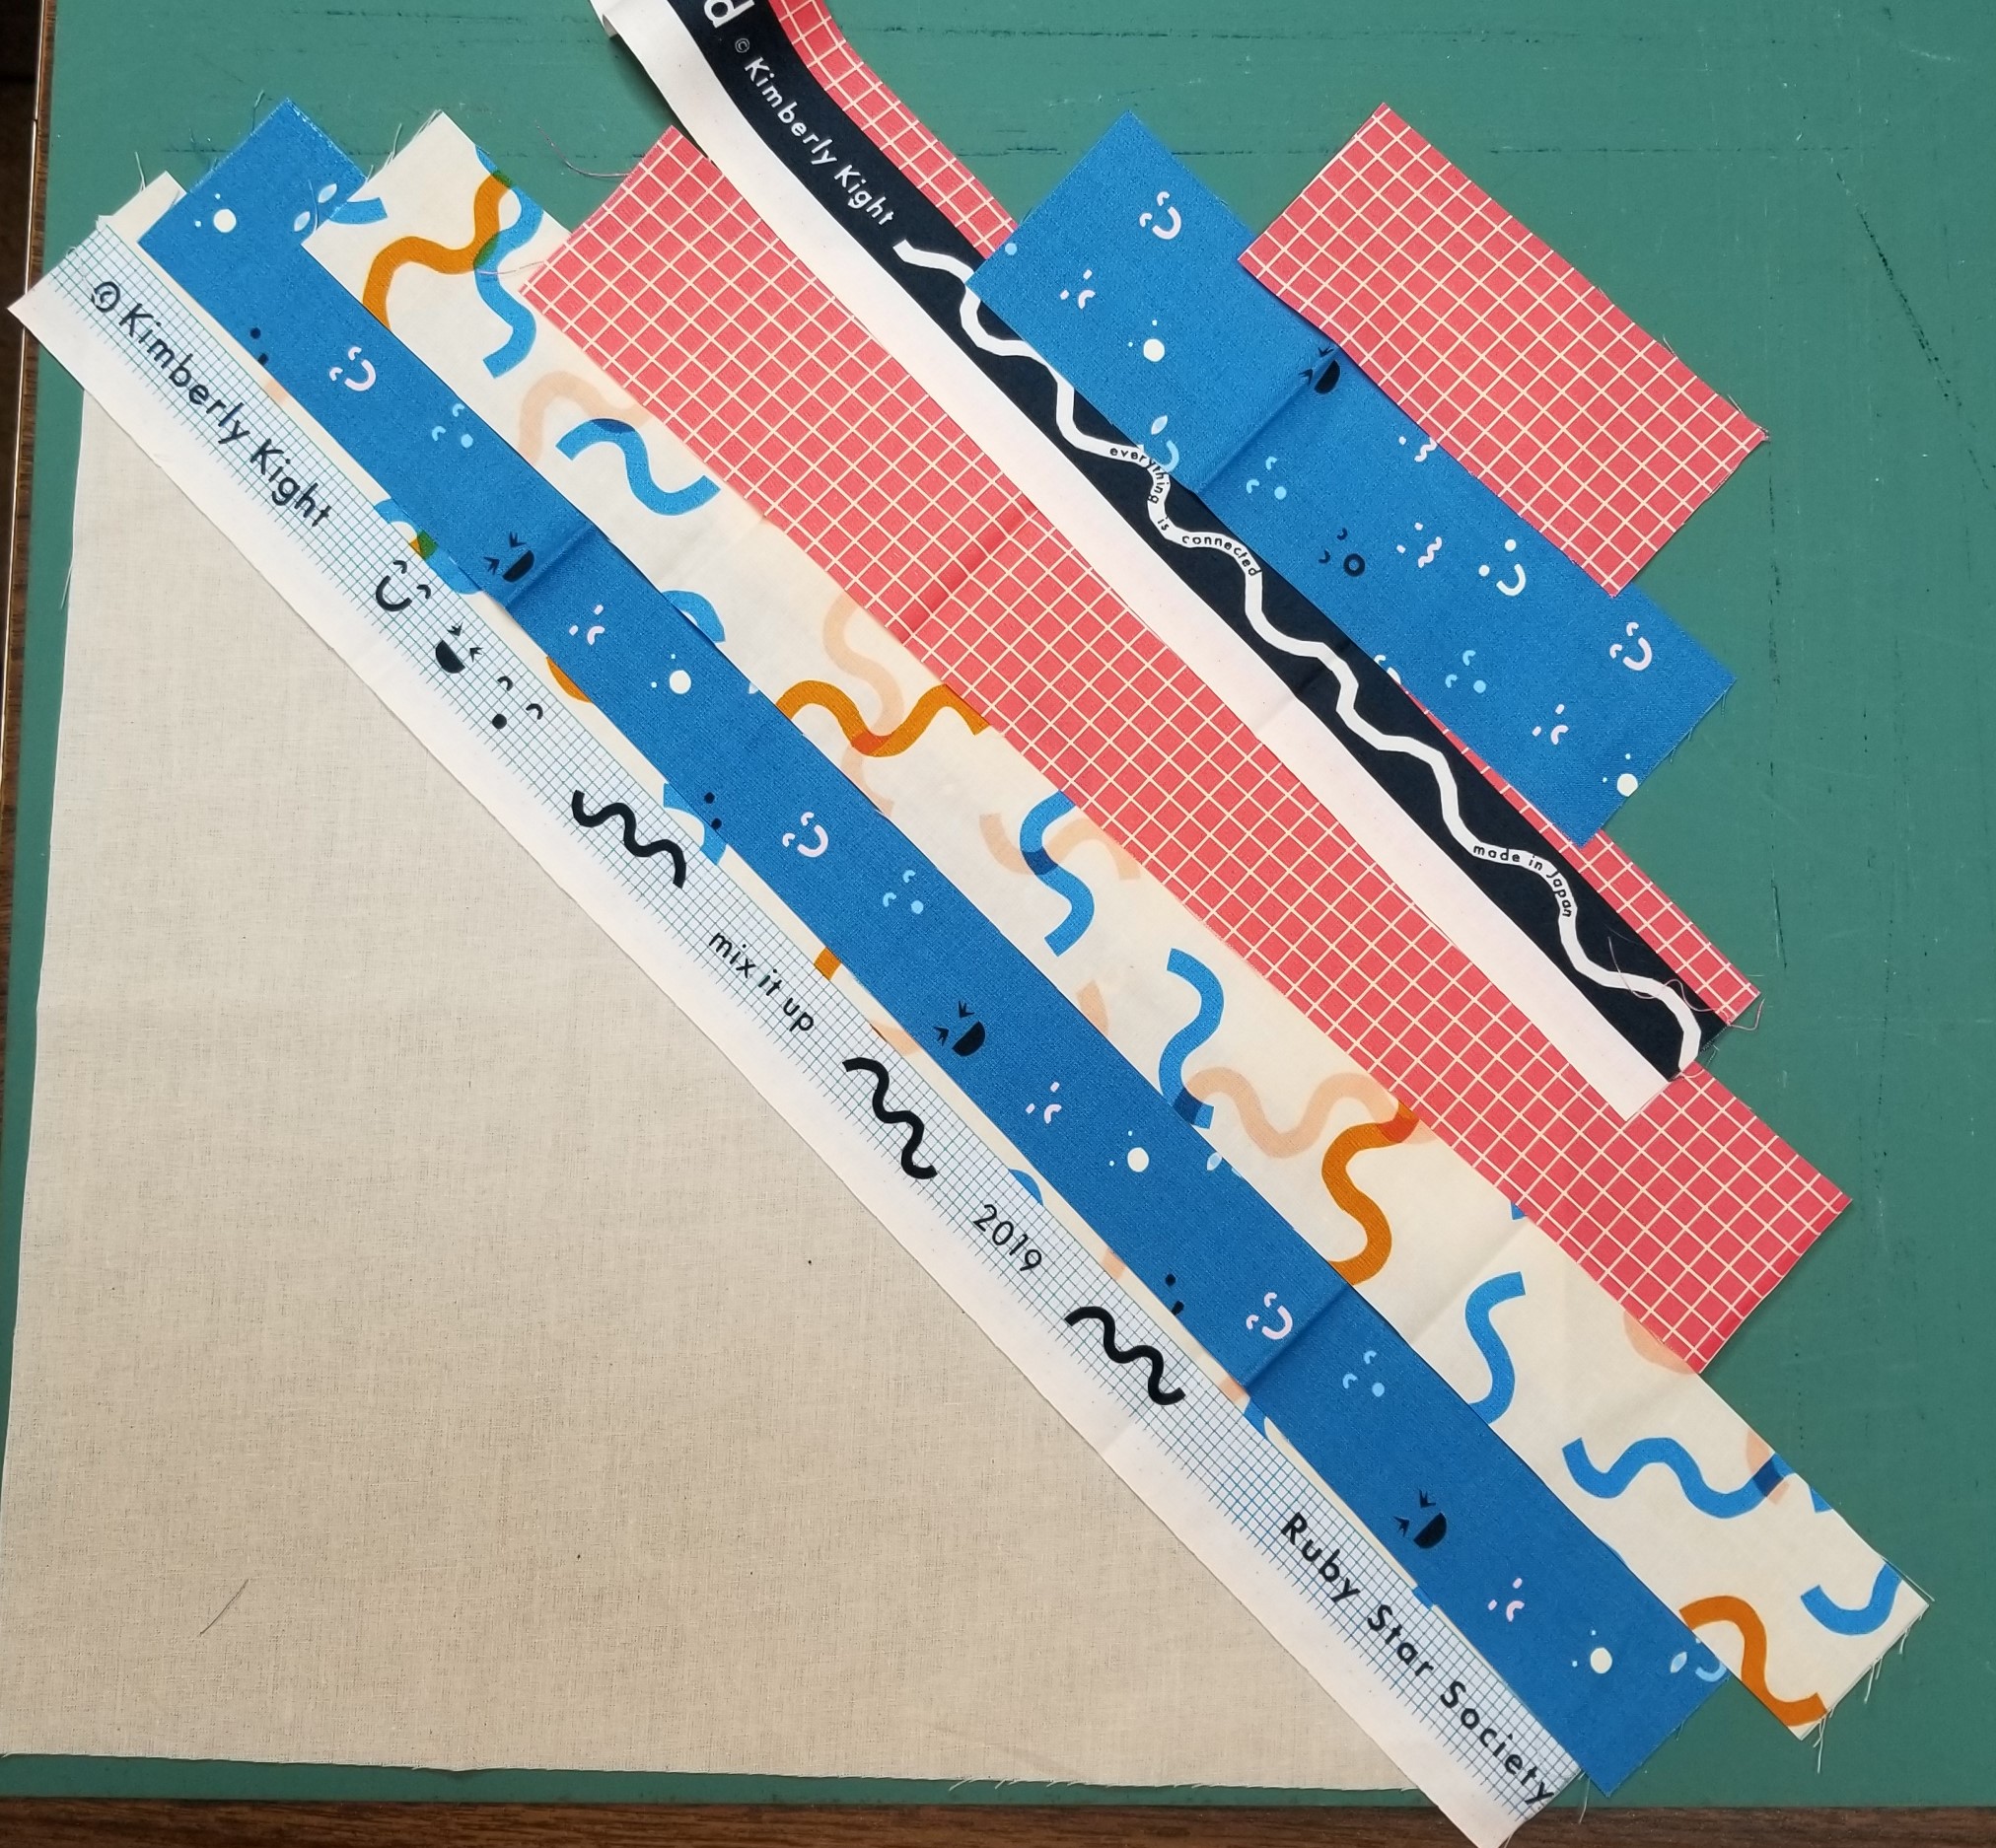
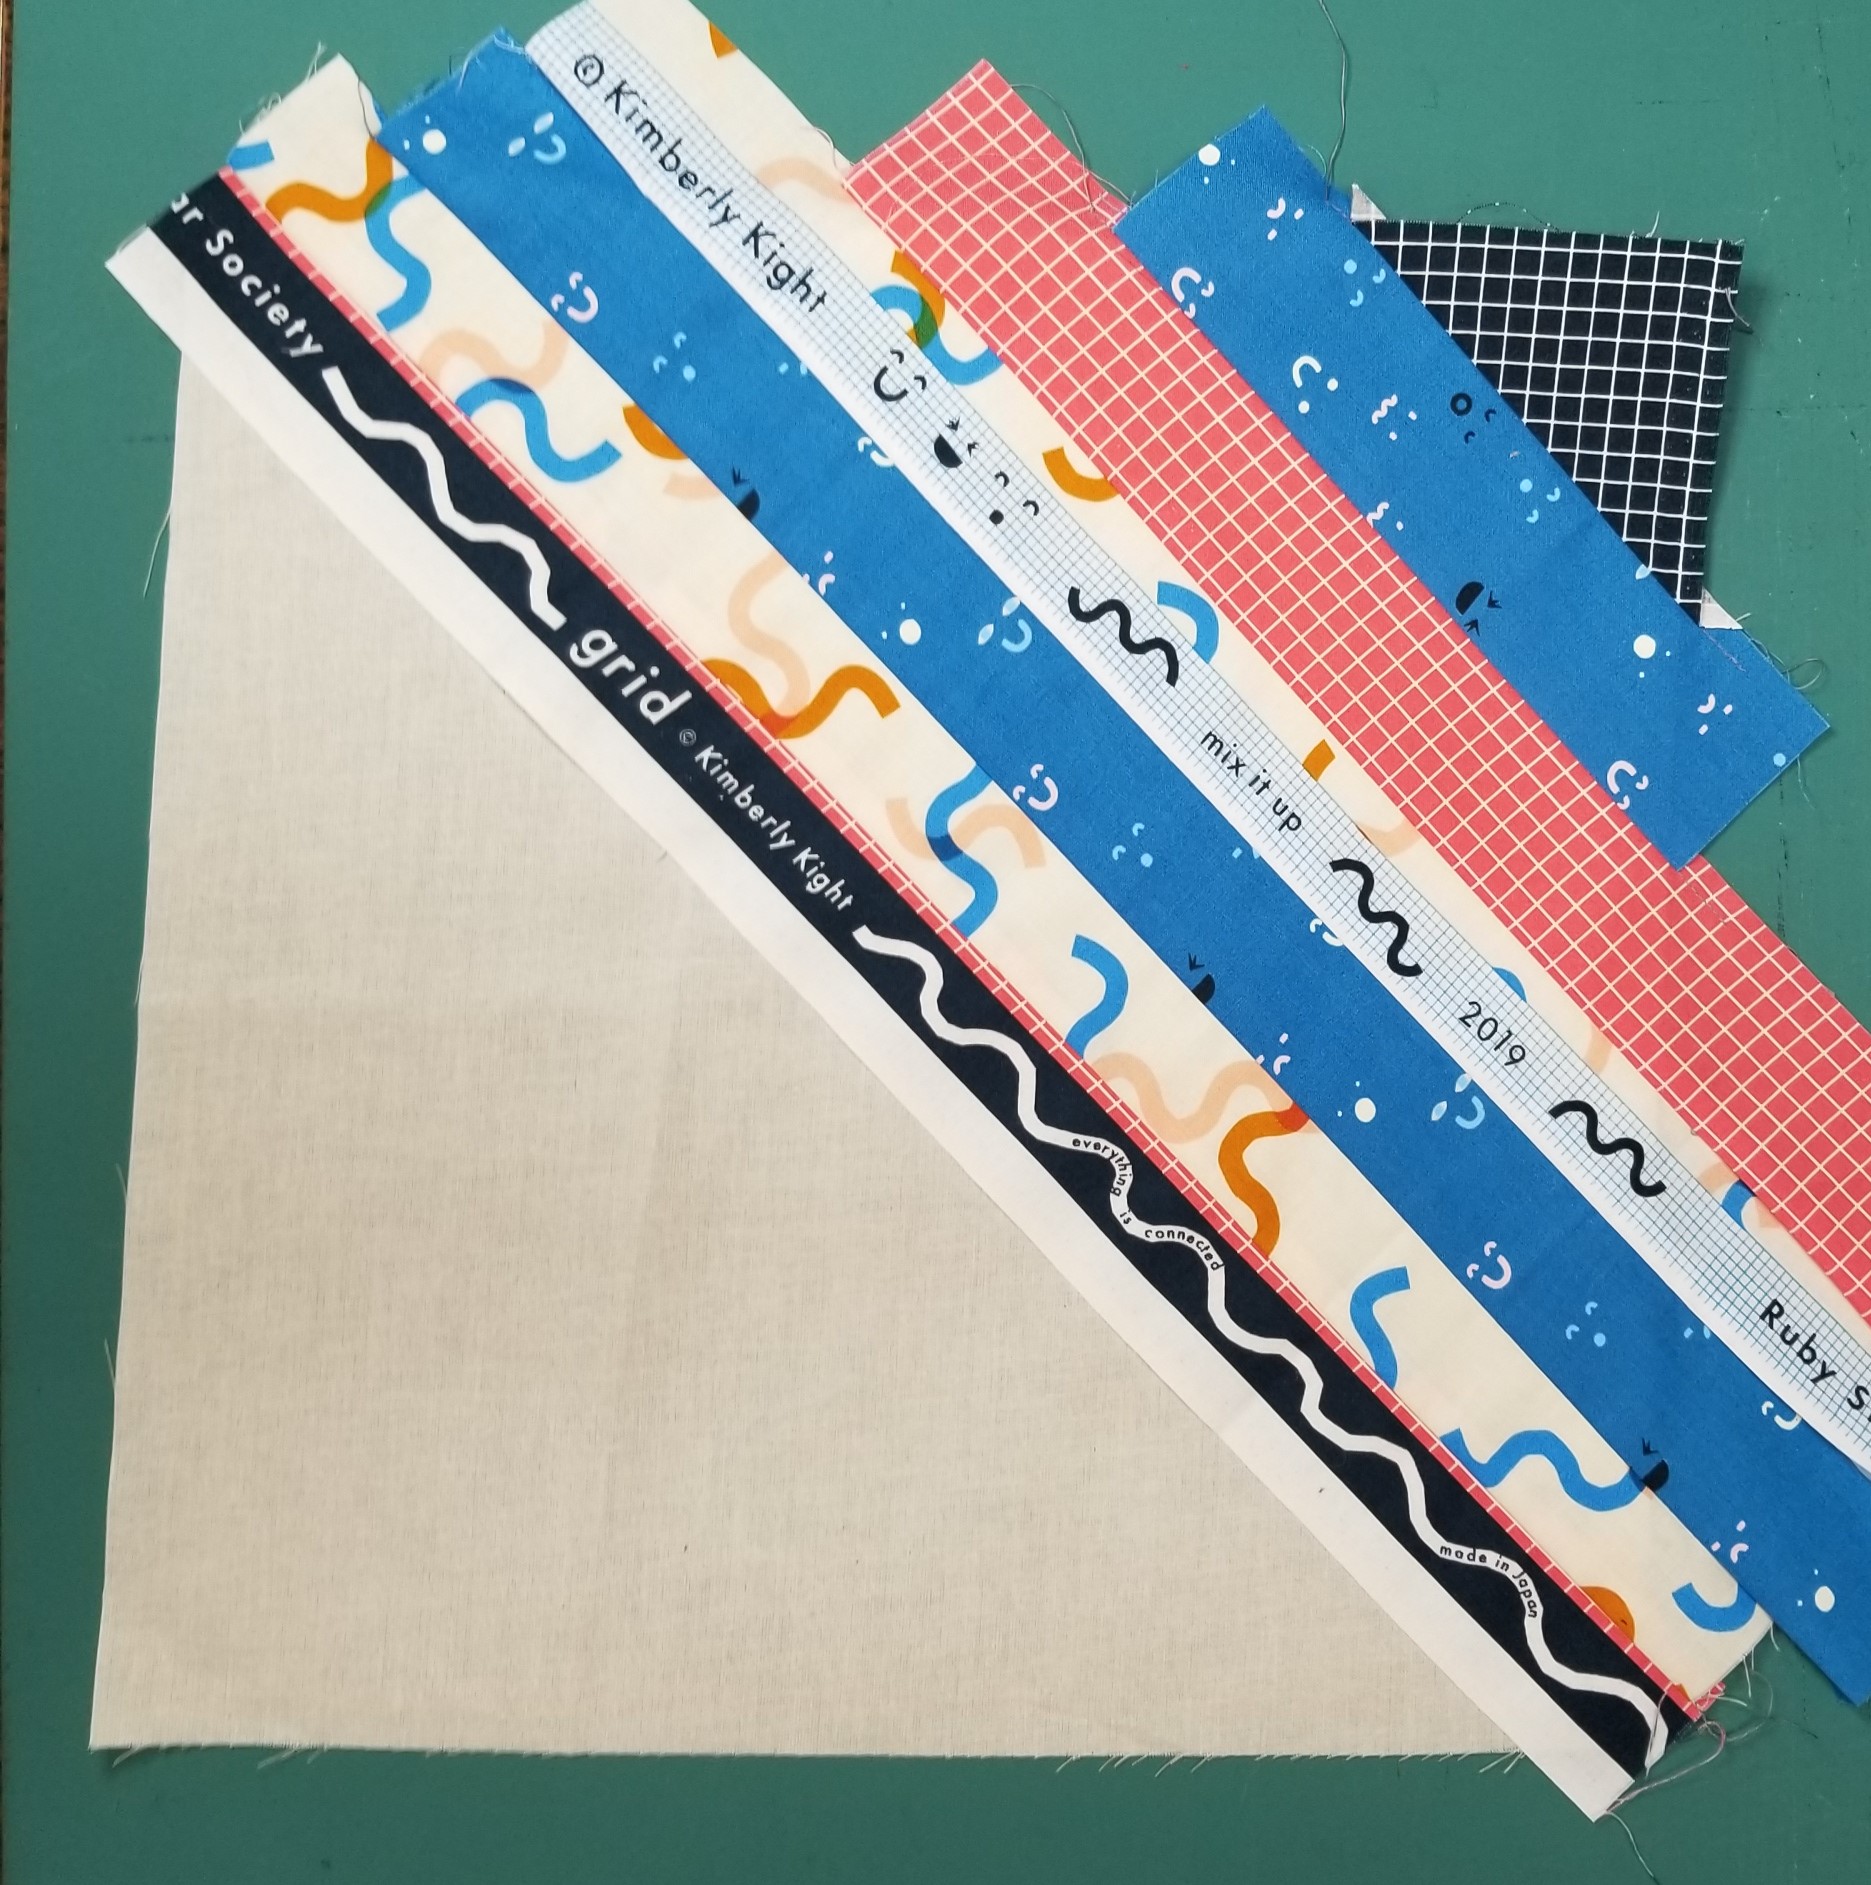
For this project, I am using Anagram and Grid by Kimberly Kight of Ruby Star Society for Moda.
- Umbrella top - you will need “strings” - a piece of fabric that can be anywhere from 3/4″ wide to 2 – you will need enough to cover ½ of a 13” x 13” square (keep in mind that there will be seam allowances – you will probably need more than you think). The largest piece needs to be 1” x 19”
- This is a great place to use some of your fabric selvages and/or scraps
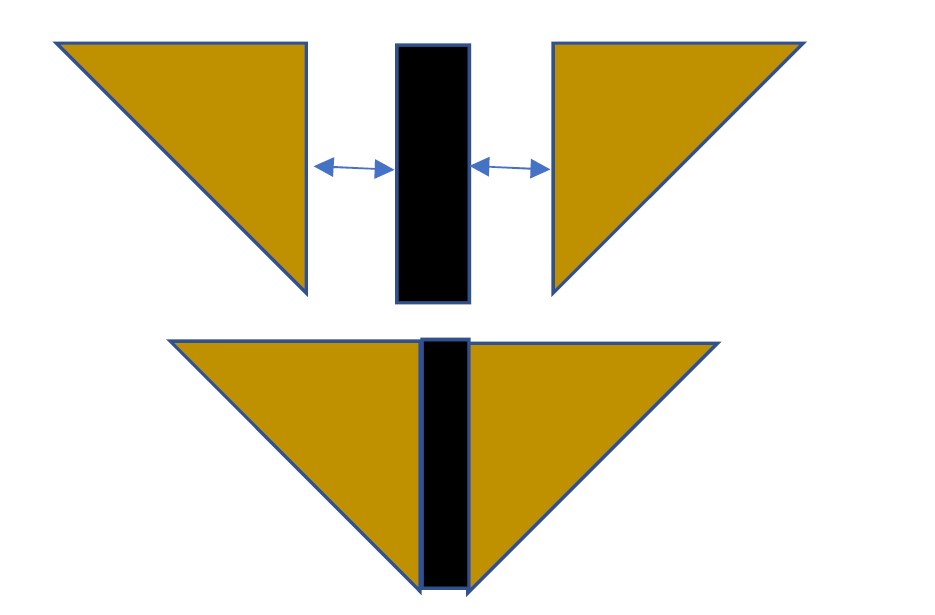
- Sand – 1 - 9” square subcut into 2 triangles
- Umbrella pole – 1 - 2” x 9” rectangle
- Umbrella Stand – 1 – 4” x 4” square
![]()
- Muslin or foundation paper piecing paper – 1 piece 13 “ x 13"
![]()
All seams are 1/4" unless otherwise noted.
Umbrella Top
- Place your foundation piece on your work space. Layer your "strings" on the fabric, starting on the diagonal so that you'll have a general idea of what the final result will be.
- Note - you only need to sew strings onto half of the foundation piece.
- Also, because of seam allowances, you will most likely end up needing more pieces than you think!

- Sew strings onto the foundation piece, starting in the middle diagonally and going out to one corner.
- After all strings are sewn, press well; cut on the diagonal and trim so that you have a 13” x 13” right angle triangle.

- Find more instructions about sewing with "strings" on the Moda String-a-Long post.
Umbrella Pole and Stand
- Sew the “sand” triangles to the umbrella pole as per the diagram below:
- Draw a line on the diagonal of the back side of the umbrella stand piece. Place this piece on the unit you created in the previous step and sew the umbrella stand piece on the diagonal line:
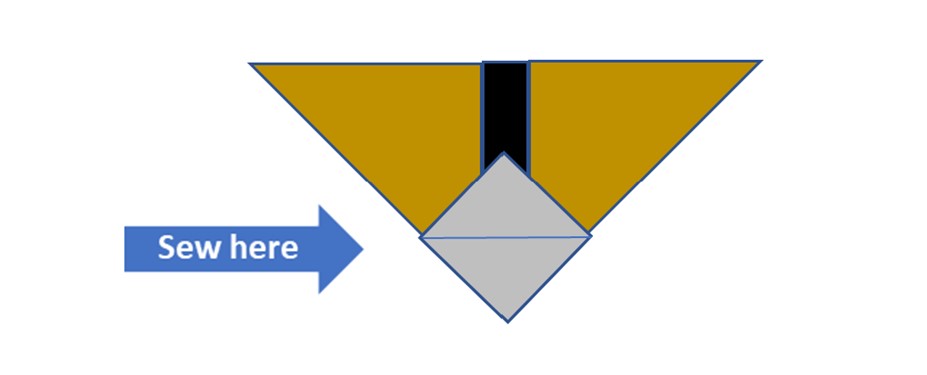

- Trim excess fabric from the bottom portion of the umbrella stand piece 1/4" from the seam. Open the fabric and carefully press toward the umbrella stand.
- Trim piece so that you have a 13” x 13” right angle triangle.

Final Assembly
- Sew the umbrella top unit and the sand/umbrella pole/stand unit together along the longest side of the triangle.
- Press seams open.
- Trim block to 12 ½” x 12 ½”

![]()
This block finishes at 12" x 12".
Thanks for reading along. I hope you're enjoying your summer! Please follow me on Instagram to keep up with my latest projects (and possibly some fun giveaways!).
Mona Phelps
[blog: Kentucky Whittaker Creations]
[instagram: @mona.phelps]
[facebook: facebook.com/ky.whittaker.creations]
![]()
Comments