Welcome to Moda Fabrics!
BH5 – Block 3 – Brigitte Heitland
BH5 – Block 3 – Brigitte Heitland
Published:
Sep 27 2023 - 07:30
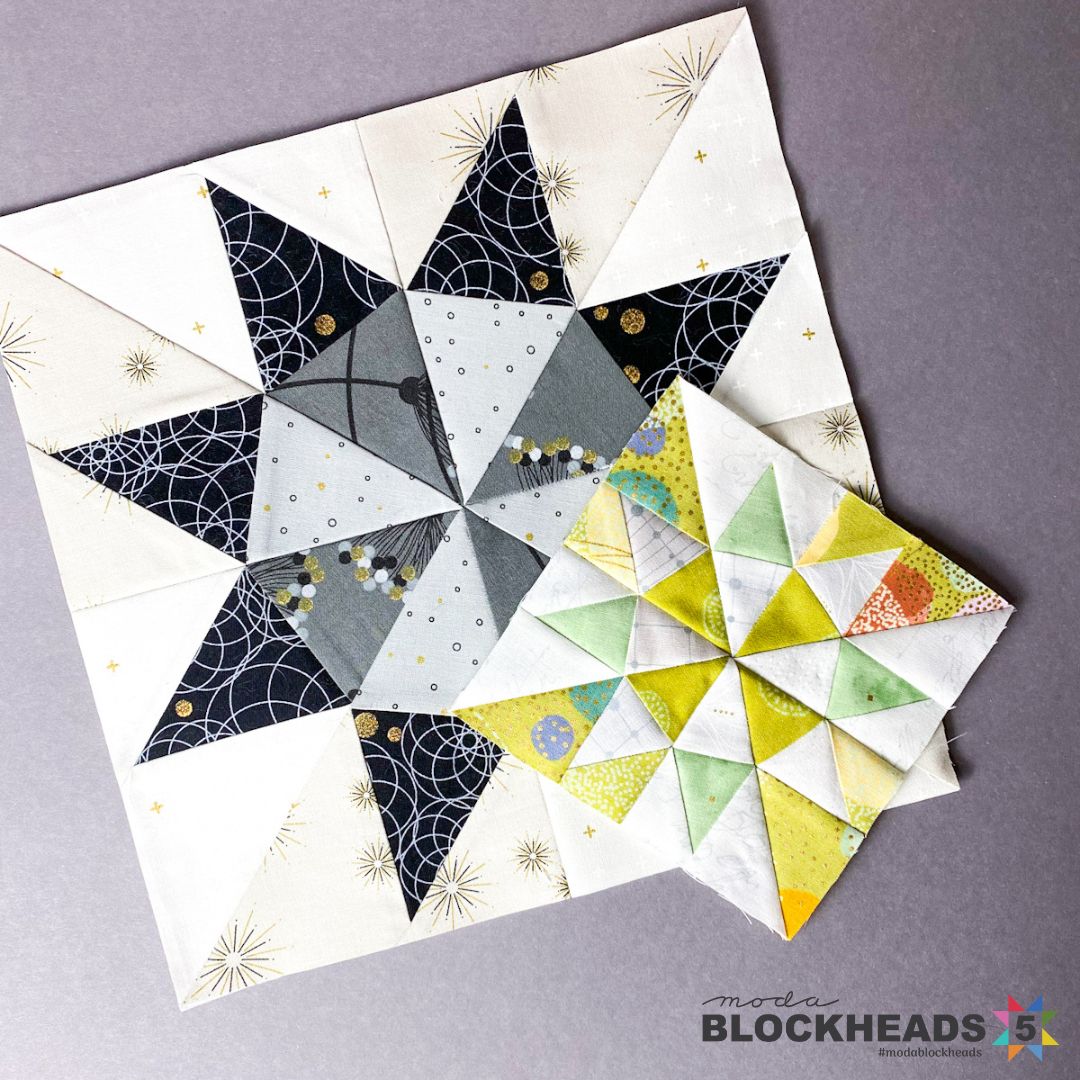
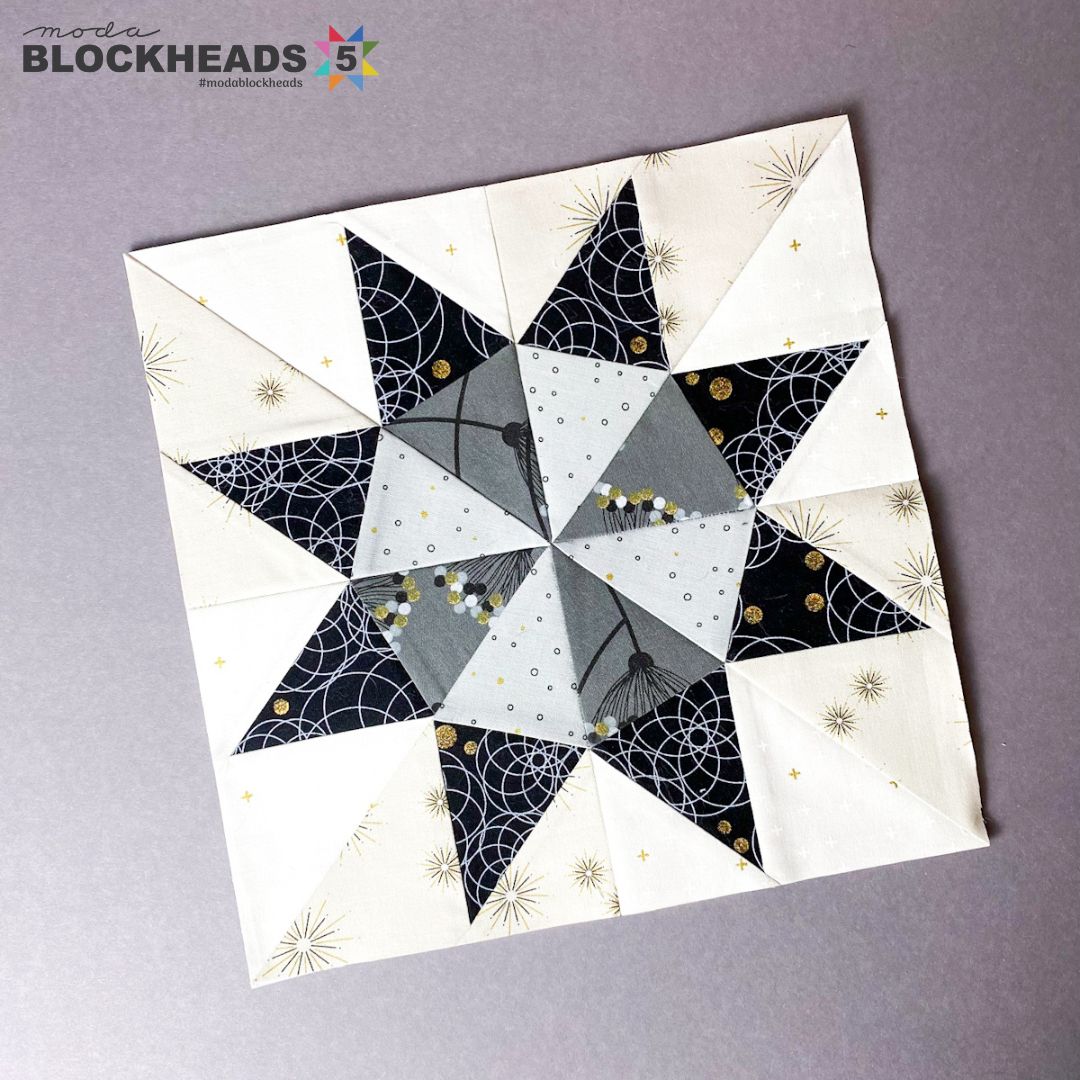
Happy Blockheads Wednesday! Block 3 is brought to you by Brigitte Heitland of Zen Chic. Brigitte’s style is playful, modern, and just a little sassy – and her Stellar Elegance block is no exception!
You can find this week’s pattern here: BH5 – Group 1, Block 3 – Stellar Elegance by Brigitte Heitland
Follow along with Brigitte!
Instagram: @zenchicmoda
brigitteheitland.de
If you’re new to Blockheads, here are a couple of quick things to know:
- This is a free quilt-along. No sign-ups are required. Just download the pattern and you’re ready to sew!
- The PDF patterns will be posted on the Moda blog and in the official Facebook group every Wednesday by 8:00 AM CDT.
- You can also bookmark this page: Blockheads 5 main page to find a convenient list of all the patterns as they are released.
- If you’d like to sign up for our blog newsletter to get blog posts delivered to your inbox, you can sign up here: Blog Newsletter Sign-Up
- If you want to sew along with a virtual Blockheads community, head over to Facebook and join our official Moda Blockheads Facebook group. Our group is an active and vibrant community of 65,000 quilters and counting! It’s a great place to be inspired and share pictures of your Blockheads progress.
- If Instagram is where you prefer to hang out, be sure to follow us (@modafabrics) and the hashtags #modablockheads and #modablockheads5 to see the latest blocks from our designers and other Blockheads.
- Be sure to get your official Blockheads t-shirts, sweatshirts, tote bags, water bottles, and more from our pop-up shop HERE.
(Looking for a little more information about Blockheads? You can check out the Blockheads 5 archive HERE.)
Be sure to head over to Brigitte's blog as soon as you’ve downloaded the pattern! Brigitte is sharing her tips and tricks for fabric placement and construction options for Stellar Elegance. She has so much great information in her post – you don’t want to miss out on that! You can find Brigitte's blog here (live after 8 AM Central): https://www.brigitteheitland.de/blog/stellar-star
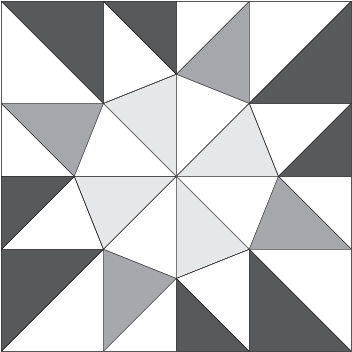
Brigitte never disappoints with her playful, modern designs! She’s brought us a delightfully challenging block this week, and our first foray into foundation paper piecing (FPP) for Blockheads 5.
If you’ve never done any FPP before, or if you have struggled with the technique in the past, don’t worry – we’ve got some tips to help you through it!
If you’re a visual learner and/or have never foundation paper pieced before, you’ll definitely want to check out the video below. In it, I walk you through the Stellar Elegance pattern from start to finish, sharing tips for reading and printing the pattern, cutting your fabric, and stitching and pressing your block.
If you just need a quick refresher, here are some general FPP tips to keep in mind:
General FPP tips
1. Print or copy the pattern PDF and templates at 100% or “Actual size” to ensure accuracy. The template pages will have a 1” square gauge on every page; be sure to measure that square after printing to confirm that it is exactly 1”. The seam allowances for each template must also measure exactly 1/4”. Confirm all measurements before sewing.
2. Cut out the unit templates from the template pages before sewing, leaving about 1/8”-1/4” excess around the dotted seam allowance line.
3. When cutting your fabrics, make sure each piece of fabric extends about 1/2” beyond the section it’s meant to cover. For example, when cutting fabric for A1, make sure the fabric extends 1/2” past the solid outline of A1 and into the neighboring sections and/or the seam allowance, if the section is adjacent to the seam allowance.
4. Complete the individual foundation paper units in order numerically and alphabetically.
5. For best results, shorten your stitch length and snip threads after each section for a neat finish.
6. Backstitch at the beginning and end of each seam to secure it.
7. Remember that on FPP templates, you will stitch on the solid line and trim the completed unit on the dotted line.
8. When trimming each paper pieced unit, be sure that the fabric extends to the edge of the paper to secure your block with a 1/4” seam.
For me, one of the trickiest things about FPP is cutting my fabrics large enough to cover each section but not so large that I waste a lot of fabric. I used to just cut oversized squares of fabric, but that made lining everything up a little confusing. One way to help find that sweet spot is to print out extra templates, cut the individual sections apart, and use them as fabric-cutting templates. Just be sure to add about 1/2” seam allowance when cutting out your fabrics. You’ll trim it down to 1/4” after joining each piece, and I think it’s always better to have a bit of extra wiggle room in FPP, especially until you get the hang of it! I talk about that technique in the video, if you’d like to see it in action.
It was an extra-busy week at Moda HQ, so most of us only had time to make the 6” version of Brigitte’s block!
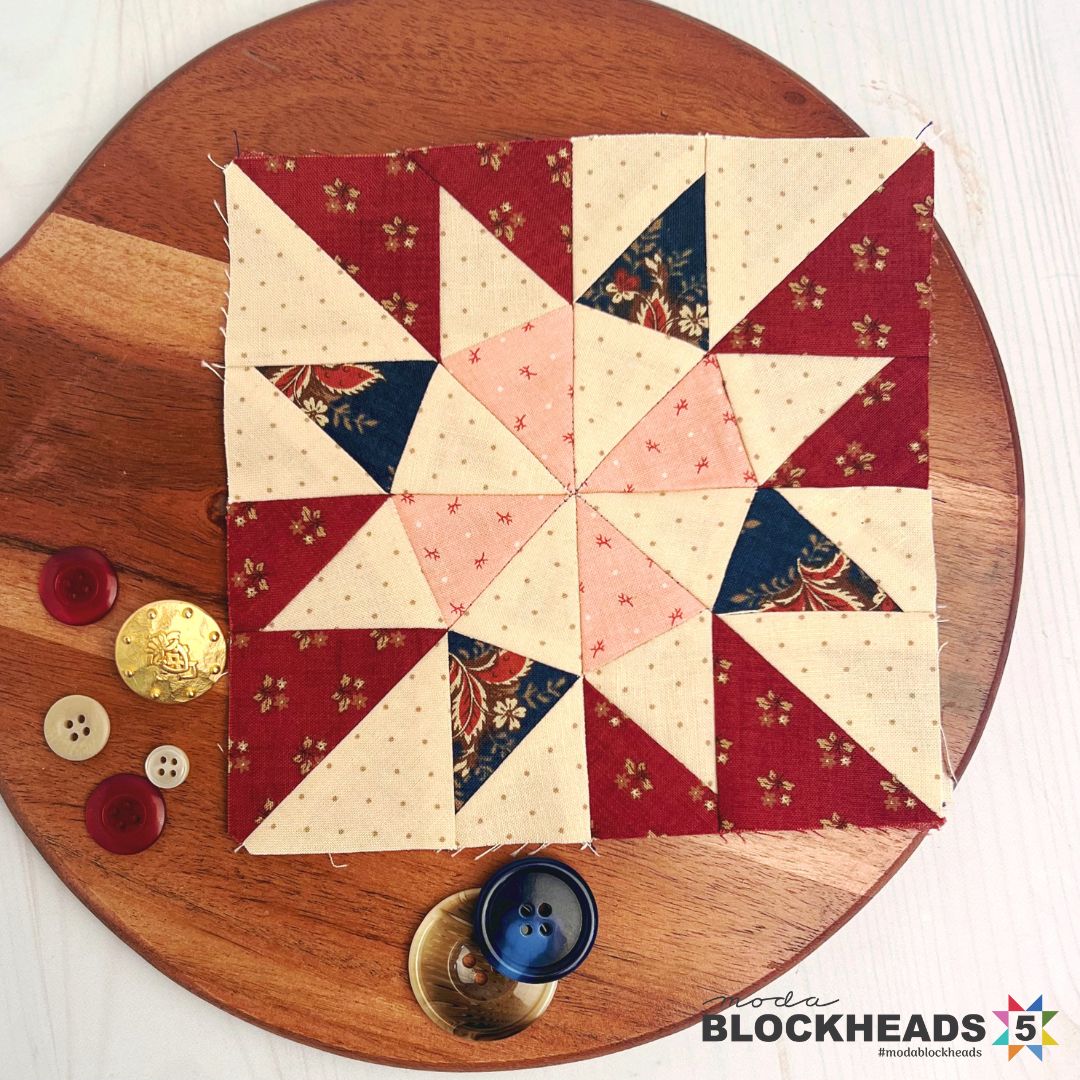
I like the little touch of pink in Tammy’s block this week, and it’s fun to see more traditional fabrics used in a modern block like this!
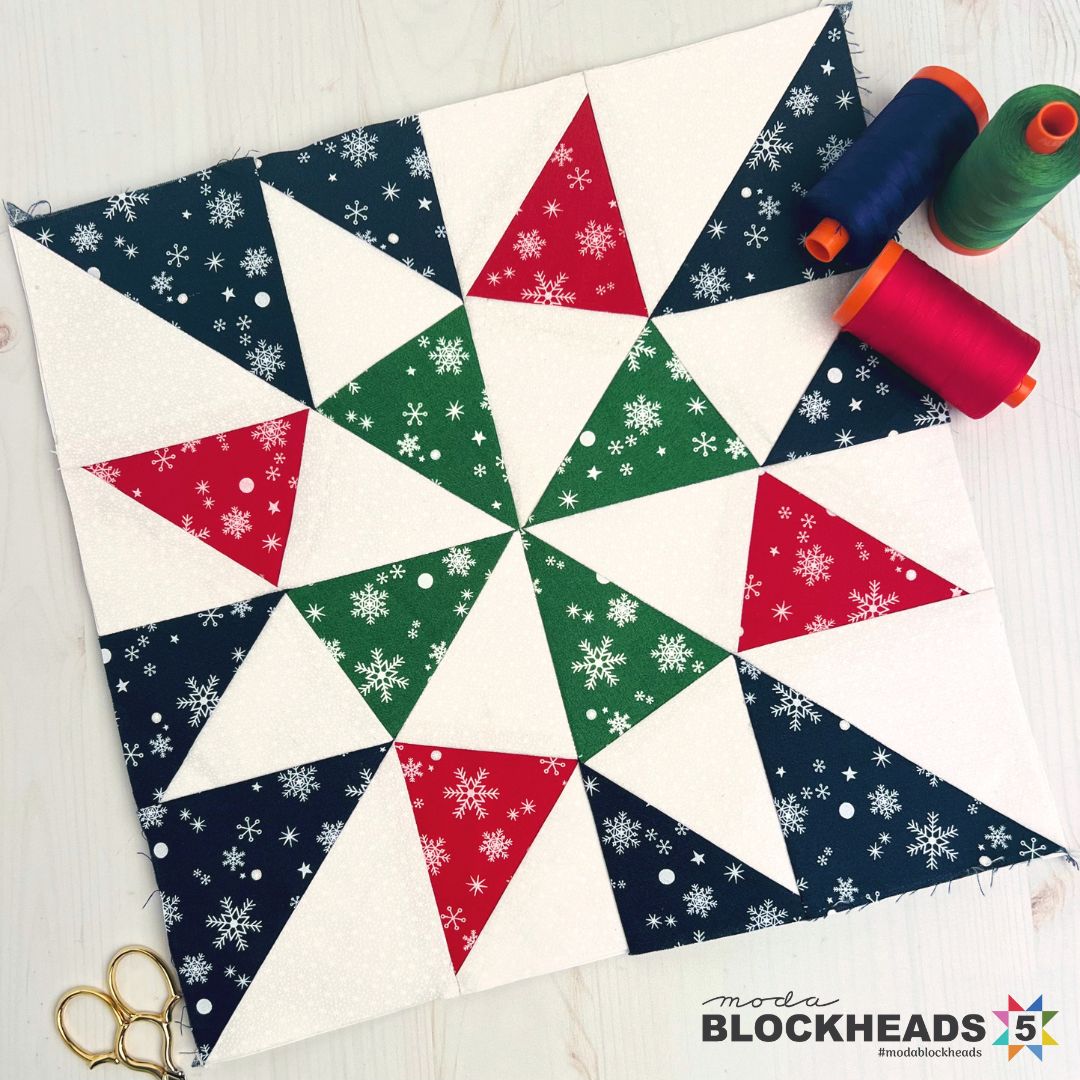
Alison is a pro at foundation paper piecing! She’s making her 12” blocks in Christmas fabrics and her 6” block in Bella Solids.
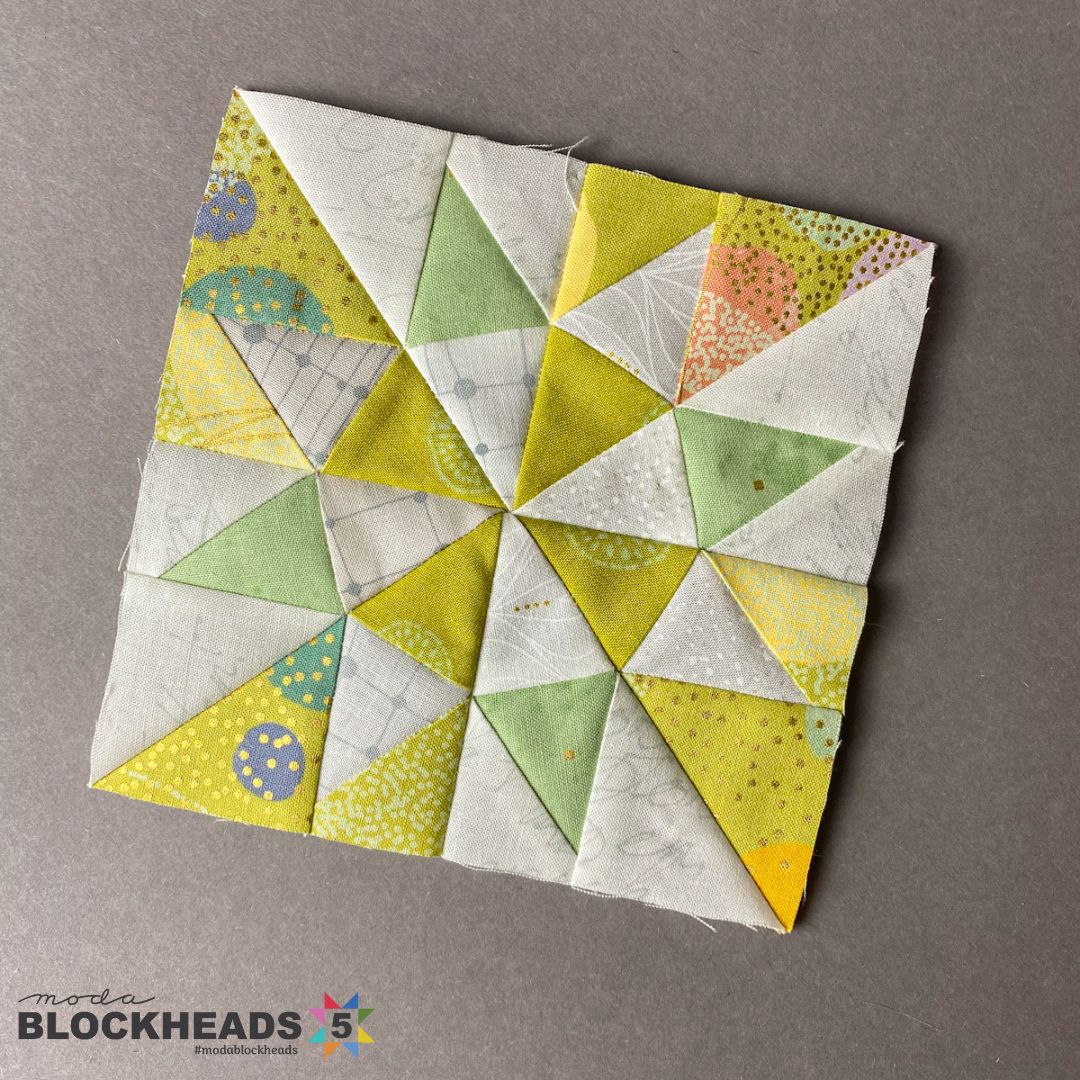
I love her sunny 6” block!

After seeing Lissa’s block, I think I’m going to have to redo mine! I love her fabric placement. What a difference it makes to use just one fabric for the background and one color for the star!

And I love how the bold red stripe fabric creates a secondary pinwheel pattern in my block.

Now…off you go to press, cut, and sew! And don’t forget to share your blocks with us in our Facebook group or on Instagram (#modablockheads5)!
Posted in:
Comments