Welcome to Moda Fabrics!
Got Toweling?
Got Toweling?
Published:
May 19 2020 - 06:50
We've been sharing projects made with Moda toweling for many years - quilts, bags, table runners, etc. A few weeks ago, we shared towels. With sustainability, the availability of paper towels, and other considerations, everyone wanted to know more.
For towels, it's as simple as cutting a length and hemming the two ends.
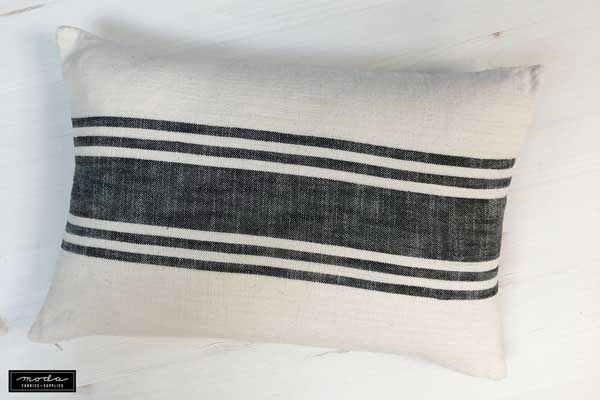
For a pillow, cut the lenth you need for the size pillow being made. Then remove the stitches on the sides, press the hemmed edges open and flat, and use the piece to make the pillow of your choosing.
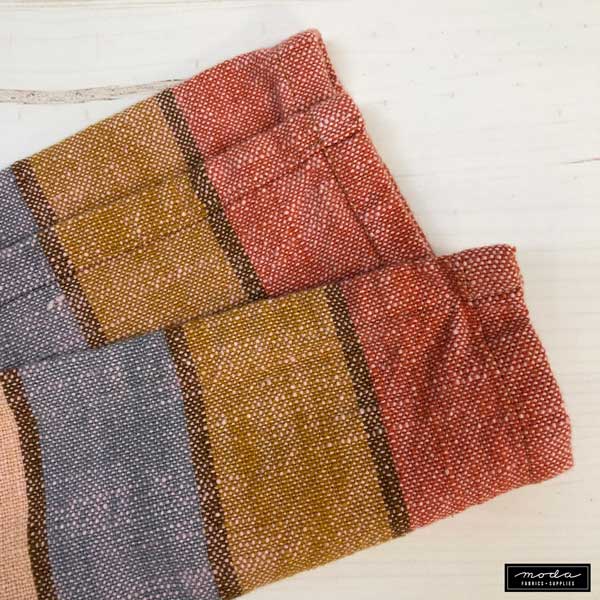
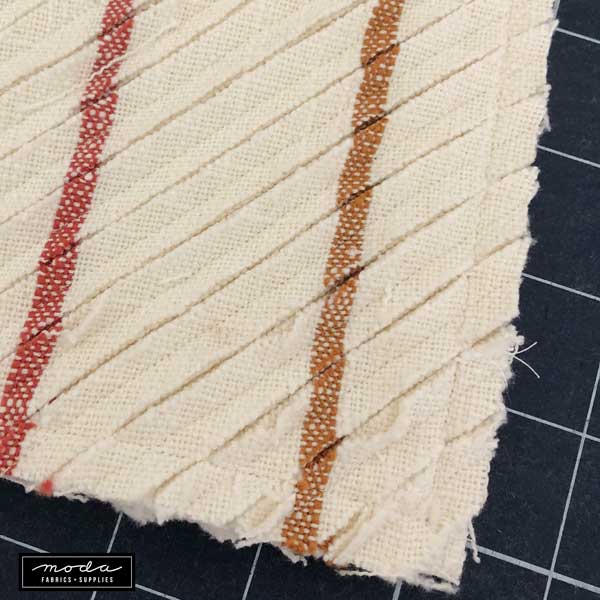
This toweling is from Urban Cottage by Urban Chiks.
For chenille potholders, there are a few more steps. You might be asking yourself "why do I need one of those?" I use them for potholders, trivets - it's perfect for a hot tea kettle or saucepan, and it makes a nice drying spot for just-rinsed glasses and tea/coffee cups. Soft, absorbent and easily washable.
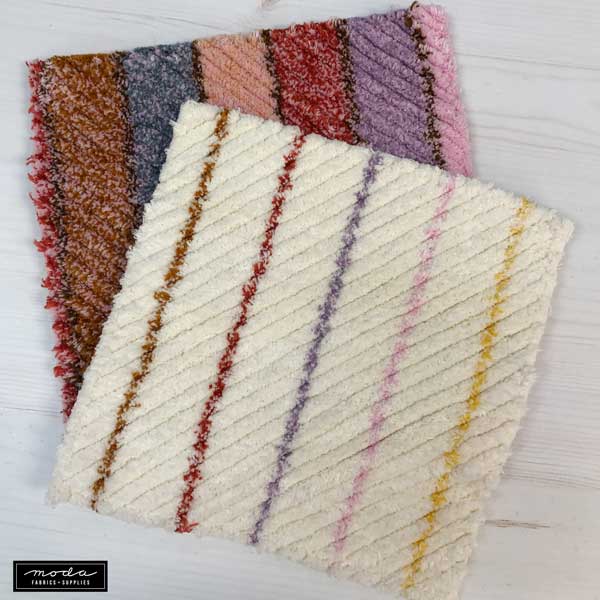
These are made using Ruby Star Society's in-shops-now Chore Coat Toweling. There is a pattern for making Chenille Hot Pads using Moda's toweling and wovens - Chenille Hot Pads AQD 268. (There is also a pattern for making a Chenille Placemat or Bath Mat - AQD 272.)
There are a couple things to share about making chenille. (Chenilling?)
On your sewing machine, I've stitched more than a dozen chenille items using standard 50wt. thread and an 80/12 needle. I also use a walking foot so the layers don't shift as I'm stitching. You can pin the layers to keep them lined up, or not.
Layering the squares. The bottom square needs to be cut 1/2" bigger than the other squares to make it easier to insert the cutting implement. Trust me, it matters. If you goof and cut all of the squares the same size, I would consider cutting the top layers a 1/2" smaller.
Stitching the lines. They are on the diagonal and the best way to mark the first stitching line is with a Hera Marker. My favorite is the Point 2 Point Turner shown here.
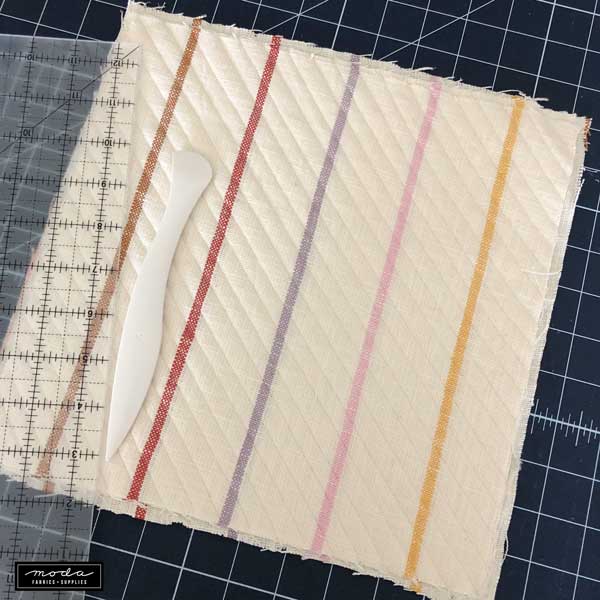
After the first line, I use the edge of my walking foot as a guide for the next line. (Adjust the needle position as needed to get the desired width.)
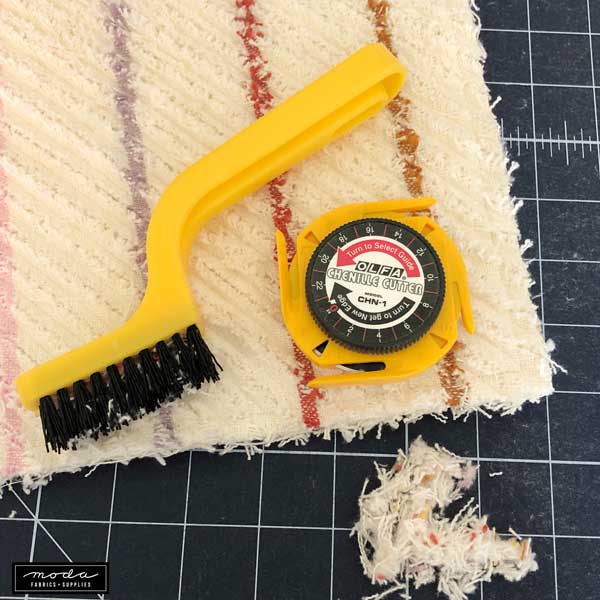
Cutting the channels - creating the chenille.
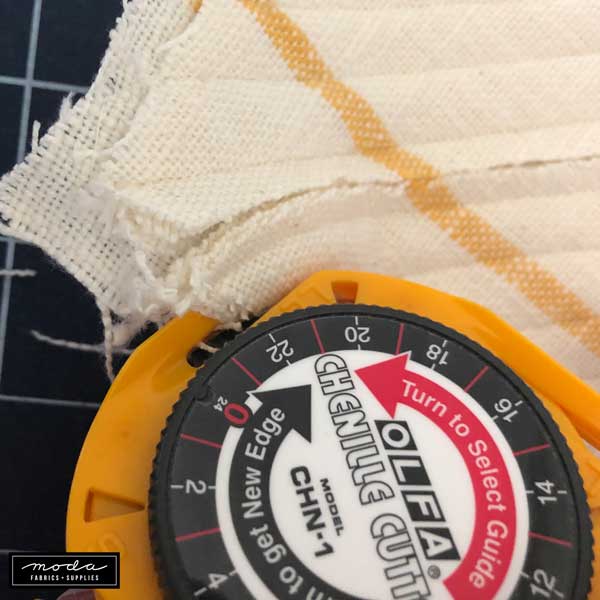
Slide the guide for the cutter into the channel - above the bottom layer and beneath the upper layers. With some fabrics, I have found that using sharp scissors to cut the first 1/2" or so helps get the cutter started. Be sure that the scissor blade is in the channel above the bottom layer.
This is my favorite cutter - the Olfa Chenille Cutter. It's easy to hold and move through the channel using one of the four sizes of guides. It's also very sharp, the blade can be advanced so it has a new edge, and the blade is easy to change. Replacement blades are available.
Every couple of rows, take a moment to clean the threads and fuzz out of the cutter. You might need a toothpick or wooden skewer as the threads can get stuck in the blade tightly.
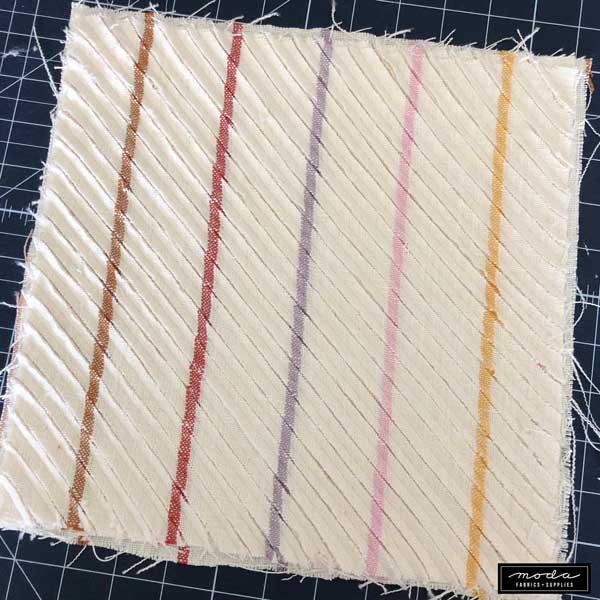
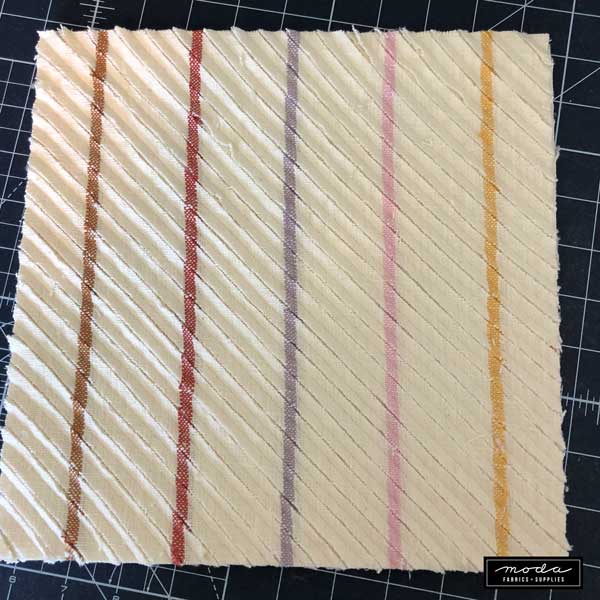
This is what the stitched and cut piece will look like. If it's gotten pulled out of shape while cutting, it can be pulled back into a square. Pressing it with steam will also help set the shape.
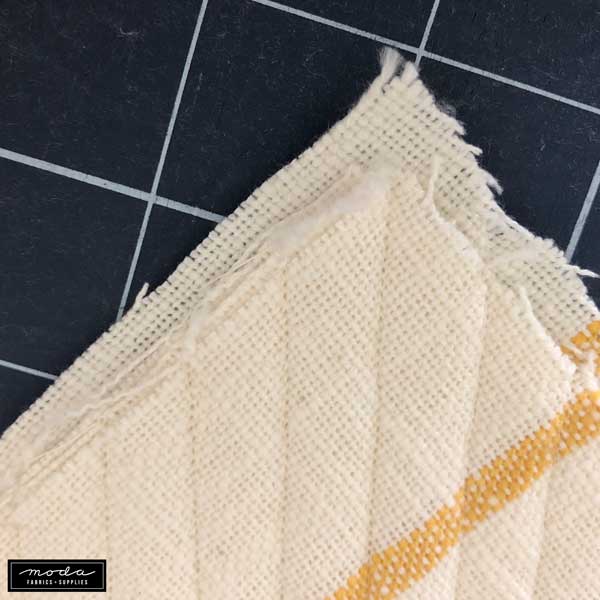
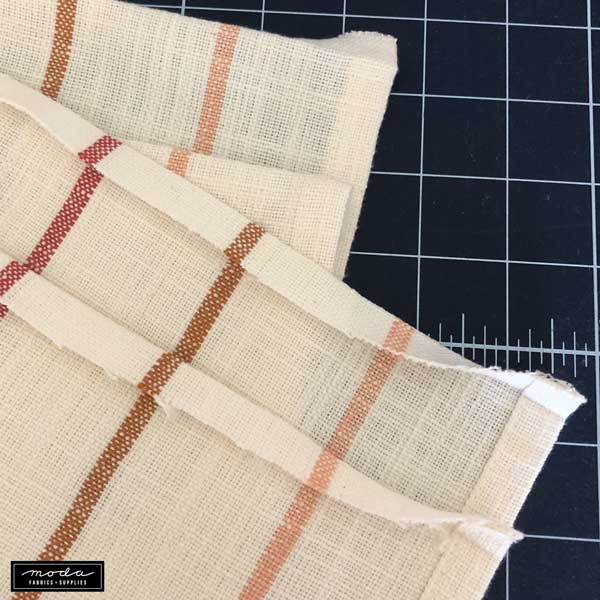
The next step is to trim the square. For pot holders, there are two layers so both sides are trimmed to the same size.
Then they are layered with cut-sides out and stitched around the four edges with a 1/4" seam allowance.
Use a walking foot to stitch through both layers - at least 6 layers of toweling - and a stiletto or "purple thing" to keep the edges smooth. And no, you can't stitch the two layers together before cutting the channels.
Now comes the fun. And the messy part. Brushing the cut edges with a Chenille Brush.

While some will say that this isn't required, that the edges will fray on their own when the finished chenille is washed, taking the time to brush the stitched piece before it is washed does make a difference. I skipped this step with the first two chenille pot holders I made, and it wasn't until they were brushed and washed again that I got the look I wanted.
Brush gently! I brush down the channels first - diagonally. Then I brush vertically, and then finally, horizontally. Did I mention to brush gently?
It already looks good. Did I mention this step was messy?
Then wash the finished chenille pot holder and projects. (Do not wash them with black, navy, or dark gray knits of any kind unless you have a lot of lint rollers on hand.)
When the pot holders come out of the wash, they'll need a bit of a "hair cut".

Use a pair of scissors to trim the threads and pretty-up the squishy soft pot holder.
Now about those towels... I'm asked about what size to cut, seam allowance, if there are any special things to do, etc.
Sizes. My preference is for a finished towel that is about 20" long as it is a nice size for cleaning up, to use as a napkin or hand towel, and even for a simple placemat. So I cut 22" lengths. That allows for my hem and a little bit of shrinkage.
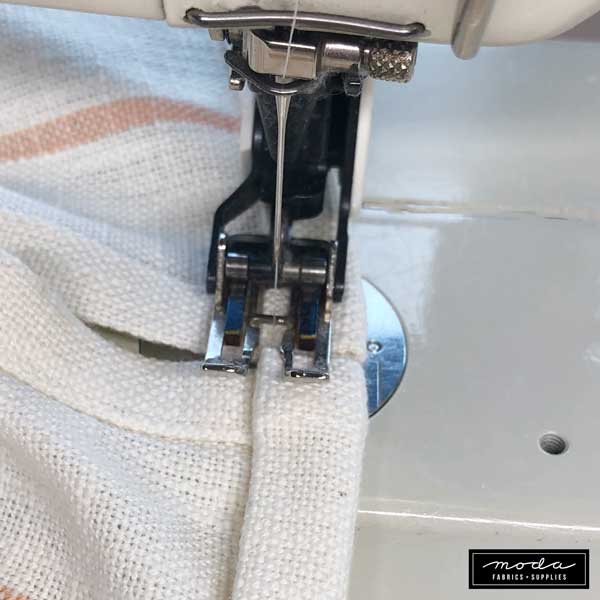
Stitching. A walking foot is recommended as it helps on the sides as there are nine layers of toweling. I also use 50wt. thread and an 80/12 needle. I also go slowly on the ends, especially when I backstitch. I use a stitch length of approx. 10-12 stitches per inch - 2.0 to 2.25 on my sewing machine.
To make hemming easier, I press the ends under approx. 3/8" to 1/2". I like the ends to be hemmed at approximately the same width as the sides.
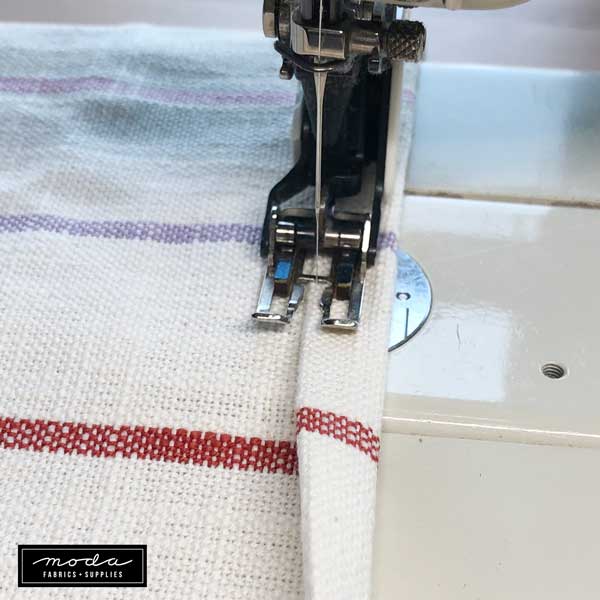
The edge is simply folded up as I stitch, and yes, I do use the seam line guide, adjusting the fold as I go.
And when I reach the end, I pull the other side around and chain-hem.
I keep stitching this way until all 27 towels have been hemmed. I'm kidding! I hemmed a dozen towels the other day and it took maybe 45 minutes to do. Pressing the edge up makes it all go quickly. (Pressing the edges up takes just a minute or two for each towel.)
When they're all hemmed, I like putting them in the wash so they're clean, fluffy and ready-to-use.
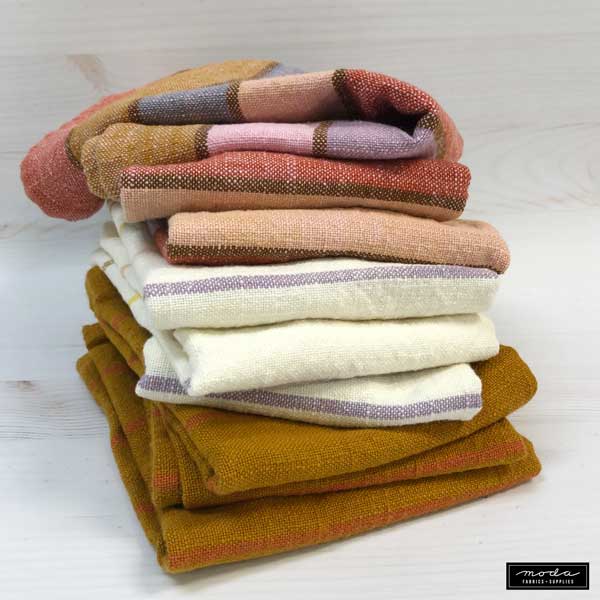
Moda Toweling comes in two widths. The majority of toweling has a has a finished, hemmed width of 16", and the new Rock Pool toweling has a finished, hemmed width of 18".
With the exception of the pillow, the toweling shown here is Ruby Star Society's Chore Coat Toweling. It has a finished, hemmed width of 16". It has a lovely, nubby texture, and the washed towels are soft, absorbent and almost too pretty to use.
Moda Toweling is available at many quilt shops. If your favorite or local shop doesn't carry it, a Google search for "Moda Toweling" will yield shops that do.
Have a good day and stay safe.
Posted in:
Comments