Welcome to Moda Fabrics!
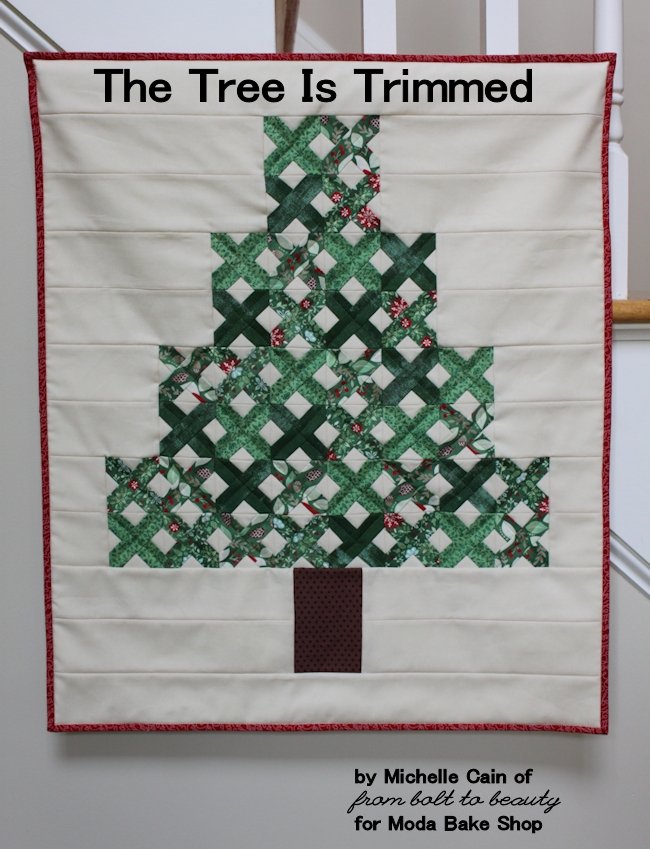
The Tree is Trimmed Mini Quilt
The Tree is Trimmed Mini Quilt
Hi, there! It’s Michelle, of From Bolt to Beauty, here to share a fun holiday project with you. This mini-quilt uses jelly-roll strips to construct the cross-stitch blocks and background. It’s perfect for chain piecing, and if you start the assembly line now, you can create a veritable forest of Christmas trees well in advance of holiday gift giving.
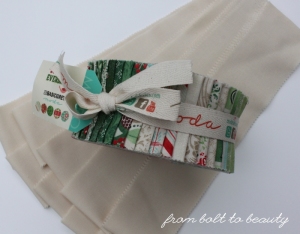
4 colored jelly-roll strips (I used Basic Grey’s Evergreen)
9 solid jelly-roll strips (I used Bella Solids in natural)
3” x 4½” piece of fabric for the trunk
⅛ yard of fabric for binding
25½” x 29” piece of fabric for the back (this provides approximately 2” of overhang on all sides)
25½” x 29” piece of batting
Thread to match
Finished size: approximately 21½” x 25”
All seams are a scant ¼”
Cutting: The Cross-Stitch Blocks
Cut the selvages off all the jelly-roll pieces.
Take the 4 colored jelly-roll strips, and cut them all at the 20” mark. Set aside the 4 longer strips (the ones that are about 22” long).
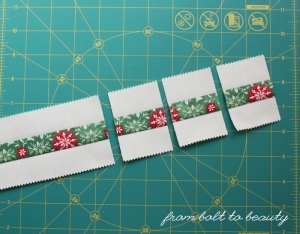
Take the (4) 20” strips. Cut them in half length-wise, making 2 strips that are 1¼” wide. Then cut those thinner strips into 3¾” pieces. Each 20” strip will yield (10) 1¼” x 3¾” pieces, for a total of 40. These are the main arms of the Xs.
Take the 4 longer colored strips that you had set aside. Cut them in half length-wise, making 2 strips that are 1¼” wide, for a total of 8.
Take 8 of the 9 solid jelly-roll strips, and cut them at the 20” mark. Set aside the (8) 20” strips and the uncut 9th one. We will use them later in the tutorial for the background.
Take the 8 longer solid strips. Cut them in half length-wise, making 2 strips that are 1¼” wide, for a total of 16.
Hint: Before working with jelly-roll strips, I like to press them with a little starch. That way, I can make sure they’re straight before cutting them, and the starch makes the long, thin pieces more manageable to sew. I also have more success when I use a short stitch length when sewing long strips.
Sewing: The Cross-Stitch Blocks
Take the (16) 1¼” solid strips and (8) 1¼” colored strips. Sew a solid strip, length-wise, on each side of the 8 colored strips. Press the seams toward the colored fabric.
Cut each of the strips from the previous step into 2” pieces. These are the side arms of the Xs. Each of the 8 colored strips will yield 11 side arms. You only need 10 from each strip for this project, for a total of 80.
Hint: Instead of lining your ruler mark with the edge of the solid fabric, line it up with the seam between the solid fabric and colored fabric. Doing so will make more accurate Xs.
Take the (40) 1¼” x 3¾” main arms, and sew a matching 2” side-arm piece on either side. Do this by first centering and sewing a side arm on the main arm, pressing the seam toward the colored fabric, and then matching the second side arm’s placement to the first. Press the second seam to the colored fabric.
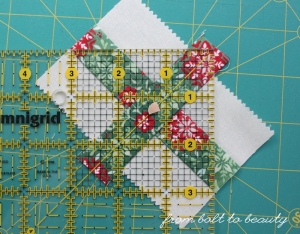
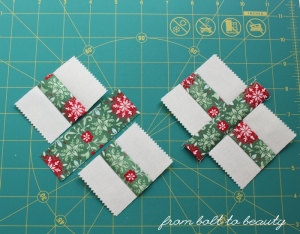 You will have 40 untrimmed blocks at the end of this step. Cut those 40 blocks to 2½” squares.
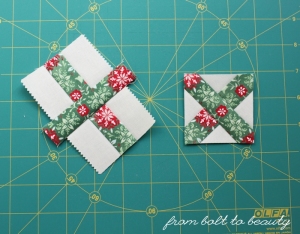 Hint: I use a 6½” square to trim these blocks. I find that I have more control over the fabric if I use a 6½” square instead of, say, a 2½” square. Also, I like to line up the 1¼” marks on my square with the intersections of the X’s arms.
Sewing: The Rows of the Tree
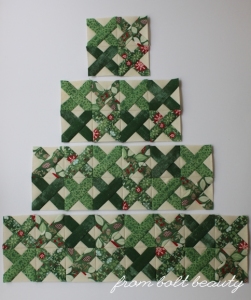
Arrange the cross-stitch blocks into rows like the photo below.
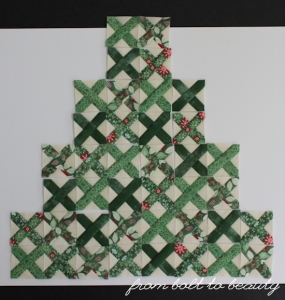 Once you’re satisfied with the placement of your fabrics, sew each row together. Press seams open.
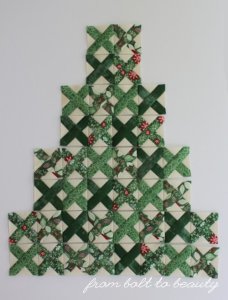 Sew rows of the same length together. That is, sew the (2) 2-block rows together. Sew the (2) 4-block rows together, etc. Press seams open.
Cutting: The Background Fabric
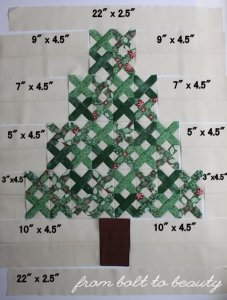
Take the 1 uncut solid strip and the (8) 20” solid strips that you had set aside during the initial cutting. You will use these in the background. Cut the 1 uncut strip in half vertically, giving you 2 strips that are approximately 22” in length. Sew the remaining 8 strips length-wise into 4 pairs. Then cut those 4 pairs into the following lengths. To avoid running out of fabric, start by cutting the 10” strips first, then the 9” strips, and so on.
(2) 10” x 4½ strips
(2) 9” x 4½ strips
(2) 7” x 4½ strips
(2) 5” x 4½ strips
(2) 3” x 4½ strips
Hint: Instead of lining your ruler mark with the edge of the fabric, line it up with the seam to make vertical cuts.
Sewing: The Background to the Tree
Now you have all the pieces for the quilt top. Arrange them as shown in the picture below.
Working row by row, sew the background pieces to the cross-stitch blocks and the background pieces to the tree trunk, being sure to line up the middle of the tree trunk with the seam between the 4th and 5th cross-stitch blocks in the bottom row of the tree. Press seams open.
Sew the rows together length-wise. Press seams open.
Square up your quilt top. Quilt and bind as desired.
One 21½” x 25” wall hanging or table topper, perfect for gifting or bringing some holiday cheer into your own house!
Michelle Cain
{frombolttobeauty.blogspot.com}

