Welcome to Moda!
Easter Basket Mini
Easter Basket Mini
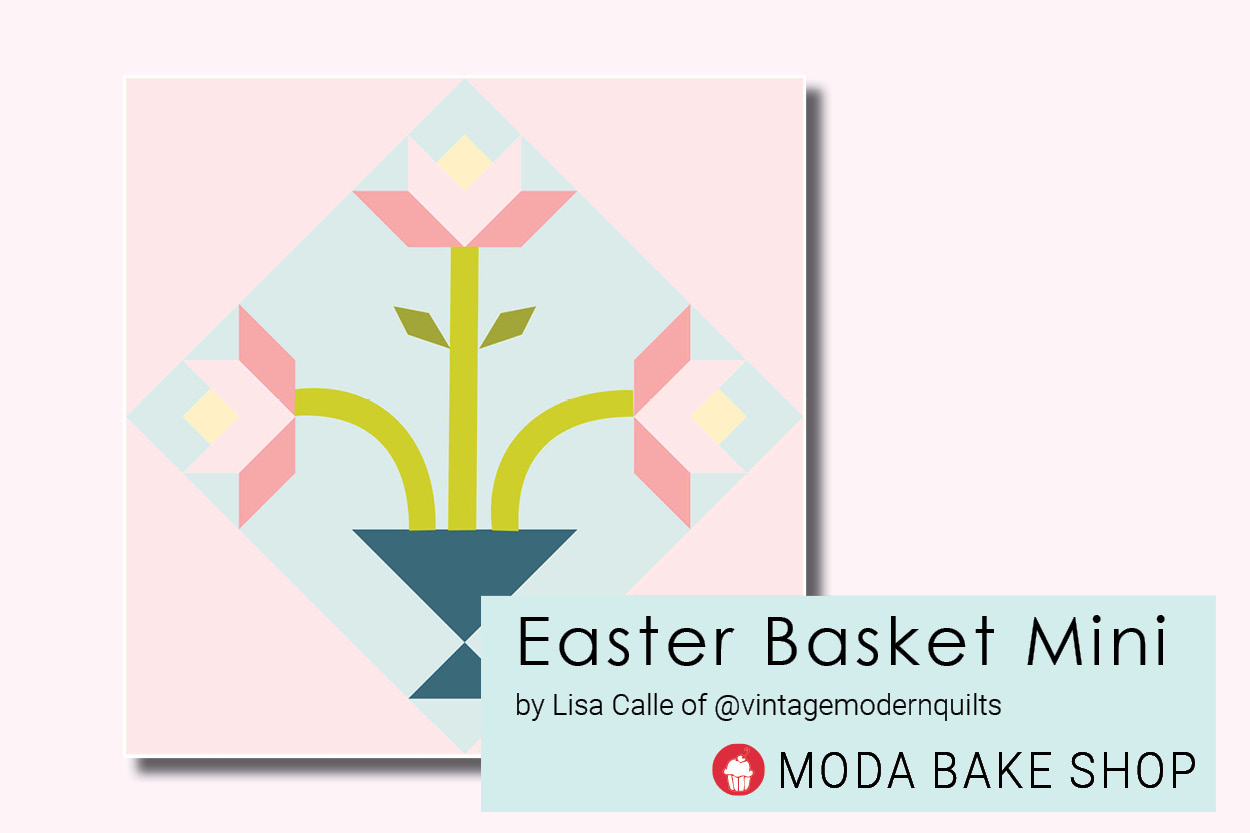
It may look complicated but no Y seams are required to piece the block and the applique is minimal. You can use pre-made bias tape for the stems.
YIELD
This quilt finishes at 24" square.
INGREDIENTS
½ yard Fabric 1
½ yard Fabric 3
Scraps of Fabrics 2, 4, and 6
1 fat eighth of Fabric 5
1 fat quarter of Fabric 7 or 1½ yards of premade double fold bias binding for stems
1/3 yard of binding
¾ yard backing fabric
INSTRUCTIONS
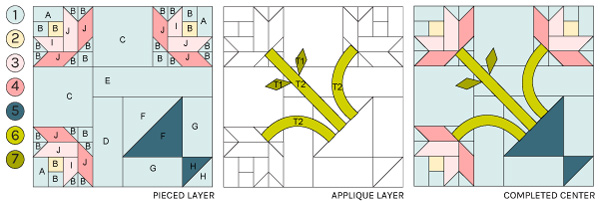
From Fabric 1, cut:
[A] (3) 2” x 3.5” rectangles
[B] (24) 2” squares
[C] (2) 6.5” squares
[D] (1) 3.5” x 9.5” rectangle
[E] (1) 3.5” x 12.5” rectangle
[F] (1) 7” square
[G] (2) 3.5” x 6.5” rectangles
[H] (1) 4” square
From Fabric 2, cut:
[B] (3) 2” squares
From Fabric 3, cut:
[I] (3) 2” x 3.5” rectangles
[J] (3) 2” x 5” rectangles
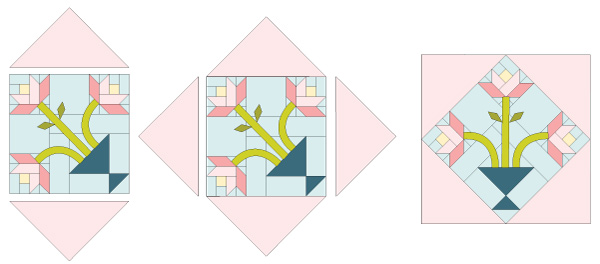
(2) 13¾” squares cut once on the diagonal
From Fabric 4, cut:
[F] (1) 7” square
From Fabric 5, cut:
[H] (1) 4” square
From Fabric 6, cut:
[T1] (2) Template 1 pieces
From Fabric 7, cut:
[T2] (3) approximately18” strips of double fold bias tape
STEP 1. MAKE FLOWERS
Make Easy Corner Triangle units: draw a pencil line along the diagonal of the WRONG side of (2”) Fabric A squares. Match with [I] rectangle as shown. Sew on the marked line. Trim ¼” away from the sewn line and press. Repeat with remaining petal pieces, adding a square to each end of [J] Fabric 4 rectangles. Be sure to take note of direction of each petal.

Join petal units with [A] rectangle,[B] squares as shown. Make 4 flower units measuring 6½” unfinished.

STEP 2. MAKE BASKET
Make Half Square Triangles from 7” and 4” squares: Mark a pencil line along the diagonal of each 4” and 7” background square. Match with Fabric 5 squares. Sew ¼” away from each side of the marked line. Trim on the pencil line and press. Trim 7” squares to 6½” and 4” to 3½” square. You will have extra HSTs.
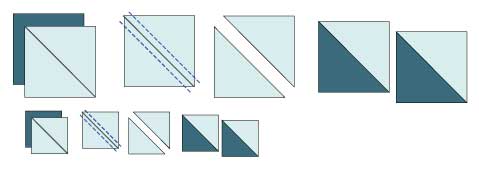
Join HSTs with remaining background pieces as shown.

STEP 3. ASSEMBLE BLOCK
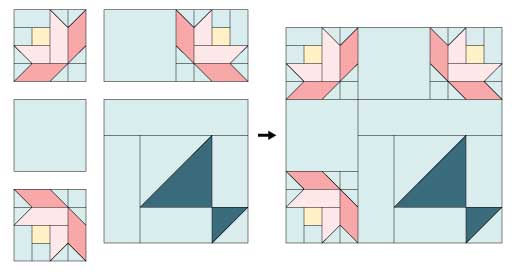
Join flowers and basket units as shown. Press well and stay stitch edges to prepare for applique.
STEP 4. APPLIQUE STEMS AND LEAVES
Cut T1 pieces using the template provided. Make or use premade double fold bias tape for stems. Prepare pieces for preferred method of applique.
(Template available in Printer Friendly Version at the bottom of this post)
STEP 5. ASSEMBLE THE QUILT
Add corner triangles to the completed block to set on point. Layer, baste, quilt, and bind as desired. Quilt finishes at approximately 24” square.
This quilt finishes at 42" x 52".
Lisa Calle
Update: The fabric requirements on the Printer-Friendly File need a correction - Fabric #3 should be 1/2-yard, and Fabric #2 should be scraps. The corrections have been changed above.

Comments